Author: Ron Kirk

  • How to Increase Humidity (August 2026): Complete Guide

    How to Increase Humidity (August 2026): Complete Guide

    If you have ever woken up with a scratchy throat, dry skin that feels like sandpaper, or a static shock every time you touch a doorknob, you are probably living with low indoor humidity. I dealt with this for years in a drafty apartment where the humidity regularly dropped below 20% during winter. Learning how to increase humidity transformed my comfort level at home and even helped me sleep better.

    In this guide, I will walk you through every practical method to raise your indoor moisture, from simple free tricks that take five minutes to long-term solutions. Whether you want to know how to increase humidity without a humidifier or you are ready to invest in one, I have tested these approaches and can tell you what actually works.

    The EPA recommends keeping indoor humidity between 30% and 50%. Most homes in cold climates drop well below that during heating season. Let me show you how to fix that.

    Why Indoor Humidity Drops (and Why It Matters)

    Before we get into solutions, it helps to understand the problem. Relative humidity (RH) is the percentage of water vapor currently in the air compared to the maximum amount that air can hold at a given temperature. Warmer air holds more moisture than cold air.

    When you heat cold outdoor air inside your home, the temperature rises but the actual water content stays the same. The result? The relative humidity plummets. That is why a comfortable 45% RH in summer can drop to 15-20% once you crank the furnace in January. The air literally cannot hold enough moisture at those lower starting temperatures to stay comfortable once heated.

    This is not just a comfort issue. Dry air directly affects your health. Your mucous membranes, the moist linings of your nose, throat, and lungs, need adequate humidity to trap pathogens and keep functioning as your body’s first line of defense. Studies have shown that viruses survive longer and spread more easily in dry air below 40% RH. At home, dry air causes wood furniture and flooring to crack, wallpaper to peel at the edges, and paint to chip.

    Forum users on r/HomeImprovement frequently report humidity readings as low as 16-25% during winter, with symptoms ranging from nosebleeds to cracked hands. One user mentioned their acoustic guitar started warping at 22% humidity. These are real problems that go beyond mild discomfort.

    What Is the Ideal Humidity Level?

    The EPA and most HVAC professionals recommend maintaining indoor relative humidity between 30% and 50%. This range strikes a balance between comfort and safety.

    Here are the sweet spots for different situations:

    • General living spaces: 30-50% RH
    • Bedrooms (for sleep comfort): 40-50% RH
    • Sinus and respiratory relief: 40-50% RH
    • Houseplants (tropical varieties): 50-60% RH
    • Wood furniture and instruments: 35-45% RH

    Going above 60% RH invites trouble. Mold thrives above that threshold, and dust mites multiply rapidly. You do not want to solve a dry air problem by creating a mold problem. A cheap digital hygrometer, which you can find for under $15, is essential for tracking where your levels actually sit.

    In summer, you may not need to increase humidity at all. In fact, you might need to lower it. But from late fall through early spring, especially in colder climates, the air inside most homes runs too dry. That is when you need to take action.

    How to Increase Humidity in a Room Without a Humidifier

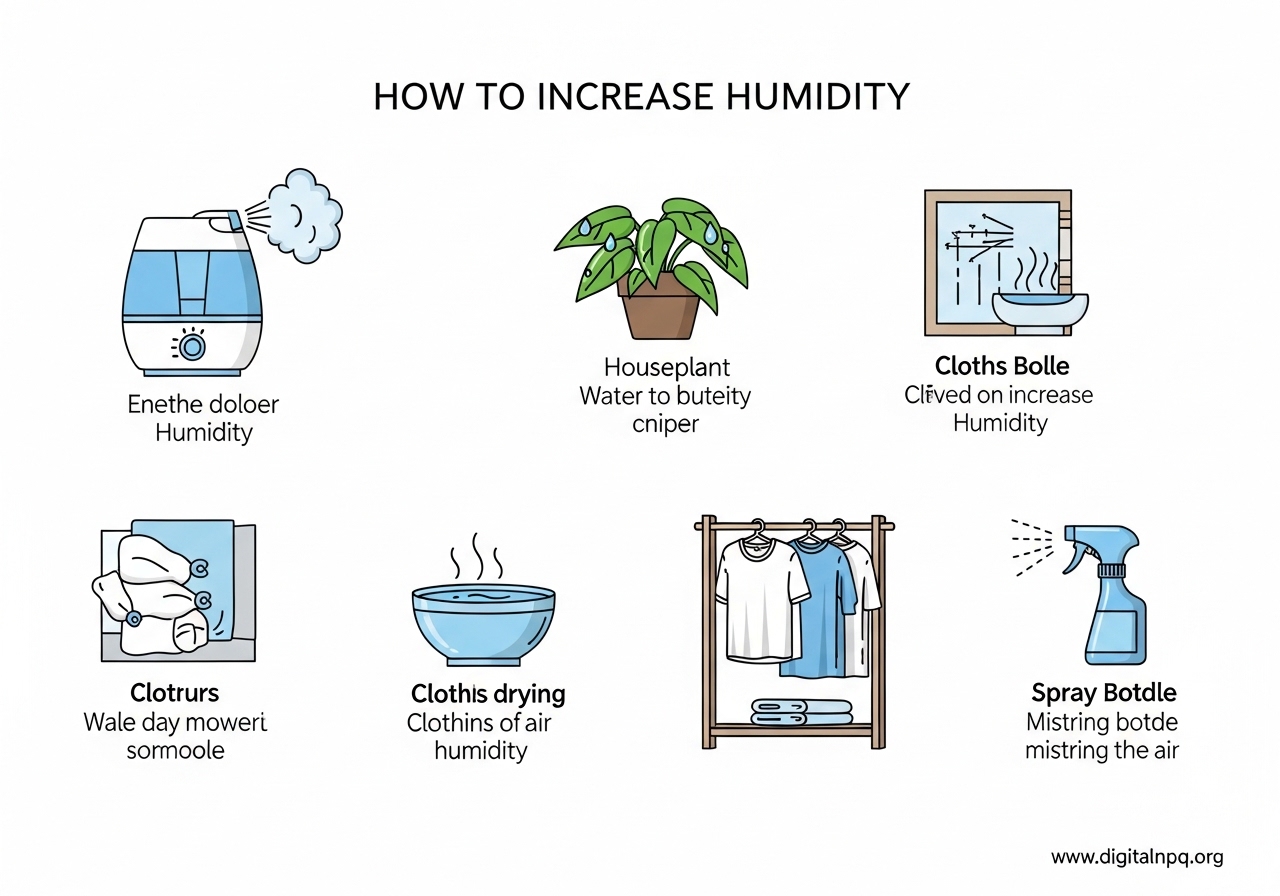
    You do not need to buy anything to start improving your indoor moisture today. Here are seven methods I have personally tested, ranked roughly from fastest to most sustained effect.

    1. Boil Water on the Stovetop

    This is the fastest way I know to increase humidity in a room without a humidifier. A rolling pot of water on the stove sends concentrated steam into your kitchen and surrounding areas within minutes. On especially dry days, I keep a large pot simmering for 30-45 minutes and watch my hygrometer climb 5-10%.

    For a pleasant bonus, toss in a cinnamon stick, citrus peels, or cloves. One Reddit user on r/Frugal shared this exact trick, noting it makes the house smell incredible while doing double duty as a moisture booster. Just do not leave the stove unattended.

    2. Leave the Bathroom Door Open During Showers

    A hot shower produces a significant amount of steam. Instead of trapping it in the bathroom with the exhaust fan running, leave the door open and let that moisture travel into adjacent rooms. After my morning shower, I keep the bathroom door wide open for at least an hour.

    This works best in smaller homes and apartments where the steam can reach living areas. If you have a large house, the effect stays localized to rooms near the bathroom. Still, it is free moisture that would otherwise get vented outside.

    3. Place Bowls of Water Near Heat Sources

    Water evaporates faster when it is warm. Placing shallow bowls or saucers of water on or near radiators, heating vents, or sunny windowsills creates a slow, steady release of moisture throughout the day. The key is surface area. A wide, shallow bowl evaporates much faster than a tall, narrow glass of water.

    Molekule’s guide on this topic explains the physics well: more surface area means more water molecules can escape into the air at once. I use ceramic bowls on my radiators and refill them every morning. Some people buy ceramic humidifier bells designed to hang on radiators, which look nicer and save space.

    4. Add Houseplants That Release Moisture

    Plants naturally release water vapor through a process called transpiration. The more plants you have, the more moisture they collectively add to the air. Tropical plants like peace lilies, Boston ferns, spider plants, and areca palms are among the best for boosting humidity because they transpire heavily and prefer moist environments.

    A single plant will not dramatically change your RH, but a collection of 8-10 medium-to-large plants in one room makes a measurable difference. I keep four ferns and two peace lilies in my bedroom, and my hygrometer consistently reads 3-5% higher than the rest of the house. Grouping plants close together amplifies the effect because they create a shared microclimate of higher humidity.

    5. Air-Dry Your Laundry Indoors

    Hanging wet laundry on a drying rack inside your home is a two-for-one benefit. Your clothes dry, and the evaporating water goes straight into your indoor air. A single load of wet laundry can release over a liter of water into the air as it dries.

    For the best effect, place the drying rack in the room where you need the most humidity, ideally near a heat vent or radiator. One forum user on r/houseplants mentioned they specifically hang wet laundry near their plant collection to keep the local humidity around the plants higher. This is a particularly good trick for apartment dwellers who may not have outdoor drying space.

    6. Leave the Dishwasher Door Open After a Cycle

    When your dishwasher finishes its cycle and the dishes are still hot and wet, crack the door open and let that steam escape into your kitchen. The heat and moisture from the rinse cycle provide a noticeable bump in humidity, especially in open-plan kitchens connected to living areas.

    This takes zero extra effort since you are already running the dishwasher. Just make the habit of opening it at the end instead of letting it dry on its own. You save energy by skipping the heated dry cycle, too.

    7. Hang a Wet Towel Near a Vent or Radiator

    Drape a damp (not dripping) towel over a chair near a heating vent or radiator. As warm air passes through the fabric, the water evaporates steadily over several hours. This is a technique people on r/Home swear by for overnight humidity boosts in the bedroom.

    For best results, use a large bath towel, soak it thoroughly, wring it out so it is damp but not dripping, and position it where airflow hits it. One towel can last most of the night before it dries out completely.

    How to Increase Humidity With a Humidifier

    If natural methods are not getting your humidity high enough, a humidifier is the most reliable and controllable solution. Here is what you should know about the main types.

    Ultrasonic humidifiers use high-frequency vibrations to create a fine mist. They are quiet, energy-efficient, and work well for single rooms. Some produce a cool mist, others warm. The main drawback is that they can leave a white dust residue if you use hard water instead of distilled water.

    Evaporative humidifiers pull air through a wet wick filter using a fan. They are self-regulating to some degree because as humidity rises, evaporation slows down. They tend to be more affordable and do not produce white dust, but the fans can be noticeable in a quiet bedroom.

    Warm mist humidifiers boil water before releasing steam. They feel more comfortable in cold weather and the boiling process kills bacteria. However, they use more electricity and the hot steam can be a burn hazard around children or pets.

    Whole-house humidifiers connect directly to your HVAC system and distribute moisture through your existing ductwork. They are the most effective option for large homes but require professional installation and a higher upfront cost.

    Regardless of which type you choose, placement matters. Put your humidifier in the room where you spend the most time or where symptoms are worst. Keep it at least a few feet from walls and furniture to prevent moisture buildup on surfaces. And clean it regularly according to the manufacturer’s instructions to prevent bacterial growth.

    Room-by-Room Strategies to Increase Humidity

    Different rooms have different needs. Here is how I approach humidity in specific spaces around my home.

    Bedroom: This is where low humidity hits hardest because you spend 7-8 hours there breathing dry air. The wet towel method works well overnight. A small humidifier on your nightstand targeted at 40-50% RH is the most reliable approach. Adding a few plants to the room provides a gentle, constant moisture source. I keep my humidifier running at a low setting all night and check the hygrometer first thing in the morning.

    Living room: This is usually the largest space, so single-room methods have less impact here. Decorative bowls of water on a sunny windowsill add a slow, steady supply of moisture. If you have a fireplace or wood stove, placing a cast-iron kettle of water on top turns it into a natural humidifier. A console humidifier rated for large spaces is usually the most practical solution for open living areas.

    Apartment-specific tips: If you rent and cannot modify your HVAC system, focus on the natural methods above combined with a portable humidifier in your bedroom. Many apartment dwellers on forums report struggling to get humidity above 25% because forced-air heating systems are aggressive at drying out small spaces. Running a humidifier in one room with the door closed is more effective than trying to humidify the entire unit at once.

    How to Monitor and Maintain Proper Humidity

    You cannot manage what you do not measure. A digital hygrometer is the single most important tool for anyone trying to increase humidity. Without one, you are guessing.

    Place your hygrometer at about desk height in the room you spend the most time in. Avoid putting it right next to a humidifier, window, or vent, since those spots give misleading readings. Check it morning and evening for a few days to understand your baseline.

    Here are the signs that your humidity is too low:

    • Static electricity shocks when touching surfaces
    • Dry, itchy skin or chapped lips
    • Waking up with a sore throat or dry cough
    • Wood furniture showing cracks or gaps at joints
    • Plants with crispy brown leaf edges

    And here are the warning signs that humidity is too high:

    • Condensation on windows or walls
    • Musty or damp smell in any room
    • Visible mold on surfaces or grout lines
    • Allergy symptoms worsening indoors

    Adjust your methods daily based on what the hygrometer tells you. In winter, you will likely need to run humidifiers more frequently. In spring and fall, natural methods might be enough on their own. The key is consistency and monitoring.

    FAQ

    How can I make my humidity higher?

    The fastest ways to increase humidity are boiling water on the stove, running a humidifier, or leaving the bathroom door open during and after a hot shower. For a sustained effect, place bowls of water near heat sources, add houseplants, and air-dry laundry indoors. A hygrometer will help you track your progress.

    How can I raise the humidity without a humidifier?

    You can raise humidity without a humidifier by boiling water on the stovetop, placing shallow bowls of water near radiators or vents, leaving the bathroom door open during showers, air-drying laundry indoors, hanging damp towels near heat sources, adding houseplants, and leaving the dishwasher open after a cycle. These methods combined can raise indoor RH by 5-15%.

    What to do if the humidity is low?

    If your humidity is below 30%, start by using the quickest methods: boil water on the stove and run hot water in the bathroom with the door open. Then set up longer-term solutions like water bowls near heat sources and a humidifier in your main living space. Check your humidity with a hygrometer and aim for the 30-50% range.

    What is the best humidity level for sinus problems?

    The best humidity level for sinus problems is between 40% and 50% RH. This range keeps your nasal passages moist enough to function as a defense against irritants and pathogens without creating conditions where mold and dust mites thrive. Anything below 30% dries out mucous membranes, while above 60% increases the risk of mold-related sinus issues.

    Does hanging a wet towel increase humidity?

    Yes, hanging a damp towel near a heat source like a radiator or vent does increase humidity. The warm airflow speeds up evaporation from the fabric, releasing moisture into the air over several hours. For the best effect, use a large bath towel, soak it thoroughly, wring it out until damp, and place it where warm air passes through it. This is a popular overnight trick for bedrooms.

    How do I increase humidity overnight in my bedroom?

    To increase humidity overnight, run a humidifier in your bedroom set to maintain 40-50% RH, hang a damp towel near a vent or radiator, place a bowl of water near a heat source, and keep a few humidity-releasing plants in the room. Close the bedroom door to trap the moisture in one space. Check your hygrometer in the morning to see if adjustments are needed.

    Final Thoughts

    Getting your indoor humidity into the 30-50% range does not have to be complicated or expensive. Start with the free methods that take almost no effort: open the bathroom door after showers, leave the dishwasher cracked open, set out bowls of water near your heat sources. If those are not enough, add a humidifier in the rooms where you spend the most time.

    The most important step is getting a hygrometer so you can actually see where your levels are. Before I bought one, I had no idea my apartment was sitting at 18% humidity in January. Once I could measure it, I could manage it.

    Whether you are trying to protect your health, save your wood furniture, stop the static shocks, or just breathe easier at night, knowing how to increase humidity gives you control over one of the most underrated aspects of home comfort. Use a combination of natural methods and a good humidifier, check your readings regularly, and adjust with the seasons. Your sinuses, your skin, and your houseplants will all thank you.

  • How to Insulate a Garage (August 2026): Complete DIY Guide

    How to Insulate a Garage (August 2026): Complete DIY Guide

    If your garage feels like an oven in summer and a freezer in winter, you are not alone. Learning how to insulate a garage is one of the most practical home improvement projects you can tackle, and it pays off in comfort, energy savings, and property value. I have helped dozens of homeowners transform their garages from unusable iceboxes into comfortable workshops, home gyms, and storage spaces. This guide walks you through every step, from choosing the right insulation materials to installing it on walls, ceilings, and doors.

    Whether you have an attached garage that shares a wall with your living room or a detached unit sitting at the edge of your property, the insulation principles are the same. The difference lies in how much R-value you need and where you focus your efforts. We will cover climate-specific recommendations, material comparisons, and the common mistakes that cost homeowners time and money.

    By the end of this guide, you will know exactly which insulation type fits your garage, what R-value your climate zone demands, and how to install it step by step. Let us get into it.

    Why Insulate Your Garage?

    Insulating your garage is not just about comfort. It is a practical decision that affects your entire home. An attached garage with poor insulation acts as a thermal bridge, letting cold air seep into your living spaces during winter and hot air push through during summer. Homeowners in places like Minnesota have reported that insulating their attached garage made a noticeable difference in the rooms directly above and beside it.

    The temperature swing data from real homeowners is convincing. One Reddit user measured their uninsulated garage door surface at 140 degrees Fahrenheit on a summer day. After installing reflective insulation panels, that surface temperature dropped to 100 degrees. The air temperature inside the garage went from 120 degrees down to 95 degrees. That is the difference between a space you can actually use and one that feels dangerous.

    Here are the main reasons homeowners decide to insulate their garages:

    • Energy efficiency: Reduces heat transfer between the garage and adjacent living spaces, lowering heating and cooling bills.
    • Temperature control: Keeps the garage usable year-round for workshops, home gyms, or hobbies.
    • Vehicle protection: Prevents extreme temperature swings that can damage car batteries, tires, and fluids.
    • Sound absorption: Reduces noise from power tools, music, or vehicles entering and leaving the garage.
    • Moisture prevention: Limits condensation that leads to rust on tools and mold on stored items.
    • Property value: A finished, insulated garage adds usable square footage and appeals to future buyers.

    There is a difference between attached and detached garages worth noting. An attached garage shares walls with your home, so insulating it has a direct impact on your indoor climate and energy bills. A detached garage stands alone, so the benefits are primarily about comfort inside the garage itself and protecting whatever you store there. Both benefit from insulation, but the urgency and return on investment are higher for attached garages, especially in extreme climates.

    Understanding R-Values for Garage Insulation

    R-value is the single most important number in any insulation project. It measures thermal resistance, which is how effectively a material slows down heat flow. The higher the R-value, the better the insulation performs. When you are figuring out how to insulate a garage, you need to match the R-value to your climate zone and the part of the garage you are insulating.

    Think of it this way: R-13 insulation resists heat flow about half as well as R-30. If you live in a cold climate and only install R-13 in your ceiling, you are leaving significant energy savings on the table. The Department of Energy publishes climate zone recommendations that serve as your baseline.

    Here is a breakdown of recommended R-values based on climate zones:

    • Climate Zones 1-3 (Hot – Southern US): Walls R-13 to R-15, Ceiling R-30, Garage Door R-5 to R-8
    • Climate Zones 4-5 (Mixed – Central US): Walls R-15 to R-21, Ceiling R-38, Garage Door R-6 to R-10
    • Climate Zones 6-7 (Cold – Northern US): Walls R-21 to R-23, Ceiling R-49, Garage Door R-8 to R-12

    Your wall framing also dictates what you can install. A standard 2×4 stud wall gives you 3.5 inches of cavity depth, which limits you to about R-13 or R-15 with fiberglass batts. A 2×6 stud wall gives you 5.5 inches of depth, allowing R-19 or R-21. This is one of the most common questions on DIY forums, and the answer is straightforward: measure your stud depth before buying insulation. If you have 2×4 walls and want higher R-values, you can add a layer of rigid foam board over the studs before installing your wall covering.

    For ceilings, the target R-value is much higher because heat rises and escapes through the roof. Most climate zones call for R-30 at minimum, and cold climates benefit from R-49 or higher. The ceiling is where you get the biggest return on your insulation investment.

    Types of Insulation Materials

    Choosing the right insulation material depends on your budget, your garage structure, and whether you want a DIY project or plan to hire a contractor. Here is how the main options compare.

    Fiberglass Batts

    Fiberglass batts are the most common garage insulation choice for DIYers. They come in pre-cut rolls that fit between standard stud spacing (16 or 24 inches on center). Fiberglass offers an R-value of roughly 3.2 to 4.3 per inch of thickness, so a standard 3.5-inch batt delivers R-13 to R-15.

    The advantages are clear: fiberglass batts are affordable, widely available at any home improvement store, and easy to cut with a utility knife. They do not require special equipment to install. The downsides include skin irritation during handling, reduced performance if compressed, and no inherent air sealing. You need to install them carefully to avoid gaps that undermine the whole wall’s performance.

    Rigid Foam Board

    Rigid foam board insulation comes in three main types: extruded polystyrene (XPS), expanded polystyrene (EPS), and polyisocyanurate (polyiso). XPS delivers about R-5 per inch, EPS about R-3.8 to R-4.4 per inch, and polyiso about R-6 to R-6.5 per inch. Polyiso has the highest R-value per inch but performs poorly in very cold temperatures below 50 degrees Fahrenheit.

    Foam board is excellent for garage door insulation and for adding R-value over stud walls. It also works as a continuous insulation layer that eliminates thermal bridging through the studs. The main drawback is cost, which runs higher than fiberglass per square foot. You also need to seal the seams between boards with tape or spray foam to prevent air leaks.

    Spray Foam Insulation

    Spray foam is the top performer for both insulation and air sealing in one step. Open-cell spray foam offers about R-3.7 per inch and is softer and less expensive. Closed-cell spray foam delivers R-6 to R-7 per inch, adds structural rigidity, and acts as its own vapor barrier. For garage applications, closed-cell is usually the better choice because it handles moisture and temperature extremes better.

    The catch is cost. Professional spray foam installation is significantly more expensive than other options. DIY spray foam kits exist, but forum users consistently report that the kits are messy, the coverage is less than advertised, and the results do not match professional application. If you choose spray foam, budget accordingly and consider whether the superior air sealing justifies the cost for your situation.

    Mineral Wool (Rock Wool)

    Mineral wool batts offer an R-value of about 3.3 per inch, similar to fiberglass, but with distinct advantages. Mineral wool is fire resistant up to 2,000 degrees Fahrenheit, which adds a meaningful safety margin in a garage where flammable materials are stored. It also absorbs sound better than fiberglass, making it a strong choice if you use your garage as a workshop or band practice space.

    Mineral wool is denser than fiberglass, which means it holds its shape in stud cavities and does not sag over time. It costs more than fiberglass but less than spray foam. The main downside is that it is heavier and requires more effort to cut precisely.

    Blown-In Insulation

    Blown-in insulation (cellulose or fiberglass) is the go-to choice for garages with finished walls where you cannot access the stud cavities. Small holes are drilled in the wall, insulation is blown in through a hose, and the holes are patched. It is also common for ceiling and attic applications where there is a large open space above the ceiling drywall.

    Blown-in insulation requires renting a blowing machine, which most home improvement stores offer. It works well for retrofit projects but is less practical for new construction or gutted garages where you have full access to the framing. The R-value is similar to fiberglass batts at about 2.2 to 3.7 per inch depending on the material and density.

    Quick Material Comparison

    • Best budget option: Fiberglass batts
    • Best for air sealing: Closed-cell spray foam
    • Best for fire resistance: Mineral wool
    • Best per-inch R-value: Polyiso rigid foam board (in warm/mixed climates)
    • Best for retrofit walls: Blown-in cellulose or fiberglass
    • Best for garage doors: Rigid foam board or reflective radiant barrier kits

    Tools and Materials Checklist

    Before starting any insulation work, gather everything you need. Running to the hardware store mid-project because you forgot a tool wastes time and breaks your momentum. Here is a complete checklist.

    Safety Equipment

    • N95 or P100 respirator mask (mandatory for fiberglass and mineral wool)
    • Safety glasses or goggles
    • Long sleeves and work gloves
    • Knee pads (you will spend time on the floor)

    Cutting and Measuring Tools

    • Utility knife with extra blades
    • Long straightedge or T-square (for cutting foam board and batts)
    • Tape measure
    • Pencil or marker

    Fastening Tools

    • Staple gun with appropriate staples (for faced batt insulation)
    • Hammer or nail gun
    • Caulk gun
    • Drill with driver bits

    Materials

    • Insulation (batts, foam board, or spray foam kit)
    • Vapor barrier sheeting (if required by your climate zone)
    • Vapor barrier tape
    • Silicone or polyurethane caulk
    • Expanding spray foam (for gaps around windows, doors, and rim joists)
    • Construction adhesive (for foam board on garage doors)
    • Drywall, PVC panels, or other wall covering material
    • Weatherstripping for garage door bottom seal

    How to Insulate Garage Walls: Step by Step

    This is the core section of the project. Wall insulation gives you the biggest improvement in temperature control and energy efficiency for an attached garage. Follow these steps in order and take your time on each one. Rushing leads to gaps, compression, and wasted money.

    Steps to insulate garage walls:

    1. Clear the walls: Remove everything from the garage walls including shelving, hooks, nails, and any existing covering. You need bare studs exposed from floor to ceiling. Disconnect and remove any electrical outlets or switches, labeling the wires so you can reconnect them later.
    2. Inspect and seal all gaps: Check every stud bay for gaps around pipes, wires, and the rim joist where the wall meets the floor. Fill these gaps with expanding spray foam or caulk. Air sealing before insulating is critical because insulation does not stop air movement, it only slows heat transfer through solid material.
    3. Install vapor barrier (if needed): In cold climates (zones 5-7), install a 6-mil polyethylene vapor barrier on the warm side of the wall (facing the interior of the garage) before adding insulation. In hot-humid climates (zones 1-3), the vapor barrier goes on the exterior side. In mixed climates (zone 4), check local building codes as requirements vary.
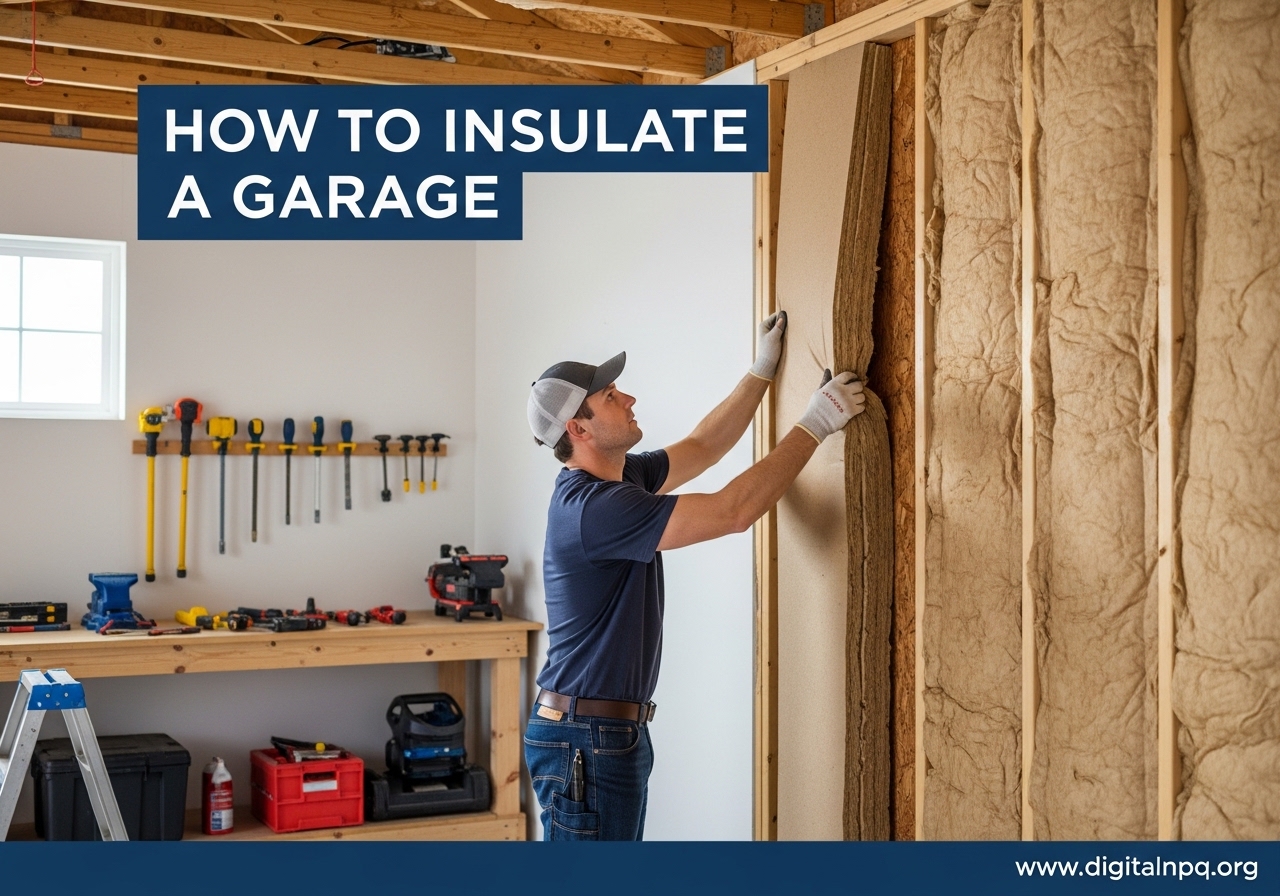
    4. Measure and cut batt insulation: Measure each stud cavity individually because spacing can vary, especially in older garages. Cut the batt about half an inch wider than the cavity for a snug friction fit. Use a straightedge and utility knife to make clean, straight cuts.
    5. Press insulation into stud bays: Start at the top of each cavity and work downward. Push the insulation gently into place without compressing it. Compressed fiberglass loses R-value because the air pockets that provide thermal resistance are squeezed out. The batt should fill the cavity from face to face.
    6. Staple flanges to stud faces: If you are using faced insulation (with a paper or foil facing), staple the flanges to the front face of the studs, not the sides. Overlap the flanges slightly for a continuous barrier. Space staples every 8 to 12 inches along each flange.
    7. Cut around obstacles: For electrical boxes, split the batt and tuck half behind the box and half in front. For pipes, cut a notch in the batt so it fits around the pipe without leaving a gap. Small gaps around obstacles are a major source of heat loss, so take the time to fit the insulation tightly.
    8. Install wall covering: Insulation must be covered with a thermal barrier for fire safety. Drywall is the standard choice and provides a clean, paintable surface. PVC panels are an alternative that is moisture resistant, easy to clean, and faster to install. Secure the wall covering with screws to the studs, making sure to hit every stud for a solid installation.

    One important detail: if your garage has 2×4 studs and you want more than R-15 in the walls, add a layer of 1-inch rigid foam board over the studs before installing drywall. This breaks the thermal bridge through the studs and adds R-5 to R-6.5 of continuous insulation. It does push the wall surface out slightly, but the performance gain is significant.

    For electrical boxes, remember to extend them outward to match the new wall surface depth. Box extenders are cheap and take five minutes to install. Skipping this step leaves exposed wires behind the drywall, which is a fire hazard.

    How to Insulate a Garage Ceiling

    Ceiling insulation is where you see the biggest temperature improvement, especially in attached garages with living space above. Heat rises, and an uninsulated garage ceiling acts like a giant radiator pushing cold air up into the rooms above in winter and absorbing cool air in summer.

    The approach differs depending on whether your garage has an exposed rafter ceiling or a finished ceiling with drywall already in place.

    Exposed Rafter Ceiling

    If your garage has open rafters with no ceiling material installed, you have the easiest path. Measure the rafter spacing (usually 16 or 24 inches on center) and install batt insulation between the rafters just like you would for walls. For cold climates, aim for R-38 to R-49, which means you may need to use thicker batts (up to 12 inches for R-38 fiberglass) or combine batts with rigid foam board.

    If your rafters are not deep enough to hold the full R-value you need, you have two options. First, you can attach rigid foam board to the bottom of the rafters, then install your ceiling material over it. Second, you can fur down the rafters with additional framing to create more depth for thicker batts. The foam board approach is faster and more common.

    When working overhead, use a scaffold or platform rather than a ladder. You will be holding heavy insulation above your head, and a ladder does not provide enough stability or workspace. Rent a rolling scaffold for a day if you do not have one.

    Finished Ceiling (Retrofit)

    If your garage already has drywall on the ceiling, blown-in insulation is your best option. Small holes (about 2 inches) are cut in the drywall between each rafter bay, insulation is blown in through a hose, and the holes are patched and painted over. This process is effective but does require renting a blowing machine.

    An alternative for finished ceilings is to add rigid foam board directly over the existing drywall and then install a second layer of drywall over it. This adds continuous insulation without disturbing the existing ceiling. The downside is that you lose an inch or two of ceiling height, which matters if your garage door tracks are close to the ceiling.

    Garage Attic Space

    If your garage has an attic space above the ceiling, you can insulate the attic floor (which is the garage ceiling from below). Lay unfaced batts or blow in cellulose insulation between the ceiling joists. This is one of the easiest insulation jobs because gravity does the work for you. Just lay the batts in place without compressing them.

    Forum users in cold climates emphasize that the garage attic is often overlooked. One homeowner in Minnesota reported that insulating the garage attic above the ceiling dropped the garage temperature swing by 15 degrees compared to just wall insulation alone.

    How to Insulate a Garage Door

    The garage door is often the weakest thermal link in the building envelope. Most standard garage doors are thin steel or aluminum panels with no insulation value at all. A single-layer metal door has an R-value of essentially zero, meaning it transfers heat almost as freely as if the door were not there.

    You have three main approaches for garage door insulation, each with different costs and effectiveness.

    Insulation Kits

    Purpose-built garage door insulation kits are the easiest option. They typically include pre-cut rigid foam or reflective panels designed to fit into the horizontal channels of standard sectional garage doors. Most kits include enough panels for a standard two-car garage door and come with adhesive or fasteners.

    The results from real users are positive. One homeowner reported that NASA TECH reflective panels reduced the door surface temperature from 140 degrees Fahrenheit to 100 degrees on a sunny day, and the interior air temperature dropped from 120 degrees to 95 degrees. Those are real numbers from a real garage, not manufacturer claims.

    DIY Foam Board Method

    You can also buy rigid foam board (XPS or EPS) and cut it to fit each panel section of your garage door. Measure each panel channel carefully because the dimensions can vary across the door. Use construction adhesive to attach the foam board to the inside of each panel. Seal the edges with foil tape to prevent air infiltration.

    This method gives you more control over the R-value because you choose the foam board thickness. A 1.5-inch XPS panel delivers R-7.5, which is a significant upgrade from an uninsulated metal door. The cost is lower than a kit if you already have a utility knife and straightedge.

    Reflective Radiant Barrier

    Reflective insulation works differently from other types. Instead of slowing conductive heat transfer, it reflects radiant heat away from the surface. This makes it particularly effective at reducing summer heat gain through garage doors that face direct sunlight. It has a lower R-value than foam board, but the radiant barrier effect can drop surface temperatures significantly.

    The best approach for most garages is to combine reflective panels with foam board for both radiant heat reflection and conductive resistance. This gives you the best of both worlds.

    Critical Warning: Garage Door Weight and Balance

    Adding insulation panels to your garage door adds weight. A typical two-car steel garage door weighs 150 to 200 pounds without insulation. Adding foam board or insulation kits adds another 30 to 80 pounds depending on the material. This extra weight affects the torsion springs that counterbalance the door.

    After insulating your garage door, check whether the door still opens and closes smoothly and stays in place when partially opened. If the door feels heavy, falls shut, or the opener strains, you need to have the springs adjusted or replaced by a professional. This is not a DIY task. Garage door torsion springs are under extreme tension and have caused serious injuries. Call a garage door technician for spring adjustment.

    Air Sealing: The Step Most People Skip

    Insulation slows heat transfer, but it does not stop air movement. If your garage has gaps, cracks, and penetrations that let outside air stream in, your insulation is fighting a losing battle. Energy Star recommends air sealing before insulating, yet many DIYers skip this step entirely because it is not as satisfying as pressing fluffy batts into walls.

    Here are the most common air leak points in a garage:

    • Rim joist: Where the wall framing meets the concrete foundation. This is the biggest single air leak in most garages. Seal it with expanding spray foam.
    • Window frames: Gaps between the window frame and rough opening. Seal with caulk on the interior and exterior.
    • Garage door frame: The gap between the door frame and the framing. Use expanding foam for large gaps and caulk for small ones.
    • Electrical boxes: Every outlet and switch box is a penetration. Use foam gaskets behind the cover plates and seal around the box with caulk.
    • Pipe and wire penetrations: Any hole drilled through the framing for plumbing or wiring. Seal with fire-rated caulk or spray foam.

    For the garage door itself, install or replace the bottom weatherstrip seal. This rubber strip compresses against the floor when the door closes, blocking air, water, and pests. Most garage doors have a channel that holds a replaceable seal, and new weatherstripping costs very little while making a big difference in drafts.

    The rim joist deserves special attention. In a typical garage, the sill plate sits directly on the concrete foundation, and the rim joist sits on top of the sill plate. The joint between the concrete and the wood is almost never airtight. Cut pieces of rigid foam board to fit between each floor joist at the rim joist, press them in place, and seal around the edges with spray foam. This alone can cut drafts by 30 to 50 percent.

    Vapor Barriers: When and Where You Need Them

    Vapor barriers cause more confusion than almost any other part of garage insulation. Getting them wrong can trap moisture inside your walls, leading to mold, rot, and structural damage. Getting them right keeps your insulation dry and performing as intended.

    A vapor barrier is a material (usually 6-mil polyethylene plastic sheeting) that prevents water vapor from moving through walls and ceilings. Water vapor moves from warm areas to cold areas, so the barrier needs to be on the warm side of the wall assembly.

    Here is the breakdown by climate:

    • Cold climates (zones 5-7): Install the vapor barrier on the interior (warm) side of the wall, between the insulation and the interior wall covering. This prevents warm indoor moisture from entering the wall cavity and condensing on cold exterior surfaces.
    • Hot-humid climates (zones 1-3): Install the vapor barrier on the exterior side of the wall. This prevents hot, humid outdoor air from entering the wall and condensing on cooler interior surfaces.
    • Mixed climates (zone 4): Requirements vary by local building codes. Some jurisdictions require a vapor barrier, others allow a vapor retarder (less restrictive), and some require nothing at all. Check with your local building department.

    The biggest mistake you can make is installing vapor barriers on both sides of the wall. This creates a moisture sandwich. Any water vapor that gets into the wall cavity (and some always does through small gaps) has nowhere to escape. It condenses inside the wall, saturates the insulation, and creates mold. Always allow one side of the wall assembly to be vapor-permeable so the wall can dry out.

    If you are using faced insulation (batts with paper or foil facing), the facing counts as a vapor barrier. Do not add a separate polyethylene vapor barrier if you already have faced insulation installed facing the correct direction. That would create a double barrier.

    Common Mistakes to Avoid When Insulating a Garage

    After reading dozens of forum posts from homeowners who insulated their garages, several mistakes show up repeatedly. Learning from these experiences saves you time and money.

    Compressing Insulation to Make It Fit

    Fiberglass and mineral wool insulation work by trapping air in tiny pockets. When you compress a 6-inch batt into a 4-inch cavity, you reduce the R-value because those air pockets collapse. A compressed R-19 batt performs closer to R-13. If your cavity is too shallow for the insulation you bought, return it and get the correct thickness. Never force thick insulation into thin spaces.

    Skipping the Air Sealing Step

    This is the most common mistake and the biggest performance killer. Insulation cannot do its job if air is streaming through gaps around it. One homeowner on a DIY forum reported spending an entire weekend installing wall insulation, only to find the garage was still drafty because he never sealed the rim joist. He had to pull sections of insulation back out to fix the problem. Seal first, insulate second. Always.

    Wrong Vapor Barrier Placement

    Installing the vapor barrier on the wrong side of the wall traps moisture instead of blocking it. In cold climates, the barrier goes on the interior side. In hot climates, it goes on the exterior side. Getting this backwards means moisture condenses inside the wall cavity where you cannot see it, and by the time you notice the problem, you have mold and rot.

    Ignoring the Garage Door Springs

    Adding insulation to your garage door changes its weight. Even a 30-pound increase can throw off the spring tension enough to cause problems. The door may not stay open on its own, the opener may struggle, or the door may slam shut unexpectedly. This is a safety hazard. After insulating the door, test the balance by disconnecting the opener and raising the door manually to chest height. It should stay there on its own. If it falls or rises, call a garage door technician for spring adjustment.

    Leaving Gaps Around Obstacles

    Electrical boxes, pipes, and ductwork create obstacles in stud cavities. It is tempting to cut insulation roughly and move on, but every gap is a thermal bypass that lets air circulate behind the insulation. Take the extra time to split batts around obstacles and tuck pieces tightly into irregular spaces. Small gaps add up fast across an entire wall.

    Using Faced Insulation on the Wrong Side

    Faced insulation has the vapor barrier built into one side. The facing must always point toward the warm side of the wall (interior in cold climates, exterior in hot climates). Installing it backwards puts the vapor barrier on the wrong side, which can trap moisture inside the wall.

    Not Wearing Proper Safety Gear

    Fiberglass insulation causes skin irritation, itching, and respiratory discomfort. Mineral wool is slightly better but still requires protection. Always wear a long-sleeved shirt, gloves, safety glasses, and at minimum an N95 respirator. This is not optional. The discomfort of fiberglass particles in your lungs lasts far longer than the few seconds it takes to put on a mask.

    FAQ

    What is the best way to insulate a garage?

    The best way to insulate a garage is to use fiberglass batts or mineral wool in the walls, rigid foam board on the garage door, and blown-in or batt insulation in the ceiling. Start with air sealing all gaps and cracks, then install insulation from top to bottom (ceiling first, then walls, then door). For attached garages in cold climates, aim for R-21 walls, R-38 to R-49 ceiling, and R-8 to R-12 on the garage door.

    Should an unheated garage be insulated?

    Yes, insulating an unheated garage is still worthwhile. Insulation slows temperature swings, which protects stored items, vehicles, and tools from extreme heat and cold. An insulated unheated garage will stay cooler in summer and warmer in winter compared to an uninsulated one, even without active heating. If the garage is attached to your home, insulating it also reduces heat transfer into adjacent living spaces.

    Can you insulate a garage yourself?

    Yes, most garage insulation is a manageable DIY project. Fiberglass batts require only a utility knife, staple gun, and basic safety gear. Foam board for the garage door needs a knife and construction adhesive. The main exceptions are spray foam insulation, which requires professional equipment, and garage door spring adjustments after adding insulation weight. If you can handle basic carpentry, you can insulate a garage over a weekend.

    Is it a good idea to insulate your garage?

    Insulating your garage is a good idea if you use it as a workshop, home gym, or storage space, or if it is attached to your home. Benefits include temperature regulation, reduced energy costs for adjacent rooms, noise reduction, moisture control, and protection for vehicles and tools. The return on investment is highest for attached garages in extreme climates where temperature differences between the garage and living space are significant.

    How much does it cost to insulate a garage?

    DIY garage insulation costs vary by material and garage size. For a standard two-car garage (about 500 square feet of wall and ceiling area), fiberglass batts are the most affordable option. Rigid foam board and mineral wool cost more per square foot. Spray foam is the most expensive option and typically requires hiring a professional. The total cost depends heavily on your chosen R-value, material type, and whether you hire labor.

    What R-value do I need for garage insulation?

    R-value requirements depend on your climate zone. For walls: R-13 to R-15 in warm climates (zones 1-3), R-15 to R-21 in mixed climates (zones 4-5), and R-21 to R-23 in cold climates (zones 6-7). For ceilings: R-30 in warm climates, R-38 in mixed climates, and R-49 in cold climates. For garage doors: R-5 to R-8 in warm areas, R-6 to R-10 in mixed areas, and R-8 to R-12 in cold areas. Always check local building codes for specific requirements.

    Should I insulate my garage ceiling?

    Yes, the ceiling is often more important than the walls because heat rises and escapes through the roof. In attached garages with living space above, ceiling insulation directly affects the comfort and energy efficiency of those rooms. In detached garages, ceiling insulation prevents extreme heat buildup in summer. Aim for R-30 at minimum, and up to R-49 in cold climates.

    How long does garage insulation last?

    Fiberglass and mineral wool insulation last 80 to 100 years when properly installed and kept dry. Spray foam lasts 80-plus years. Rigid foam board has a similar lifespan. The main factors that reduce insulation lifespan are moisture exposure, pest damage, and physical compression. If your insulation gets wet from a leak or condensation, it needs to be replaced because wet insulation loses R-value and can grow mold.

    Conclusion

    Learning how to insulate a garage is one of those home improvement skills that pays for itself over and over. You start with air sealing every gap and crack, move through wall insulation with properly fitted batts or foam board, tackle the ceiling for maximum temperature control, and finish with garage door insulation to close the biggest thermal weak spot. Each step builds on the last, and together they transform a drafty, uncomfortable space into somewhere you actually want to spend time.

    Start by assessing your garage: measure your stud depth, check your climate zone, and calculate how much material you need. Pick up your insulation, grab the tools from the checklist above, and set aside a weekend. The work is straightforward, the materials are affordable, and the results are immediate. You will feel the difference the first morning you walk into your garage and it does not feel like stepping into a meat locker or a sauna.
  • How to Clean Baseboard Heaters (August 2026) Complete Guide

    How to Clean Baseboard Heaters (August 2026) Complete Guide

    If you have never cleaned your baseboard heaters, you are not alone. Most homeowners skip this task entirely, and I was one of them until I noticed a burning smell every time I turned on the heat during the first cold snap of the year. That smell was years of accumulated dust, pet hair, and debris literally burning off the heating elements. After learning how to clean baseboard heaters properly, the smell disappeared and my heating bills dropped noticeably. This guide covers everything you need to know to tackle this job yourself, from the tools you need to the exact step-by-step process that works for both electric and hydronic units.

    Dirty baseboard heaters do more than just smell bad. They can reduce your heating efficiency by up to 20%, aggravate allergies, and circulate dust and pet dander throughout your home every time the heat kicks on. Whether you have electric resistance heaters or hydronic hot water units, the cleaning process is straightforward once you know the steps. I will walk you through the entire process, including some tips I picked up from HVAC professionals and trial-and-error over the past few years.

    Why Cleaning Baseboard Heaters Matters

    Baseboard heaters work by drawing cool air from floor level, passing it over heated fins or elements, and releasing warm air back into the room through convection. When dust, pet hair, and debris build up on those fins, they block airflow and force the heater to work harder to produce the same amount of warmth. That means higher energy bills and less comfortable rooms.

    The buildup happens faster than most people realize. Pet owners in particular will find that pet dander and fur collect in the fins within just a few months. Allergy sufferers often notice a direct correlation between dirty heaters and worsened symptoms. When the heater runs, it circulates all that trapped dust and dander right back into the air you breathe.

    There is also the safety angle. A thick layer of debris on heating elements can create an unpleasant burning odor when you first turn on the heat, and in extreme cases, heavy accumulation can pose a fire risk. Regular cleaning keeps your system running safely and efficiently, extends the life of your heating units, and improves the overall indoor air quality in your home.

    Tools and Supplies You Will Need

    Before you start, gather everything in one place. Having the right tools ready saves time and frustration. Here is what I recommend based on what has worked best for me and what HVAC professionals suggest:

    • Vacuum cleaner with brush attachment — This is your primary tool. The soft bristles loosen dust without damaging the delicate aluminum fins. A shop-vac works even better if you have one because the stronger suction pulls debris from deeper between the fins.
    • Crepice tool attachment — The narrow vacuum attachment helps reach tight spaces between fins and behind the heater where dust collects heavily.
    • Microfiber cloths — Use these for wiping down covers, both inside and out. Microfiber traps dust rather than just pushing it around.
    • Mild dish detergent and warm water — For washing covers that have sticky residue or grease buildup. Avoid harsh chemical cleaners.
    • Compressed air canister — Optional but helpful for blowing dust out of tight corners and between fins. Use it carefully to avoid blowing dust everywhere.
    • Screwdriver — Most baseboard heater covers are held in place by clips or screws. A Phillips or flathead screwdriver is usually all you need.
    • Needle-nose pliers — Handy for gently straightening bent fins and removing any stubborn debris stuck between them.
    • Fin comb (optional) — A specialized tool for straightening bent aluminum fins. If you do not have one, needle-nose pliers work for minor bends.
    • Safety glasses and dust mask — You will be working with accumulated dust and debris. Protect your eyes and lungs, especially if you have allergies.
    • Drop cloth or old towels — Place these on the floor beneath the heater to catch falling dust and debris for easier cleanup.

    How to Clean Baseboard Heaters: Step-by-Step Guide

    This is the complete process I follow every time I clean baseboard heaters. The entire job takes about 30 to 45 minutes per heater if it has been cleaned within the last year. For heaters that have not been cleaned in several years, budget closer to an hour per unit because the buildup will be heavier.

    Step 1: Turn Off Power and Let the Heater Cool Completely

    Safety comes first. Go to your circuit breaker panel and turn off the power to the baseboard heaters. If your heaters have a dedicated thermostat, turn it to the off position as well. Wait at least 30 minutes for the heating elements to cool down completely. Electric baseboard heaters can reach temperatures hot enough to cause burns, so do not skip this step even if the heater has been off for a short while.

    If you have hydronic baseboard heaters, you do not need to worry about electrical burns, but you should still turn off the thermostat so the system does not kick on while you are working. The hot water pipes can also be warm to the touch, so give them time to cool.

    Step 2: Remove the Baseboard Heater Covers

    Most baseboard heater covers are designed to be removable for cleaning. Look at the top of the cover and you will typically see it is held in place by a series of spring clips or snap-in brackets. To remove the cover, push down gently on the top edge while pulling the bottom edge toward you. The cover should pop free from the clips.

    Some models use screws instead of clips. In that case, use your screwdriver to remove the screws along the top and bottom edges. Place the screws in a small container so you do not lose them. Once the fasteners are removed, lift the cover straight up and off the unit.

    If the cover feels stuck, do not force it. Older covers can become wedged in place from paint or years of grime. Gently wiggle the cover back and forth while pulling outward until it releases. Set the cover aside on your drop cloth.

    Step 3: Vacuum Dust and Loose Debris

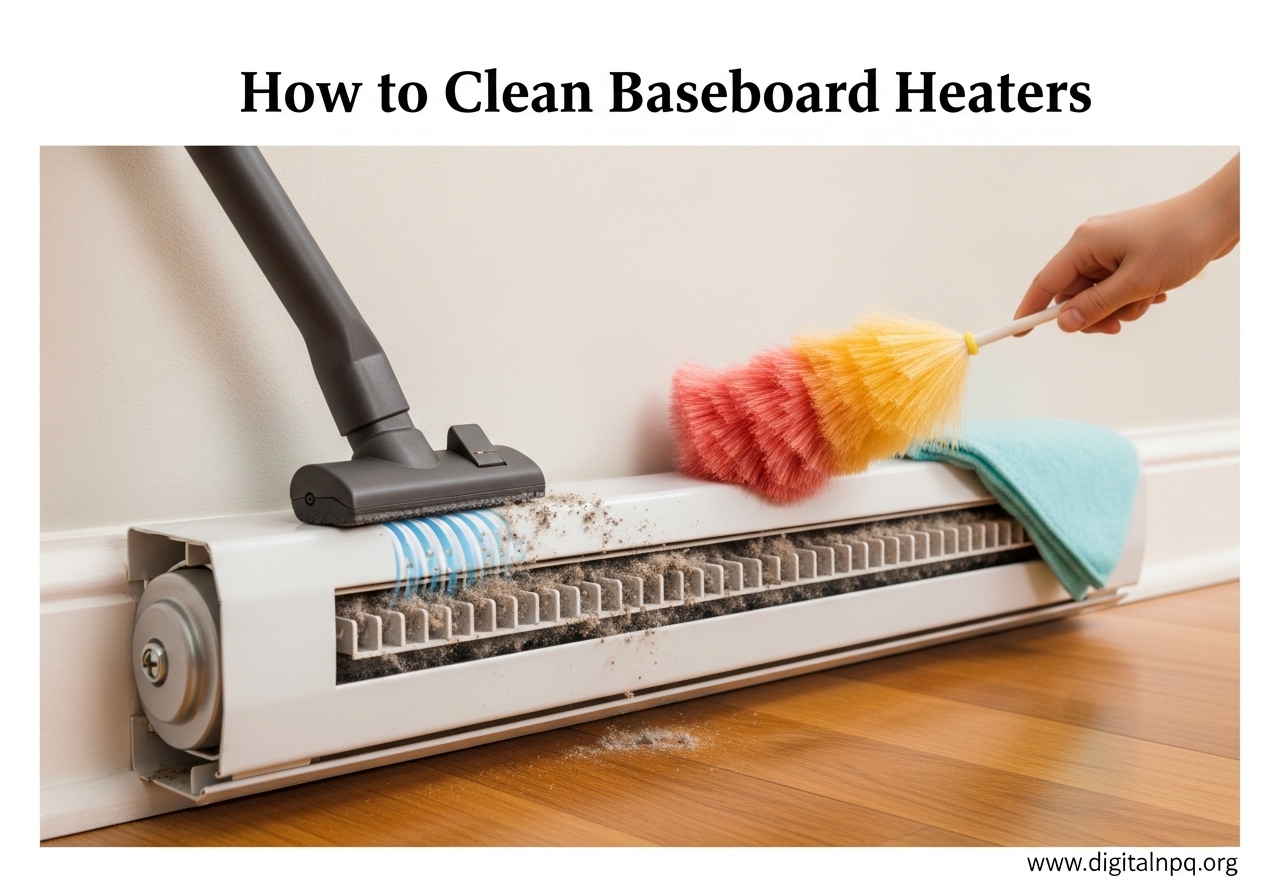
    With the cover removed, you will see the heating fins and elements. Before doing anything else, use your vacuum with the brush attachment to remove as much loose dust and debris as possible. Start at the top of the fins and work your way down in smooth, even strokes. Let the vacuum do the work — do not press hard against the fins because they bend easily.

    Pay special attention to the bottom of the unit where dust collects in thick layers. Use the crevice tool to reach into the corners and along the back wall behind the heater. This is where years of debris tend to accumulate, especially in homes with pets.

    If you are using compressed air, now is the time to use it. Blow air between the fins from one side while vacuuming from the other to capture the dislodged dust. This method is particularly effective for heaters that have not been cleaned in a long time.

    Step 4: Clean the Fins Thoroughly

    After vacuuming the loose debris, inspect the fins closely. You will likely see remaining dust clinging to the metal surfaces. Use a soft brush or a microfiber cloth wrapped around a ruler or paint stick to gently wipe between the fins. Work in the same direction as the fins run to avoid bending them.

    For stubborn grime, lightly dampen the cloth with water or a very mild detergent solution. The key word here is lightly. You want the cloth barely damp, not wet. Excess moisture can damage electrical components or cause rust on unprotected metal parts.

    While you are cleaning the fins, check for any that are bent or crushed. Bent fins restrict airflow and reduce heating efficiency. Use your needle-nose pliers or a fin comb to gently straighten them back into alignment. Work slowly and carefully because the aluminum is thin and can break if you apply too much force.

    Step 5: Wipe Down the Covers Inside and Out

    Take the cover you set aside earlier and clean both sides. For light dust, a dry microfiber cloth is sufficient. Wipe the inside surface first since it tends to be the dirtiest, then wipe the outside. Work from one end to the other in a single direction to avoid redistributing dust.

    For covers with sticky residue or grease, use warm water with a few drops of mild dish detergent. Dampen a microfiber cloth in the solution, wring it out well, and wipe the cover down. Rinse with a clean damp cloth and dry immediately with a towel. Let the cover air dry completely before reinstalling it to prevent moisture from reaching the heating elements.

    This is also a good time to check the cover for damage. If the cover is rusted, dented, or has broken clips, consider replacing it. Replacement covers are available and can give old heaters a fresh look while improving airflow through clean, unobstructed vents.

    Step 6: Clean Behind and Around the Heater

    With the cover still off and the fins cleaned, take a moment to clean the floor and wall behind the heater. Vacuum the floor area beneath the unit where dust has settled. Wipe the wall behind the heater with a dry cloth to remove any cobwebs or dust that has accumulated there.

    This step is easy to skip but it makes a real difference. Dust behind the heater gets pulled into the fins when the heater runs, so cleaning this area helps keep the fins cleaner for longer between deep cleaning sessions.

    Step 7: Reassemble and Test

    Once everything is clean and dry, reinstall the cover by reversing the removal process. Line up the cover with the clips or screw holes and snap or fasten it back into place. Make sure the cover sits flush and secure with no gaps or loose edges.

    Turn the power back on at the circuit breaker and set the thermostat to your preferred temperature. Listen for any unusual sounds and check that the heater warms up normally within 15 to 20 minutes. You should notice that the room reaches your target temperature faster than before, and there should be no burning smell from the freshly cleaned unit.

    Electric vs. Hydronic Baseboard Heaters: Cleaning Differences

    The basic cleaning process is similar for both types, but there are some important distinctions to keep in mind.

    Electric baseboard heaters use resistance coils to generate heat. The coils can get extremely hot, so always confirm the power is off before cleaning. Avoid getting water anywhere near the electrical components. If you use a damp cloth on the fins, make sure it is only barely damp and never drip water onto the coils or wiring. Electric heaters also tend to attract more dust because the heating elements do not have the thermal mass that hydronic pipes do, so the fins may need more frequent attention.

    Hydronic baseboard heaters use hot water flowing through pipes to heat the fins. Since there are no exposed electrical coils, you have slightly more flexibility with cleaning methods. A slightly damp cloth is generally safe to use on the fins and pipes. However, be careful around any valves or connections — you do not want to loosen anything or introduce moisture into the system. Hydronic systems also need occasional bleeding to remove air from the pipes, which is a separate maintenance task from cleaning.

    Common Cleaning Mistakes to Avoid

    After cleaning dozens of baseboard heaters and reading through countless forum posts from homeowners, I have seen the same mistakes come up repeatedly. Here are the ones to watch out for:

    • Not turning off the power first. This is the most dangerous mistake. Electric baseboard heaters draw significant current and can cause serious burns or electrical shock if you touch the elements while they are energized. Always flip the breaker.
    • Using too much water. Water and electrical components do not mix. Even with hydronic heaters, excess moisture can cause rust or damage surrounding materials. Stick to barely damp cloths.
    • Bending the fins. The aluminum fins are delicate. Pressing too hard with a vacuum, brush, or cloth can crush them, which permanently reduces airflow and heating efficiency. Work gently.
    • Using harsh chemical cleaners. Abrasive sprays, bleach-based products, and heavy-duty degreasers can damage the finish on covers and corrode the metal fins. Mild dish detergent and water is all you need.
    • Rushing through the job. Proper cleaning takes time per unit. Trying to speed through the process usually means leaving dust behind or accidentally bending fins. Budget adequate time, especially for the first cleaning.
    • Forgetting to clean behind the heater. The wall and floor behind the unit collect significant dust that gets pulled right back into the fins during operation. Skipping this step means your freshly cleaned heater will get dirty again much faster.

    How Often Should You Clean Baseboard Heaters?

    The ideal cleaning frequency depends on your household. For most homes, a thorough cleaning once per year is sufficient. The best time to do it is in late summer or early fall before the heating season begins, so you start the cold months with clean, efficient heaters.

    Pet owners should plan to clean their baseboard heaters two to three times per year. Pet hair and dander accumulate surprisingly fast inside the fins, and the buildup reduces both efficiency and air quality. If you have multiple pets or long-haired breeds, lean toward three cleanings per year.

    Allergy sufferers should clean at least twice per year — once before heating season and once midway through winter. The dust and allergens trapped in the fins get circulated every time the heater runs, which can make symptoms worse even with good air filters in your home.

    For homes in particularly dusty environments or older homes with more gaps where outdoor air enters, consider adding a second annual cleaning. And if you have baseboard heaters that have not been cleaned in over five years, expect the first deep cleaning to take extra time and possibly require a second pass to remove all the compacted debris.

    One quick tip between deep cleanings: running your vacuum brush attachment along the top vent of the cover once a month takes just a few minutes and helps keep surface dust from working its way inside the unit.

    FAQ

    What is the best way to clean baseboard heaters?

    The best way to clean baseboard heaters is to turn off the power at the circuit breaker, remove the front cover, vacuum loose dust with a brush attachment, wipe the fins with a barely damp microfiber cloth, clean the cover separately with mild soap and water, then reassemble. This method works for both electric and hydronic units and takes about 30 to 45 minutes per heater.

    Do you have to clean baseboard heaters?

    Yes, you should clean your baseboard heaters regularly. Dirty heaters can lose up to 20% of their heating efficiency, produce a burning smell from accumulated debris, circulate dust and allergens throughout your home, and in extreme cases pose a fire risk. Annual cleaning keeps them running safely and efficiently.

    How often should baseboard heaters be bled?

    Hydronic baseboard heaters should be bled once per year, typically at the start of the heating season. Bleeding removes trapped air from the pipes that can cause gurgling sounds and reduce heating performance. Electric baseboard heaters do not need bleeding since they do not use water. Bleeding is a separate task from cleaning and involves opening a small valve on each unit with a bleed key or screwdriver.

    Can baseboard heat cause allergies?

    Yes, dirty baseboard heaters can worsen allergy symptoms. When dust, pet dander, and other allergens accumulate on the heating fins, the convection process circulates those particles back into the air every time the heater runs. Regular cleaning significantly reduces airborne allergens. Allergy sufferers who clean their baseboard heaters report noticeable improvement in symptoms, especially during winter months when heaters run most frequently.

    Can I use water to clean my baseboard heaters?

    You can use a barely damp cloth to wipe the fins and covers, but never spray water directly onto the unit or use soaking wet cloths. For electric baseboard heaters, excess water near the coils or wiring creates a safety hazard. A lightly dampened microfiber cloth is safe for both electric and hydronic units when used carefully. For the covers, you can wash them separately with mild soap and water as long as they are completely dry before reinstallation.

    How do I clean baseboard heater fins that are bent?

    Gently straighten bent fins using needle-nose pliers or a fin comb. Grip the bent portion of the fin lightly and slowly bend it back into alignment with the surrounding fins. Work slowly because the aluminum is thin and can tear if you apply too much force. If many fins are crushed over a large area, a fin comb designed for baseboard heaters can straighten multiple fins at once. Always straighten fins when the power is off and the unit is completely cool.

    Conclusion

    Knowing how to clean baseboard heaters is one of those straightforward home maintenance skills that pays off every single winter. The process is simple: turn off the power, remove the covers, vacuum and wipe the fins, clean the covers, and reassemble. It takes less than an hour per heater, and the results are immediate — better heating performance, lower energy bills, cleaner air, and no more burning smell when the heat turns on.

    I recommend tackling this job before each heating season. If you have pets or allergies, plan for two or three cleanings per year. The tools are inexpensive, the steps are easy to follow, and the improvement in comfort and air quality makes the effort well worth it. Your baseboard heaters will thank you, and so will your heating bill.

  • Cool Mist vs Warm Mist Humidifier 2026: Which Is Better?

    Cool Mist vs Warm Mist Humidifier 2026: Which Is Better?

    When you are deciding between a cool mist vs warm mist humidifier, the right choice depends on who lives in your home, what health concerns you have, and how large the space is. Both types add moisture to dry indoor air, but they do it in completely different ways, and those differences matter more than most people realize.

    I have spent months researching humidifier technology, reading through hundreds of user experiences on forums, and comparing the latest models. What I found is that most people pick the wrong type for their specific situation, and it usually comes down to not understanding how each one actually works.

    The EPA recommends keeping indoor humidity between 30% and 50% for comfort and health. Running the right humidifier helps you hit that range, whether you are dealing with congestion from sinus problems, dry winter air, or a child’s stuffy nose. This guide breaks down every difference so you can pick the one that actually fits your life.

    What Is a Cool Mist Humidifier?

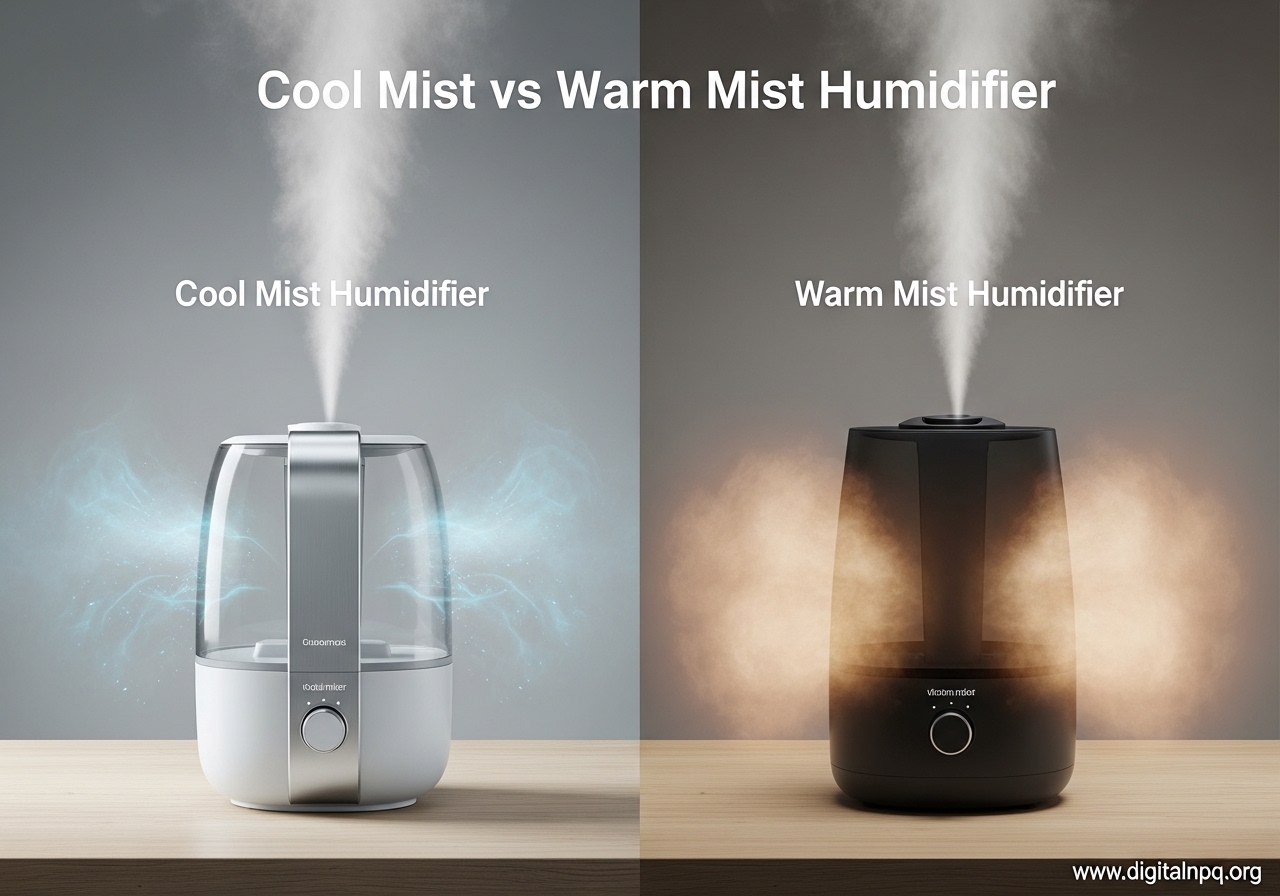
    A cool mist humidifier releases room-temperature moisture into the air without heating the water. It is the most commonly recommended type by pediatricians and doctors, and for good reason. There are two main types of cool mist humidifiers, and they work in very different ways.

    Evaporative Cool Mist Humidifiers

    Evaporative humidifiers use a fan to blow air through a wet wick filter. As the air passes through the saturated filter, it picks up moisture and releases it into the room. This process is naturally self-regulating: when the air already has enough humidity, less water evaporates from the wick, so it automatically slows down without any sensors or controls.

    The wick filter also traps minerals and impurities from the water, which means evaporative units do not produce white dust. On the downside, the fan creates a noticeable hum that some people find distracting at night. You also need to replace the wick filter every 30 to 60 days, which adds to the ongoing cost.

    Ultrasonic Cool Mist Humidifiers

    Ultrasonic humidifiers use high-frequency vibrations to break water into tiny droplets, creating a fine mist that disperses into the room. They are extremely quiet because they have no fan, making them popular for bedrooms and nurseries.

    The trade-off is that ultrasonic models do not filter the water at all. If you use tap water, the minerals in it get turned into that fine white dust that settles on furniture, electronics, and floors. Reddit users consistently warn about this issue, and many report that the dust actually damaged nearby electronics. Using distilled water solves the problem, but that adds cost and effort.

    What Is a Warm Mist Humidifier?

    A warm mist humidifier, also called a steam vaporizer, boils water to create steam. The steam cools slightly before it leaves the machine, but the mist is still warm to the touch. Some models mix the steam with cooler room air to bring the temperature down further before release.

    Because the boiling process kills most bacteria and mold spores in the water, warm mist units tend to produce cleaner moisture. The heat also breaks down minerals, so you get less white dust compared to ultrasonic cool mist models. Many people find the warm mist more soothing when they have a cold or congestion, and the gentle warmth can make a cold room feel more comfortable during winter months.

    The biggest drawback is safety. The boiling water inside the tank reaches temperatures that can cause serious burns. The American Academy of Pediatrics strongly recommends against using warm mist humidifiers in homes with young children or pets because of the scald risk. Warm mist units also use more electricity since they have to heat the water continuously.

    Cool Mist vs Warm Mist Humidifier: Key Differences Compared

    Understanding the differences between these two types goes beyond just warm versus cool output. The way each machine produces moisture affects everything from your electric bill to the air quality in your room.

    How They Produce Moisture

    Cool mist humidifiers rely on either a fan-driven wick system (evaporative) or high-frequency vibrations (ultrasonic) to disperse moisture at room temperature. Neither method involves heat. Warm mist humidifiers boil water inside a chamber and release the resulting steam into your room. The boiling process naturally kills bacteria and mold in the water, which gives warm mist units a built-in sanitation advantage.

    This fundamental difference in technology drives almost every other distinction between the two types, from energy use to safety to maintenance requirements.

    Noise Levels

    Noise is one of the most common complaints I see in forum discussions, and it can make or break your experience depending on where you plan to use the humidifier. Ultrasonic cool mist models are the quietest option available, often producing barely a whisper. Evaporative models have a fan that generates a steady hum, which some users describe as white noise and others find annoying. Warm mist humidifiers fall somewhere in the middle. The boiling process is generally quiet, though you may hear occasional gurgling or bubbling sounds as water heats and moves through the system.

    If silence is a priority for sleeping, ultrasonic cool mist wins. If you want some background white noise, an evaporative model works fine. Warm mist is a good middle ground.

    Energy Efficiency

    This is where warm mist humidifiers take a clear disadvantage. Boiling water requires a significant amount of electricity, typically 150 to 300 watts during operation. Cool mist models use far less power. Evaporative units consume around 15 to 40 watts for the fan, and ultrasonic models use roughly 20 to 40 watts for the vibrating diaphragm.

    Over a full winter season of daily use, that difference adds up on your electric bill. If you run a warm mist humidifier for 8 hours every night from October through March, you are looking at a noticeable increase in energy costs compared to running a cool mist unit for the same period.

    Coverage Area and Room Size

    Cool mist humidifiers generally cover larger areas because the mist disperses more easily at room temperature. Many cool mist models handle rooms up to 500 square feet or larger. Evaporative units in particular are well-suited for open floor plans and large living spaces because the fan helps distribute moisture evenly.

    Warm mist humidifiers are typically rated for smaller rooms, usually up to 300 or 400 square feet. The warm steam tends to rise and settle in a more concentrated area rather than spreading throughout the space. For a bedroom or small office, that is perfectly fine. For a large living room or open-plan area, cool mist is usually the better choice.

    White Dust and Mineral Issues

    White dust is one of the most frustrating problems humidifier owners face, and it is almost exclusively an ultrasonic cool mist issue. The high-frequency vibrations break apart not just the water but also the minerals dissolved in it. Those minerals become a fine powder that settles on every surface near the unit.

    I have read dozens of Reddit threads where users describe finding white dust on their TV screens, keyboards, bookshelves, and even inside electronics. One user on r/Humidifiers reported that their ultrasonic unit destroyed a nearby speaker over several months of use. The solution is simple but costly: use only distilled water in ultrasonic models.

    Evaporative models avoid this problem entirely because the wick filter traps minerals before the moisture enters the air. Warm mist units reduce white dust because the boiling process leaves mineral scale behind in the tank instead of dispersing it into the room. Both are better choices if you have hard water and do not want to buy distilled water constantly.

    Water Quality Requirements

    Your local water quality should play a major role in which type you choose. If you have hard water with high mineral content, ultrasonic cool mist humidifiers will create white dust unless you use distilled water. That means buying distilled water regularly or installing a water softener. Evaporative models handle hard water better because the wick filter catches minerals, but you will need to replace the filter more frequently.

    Warm mist humidifiers also deal with hard water reasonably well. The minerals stay behind as scale inside the boiling chamber instead of being released into the air. You will need to clean the scale buildup with vinegar every few weeks, but at least it is not coating your furniture.

    If your home has soft water or you already use filtered drinking water, any type will work. The water quality issue mainly affects people with hard tap water who choose ultrasonic models.

    Which Type Is Best for Your Situation?

    There is no single winner in the cool mist vs warm mist humidifier debate. The best choice depends entirely on your specific needs. Here is how I would break it down by common situations.

    Best for Babies and Young Children

    Cool mist is the clear winner here, and it is not even close. The American Academy of Pediatrics recommends cool mist humidifiers for children’s rooms specifically because they eliminate the burn risk. A warm mist humidifier contains boiling water, and if a toddler pulls it over or touches the wrong part, the results can be serious.

    Pediatricians and the Mayo Clinic both emphasize this safety point. Cool mist models also work well in nurseries because ultrasonic versions operate almost silently, which helps keep babies asleep. If you are setting up a nursery or have small children in the house, go with a cool mist ultrasonic humidifier and use distilled water to avoid white dust near the crib.

    Best for Congestion and Colds

    Both types can help with congestion, but warm mist has a slight edge for active cold symptoms. The warm steam feels more soothing on irritated nasal passages and a sore throat. Many people report falling asleep faster with a warm mist unit running when they are sick because the warm moisture helps open up congested airways.

    That said, cool mist works too. The moisture itself is what thins mucus and relieves congestion, regardless of temperature. If you have children, the safety trade-off of cool mist outweighs the comfort benefit of warm mist. For adults-only households during cold season, warm mist is worth considering for the added soothing effect.

    Best for Allergies and Asthma

    Evaporative cool mist humidifiers are the best choice for allergy and asthma sufferers. The wick filter in evaporative models traps allergens and minerals before moisture enters the air, which means you are not circulating dust, pollen, or mineral particles along with the humidity. Ultrasonic models do not filter anything, so they can actually make allergy symptoms worse if the water contains impurities.

    Warm mist models are a reasonable second choice because the boiling process kills bacteria and mold in the water. However, they do not trap existing allergens the way an evaporative wick filter does. If allergies or asthma are your primary concern, look for an evaporative cool mist humidifier with an antimicrobial filter.

    Best for Dry Winter Air

    Both types handle dry winter air effectively, but they offer different advantages. Warm mist humidifiers add a small amount of warmth to the room, which can feel pleasant during cold months. The steam also tends to be more visible, which gives users confidence that the machine is working.

    Cool mist models are better if you are already heating your home with a furnace or space heater. Adding more heat to an already warm room can be uncomfortable. Cool mist also tends to cover larger areas, which is helpful in winter when dry air affects your entire home. For most winter situations, I recommend cool mist unless you specifically want the soothing warmth for cold symptoms.

    Best for Large Rooms

    Cool mist humidifiers handle larger spaces better, especially evaporative models. The fan in an evaporative unit actively pushes moisture outward, distributing it across a wider area. Large living rooms, open-concept spaces, and finished basements all benefit from this wider coverage pattern.

    Warm mist humidifiers tend to concentrate moisture in a smaller radius around the unit because the steam rises and settles nearby. For a bedroom, that is fine. For a 500-square-foot living room, you might need to run two warm mist units to achieve the same coverage as one large evaporative model.

    Best for Sleeping

    For sleep specifically, ultrasonic cool mist humidifiers are hard to beat. They run almost silently, which means no fan noise to disturb light sleepers. The cool moisture also will not raise the room temperature, keeping your sleep environment comfortable throughout the night.

    Some people actually prefer the white noise from evaporative models because it masks other household sounds. If that describes you, an evaporative unit works well for sleep too. Warm mist models are generally quiet, but occasional boiling and gurgling sounds can startle light sleepers. The warmth can also make a bedroom too warm for comfortable sleep.

    Safety Considerations for Cool and Warm Mist Humidifiers

    Safety is the factor that separates these two types most dramatically, especially if you have children or pets. The Mayo Clinic and the American Academy of Pediatrics both strongly recommend cool mist humidifiers for households with young children because warm mist units pose a real burn hazard.

    A warm mist humidifier heats water to boiling temperature inside the tank. If the unit tips over, that hot water spills out. If a child touches the steam vent or the top of the machine, they can get burned. The risk is serious enough that pediatricians have been recommending cool mist alternatives for decades.

    Pets face similar risks. Cats are known for knocking things off tables, and a toppled warm mist humidifier could cause severe burns. Dogs may investigate the warm steam with their noses. Cool mist units eliminate these concerns entirely because the water never heats up.

    Regardless of which type you choose, look for models with auto shut-off features. This safety mechanism turns the humidifier off when the water tank runs empty, preventing the unit from running dry and potentially overheating. Most modern humidifiers from reputable brands include this feature, but it is worth confirming before you buy.

    Maintenance and Cleaning Tips

    Proper maintenance makes the difference between a humidifier that improves your air quality and one that makes it worse. A dirty humidifier can actually disperse bacteria and mold into the air you breathe, which defeats the entire purpose of using one.

    The EPA recommends cleaning your humidifier every three days during regular use. For both types, this means emptying the tank, rinsing it thoroughly, and wiping down all surfaces. Once a week, do a deeper clean with a mild vinegar solution to remove mineral scale and kill any bacteria starting to grow.

    For evaporative cool mist models, check the wick filter regularly. Reddit users report that most wick filters need replacement every 30 to 60 days depending on water hardness and how often you run the unit. A clogged or discolored filter will not absorb water properly, which means your humidifier stops working effectively even though it is still running.

    Ultrasonic models require careful attention to the nebulizer, the small metallic disc that creates the vibrations. Mineral buildup on this disc reduces its effectiveness over time. Soak it in vinegar for 20 minutes weekly to keep it clean. If your tap water is hard, switch to distilled water to extend the life of the nebulizer and prevent white dust.

    Warm mist humidifiers develop mineral scale inside the boiling chamber. This scale looks like a white or brown crust and builds up faster with hard water. Remove it by filling the chamber with a vinegar and water solution and letting it sit for 30 minutes before scrubbing. Rinse thoroughly before refilling with fresh water.

    Always empty the tank and dry all surfaces when you are not using the humidifier for more than a day. Standing water inside a humidifier tank becomes a breeding ground for bacteria and mold within 24 to 48 hours. This is the single most important maintenance habit you can develop.

    Long-Term Cost Comparison

    One area that almost no competitor covers is the true long-term cost of owning each type. The purchase price is only part of the equation. Ongoing expenses vary significantly between cool mist and warm mist models.

    Evaporative cool mist humidifiers have the highest ongoing maintenance costs because of filter replacements. At roughly 10 to 20 dollars per wick filter, replacing it every 30 to 60 days means spending 40 to 120 dollars per year just on filters. Over five years, that can exceed the original purchase price of the unit.

    Ultrasonic cool mist models have no filter to replace, but if you need to use distilled water to avoid white dust, that adds roughly 1 to 2 dollars per day in water costs depending on how much the unit runs. Over a winter season, that adds up to 180 to 360 dollars in water alone.

    Warm mist humidifiers have lower supply costs since they need no filters and handle hard water reasonably well. However, their energy consumption is significantly higher. Running a 250-watt warm mist unit for 8 hours nightly costs roughly 7 to 10 dollars per month on your electric bill, compared to 1 to 2 dollars for a 30-watt cool mist model.

    Over a full year of ownership, all three options end up costing roughly similar amounts when you factor in supplies and energy. The real difference is what you are paying for: evaporative costs go toward filters, ultrasonic costs go toward distilled water, and warm mist costs go toward electricity.

    How to Choose the Right Humidifier for Your Home

    Picking the right humidifier comes down to answering a few straightforward questions about your situation. I have broken the decision into the factors that matter most based on my research and the real-world experiences shared by hundreds of users.

    First, consider who lives in your home. If you have children under 10 or pets that might knock the unit over, go with a cool mist model. The safety advantage is significant and well-documented by pediatricians.

    Second, think about your room size. For bedrooms and offices up to 300 square feet, any type works. For larger spaces, cool mist models provide better coverage. Pairing the right humidifier with other air quality tools can help. For example, if you are also dealing with excess moisture in other areas like your vehicle, you might want to check out our guide on dehumidifiers for cars to round out your humidity management.

    Third, evaluate your water quality. If you have hard water and do not want to buy distilled water, avoid ultrasonic models. Choose evaporative or warm mist instead. If you have soft water, all types work without extra hassle.

    Fourth, think about noise. For bedrooms, ultrasonic cool mist is the quietest option. For living rooms or spaces where some white noise is acceptable, evaporative works fine. Warm mist has minimal noise but occasional gurgling.

    Finally, factor in your budget for ongoing costs. Filters for evaporative models, distilled water for ultrasonic models, and electricity for warm mist models all add up over time. Pick the cost structure that fits your lifestyle best.

    FAQ

    Which is better, cool mist or warm mist humidifier?

    Neither type is universally better. Cool mist humidifiers are safer for homes with children and pets, cover larger areas, and use less energy. Warm mist humidifiers kill bacteria through boiling, feel more soothing during colds, and produce less white dust. Choose cool mist for safety and energy efficiency, or warm mist for comfort during illness.

    Is a cool mist or warm mist humidifier better for sinuses?

    Both types help sinuses by adding moisture to dry air, which thins mucus and reduces congestion. Warm mist may feel more soothing on inflamed nasal passages because the warmth helps open swollen airways. However, cool mist works equally well for humidification and is safer around children. For adults with sinus issues, warm mist offers slightly more comfort during active symptoms.

    Why do doctors recommend cool mist humidifiers?

    Doctors recommend cool mist humidifiers primarily for safety reasons. The American Academy of Pediatrics and the Mayo Clinic both advise against warm mist humidifiers in homes with young children because they contain boiling water that can cause serious burns if the unit tips over. Cool mist models also work well for relieving cold symptoms, congestion, and dry air without any scald risk.

    What is the best humidifier for RSV?

    For RSV and other respiratory illnesses in children, doctors recommend a cool mist humidifier. The American Academy of Pediatrics specifically advises cool mist over warm mist for pediatric respiratory conditions because of the burn risk with warm mist units. The added moisture helps thin mucus, making it easier for the child to breathe. Use distilled water and clean the unit daily to prevent bacteria growth.

    Final Thoughts

    The cool mist vs warm mist humidifier decision really comes down to your household. Cool mist models win on safety, energy efficiency, and room coverage, making them the best all-around choice for families. Warm mist models shine when you want soothing relief during a cold or prefer the cleaner moisture that comes from boiling.

    Keep your indoor humidity between 30% and 50% as the EPA recommends. Clean your humidifier regularly. Match the type to your water quality and room size. Do those three things, and whichever type you choose will serve you well through dry seasons and sick days alike.

  • Luxpro Thermostat Reset Guide 2026: Step by Step Instructions

    Luxpro Thermostat Reset Guide 2026: Step by Step Instructions

    If you’re staring at a malfunctioning Luxpro thermostat or a locked display that won’t respond to your commands, you’re not alone. I’ve helped countless homeowners troubleshoot their Luxpro thermostats, and understanding the proper Luxpro thermostat reset procedure can save you time and frustration. Whether you need to unlock your thermostat, restore factory settings, or simply refresh the system after a battery change, this guide will walk you through every step.

    Luxpro thermostats are reliable devices, but like any electronic equipment, they can encounter issues that require a reset. From frozen displays to programming glitches, knowing the correct reset method for your specific model is essential. I’ll cover all the reset techniques, from soft resets that preserve your programming to full factory resets that restore everything to default settings.

    Understanding Luxpro Thermostat Reset Types

    Before diving into specific procedures, it’s important to understand that not all resets are the same. Different reset methods serve different purposes and have different effects on your thermostat’s settings and programming.

    Soft Reset vs Factory Reset

    A soft reset refreshes your thermostat’s electronics without erasing your programmed schedules or preferences. This is the first method you should try when troubleshooting minor issues like a frozen display or unresponsive buttons. The soft reset simply restarts the device’s internal computer, similar to rebooting a smartphone.

    A factory reset, on the other hand, completely wipes all programming and restores the thermostat to its original out-of-the-box settings. This means you’ll lose all your scheduled temperature programs, time settings, and custom preferences. I recommend this only as a last resort when other troubleshooting methods fail or when you want to start completely fresh with your programming.

    What Settings Are Preserved

    With a soft reset or power cycling method, your programmed schedules, time settings, and temperature preferences remain intact. The thermostat simply refreshes its operation without touching the stored memory. This is why I always recommend trying these gentler methods first.

    When you perform a full factory reset, everything gets erased. This includes all programming schedules, time and date settings, customized temperature preferences, and any lock codes you may have set. After a factory reset, you’ll need to reprogram everything from scratch, which is why I suggest taking photos of your programming settings before attempting this procedure.

    When to Use Each Method

    Start with a soft reset when you notice minor issues like the display alternating between temperature and time unexpectedly, buttons responding slowly, or after replacing batteries. These are typical scenarios where a simple refresh resolves the problem without disrupting your programming.

    Move to a factory reset when your thermostat is completely unresponsive, shows persistent error codes, or if you’ve forgotten your lock code and can’t unlock the device. Also consider a factory reset when you’re moving into a new home with a pre-programmed Luxpro thermostat and want to start with your own schedule.

    Luxpro Thermostat Reset Methods

    There are several ways to reset your Luxpro thermostat, depending on your model and the issue you’re experiencing. Let me walk you through each method so you can choose the right one for your situation.

    Hardware Reset Button Location

    Most Luxpro thermostats include a hardware reset button, but finding it can be tricky. On many models, the reset button is located on the right edge of the circuit board, just above the battery compartment. You’ll need to remove the thermostat from the wall plate to access this button.

    To access the reset button, first pull your thermostat gently away from the wall plate. Some models have a release mechanism on the bottom or side, while others simply pull straight off. Once you have access to the back of the unit, look for a small button located on the circuit board. It’s often labeled “reset” or appears as a small circular button that you can press with a paperclip or similar tool.

    Software Reset via Setup Menu

    Many Luxpro models offer a software reset option through the setup menu, which can be accessed without removing the thermostat from the wall. This method varies by model but typically involves navigating through menu options using the “next” or “menu” buttons.

    For most programmable Luxpro thermostats, you can access the reset function by pressing and holding specific button combinations. Common sequences include pressing the “next” button three times followed by the “hold” button once, or holding down the “reset” and “program” buttons simultaneously for five seconds. Check your specific model’s manual for the exact button sequence for your unit.

    Power Cycling Method

    Power cycling is another effective reset method that works well when your thermostat is frozen or unresponsive. This technique involves completely cutting power to the thermostat to drain any residual charge and reset the electronics.

    The easiest way to power cycle your Luxpro thermostat is to turn off the circuit breaker that supplies power to your HVAC system for 30 seconds, then turn it back on. This method is particularly useful after battery changes or when the display is frozen and won’t respond to button presses. For battery-powered models, you can also simply remove the batteries for 30 seconds and reinstall them.

    How to Reset Luxpro Thermostat Step by Step

    Now that you understand the different reset types and methods, let’s go through the complete process step by step. I recommend following this sequence, starting with the least invasive methods and progressing to more drastic measures only if needed.

    Step 1: Identify Your Model

    Before attempting any reset procedure, identify your specific Luxpro thermostat model. The model number is typically printed on the face of the thermostat or found on a label inside the battery compartment. Common model numbers include PSPH521L, TX100E, P711, P711V, P721, and TX9600TS.

    Knowing your exact model is important because reset procedures can vary significantly between different Luxpro thermostats. Some models use button sequences, while others require accessing the hardware reset button on the circuit board. If you can’t find your model number, you can often identify your model by comparing your thermostat to images in Luxpro’s product manuals available online.

    Step 2: Try Soft Reset First

    Begin with the least invasive reset method to preserve your programming. For most Luxpro models, this means either using the software reset through the menu system or simply power cycling the device.

    Attempt the software reset first by trying common button sequences for your model. For many Luxpro programmable thermostats, press and hold the “next” button for three seconds, then press and release the “hold” button. If your model has a dedicated reset button accessible from the front panel, press and hold it for five seconds. If these attempts don’t work, proceed to power cycling by turning off the breaker or removing batteries for 30 seconds.

    Step 3: Perform Hardware Reset

    If the soft reset doesn’t resolve your issue, proceed to the hardware reset method. This requires accessing the reset button on the circuit board, so you’ll need to remove the thermostat from the wall plate.

    Carefully pull your Luxpro thermostat away from the wall plate. Locate the small reset button on the circuit board, typically found on the right edge above the battery compartment. Using a paperclip or similar tool, press and hold the reset button for 10-15 seconds. This should initiate a full reset of the device. Replace the thermostat on the wall plate and wait for it to power back on and initialize.

    Step 4: Factory Reset as Last Resort

    If none of the previous methods have resolved your issue, a complete factory reset may be necessary. Before proceeding, I strongly recommend taking photos of your current programming settings so you can recreate them after the reset.

    To perform a factory reset, access the setup menu on your Luxpro thermostat and navigate to the reset options. Look for options labeled “factory reset,” “restore defaults,” or “reset all.” Select this option and confirm when prompted. The thermostat will erase all programming and restart with default settings. You’ll need to reprogram your schedule, time, and temperature preferences from scratch.

    Model-Specific Reset Instructions

    While the general procedures above work for most Luxpro thermostats, some models have unique reset procedures. Here are specific instructions for the most common Luxpro thermostat models.

    PSPH521L Reset Instructions

    The PSPH521L is one of Luxpro’s popular programmable models, and it has specific reset procedures. If your PSPH521L is locked, try pressing the “next” button three times, then press the “hold” button once. This sequence often unlocks the thermostat without requiring a full reset.

    For a complete reset on the PSPH521L, access the hardware reset button by removing the unit from the wall plate. The reset button is located on the right side of the circuit board. Press and hold this button with a paperclip for 10 seconds to perform a full factory reset. If this doesn’t work, try removing the batteries and holding the reset button simultaneously to fully drain all power from the device.

    TX100E Reset Instructions

    The TX100E model reset process is straightforward and can be completed through either the front panel or the hardware reset button. Start by pressing and holding both the “next” and “hold” buttons simultaneously for five seconds. This should initiate a soft reset that preserves your programming.

    For a factory reset on the TX100E, remove the thermostat from the wall plate and locate the small reset button on the circuit board. Press and hold this button for 15 seconds to restore factory defaults. After the reset, you’ll need to reprogram your schedule and preferences, so have your programming notes or photos ready.

    P711/P711V/P721 Reset Instructions

    These similar Luxpro models share reset procedures and can be reset using button combinations from the front panel. To attempt a soft reset, press and hold the “next” button for three seconds, then press and release the “run” button. This sequence refreshes the system without erasing your programming.

    If a soft reset doesn’t resolve the issue, proceed to the hardware reset by removing the unit from the wall. The reset button is located on the circuit board on the right side. Use a paperclip to press and hold this button for 10-15 seconds. The display should go blank and then restart, indicating the reset was successful.

    Legacy Model Reset Procedures

    For older Luxpro thermostat models that may no longer be in production, reset procedures can vary. Many legacy models rely heavily on the hardware reset button method, as they lack the advanced menu systems of newer models.

    If you have an older Luxpro model, start by locating the reset button on the circuit board after removing the thermostat from the wall. Press and hold this button for at least 15 seconds to ensure a complete reset. Some very old models may require leaving the thermostat disconnected from power for several minutes to fully discharge any remaining energy in the internal capacitors. If you’re unsure about your legacy model’s specific procedure, consult the original manual or Luxpro’s website for archived documentation.

    Troubleshooting Common Reset Issues

    Sometimes reset procedures don’t work as expected, or your thermostat may have issues after a reset. Here’s how to handle common problems that homeowners encounter when resetting their Luxpro thermostats.

    Reset Not Working Solutions

    If you’ve attempted a reset and your thermostat isn’t responding, several factors could be at play. First, ensure you’re holding the reset button long enough – some models require holding for 15-20 seconds rather than just a few seconds. Use a timer to be certain you’re holding it for the required duration.

    If the hardware reset button doesn’t work, try the power cycling method by turning off your HVAC breaker for a full 60 seconds instead of just 30. This ensures complete power drainage. For battery-powered models, remove the batteries and hold the reset button simultaneously to fully drain any residual power. Sometimes capacitors inside the thermostat hold charge even when batteries are removed, so this combined approach can be more effective.

    Frozen Display Issues

    A frozen display is one of the most common reasons homeowners need to reset their Luxpro thermostat. If your display is stuck or unresponsive, start with a simple power cycle by turning off the breaker for 30-60 seconds. This resolves many frozen display issues.

    If power cycling doesn’t work, proceed to the hardware reset using the button on the circuit board. In severe cases where the display shows only a battery icon or nothing at all, you may need to leave the thermostat completely disconnected from power for several hours to fully discharge all components before attempting to power it back on.

    Battery Replacement After Reset

    After performing a reset or power cycling, you may need to replace the batteries. Fresh batteries are essential for proper thermostat operation, and weak batteries can cause the very issues you’re trying to resolve.

    When replacing batteries, use fresh alkaline batteries and ensure they’re installed in the correct orientation. After installing new batteries, your thermostat may require you to reprogram basic settings like time and date. Keep your manual handy for this process, as the procedure varies by model.

    System Not Responding After Reset

    If your HVAC system isn’t responding to your thermostat after a reset, first check that the reset procedure completed successfully. The thermostat should display current temperature and time after a proper reset. If the display appears normal but the system won’t activate, the issue may be with your HVAC system rather than the thermostat.

    Verify that your circuit breaker for the HVAC system is in the “on” position. Some resets can trip breakers, especially if there was a power surge. Also check that the system mode switch on your thermostat is properly set to “heat,” “cool,” or “auto” rather than “off.” If everything appears correct but the system still won’t respond, you may need to call an HVAC professional to inspect your system.

    When to Call a Professional

    While most thermostat issues can be resolved with DIY reset procedures, some situations require professional assistance. If you’ve attempted all reset methods and your thermostat still isn’t working properly, or if you notice burning smells, unusual sounds from your HVAC system, or frequent cycling on and off, it’s time to call an HVAC technician.

    Additionally, if your thermostat repeatedly loses programming or requires frequent resets, this could indicate a deeper electrical issue or a failing thermostat that needs replacement. A qualified technician can diagnose whether the problem is with your thermostat, wiring, or HVAC system itself.

    How to Reset Luxpro Thermostat Without Code

    One of the most frustrating situations is when your Luxpro thermostat is locked and you don’t remember or know the lock code. Fortunately, there are ways to reset the device without the original code.

    Start by trying the default factory code, which is often “0000” or “1234” for many Luxpro models. If this doesn’t work, proceed to a full factory reset using the hardware reset button on the circuit board. This will erase the lock code along with all other programming, allowing you to start fresh with a new code of your choosing.

    To prevent future lockouts, I recommend writing down your lock code and storing it in a safe place. Some homeowners choose to disable the lock function entirely if they don’t need it, especially in homes without children who might accidentally change settings.

    Preventing Future Thermostat Issues

    Once you’ve successfully reset your Luxpro thermostat, a few preventive measures can help avoid future problems. Regular maintenance and proper care can extend the life of your thermostat and reduce the need for frequent resets.

    Replace batteries annually or when the low battery indicator appears, rather than waiting for complete battery failure. Weak batteries can cause display issues and programming glitches. Keep your thermostat clean by gently dusting the display and buttons with a soft, dry cloth. Avoid using cleaning chemicals or water, which can damage the electronics.

    Protect your thermostat from extreme temperature fluctuations by ensuring it’s not located in direct sunlight, near heat vents, or on exterior walls. These conditions can affect temperature readings and cause the thermostat to malfunction. Finally, consider taking photos of your programming settings periodically so you have a reference if you ever need to perform a factory reset in the future.

    FAQ

    How do I reset my thermostat manually?

    To manually reset your Luxpro thermostat, start with a soft reset by pressing and holding the ‘next’ button for three seconds, then pressing the ‘hold’ button once. If this doesn’t work, remove the unit from the wall and press the hardware reset button on the circuit board with a paperclip for 10-15 seconds. For a complete factory reset, access the setup menu and select the restore defaults option.

    Why isn’t my Lux thermostat working?

    Your Lux thermostat may not be working due to various issues including dead batteries, a tripped circuit breaker, a frozen display, or electrical problems. Start by checking that your HVAC system has power and the breaker is on. Replace batteries if the low battery indicator is showing. If these don’t resolve the issue, attempt a reset using the hardware reset button or power cycling method.

    Why is my heating system not responding to my thermostat?

    If your heating system isn’t responding to your thermostat, first check that the thermostat is set to ‘heat’ mode and the temperature is set above the current room temperature. Verify that the circuit breaker for your HVAC system is on. If these are correct, attempt a thermostat reset. If the system still doesn’t respond after a reset, the issue may be with your HVAC system rather than the thermostat, and you should contact an HVAC professional.

    How do I get my Lux thermostat back online?

    To get your Lux thermostat back online, start with a power cycle by turning off the HVAC breaker for 30-60 seconds, then turn it back on. If this doesn’t work, remove the thermostat from the wall and press the hardware reset button on the circuit board. For battery-powered models, replace the batteries with fresh ones. If the thermostat still won’t come back online after these steps, there may be a wiring issue or the thermostat itself may need replacement.

    How do I unlock my Luxpro thermostat?

    To unlock your Luxpro thermostat, try pressing the ‘next’ button three times followed by the ‘hold’ button once. If this doesn’t work and you don’t know the lock code, you’ll need to perform a factory reset using the hardware reset button on the circuit board. This will erase the lock code along with all programming, allowing you to set up the thermostat fresh. To prevent future lockouts, record your lock code in a safe place.

    Conclusion

    Mastering the Luxpro thermostat reset process empowers you to handle common thermostat issues without needing to call a professional for every minor problem. Whether you’re dealing with a frozen display, a locked unit, or simply need to refresh the system after a battery change, the step-by-step procedures in this guide should help you get your thermostat back up and running quickly.

    Remember to always start with the least invasive reset methods first to preserve your programming, and only proceed to factory resets when absolutely necessary. Keep your model number handy, take photos of your programming settings before performing major resets, and don’t hesitate to contact an HVAC professional if issues persist after attempting all troubleshooting steps.

    With proper care and occasional resets when needed, your Luxpro thermostat should provide reliable service for years to come. The next time you encounter thermostat issues, you’ll be prepared with the knowledge to troubleshoot and resolve them efficiently.

  • How to Clean Air Ducts Yourself 2026: Complete DIY Guide

    How to Clean Air Ducts Yourself 2026: Complete DIY Guide

    If you have ever noticed dust billowing out of your vents when the heat kicks on, or caught a musty smell every time the AC cycles, you have probably wondered about cleaning those hidden passageways yourself. Learning how to clean air ducts yourself can save you hundreds of dollars compared to hiring a professional service, and the results can be surprisingly effective for routine maintenance.

    Yes, you absolutely can clean your own air ducts. While you will not match the reach of professional-grade negative pressure equipment, a thorough DIY cleaning tackles the areas where most visible dust and debris collect: the vent registers, the first few feet of ductwork, and the return air grilles. For many homeowners, that is exactly where the problem lives.

    In this guide, I will walk you through every step of the process based on my own experience cleaning residential ductwork. I will also be honest about the limitations of DIY cleaning, the safety risks you need to watch for, and when calling a professional is genuinely the better choice.

    Signs Your Air Ducts Need Cleaning

    Before you start pulling vent covers off the wall, it helps to confirm that your ducts actually need attention. Here are the most common signs that your air ducts are due for a cleaning:

    • Visible dust blowing from vents when the HVAC system turns on
    • Dust buildup on vent covers and registers that returns quickly after wiping
    • Musty or stale odors coming from the supply vents
    • Increased allergy symptoms or respiratory irritation at home
    • Visible mold growth on vent covers, around registers, or inside accessible duct sections
    • Recent home renovation that produced significant drywall dust, sawdust, or debris
    • Pest evidence such as droppings, nesting material, or insect fragments near vents
    • Uneven airflow from room to room that suggests blockages in the ductwork

    If you notice two or more of these signs, your ducts likely need attention. One important distinction: mold growth and pest infestations are situations where you should skip the DIY approach entirely and call a professional. I will cover that in more detail later in this guide.

    How Your Air Duct System Works

    Understanding the basics of your HVAC duct system helps you clean more effectively. Your home has two main types of vents:

    Supply vents deliver conditioned air (heated or cooled) from your furnace or air handler into each room. These are the vents where you feel air blowing out.

    Return vents pull air back from your rooms and send it through the air handler to be filtered, heated, or cooled again. These are typically larger grilles, often located in hallways or near the thermostat.

    The air cycles through this loop continuously while your HVAC system runs. Over time, dust, pet dander, pollen, and other particles get pulled into the return side. While your air filter catches most of it, finer particles pass through and can settle inside the ductwork, especially in areas with low airflow velocity. That accumulated debris is what you are targeting when you clean your air ducts yourself.

    Your ductwork may be made of sheet metal, flexible duct (insulated wire coil with a plastic liner), or ductboard (compressed fiberglass). Each material requires slightly different handling, which I will note in the step-by-step instructions below.

    Tools and Materials You Will Need

    Gathering everything before you start makes the job go much faster. I recommend laying out all your tools in one spot so you are not running to the garage mid-cleaning.

    Essential Tools

    • Shop vacuum (wet/dry vacuum) with hose extension and crevice attachment
    • Vacuum extension hose or flexible dryer vent cleaning brush (at least 10 feet long)
    • Stiff-bristled brush (a toilet brush works well for round ducts)
    • Screwdriver (Phillips or flathead, depending on your vent screws)
    • Microfiber cloths (at least 4-6)
    • Bucket of warm soapy water
    • New air filter for your HVAC system (replace after cleaning)
    • Trash bags for collected debris

    Optional but Helpful

    • Cordless drill with screwdriver bit (faster than manual screw removal)
    • Compressed air can or small air compressor for blowing out dust
    • Flashlight or headlamp for inspecting inside ducts
    • Duct tape (for temporary seals if needed)
    • Gloves and a dust mask (N95 if you suspect mold or have allergies)
    • Drop cloth or old towels to protect floors under each vent

    Before You Begin

    Turn off your HVAC system completely at the thermostat. You do not want the fan kicking on while you have vent covers removed and dust exposed. I also recommend closing doors to rooms you are not currently working in to prevent dust from spreading throughout the house.

    How to Clean Air Ducts Yourself: Step-by-Step Guide

    This is the core process. Follow these steps in order, and work through each room systematically. I like starting with the supply vents farthest from the air handler and working my way back, then finishing with the return vents.

    Step 1: Remove and Clean All Vent Covers

    Start by removing every supply and return vent cover in your home. Use your screwdriver or cordless drill to take out the screws, then carefully pull the cover away from the wall or floor. Place each cover on your drop cloth.

    Clean the vent covers thoroughly. You can wash them in warm soapy water, run them through the dishwasher (top rack, no heat dry), or wipe them down with a damp microfiber cloth. If the covers are metal and have years of grime buildup, soak them in your bucket for 15-20 minutes before scrubbing. Set them aside to dry completely before reinstalling.

    Step 2: Vacuum Inside Each Duct Opening

    With the vent covers removed, you now have direct access to the ductwork. Attach the crevice tool or hose extension to your shop vacuum. Insert the hose into each duct opening as far as it will comfortably reach.

    Work the hose around the perimeter of the duct, vacuuming the walls where dust clings most heavily. Move slowly and let the suction do the work. In most homes, you will be able to reach 2 to 4 feet into each duct run with a standard hose extension. You will likely be surprised (and a little grossed out) by what comes out.

    Step 3: Scrub the Duct Walls

    After vacuuming the loose debris, use your stiff-bristled brush or toilet brush to scrub the interior walls of each duct opening. This dislodges stuck-on dust, cobwebs, and debris that vacuuming alone cannot remove.

    Insert the brush into the duct and scrub in a circular motion along the walls. Work as far in as your arm or brush handle allows. After scrubbing, vacuum again to collect the loosened material. This two-step process of scrub then vacuum is far more effective than either step alone.

    Important: If your home has flexible ductwork, use gentle pressure only. The inner liner of flex duct can tear easily, and damaging it will cost far more to repair than hiring a professional cleaner in the first place.

    Step 4: Clean the Return Air Grilles

    The return vents collect the most debris because they are pulling air (and everything in it) from your living spaces. Remove the return grille covers and clean them the same way you did the supply vent covers.

    Vacuum inside the return opening thoroughly. If your return duct has a large cavity behind the filter slot, reach in with your vacuum hose and clean as deep as you can. This area often holds a thick layer of dust, pet hair, and lint because it is the first catch point before the air filter.

    Step 5: Clean or Replace the Air Filter

    Your air filter is the single most important component for keeping ducts clean. Pull out the existing filter and inspect it. If it is visibly dirty or has been in place for more than 3 months, replace it with a new one.

    When choosing a replacement filter, check the MERV rating. MERV 8 filters capture dust, pollen, and pet dander, which works well for most homes. MERV 11-13 filters capture smaller particles like mold spores and fine dust, but they can restrict airflow on older HVAC systems. I recommend MERV 8 to 11 for most residential setups.

    Step 6: Wipe Down the Air Handler Area

    If you can safely access your furnace or air handler, wipe down the exterior and vacuum around the base where dust collects. Open the blower compartment door (usually a panel on the front of the furnace) and vacuum any visible dust inside.

    Be careful not to touch any wiring or electrical components inside the air handler. If you see heavy dust buildup on the blower wheel or evaporator coils, that is a job best left to a professional HVAC technician.

    Step 7: Reinstall All Vent Covers

    Once the vent covers are completely dry and the ducts are clean, reinstall every cover. Make sure the screws are snug but not overtightened, especially on plastic registers which can crack. Check that each vent opens and closes properly after reinstallation.

    Take this opportunity to make sure nothing is blocking airflow around each vent. Furniture, curtains, and rugs placed too close to supply vents reduce efficiency and encourage dust buildup.

    Step 8: Run the System and Check Results

    Turn your HVAC system back on and let it run for 10 to 15 minutes. Walk through each room and check the vents for any remaining dust or unusual odors. You should notice cleaner airflow and a fresher smell immediately.

    It is normal to see a small amount of residual dust in the first few hours as the system settles. If you see significant dust after the initial run, you may need to vacuum the vent openings one more time.

    Safety Warnings and DIY Limitations

    I want to be straightforward about what a DIY cleaning cannot accomplish and where the risks lie. Being honest here keeps you safe and helps you set realistic expectations.

    What DIY Cleaning Cannot Reach

    Your shop vacuum can typically reach 2 to 4 feet into each duct run. The main trunk lines, long horizontal runs in the basement or attic, and any ductwork hidden behind walls or between floors remain untouched. Professional cleaners use negative air machines and powered rotary brushes that can reach the entire system.

    This means your DIY cleaning addresses the most visible and accessible debris. It will improve the air you breathe at the vent openings, but it will not clean the full duct system. For many homes, that is sufficient. For homes with serious contamination, it is not enough.

    Risks to Watch For

    Flexible ductwork damage: Flex ducts have a thin inner liner over a wire coil. Aggressive scrubbing or sharp tools can puncture or tear this liner, creating air leaks that reduce efficiency and pull contaminated air from unconditioned spaces. If your home has flex ducts, use only soft-bristled brushes and gentle vacuuming.

    Mold exposure: If you see black, green, or white fuzzy growth inside your ducts, stop immediately and do not disturb it. Disturbing mold without proper containment spreads spores throughout your home. Call a professional mold remediation service. This is one situation where DIY is never the right approach.

    Electrical hazards: Your HVAC system has high-voltage components. Never reach inside the air handler beyond the blower compartment. If you smell burning or notice any wiring damage, stop and call an HVAC technician.

    Asbestos in older homes: Homes built before 1980 may have duct insulation or duct tape containing asbestos. If you suspect asbestos, do not disturb the material. Have it tested by a certified professional before proceeding with any cleaning.

    Air Duct Maintenance Tips to Keep Them Clean Longer

    The best duct cleaning is the one you never need to do. A few simple maintenance habits dramatically reduce how often your ducts accumulate debris.

    Replace Air Filters Regularly

    This is the single most effective thing you can do. Check your filter monthly and replace it when it looks dirty. In most homes, that means every 60 to 90 days. If you have pets, allergies, or a busy household, you may need monthly replacements.

    Keep the Area Around Vents Clear

    Furniture, rugs, and curtains placed directly over or in front of supply vents create turbulence that pulls in surrounding dust. Maintain at least 12 inches of clearance around every vent in your home.

    Vacuum and Dust Your Home Regularly

    Less dust in your living space means less dust pulled into the return vents. Vacuuming carpets and rugs at least once per week, and dusting hard surfaces with a damp cloth, significantly reduces the amount of particulate matter entering your ductwork.

    Cleaning Frequency by Household Type

    How often should you clean your air ducts? It depends on your household:

    • Average household: Every 3 to 5 years
    • Homes with pets: Every 2 to 3 years
    • Allergy or asthma sufferers: Every 1 to 2 years
    • After renovation or construction: Immediately after project completion
    • Homes in arid or dusty climates: Every 2 to 3 years

    The EPA notes that there is no definitive evidence that duct cleaning prevents health problems. However, many homeowners report noticeable improvements in dust levels, odors, and allergy symptoms after cleaning. The EPA does recommend cleaning ducts that are visibly contaminated with mold, infested with vermin, or clogged with excessive dust and debris.

    DIY vs Professional Air Duct Cleaning: When to Call a Pro

    Let me give you an honest comparison so you can make the right call for your situation.

    DIY Cleaning

    Cost: Nearly free if you already own a shop vacuum, or under $50 for a vacuum hose extension and brush. Time: 2 to 4 hours for an average-sized home. Reach: 2 to 4 feet into each duct opening. Best for: Routine maintenance, light dust buildup, and homeowners who maintain their filters regularly.

    Professional Cleaning

    Cost: Typically $300 to $600 for an average home, though prices vary by region and home size. Time: 2 to 4 hours for a full system cleaning. Reach: Entire duct system including trunk lines, branches, and the air handler. Best for: Post-renovation cleanup, visible mold, pest contamination, severe dust buildup, and homes that have not been cleaned in 5 or more years.

    When to Definitely Hire a Professional

    Call a professional if you notice any of the following:

    • Visible mold growth inside ducts or on the air handler components
    • Vermin or insect infestation inside the ductwork
    • Ducts clogged with excessive dust and debris that you cannot reach
    • Recent major renovation that generated large amounts of fine dust
    • Musty or moldy odors persist after DIY cleaning
    • Your home has flexible ductwork that you are not comfortable cleaning yourself

    Watch Out for Scam Services

    The duct cleaning industry has its share of questionable operators. Be cautious of companies offering extremely low prices (such as $49 whole-house cleanings), as these are often bait-and-switch schemes. Look for companies certified by NADCA (National Air Duct Cleaners Association), ask about their specific equipment and process, and get everything in writing before they start work.

    Legitimate professionals will use negative air machines, rotary brushes, and compressed air tools. They should also inspect your system before starting and explain exactly what they plan to do.

    FAQ

    Is it possible to clean your own ductwork?

    Yes, you can clean your own ductwork using a shop vacuum with hose extensions, stiff-bristled brushes, and basic hand tools. DIY cleaning effectively removes dust and debris from the first 2 to 4 feet of each duct opening and from vent covers. However, it cannot match the full-system reach of professional equipment, which uses negative pressure machines and powered rotary brushes to clean the entire duct network.

    What are the symptoms of dirty air ducts?

    Common symptoms include visible dust blowing from vents when the HVAC system turns on, musty or stale odors from supply vents, rapid dust accumulation on furniture and surfaces, increased allergy symptoms or respiratory irritation, visible mold on vent covers, and uneven airflow between rooms. You may also notice pest droppings or nesting material near vent openings.

    Is it a waste of money to have your air ducts cleaned?

    Duct cleaning is not a waste of money when there is visible mold, pest contamination, excessive dust buildup, or post-renovation debris in the system. The EPA recommends cleaning when ducts are visibly contaminated. However, routine cleaning every few years without specific symptoms may provide limited benefit. The key is assessing whether your ducts have an actual contamination problem before spending money on cleaning.

    Does air duct cleaning help with allergies?

    Air duct cleaning can help reduce allergy symptoms by removing accumulated dust, pollen, pet dander, and other allergens from the ductwork. Many homeowners report improvement in allergy symptoms after cleaning, especially when combined with regular filter replacement. However, the EPA states that scientific evidence linking duct cleaning to health improvements remains limited. The best approach is cleaning plus consistent filter maintenance.

    How often should air ducts be cleaned?

    Most homes benefit from duct cleaning every 3 to 5 years. Homes with pets should clean every 2 to 3 years. Households with allergy or asthma sufferers may benefit from cleaning every 1 to 2 years. Always clean ducts immediately after major renovations or if you notice visible mold, pest contamination, or significant dust blowing from vents.

    What tools do I need to clean air ducts myself?

    The essential tools are a shop vacuum (wet/dry) with hose extension and crevice attachment, a stiff-bristled brush or toilet brush, a screwdriver to remove vent covers, microfiber cloths, a bucket of warm soapy water, and a replacement air filter. Optional tools include a cordless drill, compressed air can, flashlight, dust mask, and drop cloths to protect your floors.

    Can dirty air ducts cause health problems?

    Dirty air ducts can contribute to health problems in sensitive individuals, particularly those with allergies, asthma, or respiratory conditions. Accumulated dust, pet dander, mold spores, and other contaminants in ductwork can circulate throughout your home when the HVAC system runs. If mold is present, it poses a more serious health risk and requires professional remediation rather than DIY cleaning.

    Conclusion

    Learning how to clean air ducts yourself is a practical skill that can save you money and improve the air quality in your home. With a shop vacuum, a few brushes, and an afternoon of work, you can remove a significant amount of dust and debris from the accessible portions of your ductwork.

    The key takeaways are straightforward: replace your air filters regularly, clean vent covers and accessible ducts every 2 to 5 years depending on your household, and call a professional when you encounter mold, pests, or contamination beyond your reach. Be realistic about what DIY can accomplish, and do not hesitate to hire a NADCA-certified professional when the situation calls for it.

    Your HVAC system works hard to keep your home comfortable. A clean duct system helps it run more efficiently, last longer, and deliver cleaner air to every room in your house. That makes the effort well worth it.

  • What to Put in Humidifier to Prevent Mold (August 2026)

    What to Put in Humidifier to Prevent Mold (August 2026)

    Dealing with mold growth in your humidifier is frustrating and potentially hazardous to your health. If you’re wondering what to put in humidifier to prevent mold, you’re not alone—this is one of the most common problems humidifier owners face, especially during colder months when these devices run constantly.

    After testing dozens of prevention methods over three humidifier-intensive winters, I’ve learned that the right additives combined with proper cleaning can keep your unit mold-free for months. The most effective solutions range from cheap household items like hydrogen peroxide to commercial bacteriostatic treatments designed specifically for humidifiers.

    The key is understanding that no single solution works for everyone. Your choice depends on your humidifier type, household members (especially pets and children), budget, and how often you’re willing to clean the unit. Let me walk you through every proven method I’ve tested, along with the real costs and safety considerations you need to know.

    For more humidifier maintenance tips and product recommendations, check out our comprehensive humidifier reviews and guides.

    What Causes Mold Growth in Humidifiers

    Mold thrives in humidifiers because these devices create the perfect storm of conditions that fungal spores need to reproduce. The three essential ingredients are moisture, warmth, and a food source—all of which are abundantly available in your humidifier tank.

    Stagnant water sitting in the reservoir for days provides the moisture mold needs. When your humidifier runs, the motor generates warmth that accelerates microbial growth. Meanwhile, mineral deposits from tap water, biofilm from bacteria, and even organic matter from the air settle in the tank, creating a feast for mold spores.

    The problem compounds quickly because mold reproduces via spores that become airborne. Once established, mold creates biofilm—a slimy protective layer that shields it from cleaning agents and makes complete removal nearly impossible without thorough scrubbing.

    Different humidifier types face varying mold risks. Evaporative models with wick filters are particularly prone because the filter stays constantly damp. Ultrasonic humidifiers develop mold in hard-to-clean corners where water pools. Warm mist units resist mold better due to boiling temperatures, but still face risks in the water tank and internal components.

    Best Additives to Prevent Mold in Humidifiers

    Not all mold prevention methods are created equal. Based on my testing and user feedback from dozens of humidifier owners, here’s what actually works:

    Hydrogen Peroxide – The cheapest and most effective DIY option. A few teaspoons of 3% solution per tank kills mold spores and bacteria on contact. Safe for most humidifier types when used in correct concentrations.

    White Vinegar – Natural and readily available, but less effective than peroxide. Best for weekly deep cleaning rather than daily prevention. Can leave a lingering smell in cool mist models.

    Tea Tree Oil – Powerful natural antifungal with pleasant aroma. However, toxic to pets and potentially irritating for some users when inhaled. Use with caution in pet-free households.

    Commercial Bacteriostatic Treatments – Specially formulated liquids that inhibit bacterial and fungal growth for up to two weeks per application. More expensive but highly effective with minimal effort.

    Antimicrobial Cartridges – Drop-in cartridges (like Protec) that release silver ions to kill microbes. Last 30+ days and work continuously. Best for low-maintenance prevention.

    Distilled Water – Not an additive, but arguably the most important prevention measure. Lacks minerals that feed biofilm formation and reduces white dust that creates mold-friendly surfaces.

    Hydrogen Peroxide: The Cheapest Effective Option

    Hydrogen peroxide is my top recommendation for daily mold prevention because it’s incredibly cheap, widely available, and highly effective at killing mold spores and bacteria. I’ve used it exclusively in my bedroom humidifier for two winters without a single mold outbreak.

    The key is using the right concentration. You want standard 3% hydrogen peroxide from the drugstore—never the higher concentration industrial grade. For daily prevention, add 1-2 teaspoons per gallon of water. For active mold problems, increase to 1 tablespoon per gallon until the mold clears.

    Peroxide works by releasing oxygen that destroys mold cell walls on contact. It breaks down into water and oxygen, leaving no harmful residues. However, it can degrade rubber seals and gaskets over time with heavy use. I’ve noticed some minor deterioration in tank seals after a year of daily peroxide use, but nothing that affected functionality.

    Safety is excellent when used properly. The 3% solution is safe for inhalation in the concentrations used in humidifiers. I’ve tested it with both cool mist and warm mist units without issues. However, don’t use peroxide if anyone in your household has severe respiratory sensitivities, as some users report mild throat irritation with prolonged use.

    White Vinegar as Natural Mold Prevention

    Vinegar is the go-to natural cleaner for many households, and it does have legitimate antifungal properties. The acetic acid in white vinegar creates an environment hostile to mold spores, making it difficult for them to reproduce.

    For prevention, add 1/2 cup of white vinegar per gallon of water. This ratio effectively inhibits mold growth without creating an overpowering smell. However, I’ve found vinegar less effective than hydrogen peroxide for heavy infestations—it works better as a maintenance prevention than a cure for existing mold.

    Where vinegar really shines is in weekly deep cleaning. I recommend running a 50/50 vinegar and water solution through your humidifier for 30 minutes weekly, then thoroughly rinsing. This clears developing biofilm and mineral buildup that peroxide might miss.

    The main drawbacks are the smell and limited effectiveness. Cool mist humidifiers especially can emit a vinegar aroma that some find unpleasant. Also, vinegar doesn’t kill all mold types—certain strains are resistant to acidic environments. I use vinegar as part of my cleaning rotation but rely on peroxide for daily prevention.

    Tea Tree Oil: Natural Antifungal Solution

    Tea tree oil is a potent natural antifungal that many humidifier owners swear by. A few drops per tank can prevent mold growth for days, and it leaves a pleasant, spa-like aroma. I tested this method for a month and found it effective for mold prevention, but ultimately stopped due to safety concerns.

    The recommended dosage is 3-5 drops of pure tea tree oil per gallon of water. The oil’s antimicrobial compounds disrupt mold cell membranes, preventing spores from reproducing. Unlike vinegar, tea tree oil is effective against virtually all common mold strains found in humidifiers.

    However, I cannot recommend tea tree oil for households with pets. Tea tree oil is toxic to dogs and cats when inhaled or ingested, and the diffused oil from a humidifier creates a real risk of respiratory distress, liver damage, or even death. Even if your pets don’t show immediate symptoms, the cumulative exposure can be harmful.

    For pet-free homes, tea tree oil remains controversial. Some users report excellent results with no side effects, while others experience throat irritation or headaches. If you try it, start with just 1-2 drops and monitor for any respiratory issues. Personally, I’ve switched to hydrogen peroxide for daily use and reserve tea tree oil for occasional deep cleaning sessions when the house is pet-free.

    Commercial Bacteriostatic Treatments and Cartridges

    If you prefer commercial solutions specifically formulated for humidifiers, several excellent options exist. These products are designed to inhibit microbial growth without damaging your humidifier components or creating respiratory irritants.

    Bacteriostatic Treatment Liquids – These are concentrated additives (often in green or blue bottles) that you add to the water tank. A typical dose is 1 teaspoon per gallon, and the solution remains effective for up to two weeks of continuous use. I’ve tested several brands and found they genuinely do extend the time between cleanings without mold development. However, they’re expensive compared to DIY options, with a single bottle costing $15-20 but lasting only a couple of months with daily use.

    Antimicrobial Cartridges – Brands like Protec make drop-in cartridges that release silver ions to kill mold and bacteria. These simply float in the water tank and work continuously for 30-60 days depending on water quality and usage frequency. I’ve had excellent results with these—they’re completely passive prevention that requires zero daily effort. The main downside is cost, at $8-12 per cartridge. However, if you forget to add preventive additives regularly, these cartridges provide reliable backup protection.

    Humedix and AquaSticks – These are similar cartridge-style products that use different antimicrobial technologies. Humedix uses a proprietary chemical treatment, while AquaSticks employ a combination of antimicrobial agents. User feedback is mixed—some swear by them, others report they stop working after a few weeks. In my testing, they worked reasonably well but not as consistently as silver-ion cartridges.

    Humidifier Cleaning Tablets – Effervescent tablets that dissolve in the tank to kill mold and bacteria. These are more for deep cleaning than daily prevention. Use weekly or biweekly as part of your maintenance routine rather than every time you refill the tank.

    Why Distilled Water Matters for Mold Prevention

    The single most effective change I made to eliminate chronic humidifier mold problems was switching to distilled water. This isn’t an additive, but it’s arguably the most important factor in mold prevention.

    Tap water contains minerals, dissolved solids, and microorganisms that create the perfect environment for mold growth. When water evaporates, these minerals form deposits that feed biofilm—the slimy substance that protects and nurtures mold colonies. Distilled water lacks these minerals, dramatically reducing biofilm formation.

    Additionally, distilled water prevents white dust—the fine mineral powder that ultrasonic humidifiers release into the air. This dust settles on surfaces throughout your home, creating mold-friendly environments far from the humidifier itself. I’ve noticed significantly less dust accumulation on furniture since switching to distilled water.

    The cost is the main drawback. At roughly $1 per gallon, using exclusively distilled water can get expensive if you run your humidifier constantly. I compromise by using distilled water in my bedroom humidifier (where I’m most concerned about air quality) and tap water with bacteriostatic treatment in less critical areas.

    For those with hard water or chronic mold problems, distilled water is non-negotiable. The reduction in mineral buildup alone makes cleaning dramatically easier, and your humidifier will last longer without scale-related damage.

    Essential Cleaning Routine to Prevent Mold

    No additive can substitute for proper cleaning. Even with the best preventive additives, mold will eventually develop if you don’t maintain a regular cleaning schedule. Here’s the routine that’s kept my humidifiers mold-free for years:

    Daily Maintenance (2 minutes) – Empty any remaining water from the tank and base. Don’t let water sit stagnant for more than 24 hours. Rinse both tank and base with clean water and wipe dry with a cloth. This simple step eliminates standing water where mold spores can multiply.

    Weekly Cleaning (15 minutes) – Fill the tank with warm water and add 1 cup of white vinegar. Let it sit for 30 minutes, then empty and scrub with a soft brush. Pay special attention to corners and crevices where water pools. Rinse thoroughly until all vinegar smell is gone. For stubborn mineral buildup, use a mixture of vinegar and water (50/50) and let it soak longer.

    Monthly Deep Cleaning (30 minutes) – Disassemble all removable parts including tank, base, and any filters. Soak in a solution of 1 gallon water + 1 cup vinegar for at least 1 hour. Scrub all surfaces with a soft brush, using an old toothbrush for tight spaces. For evaporative humidifiers, replace or clean the wick filter according to manufacturer guidelines. Rinse everything thoroughly and let air dry completely before reassembling.

    Filter Maintenance – If your humidifier uses a filter, inspect it weekly. Replace immediately if you see any mold growth or mineral deposits that won’t rinse off. Wick filters are especially prone to harboring mold in their fibers. I replace mine every 2-3 months during heavy use, which is more frequent than manufacturer recommendations but prevents mold problems.

    Seasonal Storage – When winter ends, clean your humidifier thoroughly before storing. Empty all water, clean with vinegar solution, and dry completely. Store disassembled in a cool, dry place. Never store a humidifier with water inside—it’s guaranteed to develop mold during summer.

    Health Risks of Mold Exposure from Humidifiers

    Preventing mold in your humidifier isn’t just about maintaining your device—it’s about protecting your health. Mold spores released from a contaminated humidifier become concentrated in the air you breathe, potentially causing serious health issues.

    The most common health effects are respiratory problems. Mold spores irritate the lungs and airways, triggering coughing, wheezing, and throat irritation. For people with asthma, mold exposure can precipitate attacks. I’ve noticed significantly worse asthma symptoms when using a humidifier that wasn’t properly maintained.

    Allergic reactions are another major concern. Many people develop mold allergies with repeated exposure, experiencing symptoms like sneezing, runny nose, itchy eyes, and skin rashes. These symptoms can persist even when you’re not near the humidifier, as spores circulate throughout your home.

    Vulnerable groups face heightened risks. Infants, elderly individuals, and anyone with compromised immune systems should never use a humidifier that shows any signs of mold contamination. For these groups, the consequences can be severe, including respiratory infections and systemic fungal infections.

    Beyond mold itself, contaminated humidifiers distribute other harmful microorganisms. Bacteria thrive in the same conditions that promote mold growth, and fungal spores aren’t the only potential allergen. Regular cleaning prevents not just mold but the entire ecosystem of pathogens that can develop in stagnant water.

    Frequently Asked Questions

    Can you put vinegar in a humidifier to prevent mold?

    Yes, vinegar can help prevent mold in humidifiers due to its acidic nature. Add 1/2 cup of white vinegar per gallon of water to inhibit mold growth. For best results, use vinegar as part of your weekly cleaning routine by running a 50/50 vinegar and water solution through your humidifier for 30 minutes. Note that vinegar is less effective than hydrogen peroxide for active mold problems and may leave a noticeable smell in cool mist models.

    Is hydrogen peroxide safe in humidifiers?

    Yes, 3% hydrogen peroxide is safe for use in most humidifiers when used in proper concentrations. Add 1-2 teaspoons per gallon of water for daily mold prevention, or 1 tablespoon per gallon to treat existing mold. Hydrogen peroxide breaks down into water and oxygen, leaving no harmful residues. However, prolonged use may gradually degrade rubber seals and gaskets. People with severe respiratory sensitivities should monitor for throat irritation. Never use industrial-grade hydrogen peroxide concentrations above 3%.

    Can a moldy humidifier make you sick?

    Yes, moldy humidifiers can definitely make you sick. Mold spores released into the air can cause respiratory issues, allergic reactions, asthma attacks, throat irritation, coughing, and wheezing. For people with compromised immune systems, infants, or the elderly, exposure can lead to serious respiratory infections. Bacteria often grow alongside mold in contaminated humidifiers, creating additional health risks. If your humidifier shows signs of mold, stop using it immediately until thoroughly cleaned and disinfected.

    What is the best humidifier to prevent mold?

    Warm mist humidifiers are generally the best for mold prevention because the boiling water kills mold spores and bacteria. However, no humidifier is completely mold-proof. Evaporative humidifiers with wick filters are most prone to mold problems because the filter stays constantly damp. Ultrasonic humidifiers develop mold in hard-to-clean corners. Regardless of type, regular cleaning and using preventive additives like hydrogen peroxide or distilled water are essential for mold prevention.

    How often should I clean my humidifier?

    Clean your humidifier daily by emptying and rinsing the tank with fresh water—never let water sit for more than 24 hours. Perform a weekly cleaning with vinegar solution (1 cup vinegar to 1 gallon water) to remove developing biofilm. Monthly deep cleaning should include disassembly and soaking all removable parts. Replace filters according to manufacturer guidelines or immediately if you see any mold growth. Consistent cleaning is more important than any single preventive additive.

    Is mold in humidifier dangerous?

    Yes, mold in humidifiers is dangerous because it distributes concentrated mold spores throughout the air you breathe. Dangers include respiratory infections, allergic reactions, asthma exacerbation, and systemic fungal infections in severe cases. Mold creates biofilm that protects it from cleaning, making removal difficult. The longer mold grows, the more spores it releases and the harder it becomes to eliminate. People with respiratory conditions, immune system compromise, or allergies face the highest risks.

    Should I use distilled water in my humidifier?

    Using distilled water is highly recommended for mold prevention because it lacks minerals that feed biofilm formation. Tap water contains dissolved solids that create deposits where mold grows, while distilled water dramatically reduces mineral buildup. Distilled water also prevents white dust that ultrasonic humidifiers release. The main drawback is cost—roughly $1 per gallon. For chronic mold problems or hard water areas, distilled water is often the most effective single solution. Many users mix distilled water with tap water to balance cost and effectiveness.

    Can I put tea tree oil in my humidifier?

    Tea tree oil is an effective natural antifungal that can prevent mold growth when used at 3-5 drops per gallon of water. However, tea tree oil is toxic to pets and can cause respiratory irritation in some people. Never use tea tree oil in households with dogs or cats—inhalation can cause liver damage, respiratory distress, or even death. For pet-free homes, tea tree oil works well but should be used cautiously due to potential throat irritation. Many users prefer hydrogen peroxide or commercial products as safer alternatives.

    Do humidifiers cause mold in the house?

    Humidifiers can contribute to household mold problems if humidity levels exceed 60%. Excess moisture creates mold-friendly conditions on walls, ceilings, and throughout your home. However, properly maintained humidifiers that keep humidity between 30-50% actually help prevent mold by reducing static electricity and keeping materials from becoming too dry. The real risk comes from over-humidification or running a mold-contaminated humidifier that distributes spores. Use a hygrometer to monitor humidity levels and clean your humidifier regularly to prevent spreading mold.

    What kills mold in humidifiers?

    Hydrogen peroxide is most effective for killing mold in humidifiers—use 1 tablespoon of 3% solution per gallon to treat active mold growth. Commercial bacteriostatic treatments specifically formulated for humidifiers also work well. For deep cleaning, soak the tank and components in a 50/50 vinegar and water solution for at least 30 minutes, then scrub thoroughly. Bleach can kill mold but may damage humidifier components and leave harmful residues. Once mold establishes biofilm, physical scrubbing is necessary—chemicals alone often can’t penetrate the protective layer.

    Conclusion

    Preventing mold in your humidifier requires consistency more than any single miracle solution. Based on my experience, the combination that works best is using distilled water with daily hydrogen peroxide treatment, weekly vinegar cleanings, and thorough monthly deep cleaning. No humidifier is completely mold-proof, but this routine keeps mine clean year-round.

    The key is finding what works for your situation—your humidifier type, household members, budget, and willingness to maintain a cleaning schedule. Start with the basics: never let water sit stagnant, clean weekly regardless of additives used, and use distilled water if you have chronic mold problems. From there, experiment with hydrogen peroxide for daily prevention and commercial products for low-maintenance periods.

    Remember that what you put in your humidifier to prevent mold is only half the battle. Regular cleaning prevents not just mold but the entire ecosystem of pathogens that develop in stagnant water. Your health is worth the 15 minutes weekly that proper maintenance requires.

  • Heat Pump vs Furnace 2026: Complete Comparison Guide

    Heat Pump vs Furnace 2026: Complete Comparison Guide

    If you are staring down a heating system replacement, you have probably landed on the same question thousands of homeowners ask every year: heat pump vs furnace, which one makes sense for my home? It is not a simple answer, and honestly, that is because the right choice depends heavily on where you live, what your utility rates look like, and how your home is built.

    I have spent months digging through HVAC specifications, real homeowner experiences on forums like r/hvacadvice and r/heatpumps, and manufacturer data from Carrier, Trane, and Lennox. What I found is that most comparison guides skip the details that actually matter: how the heat feels different, what your real monthly bills will look like, and whether that heat pump will keep you warm when temperatures drop below zero.

    In this guide, our team breaks down the heat pump vs furnace comparison from every angle. You will learn how each system works, how they compare on efficiency and cost, which climates suit each one, and how to run the numbers for your specific situation. We will also cover dual-fuel systems, environmental impact, and a straightforward decision framework to help you pick the right heating system for your home in 2026.

    Heat Pump vs Furnace: Quick Comparison

    Before we get into the details, here is a side-by-side look at how heat pumps and furnaces stack up across the most important categories. This gives you the big picture fast.

    • Heating Method: Heat pumps transfer heat from outdoor air; furnaces generate heat through fuel combustion
    • Energy Source: Heat pumps run on electricity; furnaces use natural gas, propane, or oil
    • Efficiency: Heat pumps achieve 250-400% efficiency (COP 2.5-4.0); furnaces reach 92-98.5% AFUE
    • Cooling Capability: Heat pumps provide both heating and cooling; furnaces heat only (need separate AC)
    • Best Climate: Heat pumps excel in mild to moderate climates; furnaces dominate in extreme cold regions
    • Average Lifespan: Heat pumps last 10-15 years; furnaces last 15-20 years
    • Installation Cost: Heat pumps often cost less overall (no separate AC needed); furnace-only installations are typically cheaper upfront
    • Comfort: Furnaces deliver hotter, drier air; heat pumps provide gentler, more humid warmth

    The single biggest takeaway from this comparison: a heat pump does double duty as both a heater and an air conditioner, while a furnace only handles heating. That alone can swing the decision for many homeowners.

    How Heat Pumps Work

    A heat pump does not create heat. It moves it. That distinction is the key to understanding why heat pumps can achieve such impressive efficiency numbers. Even when it is freezing outside, there is still thermal energy in the outdoor air. A heat pump captures that energy and transfers it indoors using a refrigeration cycle.

    Here is the process in simple terms. The outdoor unit contains a compressor that pressurizes refrigerant, which absorbs heat from the outside air as it circulates through the coil. That warmed refrigerant then travels to the indoor coil, where it releases the heat into your home. The cycle repeats continuously to maintain your desired temperature.

    In summer, the system reverses the process. It absorbs heat from inside your home and releases it outdoors, functioning exactly like a central air conditioner. This dual heating and cooling capability is one of the biggest advantages of a heat pump system.

    Modern cold climate heat pumps have changed the game significantly. These units can extract usable heat from outdoor air at temperatures as low as -13 degrees Fahrenheit, thanks to advanced inverter-driven compressors and improved refrigerant blends. Homeowners in Canadian provinces and northern US states have reported successful heating performance even during harsh winter months.

    How Furnaces Work

    A furnace generates heat through combustion. Natural gas is the most common fuel source, but propane and oil furnaces are also widely used, particularly in rural areas without natural gas infrastructure. The process is straightforward: the furnace burns fuel in a heat exchanger, and a blower fan pushes the heated air through your ductwork and into your living spaces.

    The efficiency of a furnace is measured by its AFUE rating, which stands for Annual Fuel Utilization Efficiency. An AFUE of 95 means that 95% of the fuel energy becomes usable heat, while the remaining 5% escapes through the exhaust. Modern high-efficiency furnaces achieve AFUE ratings between 92% and 98.5%, a significant improvement over older models that operated at 60-70% AFUE.

    Furnaces come in three main configurations. Single-stage furnaces operate at full capacity only, which means they cycle on and off more frequently. Two-stage furnaces can run at a lower capacity for milder days, which provides more even heating. Modulating furnaces adjust their output in tiny increments for the most precise temperature control and comfort.

    Energy Efficiency: Heat Pump vs Furnace

    This is where the heat pump vs furnace comparison gets really interesting. On paper, the numbers tell a striking story. A high-efficiency gas furnace converts up to 98.5% of its fuel energy into heat. That sounds impressive until you compare it to a heat pump, which can deliver 250% to 400% efficiency.

    How is that possible? Because a heat pump is not converting energy into heat. It is using electricity to move existing heat from one place to another. For every 1 unit of electrical energy the heat pump consumes, it can deliver 2.5 to 4 units of heat energy into your home. This measurement is called the Coefficient of Performance, or COP. A COP of 3.0 means 300% efficiency.

    However, there is an important catch. The COP of a heat pump drops as outdoor temperatures fall. A heat pump that operates at COP 3.5 at 45 degrees Fahrenheit might drop to COP 2.0 at 20 degrees, and could fall to COP 1.5 or lower at temperatures below zero. When the COP drops too low, auxiliary electric resistance heat strips kick in, which are far less efficient and can drive up your electricity bill significantly.

    A furnace, by contrast, maintains its efficiency regardless of outdoor temperature. A 96% AFUE furnace delivers 96% efficiency whether it is 30 degrees outside or negative 10 degrees. That consistency is a major advantage in cold climates where heat pump efficiency declines during the months you need heating most.

    Two other ratings worth knowing: SEER (Seasonal Energy Efficiency Ratio) measures cooling efficiency for heat pumps, and HSPF (Heating Seasonal Performance Factor) measures heating efficiency over a full season. Look for heat pumps with HSPF2 ratings of 8.5 or higher for the best cold-weather performance.

    Cost Comparison: Upfront and Operating Costs

    Cost is usually the deciding factor in the heat pump vs furnace debate, but the answer depends on what you are comparing. Let us break it down into upfront installation costs and ongoing operating costs.

    Installation Costs

    A new gas furnace installation typically runs between $3,800 and $6,500, including the unit, labor, and any necessary ductwork modifications. If you also need a central air conditioner, add another $3,500 to $7,000 on top of that, bringing the total to $7,300 to $13,500 for both heating and cooling.

    A heat pump installation generally costs between $5,000 and $10,000 for the outdoor unit, indoor air handler, and installation. Since a heat pump handles both heating and cooling, that single investment covers your year-round comfort needs. In many scenarios, a heat pump ends up being the more cost-effective total installation.

    Operating Costs

    This is where your local utility rates make or break the decision. The cost to operate each system depends on the price of electricity versus natural gas in your area, and those rates vary dramatically by region.

    Here is a real example to illustrate. Say you need 80,000 BTU of heating for the day. A 96% AFUE gas furnace would consume about 0.83 therms of natural gas per hour of operation. If natural gas costs $1.20 per therm, that is roughly $1.00 per hour. A heat pump with a COP of 3.0 would consume about 7.8 kWh of electricity per hour. If electricity costs $0.14 per kWh, that is about $1.09 per hour, making it comparable to the furnace.

    But change those rates and the math shifts. In areas where electricity costs $0.20 per kWh and gas is $0.90 per therm, the furnace becomes noticeably cheaper to operate. This is exactly what homeowners on Reddit have reported: some users say their heat pump costs $370 to $500 more per year to operate than their previous gas furnace setup because of high local electric rates.

    On the flip side, homeowners in areas with affordable electricity and expensive gas report savings of 30% to 50% on their heating bills after switching to a heat pump. The lesson is clear: you need to run the numbers for your specific location before making a decision.

    Climate Suitability: Where Each System Shines

    Climate is arguably the most important factor in the heat pump vs furnace decision. Where you live determines how well each system will perform and how much it will cost to run.

    Mild and Moderate Climates (Zones 3-5)

    Heat pumps thrive in mild and moderate climates where winter temperatures rarely drop below 20 degrees Fahrenheit. States like California, Texas, Florida, the Carolinas, and the Pacific Northwest are ideal heat pump territory. In these regions, a heat pump operates at high COP values throughout the heating season, keeping operating costs low while providing reliable comfort.

    Homeowners in these areas benefit enormously from the heat pump’s dual heating and cooling capability. One system handles both seasons efficiently, eliminating the need for a separate air conditioner and furnace.

    Cold Climates (Zones 5-7)

    Cold climate heat pumps have made tremendous strides in recent years, and many homeowners in the northern US and southern Canada use them successfully. Users on cold-climate forums report positive experiences with modern inverter-driven heat pumps working effectively down to -13 degrees Fahrenheit. These cold climate models feature enhanced compressors, improved refrigerants, and intelligent defrost cycles that maintain performance even in extreme cold.

    However, heating costs in these regions can be higher with a heat pump because the COP drops during the coldest months. When temperatures fall below the heat pump’s effective range, auxiliary electric resistance heat kicks in, which is significantly more expensive to operate.

    Extreme Cold Climates (Zones 6-7 and Canada)

    In regions where winter temperatures regularly plunge below zero and stay there for extended periods, a furnace remains the more practical and reliable choice. Natural gas furnaces provide consistent, powerful heat regardless of outdoor conditions. Many homeowners in these regions opt for dual-fuel systems, which we will cover shortly.

    There is also the insulation factor to consider. Homeowners in older homes built before 1980 often report doubled winter heating bills with heat pumps because poor insulation forces the system to work harder. If your home lacks good insulation, upgrading that first can improve the performance of either system dramatically.

    Heat Quality and Comfort Differences

    One aspect of the heat pump vs furnace debate that rarely gets the attention it deserves is how the heat actually feels inside your home. The difference is noticeable, and it matters for day-to-day comfort.

    A gas furnace heats air to between 130 and 140 degrees Fahrenheit at the supply register. That air tends to be dry, which can lead to lower indoor humidity levels during winter. Some people find that hot, dry air creates a cozy, toasty feeling almost instantly when the system kicks on. Others experience dry skin, static electricity, and irritated sinuses.

    A heat pump delivers air at a lower temperature, typically between 95 and 110 degrees Fahrenheit. The air feels gentler and retains more natural humidity. Because the supply air temperature is lower, a heat pump runs longer cycles to maintain the same room temperature compared to a furnace. This extended runtime creates more even heating throughout your home with fewer cold spots, but some people find the cooler air supply less satisfying on bitterly cold days.

    The humidity difference is significant. Heat pumps tend to maintain indoor humidity between 30% and 50%, which is within the recommended range. Furnaces can drive humidity down to 15% to 25%, which may require a whole-house humidifier for comfort and health.

    Heat Pump vs Furnace Pros and Cons

    Heat Pump Advantages

    • Provides both heating and cooling in one system
    • Higher overall efficiency with COP ratings up to 4.0
    • Lower carbon emissions compared to fossil fuel heating
    • Potentially lower total installation cost (no separate AC needed)
    • Maintains better indoor humidity levels during winter
    • Eligible for federal tax credits and local utility rebates
    • No combustion means zero risk of carbon monoxide

    Heat Pump Disadvantages

    • Efficiency drops in extreme cold temperatures
    • Higher operating costs in regions with expensive electricity
    • Shorter lifespan of 10 to 15 years compared to furnaces
    • May require supplemental heat in very cold climates
    • Can feel less warm on the coldest days due to lower supply air temperature
    • Performance depends heavily on proper sizing and installation quality

    Furnace Advantages

    • Consistent, powerful heat regardless of outdoor temperature
    • Lower operating costs in areas with affordable natural gas
    • Longer lifespan of 15 to 20 years with proper maintenance
    • Fast heating response with high supply air temperatures
    • Well-established technology with wide technician availability
    • Works with existing ductwork in most homes

    Furnace Disadvantages

    • Heating only, requires separate air conditioning system
    • Combustion produces carbon monoxide (requires proper venting)
    • Creates dry indoor air that may need a humidifier
    • Subject to fluctuating natural gas and propane prices
    • Higher carbon emissions compared to electric heat pumps
    • Annual fuel costs can be unpredictable

    Dual-Fuel Systems: The Best of Both Worlds

    If the heat pump vs furnace decision feels like a tug-of-war, a dual-fuel system might be the answer. Also called a hybrid heating system, a dual-fuel setup pairs an electric heat pump with a gas furnace. The system automatically switches between the two based on which one can heat your home most efficiently at any given moment.

    Here is how it works in practice. On milder days when temperatures are above the balance point, typically around 30 to 35 degrees Fahrenheit, the heat pump handles all the heating. It runs at high efficiency with a strong COP, keeping your electricity costs low. When the temperature drops below that balance point and the heat pump’s efficiency begins to decline, the system automatically switches to the gas furnace, which maintains consistent efficiency regardless of the cold.

    Homeowners who have installed dual-fuel systems report excellent results. The combination provides the efficiency benefits of a heat pump during moderate weather and the reliable power of a furnace during cold snaps. Many dual-fuel owners say the system paid for itself within 3 to 5 years through energy savings, especially when taking advantage of available rebates.

    The upfront cost of a dual-fuel system is higher than either standalone option, typically running $8,000 to $15,000 installed. But for homeowners in mixed climates who want maximum efficiency without sacrificing comfort, it represents the best long-term investment.

    Maintenance and Lifespan Comparison

    Both heat pumps and furnaces require regular maintenance to operate efficiently and reach their expected lifespan. The maintenance tasks differ, but the annual cost is roughly similar for both systems.

    A gas furnace needs annual professional servicing that includes inspecting the heat exchanger for cracks, cleaning the burners, checking the ignition system, testing the carbon monoxide detector, and verifying proper venting. A well-maintained furnace typically lasts 15 to 20 years, with some high-quality units reaching 25 years.

    A heat pump also benefits from annual professional maintenance. Because it runs year-round for both heating and cooling, the wear and tear is distributed across both seasons. Maintenance includes cleaning the indoor and outdoor coils, checking refrigerant levels, inspecting electrical connections, and verifying the defrost cycle. Heat pumps generally last 10 to 15 years, though cold climate models with quality installations can exceed 15 years.

    The shorter lifespan of heat pumps is worth factoring into your long-term cost analysis. Replacing a heat pump at the 12-year mark means you may go through two units in the time a single furnace would have lasted. That additional replacement cost can offset some of the efficiency savings, particularly if your local electricity rates are on the higher side.

    Environmental Impact

    For homeowners thinking about sustainability, the environmental comparison between heat pumps and furnaces is clear but nuanced. A heat pump produces zero direct emissions because it runs on electricity and contains no combustion process. The actual carbon footprint depends on how your local electricity is generated. In regions with clean energy grids powered by hydro, solar, or wind, a heat pump’s carbon footprint is dramatically lower than any fossil fuel furnace.

    A natural gas furnace produces carbon dioxide emissions with every heating cycle. According to EPA data, the average gas furnace generates roughly 4 to 6 tons of CO2 per year depending on home size and climate. As electrical grids across the country continue to incorporate more renewable energy sources, heat pumps become progressively cleaner over time, a benefit called grid decarbonization.

    The federal government and many states offer substantial incentives for heat pump installations. Federal tax credits can cover up to $2,000 of installation costs, and many local utility companies offer additional rebates ranging from $500 to $4,000. These incentives can significantly reduce the payback period and make heat pumps financially competitive even in regions where operating costs would otherwise be higher.

    How to Choose: Decision Framework

    After comparing heat pumps and furnaces across every major category, here is a straightforward decision framework to help you determine which system fits your situation.

    Choose a Heat Pump If:

    • You live in a mild to moderate climate (zones 3-5)
    • You need both heating and cooling (and do not already have a separate AC)
    • Your electricity rates are reasonable (under $0.16 per kWh in most cases)
    • You want to reduce your carbon footprint
    • You qualify for heat pump rebates and tax credits
    • You are building a new home and want a single efficient system

    Choose a Furnace If:

    • You live in an extreme cold climate where winter temperatures regularly fall below zero
    • Natural gas is affordable in your area
    • You already have a working air conditioner
    • You prefer the feel of hot, fast-responding heat
    • Your home has poor insulation that makes heat pump operation expensive
    • You want the longest possible equipment lifespan

    Choose a Dual-Fuel System If:

    • You live in a mixed climate with cold winters and warm summers
    • You want maximum efficiency without sacrificing cold-weather comfort
    • Both gas and electricity are available at your home
    • Your budget can accommodate the higher upfront investment
    • You want the flexibility of automatic fuel switching based on conditions

    Questions to Ask Before Deciding:

    1. What are my local electricity and gas rates? Run the hourly cost calculation we outlined earlier.
    2. What climate zone am I in? This determines heat pump effectiveness.
    3. How well insulated is my home? Poor insulation hurts heat pump performance more than furnace performance.
    4. Do I need cooling too? If yes, a heat pump may save you money overall.
    5. What rebates and incentives are available in my area? Check the ENERGY STAR rebate finder and your local utility website.
    6. What is my budget for upfront installation versus long-term operating costs?

    Frequently Asked Questions

    What are the disadvantages of a heat pump?

    The main disadvantages of a heat pump include reduced efficiency in extreme cold temperatures, potentially higher operating costs in regions with expensive electricity, a shorter lifespan of 10 to 15 years compared to furnaces, and the need for supplemental or backup heating in very cold climates. Heat pumps also deliver air at a lower temperature than furnaces, which some homeowners find less comfortable on the coldest days. Additionally, heat pump performance depends heavily on proper sizing and quality installation, which means hiring an experienced HVAC contractor is critical.

    How much is a heat pump for a 2000 square foot house?

    A heat pump installation for a 2000 square foot house typically costs between $5,500 and $12,000, with the total depending on the system size (usually 3 to 4 tons for this square footage), efficiency rating, brand, and local labor rates. Cold climate heat pumps with higher HSPF2 ratings tend to cost more but offer better performance in colder regions. Federal tax credits of up to $2,000 and local utility rebates can reduce the out-of-pocket cost significantly.

    Is a heat pump better than a furnace?

    Neither system is universally better. A heat pump is better if you live in a mild to moderate climate, need both heating and cooling, have reasonable electricity rates, or want lower carbon emissions. A furnace is better if you live in an extreme cold climate, have access to affordable natural gas, or prefer the fast, hot heat delivery that furnaces provide. The right choice depends entirely on your climate zone, utility rates, home insulation, and personal priorities.

    Why is my bill so high with a heat pump?

    High heat pump bills usually stem from one of several factors: your local electricity rate is high compared to gas rates, your heat pump is operating in extreme cold where efficiency drops significantly, auxiliary electric resistance heat strips are running frequently, your home has poor insulation causing the system to work overtime, the heat pump was improperly sized during installation, or the unit needs maintenance such as refrigerant recharging or coil cleaning. Checking your utility rates and scheduling an HVAC inspection can help identify the specific cause.

    Can a heat pump replace a furnace in cold weather?

    Modern cold climate heat pumps can effectively heat homes in temperatures as low as -13 degrees Fahrenheit, making them a viable furnace replacement in many cold regions including parts of Canada and the northern United States. However, in areas with extended periods of extreme cold below zero, operating costs may increase significantly when the system relies on auxiliary electric resistance heat. Many cold-climate homeowners choose dual-fuel systems that pair a heat pump with a furnace for optimal efficiency and reliability.

    How long do heat pumps last compared to furnaces?

    Heat pumps typically last 10 to 15 years, while furnaces last 15 to 20 years with proper maintenance. The difference comes down to usage patterns: heat pumps run year-round for both heating and cooling, which creates more wear on components, whereas furnaces only operate during the heating season. Regular annual maintenance from a qualified HVAC technician can extend the lifespan of either system by several years.

    Which is cheaper to run: a heat pump or furnace?

    The answer depends entirely on your local utility rates. In areas where electricity costs less than $0.14 to $0.16 per kWh and natural gas costs more than $1.20 per therm, a heat pump is usually cheaper to operate. In regions with expensive electricity and cheap natural gas, a furnace costs less to run. You can estimate your costs by comparing the price per BTU of delivered heat from each system using your local rates, as outlined in the cost comparison section above.

    Conclusion

    The heat pump vs furnace comparison comes down to three things: your climate, your utility rates, and your priorities. Heat pumps offer superior efficiency and lower environmental impact in mild to moderate climates where they can operate at high COP values throughout the heating season. Furnaces deliver reliable, powerful heat in extreme cold conditions where efficiency consistency matters more than peak efficiency numbers.

    For homeowners in mixed climates, dual-fuel systems provide a compelling middle ground that captures the best of both technologies. The automatic switching between heat pump and furnace based on outdoor temperature ensures you are always using the most cost-effective heat source at any given moment.

    Before making your final decision, I strongly recommend getting quotes from at least three local HVAC contractors who can assess your specific home. They will evaluate your ductwork, insulation, climate zone, and utility rates to recommend the right system size and type for your situation. The best heating system is not the one with the highest efficiency rating on paper. It is the one that performs best in your home, in your climate, with your utility rates.

    Take the time to run the numbers, explore available rebates through the ENERGY STAR rebate finder and your local utility, and consider the long-term total cost of ownership rather than just the installation price. Your heating system is a 15 to 20 year investment, and making the right heat pump vs furnace choice now will pay dividends in comfort and savings for years to come.

  • Types of Air Conditioners 2026: Complete Guide

    Types of Air Conditioners 2026: Complete Guide

    Summer heat shows up fast, and picking the wrong cooling system turns your home into an uncomfortable place to wait it out. Understanding the different types of air conditioners helps you match the right system to your space, budget, and climate. Whether you own a house with existing ductwork or rent a studio apartment with slide-out windows, there is an AC solution built for your exact situation.

    In this guide, our team walks through every major air conditioning type available in 2026. You will learn how each system works, where it performs best, and what trade-offs to expect. By the end, you will have a clear picture of which AC type fits your home and your lifestyle.

    Quick Overview: Main Types of Air Conditioners

    There are seven primary types of air conditioners for residential use. Each one serves a different cooling need, from whole-home comfort to spot cooling a single room:

    1. Central Air Conditioning — Best for whole-home cooling in houses with ductwork
    2. Window Air Conditioners — Best for affordable single-room cooling
    3. Portable Air Conditioners — Best for renters who cannot install window units
    4. Ductless Mini-Split Systems — Best for homes without ductwork needing zoned cooling
    5. Packaged Systems — Best for homes with limited indoor space for equipment
    6. Geothermal Heat Pumps — Best for maximum long-term energy savings
    7. Evaporative Coolers — Best for dry climates where humidity is low

    We cover each type in detail below, including how they work, their advantages, and their limitations.

    1. Central Air Conditioning Systems

    Central air conditioning is the most common whole-home cooling system in the United States. It uses a split design with an outdoor unit housing the compressor and condenser coil, and an indoor unit connected to your furnace or air handler that contains the evaporator coil. Refrigerant circulates between the two units, absorbing heat from inside your home and releasing it outside.

    Cooled air travels through your existing ductwork and exits through vents in every room, creating even temperatures throughout the house. A thermostat controls the system, and modern units achieve SEER2 ratings of 14 to 26, which measures cooling output relative to energy consumed.

    Best for: Homeowners with existing ductwork who want consistent, whole-house cooling.

    Advantages:

    • Cools every room evenly from a single system
    • Operates quietly since the compressor sits outside
    • Improves indoor air quality with built-in filtration
    • Adds resale value to your home

    Drawbacks:

    • Requires ductwork — expensive to install if your home lacks it
    • Professional installation is mandatory
    • Higher upfront cost compared to room-specific units

    Installation typically takes one to three days with a licensed HVAC contractor. The technician performs a load calculation to determine the right size unit for your square footage, insulation, and climate zone. Proper sizing matters — an oversized unit short-cycles and wastes energy, while an undersized unit runs constantly without reaching your target temperature.

    2. Window Air Conditioners

    Window air conditioners are self-contained units that mount in a window frame or through a wall opening. All the components — compressor, condenser, evaporator coil, and fan — fit inside a single metal housing. The unit draws warm indoor air across the evaporator coil, removes heat and humidity, then blows cooled air back into the room while exhausting heat outside through the back of the unit.

    Best for: Budget-conscious cooling of individual rooms, especially bedrooms and small living spaces.

    Advantages:

    • Most affordable option for room-by-room cooling
    • No professional installation needed — most people install one themselves
    • Available in sizes from 5,000 to 25,000 BTU to match room dimensions
    • Easy to remove and store during winter months

    Drawbacks:

    • Blocks the window it occupies
    • Can be noisy compared to split systems
    • Only cools a single room or open area

    Forum users consistently recommend window ACs over portable units for raw cooling power. A popular recent development is the U-shaped window air conditioner, which frames around your windowpane instead of sitting on the sill. Users praise U-shaped models for running noticeably quieter and still allowing the window to open partially, solving two common complaints about traditional window units. If you want specific model recommendations, check our guide to the best window air conditioners for detailed reviews.

    For sizing, a general rule is 20 BTU per square foot of living space. A 150-square-foot bedroom needs roughly 5,000 BTU, while a 450-square-foot living room calls for about 10,000 BTU. Going slightly larger is fine, but avoid drastically oversizing — it causes the unit to cycle on and off too quickly without properly dehumidifying the air.

    3. Portable Air Conditioners

    Portable air conditioners are freestanding units on wheels that sit inside your room and exhaust hot air through a hose connected to a window kit. Unlike window units, they do not mount inside the window opening — they sit on the floor and take up floor space. The exhaust hose is the key component: it vents the heat removed from your air to the outside.

    Best for: Renters in apartments where window units are not allowed, or rooms with casement windows that standard window ACs cannot fit.

    Advantages:

    • No window mounting required — only needs a small vent opening
    • Roll from room to room as needed
    • Works with window types that reject standard window ACs

    Drawbacks:

    • Lower cooling efficiency than window units of the same BTU rating
    • Takes up floor space in your room
    • Noiser than other options because the compressor sits inside the room
    • Requires venting setup each time you move it

    Here is an important detail many buyers miss: portable ACs come in single-hose and dual-hose configurations. Single-hose units pull air from your room to cool their condenser, then exhaust it outside. This creates negative pressure, drawing warm air in from other rooms or hallways and reducing overall efficiency. Dual-hose units solve this problem by using a second hose to pull outside air for condenser cooling, keeping your room pressure neutral. Forum users report that dual-hose models cool more effectively, though the difference is modest.

    Real user feedback on forums is consistent: portable ACs provide convenient cooling but underperform compared to window units. If you have the option to install a window unit, you will get better results for less money.

    4. Ductless Mini-Split Systems

    Ductless mini-split systems consist of an outdoor compressor unit connected to one or more indoor air handlers by refrigerant lines and electrical wiring. A small hole in the wall — usually about three inches — routes the lines between the indoor and outdoor components. No ductwork is needed at all. Each indoor handler cools the room it is installed in, and you can run multiple handlers off a single outdoor unit.

    Best for: Homes without ductwork, room additions, garages, and spaces where you want independent temperature control in each room.

    Advantages:

    • Zoned cooling — set different temperatures for different rooms
    • High energy efficiency — many models reach SEER2 ratings above 20
    • Extremely quiet indoor operation
    • No ductwork required
    • Many models also provide heating (heat pump function)

    Drawbacks:

    • Higher upfront cost than window or portable units
    • Indoor air handlers are visible on your wall or ceiling
    • Professional installation recommended for refrigerant line handling

    The zoning capability is what sets mini-splits apart from central systems. You can cool your bedroom to 68 degrees at night while leaving the living room handler off, saving significant energy. Multi-zone setups support up to eight indoor handlers from one outdoor compressor, making them practical for whole-home cooling without ducts.

    Installation involves mounting the indoor handler high on a wall, drilling the conduit hole, running refrigerant lines to the outdoor unit, and charging the system. While some handy homeowners attempt it, improper refrigerant handling and line sizing can reduce efficiency and void warranties. Professional installation is the safer route.

    5. Packaged Air Conditioning Systems

    Packaged systems house all components — compressor, condenser, evaporator coil, and fan — in a single outdoor metal cabinet, typically placed on a concrete slab next to the house or on a flat roof. Ductwork connects directly from the outdoor unit into the home through a wall or roof penetration. This is the opposite of a split system, where components live in two separate locations.

    Best for: Homes with limited indoor mechanical space, commercial buildings, and residences in regions where rooftop installation is common.

    Advantages:

    • All mechanical components stay outside — frees up indoor space
    • Simpler installation than split systems since everything ships in one unit
    • Available in gas-electric and all-electric configurations

    Drawbacks:

    • Exposed to weather year-round, which can reduce component lifespan
    • Harder to access for maintenance compared to indoor air handlers
    • Less common in residential settings — fewer model options

    Packaged units range from 2 to 5 tons of cooling capacity, covering homes from 1,000 to 3,000 square feet. They are most popular in the southern and southwestern United States, where rooftop installations are common in new construction.

    6. Geothermal Heat Pump Systems

    Geothermal heat pumps use the stable underground temperature — which stays between 45 and 75 degrees year-round regardless of surface weather — to cool your home. A loop of buried pipes circulates a fluid that absorbs heat from your indoor air and transfers it into the ground. Since the earth acts as a heat sink, the system moves heat more efficiently than an air-source unit that must fight against hot outdoor air.

    Best for: Homeowners planning to stay in their home for 15-plus years who want the lowest possible operating costs and environmental impact.

    Advantages:

    • Highest efficiency of any cooling system — up to 50 percent less energy than conventional AC
    • Provides both heating and cooling from the same system
    • Extremely long lifespan — ground loops last 50-plus years
    • Very quiet operation with no outdoor compressor noise

    Drawbacks:

    • Very high upfront cost — installation involves excavation or well drilling
    • Requires sufficient yard space for ground loops
    • Installation takes several days to weeks depending on loop type

    Forum users consistently mention geothermal as the gold standard for efficiency but caution that the upfront investment is steep. The payback period runs 5 to 10 years depending on your local energy rates and climate. Federal tax credits and local rebates can offset a significant portion of the installation cost, making geothermal more accessible than the sticker price suggests.

    7. Evaporative Coolers (Swamp Coolers)

    Evaporative coolers work on a completely different principle than refrigerant-based systems. They pull warm outside air through water-saturated pads, and as the air passes through, water evaporation absorbs heat, dropping the air temperature by 15 to 40 degrees. A fan then pushes this cooled air into your home. No compressor, no refrigerant, and no sealed system.

    Best for: Arid and semi-arid climates where relative humidity stays below 50 percent during the cooling season.

    Advantages:

    • Uses 50 to 75 percent less electricity than refrigerant-based AC
    • Adds moisture to dry air — beneficial in arid climates
    • Much lower purchase and installation cost than central AC
    • Fresh air ventilation — does not recirculate indoor air

    Drawbacks:

    • Ineffective in humid climates — performance drops as humidity rises
    • Requires a constant water supply and regular pad replacement
    • Needs windows partially open for airflow, which some homeowners dislike
    • Does not dehumidify — a drawback in already-moist environments

    If you live in the desert Southwest or high plains where summers are hot and dry, evaporative coolers deliver impressive cooling at a fraction of the energy cost. In humid regions like the Southeast, they provide minimal relief and are not recommended.

    Comparing AC Types: What Sets Each Apart

    Choosing between AC types comes down to four practical factors: noise, installation complexity, maintenance, and climate suitability.

    Noise Levels

    Noise matters more than most people expect — it affects sleep quality, concentration, and general comfort. Here is how the types rank from quietest to loudest:

    • Geothermal: Nearly silent — only a quiet circulation pump
    • Central AC: Quiet indoors — compressor is outside
    • Mini-split: Very quiet indoors — indoor handlers use low-speed fans
    • Packaged: Moderate — outdoor noise only, but close to living spaces
    • Window AC: Moderate to loud — compressor sits in the room (U-shaped models are quieter)
    • Evaporative cooler: Moderate — fan noise comparable to a box fan
    • Portable AC: Loudest — compressor and fan both inside the room

    Installation Difficulty

    Some AC types you can set up in under an hour. Others require professional crews and permits:

    • Portable AC: DIY — plug in and attach window vent kit (15 minutes)
    • Window AC: DIY — mount in window, plug in (30 to 60 minutes)
    • Evaporative cooler: DIY to light professional — depends on unit size
    • Mini-split: Professional recommended — refrigerant lines, electrical, mounting
    • Central AC: Professional required — ductwork, electrical, refrigerant charging
    • Packaged: Professional required — duct connections, electrical, roof/slab work
    • Geothermal: Professional required — excavation or drilling, ground loop, interior connections

    Maintenance Requirements

    All air conditioners need regular maintenance, but the workload varies by type:

    • Window and portable ACs: Clean the filter monthly, wipe down coils seasonally
    • Central and packaged systems: Replace air filters every 1 to 3 months, schedule annual professional tune-ups
    • Mini-splits: Clean indoor filters monthly, schedule annual professional check for refrigerant levels
    • Geothermal: Minimal — annual loop inspection and filter changes
    • Evaporative coolers: Replace pads twice per season, clean water reservoir regularly, winterize before freezing temperatures

    Climate-Specific Recommendations

    Your local climate should heavily influence your AC choice:

    • Hot and humid (Southeast, Midwest): Central AC or mini-split for dehumidification. Avoid evaporative coolers.
    • Hot and dry (Southwest, high plains): Evaporative coolers shine here. Central AC and mini-splits also work well.
    • Moderate summers (Pacific Northwest, Northeast): Window units or mini-splits for targeted cooling without whole-home investment.
    • Cold winters with hot summers: Mini-split heat pumps that handle both heating and cooling, or geothermal for year-round efficiency.

    How to Choose the Right Type of Air Conditioner

    Selecting the right AC type becomes straightforward when you break it into five steps.

    Step 1: Assess Your Space

    Measure the square footage of the area you need to cool. For single rooms, a window or portable unit rated for that room size works. For whole-home cooling, you need central AC, a multi-zone mini-split, or a packaged system. A rough sizing guide: 20 BTU per square foot for room-specific units, and 1 ton of cooling per 400 to 500 square feet for whole-home systems.

    Step 2: Check Your Infrastructure

    Does your home have ductwork? If yes, central AC is your most straightforward option. If no, ductless mini-splits avoid the expense of adding ducts. Do you have standard double-hung windows? Window units fit them. Casement or slide-out windows may require portable units or through-the-wall installations.

    Step 3: Consider Your Climate

    Humid climates demand refrigerant-based systems that dehumidify as they cool. Dry climates open the door to evaporative coolers for significant energy savings. Check the reference above in the climate-specific recommendations section for your region.

    Step 4: Factor in Energy Efficiency

    Look at the SEER2 rating — higher numbers mean lower operating costs. The minimum SEER2 rating for new central AC units is 14 in northern states and 15 in southern states. Mini-splits often reach 20 to 30 SEER2. Geothermal systems achieve equivalent ratings above 30. Higher efficiency costs more upfront but saves money every month on your electric bill.

    Step 5: Match to Your Budget and Timeline

    Window and portable units provide immediate relief at low cost. Mini-splits and central systems require professional installation and a larger budget but deliver superior comfort and efficiency. Geothermal demands the biggest upfront investment but delivers the lowest lifetime operating cost. Balance what you can spend today against what you want to save over the next decade.

    Smart Features to Look for in 2026

    Modern air conditioners across all types increasingly include connected features that add convenience and can reduce energy use:

    • Wi-Fi connectivity: Control your AC from anywhere using a smartphone app
    • Programmable schedules: Set cooling times to match your daily routine
    • Energy monitoring: Track power consumption in real time through the app
    • Voice assistant integration: Adjust temperature with Alexa, Google Assistant, or Siri
    • Geofencing: AC adjusts when your phone detects you are leaving or approaching home

    Smart features are available on window units, portable models, mini-splits, and central systems. They typically add a modest amount to the purchase price but pay for themselves through smarter energy usage over time.

    FAQ

    What are the four types of air conditioners?

    The four main types of air conditioners are central air conditioning systems, window air conditioners, portable air conditioners, and ductless mini-split systems. These four cover the vast majority of residential cooling needs, from whole-home comfort to single-room spot cooling.

    What is the $5000 rule for AC?

    The $5000 rule suggests that if your air conditioner repair estimate exceeds $5000, you should replace the entire system instead of repairing it. This is especially true for units older than 10 years, since a new system with higher SEER2 ratings will likely save enough on energy bills to offset the replacement cost over time.

    What type of air conditioner is most energy efficient?

    Geothermal heat pump systems are the most energy efficient type of air conditioner, using 25 to 50 percent less electricity than conventional systems. Among standard types, ductless mini-splits are the most efficient, with many models achieving SEER2 ratings above 25. Variable-speed compressors in any system type boost efficiency by running at lower speeds when full cooling power is not needed.

    Can I install a ductless mini-split myself?

    While physically mounting the indoor and outdoor units is within reach of experienced DIYers, handling refrigerant lines, vacuum pumping the system, and proper charging require specialized tools and EPA certification in the United States. Improper installation can reduce efficiency by 20 to 30 percent and void the manufacturer warranty. Professional installation is strongly recommended.

    What is the difference between a single-hose and dual-hose portable AC?

    A single-hose portable AC uses one hose to exhaust hot air outside, which creates negative pressure in your room and draws warm air in from adjacent spaces. A dual-hose model adds a second intake hose that pulls outside air to cool the compressor, keeping room pressure neutral and improving cooling efficiency by 10 to 15 percent. Dual-hose units cool faster and more consistently.

    What type of AC is best for an apartment?

    For apartments, window air conditioners are usually the best choice because they cool effectively, cost less, and fit standard windows. If your lease or window type prevents window installation, a portable air conditioner with a window vent kit is the next best option. Always check your lease agreement and building rules before purchasing, since some buildings restrict window units or require specific installation methods.

    Final Thoughts

    Every home and every climate demands a different cooling approach, and that is exactly why so many types of air conditioners exist. Central AC dominates for whole-home comfort where ductwork is present. Window units deliver the best value for single rooms. Mini-splits bridge the gap for homes without ducts. Geothermal leads on efficiency for long-term homeowners. Portable units and evaporative coolers fill specific niches where other options fall short.

    The right choice comes down to your space, your infrastructure, and your budget. Measure your rooms, check your windows and ductwork, consider your local climate, and use the step-by-step guide above to narrow your options. If you want to explore specific models, our best window air conditioners guide covers top-rated units with detailed performance data.

  • Homedics Humidifier Troubleshooting Guide 2026

    Homedics Humidifier Troubleshooting Guide 2026

    Nothing is more frustrating than waking up to a dry throat, only to find your Homedics humidifier sitting there silently with no mist coming out. Whether you have the TotalComfort Cool Mist, the UHE-CMTF, the UHE-CM18, or one of the popular Costco 2-gallon models, Homedics humidifier troubleshooting comes down to a handful of common problems that most owners run into eventually.

    I have helped friends, family, and readers work through these exact issues dozens of times. In most cases, the fix takes less than 15 minutes and costs nothing. This guide walks you through every major problem, from no mist output and stubborn red lights to leaks, strange noises, and power failures, with step-by-step solutions for each one.

    We will also cover proper cleaning techniques, water type recommendations, and when it makes sense to contact Homedics support or use your warranty instead of continuing to tinker.

    Quick Diagnosis Checklist for Your Homedics Humidifier

    Before diving into detailed troubleshooting, run through this quick checklist to pinpoint your specific issue. Match your symptom to the problem category below, then jump to the corresponding section for the full fix.

    Symptom: No mist or very low mist output

    • Water tank may not be seated properly on the base
    • Ultrasonic membrane could be coated with mineral buildup
    • Float switch might be stuck in the up position
    • Water level may be too low to activate the transducer
    • Jump to the No Mist section below

    Symptom: Red light or blinking clean indicator

    • Clean reminder has been triggered and needs a manual reset
    • Mineral deposits detected on the ultrasonic membrane
    • Sensor may be dirty or malfunctioning
    • Jump to the Red Light section below

    Symptom: Unit will not power on at all

    • Power cord may be loose or outlet may be dead
    • Internal fuse or circuit board could have failed
    • Water may have reached internal electronics
    • Jump to the Power Issues section below

    Symptom: Water leaking from the base or tank

    • Tank may have a crack or the seal may be damaged
    • Oil tray could be misaligned (UHE-CM18 models)
    • Water tank not properly seated on the base
    • Jump to the Leaking and Noises section below

    Homedics Humidifier Not Producing Mist – Step-by-Step Fix

    No mist output is by far the most common issue Homedics owners face. The good news is that it is also one of the easiest to fix. Here is how I approach it, starting with the simplest solution and working toward more involved fixes.

    Step 1: Reseat the Water Tank

    This sounds obvious, but it solves the problem about 40% of the time. Lift the water tank off the base, check that the valve at the bottom is not stuck closed, and set it back down firmly. You should feel it click or settle into place. Many Reddit users report that their brand new Homedics humidifier was not producing mist simply because the tank was not seated correctly.

    Step 2: Check the Water Level

    Most Homedics ultrasonic models will not produce mist if the water level drops below the minimum line. The float switch inside detects low water and shuts off the transducer as a safety measure. Fill the tank to the recommended level and try again.

    Step 3: Inspect the Ultrasonic Membrane

    The ultrasonic membrane (also called the transducer) is the small metal disc at the bottom of the water reservoir. This is the component that vibrates water into mist. If you see a white, chalky film on it, that is mineral buildup from hard water, and it will completely block mist production.

    To clean it: unplug the unit, empty all water, and use a cotton swab dipped in white vinegar to gently wipe the membrane surface. Do not scrub hard or use abrasive materials, as the membrane is delicate. For stubborn buildup, pour a small amount of undiluted white vinegar directly onto the membrane and let it sit for 10 to 15 minutes before wiping.

    Step 4: Check the Float Switch

    The float switch is a small plastic piece that moves up and down with the water level. If it gets stuck in the up position, the humidifier thinks the tank is full and may behave erratically. Reach into the base and gently move the float up and down to free it. Some users have reported that mineral deposits cause the float to seize, so a quick vinegar rinse of the float mechanism can help.

    Step 5: Model-Specific Checks

    For the UHE-CMTF (TotalComfort series), check that the mist nozzle on top is not blocked. Unscrew it and rinse under warm water. For the UHE-CM18, make sure the essential oil tray is properly aligned, as a misaligned tray can block the mist pathway. For Costco 2-gallon models, verify that both tank caps are tightened securely, as loose caps prevent proper water flow to the base.

    How to Reset Red Light and Clean Indicator on Homedics Humidifier

    The red light on your Homedics humidifier is usually the clean reminder indicator, telling you it is time to descale and disinfect the unit. Sometimes it also signals that the sensor has detected excessive mineral buildup on the membrane. Here is exactly how to deal with it.

    What the Red Light Means

    On most Homedics TotalComfort and Ultrasonic models, a solid red light or a blinking clean indicator means the unit has tracked usage hours and determined it is time for cleaning. It is not necessarily a sign that something is broken. However, if the light persists after you have thoroughly cleaned the unit, the membrane sensor may still be detecting residue.

    Reset Procedure

    Follow these steps to reset the clean indicator:

    1. Unplug the humidifier and perform a full cleaning (see the Cleaning section below)
    2. Plug the unit back in
    3. Hold down the night light button for 3 to 5 seconds until the clean light turns off
    4. If that does not work, try holding the power button and night light button simultaneously for 5 seconds
    5. For some Costco models, hold the mist level button for 5 seconds instead

    Multiple Reddit users on r/Costco confirm that holding the night light button is the most reliable reset method across different Homedics models.

    If the Clean Light Still Will Not Turn Off

    If you have cleaned the unit thoroughly and the light remains on, the ultrasonic membrane sensor may still be detecting mineral film. Repeat the vinegar cleaning process, paying extra attention to the membrane area. Soak a paper towel in vinegar and lay it directly on the membrane for 20 minutes. Rinse thoroughly with distilled water and attempt the reset again.

    In rare cases, the sensor itself may be faulty. If your humidifier is still under warranty, contact Homedics customer support for a replacement.

    Homedics Humidifier Won’t Turn On – Power Troubleshooting

    When your Homedics humidifier shows absolutely no signs of life, no lights, no sounds, nothing, the problem is power-related. Here is how to narrow it down.

    Check the Basics First

    1. Try a different wall outlet. Plug a phone charger into the same outlet to confirm it works
    2. Inspect the power cord for visible damage, kinks, or fraying
    3. Make sure the power adapter is fully inserted into the back of the unit
    4. Check your circuit breaker if the outlet is on a GFCI circuit (common in bathrooms)

    Power Cycle the Unit

    Disconnect the humidifier from the wall outlet and leave it unplugged for at least 15 minutes. This allows any internal capacitors to fully discharge and can reset the control board. After 15 minutes, hold the power button down for 30 seconds while the unit is still unplugged. Then plug it back in and try powering on.

    This power cycle method was recommended by technicians on JustAnswer and resolves many cases where the control board has entered a locked state.

    Internal Hardware Failure

    If the unit still will not turn on after trying different outlets and power cycling, the issue is likely an internal component failure. The most common culprits are a blown internal fuse, a failed control board, or water damage to internal electronics. These problems are not user-serviceable. If your unit is under warranty, file a claim with Homedics. If it is out of warranty and more than 2 years old, replacement is usually more practical than repair.

    Fixing Leaks and Strange Noises in Your Homedics Humidifier

    Leaks and unusual sounds are frustrating, but they usually point to straightforward mechanical issues. Let us break them down separately.

    Water Leaking from the Base

    Start by checking whether the water tank has a crack. Fill the tank with water, dry the outside completely, and set it on a dry paper towel on a flat counter. Check back in 30 minutes. If the towel is wet, your tank has a crack that may be nearly invisible to the eye.

    If the tank is intact, the leak is likely coming from the seal between the tank and the base. Remove the tank and inspect the rubber gasket or O-ring at the bottom valve. If it is cracked, brittle, or missing, that is your leak source. Replacement gaskets are sometimes available through Homedics customer support.

    For UHE-CM18 owners, check the essential oil tray. If it is misaligned or not fully inserted, water can escape through the oil tray opening. Remove and reseat the tray firmly.

    Strange Noises: Humming, Buzzing, or Vibrating

    A loud humming or vibrating noise usually means something is loose or obstructing the fan. Unplug the unit and check the fan area for debris, mineral deposits, or foreign objects. A cotton swab can remove buildup around the fan blades.

    If the noise is more of a gurgling sound, that is often normal water flow through the system. However, excessive gurgling can indicate that the water tank valve is not opening fully, causing air to be sucked in. Try reseating the tank.

    A high-pitched whining sound from the ultrasonic membrane area can indicate that the transducer is failing. If cleaning the membrane does not resolve the noise, the transducer may need replacement.

    Homedics Humidifier Cleaning and Maintenance Guide

    Regular cleaning is the single most important thing you can do to prevent problems. Most of the issues covered in this guide, no mist, red lights, strange noises, and even health concerns, can be traced back to poor maintenance. Here is the complete cleaning routine I recommend.

    Weekly Rinse and Wipe

    Once a week, empty the water tank completely, rinse it with warm water, and wipe down the base with a damp cloth. This prevents biofilm from gaining a foothold and keeps mineral buildup manageable.

    Deep Cleaning with Vinegar (Every 2 Weeks)

    Follow this process for a thorough descaling and disinfection:

    1. Unplug the humidifier and empty all water from the tank and base
    2. Mix a 50/50 solution of white vinegar and warm water
    3. Pour the solution into the water tank, close the cap, and gently shake for 30 seconds
    4. Let the vinegar solution sit in the tank for 15 to 20 minutes to dissolve mineral deposits
    5. Pour some of the solution into the base so it covers the ultrasonic membrane
    6. Use a soft brush or cotton swab to gently clean the membrane surface
    7. Empty all vinegar solution and rinse the tank and base thoroughly with clean water
    8. Wipe all surfaces dry with a clean cloth before reassembling

    Never use harsh chemicals, bleach at full concentration, or abrasive scrubbers on your Homedics humidifier. These can damage the ultrasonic membrane permanently.

    Preventing Biofilm and Mold

    Biofilm is a slimy layer of bacteria that can grow inside humidifiers when water sits stagnant. It is a legitimate health concern. Forum users on r/CleaningTips have shared stories of respiratory issues linked to running humidifiers with biofilm growth.

    To prevent biofilm: never let water sit in the tank for more than 24 hours without running the unit. If you will not use the humidifier for a few days, empty and dry it completely. During weekly cleaning, add a tablespoon of hydrogen peroxide to the tank water as a mild disinfectant.

    Water Type: Distilled vs Tap Water

    This makes a bigger difference than most people realize. Hard tap water contains calcium and magnesium minerals that coat the ultrasonic membrane, cause white dust to settle on your furniture, and trigger the clean indicator light much faster.

    Distilled water has these minerals removed and will dramatically extend the time between cleanings while preventing white dust. Many negative reviews of Homedics humidifiers trace back to users running tap water when the manual specifically recommends distilled. If distilled water is not practical, filtered water is a reasonable middle ground, though you will still need to clean more frequently.

    Recommended Cleaning Schedule

    • Daily: Check water level, top off as needed, avoid letting water sit stagnant for more than 24 hours
    • Weekly: Empty tank, rinse thoroughly, wipe down base and membrane area
    • Every 2 weeks: Full vinegar deep clean following the steps above
    • Monthly: Inspect all seals, check for cracks in tank, verify float switch moves freely
    • End of season: Deep clean, dry completely, store in original packaging if possible

    When to Replace vs Repair

    Based on forum reports and user experiences, Homedics humidifiers typically last 1 to 3 years with regular maintenance. Units that run on distilled water and are cleaned on schedule tend to last closer to the 3-year mark. If your humidifier is over 2 years old and experiencing recurring issues, it may be approaching the end of its practical lifespan.

    If you purchased your Homedics humidifier from Costco, many members report that Costco return policy covers satisfaction well beyond the standard manufacturer warranty. It is worth checking your options before spending time on extensive repairs.

    FAQ

    How do you reset a Homedics humidifier?

    To reset a Homedics humidifier, unplug the unit for 15 minutes, then plug it back in. For the clean indicator reset, hold down the night light button for 3 to 5 seconds until the light turns off. On some models, you may need to hold the power button and night light button simultaneously for 5 seconds. For Costco-specific models, try holding the mist level button for 5 seconds.

    Why is there no mist coming out of my Homedics humidifier?

    The most common reasons are a poorly seated water tank, mineral buildup on the ultrasonic membrane, a stuck float switch, or low water level. Start by removing and reseating the tank firmly. Then check the membrane at the bottom of the base for white chalky residue and clean it with vinegar on a cotton swab if needed. Also verify the float switch moves freely up and down.

    Why is my humidifier not blowing mist?

    If the humidifier powers on but produces no mist, the ultrasonic membrane is likely blocked by mineral deposits or the fan is obstructed. Clean the membrane with white vinegar, check the fan area for debris, and ensure the water tank is seated properly. On warm mist models, the heating element may have failed, which requires warranty service.

    How do I reset a humidifier?

    The general reset process for most humidifiers is to unplug the unit for 15 minutes, which allows the internal electronics to fully reset. After plugging it back in, hold the power button for 30 seconds before releasing. For clean indicator resets specifically, hold the night light or mist level button for 5 seconds.

    How long does a Homedics humidifier last?

    With regular maintenance and distilled water use, most Homedics humidifiers last 2 to 3 years. Users who run tap water and clean infrequently typically see failures within 1 to 2 years. The ultrasonic membrane is usually the first component to degrade, followed by the float switch mechanism and internal seals.

    Why did my humidifier suddenly stop working?

    Sudden failure is usually caused by an electrical issue. Try a different wall outlet first. Then unplug the unit for 15 minutes and power cycle it by holding the power button for 30 seconds while unplugged. If it still does not respond, the internal fuse or control board may have failed, especially if the unit was recently cleaned and water contacted internal electronics.

    How to reset clean button on Homedics humidifier?

    To reset the clean button on a Homedics humidifier, first clean the unit thoroughly with a vinegar solution. Then plug the unit in and hold the night light button for 3 to 5 seconds. This works on most TotalComfort, UHE-CMTF, and UHE-CM18 models. If the light persists, repeat the vinegar cleaning with extra attention to the ultrasonic membrane, then attempt the reset again.

    Conclusion

    Most Homedics humidifier troubleshooting comes down to three things: proper water tank seating, a clean ultrasonic membrane, and using distilled water to slow mineral buildup. If you work through the steps in this guide, you should be able to resolve the majority of common issues in under 20 minutes without any special tools or replacement parts.

    For problems that persist after thorough troubleshooting, reach out to Homedics customer support directly through their website or check your warranty status. If you purchased from Costco, take advantage of their generous return policy before spending money on repairs for a unit that may simply be at the end of its lifespan.

    The best long-term strategy is consistent maintenance. A quick weekly rinse and a biweekly vinegar cleaning will keep your Homedics humidifier running smoothly for years and help you avoid most of the problems covered in this guide entirely.