
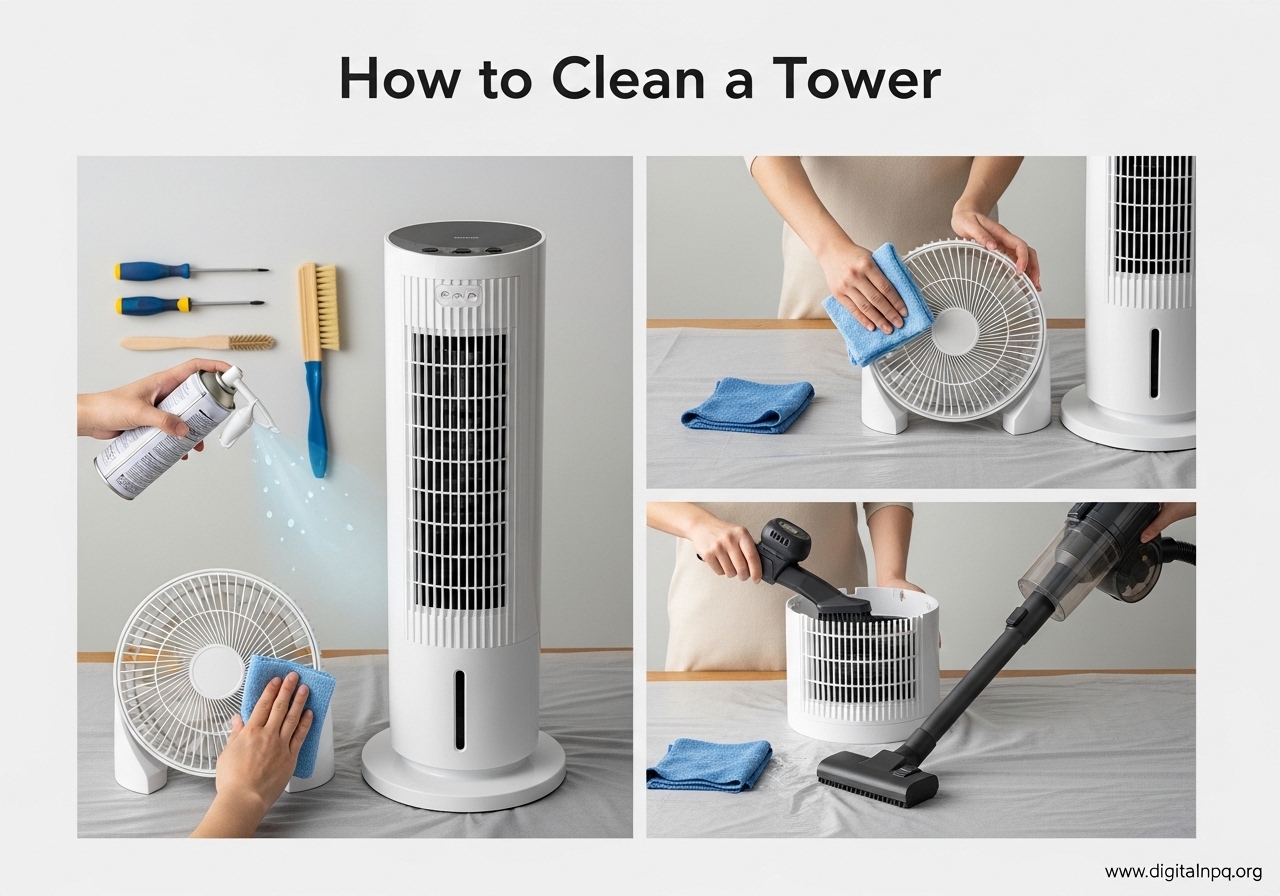
If you have ever noticed your tower fan blowing less air than it used to, dust buildup is almost certainly the culprit. Learning how to clean tower fan units properly can restore airflow, cut down on allergens in your home, and add years to the life of your appliance. I have cleaned dozens of tower fans over the years, from basic models to premium units with complex grilles, and the process is simpler than most people think.
This guide walks you through every step, from quick surface wipes to deep interior cleaning, including methods for fans that cannot be taken apart. I will also share the plastic bag cleaning hack that Reddit users swear by, brand-specific tips for popular models, and a maintenance schedule to keep dust from coming back so fast.
Why You Need to Clean Your Tower Fan Regularly
A dirty tower fan does more than just look bad. Dust and pet hair accumulate on the internal blades and vent openings over time, creating a thick layer that chokes off airflow. When I pulled apart a fan that had not been cleaned in eight months, the cylindrical blade assembly was so caked with dust that the motor was straining to spin at its lowest speed.
That strain leads to real problems. A fan working harder than it should runs hotter, uses more electricity, and makes more noise. In extreme cases, the dust buildup can cause the motor to overheat and fail entirely. Beyond the mechanical damage, a dusty tower fan recirculates particles back into your air, which is especially bad news for anyone with allergies or asthma.
Here is what regular tower fan maintenance prevents:
- Reduced airflow that makes the fan feel weak and ineffective
- Musty or burning odors caused by dust heating up on the motor housing
- Increased energy consumption as the motor compensates for restricted blades
- Premature motor failure from prolonged overheating
- Allergen recirculation affecting indoor air quality
Cleaning your tower fan every few weeks takes about 15 minutes for a basic session and maybe 30 minutes for a deep clean. That small time investment pays off in better performance, lower energy bills, and a fan that lasts years longer.
Signs Your Tower Fan Needs Cleaning Right Now
Not sure if it is time to clean your fan? Here are the telltale signs I look for:
- Visible dust on the exterior grilles – If you can see gray buildup on the vent slats, the inside is far worse
- Weaker airflow than usual – Compare the output at the highest setting to how it felt when new
- Rattling or buzzing noise – Dust clumps on blades throw off the balance, creating vibrations
- Burning or dusty smell when running – Heated dust gives off a distinct warm, dirty odor
- The fan wobbles or vibrates on flat surfaces – Uneven dust distribution on the blade assembly causes imbalance
- Pet hair visible in the vent openings – Pet fur is one of the worst airflow blockers
If you checked even one of these boxes, it is time to clean your tower fan. The good news is that most of the process requires nothing more than household items you probably already have.
Tools and Supplies You Will Need
Gathering everything before you start makes the job go much faster. Here is the complete list I use when cleaning a tower fan:
- Microfiber cloth – For wiping the exterior housing and base
- Vacuum with brush attachment – The soft bristle brush pulls dust from vents without scratching
- Compressed air can – For blowing dust out of tight internal spaces
- Cotton swabs (Q-tips) – Perfect for cleaning narrow vent ridges and corners
- Pipe cleaners – Great for threading through tight slats and the center column
- Bottle brush – Fits inside the cylindrical housing for deep cleaning
- Mild dish soap and warm water – For washing removable parts
- Phillips head screwdriver – If your fan model allows disassembly
- Soft-bristled paintbrush – An alternative to the vacuum brush for delicate areas
- Clean towel – For drying all parts before reassembly
You do not need every single item on this list for a quick clean. The microfiber cloth, vacuum, and compressed air will handle most of the work. The other tools come into play during a deep cleaning session or for fans with stubborn buildup in hard-to-reach areas.
How to Clean Tower Fan: Step-by-Step Guide
This is the complete tower fan cleaning process I have refined over years of maintaining my own fans and helping friends tackle theirs. Follow these seven steps in order for the best results.
Step 1: Unplug and Prepare Your Workspace
Always unplug your tower fan before doing anything else. This is non-negotiable. You are about to work near the motor housing and internal electrical components, so cutting the power eliminates any risk of shock or accidental activation.
Move the fan to a well-ventilated area, ideally outside or in a garage. Cleaning releases a lot of dust, and you do not want that settling back into your living space. If you must clean it indoors, lay down a large towel or plastic sheet underneath to catch debris. I also recommend wearing a dust mask if you have allergies or sensitivity to dust.
Step 2: Wipe Down the Exterior
Start with the outside of the fan. Use a dry microfiber cloth to wipe down the entire housing, paying extra attention to the top edge, the control panel area, and the base where dust settles most. For stubborn grime, slightly dampen the cloth with water or a mild all-purpose cleaner.
Never spray liquid directly onto the fan. Apply it to the cloth first, then wipe. Liquid seeping into the vent openings can damage the motor or create a safety hazard. Work from top to bottom so you are not pushing dust back onto areas you already cleaned.
For the narrow ridges and grooves on the housing, wrap the microfiber cloth around a butter knife or ruler to reach into the crevices. Cotton swabs also work well for tight spots around the control buttons and the seam where the housing panels meet.
Step 3: Clean the Vents and Grilles
The vent openings are where most visible dust collects, and cleaning them makes an immediate difference in airflow. Attach the soft brush tool to your vacuum and run it slowly over every vent slat, top to bottom. The brush bristles loosen the dust while the suction pulls it away.
For the narrow gaps between vent slats that the vacuum cannot fully reach, use pipe cleaners or cotton swabs. Thread a pipe cleaner through each row of vents and gently pull it through to grab embedded dust. This takes a few extra minutes but is one of the most satisfying parts of the cleaning process because you can see the difference immediately.
If your fan has a removable rear grille, take it off for separate cleaning. Most grilles snap or screw off. Soak it in warm water with a few drops of dish soap for 10 minutes, then scrub gently with a soft brush, rinse thoroughly, and set it aside to dry completely.
Step 4: Deep Clean the Interior (Disassemblable Fans)
Some tower fans can be partially or fully disassembled for thorough interior cleaning. If your model has screws on the back panel, removing them gives you access to the cylindrical blade assembly and motor housing. Check your owner’s manual first, because the disassembly process varies significantly between brands.
Once the housing is open, use compressed air to blow dust off the blades from multiple angles. Hold the can about six inches away and use short bursts rather than a continuous stream. For thick dust clumps that refuse to budge, a bottle brush works wonders on the cylindrical blade surfaces. Gently scrub each blade section, then blow the loosened dust away with another round of compressed air.
If the blades are removable, take them out and wash them in the sink with warm soapy water. A bottle brush helps clean the curved surfaces inside the blade housing. Make sure every part is completely dry before you put anything back together. Even a small amount of moisture near the motor can cause problems.
I have found that pipe cleaners are incredibly useful for cleaning the center column where the blade assembly connects to the base. Dust loves to accumulate in that gap, and a pipe cleaner threaded through the opening pulls it out cleanly.
Step 5: Clean Without Disassembling (Compressed Air Method)
What if your tower fan does not come apart? Many budget and mid-range models have sealed housings with no accessible screws. For these, the compressed air method is your best option, though it requires more patience.
First, angle the fan so the vents face downward. This lets gravity help pull the dislodged dust out instead of pushing it deeper inside. Insert the compressed air straw into the vent openings at different angles and fire short bursts throughout the interior. Move systematically from the top of the fan to the bottom, working your way around all sides.
After blowing compressed air through every vent opening, vacuum the exterior again to catch the dust that was pushed out. You may need to repeat this cycle two or three times for heavily soiled fans. An air compressor with a narrow nozzle attachment works even better than canned air if you have access to one. Reddit users report that this is one of the most effective approaches for non-disassemblable models.
One important caveat: compressed air can sometimes push dust deeper into the motor housing if you are not careful. Always blow air outward through the vents rather than inward, and avoid spraying directly at the motor housing area.
Step 6: The Plastic Bag Hack for Quick Cleaning
This method circulated widely on Reddit and Facebook cleaning communities, and it is genuinely effective for a quick refresh between deep cleanings. The idea is simple: grab a large plastic bag, spray the inside of the bag with a mix of water and a tiny amount of dish soap, then place the bag over the top of the fan and secure it around the housing with tape or a rubber band.
Turn the fan on its lowest speed for about 30 seconds. The soap spray inside the bag loosens the dust from the vent surfaces, and the airflow pulls the dust into the bag instead of back into the room. When you remove the bag, you will see a surprising amount of dust collected inside.
This hack is not a replacement for a proper deep clean, but it works great as a monthly maintenance step. It takes less than two minutes and keeps the dust buildup manageable so your deep cleaning sessions are easier. I use this method every few weeks on my office tower fan and it has made a noticeable difference in how often I need to do a full cleaning.
Step 7: Dry and Reassemble
Before you reassemble any parts or plug the fan back in, every component must be completely dry. This is the step where rushing causes the most problems. Set washed parts on a clean towel and let them air dry for at least an hour. If you used only a damp cloth on the exterior and compressed air inside, 15 to 20 minutes should be sufficient.
For faster drying, you can use a hair dryer on its cool setting. Never use hot air, as it can warp plastic components. Check for moisture in the vent openings and around the motor housing especially carefully.
Reassembly is the reverse of the disassembly process. Snap or screw the rear grille back into place, replace any housing panels you removed, and make sure all screws are tight. Give the fan a gentle shake to confirm nothing rattles before plugging it back in. Turn it on the lowest setting first and listen for any unusual sounds before ramping up to full speed.
Brand-Specific Cleaning Tips
Not all tower fans are built the same way, and knowing the quirks of your specific brand can save you time and frustration.
Lasko Tower Fans
Lasko is one of the most common tower fan brands, and most models feature a removable rear grille held in place by clips or a few screws. The grille comes off easily, giving you access to the blade assembly for compressed air cleaning. Some Lasko models have a built-in ionizer, which attracts even more dust than standard fans, so you may need to clean them more frequently. Avoid using water anywhere near the ionizer component.
Honeywell Tower Fans
Honeywell fans tend to have tighter vent spacing than other brands, which means cotton swabs and pipe cleaners are essential tools for this model. The narrow slats trap dust more aggressively but are harder to clean with a vacuum alone. Some Honeywell models include a removable filter near the air intake at the base. Check for this filter and wash it separately if your model has one. These fans also tend to have more electronics in the control panel area, so be extra careful with moisture near the top of the unit.
Dreo Tower Fans
Dreo designs several of their newer tower fan models with easy cleaning in mind. Some Dreo models feature detachable front grilles that pop off without tools, making interior access significantly easier. If you own a Dreo fan with this feature, take advantage of it for regular deep cleaning. Dreo fans also tend to have wider vent spacing, which makes the vacuum brush attachment more effective on the exterior. Their oscillation mechanism is sealed, so avoid spraying compressed air directly into the rotating base joint.
Common Mistakes to Avoid When Cleaning a Tower Fan
After years of cleaning tower fans, I have seen every mistake in the book. These are the ones that cause the most damage:
- Spraying water or cleaner directly on the fan – Liquid always finds its way to the motor. Apply cleaning solutions to your cloth, never to the fan itself.
- Not waiting for parts to dry completely – Even a few drops of water on electrical components can cause shorts or corrosion over time.
- Forcing disassembly on sealed models – If there are no visible screws or clips, prying the housing open will crack the plastic and possibly damage internal wiring.
- Using harsh chemical cleaners – Bleach, ammonia, and abrasive cleaners can degrade the plastic housing and leave harmful residues that get blown into the air.
- Vacuuming without a brush attachment – The bare vacuum nozzle can scratch the plastic vents and is less effective at pulling dust from narrow gaps.
- Skipping the drying step – Reassembling damp parts is the fastest path to mold growth inside your fan.
The biggest mistake of all is simply not cleaning the fan at all. A tower fan that runs continuously without maintenance will lose performance gradually enough that you might not notice until it is barely moving air. Regular attention keeps it running like new.
How to Prevent Dust Buildup in Your Tower Fan
The best cleaning job is the one you do not have to do. A few proactive habits can dramatically reduce how often your tower fan needs a deep clean:
- Vacuum the exterior weekly – A quick pass with the brush attachment takes 30 seconds and prevents surface dust from working its way inside.
- Keep the fan off the floor when possible – Floor-level placement exposes the intake to carpet fibers, pet hair, and settled dust. A low table or stand helps.
- Run an air purifier in the same room – Cleaner ambient air means less dust gets pulled through the fan in the first place.
- Use the plastic bag hack monthly – This quick method keeps buildup from reaching the point where a full deep clean is necessary.
- Store the fan properly in winter – Put it in a bag or cover it during the off-season so it does not collect months of dust while sitting idle.
- Position away from pet resting areas – Pet hair is one of the worst offenders for clogging fan vents. A few feet of distance makes a real difference.
I started following these prevention steps with my own fans two years ago, and the difference is striking. My bedroom tower fan used to need deep cleaning every month. Now I can go two to three months between deep cleaning sessions, and the airflow stays consistent the entire time.
How Often Should You Clean Your Tower Fan?
The right cleaning frequency depends on how much you use the fan and the conditions in your home. Here is the schedule I recommend:
- Light use (a few hours per day, low dust environment) – Quick exterior wipe every 3 to 4 weeks, deep clean every 2 to 3 months
- Moderate use (most of the day, average household dust) – Quick exterior wipe every 2 weeks, deep clean every 1 to 2 months
- Heavy use (running constantly, pets, or allergy sufferers) – Quick exterior wipe weekly, deep clean every month
During peak summer months when the fan runs more often, shift to the next higher frequency. The same goes for spring, when pollen counts are highest. If you notice any of the warning signs I mentioned earlier, do not wait for the scheduled cleaning. Take care of it right away to prevent strain on the motor.
FAQ
How do you clean the inside of a Lasko tower fan?
Remove the rear grille by unclipping or unscrewing it. Use compressed air to blow dust off the blade assembly from multiple angles. For stubborn dust, use a bottle brush on the cylindrical blades and pipe cleaners for the center column. Vacuum the loosened debris from the open back. Wash the grille in warm soapy water, dry it completely, and reattach.
Can I wash my tower fan with water?
You can wash removable parts like grilles and blade assemblies in warm soapy water, but never spray water directly on the fan body or submerge the unit. The motor and electrical components will be damaged by water exposure. Always use a damp cloth on the exterior and compressed air for interior cleaning of sealed units.
Do tower fans come apart for cleaning?
Some do and some do not. Models with screws on the back panel can be partially disassembled to access the blade assembly. Many Lasko and Dreo fans have removable grilles. However, budget models with sealed housings cannot be taken apart safely. For sealed units, use the compressed air method or the plastic bag hack described in this guide.
How do you clean a tower fan without taking it apart?
Use compressed air to blow dust out through the vent openings while tilting the fan so debris falls out. Vacuum the exterior vents with a brush attachment, and use cotton swabs or pipe cleaners for narrow slats. The plastic bag hack, where you spray the inside of a bag with soapy water and place it over the running fan for 30 seconds, is also effective for quick cleaning.
How often should a tower fan be cleaned?
For moderate daily use, wipe the exterior every 2 weeks and do a deep clean every 1 to 2 months. Heavy users, pet owners, and allergy sufferers should wipe the exterior weekly and deep clean monthly. Light users can stretch exterior cleaning to every 3 to 4 weeks with deep cleaning every 2 to 3 months.
Are tower fans harder to clean than other fan types?
Tower fans are moderately harder to clean than desk or box fans because of their narrow vent spacing and sealed cylindrical design. However, they are easier to maintain than ceiling fans. The key is regular light cleaning to prevent heavy buildup that requires disassembly. Using pipe cleaners, cotton swabs, and compressed air makes the job much easier.
Do fans spread dust mites around the room?
Yes, a dusty fan can blow dust mites, pet dander, pollen, and other allergens back into the air. This is one of the strongest reasons to clean your tower fan regularly, especially if anyone in your home has allergies or asthma. A clean fan with good airflow actually helps reduce airborne particles when combined with proper ventilation.
Final Thoughts
Cleaning a tower fan does not require special skills or expensive tools. A microfiber cloth, a vacuum with a brush attachment, and a can of compressed air handle 90 percent of the job. The remaining 10 percent, deep cleaning the interior, comes down to knowing whether your fan can be disassembled and having the right tools like pipe cleaners and a bottle brush ready.
The most important takeaway from this guide on how to clean tower fan units is consistency. A quick wipe every couple of weeks prevents the heavy buildup that makes deep cleaning difficult. Pair that with the plastic bag hack for a monthly refresh, and your tower fan will keep delivering strong, clean airflow all summer long.