
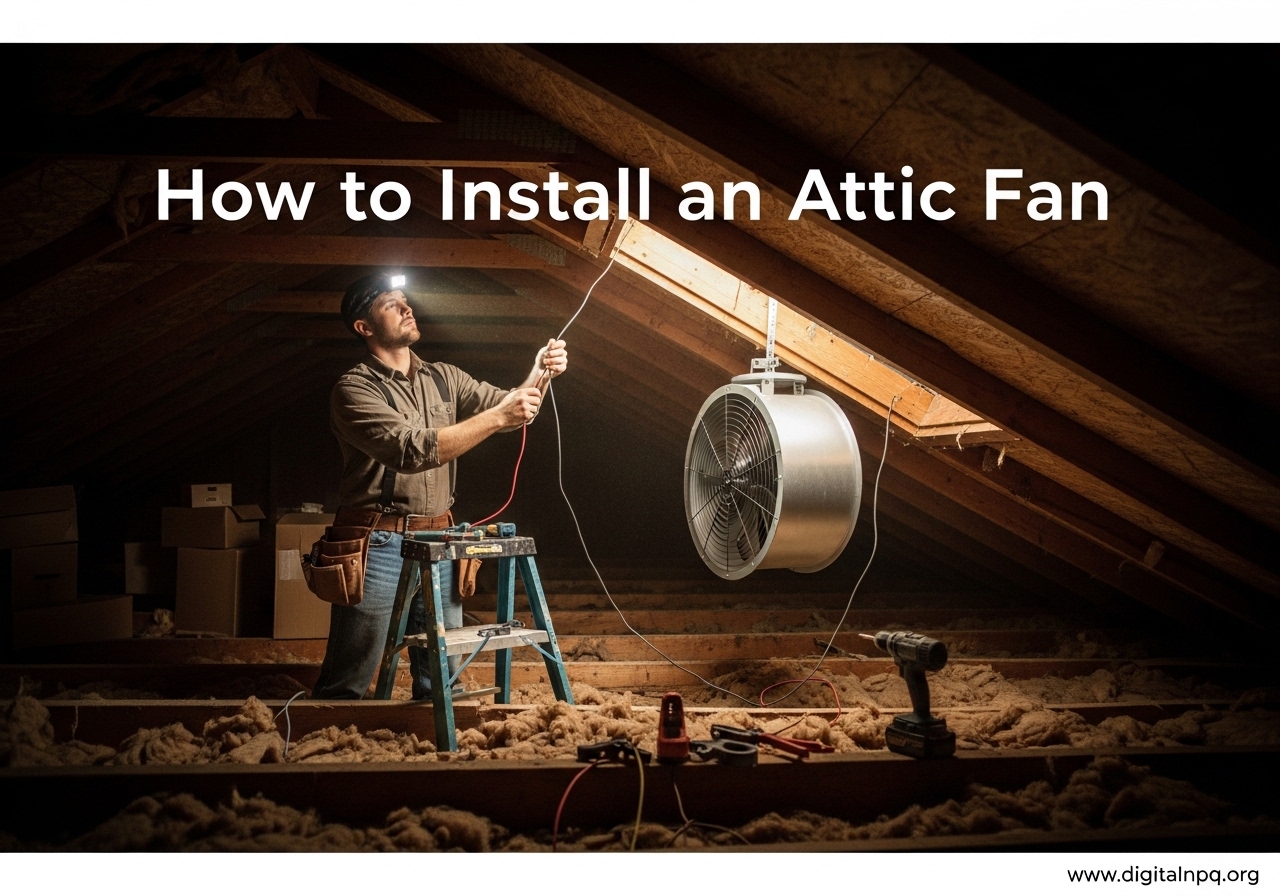
If your upstairs rooms feel like a sauna every summer and your energy bills keep climbing, your attic might be the silent culprit. Learning how to install an attic fan is one of the most practical weekend projects a homeowner can tackle, and it can shave 15 to 30 percent off your cooling costs. I have helped friends and family install over a dozen attic fans over the years, and the process is more straightforward than most people expect.
An attic fan works by pulling hot, stagnant air out of your attic space while drawing cooler outside air in through intake vents. Without active ventilation, attic temperatures can soar above 150 degrees Fahrenheit on a hot summer day. That trapped heat radiates down through your ceiling and walls, forcing your air conditioner to work overtime just to maintain a comfortable indoor temperature. Beyond comfort, an attic fan also protects your roof shingles from premature aging caused by excessive heat and prevents moisture buildup that leads to mold growth and structural wood rot.
This guide covers everything you need to know about attic fan installation in 2026. I will walk you through choosing the right fan type for your specific home, calculating the correct size using a simple CFM formula, gathering all necessary tools, and completing both roof-mount and gable-mount installations step by step. You will also find detailed wiring instructions, thermostat setup guidance, important safety precautions, and a full maintenance schedule to keep your fan running efficiently for years to come.
Whether you are a seasoned DIYer looking to save on professional installation costs or a first-timer wanting to improve your home ventilation, this guide gives you the information you need to get the job done right the first time.
Types of Attic Fans: Which One Is Right for You
Before you start measuring and cutting, you need to decide which type of attic fan suits your home and skill level. The two main mounting styles are roof-mount and gable-mount, and each has distinct advantages and installation requirements. You also need to choose between electric and solar power sources. Understanding these differences upfront will save you time, money, and frustration later on.
Roof-Mount Attic Fans
Roof-mount fans install directly through your roof deck, typically near the ridge where hot air accumulates. They sit on top of your shingles with a flange that gets flashed into the surrounding roofing material to create a waterproof seal. Because they are positioned at the highest point of the attic, they excel at exhausting the hottest air first, which is exactly where heat buildup is most intense. I prefer roof-mount fans for homes without gable vents because they create a direct vertical exhaust path with maximum efficiency.
The main drawback is that installation requires cutting a hole through your roof surface, which means working on a ladder at height and carefully removing and replacing shingles. If the flashing is not sealed properly, you risk a roof leak that could damage your ceiling and insulation. Roof-mount fans are also more visible from the street, though many modern low-profile models blend in well with standard roof vents.
Roof-mount fans work best for homes with open attic spaces where air can flow freely to the fan. If your attic has many cross braces, ductwork, or framed-in storage areas that block airflow, a roof-mount fan may struggle to pull air from the far ends of the space.
Gable-Mount Attic Fans
Gable-mount fans attach to the vertical wall at one end of your attic, typically behind or replacing existing louvered vents. If your home already has a gable vent opening, installation is much easier because you are not penetrating the roof surface at all. The fan mounts to a plywood or metal frame that screws directly into the wall studs, making this the safer and more approachable option for many DIYers.
Gable-mount fans are ideal for homeowners who want to avoid roof work entirely. They are completely hidden from the exterior and easier to service or replace because you can access them entirely from inside the attic without going on the roof. The downside is that they rely on a clear, unobstructed path from the gable end to pull air across the entire attic, so they may be less effective in long, narrow attics or attics with many obstructions.
For gable-mount fans to work well, the opposing end of the attic needs adequate intake vents. Without balanced intake on the far side, the fan simply recirculates the same air without effectively cooling the entire space. I always check the full attic layout before recommending a gable-mount installation.
Solar-Powered vs Electric Attic Fans
Solar attic fans use a small photovoltaic panel to power the motor, which means zero operating cost and no electrical wiring to worry about. They are an attractive option for DIYers who want to avoid electrical work entirely, and they qualify for federal solar tax credits in many cases. However, solar fans typically produce lower CFM ratings than electric models, usually in the 800 to 1,200 CFM range, and they only run when the sun is shining directly on the panel.
Electric attic fans connect to your home electrical system, usually through a dedicated circuit or a nearby junction box in the attic. They deliver consistent, reliable airflow regardless of weather conditions or time of day and can be paired with a thermostat or humidistat for fully automatic operation. If you need maximum ventilation power and want the fan to run on cloudy days and during the evening when attic heat lingers, electric is the way to go.
Some newer models offer dual-power capability, using both a solar panel and an electrical connection. These give you the best of both worlds: free solar power during the day with electric backup when needed. Dual-power fans tend to cost more upfront but offer the most versatile operation throughout the year.
When choosing between solar and electric, consider your climate and attic access. In sunny regions like the Southwest, a solar fan may provide all the ventilation you need. In humid or overcast regions, an electric fan with a humidistat is usually the better investment for consistent moisture control.
How to Calculate the Right Fan Size (CFM Guide)
Sizing your attic fan correctly is one of the most important steps in the entire process, and it is a step many homeowners skip. An undersized fan will not move enough air to make a meaningful difference in attic temperature. An oversized fan can create negative pressure that pulls conditioned air out of your living space through ceiling gaps and around light fixtures. The good news is that calculating the right CFM is a simple formula anyone can use.
The CFM Formula Explained
CFM stands for cubic feet per minute, which measures how much air the fan can move. Start by measuring your attic floor area in square feet. Multiply that number by 0.7 to get your minimum CFM requirement. For example, if your attic is 1,500 square feet, you need a fan rated for at least 1,050 CFM (1,500 x 0.7 = 1,050). If your attic has a steep pitch, limited intake ventilation, or receives direct afternoon sun, round up to the next available size for extra capacity.
Here are a few quick reference calculations for common attic sizes:
- 1,000 sq ft attic = 700 CFM minimum
- 1,500 sq ft attic = 1,050 CFM minimum
- 2,000 sq ft attic = 1,400 CFM minimum
- 2,500 sq ft attic = 1,750 CFM minimum
- 3,000 sq ft attic = 2,100 CFM minimum
For attics larger than 3,000 square feet, consider installing two fans rather than one oversized unit. Two smaller fans placed at opposite ends of the attic provide more even air circulation than a single large fan. This dual-fan approach is especially effective in homes with complex rooflines or multiple attic sections separated by framing.
Intake Ventilation Requirements
Your attic fan can only pull in as much air as your intake vents allow. This is where many installations go wrong, and it is the most common reason attic fans underperform. The general rule is that you need at least 1 square foot of net free intake ventilation for every 300 square feet of attic floor area. This is known as the 1:300 rule, and it applies to most standard residential attics.
Without adequate intake vents, your fan will struggle to move air and may create negative pressure that draws conditioned air from your living space through gaps around light fixtures, plumbing penetrations, and the attic access hatch. Before buying a fan, check that you have sufficient soffit vents, ridge vents, or other intake openings to support the fan capacity. If your intake ventilation is lacking, add more soffit vents before installing the fan. I have seen several cases where a powerful fan was rendered completely useless because the homeowner skipped this critical step.
To check your intake ventilation, count your soffit vents and look up their net free area rating. Each standard 8-inch by 16-inch soffit vent typically provides about 64 square inches of net free area, which is roughly 0.44 square feet. Divide your total net free intake area by your attic square footage and compare it to the 1:300 ratio. If you come up short, add vents until you meet the requirement.
Tools and Materials You Will Need
Gathering everything before you start saves time and prevents frustrating mid-project trips to the hardware store. Here is the complete checklist I use for every attic fan installation, broken down by category so you can assemble your kit efficiently.
Power Tools
- Reciprocating saw with wood blade (for cutting through roof deck or gable wall)
- Cordless drill with Phillips and square-drive bits
- Hole saw or jigsaw (for pilot holes and wiring access through framing)
- Circle cutter or adjustable hole saw (matching fan diameter for gable installations)
Hand Tools
- Utility knife with extra blades (for cutting shingles and roofing felt)
- Tape measure, at least 25 feet long
- Flat pry bar (for removing shingles and nails)
- Caulking gun for roofing cement and silicone
- Wire strippers with built-in wire cutter
- Needle-nose pliers and wire crimpers
- Screwdrivers (both Phillips and flathead)
- Pencil or permanent marker for marking cut lines
- Flashlight or headlamp for attic visibility
- Non-contact voltage tester (essential for electrical safety)
- Chalk line for marking straight cuts
Materials and Supplies
- Roofing cement, at least two tubes for roof-mount installations
- Roofing nails (1-1/4 inch galvanized, one box)
- Deck screws (exterior rated, 1-1/2 inch and 2 inch)
- Aluminum flashing or galvanized step flashing (for roof-mount)
- Roofing felt paper (for patching underlayment)
- 14/2 NM electrical cable (for electric fans, length depends on run)
- Wire nuts sized for 14-gauge wire (yellow or red)
- Electrical tape (black, for wrapping connections)
- Metal junction box with cover plate
- Inline thermostat rated for fan amperage (if not included)
- 1/2-inch plywood sheet (for gable-mount frame construction)
- Silicone caulk, exterior grade, paintable
- Expanding foam sealant (for gaps around frame)
- Cable staples (for securing NM cable to framing)
- Safety glasses and heavy-duty work gloves
- Dust mask or N95 respirator (for insulation fibers)
I always buy a little extra of everything, especially roofing cement, screws, and wire nuts. Running out of materials halfway through an attic fan installation is frustrating and can lead to shortcuts that cause problems later.
Safety Precautions Before You Start
Working in an attic and on a roof involves real hazards that deserve serious attention. I cannot stress this enough: take the time to prepare properly and follow every safety step. A rushed installation is how accidents happen, and a trip to the emergency room will cost far more than hiring a professional. Here are the safety steps I follow on every single project without exception.
Electrical Safety
Before touching any wiring, shut off power at the main breaker panel. Do not just flip the switch for the attic circuit; verify the correct breaker by testing outlets and fixtures in the area. Use a non-contact voltage tester to confirm the circuit is dead before handling any wires. Touch the tester to each wire you plan to work with and verify the tester shows no voltage. Label the breaker with tape or a tag so nobody accidentally turns it back on while you are working.
If you discover any damaged wiring, corroded junction boxes, or aluminum wiring in your attic, stop and call a licensed electrician. These conditions require professional assessment and repair. It is absolutely worth the cost for the peace of mind that comes with knowing your electrical connections are safe and up to code.
Fall Protection and Roof Safety
If you are installing a roof-mount fan, schedule the work for a dry day with calm winds. Never work on a wet or frost-covered roof. Wear shoes with soft rubber soles for good traction, and avoid worn-out shoes that slip easily. Have someone hold the base of your ladder at all times, or use ladder stabilizers that hook over the ridge. Never work on a roof alone; always have a second person on the ground who can call for help if needed.
If your roof pitch is steeper than 6:12 (meaning the roof rises 6 inches for every 12 inches of horizontal run), consider hiring a professional roofer for the exterior portion of the installation. Steep roofs require specialized safety harnesses and fall-arrest equipment that most homeowners do not own.
Inside the attic, watch every step you take. Only walk on the ceiling joists or lay a portable board across them to create a temporary platform. Stepping between joists means stepping through your ceiling drywall, which is an expensive and potentially dangerous mistake. Wear a dust mask or respirator at all times because attic insulation fibers get airborne quickly and breathing them is harmful over time.
Building Code and Permit Requirements
Check with your local building department before starting any work. Most jurisdictions require an electrical permit for new wiring or circuit extensions, and some require a building permit for any roof penetration. Ignoring permit requirements can cause serious problems when you sell your home, file an insurance claim, or have your home inspected. A quick call to your building department takes five minutes and could save you major headaches later.
Some homeowners associations also have rules about visible roof modifications. If you live in an HOA community, check your architectural guidelines before choosing a roof-mount fan. Gable-mount fans are often preferred in HOA-regulated neighborhoods because they are not visible from the street.
When to Hire a Professional Instead
I am a strong advocate for DIY projects, but some situations genuinely call for professional help. Hire a licensed electrician if your home has aluminum wiring (common in homes built between 1965 and 1975), if you need to run a new circuit from your breaker panel, or if local code requires a licensed professional for any electrical work. Hire a professional roofer if your roof is steep, heavily damaged, covered with fragile materials like slate or clay tiles, or if you simply are not comfortable working at heights.
Professional attic fan installation typically runs between $300 and $700 for labor alone. While that is a meaningful cost, it is reasonable compared to the cost of repairing water damage from a botched roof penetration or fixing electrical problems from improper wiring. You can also split the work: handle the mechanical installation yourself and hire an electrician just for the wiring portion.
How to Install a Roof-Mount Attic Fan
Roof-mount installation is the most common method and the one I have done the most over the years. The process involves cutting a hole in your roof deck, installing flashing to keep water out, mounting the fan on top of the flashing, and sealing everything thoroughly. Follow these steps carefully, and spend extra time on the weatherproofing because that is what separates a lasting installation from one that leaks.
Step 1: Choose the Mounting Location
Pick a spot on the back side of your roof, near the ridge but at least 2 feet below the peak. The back side keeps the fan less visible from the street, which is important for curb appeal and HOA compliance. Position the fan between two rafters so the mounting flange has solid support underneath. Go into the attic first and verify that the chosen spot is clear of plumbing vents, HVAC ducts, electrical wiring, and any structural bracing.
Drive a long nail through the roof deck from inside the attic at your chosen location. This marker nail will poke through the shingles on the roof surface, giving you an exact reference point when you go outside. Push the nail all the way through so about 2 inches is visible above the shingles.
Step 2: Mark and Cut the Opening
Climb onto the roof and locate your marker nail. Center the fan housing over the nail and trace its outline onto the shingles with a permanent marker or chalk. Add approximately 1 inch of extra space around the traced line to accommodate the flashing flange. Use a utility knife to cut through the shingles and roofing felt along your outline, cutting deep enough to expose the roof deck underneath.
Switch to a reciprocating saw with a wood blade and carefully cut through the roof deck (plywood or OSB sheathing) along your marked line. Cut slowly and steadily to avoid damaging surrounding shingles. Remove the cut section of roof deck and pull out any nails or staples that are in the way. Clean up the edges so the hole is smooth, even, and exactly the right size for the fan housing to drop in.
Step 3: Remove Shingles Around the Cutout
Use a flat pry bar to carefully remove the shingles in a 12 to 18-inch border around the opening on the top and sides. You need this exposed area to slide the flashing under the existing shingle courses above the hole. Pry up the shingle tabs, remove the roofing nails underneath with the pry bar, and set the shingles aside carefully so you can re-nail them later. Remove nails from the shingles above the hole but leave the shingles themselves partially attached and folded back.
Be gentle during this step. Breaking or cracking shingles during removal means you will need to replace them, which adds time and cost. Work the pry bar slowly under each nail and lift rather than prying hard against the shingle surface.
Step 4: Install the Flashing
Slide the fan flange or a separate piece of aluminum flashing under the shingles above the opening. The top edge of the flashing should tuck at least 4 inches under the shingle course above to ensure water runs over the flashing and not under it. Nail the flashing down along the top and sides using galvanized roofing nails, spacing them about 3 inches apart.
Apply a generous bead of roofing cement under the top edge of the flashing and under each shingle that overlaps the flashing. Spread the cement with a putty knife to create an even, continuous seal. Make sure the bottom edge of the flashing sits on top of the shingles below the opening. This overlap is critical because it ensures water flows down and over the flashing, not underneath it.
Step 5: Mount the Fan
Set the attic fan into the prepared opening. Most fans have an integrated flange or base plate that sits on top of the flashing you just installed. Center the fan in the hole and verify that it sits level. Secure the fan to the roof deck using the provided screws or galvanized roofing nails through the flange holes. Drive fasteners through the bottom and sides of the flange.
Do not nail or screw through the top edge of the flange. Fasteners through the top create upward-facing holes that can catch and channel water under the flashing, even when sealed with roofing cement. This is a common mistake that leads to slow leaks over time.
Step 6: Seal Everything Thoroughly
Apply roofing cement liberally around the entire base of the fan where the flange meets the shingles. Cover all nail and screw heads with roofing cement to prevent water from seeping through the fastener holes. Re-attach the shingles you removed earlier, nailing them back into place over the flashing with galvanized roofing nails. Apply another generous bead of roofing cement under the top edge of the shingles where they overlap the fan flange.
This step is where I spend the most time on every installation. A thorough sealing job is the difference between a leak-free installation that lasts for years and a ceiling stain that appears six months from now. Do not rush the weatherproofing. If in doubt, add more roofing cement.
Step 7: Complete the Wiring
From inside the attic, connect the fan wiring following the detailed electrical instructions in the wiring section below. Run the power cable from the fan motor down to your power source, securing the cable to rafters with cable staples every 4 feet. Keep all wiring at least 3 inches away from the fan blades and any moving parts. Make sure the cable does not rest against sharp metal edges or hot surfaces.
How to Install a Gable-Mount Attic Fan
Gable-mount installation is generally easier and less risky than roof-mount because you never cut through the roof surface. The fan attaches to the vertical gable wall at one end of your attic, usually behind the existing louvered vent. Here is the complete step-by-step process to do it right.
Step 1: Measure the Gable Vent Opening
Measure the existing gable vent opening or the space between the wall studs where you plan to install the fan. Standard gable openings are typically 16 to 24 inches wide, which matches common fan sizes. Check your specific fan dimensions against the opening to confirm it will fit with room for the mounting frame. If you do not have an existing gable vent, you will need to cut an opening in the gable wall sheathing, install framing lumber around the perimeter, and attach louvered vents on the exterior before mounting the fan.
When measuring, account for the louver slats inside the vent. The slats reduce the effective open area, and a fan that is too large will block airflow through the louvers rather than enhancing it. Leave at least 1 inch of clearance between the fan housing and the louver frame on all sides.
Step 2: Build the Mounting Frame
Cut a piece of 1/2-inch plywood to fit snugly inside the gable opening. The plywood should overlap the studs or framing by at least 1 inch on all four sides for a secure attachment. Use a compass or the fan housing itself to mark a circle in the center of the plywood that matches the diameter of your fan. Cut the hole with a jigsaw, cutting just inside the marked line for a tight fit.
Test-fit the fan in the hole before proceeding. The fan should slide in with slight resistance but not require force. If the hole is too tight, sand or trim the edges until the fan drops in cleanly. If your fan came with a factory mounting bracket, use that instead of building a custom plywood frame and follow the manufacturer instructions.
Step 3: Attach the Fan to the Frame
Mount the fan to the plywood frame using the hardware provided with the fan. The fan blades should face outward, toward the gable vent, so they push hot air out of the attic rather than pulling it in. Secure the fan with screws through every mounting hole in the fan housing. Do not skip any holes, as a fan running at full speed generates vibration that will loosen undertightened fasteners over time.
Seal around the fan housing where it meets the plywood using a bead of silicone caulk. This prevents air from bypassing the fan blades and recirculating within the attic. Air that leaks around the edges of the fan reduces overall ventilation efficiency.
Step 4: Install the Assembly in the Gable Wall
Lift the fan-and-frame assembly into position in the gable opening. The plywood frame should sit flush against the wall studs or existing framing members. Use a level to check that the frame is plumb and level before fastening. Drive deck screws through the plywood into the studs on all four sides, using at least four screws per side for a solid, rattle-free mount.
The fan will vibrate during operation, so a secure installation prevents annoying rattling and noise transmission through the wall framing. If the opening is larger than your frame, add filler strips of 1×2 lumber between the frame and the studs to close the gaps before screwing everything together.
Step 5: Seal the Edges
Run a continuous bead of exterior-grade silicone caulk around the entire perimeter where the plywood frame meets the gable wall on both the interior and exterior sides. Fill any remaining gaps with expanding foam sealant. This dual-sealing approach prevents outside air from bypassing the fan, stops rain from entering the attic around the frame edges, and blocks insects and pests from finding their way in through gaps.
Let the caulk cure fully according to the manufacturer instructions before turning on the fan. Running the fan before the caulk sets can blow the wet sealant out of the joints and leave gaps.
Step 6: Run the Wiring
Route the electrical cable from the fan down through the attic to your power source. Secure the cable to framing members with cable staples every 4 to 5 feet. If the cable must pass through a top plate or wall stud, drill a 5/8-inch hole and feed the cable through with a plastic bushing or grommet to protect the cable jacket from sharp wood edges. Follow the detailed wiring instructions in the next section for making all electrical connections safely.
How to Wire an Attic Fan with a Thermostat
Wiring is the part that makes most DIYers nervous, and for good reason. Electricity demands respect and careful attention. If you follow these instructions step by step and turn off the power first, you can handle the wiring safely. If anything feels uncertain at any point, call a licensed electrician. There is no shame in getting professional help with electrical work, and it is always the right call when you are unsure.
Running the Power Cable
For most attic fan installations, you will run 14/2 NM (non-metallic) cable from a nearby junction box or circuit in the attic to the fan location. Choose a circuit that can handle the fan amperage draw without overloading. Most residential attic fans draw between 1.5 and 4 amps, which is well within the capacity of a standard 15-amp circuit. Avoid sharing a circuit with heavy-draw appliances like air conditioners, microwaves, or space heaters.
Run the cable from the power source to the fan location, keeping it secured to rafters and at least 6 inches away from any heat sources like flue pipes or furnace vents. Avoid running cable across the attic floor where it could get stepped on or damaged by stored items. Use cable staples to secure the cable every 4 to 5 feet along its run. If you need to run a brand new circuit from the breaker panel to the attic, that job is best left to a licensed electrician who can ensure proper wire sizing and breaker selection.
Making the Electrical Connections
At the fan motor, you will typically find three wires: black (hot), white (neutral), and green or bare copper (ground). Connect the black wire from the fan to the black wire from your power cable using a wire nut sized for 14-gauge wire (typically yellow wire nuts). Twist the wires together clockwise before applying the nut to ensure a solid mechanical connection. Do the same for the white wires. Connect the ground wire to the green ground screw on the fan housing or junction box.
Wrap each wire nut connection with electrical tape, wrapping in the same direction the nut tightens so the tape does not unravel. Give each wire nut a gentle tug to confirm the connection is secure. A loose wire nut is the single most common cause of a fan that stops working.
If your fan has a pre-wired plug instead of bare wires, you can install a covered outlet box in the attic and simply plug the fan in. This approach is code-compliant in many jurisdictions and makes future maintenance easier because you can unplug the fan to service it without touching any wire connections.
Installing the Thermostat
Most attic fans either have a built-in thermostat or include one in the package. If yours does not include one, buy an inline thermostat rated for at least the full amperage of your fan. Mount the thermostat in the attic air stream, positioned away from direct sunlight and at least 3 feet from the fan housing. This distance ensures the thermostat reads true ambient attic temperature rather than the warmer air being pushed past the fan blades.
Wire the thermostat in line with the hot (black) wire between the power source and the fan. Power flows from the source, through the thermostat switch, and then to the fan motor. When the attic temperature rises above the thermostat set point, the internal switch closes and the fan turns on automatically. When the temperature drops below the set point, the switch opens and the fan shuts off.
Recommended Thermostat Settings
I set attic fan thermostats between 100 and 110 degrees Fahrenheit for most homes. This range allows the fan to kick on when the attic gets hot enough to affect your living space below, but it does not run the fan constantly during mild weather when ventilation is not needed. If you set the thermostat too low (below 95 degrees), the fan may run almost continuously throughout the spring and fall, wasting electricity and shortening the fan motor life. If you set it too high (above 120 degrees), the attic will reach dangerously high temperatures before the fan activates, which defeats the purpose.
In humid climates like the Southeast and Gulf Coast, consider adding a humidistat alongside the thermostat. A humidistat turns the fan on when attic humidity exceeds a set level, typically 60 to 70 percent relative humidity. This is important because moisture damage can occur even in cool weather when the thermostat alone would not trigger the fan. A combination thermostat and humidistat ensures your attic stays protected year-round.
Testing Your Attic Fan and Common Troubleshooting
Once everything is installed and wired, it is time to test the system before calling the job done. Do not skip this step, no matter how confident you are in your work. Catching problems during initial testing is much easier and cheaper than discovering them on the hottest day of the year when the fan fails to run.
Initial Testing Procedure
Turn the breaker back on and set the thermostat to its lowest temperature setting so the fan activates immediately regardless of actual attic temperature. You should hear the motor start within a few seconds. Place your hand near the fan and you should feel air being pulled toward the exhaust point. Hold a piece of tissue paper or a smoke pencil near the intake vents (soffit vents) to visually confirm air is flowing into the attic from outside.
Listen carefully to the fan while it runs. It should produce a steady, even hum without any grinding, scraping, or metallic sounds. Watch for excessive vibration in the fan housing or the surrounding framing. Even slight wobbling can loosen fasteners over time and create annoying noise that travels through the wall framing into your living space.
After confirming the fan runs properly, adjust the thermostat back to your desired operating set point (100 to 110 degrees). The fan should shut off within a few minutes once the thermostat senses the temperature has dropped below the set point. If the fan continues running, the thermostat may be faulty, improperly wired, or located in a spot that stays consistently warm.
Check for Roof Leaks
For roof-mount installations, inspect the attic carefully after the first significant rainstorm. Take a flashlight and examine the area around the fan flashing from inside the attic. Look for any moisture on the roof deck, dripping water, dark water stains on the plywood, or damp insulation directly below the fan. Even a slow, intermittent leak can cause major water damage, mold growth, and wood rot over time if left unaddressed.
If you find any signs of moisture, apply additional roofing cement to the exterior flashing, paying special attention to the top edge where water is most likely to sneak under the shingles. Re-seal any nail heads that may have worked loose and check that all shingles are lying flat against the flashing.
Troubleshooting Common Issues
Fan does not turn on: First, verify the breaker is on and the thermostat is set correctly. Then check all wire nut connections for tightness. Bypass the thermostat temporarily by connecting the hot wire directly to the fan. If the fan runs with the thermostat bypassed, the thermostat is the problem. If the fan still does not run, check for voltage at the fan motor with a multimeter. A loose wire nut at the junction box or at the fan is the most common cause of a dead fan.
Fan vibrates or rattles: Check that all mounting screws and bolts are tight. A loose frame, unsecured fan housing, or missing mounting screw causes vibration that gets worse over time. For gable-mount fans, add rubber washers between the fan housing and the plywood frame to dampen vibrations. For roof-mount fans, verify the fan is sitting level in the opening and is not resting on an uneven shingle edge.
Fan runs but airflow feels weak: The most likely culprit is blocked or insufficient intake ventilation. Go outside and check your soffit vents for blockage from insulation, paint, or debris. From inside the attic, look for insulation that has shifted to cover the soffit vents from the inside. Clear any blocked vents and consider adding more intake ventilation if the existing vents cannot support the fan CFM rating.
Fan runs constantly and never shuts off: The thermostat set point is probably too low, or the thermostat sensor is located in a hotspot near the roof deck where it reads higher than the actual ambient attic temperature. Relocate the thermostat sensor to a spot in the free air stream away from direct roof deck contact and at least 3 feet from the fan housing.
Attic Fan Maintenance Tips for Longevity
A well-maintained attic fan can last 10 to 15 years or longer with consistent care. Here is the seasonal maintenance routine I recommend to keep your fan running at peak efficiency and avoid unexpected failures during the heat of summer.
Spring Preparation (Before Cooling Season)
Before the hot season begins each year, clean the fan blades and motor housing with a dry cloth, soft brush, or compressed air. Dust and debris buildup on the blades reduces airflow efficiency and makes the motor work harder, which shortens its lifespan. Check all electrical connections for signs of corrosion, heat discoloration, or loose wire nuts. Test the thermostat by adjusting the set point and confirming the fan responds correctly.
While you are up there, clear any debris from around the exterior vent opening. Leaves, bird nests, and wasp nests commonly block attic fan exhausts and reduce performance. A quick visual inspection from the outside twice a year keeps the airflow path clear.
Mid-Summer Performance Check
After the fan has been running for about a month of heavy summer use, go back into the attic and listen to the fan while it operates at full speed. Pay attention to any new sounds, squeaking, grinding, or rattling that were not present during initial installation. These sounds often indicate developing bearing wear or a loose mounting component. Catching bearing wear early can save you from a complete fan motor failure during the hottest week of the year when replacement parts are hardest to find.
Fall and Winter Shutdown Guidelines
In cold climates with freezing winter temperatures, most attic fans should be turned off during the winter months. Running a fan in cold weather can pull warm, moist air from your living space into the attic, where the moisture condenses on cold surfaces and causes mold, mildew, and wood rot. Turn off the breaker supplying the fan, or unplug the fan if it uses a plug connection.
If your fan has a humidistat, you can leave the power on and rely on just the humidistat to control winter moisture levels. Set the humidistat to activate between 60 and 70 percent relative humidity, and it will run the fan only when needed to remove excess moisture from the attic air.
Cover the exterior vent opening with a ventilated cover or wire screen to prevent pests, birds, and squirrels from entering the attic through the fan housing during the off season. Do not seal the fan completely with plastic or solid covers, because some passive air exchange is still beneficial for moisture control during winter months.
Annual Inspection Checklist
Once a year, preferably in early spring, perform a thorough inspection of the entire fan system. Check the fan housing for rust, cracks, loose fasteners, or damaged blades. Inspect the roof flashing on roof-mount fans for any signs of lifting, cracking sealant, or deteriorating shingles around the base. Reapply roofing cement to any areas where the seal has degraded. For gable-mount fans, inspect the caulk seal around the mounting frame and re-caulk any gaps or cracks.
Lubricate the motor bearings if your fan model has lubrication ports (many modern fans use sealed bearings and are maintenance-free in this regard). Check the fan belt if your model uses a belt drive rather than direct drive. Replace cracked or worn belts before they break during summer operation.
When a fan starts making grinding noises, draws noticeably more electrical power than usual, or fails to start reliably on hot days, it is usually time for a full replacement rather than a repair. Fan motors are typically the first component to fail, and replacing the entire fan unit is often more cost-effective and reliable than replacing just the motor and hoping the other components hold up.
FAQ
Can you install an attic fan yourself?
Yes, you can install an attic fan yourself if you have basic carpentry and electrical skills. Gable-mount installations are more DIY-friendly because they do not require cutting through the roof or working at height. Roof-mount installations are doable but require careful flashing and weatherproofing to prevent leaks. If you are uncomfortable with electrical wiring, you can handle the mechanical mounting yourself and hire an electrician for just the wiring portion, which keeps costs down while ensuring safety.
How much does it cost to have someone install an attic fan?
Professional attic fan installation typically costs between $300 and $700 for labor alone, depending on your location and the complexity of the job. The fan itself adds another $100 to $400 depending on type, size, and features. Total installed cost for a professional job generally ranges from $400 to $1,100. Solar attic fans sit at the lower end of that range since they do not require electrical wiring. DIY installation can reduce your total cost to just the fan and materials, typically $150 to $500.
Why don’t they put attic fans in houses anymore?
Many newer homes are built with improved passive ventilation systems like continuous ridge vents and larger soffit vents that reduce the need for powered attic fans. Some building science experts argue that a well-insulated, properly air-sealed attic with adequate passive ventilation does not need mechanical assistance. However, attic fans are still widely recommended for homes in hot climates, older homes with inadequate passive ventilation, or homes experiencing active moisture problems. They remain a valuable and cost-effective upgrade when installed correctly with proper intake ventilation.
Do I need an electrician to install an attic fan?
You do not always need an electrician, but it depends on your specific situation. If you are installing a solar-powered fan, no electrical work is required at all. For electric fans, you can handle the wiring yourself if you are tapping into an existing junction box in the attic and feel comfortable with basic wire connections. However, you should hire a licensed electrician if you need to run a new circuit from the breaker panel, if your home has aluminum wiring, or if your local building code requires a licensed professional for any electrical modifications.
What is the 1:150 rule for attic ventilation?
The 1:150 rule is a building code guideline that states you need 1 square foot of net free ventilation area for every 150 square feet of attic floor space. This total ventilation area should be split roughly evenly between intake vents (typically soffit vents at the eaves) and exhaust vents (ridge vent, gable vent, or powered attic fan). If your attic has a balanced vapor barrier installed on the warm side of the ceiling insulation, the requirement improves to the 1:300 rule, meaning you need only 1 square foot of ventilation per 300 square feet of attic space.
Can I just put a regular fan in my attic?
No, a regular household fan or box fan is not designed or rated for attic use and will not hold up to the extreme temperatures, dust, and moisture found in attic environments. Attic fans are specifically engineered with thermally protected motors, weather-resistant housings, and sealed bearings that can handle conditions that would destroy a standard fan within weeks. Using a regular fan in an attic is also a fire hazard because the motor can overheat in the high attic temperatures. Always use a fan that is specifically rated and labeled for attic ventilation.
Final Thoughts
Learning how to install an attic fan is a home improvement project that truly pays for itself through lower cooling bills, reduced moisture damage, and a noticeably more comfortable living space. Whether you choose a roof-mount or gable-mount installation, the key steps remain the same: size the fan correctly using the CFM formula, verify adequate intake ventilation before you begin, seal every penetration and joint thoroughly, and wire the thermostat for reliable automatic operation.
Take your time with the weatherproofing and electrical connections. Those two areas determine whether your installation runs trouble-free for the next decade or becomes a source of roof leaks and electrical headaches. If any step feels beyond your comfort level or skill set, hiring a professional for just that portion is a smart compromise that keeps overall costs down while ensuring the work meets safety standards.
With the fan installed and running properly, you should notice a measurable difference within the first few hot days of summer. Your attic temperature will stay significantly cooler, your air conditioner will cycle less frequently, and your entire home will feel more comfortable from the top floor down to the basement.