
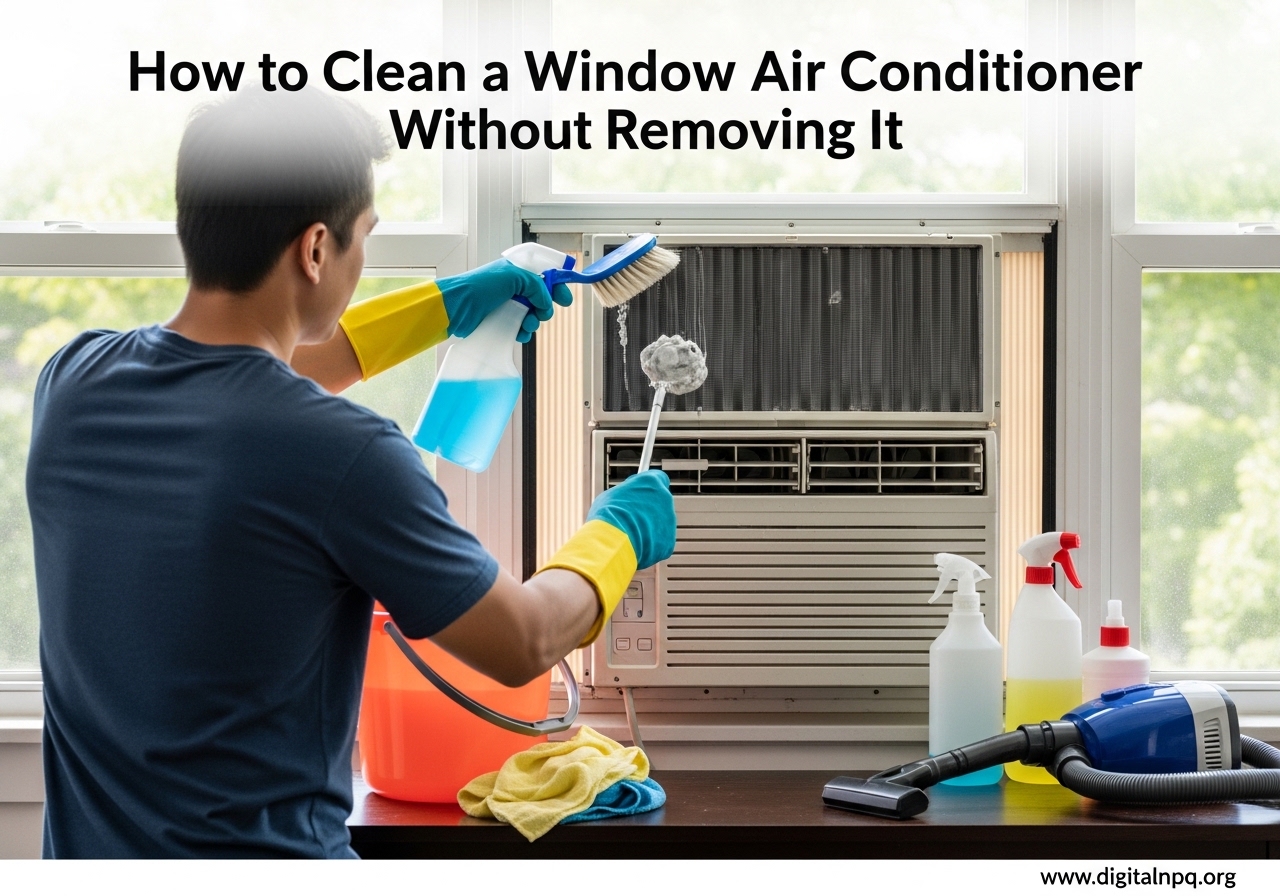
Yes, you can absolutely clean a window air conditioner without removing it from the window. The entire process takes about 30 to 45 minutes and uses basic household supplies like mild dish soap, white vinegar, and a vacuum with a brush attachment. I have cleaned dozens of window AC units over the years using this exact method, and it works reliably for keeping your unit running efficiently without the hassle of uninstalling it.
In this guide, I will walk you through every step of how to clean a window air conditioner without removing it. We will cover the filter, evaporator coils, condenser coils, drain pan, grill, and even how to straighten bent fins. I will also share the DIY cleaning solutions I have tested, mold prevention tips, and a maintenance schedule that keeps your unit in top shape all summer long.
Regular cleaning does more than just improve air quality. A clean window AC unit can reduce your energy bills by up to 20%, prevent mold growth that triggers allergies, and extend the life of your unit by several years. Whether you are a renter who cannot remove the unit, an elderly homeowner looking for a manageable routine, or simply someone who wants to avoid the heavy lifting, this guide has you covered.
Signs Your Window AC Unit Needs Cleaning
Your window AC unit gives you several clear warning signs when it is overdue for a cleaning. The most obvious one is reduced airflow coming from the vents. When dust and debris clog the filter and coils, the blower fan has to work harder to push air through the system, and you feel weaker cooling from across the room.
Another red flag is a musty or stale smell when you turn on the unit. That odor usually means mold or mildew is growing somewhere inside, often on the evaporator coil or in the drain pan where moisture collects. I once ignored this smell for two weeks and ended up with a full mold bloom that took twice as long to clean.
Watch for these additional signs that your window AC needs attention:
- Higher than normal energy bills despite normal usage patterns
- Visible dust buildup on the front grill or louvers
- The unit cycling on and off more frequently than usual
- Water dripping from the front of the unit instead of draining properly
- Unusual rattling or grinding noises during operation
- The unit taking longer than usual to cool the room
If you notice two or more of these symptoms, it is time to clean your window air conditioner without delay. Waiting longer only makes the job harder and can cause permanent damage to the coils or blower motor.
Tools and Materials You Will Need
Before starting, gather all your supplies so you do not have to stop midway through the job. Most of these items are probably already in your home. The rest are inexpensive and available at any hardware store or online.
Here is the complete list of what I use every time I clean a window AC unit:
- Vacuum cleaner with a soft brush attachment
- Fin comb (optional but helpful for bent aluminum fins)
- No-rinse foaming coil cleaner (or white vinegar as a DIY alternative)
- Mild dish soap and warm water in a spray bottle or bucket
- Soft-bristled brush or an old toothbrush for tight spaces
- Microfiber cloths or clean rags (at least 3 or 4)
- A large towel or plastic tarp to protect your floor and wall
- Screwdriver (usually Phillips head, for removing the front grill)
- Protective gloves (rubber or nitrile)
- Spray bottle for vinegar solution
If you are on a tight budget, skip the commercial coil cleaner and use a mixture of equal parts white vinegar and water. It works well for light to moderate buildup. For heavy grime, a dedicated foaming coil cleaner dissolves grease and dirt faster and rinses away cleanly.
I also recommend having a small trash bag nearby for the dust and debris you will pull out of the unit. It keeps your workspace tidy and prevents loose dirt from falling back into the AC components.
Safety Precautions Before You Start
Safety comes first whenever you are working with an appliance that combines electricity and water. Taking a few minutes to prepare your workspace prevents accidents and protects your home from water damage.
Start by turning off the window AC unit and unplugging it from the power outlet. Do not just switch it off with the remote or the control panel. Physically remove the plug from the wall. This eliminates any risk of electric shock while you are working inside the unit with wet hands or cleaning solutions.
Next, protect the area around the unit. Lay down a large towel or plastic tarp on the floor directly beneath the AC. Tape it to the wall with painter’s tape to create a catch basin for any water, dirt, or cleaning solution that drips out during the process. I learned this the hard way after ruining a hardwood floor with soapy runoff during my first cleaning attempt.
Put on your gloves before you start handling any cleaning chemicals or reaching into the unit. The aluminum fins inside are sharp and can cut your fingers easily. If you are sensitive to dust or mold spores, consider wearing a basic dust mask as well.
One important note: never use bleach on the coils or internal metal components. Bleach can corrode aluminum and copper parts, causing permanent damage. Stick with mild dish soap, white vinegar, or a dedicated coil cleaner that is specifically formulated for HVAC use.
How to Clean a Window Air Conditioner Without Removing It: Step-by-Step Guide
This is the complete 7-step process I follow to clean a window air conditioner without removing it from the window. Each step builds on the previous one, so work through them in order for the best results.
Step 1: Turn Off and Unplug the Unit
I mentioned this in the safety section, but it bears repeating because it is the most important step. Turn the AC off using the controls, then unplug it from the wall outlet. If your unit is hardwired into the electrical system, switch off the breaker that controls it at your electrical panel.
Wait about 10 to 15 minutes for the internal components to cool down before you start handling anything inside. The coils and compressor can stay warm for a short while after the unit shuts off. Working on a cool unit is safer and more comfortable.
While you wait, double-check that your tarp or towel is securely positioned beneath the unit. Confirm that no electrical outlets or power strips are sitting in the potential drip zone. This small preparation step saves you from bigger problems later.
Step 2: Remove and Clean the Front Grill
Most window AC units have a front grill or louver panel that snaps off or is held by one or two screws at the bottom. Check your unit’s manual if you are unsure how yours opens, but the vast majority either pull straight off or have a small latch on each side.
Gently remove the front grill and set it aside on your towel. Use your vacuum with the brush attachment to remove loose dust from both sides of the grill. Then wash it thoroughly in your sink or a bucket using warm water and a few drops of mild dish soap. A sponge or soft cloth works well for this.
Scrub away any stuck-on grime with an old toothbrush, paying attention to the louver slats where dust accumulates. Rinse the grill completely with clean water and let it air dry while you work on the rest of the unit. Make sure it is fully dry before you reattach it later.
Step 3: Take Out and Wash the Air Filter
The air filter sits directly behind the front grill on almost every window AC model. It usually slides out easily by pulling it up and out of its track. Some units have a reusable mesh filter, while others use a pleated filter that needs replacement rather than washing.
For reusable mesh filters, take the filter to your sink and rinse it under warm running water. Apply a small amount of mild dish soap and gently work it through the mesh with your hands. Rinse until the water runs completely clear with no soap residue remaining.
For heavier buildup on the filter, let it soak in a basin of warm soapy water for 10 to 15 minutes before rinsing. Shake off the excess water and lean it against a wall or towel to air dry completely. The filter must be fully dry before you put it back, because a damp filter promotes mold growth.
If your unit uses a disposable pleated filter instead of a washable mesh filter, check the size printed on the frame and purchase a replacement. These are typically inexpensive and should be replaced every one to three months during the cooling season.
Step 4: Clean the Evaporator Coils
With the grill and filter removed, you now have access to the evaporator coils. These are the thin metal fins located behind the filter area, on the room-facing side of the unit. They absorb heat from your room’s air and are critical for efficient cooling.
Start by using your vacuum with the soft brush attachment to gently remove loose dust from the coil surface. Move the vacuum slowly across the fins in an up-and-down motion, following the direction of the fins. Do not press hard. The aluminum fins bend easily, and bent fins restrict airflow.
Next, apply your coil cleaner. If you are using a commercial no-rinse foaming cleaner, spray it evenly across the coil surface following the product directions. Let the foam sit for the recommended time, usually 5 to 10 minutes, while it breaks down grease and grime. The foam then drips into the drain pan and evaporates without needing a rinse.
If you prefer the DIY route, fill a spray bottle with equal parts white vinegar and water. Spray the solution generously onto the coils and let it sit for about 5 minutes. Then use a soft-bristled brush or old toothbrush to gently scrub the fins in the same direction they run. Wipe away the loosened dirt with a damp microfiber cloth.
Be patient with this step. Evaporator coils that have not been cleaned in a year or more will have significant buildup. You may need to apply the cleaner twice for heavily soiled coils. The improvement in cooling performance after cleaning dirty evaporator coils is usually dramatic and immediate.
Step 5: Clean the Condenser Coils
The condenser coils are on the outside portion of the window AC unit, facing the exterior. These release the heat your unit removes from your room. Because they are exposed to outdoor air, they tend to collect more dirt, pollen, and debris than the evaporator coils.
Cleaning the condenser coils without removing the unit is a bit trickier because access is limited. If you can safely reach the back of the unit from outside, use the same vacuum and brush method described for the evaporator coils. Work carefully and avoid bending the delicate fins.
For units mounted high in a window or on an upper floor, you can spray foaming coil cleaner through the back vents from inside. Extend the nozzle of the cleaner through the side or rear openings of the unit and apply the foam as evenly as possible. The foam will expand, dissolve dirt, and drip into the drain pan below.
If you cannot reach the condenser coils at all from your position, this is one component where a partial approach is acceptable. Clean what you can reach, and plan to have the unit professionally serviced once every two to three years for a thorough deep cleaning of the exterior coils.
Step 6: Clean the Drain Pan and Condensate Drain
The drain pan sits at the bottom of the AC unit and collects the condensation that drips off the evaporator coils during operation. Over time, this pan collects dirt, slime, and sometimes mold. A clogged drain pan or drain hole causes water to overflow, which can damage your wall, window sill, or floor.
Use a flashlight to look inside the drain pan area. If you see standing water or slimy buildup, that is your target. Reach in with a damp cloth or sponge and wipe out as much of the pan as you can access. An old toothbrush helps scrub the corners and edges where grime tends to accumulate.
Locate the drain hole or condensate drain tube at the bottom of the pan. This small opening allows water to exit the unit to the outside. If it is clogged, use a pipe cleaner, a stiff piece of wire, or a zip tie to gently poke through the blockage. Flush it with a small amount of your vinegar solution to kill any mold or bacteria growing inside.
After clearing the drain, pour a small cup of water into the pan to verify it drains freely. If the water backs up instead of flowing out, repeat the clearing process. A properly draining pan is essential for preventing water damage and mold growth inside your window AC unit.
Step 7: Straighten Bent Fins and Reassemble
The aluminum fins on both the evaporator and condenser coils are paper-thin and bend easily. Bent fins block airflow and reduce the cooling efficiency of your unit. If you noticed any crushed or flattened areas while cleaning, now is the time to fix them.
A fin comb is the right tool for this job. These inexpensive plastic or metal combs come with multiple teeth sizes to match different fin spacings. Select the teeth size that fits snugly between your fins, then gently draw the comb through the bent area in the same direction the fins run. Work slowly and use light pressure. It takes very little force to straighten aluminum fins back into alignment.
If you do not have a fin comb, you can use a thin, flat tool like a butter knife to carefully pry individual fins back into position. This is slower but effective for small areas. Avoid using sharp tools that could puncture the refrigerant tubing hidden between the fins.
Once the fins are straightened, reassemble the unit by reversing the disassembly steps. Slide the clean, dry air filter back into its track. Snap or screw the front grill back into place. Remove your protective tarp and clean up any drips or spills around the work area.
Plug the unit back in and turn it on. Let it run for 10 to 15 minutes and check for any unusual sounds, vibrations, or odors. A clean window AC should produce steady, even airflow and cool the room noticeably faster than before cleaning.
DIY Cleaning Solutions vs Commercial Coil Cleaners
One of the most common questions I get asked is whether household solutions work as well as commercial coil cleaners. The short answer is that both approaches are effective, but they serve different situations.
The white vinegar and water solution I mentioned earlier is an excellent mild cleaner that dissolves light dust and mineral deposits. It is safe for the aluminum fins, copper tubing, and all the metal components inside your window AC. Vinegar also has mild antimicrobial properties that help kill surface mold and bacteria. For routine seasonal cleaning, it gets the job done well.
Commercial foaming coil cleaners, on the other hand, are formulated to break down heavy grease, stubborn grime, and years of accumulated buildup. They contain surfactants and solvents that cut through dirt faster than vinegar alone. The no-rinse varieties are especially convenient because the foam breaks down and evaporates without leaving residue.
Here is how I decide which to use:
- If the unit was cleaned within the last 6 months, a vinegar and water solution is sufficient
- If the coils have visible grease, heavy dirt, or have not been cleaned in over a year, use a commercial coil cleaner
- If you have asthma or chemical sensitivities, vinegar is the safer choice
- If you see mold growth on the coils, use the vinegar solution first and follow up with a commercial cleaner if the mold persists
Avoid using baking soda directly on the coils. While baking soda is great for cleaning the grill and exterior surfaces, its abrasive texture can damage the delicate aluminum fins if you scrub too hard. Stick to liquid solutions for the coils and save the baking soda for the plastic and metal parts you can rinse thoroughly.
How to Prevent Mold in Your Window AC Unit
Mold is the single most common problem I see in window air conditioners. The combination of moisture, darkness, and dust creates ideal growing conditions inside the unit. Preventing mold is much easier than removing it after it takes hold.
The most effective mold prevention strategy is running your AC unit regularly during the cooling season. The airflow and the cold coil surface actually inhibit mold growth when the unit is operating. Problems arise when a unit sits unused for weeks with moisture still inside. If you plan to not use your AC for more than a week, run it on fan-only mode for 30 minutes to dry out the internal components first.
Here are additional mold prevention tips that I follow every season:
- Clean or replace the air filter monthly during heavy use periods
- Keep the drain pan and condensate drain clear so water does not pool inside the unit
- After cleaning, spray a light mist of vinegar solution on the evaporator coil as a preventive measure
- Leave the front grill off for a few hours after cleaning to let the interior air dry completely
- Run the unit on fan mode for 15 to 20 minutes after each deep cleaning to dry all components
- Consider placing a small charcoal deodorizer pad near the air intake to absorb moisture and odors
If your unit already has a mold problem, the cleaning steps I outlined above will remove most surface mold. For severe mold growth that has penetrated deep into the insulation or foam components inside the unit, you may need to replace those parts or consider replacing the entire unit. Breathing mold spores is a health risk that is not worth taking.
To deodorize your window AC after cleaning, run it on fan mode for 20 minutes with a bowl of white vinegar placed near the air intake. The vinegar vapors help neutralize lingering musty odors without leaving a strong scent behind.
Window AC Maintenance Schedule for 2026
Keeping your window AC unit clean is not a one-time task. A regular maintenance schedule prevents the heavy buildup that makes cleaning difficult and keeps your unit running at peak efficiency. Here is the schedule I recommend for 2026 and every cooling season.
Monthly Tasks: Check and clean or replace the air filter. Inspect the front grill and louvers for visible dust. Listen for any changes in sound or vibration during operation. These three quick checks take less than 10 minutes and catch problems early.
Quarterly Tasks: Vacuum the evaporator and condenser coils with a soft brush attachment. Clear the drain pan and condensate drain hole. Wipe down the exterior cabinet with a damp cloth. This mid-season refresh keeps performance from degrading during heavy summer use.
Twice a Year: Perform the full 7-step deep cleaning process described in this guide. Do it once at the start of the cooling season before you begin using the unit regularly, and once at the end of the season before you store or cover it for winter.
Annually: Inspect the window seal and weatherstripping around the unit. Check the power cord for any damage or fraying. Verify the unit is still level and securely mounted in the window. Replace any worn or damaged parts before the next cooling season begins.
Following this schedule does more than keep your air clean. The Department of Energy estimates that regular AC maintenance can reduce energy consumption by 5 to 15 percent. For a window unit running several hours a day through the summer, that translates to real savings on your monthly electric bill. It also extends the typical 8 to 10 year lifespan of a window AC unit by reducing the strain on the compressor and blower motor.
FAQ
Can you clean a window air conditioner without taking it out of the window?
Yes, you can thoroughly clean a window AC unit without removing it. Remove the front grill and filter to access the evaporator coils, use a vacuum and coil cleaner on the coils, clear the drain pan, and wipe down all accessible components. The unit stays in the window throughout the entire process.
Can I spray vinegar in my window AC unit?
Yes, a solution of equal parts white vinegar and water is safe for cleaning your window AC coils and internal components. Vinegar dissolves light dirt and mineral deposits while killing surface mold and bacteria. Do not use full-strength vinegar or bleach, and avoid spraying directly on electrical components.
How do you clean mold out of a window air conditioner without removing it?
To clean mold from a window AC without removing it, unplug the unit, remove the front grill and filter, then spray the evaporator coils with a 50/50 vinegar and water solution. Let it sit for 10 minutes, then scrub gently with a soft brush. Wipe the drain pan thoroughly and flush the drain hole with vinegar solution. Run the unit on fan mode for 20 minutes afterward to dry everything completely.
What is the best thing to clean a window air conditioner with?
The best cleaning solution depends on the level of dirt. For routine cleaning, a mixture of equal parts white vinegar and water works well. For heavy buildup, a commercial no-rinse foaming coil cleaner is more effective. For the filter and grill, mild dish soap and warm water is ideal. Always avoid bleach on metal coils, as it causes corrosion.
How often should I clean my window air conditioner?
Clean or replace the air filter once a month during the cooling season. Perform a full deep cleaning of the coils, drain pan, and grill twice a year: once before the cooling season starts and once at the end. If you notice musty smells, reduced airflow, or higher energy bills between cleanings, clean the unit sooner rather than waiting for the next scheduled date.
Conclusion
Cleaning a window air conditioner without removing it is straightforward once you understand the process. The 7-step method I have shared here covers every component that affects your unit’s performance and air quality: the filter, grill, evaporator coils, condenser coils, drain pan, and fins. With basic supplies and about 30 to 45 minutes of effort, you can keep your window AC running efficiently without ever needing to uninstall it.
The key takeaway is consistency. A monthly filter check and a twice-yearly deep cleaning prevent the heavy buildup that makes the job harder and hurts your unit’s performance. If you follow the maintenance schedule outlined in this guide, your window AC will cool better, use less energy, and last longer through many summers of reliable service.
Start with the safety precautions, work through each step in order, and take your time with the coils since they have the biggest impact on cooling efficiency. Your lungs and your electric bill will both thank you.