
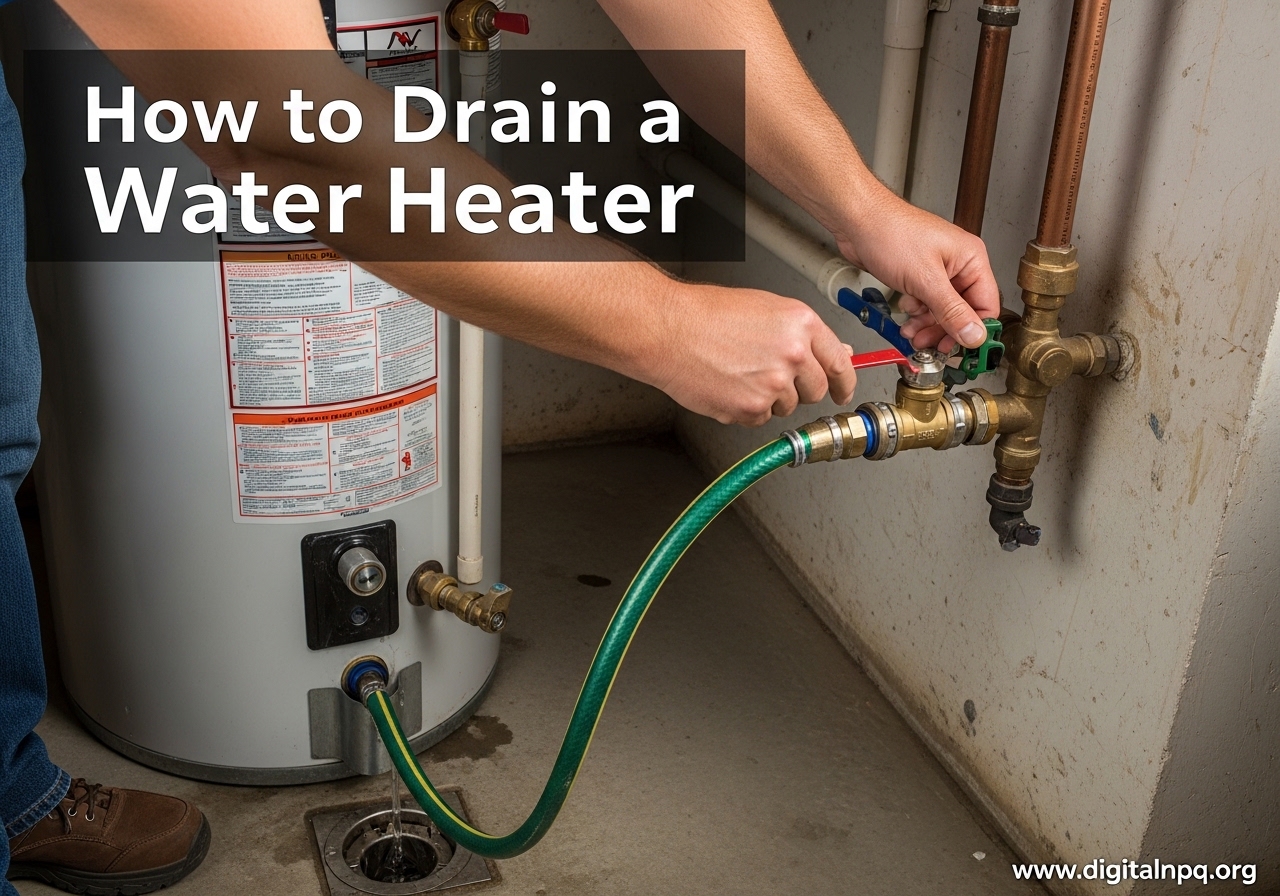
If your hot water has started smelling off, looking discolored, or making popping sounds from the tank, sediment buildup is almost certainly the culprit. Learning how to drain a water heater is one of those maintenance tasks that takes about 30 minutes but can add years to your appliance’s lifespan. I have drained plenty of water heaters over the years, both my own and for family members, and the process is far less intimidating than most homeowners expect.
The basic idea is simple: you connect a garden hose to the drain valve at the bottom of the tank, let the old water (and all the sediment it carries) flow out, then flush the tank clean before refilling it. Whether you have a gas water heater or an electric water heater, the core steps are the same. Tankless water heater owners need a slightly different approach, which I cover separately below.
In this guide, I will walk you through the entire process from start to finish. I will also cover the tools you need, common problems you might run into, and clear answers to the questions most homeowners ask before attempting this for the first time.
Why You Should Drain Your Water Heater Regularly
Over time, minerals like calcium and magnesium settle at the bottom of your hot water tank. This is especially true if you live in an area with hard water. The sediment layer builds up slowly, and most homeowners never notice until the damage has already started.
That buildup causes several problems. First, it acts as an insulating barrier between the heat source and the water, forcing your water heater to work harder and use more energy to heat the same amount of water. Second, sediment can trap water against the tank bottom, causing it to overheat and potentially crack the glass lining inside the tank. Third, you may notice a rumbling or popping noise when the unit runs, which is the sound of water bubbling through the sediment layer.
Other warning signs include hot water that runs out faster than usual, a slight brownish tint to your hot water, or water that has an unusual metallic smell. Any of these symptoms mean it is time to drain the tank.
Most manufacturers and professional plumbers recommend draining your water heater once per year. If you live in a region with hard water, you may want to do it every six months instead. I drain mine annually and the water that comes out is always cloudier than I expect, even though our area has moderately soft water.
Tools and Materials You Will Need
Before you start, gather everything in one place. There is nothing worse than running to grab a tool while water is flowing. Here is what you need:
- A standard garden hose long enough to reach from the water heater to a floor drain, outside area, or large bucket
- A pair of work gloves to protect your hands from hot water and hot metal
- A few old towels for any spills or drips
- A flathead screwdriver (some drain valves open with a screwdriver slot rather than a handle)
- A bucket if you do not have a floor drain nearby
- Teflon tape (optional, for resealing the drain valve connection if it leaks after closing)
That is it. No special plumbing tools, no expensive equipment. The whole setup takes about five minutes.
How to Drain a Water Heater: Step-by-Step Instructions
This process works for both gas and electric tank-style water heaters. I have noted the differences between the two where they matter. The entire job typically takes 20 to 40 minutes depending on your tank size and how much sediment has accumulated.
Step 1: Turn Off the Power Source
For an electric water heater, find the dedicated circuit breaker in your electrical panel and switch it off. Do not just turn down the thermostat; you need the unit completely de-energized. Heating elements that run dry will burn out quickly and require replacement.
For a gas water heater, turn the gas control knob to the “pilot” setting. This keeps the pilot light on but stops the main burner from firing. If you prefer, you can turn the knob fully off, but relighting the pilot adds an extra step at the end.
Step 2: Turn Off the Cold Water Supply
Find the cold water shutoff valve on the pipe that feeds into the top of the water heater. It is usually a gate valve or ball valve located within a few feet of the tank. Turn it clockwise until it stops. This prevents new water from entering the tank while you are trying to drain it.
Step 3: Attach a Garden Hose to the Drain Valve
Screw one end of your garden hose onto the drain valve at the bottom of the tank. The valve looks like a small spigot, similar to an outdoor hose bib. Run the other end of the hose to a floor drain, a driveway, or a large bucket. Make sure the hose connection is tight to avoid leaks at the valve.
If you do not have a floor drain, you can run the hose through a window or door to an outside area. Just be aware that the water coming out will be hot at first, so keep children and pets away from the discharge point.
Step 4: Open a Hot Water Faucet Nearby
Go to the nearest faucet that produces hot water, preferably one on the same floor as the water heater, and turn it on fully to the hot setting. This allows air to enter the tank as water drains out, which creates proper flow through the drain valve. Without this step, the tank can create a vacuum and drain very slowly or not at all.
Step 5: Open the Drain Valve
Open the drain valve slowly. If your valve has a handle, turn it counterclockwise. If it has a slot for a screwdriver, turn it with your flathead. Water should start flowing through the hose immediately.
Let the tank drain completely. A standard 40-gallon tank typically takes about 10 to 15 minutes to empty, while a larger 50 or 80-gallon tank may take 20 to 30 minutes. The initial water will be hot, so be careful near the hose connection point.
Step 6: Flush the Tank With Fresh Water
Once the flow slows to a trickle, turn the cold water supply back on for about 30 seconds to a minute at a time. This stirs up any remaining sediment from the bottom of the tank and flushes it out through the hose. Watch the water coming out of the hose.
When the water runs clear instead of cloudy or brownish, you are done flushing. This may take two or three short bursts of cold water. Some sediment is stubborn, and in tanks that have not been drained in years, it might take a few extra flushes.
Step 7: Close the Drain Valve and Disconnect the Hose
Turn the drain valve clockwise until it is fully closed. Remove the garden hose from the valve. Have a towel ready because a small amount of water will likely spill when you disconnect. Double-check that the valve is completely shut; even a slow drip can cause water damage over time.
Step 8: Refill the Tank Before Restoring Power
With the drain valve closed and the hose disconnected, keep the cold water supply turned on. The tank will begin refilling. Keep the hot water faucet you opened earlier running. When water starts flowing steadily from that faucet without sputtering air, the tank is full.
This is a critical step for electric water heaters. Never restore power to an electric water heater before the tank is completely full. Running the heating elements dry will destroy them. Once you see a steady stream from the hot faucet, go ahead and turn the circuit breaker back on for electric units, or turn the gas control knob from “pilot” back to the desired temperature setting for gas units.
Check the area around the drain valve one more time for any drips. If you notice a small leak, try tightening the valve by hand. If that does not work, a plumbing repair clamp or a few wraps of Teflon tape on the valve threads can help.
How to Drain a Tankless Water Heater
Tankless water heaters do not store standing water, so they do not accumulate sediment in the same way tank units do. However, they do build up mineral scale inside the heat exchanger over time, which reduces efficiency and can eventually cause the unit to shut down with an error code. Descaling a tankless unit requires a slightly different setup.
You will need a five-gallon bucket, a submersible pump (sometimes called a transfer pump), two connection hoses, and about two to three gallons of plain white vinegar. Some manufacturers sell descaling kits that include everything you need in one package.
Start by turning off the power to the tankless unit at the circuit breaker and shutting off the gas supply if it is a gas model. Close both the hot and cold isolation valves on the unit. Connect one hose from the cold isolation valve to the submersible pump sitting in the bucket, and another hose from the hot isolation valve back into the bucket. Pour the vinegar into the bucket.
Open both isolation valves, turn on the pump, and let the vinegar circulate through the heat exchanger for about 45 minutes to an hour. The vinegar dissolves the mineral scale inside the coils. After the cycle is done, close the isolation valves, remove the hoses, and flush the system with clean water for a few minutes by opening the cold water supply briefly with the hot water valve directing water to a drain.
Reconnect everything, restore power and gas, and run hot water at a faucet to confirm the unit is heating properly. The whole process takes about 60 to 90 minutes. I recommend doing this once a year, or more often if you have hard water.
Troubleshooting Common Problems
Even with straightforward instructions, things do not always go smoothly. Here are the most common problems homeowners encounter and how to deal with each one.
Clogged Drain Valve
This is probably the single most common issue. Sediment can block the drain valve opening, and water either trickles out or does not come out at all. If this happens, try turning the cold water supply on briefly while the drain valve is open. The incoming water pressure can dislodge the blockage.
If that does not work, you can try inserting a straightened wire coat hanger gently into the valve opening to break up the clog. Be careful not to damage the valve. As a last resort, you may need to replace the drain valve entirely, which involves draining the tank first by siphoning or bailing, then unscrewing the old valve and installing a new one with Teflon tape on the threads.
Water Not Flowing Through the Hose
If water is not coming out at all, the most likely cause is that you did not open a hot water faucet to allow air into the system. Go back and open a hot faucet somewhere in the house. Without that air inlet, the tank creates a vacuum that prevents drainage.
Also check that the hose is not kinked, the drain valve is actually open, and the cold water supply is turned off. Any one of these can stop or slow the flow significantly.
Leaking Drain Valve After Closing
Drain valves, especially the plastic ones found on many budget water heaters, are a common failure point. If yours continues to drip after you have closed it tightly, try wrapping the threads with Teflon tape. For a faster fix, you can screw a brass hose cap onto the end of the drain valve to create a secondary seal.
If the valve itself is cracked or stripped, it needs to be replaced. A brass drain valve replacement costs a few dollars at any hardware store and is a worthwhile upgrade over the factory plastic valve.
What If the Tank Has Not Been Drained in Years
This comes up more often than you might think. Many homeowners, including some professional plumbers I have spoken with on forums, admit they rarely drain their own units. If the tank has not been flushed in several years, expect the water to come out very dark and the process to take longer.
Flush the tank multiple times until the water runs clear. Do not be alarmed by the amount of sediment that comes out. The bigger concern is whether the anode rod is still functional, since a neglected tank may have a depleted anode rod that offers no corrosion protection. If your tank is more than five years old and has never been drained, consider having the anode rod inspected by a plumber.
When to Call a Professional
Most homeowners can handle draining a water heater themselves. However, you should call a licensed plumber if the drain valve is completely seized and you cannot open it, if you notice rust or corrosion on the tank body itself, or if the pressure relief valve is leaking or will not reset. Any of these could indicate bigger problems that a simple flush will not solve.
If you are simply not comfortable working with gas lines or electrical panels, there is no shame in hiring a professional. The typical service call for water heater maintenance runs between $75 and $200 depending on your area and the scope of work.
FAQ
What is the easiest way to drain a water heater?
The easiest method is to turn off the power and cold water supply, attach a garden hose to the drain valve at the bottom of the tank, open a nearby hot water faucet to allow air into the system, and open the drain valve. Let the tank empty completely, then briefly turn the cold water back on to flush out remaining sediment. Close the valve, refill the tank, and restore power. The entire process takes about 20 to 30 minutes for a standard residential unit.
Can I drain my own hot water heater?
Yes, most homeowners can safely drain a water heater without professional help. The process requires only a garden hose and basic tools. The key safety steps are turning off the power source (circuit breaker for electric, gas control knob for gas models) and being careful with hot water during the initial draining. If you can operate a hose connection and a shutoff valve, you can handle this maintenance task yourself.
How long does it take to drain a 40 gallon water heater?
A 40-gallon water heater typically takes 10 to 15 minutes to drain completely once the drain valve is open. Including setup, flushing sediment, refilling the tank, and restoring power, the full process takes about 20 to 40 minutes. Tanks with heavy sediment buildup may take slightly longer because of multiple flush cycles.
Do I need to open a faucet when draining a water heater?
Yes, opening a hot water faucet is necessary for proper drainage. It allows air to enter the tank as water flows out, preventing a vacuum from forming inside. Without an open faucet, the tank drains very slowly or may not drain at all. Open any hot water faucet in the house on the same floor as the water heater for best results.
How often should I drain my water heater?
Most manufacturers recommend draining your water heater once per year. If you live in an area with hard water, draining every six months is advisable because minerals accumulate faster. Regular annual draining removes sediment, improves heating efficiency, and can extend the life of your tank by several years.
What happens if you never drain your water heater?
If you never drain your water heater, sediment from dissolved minerals builds up at the bottom of the tank over time. This reduces heating efficiency, increases your energy bills, causes rumbling or popping noises, shortens the lifespan of the tank, and can lead to premature failure of the heating elements or the tank itself. In severe cases, sediment can clog the drain valve and damage the pressure relief valve.
Conclusion
Draining a water heater is one of the simplest and most impactful maintenance tasks a homeowner can do. It costs almost nothing, takes less than an hour, and can prevent premature tank failure, lower energy bills, and improve the quality of your hot water. The process is the same whether you have a gas or electric unit: shut off power and water, connect a hose, drain and flush, then refill and restore power.
Put it on your calendar once a year. If you live in a hard water area, aim for every six months. Your water heater will run more quietly, heat more efficiently, and last longer for the effort. And if you run into a clogged valve, a stuck relief valve, or anything that feels beyond your comfort zone, calling a plumber is always a sound decision.