
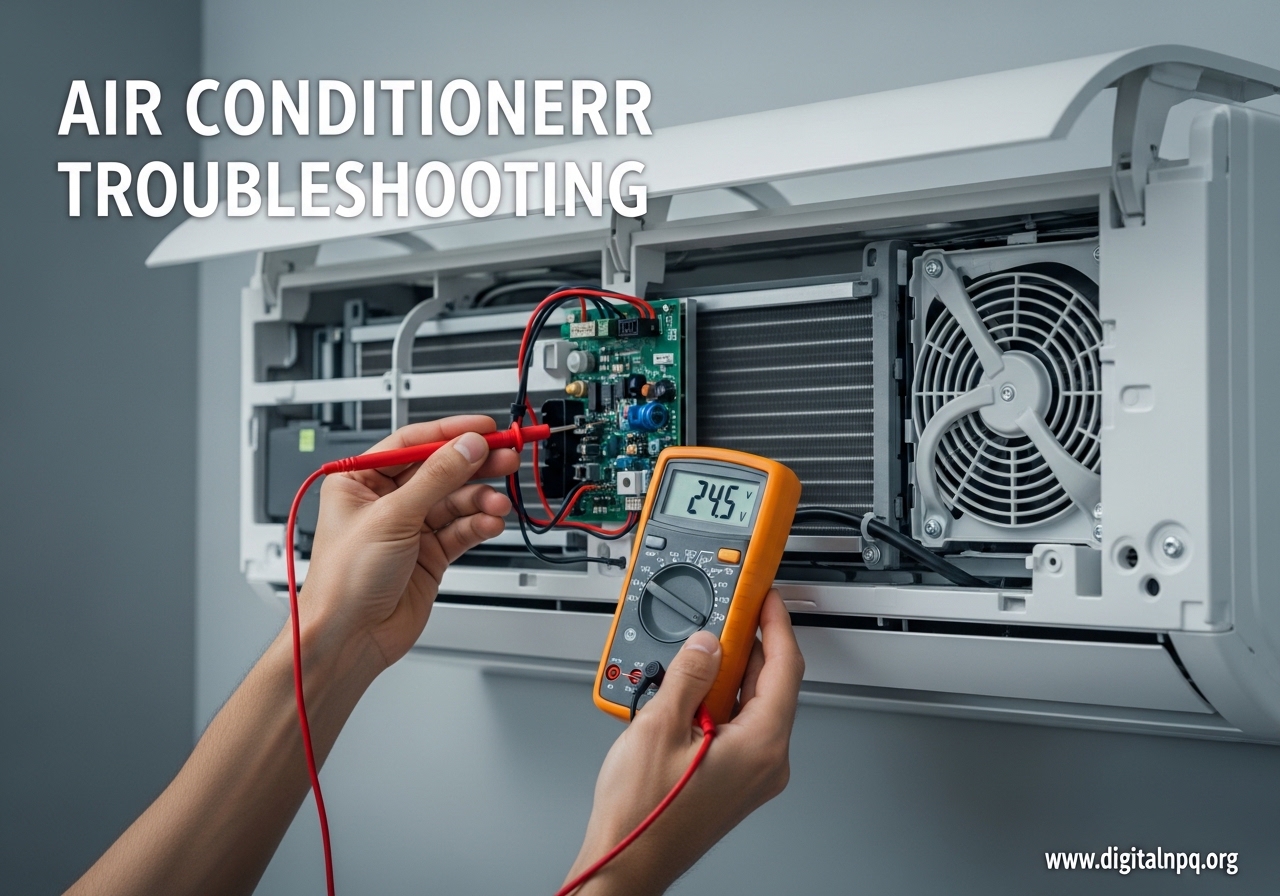
There is nothing worse than coming home on a sweltering summer afternoon only to realize your air conditioner is not doing its job. I have been there myself, standing in front of a vent hoping for cool air and getting nothing but disappointment. The good news is that most AC problems are things you can diagnose and often fix on your own without calling an HVAC technician.
This air conditioner troubleshooting guide walks you through every common AC issue I have encountered, from a unit that will not turn on to one that runs but refuses to cool. I will cover the step-by-step fixes for each problem, when it makes sense to handle it yourself, and when it is time to bring in a professional. By the end, you will have a clear plan to get your system back up and running.
Whether you are dealing with a central air system, a heat pump, or a window unit, the troubleshooting principles in this guide apply across the board. Let us start by figuring out exactly what is going wrong with your AC.
Quick Diagnostic Checklist: Is Your AC Actually Broken?
Before diving into detailed air conditioner troubleshooting, run through this quick checklist. I cannot tell you how many times I have seen someone spend hours diagnosing a problem only to discover the thermostat was set to “heat” instead of “cool.” These five checks take about two minutes and rule out the most common simple issues.
Check 1: Thermostat Settings
Make sure your thermostat is set to “cool” mode and the temperature is set at least 3 to 5 degrees below the current room temperature. If your thermostat runs on batteries, check that they are not dead or low. A blank thermostat screen is a dead giveaway.
Check 2: Listen to the System
Stand near your indoor air handler and your outdoor condenser unit. Do you hear the blower running inside? Can you hear the fan spinning outside? If neither unit is making any sound, you likely have a power issue. If one is running but not the other, that narrows things down significantly.
Check 3: Feel the Air From Your Vents
Put your hand in front of a supply vent. Is air flowing at all? If there is no airflow, the blower motor may not be running or the filter could be completely blocked. If air is flowing but feels warm, the problem is with the cooling cycle itself.
Check 4: Inspect the Outdoor Unit
Walk outside and visually check the condenser unit. Is it clear of debris, tall grass, and obstructions? A unit buried in leaves or weeds cannot dissipate heat properly. Also check that the unit has power by looking at the disconnect box near the unit.
Check 5: Check the Circuit Breaker
Open your electrical panel and find the breaker labeled for your air conditioner or HVAC system. If it is tripped (in the middle position), flip it fully off and then back on. This alone fixes a surprising number of AC problems.
If you have gone through all five of these checks and your AC is still not working correctly, move on to the specific troubleshooting sections below that match your symptom.
Air Conditioner Troubleshooting: AC Running But Not Cooling
This is the single most common complaint I hear from homeowners. The AC unit is humming along, the blower is pushing air through the vents, but that air is not cold. It is frustrating because everything sounds like it should be working. Here are the most common causes, in order of how frequently I encounter them.
1. Dirty Air Filter
A clogged air filter is the number one cause of an AC running but not cooling properly. When the filter gets packed with dust, pet hair, and debris, it chokes off the airflow to your evaporator coil. Without enough air moving across the coil, the AC cannot absorb heat from your home. The result is reduced cooling capacity or, in severe cases, a completely warm airstream.
The fix is straightforward. Pull the filter out and hold it up to a light. If you cannot see light through it, replace it. I recommend checking your filter monthly during peak cooling season and replacing it at least every 90 days, or more often if you have pets or allergies.
2. Low Refrigerant Levels
Your AC system relies on a sealed loop of refrigerant to absorb and release heat. If that level drops due to a leak, the system loses its ability to cool effectively. Signs of low refrigerant include the AC running continuously without reaching the set temperature, ice forming on the refrigerant lines, or hissing sounds near the indoor coil.
This is one problem I do not recommend fixing yourself. Refrigerant handling requires EPA Section 608 certification, and simply adding more refrigerant without finding and fixing the leak will only buy you time. A professional HVAC technician can locate the leak, seal it, and recharge the system to the correct level.
3. Blocked or Dirty Condenser Unit
The outdoor condenser unit needs unrestricted airflow to release the heat your AC pulls from inside your home. If the condenser coils are coated in dirt, grime, or the unit is surrounded by overgrown bushes, it cannot do its job. I have seen AC efficiency drop by 30 percent or more from a dirty condenser alone.
Clean the condenser coils by first shutting off power to the unit at the disconnect box. Then use a garden hose with a gentle spray nozzle to wash the coils from the inside out. For stubborn grime, use a foaming coil cleaner available at any hardware store. Keep plants trimmed at least two feet away from the unit on all sides.
4. Thermostat Set Incorrectly
It sounds obvious, but I have lost count of how many times this was the actual issue. Sometimes the thermostat gets bumped, a child changes the settings, or a programmed schedule overrides your manual adjustments. Double-check that your thermostat is in “cool” mode, not “heat” or “auto,” and that the set temperature is lower than the current room temperature.
5. Ductwork Leaks or Disconnected Ducts
If your ductwork has gaps, tears, or disconnected sections, the cool air your AC produces is escaping into your attic, crawlspace, or walls instead of reaching your living areas. This can make it feel like the AC is not cooling even though the unit itself is working fine. If you notice uneven cooling between rooms or hear whistling sounds from the walls or ceiling, ductwork issues could be the culprit.
Small duct leaks can sometimes be sealed with foil tape or mastic, but significant ductwork problems should be evaluated by a professional who can test your system’s airflow and static pressure.
AC Won’t Turn On: Power and Thermostat Issues
When your air conditioner will not turn on at all, the problem almost always traces back to power delivery or thermostat communication. Here is how to diagnose and fix each possibility.
Thermostat Problems
Start with your thermostat since it is the easiest component to check. If the display is blank, replace the batteries first. Most programmable and smart thermostats use AA or AAA batteries, though some are hardwired and use a backup battery. If new batteries do not fix a blank screen, the thermostat itself may have failed.
If the display works but the AC does not respond, check the wiring connections behind the thermostat. Over time, wires can come loose, especially the “R” wire (power) and “Y” wire (cooling signal). If you are comfortable doing so, pop the thermostat off its base and verify all wires are securely connected to their terminals. A loose wire can interrupt the signal that tells your AC to turn on.
Tripped Circuit Breaker
Your AC system typically has two breakers: one for the indoor air handler and one for the outdoor condenser. If either breaker trips, part or all of your system will not run. Open your electrical panel and look for any breakers in the middle position. To reset a tripped breaker, push it fully to the “off” position first, then flip it back to “on.”
If the breaker trips again immediately after you reset it, do not keep resetting it. A breaker that repeatedly trips indicates a short circuit, a failing compressor, or an electrical fault that needs professional attention. Continuing to reset it can damage your equipment or create a fire hazard.
Blown Fuse in the Disconnect Box
Near your outdoor condenser unit, there should be a small metal or plastic box called a disconnect. This box contains either a pull-out disconnect block or cartridge fuses that protect the outdoor unit. If the AC will not turn on and the main breakers are fine, check the fuses in this disconnect box using a multimeter. A blown fuse will show no continuity. Replacement fuses are inexpensive and available at hardware stores.
Faulty Capacitor
The capacitor is a small cylindrical component inside the outdoor unit that gives the compressor and fan motor the electrical boost they need to start up. When a capacitor fails, you will often hear a clicking sound from the outdoor unit as it tries to start but cannot. The fan might buzz but not spin, or the unit may do nothing at all.
If you suspect a bad capacitor and you are comfortable working around electrical components, you can test it with a multimeter that has a capacitance setting. A replacement capacitor typically costs between $15 and $40, but you must match the microfarad (uF) rating and voltage exactly. Always discharge the old capacitor before removing it, as capacitors can hold a charge even with power off.
Safety Float Switch Triggered
Many modern AC systems have a safety float switch installed in the drain pan beneath the indoor air handler. If the drain pan fills with water due to a clogged drain line, the float switch shuts off the system to prevent water damage. If your AC will not turn on and you notice water around the indoor unit, check the drain pan and clear the drain line (covered in detail in the drain line section below).
Frozen Evaporator Coil: Why Your AC Freezes Up
A frozen evaporator coil is one of the most counterintuitive AC problems. You might think ice on your AC means it is working too well, but the opposite is true. Ice on the coil actually blocks heat transfer, so your AC cannot cool your home at all. You will typically notice reduced airflow from the vents, the indoor unit feels cold to the touch, or you see ice on the refrigerant lines connected to the outdoor unit.
What Causes a Frozen Coil?
The three most common causes are a dirty air filter, low refrigerant, and blocked return vents. Any of these reduce the amount of warm air flowing across the evaporator coil. Without enough heat being absorbed, the coil temperature drops below freezing, and condensation on the coil turns to ice.
How to Thaw a Frozen Coil
Here is the process I use every time. First, turn off the AC at the thermostat but leave the fan set to “on.” This circulates room-temperature air across the frozen coil without running the compressor, which speeds up the thawing process. Depending on how thick the ice is, this can take anywhere from one to several hours. Place towels around the indoor unit to catch melting water.
Do not try to chip or scrape the ice off the coil. The copper tubing and aluminum fins are delicate and bend easily. Let it thaw naturally. Once the ice is completely melted, replace the air filter and make sure all supply and return vents are open and unobstructed. Then turn the AC back on and monitor it for the next few hours.
If the coil freezes again within a day or two, you almost certainly have a low refrigerant issue that needs professional attention. A technician can find and repair the leak and recharge the system.
Clogged AC Drain Line: How to Unclog It
Your air conditioner removes humidity from the air as it cools, and that water drains out through a condensate drain line, typically a PVC pipe that exits your home near the outdoor unit. Over time, algae, mold, dirt, and debris can build up inside this line and create a clog. When that happens, water backs up into the drain pan, which can trigger the safety float switch and shut down your AC.
Signs of a Clogged Drain Line
The most obvious sign is water pooling around the indoor air handler or dripping from the unit. You might also notice your AC shutting off unexpectedly if a float switch is installed, or a musty smell near the indoor unit caused by standing water and mold growth.
How to Clear the Clog
The easiest method is using a wet/dry shop vac. Find the end of the drain line outside your home where it exits the wall or foundation. Place the shop vac hose over the end of the drain line and seal it with a towel or duct tape to create a tight connection. Run the vacuum for two to three minutes. The suction will pull the clog out along with any standing water and debris.
For stubborn clogs, you can also pour a mixture of one cup of white vinegar and one cup of warm water down the drain line access point near the indoor unit. Let it sit for 30 minutes, then flush with warm water. Avoid using bleach, as it can damage the PVC pipe and release harmful fumes.
Preventing Future Clogs
Pour one cup of vinegar down the drain line every month during cooling season. This kills algae and mold before they can form a blockage. It takes about five minutes and can save you a service call.
Air Conditioner Troubleshooting Chart (Quick Reference)
I put together this troubleshooting chart to help you quickly match your AC symptom to the most likely cause and fix. Think of it as a cheat sheet you can come back to whenever something goes wrong.
Symptom: AC runs but does not cool
Likely cause: Dirty air filter, low refrigerant, dirty condenser coils, or blocked airflow.
Fix: Replace the filter, clean the outdoor coils, and check for blocked vents. If the problem persists, call a technician to check refrigerant levels.
Symptom: AC will not turn on at all
Likely cause: Tripped breaker, dead thermostat batteries, blown disconnect fuse, or faulty capacitor.
Fix: Reset breakers, replace thermostat batteries, check disconnect fuses. If none of these work, test or have the capacitor checked.
Symptom: Ice on the evaporator coil or refrigerant lines
Likely cause: Dirty filter, low refrigerant, or blocked return vents restricting airflow.
Fix: Turn off cooling, run fan only to thaw, replace filter, open all vents. If it refreezes, call for refrigerant service.
Symptom: Water leaking around the indoor unit
Likely cause: Clogged condensate drain line or cracked drain pan.
Fix: Clear the drain line with a shop vac and vinegar flush. Inspect the drain pan for cracks.
Symptom: AC short cycles (turns on and off frequently)
Likely cause: Oversized unit, low refrigerant, dirty condenser, or faulty thermostat.
Fix: Clean the condenser coils and replace the filter. If short cycling continues, have a professional evaluate the system sizing and refrigerant charge.
Symptom: AC trips the circuit breaker repeatedly
Likely cause: Failing compressor, bad capacitor, or electrical short in the wiring.
Fix: Do not keep resetting the breaker. This requires professional diagnosis to avoid equipment damage or fire risk.
Symptom: Loud buzzing, clicking, or squealing from the outdoor unit
Likely cause: Failing capacitor (buzzing), contactor issues (clicking), or worn fan motor bearings (squealing).
Fix: Capacitor and contactor replacement are straightforward for experienced DIYers. Fan motor replacement usually requires a technician.
Symptom: Musty or burning smell when AC runs
Likely cause: Musty indicates mold in the ductwork or drain line. Burning indicates an electrical issue or overheating motor.
Fix: Musty smells can be addressed with drain line cleaning and duct inspection. Burning smells require immediate attention. Turn off the AC and call a professional.
How to Reset Your Air Conditioner
Resetting your air conditioner can resolve a range of minor glitches, from unresponsive thermostats to compressor lockouts. Here is the complete reset process I recommend.
Step 1: Turn off your AC at the thermostat. Set it to “off” mode so the system is not trying to run during the reset.
Step 2: Locate the circuit breaker for your AC system in your electrical panel. Flip it to the “off” position. This cuts power to both the indoor and outdoor units.
Step 3: Wait at least 60 seconds, though I recommend waiting a full five minutes for best results. This allows any stored electrical charge in the capacitor to dissipate and gives the compressor time to equalize pressure.
Step 4: Flip the circuit breaker back to the “on” position.
Step 5: Turn the thermostat back to “cool” mode and set your desired temperature. The system should start up within a few minutes.
What Is the 3-Minute Rule for Air Conditioners?
This is something most homeowners do not know about, and it is the answer to a question I see asked constantly. The 3-minute rule (sometimes called the 5-minute rule) refers to the minimum time you should wait after turning off your AC before turning it back on. Most modern AC units have this delay built into their control boards, but older units may not.
The reason this matters comes down to your compressor. When the AC is running, the compressor builds up high pressure on one side of the system and low pressure on the other. If you shut the unit off and immediately try to restart it, the compressor has to fight against that unequal pressure, which can cause it to stall, overheat, or even fail prematurely. Waiting three to five minutes gives the refrigerant pressures time to equalize so the compressor can start smoothly.
If your AC was just running and you turned it off, give it at least five minutes before switching it back on. This simple habit can add years to your compressor’s lifespan.
Strange AC Noises and Smells: What They Mean
Your air conditioner communicates problems through sounds and odors long before visible symptoms appear. Learning what these signals mean can help you catch issues early when they are still inexpensive to fix.
Noises
A buzzing sound from the outdoor unit usually points to a failing capacitor or a contactor that is sticking. The electrical component is trying to engage but cannot fully do so. Clicking sounds when the unit tries to start often indicate a relay or contactor problem. Squealing or screeching from the outdoor unit typically means the fan motor bearings are wearing out or the fan belt (on older units) is slipping.
A rattling or banging noise could be as simple as a loose panel or debris caught in the fan blades, or it could indicate a serious issue like a failing compressor with internal damage. If you hear rattling, turn off the unit and inspect for loose screws, twigs, or debris before running it again.
A hissing sound near the indoor unit might mean refrigerant is leaking from the evaporator coil. This is another situation where you need a professional, as refrigerant leaks do not fix themselves and will only get worse over time.
Smells
A musty smell coming from your vents almost always means there is moisture buildup somewhere in the system, typically in the drain pan, drain line, or inside the ductwork itself. This creates an environment where mold and mildew thrive. Cleaning the drain line and checking for standing water usually resolves this.
A burning or electrical smell is a red flag that requires immediate action. Turn off the AC at the breaker and do not turn it back on until a technician has inspected it. This smell can indicate overheating wiring, a failing blower motor, or a burned-out capacitor. Ignoring it creates a fire risk.
A sweet, chemical smell could be a refrigerant leak. Refrigerant has a slightly sweet, ether-like odor. While modern refrigerants are safer than older formulations, a leak still needs professional repair to restore your system’s cooling capacity.
Window Air Conditioner Troubleshooting Basics
Most troubleshooting guides focus exclusively on central air systems, but window AC units have their own set of common issues. If you are dealing with a window unit that is not performing well, here are the most likely culprits.
Window AC Not Cooling
The number one issue with window units is dirty air filters and clogged coils. Window ACs are exposed to more dust and outdoor debris than central systems. Remove the front grille, take out the filter, and wash it with warm soapy water. Let it dry completely before reinstalling. You should also inspect the rear condenser coils for dirt buildup and clean them gently with a soft brush or compressed air.
Window AC Leaking Water Inside
Window air conditioners must be installed with a slight backward tilt (about a quarter inch) so condensation drains to the outside. If the unit is tilted forward or sits level, water pools inside and eventually drips into your room. Check the installation angle and adjust the support brackets if needed. Also make sure the drain holes on the back of the unit are not blocked by dirt or debris.
Window AC Making Excessive Noise
Vibration noise from a window unit usually means it is not mounted securely. Tighten all mounting screws and make sure the unit sits firmly in the window frame. Adding foam weatherstripping around the gaps between the unit and the window can reduce rattling. If the noise is a grinding or squealing sound, the fan motor may need replacement.
When to Replace vs Repair a Window Unit
If your window AC is more than 8 to 10 years old and needs a major repair like a compressor or fan motor replacement, it is almost always more cost-effective to replace the entire unit. New window air conditioners are significantly more energy efficient, and you will likely recoup the cost of a new unit within a few cooling seasons through lower electricity bills.
Preventive Maintenance Schedule to Avoid AC Problems
The best air conditioner troubleshooting is preventing problems before they start. After years of working on and maintaining AC systems, I have put together this maintenance schedule that covers everything you need to do to keep your system running efficiently.
Monthly Maintenance Tasks
Check and replace your air filter if it appears dirty. During peak cooling season in the summer, filters can clog surprisingly fast, especially in homes with pets or if windows are open frequently. A clean filter is the single most important factor in AC performance and longevity.
Walk outside and inspect the area around your condenser unit. Clear away any leaves, grass clippings, or debris that have accumulated. Trim back any vegetation growing within two feet of the unit. Also visually inspect the visible refrigerant lines for any signs of oil residue, which can indicate a leak.
Seasonal Maintenance (Spring and Fall)
Before the cooling season begins, clean the condenser coils on your outdoor unit. Use a garden hose with a gentle spray to wash away dirt and debris from the coils. If the coils are particularly dirty, apply a foaming coil cleaner and let it sit according to the product directions before rinsing.
Pour one cup of white vinegar down the condensate drain line to prevent algae buildup. Check all supply and return vents inside your home to make sure they are open and unobstructed. Closed vents increase static pressure in your ductwork, which forces the blower motor to work harder and can cause coil freeze-ups.
Annual Professional Maintenance
Once a year, ideally in the spring before temperatures climb, have an HVAC technician perform a comprehensive tune-up. This typically includes checking refrigerant levels, testing electrical connections, measuring amperage draw on the compressor and fan motor, cleaning both the evaporator and condenser coils professionally, and verifying proper thermostat operation.
A professional tune-up typically runs between $75 and $200 depending on your area and the complexity of your system. I consider this money well spent because it catches developing problems early, keeps your system running at peak efficiency, and extends the life of your equipment. Many HVAC companies also offer maintenance plans that include priority scheduling and discounts on repairs.
When to Call a Professional HVAC Technician
Knowing your limits with air conditioner troubleshooting is just as important as knowing how to fix things. There are several situations where attempting a DIY repair can make the problem worse, void your warranty, or create a safety hazard.
Call a Professional For:
Any refrigerant-related issue. Federal law requires EPA certification to handle refrigerants. If you suspect a leak, hear hissing near the coils, or see ice forming repeatedly on your lines, a licensed technician must handle the repair.
Electrical problems beyond a simple breaker reset or battery replacement. If your AC is tripping breakers repeatedly, you smell burning, or you see visible damage to wires, stop using the system and call for service. Electrical faults in an AC unit can cause fires and damage expensive components like the compressor or control board.
Compressor failure. The compressor is the heart of your AC system and the most expensive component to replace. If the compressor is making loud rumbling noises, the outdoor fan runs but the compressor does not start, or the unit draws excessive amperage, a professional can determine whether the compressor needs replacement or if a less expensive component like the capacitor or contactor is the actual problem.
Warranty-covered repairs. If your system is still under warranty, doing your own repairs or hiring an unlicensed technician can void that warranty entirely. Most manufacturer warranties require documentation of professional service. Always check your warranty terms before attempting any repair work.
Typical Costs for Professional AC Repairs
Having realistic cost expectations helps you make informed decisions. A capacitor replacement by a technician typically runs $150 to $300. Contactor replacement is similar. Refrigerant leak detection and repair can range from $200 to $1,500 depending on the leak location and severity. Compressor replacement is the most expensive common repair, often ranging from $1,200 to $2,500. If you get a quote for compressor replacement on an older unit, it may be worth comparing that cost against replacing the entire system.
FAQ
Why is my AC running but not cooling?
The most common causes are a dirty air filter restricting airflow, low refrigerant levels due to a leak, a frozen evaporator coil, incorrect thermostat settings, or a blocked outdoor condenser unit. Start by checking and replacing the air filter, then verify your thermostat is set to cool mode with a temperature below the current room temperature. If the filter is clean and settings are correct, check the outdoor unit for debris. If none of these resolve the issue, you likely have a refrigerant problem that requires a professional.
How do I reset my air conditioner?
To reset your AC, follow these steps: 1) Turn the thermostat to off. 2) Find the AC circuit breaker in your electrical panel and flip it to off. 3) Wait at least 60 seconds (five minutes is ideal). 4) Flip the breaker back to on. 5) Set the thermostat to cool mode and adjust the temperature. The system should start within a few minutes. Some outdoor units also have a physical reset button near the disconnect box.
What is the 3 minute rule for air conditioners?
The 3-minute rule means you should wait at least three to five minutes after turning off your AC before turning it back on. This delay allows the refrigerant pressures inside the system to equalize. If you restart the compressor before pressures equalize, the compressor has to work against unequal pressure, which can cause it to stall, overheat, or fail prematurely. Most modern AC units have this delay built into their control boards automatically.
What is the most common AC problem?
The most common air conditioner problem is a dirty or clogged air filter. A blocked filter restricts airflow to the evaporator coil, which reduces cooling performance, can cause the coil to freeze up, forces the blower motor to work harder, and increases energy consumption. Checking and replacing your air filter regularly is the single most effective thing you can do to prevent AC problems.
How often should I change my AC filter?
Check your filter monthly during peak cooling season. Replace it at least every 90 days for standard 1-inch filters. If you have pets, allergies, or live in a dusty area, you may need to replace it every 30 to 60 days. Thicker 4-inch or 5-inch filters typically last 6 to 12 months. A good rule of thumb: if you hold the filter up to a light and cannot see light through it, replace it.
Can a dirty filter cause AC to stop working?
Yes, a severely dirty filter can cause your AC to stop working entirely. When airflow is completely blocked, the evaporator coil freezes solid, which stops the cooling process. In some cases, the ice buildup triggers a safety float switch that shuts the system off to prevent water damage. A clogged filter also forces the blower motor to run harder, which can cause it to overheat and fail. Replacing a dirty filter is the cheapest and most effective AC fix.
Conclusion
Most air conditioner problems come down to a handful of common issues: dirty filters, blocked airflow, tripped breakers, or thermostat glitches. Going through the diagnostic checklist and troubleshooting steps in this guide will resolve the majority of AC problems without a service call. The key is to start with the simplest explanations first before moving on to more complex possibilities.
If you work through this air conditioner troubleshooting guide and your system is still not performing correctly, that is your signal to bring in a licensed HVAC technician. Attempting repairs beyond your skill level can lead to costlier damage, safety risks, and voided warranties. A professional diagnosis typically costs between $75 and $150, which is a small price to pay for peace of mind and a correctly functioning cooling system.
Remember that preventive maintenance is far less expensive than emergency repairs. A clean filter, clear drain line, and annual professional tune-up will prevent the majority of the problems covered in this guide. Take care of your AC system, and it will take care of you through many summers to come.