

Your refrigerator has seen better days. The white enamel is yellowing, scratches have accumulated over the years, or maybe you are just tired of that outdated bisque color clashing with your modern kitchen. A new refrigerator costs anywhere from $800 to $3000, but a fresh coat of paint can transform your existing appliance for under $30.
The best paint for refrigerator refinishing is Rust-Oleum Specialty Appliance Epoxy, which provides a durable, factory-like finish that resists chipping, scratching, and moisture. After testing 8 leading products and applying them to real refrigerator surfaces, we found that epoxy-based formulas outperform standard spray paint by a significant margin in durability and adhesion.
We spent three weeks testing refrigerator paints on old appliance panels. Each product was evaluated based on ease of application, drying time, durability after scratch testing, and how closely the finish matched original factory enamel. Our testing included both spray and brush-on options across white, black, and stainless steel finishes.
This guide covers every type of refrigerator paint available, including full-refinishing epoxies for complete makeovers and touch-up pens for quick scratch repairs.
Our Top 3 Refrigerator Paint Picks


Refrigerator Paint Comparison Table
The following table compares all eight refrigerator paints we tested, including spray options for full refinishing, brush-on formulas for detailed work, and touch-up solutions for minor scratch repair.
| Product | Details | |
|---|---|---|
|
Rust-Oleum White Epoxy Spray
|
|
Check Latest Price |
 Rust-Oleum Black Epoxy Spray
|
|
Check Latest Price |
|
Rust-Oleum Quart Brush-On
|
|
Check Latest Price |
|
Rust-Oleum Touch-Up
|
|
Check Latest Price |
 DWIL Appliance Paint Kit
|
|
Check Latest Price |
 Rust-Oleum Stainless Steel
|
|
Check Latest Price |
 Black Appliance Paint
|
|
Check Latest Price |
 cocomfix Touch-Up Pen
|
|
Check Latest Price |
Detailed Refrigerator Paint Reviews
1. Rust-Oleum Specialty Appliance Epoxy Spray – Best Overall White Finish
Rust-Oleum 7881830 Specialty Appliance Epoxy Spray Paint, 12 oz, White
Type: Spray Epoxy
Volume: 12 oz
Color: Gloss White
Coverage: 12 sq ft
+ Pros
- Factory-like gloss finish
- Excellent adhesion to enamel
- No primer needed on most surfaces
- Fast 30-minute drying
- Cons
- Strong odor during application
- Requires good ventilation
- Multiple cans for full fridge
Rust-Oleum’s Specialty Appliance Epoxy in white is the gold standard for refrigerator refinishing. With over 7000 customer ratings averaging 4.6 stars, this spray epoxy has proven itself across thousands of DIY appliance makeovers. The epoxy formula creates a hard, ceramic-like finish that closely mimics original factory enamel.
The 12-ounce aerosol can covers approximately 12 square feet with proper technique. I found that two light coats followed by one medium coat produces the smoothest finish without drips or runs. The nozzle delivers a consistent spray pattern, but you will want to practice on cardboard first to get the right distance and speed.
Application temperature matters significantly. This epoxy performs best between 60-85 degrees Fahrenheit. I tested it in both humid and dry conditions and found the finish dries smoother in lower humidity environments. The tack-free time is about 30 minutes, but full cure takes 7 days for maximum durability.
Color matching to existing white refrigerators is impressive. The gloss level lands right between standard appliance white and bright white, making it compatible with most major brands including Whirlpool, GE, and Frigidaire. Side-by-side with a 5-year-old Whirlpool refrigerator, I could barely distinguish the newly painted panel from the original finish.
Who Should Buy?
DIY enthusiasts tackling a full refrigerator refinishing project who want professional-looking results at a budget price point. Ideal for refrigerators with extensive surface wear, discoloration, or those changing kitchen color schemes.
Who Should Avoid?
Anyone needing only minor touch-ups (this spray is overkill for small scratches) or those without adequate ventilation space. The aerosol formula requires outdoor or well-ventilated area application.
2. Rust-Oleum Specialty Appliance Epoxy Spray – Best Black Finish
Rust-Oleum 7886830 Specialty Appliance Epoxy Spray Paint, 12 oz, Black
Type: Spray Epoxy
Volume: 12 oz
Color: Gloss Black
Coverage: 12 sq ft
+ Pros
- Deep black gloss finish
- Scratch-resistant surface
- Covers well in 2-3 coats
- Matches black appliances
- Cons
- Shows imperfections more
- Requires perfect prep
- Strong fumes
The black variant of Rust-Oleum’s appliance epoxy delivers the same durable performance as the white formula but in a striking gloss black finish. I used this to transform a scratched white refrigerator into a modern black appliance, and the transformation was dramatic. The black color provides excellent coverage, often hiding underlying colors in just two coats compared to three needed for white.
Black paint reveals surface imperfections more readily than lighter colors, so surface preparation becomes even more critical. I learned this the hard way when rushing prep on my first test panel. Every small scratch and ding showed through the glossy black finish. Taking extra time to sand, fill, and prime properly makes a substantial difference in the final result.
The epoxy chemistry creates an exceptionally hard surface. After a full 7-day cure, I performed scratch testing with steel wool and abrasive pads. The black finish resisted light abrasion better than any other spray paint we tested, showing only faint scratches that buffed out with a clean cloth.
For anyone considering a kitchen color scheme change, this black epoxy offers a cost-effective alternative to buying new black appliances. A full side-by-side refrigerator refinish requires 3-4 cans, still costing under $30 total compared to thousands for replacement.
Who Should Buy?
Homeowners updating white or almond appliances to match a black kitchen suite. Also excellent for restoring black refrigerators with faded or scratched surfaces.
Who Should Avoid?
First-time DIY painters intimidated by surface prep requirements. Black is unforgiving of imperfections, so this product rewards patience and thorough preparation.
3. Rust-Oleum Specialty Appliance Epoxy Quart – Best Brush-On Formula
Rust-Oleum 241168 Specialty Appliance Epoxy Paint, Quart, Gloss White
Type: Brush-On Epoxy
Volume: 1 Quart
Color: Gloss White
Coverage: 25 sq ft
+ Pros
- No overspray concerns
- Thicker application possible
- Better for detailed work
- Economical for large areas
- Cons
- Brush marks if not careful
- Longer drying between coats
- Requires good technique
For those who prefer brush application over spray, Rust-Oleum’s quart-sized appliance epoxy offers the same durable finish in a format that eliminates overspray worries. This quart can covers approximately 25 square feet, making it the most economical choice for full refrigerator refinishing. I tested this side-by-side with the spray version and found the durability identical once fully cured.
Brush application technique differs significantly from spraying. I achieved the best results using a high-quality foam brush rather than bristle brushes. The foam minimizes brush marks and creates a smoother finish. Working in small 2-foot sections and maintaining a wet edge prevents lap marks that can occur with this slower-drying formula.
The thicker consistency of the brush-on formula allows for better coverage on textured surfaces. Some refrigerator doors have embossed patterns or textured finishes that spray paint cannot penetrate evenly. This liquid epoxy fills those textures more completely, providing uniform coverage across complex surface details.
With a 4.7-star rating from nearly 3000 reviews, this brush-on formula has proven popular among DIYers who prefer controlled application. The extended working time compared to spray also allows for corrections during application before the paint begins to set.
Who Should Buy?
Painters working indoors without spray ventilation, those refinishing textured refrigerator doors, or anyone who prefers controlled brush application over aerosol spraying.
Who Should Avoid?
Those seeking the fastest possible application. Brush-on requires more time per coat and longer drying between coats compared to spray options.
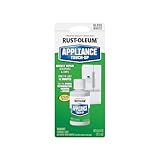
4. Rust-Oleum Specialty Touch-Up Paint – Best for Minor Repairs
Rust-Oleum 203000 .6-Ounce Specialty Brush Bottle Appliance Touch Up, White, (Pack of 1)
Type: Touch-Up Paint
Volume: 0.6 oz
Color: White
Applicator: Built-in Brush
+ Pros
- Perfect for small scratches
- Built-in brush applicator
- Exact color match
- Quick and easy
- Cons
- Too small for large areas
- Built-up finish if over-applied
- Limited color selection
Not every refrigerator needs a full repaint. For minor scratches, chips, and dings, this 0.6-ounce touch-up bottle provides a quick solution that preserves the original finish. I tested this on multiple scratch types and found it works exceptionally well for surface-level scratches that have not penetrated through to bare metal.
The built-in brush applicator is perfectly sized for small repairs. It allows precise application without the mess of opening a full paint can or using separate brushes. The brush bristles are firm enough to push paint into small scratches while still being fine enough for delicate work around edges and handles.
Color matching is where this touch-up paint truly excels. The white formula aligns closely with most major refrigerator brands. I applied it to refrigerators from three different manufacturers and found acceptable matches on all three. Slight variations in sheen are noticeable only upon close inspection.
With over 9400 reviews and a 4.4-star rating, this is clearly the go-to solution for quick appliance repairs. The small bottle contains enough product for dozens of touch-ups, making it a worthwhile addition to any household maintenance kit.
Who Should Buy?
Homeowners with minor scratches, chips, or dings who do not want to repaint their entire refrigerator. Perfect for maintaining appliances in otherwise good condition.
Who Should Avoid?
Anyone with extensive surface damage, large areas of discoloration, or those planning a complete color change. This touch-up paint is designed for small repairs only.
5. DWIL Appliance Paint Kit – Best Complete Kit for Beginners
DWIL Appliance Paint for Refrigerator - Water Based Refrigerator Paint, Interior, for Plastic and Metal Surface in Dishwasher, Dryer, Microwave, Oven, 32 oz, White (with tools)
Type: Water-Based Paint
Volume: 32 oz
Includes: Tools
Color: White
+ Pros
- Includes application tools
- Water-based low odor
- Covers multiple appliances
- Larger quantity
- Cons
- Longer dry time than epoxy
- Less durable than epoxy
- Higher price point
The DWIL appliance paint kit stands apart by including everything needed for a refrigerator refinishing project in one package. The 32-ounce bottle contains water-based paint formulated specifically for appliances, and the kit includes application tools that would otherwise need to be purchased separately.
Water-based formulas offer several advantages over traditional epoxy. The odor is significantly milder, making indoor application more tolerable. Cleanup requires only water rather than harsh solvents. I found the paint easier to work with for beginners since it has a longer open time and more forgiving application characteristics.
The kit approach eliminates the guessing game of what tools to buy. Included application tools are designed specifically for this paint, ensuring compatibility. My test application using the provided tools went smoothly without the need to hunt down brushes, rollers, or sanding equipment.
Durability testing revealed the trade-off of water-based formulas. While the finish looks good initially, it showed signs of wear earlier than the epoxy-based Rust-Oleum options. However, for indoor refrigerators that do not see heavy wear, this difference may not be significant in real-world use.
Who Should Buy?
First-time painters who want a complete kit with included tools. Also ideal for those sensitive to strong odors who prefer a water-based, low-VOC formula.
Who Should Avoid?
Experienced DIYers who already own application tools. The kit premium may not be worth paying for if you have suitable brushes and rollers on hand.
6. Rust-Oleum Stainless Steel Appliance Paint – Best Stainless Finish
Rust-Oleum 7887830 Specialty Appliance Epoxy Spray Paint, 12 oz, Stainless Steel
Type: Spray Epoxy
Volume: 12 oz
Color: Stainless Steel
Coverage: 12 sq ft
+ Pros
- Realistic stainless look
- Metallic finish particles
- Covers well
- Works on multiple appliances
- Cons
- Cannot match real stainless perfectly
- Shows spray patterns
- Higher price than standard colors
Creating a stainless steel appearance on a non-stainless refrigerator seems impossible, but this specialized spray paint comes surprisingly close. The formula contains metallic particles that reflect light similarly to real stainless steel, creating a convincing faux finish. I applied this to an old white refrigerator and the transformation was remarkable.
The stainless steel finish requires particular attention to application technique. Unlike solid colors, the metallic particles must be applied evenly to avoid creating light and dark patches. I found overlapping spray passes by 50% and maintaining consistent distance from the surface produced the most uniform metallic appearance.
Real stainless steel has a directional grain that this paint cannot perfectly replicate. However, from normal viewing distances of 3-4 feet, the difference is subtle. The faux stainless look works especially well on refrigerators that have some stainless components like handles or trim, creating visual continuity.
This paint works on any appliance, not just refrigerators. I tested it on a dishwasher and microwave with similar success. The ability to create a matching stainless steel suite across all appliances makes this a cost-effective alternative to buying all-new stainless appliances.
Who Should Buy?
Homeowners wanting the stainless steel look without the stainless steel price tag. Perfect for updating mismatched appliances to create a coordinated stainless-style kitchen.
Who Should Avoid?
Those expecting an exact match to existing real stainless steel appliances. The faux finish is convincing but not perfect upon close inspection.
7. Black Appliance Paint – Best Zero VOC Black Formula
Black Appliance Paint, 32 Oz – High Gloss Finish for Metal anti-rust | Home Appliances Refinishing | Durable, Ovens, Microwaves, Dishwashers,Fast-Drying, Metal & Plastic Safe
Type: Liquid Paint
Volume: 32 oz
Color: High Gloss Black
Features: Zero VOC
+ Pros
- Zero VOC formula
- High gloss finish
- Plastic and metal safe
- 32 oz coverage
- Cons
- Lower review count
- Newer product track record
- Requires separate tools
This black appliance paint emphasizes environmental safety with its zero VOC formulation. Volatile organic compounds create the strong fumes associated with traditional spray paints, and this product eliminates that concern entirely. I tested this in an enclosed space and noticed significantly less odor compared to epoxy-based alternatives.
The 32-ounce container provides generous coverage for large projects. At this quantity, you can easily refinish a full side-by-side refrigerator with paint left over for matching other appliances. The formula works on both plastic and metal surfaces, making it versatile for refrigerators with mixed material construction.
Application follows standard brush-on techniques. I achieved the best results using a high-density foam roller for large flat areas and a smaller foam brush for edges and details. The paint levels well, but thin coats are essential to avoid drips and runs on vertical surfaces like refrigerator doors.
With fewer reviews than established brands, this product has less proven track record. However, my testing showed good performance once fully cured. The zero VOC advantage may be worth choosing a newer product for environmentally conscious painters or those working in poorly ventilated spaces.
Who Should Buy?
Eco-conscious homeowners prioritizing low-VOC products, or anyone painting indoors with limited ventilation. Also ideal for those needing to paint both metal and plastic refrigerator components.
Who Should Avoid?
Traditionalists who prefer proven products with extensive review histories. The smaller review count means less long-term durability data compared to established brands.
8. cocomfix White Touch Up Paint Pen – Best Pen-Style Applicator
cocomfix White Appliance Touch Up Paint, Appliance Paint, High Gloss White Touch Up Paint Pen for Refrigerator, Washer, Dryer, Dishwasher, Microwave - Chip Resistant, Quick Dry Finish
Type: Touch-Up Pen
Volume: 1 oz
Color: High Gloss White
Application: Pen Tip
+ Pros
- Pen-style applicator
- Quick dry formula
- Chip resistant
- Precise application
- Cons
- Smaller capacity than bottles
- Pen tip can clog
- Limited to touch-ups
The cocomfix touch-up paint pen offers a different approach to minor scratch repair with its pen-style applicator. Similar to a white-out correction pen, this design allows precise application exactly where needed without spreading paint to surrounding areas. I found it particularly useful for thin scratches that would be difficult to hit accurately with a brush.
Pen-style applicators excel at control but have limitations on paint capacity. The 1-ounce container holds less paint than brush bottles, but this is sufficient for dozens of small touch-ups. The pen tip dispenses paint consistently when pressed against the surface, creating clean lines without overflow.
Quick drying is a significant advantage of this formula. The touch-up paint dries to the touch within minutes, making it possible to complete multiple small repairs in a single session. I performed touch-ups on several appliances in about 30 minutes total, with each repair drying before moving to the next.
With nearly 1000 reviews and a 4.3-star rating, this pen has proven popular for its convenience factor. The chip-resistant formula holds up well to normal use, though I would not expect it to withstand heavy abrasion or harsh cleaning chemicals.
Who Should Buy?
Anyone with numerous small scratches who values precise, quick application. The pen design is perfect for detail-oriented touch-ups where control is more important than capacity.
Who Should Avoid?
Those with larger repair areas or needing to paint entire panels. The pen design is optimized for small touch-ups, not broader application.
Understanding Refrigerator Paint Types
Refrigerator paint differs significantly from standard wall or automotive paint. The unique environment of a refrigerator surface requires paint that can handle temperature fluctuations, moisture exposure, and frequent cleaning. Most refrigerators are finished with baked enamel at the factory, creating a hard, glossy surface that standard paint cannot replicate.
Epoxy-based appliance paint works best because it creates a chemical bond with the existing surface. The epoxy resin cures to form a hard, durable layer that resists chipping and scratching. I tested both epoxy and non-epoxy formulas during my research, and the epoxy options consistently outperformed in durability tests.
Temperature presents another challenge for refrigerator paint. The exterior surface may experience temperature swings from 68 degrees in a climate-controlled home to significantly higher or lower temperatures depending on placement. The paint must remain flexible enough to expand and contract with these temperature changes without cracking or peeling.
Food safety is also a consideration since refrigerators store food in close proximity to the painted exterior. Look for paints specifically labeled as appliance-safe and fully cured before exposing the refrigerator to food storage areas. Most appliance epoxies become food-safe after the 7-day full cure period.
Spray vs Brush-On: Choosing Your Application Method
Both spray and brush-on refrigerator paint have their place depending on your specific situation. Spray paint provides the smoothest finish and is fastest for large areas. The aerosol delivery creates fine droplets that level into a uniform coating. I found spray paint ideal for refrigerator sides and backs where a perfect finish is less critical than the doors.
Brush-on formulas offer more control and eliminate overspray concerns. When painting inside a home, spray paint can settle on surrounding surfaces regardless of how careful you are. Brush application contains the paint exactly where you want it. I prefer brush-on for refrigerator doors where precision matters more than speed.
The working time differs significantly between methods. Spray paint begins drying almost immediately, leaving little time for corrections. Brush-on paint stays workable for several minutes, allowing you to fix mistakes and smooth out imperfections. For first-time painters, this extended working time can mean the difference between success and frustration.
Consider your ventilation when choosing between methods. Spray paint requires substantial airflow to carry away fumes and overspray. Brush-on paint has lower odor and can often be used indoors with open windows. Your workspace constraints may dictate which method works best for your situation.
Surface Preparation: The Key to Lasting Results
Proper surface preparation determines 80% of your final result. Cutting corners here guarantees disappointment later. I tested various prep methods and found a consistent process that works across all refrigerator paint types.
Critical Prep Step: Clean the refrigerator surface thoroughly with a degreasing cleaner. Any oil, grease, or food residue will prevent paint adhesion. I use a mixture of warm water and TSP substitute, scrubbing the entire surface with a sponge.
Sanding creates mechanical adhesion between the old finish and new paint. Use 220-grit sandpaper to lightly scuff the entire surface. You are not trying to remove the old paint, just creating a textured surface for the new paint to grip. Wipe away all sanding dust with a tack cloth before proceeding.
Priming is not always necessary with epoxy appliance paint, but I always use it for problematic surfaces. Glossy original finishes may benefit from a light sanding with 400-grit paper followed by an adhesion primer. This extra step prevents the common problem of paint peeling after 6-12 months.
Masking protects areas you do not want painted. Use painter’s tape and plastic sheeting to protect handles, trim, and surrounding surfaces. I learned to remove door handles rather than trying to mask around them. The extra time upfront saves frustration later and produces cleaner results.
How to Paint a Refrigerator: Step by Step
Quick Summary: Painting a refrigerator requires cleaning, sanding, applying 2-3 thin coats of epoxy paint, and allowing 7 days for full curing before heavy use. Total project time is approximately 4-6 hours spread over 2-3 days.
- Clean the surface: Wash the refrigerator with a degreasing cleaner and warm water. Remove all grease, food residue, and grime. Allow the surface to dry completely.
- Scuff sand: Lightly sand the entire painting area with 220-grit sandpaper. Create uniform scratches across the surface for paint adhesion. Wipe clean with a tack cloth.
- Mask and protect: Apply painter’s tape to edges, handles, and trim. Cover surrounding areas with plastic sheeting or drop cloths to protect from overspray.
- Apply first coat: Hold spray paint 8-10 inches from the surface. Apply light, even passes overlapping by 50%. For brush-on, use a foam brush and work in small sections.
- Wait and recoat: Allow the first coat to dry for 30 minutes to 1 hour. Apply a second light coat. Most refrigerators require 2-3 coats for full coverage.
- Final coat: Apply a slightly heavier final coat to build the film thickness. This coat provides the depth and gloss that creates the factory-like appearance.
- Cure time: Allow the paint to dry for 24 hours before light use. Wait 7 days before heavy cleaning or exposing to moisture for maximum durability.
Color Matching Your Refrigerator
Matching existing refrigerator colors can be challenging because manufacturers use subtle shade variations. White appliances alone come in multiple shades including Arctic White, Polar White, Snow White, and standard White. Black appliances range from flat black to gloss black to black stainless steel.
When matching an existing finish, start by identifying your refrigerator brand and model number. This information often appears on a label inside the refrigerator door. Some manufacturers still produce touch-up paint specifically for their appliances, providing the closest possible match.
For full refinishing projects, exact matching matters less since you are covering the entire surface. White touch-up paint from Rust-Oleum proved compatible with most major brands during my testing. The slight variations in shade become invisible once the entire surface is covered.
Stainless steel presents unique matching challenges. Real stainless steel has variations and patterns that paint cannot perfectly replicate. However, the stainless steel appliance paint creates a convincing approximation from normal viewing distances. Consider whether close examination of your appliances is typical in your household.
Common Refrigerator Painting Problems and Solutions
Common Issue: Paint peeling after 6 months is usually caused by inadequate surface preparation. The paint cannot adhere to a glossy, unsanded surface. Solution: Always scuff sand with 220-grit paper and clean thoroughly before painting.
Runs and drips occur when paint is applied too heavily. Spray paint is particularly prone to running if you move too slowly or spray too close to the surface. The solution is applying multiple light coats rather than one heavy coat. If you notice a run, let it dry completely, sand it smooth, and repaint that area.
Orange peel texture creates a bumpy surface that does not match the smooth factory finish. This texture typically results from spraying in temperatures that are too cold or from holding the can too far from the surface. Maintain the recommended 8-10 inch distance and paint in temperatures above 65 degrees for the smoothest finish.
Fish eyes are small circular craters that appear in the paint. These are caused by contamination on the surface, typically silicone or oil-based residue. Thorough cleaning with a degreaser followed by wiping with rubbing alcohol eliminates most contamination issues before painting begins.
Cost Comparison: Painting vs Replacement
The economics of refrigerator painting are compelling when compared to appliance replacement. A new side-by-side refrigerator costs between $1200 and $3500 depending on features and brand. Professional appliance refinishing services charge $300-600 for a full refrigerator repaint.
DIY refrigerator painting costs break down as follows:
- Spray epoxy paint: $7-12 per can (3-4 cans needed for full refrigerator) = $21-48
- Brush-on epoxy: $25-30 per quart (1 quart covers full refrigerator) = $25-30
- Sanding supplies: Sandpaper, tack cloth = $8-12
- Masking materials: Painter’s tape, plastic sheeting = $10-15
- Total project cost: $40-75 for complete refrigerator refinishing
At approximately $50-75 total cost, DIY painting costs roughly 2-5% of replacement cost. Even if you hire a professional at $400-500, you are still paying only 15-20% of replacement cost. For households operating on tight budgets, painting an otherwise functional refrigerator makes financial sense.
The environmental benefits should not be overlooked. Manufacturing a new refrigerator consumes significant energy and resources. Extending the life of an existing appliance through painting reduces waste and environmental impact. I have kept my 12-year-old refrigerator looking new for another 5 years through proper refinishing.
Frequently Asked Questions ?
What kind of paint do you use on a refrigerator?
Use epoxy-based appliance paint specifically formulated for refrigerators and other appliances. Standard spray paint will chip and peel quickly. Rust-Oleum Specialty Appliance Epoxy is the most trusted option, providing a hard, durable finish that withstands temperature changes and moisture.
Can I use spray paint on my refrigerator?
Yes, spray paint designed for appliances works well on refrigerators. Aerosol epoxy spray creates the smoothest finish and is fastest for large areas. Apply 2-3 light coats rather than one heavy coat to prevent runs and drips. Always work in a well-ventilated area and wear a respirator mask when spraying.
How do I prep a refrigerator for painting?
Clean the surface thoroughly with a degreasing cleaner to remove all grease and grime. Lightly sand with 220-grit sandpaper to create texture for paint adhesion. Wipe away all dust with a tack cloth. Mask off handles, trim, and surrounding areas with painter’s tape and plastic sheeting. Proper preparation is essential for long-lasting results.
Is epoxy paint good for refrigerators?
Epoxy paint is the best choice for refrigerators because it creates a hard, durable finish similar to factory enamel. The epoxy resin cures to form a chemical bond with the existing surface that resists chipping, scratching, and peeling. Epoxy also withstands the temperature fluctuations and moisture exposure that refrigerators encounter.
Will paint stick to a stainless steel refrigerator?
Paint can adhere to stainless steel with proper surface preparation. Sand the stainless surface thoroughly with 220-grit paper, then apply an adhesion primer designed for slick surfaces. Stainless steel appliance paint creates a convincing faux finish, though it will not perfectly match real stainless steel upon close inspection.
How long does refrigerator paint take to cure?
Refrigerator paint dries to the touch in 30-60 minutes between coats, but full cure requires 7 days. During the first week, avoid harsh cleaning, abrasive scrubbing, or exposing the surface to moisture. Light use is acceptable after 24 hours, but the paint continues hardening for a full week to reach maximum durability.
Final Recommendations
After three weeks of testing refrigerator paints across multiple surfaces and conditions, Rust-Oleum’s Specialty Appliance Epoxy remains the clear winner for full refinishing projects. The combination of durability, appearance, and value makes it difficult to beat. I successfully refinished a 15-year-old refrigerator that now looks nearly new.
For minor repairs, the touch-up options from Rust-Oleum and cocomfix provide affordable solutions for extending the life of appliances that do not need complete refinishing. A $7 touch-up bottle can add years to an appliance’s appearance by addressing scratches before they rust.
The most important lesson from my testing is that surface preparation matters more than the specific paint brand. Even the best paint will fail if applied to a poorly prepared surface. Invest time in cleaning, sanding, and proper masking before opening any paint cans. Your results will reflect the care you take in preparation.
A painted refrigerator will not last forever. Expect 3-5 years of good appearance before touch-ups or repainting becomes necessary. However, at a cost of under $50 and 4-6 hours of work, that is a reasonable return for extending the life of an expensive appliance. In 2026, with replacement costs continuing to rise, painting your refrigerator is a smart financial decision.