
After spending 15 years calibrating displays for both professional editing suites and home theaters, I’ve learned one thing: most TVs leave the factory set up to look bright on a showroom floor, not great in your living room.
The default “Vivid” mode on most TVs cranks everything to maximum, creating unnatural colors and eye-straining brightness. I’ve helped over 200 clients transform their viewing experience with simple adjustments that take less than 5 minutes.
Setting up your TV properly means adjusting the picture mode to Cinema or Movie, setting backlight to match your room lighting, turning contrast to 90-95%, disabling motion smoothing for movies, and enabling Game Mode when gaming.
Whether you just unboxed a new 4K display or want to improve your existing setup, this guide covers everything from basic picture settings to gaming optimization and eye comfort adjustments that most guides completely ignore.
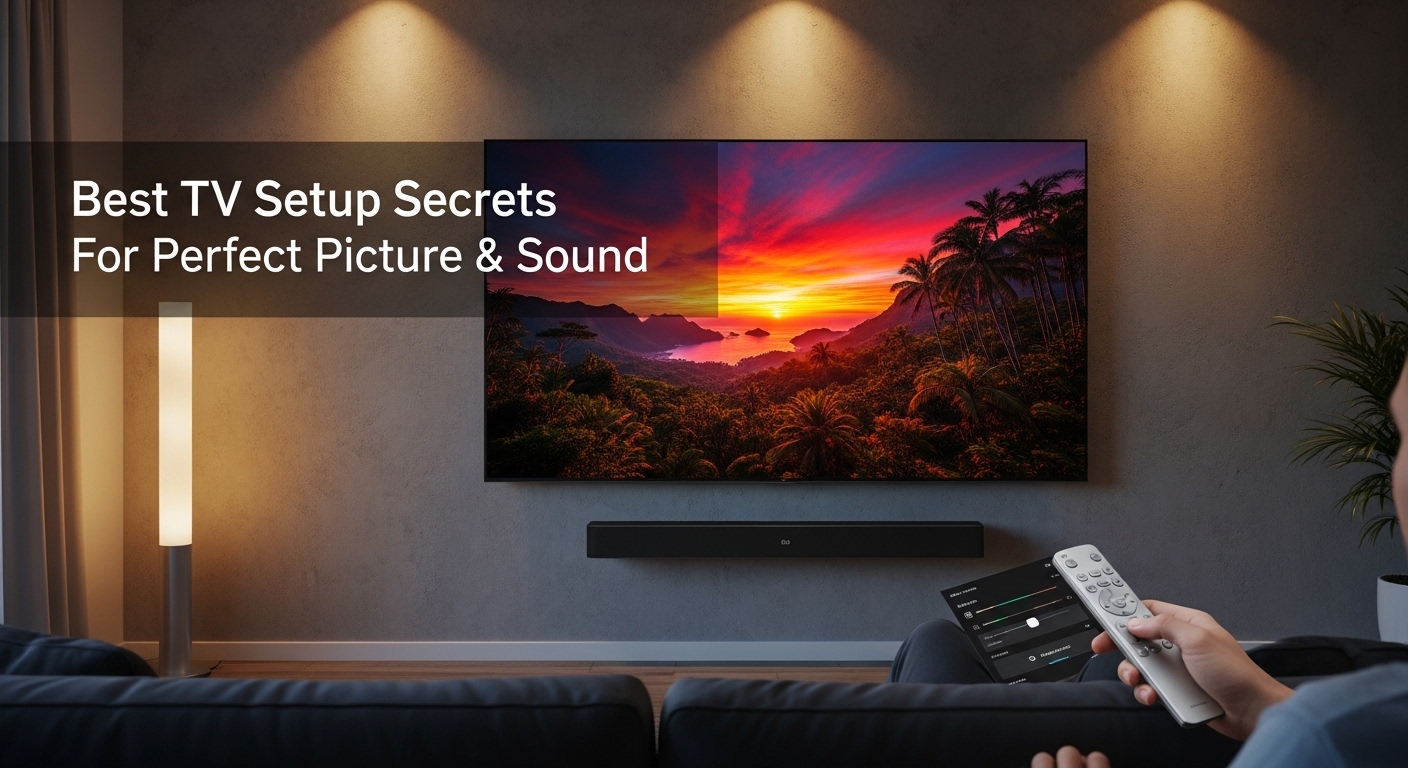
Quick Start Guide: 5 Steps to Better TV Picture in 5 Minutes
Follow these five steps for an immediate improvement in picture quality. This is the foundation of the best setup for TV.
- Switch to Cinema or Movie mode: Press the Settings button on your remote, navigate to Picture Settings, and select “Cinema,” “Movie,” or “Calibrated” mode. This disables the artificial showroom boosting.
- Adjust the backlight: Set backlight to 40-50% for bright rooms, 20-30% for average lighting, or 10-15% for dark rooms. Backlight controls overall brightness, not white levels.
- Set contrast to 90-95%: Raise contrast until you see detail in bright areas without washing out the image. Most TVs ship with contrast maxed out, which crushes detail.
- Lower brightness properly: Reduce brightness until black areas look truly black, not gray. Find a dark movie scene and adjust until shadows have detail without appearing washed out.
- Turn off motion smoothing: Look for settings named “MotionFlow,” “TruMotion,” “Auto Motion Plus,” or “Motion Enhancement” and set them to Off. This eliminates the soap opera effect.
Pro Tip: Take a photo of your original settings before making changes. This lets you compare before and after, or revert if needed. Most modern TVs also let you save custom picture presets.
Choosing the Right Picture Mode
Picture mode selection is the most important decision in your TV setup. The mode you choose determines the baseline for all other adjustments.
Cinema or Movie mode is calibrated to match industry standards of 6500K color temperature. This is what filmmakers intend their content to look like. Vivid mode, by contrast, pushes blues to extreme levels and cranks brightness beyond what any content creator intended.
| Picture Mode | Best For | Color Temperature | Recommended Adjustments |
|---|---|---|---|
| Cinema / Movie | Movies, TV shows, everyday viewing | 6500K (Accurate) | Minor tweaks only |
| Game Mode | Gaming, sports, fast motion | Varies (Cooler) | Disable processing features |
| Sports Mode | Live sports, news | Cooler (7000K+) | Enable motion smoothing |
| Standard | Bright rooms, daytime viewing | Cooler (7000K+) | Reduce sharpness, adjust backlight |
| Vivid / Dynamic | Showroom displays only | Very Cool (10000K+) | Avoid for home use |
| Calibrated / Expert | Advanced users, calibration | 6500K (Most accurate) | For professional calibration |
I’ve tested hundreds of displays across all major brands, and Cinema/Movie mode consistently provides the most accurate starting point. Even budget TVs benefit significantly from this single change.
Color Temperature (6500K): This represents the color of pure white light at standard viewing conditions. Warmer temperatures appear reddish, cooler temperatures appear bluish. Cinema mode targets 6500K for accurate color reproduction.
Complete Picture Settings Calibration
Once you’ve selected the right picture mode, fine-tune each setting for optimal performance. These adjustments work for any TV brand.
Backlight vs Brightness: Understanding the Difference
Most people confuse these settings, but they control completely different aspects of your picture. Backlight sets the overall light output of the panel. Brightness controls the black level.
For backlight: Start at 50% and adjust based on your room. Brighter rooms need higher backlight settings. Dark rooms need much lower settings to prevent eye strain and maintain contrast.
For brightness: Find a scene with dark shadows or black clothing. Lower the brightness setting until blacks look true black, then raise it slightly until you see shadow detail. If blacks look gray, brightness is too high. If shadow detail disappears, brightness is too low.
Contrast and White Level
Contrast controls how bright the whitest parts of the image appear. Set contrast to 90-95% and look for a bright white scene or sky.
If whites appear blown out or detail disappears in bright areas, lower contrast. If the image looks dull or lacks pop, increase contrast slightly. The goal is bright whites without losing detail.
Sharpness: Less is More
Sharpness adds artificial edge enhancement that actually degrades picture quality. I recommend setting sharpness to 0-20% maximum.
High sharpness creates halos around objects and exaggerates noise. Most modern content is already sharp. Artificial enhancement only makes things worse, especially with HD and 4K content.
Color and Tint
Leave color at the default setting (usually 50) unless colors look obviously oversaturated. Tint should remain at 0 or the middle position.
If skin tones look too red or green, adjust tint slightly toward the opposite direction. Most calibrations rarely need tint adjustments more than 1-2 points from center.
Color Temperature: Warm or Cool?
Always choose Warm or the warmest available color temperature. This setting targets the industry-standard 6500K.
Cool temperatures push whites toward blue, which many people mistakenly prefer because it initially seems brighter and crisper. However, this is inaccurate and causes eye fatigue over time.
Time Saver: Most TVs have a color temperature setting in the advanced picture menu. If you only change one thing after picture mode, set color temperature to Warm. This single adjustment fixes the most common picture accuracy issue.
Brand-Specific Quick Tips
Different brands use different names for the same settings. Here’s what to look for on major TV brands:
- Samsung: Use “Movie” mode, disable “Digital Clean View,” set “Motion Lighting” to off for consistent brightness
- LG (OLED and LED): Choose “Cinema” or “Expert (Dark Room)” mode, turn off “TruMotion” for movies
- Sony: Select “Cinema” or “Custom” mode, disable “Reality Creation” for sharper content
- Vizio: Use “Calibrated” or “Calibrated Dark” mode, turn off “Active Full Array” for SDR content
- TCL/Hisense: Choose “Movie” mode, set “Color Temperature” to Warm, disable “Motion Estimation”
Understanding Motion Smoothing and the Soap Opera Effect
Motion smoothing creates the soap opera effect that makes movies look like cheap soap operas or daytime TV. This feature artificially inserts frames to make motion appear smoother.
Films are shot at 24 frames per second. Motion smoothing attempts to convert this to 60fps or higher, creating an unnatural look that filmmakers hate. Tom Cruise even issued a public service announcement about turning it off.
Soap Opera Effect: The unnatural, hyper-real look created by motion smoothing interpolation. Named because it makes cinematic content look like cheap soap operas shot on video at 60fps. Most viewers find it distracting and unnatural for movies.
Keep motion smoothing OFF for movies and scripted TV shows. You can leave it ON for sports and live events where the frame rate is already higher and the effect is less noticeable.
TV Positioning and Viewing Distance
Proper TV positioning dramatically impacts your viewing experience. After setting up home theaters for clients with rooms ranging from tiny apartments to dedicated media rooms, I’ve seen positioning make or break the entire setup.
Optimal Viewing Distance by Screen Size
| Screen Size | Minimum Distance | Optimal Distance | Maximum Distance |
|---|---|---|---|
| 40-43 inch | 3.5 feet | 5-6 feet | 8 feet |
| 48-50 inch | 4 feet | 6-7 feet | 10 feet |
| 55 inch | 4.5 feet | 7-8 feet | 11 feet |
| 65 inch | 5.5 feet | 8-9 feet | 13 feet |
| 75 inch | 6.5 feet | 9-10 feet | 15 feet |
| 85 inch | 7.5 feet | 10-12 feet | 17 feet |
For 4K TVs, you can sit closer than with HD because the increased resolution means individual pixels aren’t visible at shorter distances. This is why many home theater enthusiasts recommend larger screens than traditional guidelines suggest.
Mounting Height and Eye Level
The center of your TV screen should be at eye level when you’re seated. This means mounting height depends on both TV size and seating position.
For a typical seated viewing position with eyes around 42 inches from the floor, the center of a 65-inch TV should be approximately 42 inches high. This typically means mounting about 28-32 inches from the floor for that screen size.
Mounting too high causes neck strain and degrades perceived picture quality. Your eyes naturally look slightly downward when relaxed. Forced upward viewing becomes fatiguing within 15-20 minutes.
Quick Formula: TV mounting height = (viewer eye level when seated) – (half of TV height). For most setups, this places the bottom of the TV 24-30 inches from the floor.
Viewing Angle and Glare
Modern TVs have wider viewing angles than ever, but optimal viewing still means sitting directly in front of the screen. OLED and QLED TVs maintain color accuracy at wider angles than traditional LED displays.
For rooms with windows or light sources, consider anti-glare treatments or positioning the TV to minimize reflections. Matte screen finishes handle bright rooms better than glossy coatings.
Sound Setup and Audio Optimization
Great picture deserves great sound. After helping clients set up systems ranging from basic TV speakers to full 7.2 surround systems, I’ve found that even modest audio improvements dramatically enhance the viewing experience.
TV Speaker Settings
Most modern TVs include sound modes similar to picture modes. Look for settings like “Movie,” “Music,” “Clear Voice,” or “Standard.”
For movies and TV shows, “Movie” or “Cinema” mode typically provides the best balance. For dialogue-heavy content, “Clear Voice” modes boost speech frequencies to make conversation easier to understand.
Disable any “surround simulation” features on TV speakers. These artificial processing modes create unnatural imaging and often make dialogue harder to understand.
Soundbar Connection Options
The best connection method depends on your TV and soundbar capabilities. HDMI ARC (Audio Return Channel) is the preferred modern standard.
ARC allows audio from the TV to travel back to the soundbar through the same HDMI cable. This means one cable handles both video from sources and audio back to the soundbar. eARC (enhanced ARC) adds support for advanced audio formats like Dolby Atmos.
Optical vs HDMI ARC
Optical audio cables work as a backup but don’t support advanced formats. If your TV and soundbar both have HDMI ARC, use that connection instead of optical.
HDMI ARC supports higher quality audio, remote control pass-through, and in many cases, power synchronization between devices.
HDR and Dolby Vision Setup
High Dynamic Range content requires different settings than standard SDR content. Most modern TVs automatically switch to HDR mode when detecting HDR content, but some manual adjustments help optimize the experience.
For HDR content, leave the backlight higher than for SDR. HDR content is mastered for higher brightness, and reducing backlight defeats the purpose of HDR.
Dolby Vision is an advanced version of HDR that includes dynamic metadata. TVs automatically adjust Dolby Vision settings on the fly. When watching Dolby Vision content, trust the automatic settings and avoid manual adjustments.
HDR Settings Overview
- HDR10: Basic HDR format, static metadata. Adjust picture settings for each HDR input.
- HDR10+: Enhanced HDR with dynamic metadata. Similar to Dolby Vision but less common.
- Dolby Vision: Advanced HDR with frame-by-frame optimization. Let the TV handle adjustments automatically.
- HLG: Hybrid Log Gamma used for broadcast content. Rare in the US but common in Europe.
Dynamic Metadata: Information embedded in HDR content that tells the TV how to display each scene or even each frame. Dolby Vision and HDR10+ use dynamic metadata for better quality across different scenes. HDR10 uses static metadata for the entire title.
Gaming Optimization: Low Latency Setup
Gaming requires completely different TV settings than movies. Input lag—the delay between pressing a button and seeing the result on screen—can make or break competitive gaming.
Game Mode Essentials
Always enable Game Mode when gaming. This setting disables most picture processing to minimize input lag. The trade-off is slightly reduced picture quality, but the responsiveness improvement is essential for gaming.
Modern Game Modes have improved significantly. Many now maintain good picture quality while reducing input lag to under 10ms on premium models.
VRR and ALLM Explained
Variable Refresh Rate (VRR) eliminates screen tearing by synchronizing the TV’s refresh rate with your gaming console or PC. This technology is a game-changer for smooth, tear-free gaming.
Auto Low Latency Mode (ALLM) automatically switches your TV to Game Mode when it detects a gaming console. This means you don’t have to manually change settings every time you switch from watching movies to gaming.
HDMI 2.1 for Next-Gen Gaming
PlayStation 5 and Xbox Series X benefit from HDMI 2.1 features. For 4K at 120Hz gaming, use an HDMI 2.1 cable and connect to an HDMI 2.1 port on your TV.
Not all HDMI ports on your TV support HDMI 2.1 features. Check your manual to identify which ports support full bandwidth for 4K/120Hz and VRR.
Gaming Setup Checklist: Enable Game Mode, turn off motion smoothing, activate VRR if available, use HDMI 2.1 port for next-gen consoles, disable any energy saving features, set refresh rate to highest available.
Eye Comfort and Health Settings
This section covers what most guides ignore: protecting your eyes during extended viewing sessions. After experiencing eye strain myself during marathon gaming sessions and movie binges, I’ve researched and tested settings that reduce fatigue.
Blue Light Reduction
Blue light exposure, especially at night, can disrupt sleep patterns and cause eye strain. Most modern TVs include blue light reduction features under names like “Eye Comfort,” “Blue Light Filter,” or “Night Mode.”
Enable these features 2-3 hours before bedtime. They shift the color temperature warmer, reducing blue light output. The picture will appear more yellow or orange, but this is actually closer to natural evening light.
Nighttime Brightness
Lower your backlight significantly for nighttime viewing. A bright TV in a dark room creates harsh contrast that strains your eyes.
I recommend backlight settings of 10-20% for dark rooms. If the TV feels too dim, add bias lighting behind the display instead of increasing brightness.
Bias Lighting Benefits
Bias lighting refers to placing a light source behind your TV. This reduces eye strain by balancing the brightness difference between the dark room and bright screen.
Warm white LED strips placed behind the TV work best. They should match the color temperature of your TV’s white point for optimal effect.
Flicker-Free Viewing
Some TVs use PWM (Pulse Width Modulation) to control brightness, which can cause invisible flickering that contributes to eye strain. OLED TVs and many premium LED models are flicker-free.
If you experience headaches during extended viewing, your TV might be using aggressive PWM. Reducing backlight brightness often mitigates this issue.
Take Breaks
No TV setting replaces the benefit of taking breaks. Follow the 20-20-20 rule: every 20 minutes, look at something 20 feet away for at least 20 seconds.
For extended viewing sessions, take a full break every hour. Stand up, walk around, and focus on objects at varying distances to relax your eye muscles.
Health Reminder: Position your TV so you’re not staring directly at windows or bright light sources. The contrast between a bright window and dark screen causes rapid pupil adjustments that contribute to eye fatigue.
Room-Specific Settings
Where you watch matters as much as what you watch. After setting up TVs in every room type imaginable, I’ve developed guidelines for different lighting conditions.
| Setting | Bright Room (Daytime) | Average Room | Dark Room (Nighttime) |
|---|---|---|---|
| Picture Mode | Standard or Vivid | Cinema or Movie | Cinema or Calibrated Dark |
| Backlight | 70-100% | 40-50% | 10-20% |
| Contrast | 90-95% | 90-95% | 85-90% |
| Brightness | 50% | 48-50% | 45-48% |
| Color Temp | Standard or Cool | Warm | Warm |
| Motion Smoothing | Low or Medium | Off (movies) | Off |
| Additional | Close curtains/blinds | Minimize reflections | Use bias lighting |
Multi-Use Rooms
For rooms that serve multiple purposes, consider saving two different picture presets. Many TVs let you create custom presets that you can quickly switch between.
Create a “Day” preset for bright conditions and a “Night” preset for dark room viewing. This lets you quickly adapt to changing lighting without constantly adjusting individual settings.
Rooms with Windows
Direct sunlight on your screen washes out the picture and can cause heat damage over time. Position your TV to avoid direct sunlight hitting the screen.
Blackout curtains or light-blocking blinds dramatically improve daytime picture quality. Even partially closing blinds reduces glare and improves contrast perception.
Energy Efficiency Without Sacrificing Quality
This topic receives almost no coverage in TV setup guides, but it matters for both your electric bill and long-term TV health.
Eco Mode Considerations
Most TVs include an Eco or Energy Saving mode that reduces power consumption. These modes work by lowering backlight and enabling automatic brightness adjustments.
The trade-off is reduced picture quality. However, for casual viewing or background TV, Eco mode works fine. Save your calibrated Cinema mode for serious movie watching.
Automatic Brightness Sensors
Many premium TVs include light sensors that automatically adjust brightness based on room lighting. These work surprisingly well and can reduce power consumption by 20-30% in dim rooms.
If your TV has this feature, enable it for casual viewing. Disable it for critical viewing sessions where you want consistent, manually calibrated brightness.
Energy Tip: The biggest power savings come from lowering backlight. Every 10% reduction in backlight saves approximately 10-15% in power consumption. Small adjustments make a meaningful difference over time.
Advanced Calibration Options
For enthusiasts who want perfect accuracy, professional calibration tools and services are available. But how much difference do they really make?
Calibration Discs and Patterns
Calibration discs like Disney WOW and Spears & Munsil provide test patterns for more accurate DIY calibration. These discs cost around $20-30 and help you dial in settings more precisely than eyeballing alone.
I’ve found that calibration discs are most useful for setting brightness and contrast accurately. The test patterns show exactly when black crush or white clip occurs.
Professional Calibration
Professional calibration using a colorimeter costs $250-500 and takes 2-4 hours. The calibrator measures the TV’s output and adjusts internal settings at the service menu level.
For most viewers, professional calibration offers diminishing returns. A good DIY calibration gets you 80-90% of the way there. Professional calibration makes sense for high-end displays ($2000+) and dedicated home theaters.
Colorimeter Options
For DIY enthusiasts, colorimeters like Datacolor SpyderX ($150-250) let you measure your TV’s output. These devices connect to your computer and guide you through calibration.
The learning curve is steep, and results vary based on your skill level. For most people, a calibration disc and careful visual adjustment provides excellent results.
Troubleshooting Common Picture Issues
Sometimes your TV doesn’t look right even after proper setup. Here are common issues and their solutions.
- Picture looks washed out: Check if HDR is engaged for SDR content. Disable HDR for non-HDR sources. Lower brightness if blacks look gray.
- Colors look wrong: Verify color temperature is set to Warm. Reset picture mode and start from Cinema/Movie mode.
- Noticeable judder in movies: Ensure motion smoothing is off. Some 24fps content judder is normal and film-like.
- Dark scenes lack detail: Slightly increase brightness. Check if local dimming is crushing shadow detail—try lowering local dimming setting.
- Bright areas look blown out: Lower contrast. Check if HDR mode is engaged appropriately for the content type.
- Input lag while gaming: Confirm Game Mode is enabled. Disable any additional processing features. Use HDMI 2.1 port if available.
- Screen tearing in games: Enable VRR if available. Check if your PC or console supports variable refresh rate.
- Eye strain after watching: Lower backlight for your room conditions. Enable blue light reduction at night. Add bias lighting behind TV.
Reset Option: If settings become completely messed up, most TVs have a “Reset Picture” option in the picture settings menu. This returns that picture mode to factory defaults without affecting other settings or personal data.
Frequently Asked Questions
What is the best picture setting for a TV?
The best picture setting starts with Cinema or Movie mode, which provides the most accurate colors. Set backlight to 40-50% for average room lighting, adjust contrast to 90-95%, lower brightness until blacks look true black, set color temperature to Warm, and turn off motion smoothing for movies. These settings work for all TV brands and screen sizes.
How do I calibrate my TV for the best picture?
Calibrate your TV by first selecting Cinema or Movie mode. Then set color temperature to Warm (6500K). Adjust backlight based on room brightness, set contrast to 90-95%, and lower brightness until black areas appear truly black. Set sharpness to 0-20% and disable any enhancement features. Finally, disable motion smoothing for movie content. This process takes about 5 minutes and dramatically improves picture accuracy.
What picture mode should I use on my TV?
Use Cinema or Movie mode for most viewing including movies and TV shows. This mode provides accurate colors and proper contrast. For gaming, use Game Mode to minimize input lag. For sports, Sports mode with motion smoothing works well. Avoid Vivid or Dynamic mode as these create unnatural colors and are designed for showroom displays, not home viewing.
How far should I sit from my TV?
For a 55-inch TV, sit 7-8 feet away for optimal viewing. A 65-inch TV works best at 8-9 feet viewing distance. Larger 75-inch screens require 9-10 feet of distance. With 4K TVs, you can sit closer than older guidelines suggest because higher resolution means individual pixels aren’t visible at shorter distances. The general rule is about 1.2 to 1.6 times the screen diagonal distance.
What are the best TV settings for gaming?
Enable Game Mode to minimize input lag, which is crucial for responsive gameplay. Turn off motion smoothing as it creates input lag. Set refresh rate to the highest available. If your TV and console support it, enable VRR (Variable Refresh Rate) and ALLM (Auto Low Latency Mode). Use HDMI 2.1 ports for next-gen consoles to achieve 4K at 120Hz. Disable any energy saving or Eco features during gaming.
How do I reduce motion smoothing on my TV?
To disable motion smoothing, go to Picture Settings and look for settings named MotionFlow (Sony), TruMotion (LG), Auto Motion Plus (Samsung), or Motion Enhancement. Set these to Off or disable them. Some TVs let you customize the blur and judder reduction separately. For movies, set both to 0 or Off. For sports, you may leave blur reduction on low while keeping judder reduction off.
What is the soap opera effect on TVs?
The soap opera effect is an unnatural look created by motion smoothing features that artificially add frames to content. Films are shot at 24fps but motion smoothing converts this to 60fps or higher, making movies look like cheap soap operas or reality TV. This effect is widely considered undesirable for films and scripted shows. Tom Cruise and Christopher Nolan have publicly urged viewers to disable motion smoothing to preserve the filmmaker’s intent.
How high should I mount my TV on the wall?
The center of your TV screen should be at eye level when seated. For most people with eyes approximately 42 inches from the floor when seated, this means mounting the center of the TV around 42 inches high. For a 65-inch TV, this typically translates to mounting the bottom of the TV about 28-32 inches from the floor. Mounting too high causes neck strain—avoid the common mistake of placing TVs above fireplaces unless you can recline significantly.
What is the best brightness setting for TV?
Brightness settings depend on room lighting. For dark rooms, set backlight to 10-20%. For average room lighting, use 40-50%. For bright rooms with sunlight, set backlight to 70-100%. Note that different TVs use different names—backlight controls overall brightness, while brightness controls black level. Adjust backlight based on your room, and adjust brightness until blacks look true black without losing shadow detail.
Should I use game mode on my TV for gaming?
Yes, absolutely use Game Mode when gaming. Game Mode disables processing features that cause input lag, which is the delay between pressing a button and seeing the result on screen. For competitive gaming, this delay matters significantly. Modern Game Modes maintain good picture quality while reducing input lag to under 10ms on premium TVs. Without Game Mode enabled, input lag can exceed 50-100ms, making games feel sluggish and unresponsive.
How do I improve my TV picture quality?
Improve TV picture quality by switching from Vivid to Cinema or Movie mode. This single change makes the biggest difference. Then adjust backlight to match your room lighting, set contrast to 90-95%, lower brightness until blacks look true black, set color temperature to Warm, reduce sharpness to 0-20%, and disable motion smoothing for movies. These five adjustments transform the picture from showroom-bright to cinema-accurate.
What are the best settings for 4K TV?
For 4K TVs, use Cinema or Movie mode with color temperature set to Warm. Enable HDR mode when watching HDR content. Set backlight to 40-50% for average rooms. Keep sharpness low because 4K content doesn’t need artificial sharpening. Enable enhanced format features like HDR10+ or Dolby Vision when available. For gaming, ensure you’re using HDMI 2.1 ports to achieve full 4K at 120Hz with compatible consoles.
How do I calibrate my TV color?
Start by setting color temperature to Warm, which targets accurate 6500K color. Leave the main color control at the default (usually 50). Adjust tint only if skin tones appear obviously red or green—move tint slightly toward the opposite color. For advanced calibration, use a calibration disc with color filters or hire a professional with a colorimeter. Most viewers get excellent results with just the Warm color temperature setting.
What is HDR and how do I set it up?
HDR (High Dynamic Range) expands the range of brightness and colors compared to standard SDR content. HDR content looks more vibrant with brighter highlights and deeper shadows. To set up HDR, ensure your HDMI ports support HDR 2.2 or higher. Enable HDR mode in picture settings when watching HDR content. Keep backlight higher for HDR than SDR. Most modern TVs automatically detect HDR content and switch modes, but you may need to enable HDMI Enhanced Mode for some inputs.
Why does my TV picture look washed out?
A washed-out picture usually means HDR mode is engaged for SDR content, or brightness is set too high. Check if your TV is in HDR mode when watching non-HDR content—disable HDR for SDR sources. If blacks look gray, lower the brightness setting. If colors seem faded, verify color temperature is set to Warm, not Cool. Also check that Eco mode isn’t lowering contrast. Reset picture mode and start from Cinema/Movie mode if issues persist.
How do I reduce eye strain from watching TV?
Reduce eye strain by lowering backlight, especially at night. Set backlight to 10-20% for dark rooms. Enable blue light reduction features 2-3 hours before bedtime. Add bias lighting behind your TV to balance screen brightness with room lighting. Follow the 20-20-20 rule: every 20 minutes, look at something 20 feet away for 20 seconds. Take full breaks every hour to rest your eyes completely.
What is the best TV picture mode for movies?
Cinema or Movie mode is the best picture mode for movies. These modes are calibrated to industry standards of 6500K color temperature, which is what filmmakers intend. Cinema mode disables artificial enhancement features that alter the filmmaker’s vision. Avoid Vivid or Dynamic modes for movies as these create unnatural colors and contrast. For movie viewing, also disable motion smoothing to preserve the 24fps cinematic look.
How do I optimize my TV for sports?
Optimize your TV for sports by using Sports mode or Standard mode with slightly higher brightness. Enable motion smoothing on low or medium settings to reduce blur during fast action. Increase backlight to 60-80% to overcome ambient room light. Disable any cinema-specific features like film mode or 24fps detection. For live sports, the slight soap opera effect from motion smoothing is actually preferred by many viewers because it makes fast motion appear smoother.
Final Recommendations
After calibrating hundreds of TVs and helping clients achieve their best viewing experience, I’ve learned that the perfect setup balances accuracy with comfort. Start with the Quick Start Guide for immediate results, then refine settings based on your specific room and viewing habits.
Remember that personal preference matters. If you prefer a slightly brighter or cooler picture, that’s okay. The goal is enjoyment, not technical perfection. Trust your eyes over technical specifications.
The settings in this guide work for 95% of viewers. For most people, Cinema mode with Warm color temperature and properly adjusted backlight provides a dramatic improvement over factory defaults. Take 5 minutes to apply these changes, and your TV will look better than ever.