
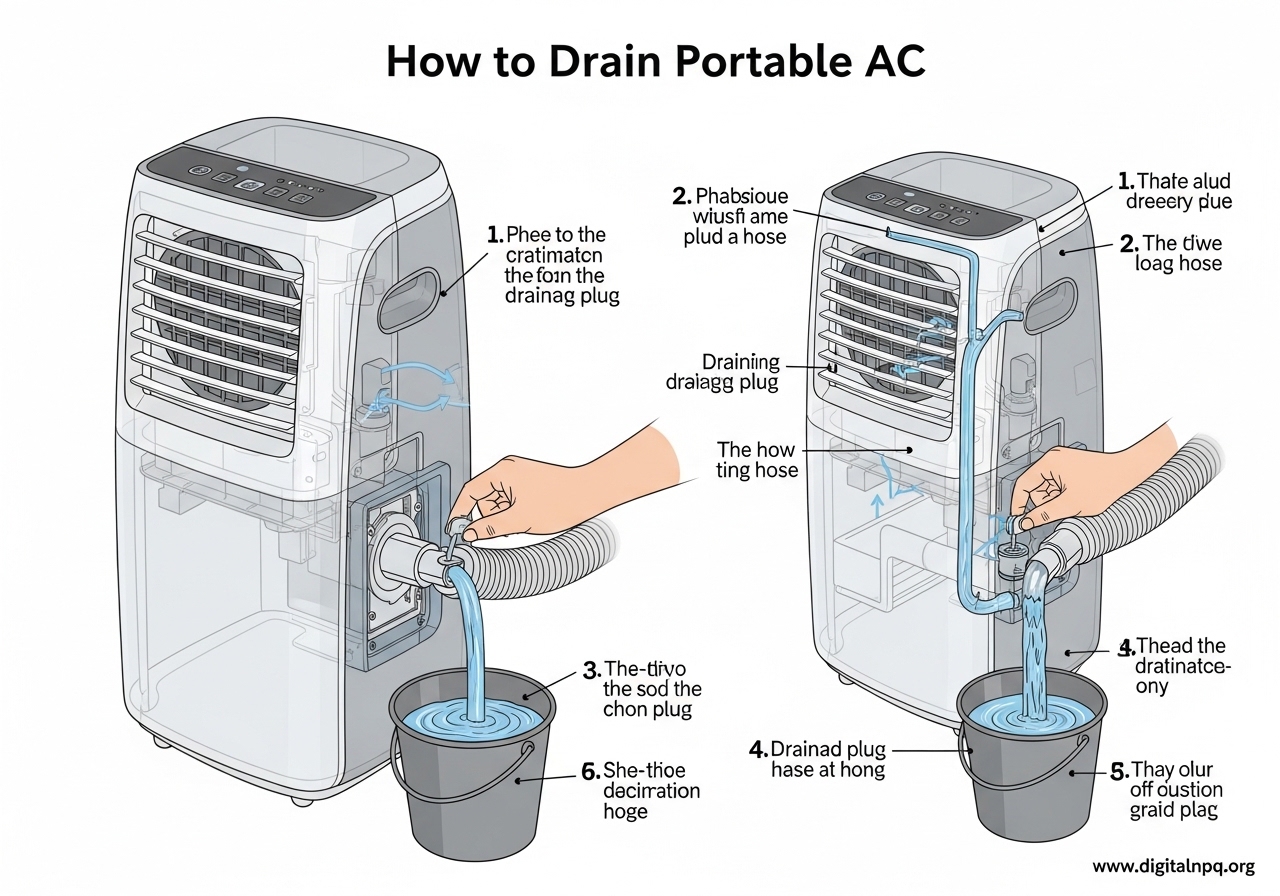
If you own a portable air conditioner, you have probably heard that annoying beep or seen a mysterious “P1” code flash on the display. That is your unit telling you it needs to be drained. Learning how to drain portable AC units properly keeps your cooler running efficiently and prevents messy water overflow on your floor. I have dealt with portable AC drainage in everything from muggy East Coast summers to dry desert climates, and the process is simpler than most people think once you understand the basics.
In this guide, I will walk you through every drainage method available — from the basic manual drain to setting up a continuous hose system and even draining without a hose at all. Whether your unit has one drain port or two, whether you run it in cool mode or dry mode, you will find exactly what you need right here.
Why Does a Portable AC Need Draining?
Portable air conditioners work by pulling warm air from your room, passing it over cold evaporator coils, and blowing the cooled air back out. When warm, humid air hits those cold coils, moisture condenses on the surface — the same way water droplets form on the outside of a cold glass on a summer day. That moisture is called condensate, and it has to go somewhere.
Most portable AC units collect this condensate water in an internal storage tank at the bottom of the unit. As the tank fills up over hours of operation, the water needs to be removed. If the tank overflows, water can leak out of the unit and damage your floor or carpet.
Self-Evaporating Technology
Many newer portable AC models use self-evaporating technology (sometimes called “auto-evaporation”) to reduce how often you need to drain. These units spray the collected condensate water over the hot condenser coils, where it evaporates and gets exhausted outside through the vent hose. In dry climates, a self-evaporating unit might rarely need manual draining at all. But in humid environments, even the best self-evaporating systems cannot keep up with the amount of moisture being pulled from the air, and you will still need to drain the tank periodically.
The slinger ring is the component responsible for this process — it picks up water from the tank and flings it onto the condenser coils. When the water level gets too high for the slinger ring to manage, the tank needs manual drainage.
How to Drain Portable AC: Step-by-Step Manual Method
The manual drain method is the most common way to empty your portable AC water tank. Every portable air conditioner has at least one drain port, usually located near the bottom of the back panel. Here is the exact process I follow every time:
Step 1: Turn off and unplug the unit. This is a non-negotiable safety step. Water and electricity do not mix. Always unplug the unit before touching any drain components.
Step 2: Place a shallow pan, bucket, or baking sheet under the drain port. The drain port is typically on the lower back of the unit. A low baking sheet or a shallow dish works well because the opening sits close to the ground. If you have a deeper bucket, you may need to elevate the entire AC unit on a sturdy platform to get enough clearance for water to flow downward.
Step 3: Remove the drain cap and rubber stopper. Most units have a screw-on drain cap and a rubber stopper underneath. Unscrew the cap first, then pull out the rubber stopper. Keep both parts in a safe place — they are easy to lose and specific to your model.
Step 4: Let the water drain completely. Water will flow out by gravity. Be patient — a full tank can take several minutes to empty. Do not tilt or shake the unit aggressively while water is draining, as this can cause splashing or force water into internal components.
Step 5: Replace the rubber stopper and screw the drain cap back on. Make sure both are seated tightly to prevent slow leaks during operation. A loose stopper is one of the most common causes of mysterious puddles under portable ACs.
Step 6: Dispose of the collected water. Condensate water is essentially distilled — it is safe to pour down any drain, into your garden, or on outdoor plants. Avoid pouring it back into any appliance.
Step 7: Plug the unit back in and power it on. Check for any dripping around the drain port for the first few minutes to confirm everything is sealed properly.
Safety Tips for Manual Draining
Always unplug before draining — even if your unit has a built-in pump. Portable ACs can hold 1 to 3 gallons of water, so use a container large enough to catch the full volume. If your unit is heavy, ask someone to help you tilt it slightly toward the drain side for more complete drainage. Never lay the unit on its side, as this can damage internal components and void your warranty.
How to Drain a Portable AC with a Hose (Continuous Drainage)
If you are tired of manually draining your portable AC every few days, setting up continuous drainage is the answer. This method uses a drain hose connected to the unit so that condensate water flows out automatically as it collects. No more buckets, no more P1 errors, no more guessing when the tank is full.
Setting Up Continuous Drainage
Most portable AC units that support continuous draining have an upper drain port specifically designed for hose attachment. The upper port sits higher on the back of the unit than the standard lower drain port, which allows gravity to move water through the hose and away from the unit.
Here is how to set it up:
Step 1: Turn off and unplug the unit.
Step 2: Locate the upper drain port on the back of the unit. It is usually marked with a hose icon or labeled “continuous drain.”
Step 3: Remove the drain cap from the upper port.
Step 4: Connect a compatible drain hose. Many portable ACs accept a standard garden hose, while others require a specific hose diameter (often included with the unit). Push the hose onto the port and tighten any threaded connection. If your hose and port are different sizes, a simple adapter from any hardware store solves the mismatch.
Step 5: Route the hose to a floor drain, sink, bucket, or out a window. The hose must slope downward the entire way — water cannot flow uphill. Even a slight upward section will cause water to pool in the hose and back up into the unit.
Step 6: Secure the hose end so it does not slip out of the drain or bucket. A hose clamp or even a heavy object placed over the hose near the drain opening keeps it in place.
Step 7: Plug the unit in and test. Run the AC for 30 minutes and check that water is flowing through the hose and that there are no leaks at the connection point.
Elevation Tips for Better Hose Flow
Gravity does all the work in a continuous drainage setup, so elevation matters. Place your portable AC on a raised platform — even 4 to 6 inches makes a noticeable difference in flow rate. A sturdy stand, a set of caster blocks, or a purpose-built AC platform all work well. Just make sure the platform is level and can support the weight of the unit plus a full tank of water (potentially 50 to 80 pounds total).
How to Drain Portable AC Without a Hose
Not every portable AC comes with a drain hose, and not everyone has a floor drain nearby. If you need to drain your unit without a hose, you have a few practical options that go beyond the standard bucket-under-the-port method.
The Bucket and Pan Method
This is the default approach most portable AC owners use. Place a shallow pan or baking sheet directly under the lower drain port, remove the cap and stopper, and let gravity do the rest. For units that sit very low to the ground, a baking sheet with a lip works better than a bucket because it slides under the unit easily.
The downside is capacity — most baking sheets hold less than a quart of water, while a full condensate tank can hold a gallon or more. You will likely need to empty the pan multiple times during a single drain session. I keep two pans handy so I can swap them quickly.
The Shop Vac Method
If your portable AC is too heavy to lift or you cannot get a container under the drain port, a wet/dry shop vac is a surprisingly effective tool. Attach the smallest nozzle or hose attachment to your shop vac, hold it against the drain port opening, and let the vacuum suction pull the water out. This method works well for units in tight spaces or on carpeted floors where you want to avoid any risk of spills.
One forum user I came across mentioned they drain their 65-pound portable AC this way every week and it takes about 90 seconds — far faster than waiting for gravity to do the job.
The Condensate Pump Option
For a more permanent solution without a nearby drain, a condensate pump is worth considering. These small pumps connect to the drain port and actively push water through tubing to a remote drain, sink, or even out a window. Unlike gravity-fed continuous drainage, a condensate pump can move water vertically — up and over obstacles. They are commonly used with dehumidifiers and HVAC systems and work just as well with portable ACs. Setup takes about 15 minutes and the pump runs automatically whenever water accumulates.
The Tilt Technique
For draining every last drop, especially before storing your unit for the off-season, carefully tilt the portable AC backward or toward the drain side. This angles the internal tank so residual water flows toward the drain port. Do this slowly and have someone help you — a sudden tilt can cause water to rush out and splash everywhere. TCL and several other manufacturers specifically recommend this technique in their support documentation for complete tank drainage.
Upper Drain Port vs Lower Drain Port Explained
Many portable AC units have two separate drain ports, and they serve different purposes. Understanding the difference saves you time and prevents confusion.
Lower Drain Port
The lower drain port sits near the bottom of the unit and is used for manual draining. When you open this port, water flows out by gravity into a container placed beneath it. This port drains the entire internal tank. Use the lower port when you need to empty a full tank, clear a P1 error, or prepare the unit for storage.
Upper Drain Port
The upper drain port is positioned higher on the unit and is designed for continuous drainage with a hose attached. Because it sits above the water level during normal operation, water only flows out through this port when a hose is connected and routed to a lower point. This port is your go-to for a set-it-and-forget-it drainage solution. Not all portable ACs have an upper port — budget models often include only the lower drain port.
Which Port Should You Use?
Use the lower port for occasional manual draining. Use the upper port for continuous hose drainage if your unit has one. If your unit only has a single port, you can still attach a hose for continuous draining — just make sure the hose slopes downward from that port and the rubber stopper is removed.
How Often Should You Drain Your Portable AC?
There is no single answer to this question because drainage frequency depends on three main factors: your climate, the operating mode, and how long you run the unit.
By Climate
In humid climates (like Florida, the Gulf Coast, or the Midwest in summer), you may need to drain every 4 to 8 hours of operation. The air holds more moisture, so your AC pulls more condensate out of the room. In dry climates (like Arizona, Nevada, or high-altitude areas), self-evaporating models might go weeks without needing a manual drain.
By Operating Mode
Cool mode produces moderate condensate. Dry mode and dehumidify mode pull significantly more moisture from the air, filling the tank much faster — expect to drain twice as often. Heating mode on dual-function units also generates condensate, though typically less than cooling in humid weather.
General Guidelines
Check the tank level every 8 to 12 hours of continuous use in moderate humidity. Most units will display a P1 error code when the tank is full and automatically shut off to prevent overflow. Do not ignore the P1 code — it means your AC has stopped cooling and needs immediate drainage to resume operation. If you see this code frequently, consider switching to continuous hose drainage to eliminate the problem entirely.
Troubleshooting Common Drainage Problems
Even with the right technique, drainage issues pop up. Here are the most common problems I hear about and how to fix them.
Hose Not Draining
If you set up continuous drainage and water is not flowing through the hose, check for three things: kinks in the hose, an upward section in the hose run, or a clogged drain port. Straighten any bends in the hose. Make sure the entire hose path slopes downward from the unit to the drain. If the drain port itself is clogged with debris or mineral buildup, use a pipe cleaner or a straightened paperclip to gently clear the opening.
Water Leaking When Removing the Drain Cap
A small amount of water escaping when you remove the cap is normal — there is often water sitting right at the opening. To minimize this, place your collection container flush against the unit before removing the cap. If water gushes out uncontrollably, the tank may be completely full and under slight pressure from the weight of the water. In this case, crack the cap open slowly and let air into the tank to equalize pressure before fully removing it.
P1 Error Keeps Coming Back
If you drain the unit and the P1 error returns within minutes, the tank may not have drained completely. Tilt the unit gently toward the drain side to get residual water out. Also check that the drain cap and rubber stopper are properly reinstalled — a missing stopper can cause the sensor to misread the water level. In rare cases, the float sensor inside the tank may be stuck. Refer to your specific model’s manual for sensor cleaning instructions.
Unit Vibrates and Splashes Water During Drain
This usually happens when the unit has not been turned off before draining. The internal fan and compressor slosh water around in the tank. Always power off and unplug before opening any drain port. If the unit is off and you still hear splashing, the internal tank baffles may be damaged — contact the manufacturer for service.
FAQ
Does my portable AC unit need to be drained?
Most portable air conditioners need periodic draining, though the frequency depends on your climate and operating mode. Units with self-evaporating technology may rarely need draining in dry climates but will still require it in humid conditions. If your unit displays a P1 error code, it needs draining immediately.
What happens if I don’t drain my portable AC?
If you ignore drainage, the internal tank will overflow and water will leak onto your floor, potentially damaging flooring, furniture, and walls. Most modern units shut off automatically when the tank is full (triggering a P1 error code) to prevent overflow, but the unit will stop cooling until you drain it.
Can I run my portable AC without draining it?
You can run a self-evaporating portable AC in cool mode in a dry climate without draining for extended periods. However, in humid conditions or when using dry or dehumidify mode, the tank will fill and the unit will shut off. Setting up continuous drainage with a hose eliminates the need for manual draining entirely.
What is the P1 error code on a portable AC?
The P1 error code indicates that the internal water tank is full and needs to be drained. It is a safety feature that shuts the compressor off to prevent overflow. To clear the code, drain the water from the unit using the lower drain port, then power the unit back on.
Why is my portable AC not draining through the hose?
The most common cause is an upward slope or kink in the hose. Portable ACs use gravity drainage, so the hose must slope downward continuously from the drain port to the drain outlet. Also check that the rubber stopper has been removed from the drain port and that the connection is tight and leak-free.
Conclusion
Knowing how to drain portable AC units is basic maintenance that keeps your cooler running at peak performance. The manual method takes just a few minutes — unplug, open the lower drain port, catch the water, seal it back up. For a hands-off approach, connect a hose to the upper drain port and let gravity handle the rest. And if you are dealing with a heavy unit or no nearby drain, a shop vac or condensate pump can make the job far easier.
The key takeaway: check your tank regularly, set up continuous drainage if your climate demands frequent emptying, and never ignore the P1 error code. A well-maintained drainage routine means consistent cooling, no water damage, and a portable AC that lasts for years.