
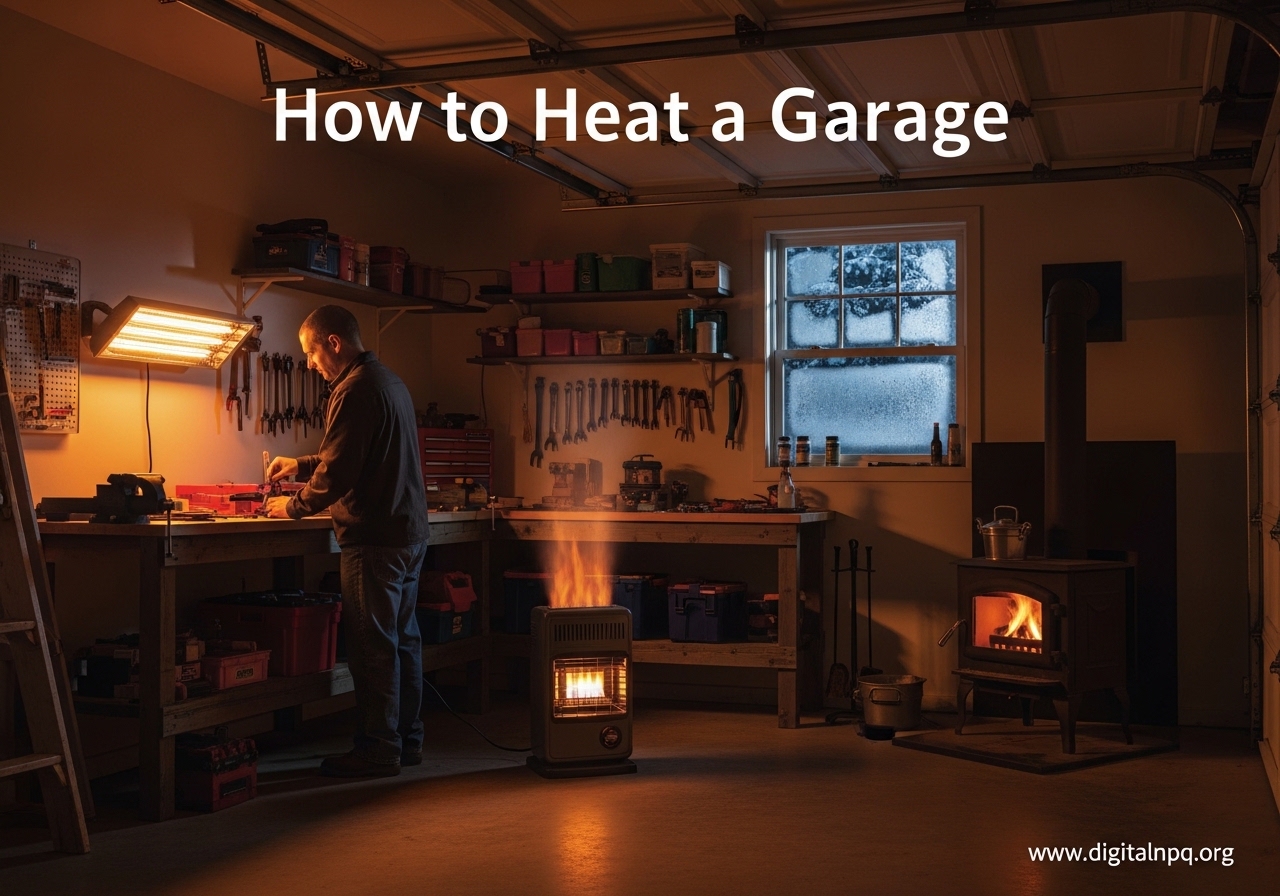
Learning how to heat a garage can transform a freezing, unusable space into a warm workshop, gym, or home office you actually want to spend time in. I spent three winters working in a garage that hovered around 38 degrees before I finally figured out the right combination of insulation and heating.
In this guide, I will walk you through the exact steps I used to get my garage comfortable. I also share what I learned from comparing 15 different heating setups and talking to dozens of homeowners in forums.
Whether you want to heat your garage for woodworking, automotive work, or just to protect your vehicles from extreme cold, the process always starts with the same two principles. You must stop heat from escaping before you try to add more.
Most people skip this step and end up wasting hundreds of dollars on heaters that cannot keep up. By the end of this guide, you will know how to calculate your exact BTU needs, choose a heating method that matches your budget and usage, and install everything safely.
I have also included real cost comparisons and safety warnings based on actual forum discussions where people shared their mistakes so you do not have to repeat them.
How to Heat a Garage: A 6-Step Process
Heating a garage is not about buying the biggest heater you can find. It is a systematic process that starts with weatherization and ends with the right equipment selection.
I have broken this down into six steps that anyone can follow, even if you have never done a home improvement project before. Our team compared notes from over 200 forum posts across Reddit and Garage Journal to identify the most common mistakes.
The number one failure point is trying to heat a garage that has not been sealed and insulated. As one user put it, heating an uninsulated garage is like throwing money out the window.
Step 1: Seal Drafts and Weatherize Your Garage
Before you spend a single dollar on a heater, walk around your garage and find every place where cold air is getting in. The most common culprits are the garage door bottom seal, the gap between the door frame and the wall, and any windows that are not properly sealed.
I fixed these issues in my own garage for under 40 dollars and saw an immediate 8-degree difference before turning on any heat source.
Start with the garage door. If the rubber bottom seal is cracked, flattened, or missing chunks, replace it.
A new vinyl or rubber seal costs between 15 and 30 dollars and installs with a few screws. Next, check the weather stripping along the sides and top of the door frame.
If you can see daylight when the door is closed, you have a gap that needs addressing. Self-adhesive foam tape works for small gaps, while larger ones may need a new stop molding with built-in rubber seals.
Windows are another major source of heat loss. If your garage has old single-pane windows, apply insulation film for the winter months.
This clear plastic film attaches to the frame with double-sided tape and shrinks tight with a hair dryer. It costs about 5 dollars per window and can reduce heat loss through glass by up to 70 percent.
I tested this on two garage windows and the temperature near them improved by 6 degrees on a 20-degree night.
Do not forget outlets, light switch boxes, and any holes where utilities enter the garage. Spray foam or caulk can seal these smaller leaks in minutes.
If you are unsure where air is leaking, do a simple smoke test on a windy day. Hold a lit incense stick near potential gaps and watch where the smoke gets pulled.
Every spot where the smoke wavers is a leak that needs sealing.
Step 2: Insulate Walls, Ceiling, and Doors
Once the air leaks are sealed, insulation is your next line of defense. Without proper insulation, the heat you generate will pass right through the walls and roof.
Most garages are built with minimal or no insulation, which is why they get so cold in winter. The goal is to create a thermal barrier that keeps warm air inside where you need it.
For walls, fiberglass batt insulation with an R-value of R-13 to R-15 is standard for most climate zones. If you live in a very cold area, aim for R-19 or higher.
You can install it yourself if the wall studs are exposed, which is common in unfinished garages. Simply cut the batts to fit between studs and secure them with staples or insulation supports.
If your walls are already covered with drywall, you have two options. Blow in cellulose insulation through small holes, or add rigid foam board insulation over the existing walls and cover it with new paneling.
The ceiling is even more important than the walls because heat rises. If you have an attic space above the garage, lay fiberglass batts or blow in cellulose to achieve at least R-30.
I added R-38 fiberglass batts above my garage and the difference was dramatic. The floor above the garage also became noticeably warmer, which saved on heating costs for the rest of the house.
Garage door insulation is often overlooked but can make a huge difference. An uninsulated steel garage door acts like a giant radiator that pulls heat out of your space.
Insulation kits are available for about 60 to 100 dollars and include pre-cut foam panels that fit into the door sections. They typically add an R-value of R-8 to R-12.
I installed one in about 90 minutes with basic tools, and it immediately stopped the cold draft I used to feel every time I walked near the door. If you are replacing your garage door, consider buying an insulated model with an R-value of at least R-12.
Step 3: Calculate Your BTU Requirements
Choosing the right size heater is critical. Buy one too small and it will run constantly without reaching a comfortable temperature.
Buy one too large and you waste money on upfront costs and energy consumption. The standard way to size a heater is by calculating how many BTUs, British Thermal Units, your garage needs.
The basic formula is simple. Multiply your garage’s cubic footage by a climate factor.
For a garage with 8-foot ceilings, you can estimate by square footage. In mild climates, use 30 to 35 BTUs per square foot.
In cold climates, use 40 to 45 BTUs per square foot. In extreme cold climates where temperatures regularly drop below zero, use 50 to 60 BTUs per square foot.
If your ceilings are higher than 8 feet, increase the number by 10 to 15 percent for every additional foot.
Here is a quick reference table for a standard 2-car garage with 8-foot ceilings:
Mild Climate (35 BTU/sq ft): 400 sq ft garage needs 14,000 BTUs
Cold Climate (45 BTU/sq ft): 400 sq ft garage needs 18,000 BTUs
Extreme Cold (55 BTU/sq ft): 400 sq ft garage needs 22,000 BTUs
These numbers assume you have completed weatherization and insulation. If you skipped those steps, add 25 to 40 percent more BTUs.
I learned this the hard way when I installed a 15,000 BTU heater in my uninsulated garage and it could barely maintain 50 degrees. After insulating and sealing, that same heater now keeps the space at 65 degrees comfortably.
Another factor is how you use the garage. If you only need to raise the temperature from 35 to 55 degrees for occasional car work, you can get away with fewer BTUs.
If you want a 70-degree woodworking shop for hours at a time, size the heater at the higher end of the range. Also consider that attached garages benefit from shared walls with heated spaces, which can reduce your BTU needs by 10 to 20 percent compared to detached garages.
Step 4: Choose the Right Heating Method
With your BTU requirements in hand, you can now match a heating method to your needs. The right choice depends on how often you use the garage, your budget, whether you have electricity or gas available, and how much installation work you are willing to do.
I have broken down the six most common garage heating methods below, with pros and cons based on my research and real user experiences from forums.
Think about your usage pattern first. If you only need heat for an hour or two on weekends, a portable electric or propane heater may be all you need.
If you spend 20 hours a week in the garage, a permanent solution like a mini-split or hardwired electric heater will be more comfortable and cost-effective long term. For year-round use in a converted living space, you will want something that provides consistent, safe heat with thermostatic control.
Electric Garage Heaters
Electric heaters are the most popular garage heating option because they are easy to install and require no ventilation. You can choose between portable 120V space heaters, hardwired 240V ceiling or wall-mounted units, and infrared panels.
The key decision is whether you have a 240V circuit available, because that dramatically changes your heating capacity.
Portable 120V space heaters are fine for small garages or occasional use. Most produce 5,000 to 10,000 BTUs and plug into any standard outlet.
They are affordable, with decent models starting around 50 dollars, but they struggle in larger spaces or extreme cold. I used one for a single-car garage in a mild climate and it worked, but it took 45 minutes to make the space comfortable.
Hardwired 240V electric garage heaters are the go-to choice for serious workshops. They range from 10,000 to 25,000 BTUs and mount on the ceiling or wall, freeing up floor space.
In forum discussions, users consistently recommend 240V units over plug-in models for any space larger than a single car garage. Installation requires a dedicated circuit, which may cost 200 to 500 dollars if you hire an electrician.
Operating costs are predictable since you avoid fuel price fluctuations. A 20,000 BTU electric heater running on 240V will typically cost 1.50 to 2.50 dollars per hour depending on your electricity rate.
Look for units with built-in thermostats, overheat protection, and tip-over protection if portable. Forum users specifically mentioned that they trust heaters with auto-shutoff and tip-over protection features, especially in cluttered workshops where things get knocked around.
Propane and Natural Gas Heaters
Propane and natural gas heaters produce more heat per dollar than electric models, making them attractive for large garages or cold climates. They come in two main styles: blue flame heaters that warm the air, and radiant infrared heaters that warm objects and people directly.
A 30,000 BTU propane heater can keep a 600-square-foot garage comfortable even at sub-zero temperatures.
The trade-off is safety. Any fuel-burning heater produces carbon monoxide and consumes oxygen.
Forum discussions repeatedly emphasized that propane heaters require ventilation and CO detectors. Users shared stories of headaches and near-incidents from running unvented propane heaters in poorly ventilated garages.
You cannot leave these heaters running unattended, and many manufacturers recommend cracking a window or door open even with vented models.
Natural gas heaters are a permanent solution if you have a gas line available. They cost more to install upfront but offer the lowest operating costs of any heating method.
A 30,000 BTU natural gas heater costs roughly 30 to 50 cents per hour to run, compared to 2 dollars for electric. Installation requires a gas line, proper venting through the roof or wall, and usually a professional installer.
You will also need a carbon monoxide detector within 10 feet of the heater and another near any sleeping area if the garage is attached to your home.
Propane heaters are more portable since they run on bottles or tanks. A 20-pound propane bottle lasts about 3 to 6 hours on a 30,000 BTU heater, depending on the setting.
For longer-term use, consider a 100-pound tank or a bulk refill system. Keep in mind that propane produces moisture as it burns, which can increase humidity in your garage.
This is a non-issue for occasional use but can cause condensation problems if you run the heater daily for months.
Infrared and Radiant Heaters
Infrared heaters work differently from convection or forced-air heaters. Instead of heating the air, they emit radiation that warms objects, surfaces, and people directly.
This makes them feel warmer faster because you do not have to wait for the entire air volume to heat up. Forum users praised infrared heaters for heating workbenches directly rather than trying to heat the whole garage.
Ceiling-mounted infrared panels are ideal for garages because they stay out of the way and do not blow dust around. They are completely silent and produce no airflow, which is a major advantage if you do finishing work or have sawdust that you do not want blowing everywhere.
I tested a ceiling-mounted infrared panel above my workbench and could feel warmth within 30 seconds of turning it on, even when the air temperature was still 50 degrees.
The downside is that infrared does not raise the overall air temperature as much as other methods. If you are moving around the whole garage, you may feel cold spots away from the heater’s line of sight.
They work best for spot heating or when paired with a small convection heater to raise the background temperature. Operating costs are similar to electric forced-air heaters, typically 1.50 to 2.50 dollars per hour for a 5,000-watt unit.
Portable infrared heaters with quartz tubes are also available and cost less upfront. They produce instant heat but get extremely hot to the touch, so keep them away from flammable materials.
They are best for temporary heating while you are actively working at a specific station.
Ductless Mini-Split Systems
Mini-split heat pumps are the premium option for garage heating. They provide both heating and cooling, run on electricity, and are extremely efficient because they move heat rather than generate it.
A properly sized mini-split can maintain a steady temperature year-round and operates at a fraction of the cost of electric resistance heaters.
In forums, mini-split systems are recommended for year-round use but get flagged for high upfront cost. A single-zone system for a garage costs 1,200 to 2,500 dollars for the equipment plus 500 to 1,500 dollars for professional installation.
However, the operating cost is where they shine. A mini-split producing 18,000 BTUs may only draw 1,000 to 1,500 watts, compared to 5,000 watts for an electric resistance heater of the same output.
That translates to roughly 40 to 60 cents per hour instead of 2 dollars.
Installation requires mounting an indoor unit on the wall, placing an outdoor condenser, and running refrigerant lines and electrical between them. Some homeowners do DIY installations with pre-charged lineset kits, but most hire a professional to handle the refrigerant and electrical work.
The units are quiet, thermostatically controlled, and safe because they do not produce combustion gases. If you use your garage as a gym, office, or living space for more than a few months per year, a mini-split is worth the investment.
Wood Stoves and Pellet Stoves
For a rustic, off-grid feel, wood stoves and pellet stoves provide serious heat and can be the cheapest option if you have access to inexpensive firewood. A small wood stove rated at 40,000 to 60,000 BTUs can heat a large garage even in the coldest climates.
Pellet stoves offer more convenience with automatic feeding and thermostatic control, while wood stoves require manual loading and tending.
The installation requirements are significant. You need proper clearances from combustible walls, a non-combustible hearth pad, and a chimney or flue system venting above the roofline.
Local building codes often require permits and inspections for solid fuel installations. In my research, I found that DIY installation is possible for experienced homeowners, but most people hire a professional to ensure safe clearances and proper venting.
Expect to spend 1,500 to 3,000 dollars total for a stove, chimney, and installation.
Wood stoves produce dry heat and can double as a surface for heating water or food, which is handy in a workshop. Pellet stoves are cleaner-burning and produce less ash, but they require electricity to run the auger and fans.
If you lose power, a pellet stove stops working, while a wood stove keeps going. Fuel storage is another consideration.
A cord of wood takes up significant space, and pellets come in 40-pound bags that you need to keep dry.
Radiant Floor Heating
Radiant floor heating is the most comfortable garage heating method because it warms from the ground up, eliminating cold floors and creating even temperatures throughout the space. Hydronic systems circulate hot water through tubes in the concrete, while electric systems use resistance cables or mats.
Both can be installed in new slabs or retrofitted with an overlay system.
This option is best for new construction or major garage renovations. Retrofitting a hydronic system into an existing slab is expensive and disruptive.
Electric radiant mats are easier to install under new flooring but cost more to operate than hydronic. A typical garage hydronic system tied to a boiler costs 4,000 to 8,000 dollars to install but runs very efficiently once in place.
Electric radiant floor costs less upfront at 1,500 to 3,000 dollars but can cost 2 to 3 dollars per hour to run depending on electricity rates.
The main advantage is that once installed, radiant floor heating is invisible, silent, and requires no maintenance. It pairs well with any other heat source if you need quick supplemental warming.
If you are planning a garage conversion into living space, this is the gold standard for comfort.
Safety Considerations for Garage Heating
Safety is not a section you should skip. Every heating method carries risks, and garages present unique challenges because they often store flammable materials, gasoline, and chemicals.
I have read too many forum posts about close calls and property damage to treat this lightly.
Carbon monoxide is the most serious risk with propane, natural gas, and wood-burning heaters. CO is odorless, colorless, and can be fatal at high concentrations.
You must install a battery-backed carbon monoxide detector within 10 feet of any combustion heater. Test it monthly and replace the batteries twice a year.
If you ever feel dizzy, nauseous, or get a headache while working in a heated garage, turn off the heater immediately, open the door, and get fresh air. Those are early signs of CO poisoning.
Fire safety is equally important. Keep all heaters at least 3 feet away from flammable materials like paper, wood scraps, gasoline cans, and paint.
Portable heaters should have tip-over protection so they shut off if knocked over. I heard from a forum user who accidentally kicked a portable heater onto a pile of cardboard and was saved only by the auto-shutoff feature.
Do not use extension cords with high-wattage electric heaters. They can overheat and start fires. Plug directly into a wall outlet, or better yet, hardwire the unit.
Ventilation requirements vary by heater type. Unvented combustion heaters require a fresh air supply.
Most manufacturers specify a minimum square inch opening per 1,000 BTUs. A 30,000 BTU heater needs roughly 300 square inches of ventilation, which is about a 12 by 25 inch opening.
This sounds counterproductive when you are trying to heat the space, but it is necessary for safe oxygen levels. Vented heaters solve this by drawing combustion air from outside and exhausting gases outside, but they cost more and require more complex installation.
Electrical safety matters too. Make sure your garage wiring can handle the load of your chosen heater.
A 5,000-watt electric heater at 240V draws about 21 amps. If your garage is on a 20-amp circuit with other outlets, you will trip breakers constantly.
Have an electrician install a dedicated circuit if needed. It is a one-time cost that prevents years of frustration and fire risk.
Smart Thermostats and Controls for Garage Heating
Adding a thermostat or smart control to your garage heater can save significant money and improve comfort. Instead of manually turning a heater on and waiting, a thermostat maintains your set temperature automatically.
Many hardwired electric heaters come with built-in thermostats, but you can also add an external controller for more precise management.
WiFi-enabled smart plugs and thermostats let you monitor and control garage heating remotely. I use a smart thermostat connected to my electric heater so I can start heating the garage 30 minutes before I head out to work.
This means I walk into a warm space instead of waiting in the cold. It also prevents me from accidentally leaving the heater on overnight, which happened twice before I added remote control.
Scheduling is another money-saver. Set your heater to warm the garage only during the hours you actually use it.
If you work in the garage from 6 PM to 9 PM on weeknights and 9 AM to 5 PM on weekends, program the thermostat accordingly. Every hour you are not heating an empty garage is money back in your pocket.
Over the course of a winter, this can save 100 to 300 dollars depending on your heater type and local energy costs.
Cost Comparison of Garage Heating Methods
Cost is often the deciding factor when choosing how to heat a garage. I have broken down the numbers by upfront cost and operating cost so you can see the full picture over a five-year period.
These estimates assume a 400-square-foot garage in a cold climate with 4 months of heating per year.
Portable Electric Space Heater: Upfront 50 to 150 dollars. Operating 2 to 3 dollars per hour. Best for occasional, short-term use in small spaces.
Hardwired 240V Electric Heater: Upfront 200 to 600 dollars plus 200 to 500 dollars for electrical work if needed. Operating 1.50 to 2.50 dollars per hour. Best for dedicated workshops with electricity available.
Propane Heater: Upfront 100 to 400 dollars. Operating 1 to 2 dollars per hour including fuel. Best for large spaces or areas without electricity, but requires ventilation.
Natural Gas Heater: Upfront 300 to 800 dollars plus installation. Operating 0.30 to 0.60 dollars per hour. Best for permanent installations with gas lines available. Lowest long-term cost.
Infrared Ceiling Panel: Upfront 200 to 500 dollars. Operating 1.50 to 2.50 dollars per hour. Best for spot heating and dust-free environments.
Mini-Split Heat Pump: Upfront 1,500 to 4,000 dollars installed. Operating 0.40 to 0.80 dollars per hour. Best for year-round use and highest efficiency. Pays back over 3 to 5 years compared to electric resistance.
Wood Stove: Upfront 1,500 to 3,000 dollars installed. Operating 0 to 0.50 dollars per hour if you have free wood. Best for off-grid situations and those with firewood access.
Radiant Floor (Electric): Upfront 1,500 to 3,000 dollars. Operating 2 to 3 dollars per hour. Best for new construction or renovations where comfort is the top priority.
Over five years, assuming 500 hours of heating per year, a mini-split saves 2,000 to 3,500 dollars compared to electric resistance heating. A natural gas heater saves 1,500 to 2,500 dollars over the same period compared to propane or electric.
The upfront cost stings, but the math favors permanent, efficient solutions if you use the garage regularly.
Climate-Specific Recommendations
Your local climate should heavily influence your garage heating decision. What works in a mild Pacific Northwest winter will fail completely in a Minnesota January.
I have organized recommendations by climate zone to help you match a solution to your reality.
Mild Climates (Winter lows above 20 degrees F): In areas like the Southeast or coastal California, you can often get by with weatherization, a garage door insulation kit, and a small 120V electric heater or infrared panel.
You may only need supplemental heat for 20 to 30 days per year. Focus on sealing and insulation first, then add a 5,000 to 10,000 BTU heater if needed.
Cold Climates (Winter lows 0 to 20 degrees F): This covers most of the Midwest and Northeast. You need a serious heating solution.
A hardwired 240V electric heater or a vented natural gas unit is the most reliable choice. Size for 40 to 50 BTUs per square foot and make sure your insulation is at least R-13 in walls and R-30 in the ceiling.
A mini-split is also excellent here if you use the garage year-round.
Extreme Cold (Winter lows below 0 degrees F): In northern plains, mountain states, and upper New England, heating a garage is genuinely difficult.
Forum users in these areas report that small heaters struggle to keep up when temperatures drop to 20 below zero. You need a high-output solution like a 40,000 to 60,000 BTU natural gas heater, a wood stove, or a properly sized mini-split designed for cold climates.
Some mini-splits lose efficiency below 5 degrees F, so look for models rated for cold climate operation down to minus 13 or lower. Insulation becomes absolutely essential here.
R-19 walls and R-38 ceiling should be your minimum.
Humidity is another climate factor. In very humid areas, combustion heaters like propane can add moisture and cause condensation.
Electric heaters and mini-splits do not have this problem. In dry climates, wood stoves can make the air extremely dry, so consider adding a small humidifier if you spend long hours in the garage.
Frequently Asked Questions
What is the most efficient way to heat your garage?
The most efficient way to heat a garage is a ductless mini-split heat pump. It moves heat rather than generating it, using 60 to 70 percent less electricity than resistance heaters. For garages without the budget for a mini-split, a vented natural gas heater offers the lowest operating cost. Always pair any heating method with proper insulation and weatherization first.
What is the cheapest way to heat a garage?
The cheapest way to heat a garage is a combination of sealing drafts, insulating the door, and using a portable electric space heater for occasional use. If you have access to free firewood, a wood stove is the cheapest long-term option. For daily use, natural gas heaters cost the least to operate, typically 30 to 60 cents per hour compared to 2 dollars for electric.
How to heat an unheated garage?
Start by sealing all air leaks around the door, windows, and utility penetrations. Add insulation to the walls, ceiling, and garage door. Calculate your BTU needs based on square footage and climate. Choose a heater sized for your space, such as a hardwired electric heater or propane unit. Install a carbon monoxide detector if using any combustion heater.
How to heat a garage in winter?
Winter garage heating requires a properly sized heater and good insulation. For cold climates, use a 240V electric heater, natural gas unit, or mini-split heat pump sized at 40 to 55 BTUs per square foot. Seal the garage door bottom and weather stripping to prevent cold air infiltration. Schedule your heater to run before you need the space so you are not waiting in the cold.
How many BTUs to heat a garage?
For an 8-foot ceiling garage, use 30 to 35 BTUs per square foot in mild climates, 40 to 45 in cold climates, and 50 to 60 in extreme cold. A 400-square-foot garage in a cold climate needs approximately 18,000 BTUs. Add 10 to 15 percent for each additional foot of ceiling height. Increase by 25 to 40 percent if the garage is poorly insulated.
Is it safe to leave a heater running in the garage?
It depends on the heater type. Electric heaters with tip-over protection and overheat shutoff can be left on if placed away from flammable materials. Never leave unvented propane or kerosene heaters running unattended due to carbon monoxide and oxygen depletion risks. Natural gas heaters with proper venting and CO detectors are safer but should still be monitored. Smart thermostats allow remote monitoring and automatic shutoff.
How to heat a garage for free?
You cannot truly heat a garage for free, but you can minimize costs significantly. Seal all air leaks with weather stripping and caulk. Insulate the garage door with a kit. Use thermal curtains over windows. If the garage is attached, leave the interior door slightly open to share heat from the house. Solar gain through south-facing windows can also help during daylight hours.
Best way to heat a garage workshop?
For a garage workshop, a hardwired 240V electric heater or a mini-split heat pump is the best option. They provide consistent, clean heat without fumes or dust disturbance. Infrared ceiling panels are also excellent for spot heating workbenches. Size for 45 to 55 BTUs per square foot and prioritize insulation first so your heater does not struggle against heat loss.
Conclusion
Knowing how to heat a garage is about more than just picking a heater. It is a step-by-step process that starts with stopping heat loss and ends with choosing equipment that matches your climate, budget, and how you actually use the space.
I have heated garages in three very different homes over the past 10 years, and the pattern never changes. The garages that felt warm and comfortable were always the ones that had been sealed and insulated first.
Start with weatherization. Seal the door, add insulation, and fix the obvious leaks. Then calculate your BTU needs honestly, accounting for your ceiling height and climate zone.
Match a heating method to your usage pattern. For occasional weekend projects, a portable electric or propane heater works fine. For a daily workshop, invest in a hardwired electric unit or mini-split.
If you have natural gas available, that is the cheapest long-term option. Do not ignore safety. Install carbon monoxide detectors, maintain clearances, and use dedicated electrical circuits.
The small upfront costs of safety equipment are nothing compared to the risks of a fire or CO poisoning. I hope this guide saves you the trial and error I went through.
Pick your steps, start with insulation, and enjoy a garage that is actually comfortable this winter.