
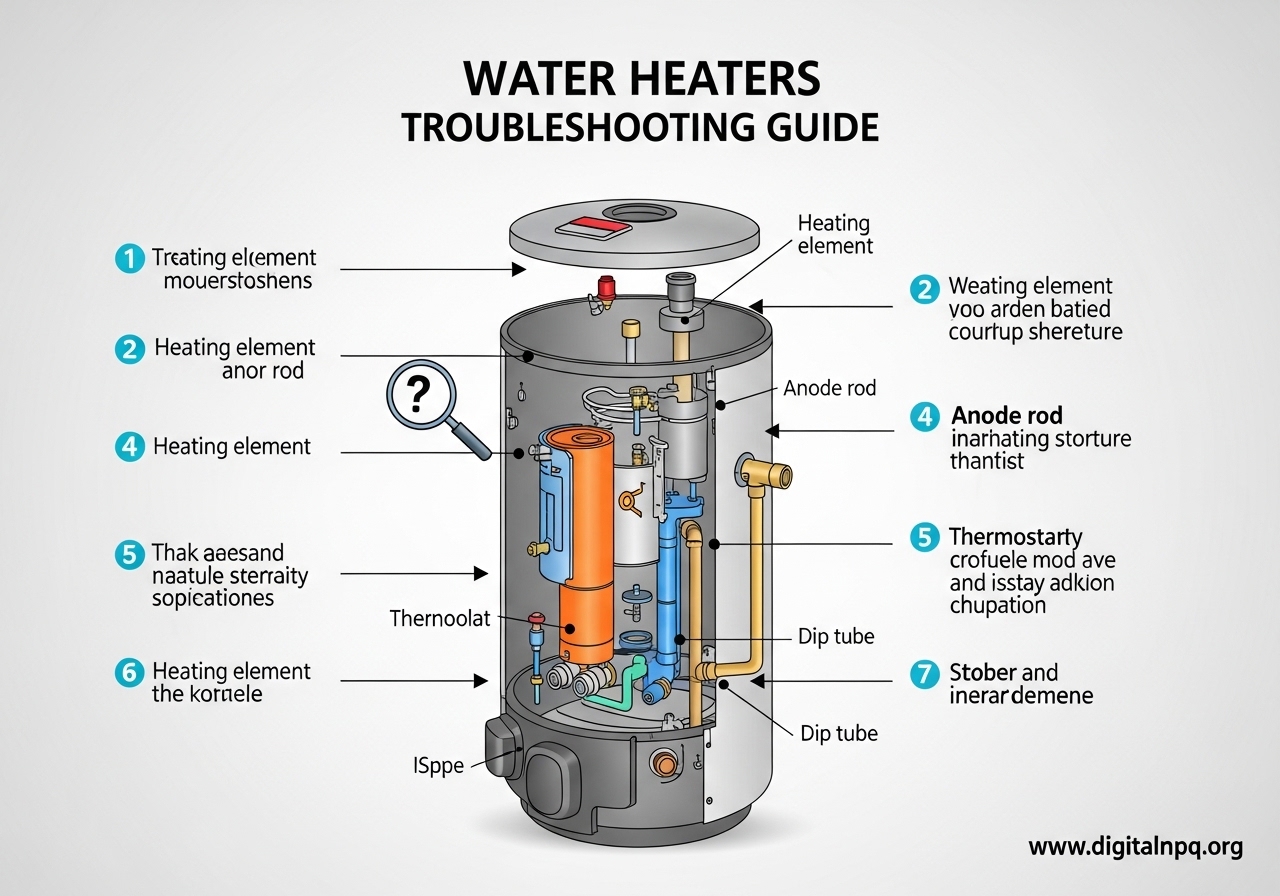
Nothing kills a morning routine faster than stepping into an ice-cold shower. If your water heater has stopped working, you are definitely not alone. Water heaters troubleshooting is one of the most searched home repair topics online, and for good reason. Nearly every home relies on one, and when it fails, the disruption is immediate.
This guide covers the most common water heater problems for gas, electric, and tankless units. I will walk you through each issue step by step, from diagnosing the root cause to applying the right fix. Whether you are dealing with no hot water at all, strange noises, leaks, or temperature swings, you will find clear instructions here.
Before we get into the specifics, a quick safety note. Working with gas lines and high-voltage electrical components carries real risk. If you smell gas at any point, leave your home immediately and call your gas company. For electrical issues, always shut off power at the breaker before touching any components. Your safety matters more than any repair.
Most water heater problems fall into a handful of categories: power or gas supply issues, component failures, sediment buildup, and leaks. I have organized this guide so you can jump straight to your specific symptom or read through for a complete understanding of how your water heater works and what goes wrong. Let’s get your hot water running again.
Quick Reference: Common Water Heater Problems and Solutions
Before diving into detailed troubleshooting, here is a fast symptom-to-solution reference. Match your problem to the most likely cause, then jump to the detailed section for step-by-step fix instructions.
- No hot water at all — Tripped breaker (electric), pilot light out (gas), or failed heating element. See the No Hot Water section below.
- Not enough hot water — Sediment buildup, dip tube failure, thermostat set too low, or undersized tank. Covered in the Inadequate Hot Water section.
- Water too hot — Thermostat set too high or faulty thermostat. Addressed in the Temperature Issues section.
- Popping or rumbling noises — Sediment buildup in the tank. See the Strange Noises section.
- Leaking from base — T&P valve, drain valve, or tank failure. See the Leaking Water Heater section.
- Rusty or brown water — Corroding anode rod or tank lining. Covered in the Discolored Water section.
- Rotten egg smell — Bacteria reacting with the anode rod. See the Discolored Water section.
- Pilot light will not stay lit — Bad thermocouple, dirty pilot orifice, or draft. Covered in the Pilot Light section.
- Reset button keeps tripping — Failed heating element or bad thermostat. See the Electric Reset section.
If your specific symptom is not listed here, keep reading. The detailed sections below cover edge cases and less common problems that still trip up homeowners every day.
No Hot Water: Causes and Fixes
Complete loss of hot water is the single most common reason people search for water heaters troubleshooting guides. The fix depends entirely on whether you have a gas or electric unit, so the diagnosis paths diverge right at the start.
Electric Water Heater: No Hot Water
Start with the simplest cause. Go to your electrical panel and check if the breaker for the water heater has tripped. Electric water heaters typically use a dedicated double-pole breaker rated for 30 amps. If it has tripped, flip it fully off and then back on. If it trips again immediately, you have a short circuit or a failed component that needs further diagnosis.
If the breaker is fine, the next suspect is the upper heating element or the upper thermostat. Electric water heaters use two heating elements, but if the upper one fails, the entire tank stops heating. The upper element acts as the gatekeeper for the whole system.
You can test a heating element with a multimeter. Turn off power at the breaker, remove the access panel on the side of the tank, and disconnect one wire from the element. Set your multimeter to the ohms setting and touch both probes to the element terminals. A reading between 10 and 30 ohms is normal. A reading of infinity means the element has burned out and needs replacement.
The reset button, also called the high-temperature cutoff switch, sits behind the upper access panel. It is usually a red button. If it has popped out, press it back in. If it trips again within minutes, you likely have a bad thermostat or a shorted element.
Gas Water Heater: No Hot Water
For gas units, the pilot light is your first check. Look through the viewing window at the bottom of the tank. If you do not see a small blue flame, the pilot has gone out. Relighting instructions are usually printed on a label near the gas control valve. Turn the gas knob to pilot, press and hold it, and use the igniter or a long lighter to relight the pilot. Hold the knob for 30 to 60 seconds before releasing.
If the pilot will not light at all, check that the gas valve on the supply line is open. If gas is flowing and the pilot still will not ignite, the pilot orifice may be clogged or the gas control valve itself may have failed. Both of these situations usually require professional help.
A pilot that lights but will not stay lit points to a bad thermocouple. The thermocouple is a small sensor that sits in the pilot flame and generates a tiny electrical current to keep the gas valve open. If it fails, the gas valve shuts off as a safety measure. Replacing a thermocouple is a relatively inexpensive repair that many homeowners can handle themselves, but if you are uncomfortable working with gas components, call a professional.
Pilot Light Issues (Gas Water Heaters)
Pilot light problems deserve their own section because they account for a huge portion of gas water heater service calls. Understanding how the pilot system works makes troubleshooting much more straightforward.
How the Pilot System Works
The pilot flame serves one primary function: it proves to the gas valve that it is safe to release gas to the main burner. The thermocouple sits directly in the pilot flame and generates about 20 to 30 millivolts of electricity when heated. That voltage holds the electromagnetic valve inside the gas control open. When the flame goes out, the voltage drops, and the valve snaps shut to prevent gas from filling your home.
Newer gas water heaters use a thermopile instead of a thermocouple. A thermopile is essentially multiple thermocouples stacked together, generating more voltage (typically 500 to 750 millivolts). The troubleshooting steps are similar, but thermopiles cost more to replace.
Why the Pilot Keeps Going Out
A pilot that relights but goes out after a few minutes or hours usually has one of three causes. The most common is a failing thermocouple or thermopile. Over time, these sensors degrade and produce less voltage, until they can no longer hold the gas valve open reliably.
The second cause is a dirty or partially clogged pilot orifice. If the pilot flame is weak and yellow instead of strong and blue, the orifice needs cleaning. A wire brush or compressed air can often clear the blockage. Turn off the gas supply before attempting any cleaning.
The third cause is a draft blowing the pilot out. Check for gaps around the flue pipe, a damaged draft hood, or negative air pressure in your mechanical room caused by other appliances competing for combustion air. If your water heater is in a small, tightly sealed room, it may not have enough air supply to maintain the pilot.
Pilot Will Not Light At All
If the pilot will not light when you try to ignite it, first verify that the gas supply is on. The gas valve on the supply line should be parallel to the pipe in the open position. If gas is flowing but nothing happens at the pilot, the pilot tube or orifice may be completely blocked. This requires disassembling and cleaning the pilot assembly, which is a job best left to a professional if you have no experience with gas components.
Electric Water Heater Reset and Circuit Breaker Problems
The reset button on an electric water heater is one of the most commonly misunderstood components. Forum discussions are full of homeowners who pressed the reset button with no response, or found it tripping repeatedly. Here is how to handle both situations.
How to Find and Press the Reset Button
The reset button is located behind the upper access panel on your electric water heater. Remove the metal panel and push aside any insulation to expose the thermostat. The reset button is typically red and sits just above the thermostat dial. Press it firmly until you feel or hear a click. If it was tripped, this restores power to the heating elements.
After resetting, wait about 30 to 45 minutes and check for hot water. If the water heats up normally and the reset button does not trip again, you probably just had a temporary overheating event. If it trips again, you need to dig deeper.
What It Means When the Reset Trips Repeatedly
A reset button that trips over and over is telling you something is wrong. The most likely culprit is a failed heating element that has shorted to ground. When an element cracks or develops a pinhole, water contacts the electrical coil inside. This causes a ground fault that trips the high-temperature cutoff.
The lower heating element is the most common failure point because it does most of the work. Testing both elements with a multimeter, as described in the No Hot Water section above, will usually reveal the bad one. Replace the failed element and the problem should resolve.
A less common cause is a thermostat that has welded its contacts shut, allowing the water to overheat. If both elements test fine but the reset keeps tripping, replace the thermostat closest to the tripping reset button.
Breaker Tripping Issues
If the main circuit breaker trips instead of the reset button, you may have a more serious electrical issue. A breaker that trips immediately after reset indicates a direct short circuit, possibly from a severely damaged heating element or wiring that has burned and contacted the tank. A breaker that trips after the heater runs for a while might indicate the element is drawing too much current due to scale buildup.
In either case, do not keep resetting the breaker. Repeated tripping damages the breaker and can create a fire hazard. Test the elements, inspect the wiring, and replace any components that show signs of burning or deterioration.
Inadequate or Not Enough Hot Water
Having some hot water but not enough is a different problem from having none at all. This section covers the causes and solutions when your water heater runs out of hot water too quickly or never gets the water hot enough.
Sediment Reducing Effective Capacity
Over time, minerals in your water settle to the bottom of the tank and form a layer of sediment. In areas with hard water, this buildup can be significant. A tank that holds 50 gallons might effectively only hold 30 gallons of usable hot water because the rest of the space is occupied by sediment. Flushing the tank restores capacity. This is covered in more detail in the Strange Noises section.
Dip Tube Failure
The dip tube is a plastic pipe that carries cold incoming water down to the bottom of the tank, where it gets heated. When the dip tube cracks or breaks, cold water enters at the top of the tank and mixes with the hot water headed to your fixtures. The result is lukewarm water that runs out fast.
Diagnosing a dip tube failure is a process of elimination. If you have flushed the tank, checked the elements, and verified the thermostats, but still get lukewarm water, the dip tube is the likely suspect. Replacing it requires draining the tank and removing the cold water inlet fitting.
Thermostat Settings and Calibration
Check your thermostat setting. The recommended temperature is 120 degrees Fahrenheit for safety and efficiency. If it is set lower, you may not have enough heat for your household’s usage patterns. If it is set correctly but the water is still not hot enough, the thermostat may need calibration or replacement.
Keep in mind that undersized water heaters are a real issue. If you recently added family members, installed a larger soaking tub, or changed your usage habits, your tank may simply be too small. A family of four typically needs at least a 50-gallon tank for gas and a 50 to 80-gallon tank for electric to avoid running out during peak morning demand.
Strange Noises Coming From Your Water Heater
Your water heater should operate almost silently. When it starts making noises, those sounds are actually useful diagnostic tools. Different noises point to different problems, so paying attention to what you hear can save you troubleshooting time.
Popping and Rumbling Sounds
Popping, rumbling, or banging sounds are the most common water heater noises. They almost always indicate sediment buildup at the bottom of the tank. As the burner or element heats water through the sediment layer, trapped water bubbles expand and burst, creating a popping or rumbling sound. Think of it like boiling water in a pot with a thick layer of sand at the bottom.
Flushing the tank is the fix. Here is the basic procedure. Turn off power or gas to the unit. Connect a garden hose to the drain valve at the bottom of the tank and run the other end to a floor drain or outside. Turn off the cold water supply. Open the drain valve and let the tank empty. Then turn the cold water back on briefly to stir up remaining sediment. Repeat this fill-and-drain cycle until the water runs clear. Close the drain valve, refill the tank completely, and restore power or gas.
Screeching or Screaming Sounds
A high-pitched screech usually means water is being forced through a restricted opening. Check the inlet and outlet valves to make sure they are fully open. A partially closed valve creates a pressure restriction that produces this noise. Heat trap nipples, which are installed on some water heaters to improve efficiency, can also produce a whistling or screeching sound. This is generally harmless but can be annoying.
Sizzling Sounds
A sizzling sound, especially near the burner of a gas water heater, often means water is dripping onto the hot burner assembly. This could indicate a small leak inside the tank or from a fitting above the burner. Inspect the area around the burner for signs of moisture. If you find water, track it back to its source. A leak at this location often means the tank itself has a crack, which requires replacement.
Ticking or Tapping Sounds
Ticking sounds are usually caused by heat traps or by pipes expanding and contracting as they heat up and cool down. This is typically harmless. If the ticking bothers you, installing dielectric nipples or water heater connectors with built-in heat traps can reduce the noise.
Leaking Water Heater: Finding and Fixing the Leak
A leaking water heater demands immediate attention. Even a small leak can cause significant water damage over time, and some leaks indicate that the tank is failing. Here is how to identify the source and determine the right course of action.
Temperature and Pressure Relief Valve (T&P Valve)
The T&P valve is a safety device located on the top or side of the tank. It releases water if the temperature or pressure inside the tank exceeds safe limits. A small amount of dripping from this valve during heating cycles can be normal, especially if your home has high water pressure. However, continuous dripping or a steady stream indicates a problem.
First, check if the valve itself is faulty. Place a bucket under the discharge tube and manually lift the valve lever for a few seconds, then release it. If the valve snaps shut and stops dripping, it was just stuck. If it continues to leak after releasing, the valve seat may be worn out and the valve needs replacement.
If the valve is releasing water because of excessive pressure, you may need a thermal expansion tank installed on your cold water line. This is common in homes with closed plumbing systems, such as those with a backflow preventer on the main water line.
Drain Valve Leaking
The drain valve at the bottom of the tank is a common leak point. If it is dripping, try tightening it by hand. If that does not help, the washer inside the valve has likely deteriorated. You can replace the drain valve, or as a temporary fix, cap it with a garden hose cap available at any hardware store.
Inlet and Outlet Connection Leaks
Check the hot and cold water connections at the top of the tank. Leaks here are usually caused by loose fittings or deteriorated plumber’s tape. Tighten the connections with a wrench, and if that does not work, drain the tank, disconnect the fitting, apply fresh Teflon tape, and reconnect.
Tank Body Leaking
This is the worst-case scenario. If water is seeping from the body of the tank itself, the tank is failing and needs replacement. There is no safe or effective way to repair a leaking tank. A tank that leaks from the body can rupture without warning, causing flooding. If you see rust streaks on the outside of the tank or water pooling at the base with no clear source, start planning for a replacement.
Condensation vs. Actual Leak
Do not confuse condensation with a leak. When cold water fills a tank in a warm, humid environment, condensation can form on the outside of the tank and drip to the floor. This is especially common in basements during summer. Wipe the tank dry and observe whether the moisture returns. If the tank stays dry after wiping, it was condensation. If water reappears quickly at a specific point, it is a leak.
Discolored, Smelly, or Rusty Hot Water
Water quality issues that only appear in your hot water supply almost always originate inside the water heater. Here is how to identify and fix the most common water quality problems.
Rusty or Brown Hot Water
If your cold water runs clear but the hot water is brown or rust-colored, the problem is inside the tank. The most likely cause is a deteriorated anode rod. The anode rod is a sacrificial metal rod, usually made of magnesium or aluminum, that attracts corrosive elements in the water to protect the steel tank. When the anode rod is consumed, corrosion attacks the tank itself.
Inspecting the anode rod is a maintenance task every homeowner should do every two to three years. The rod sits under a hex-head plug on top of the tank. Use a socket wrench to remove it. If more than six inches of the steel core wire is exposed, replace the rod. A new anode rod costs very little compared to replacing an entire water heater.
If the anode rod looks fine but the water is still rusty, the tank lining may be corroding. Unfortunately, once the glass lining inside the tank starts to fail, replacement is the only reliable option.
Rotten Egg Smell in Hot Water
A sulfur or rotten egg smell in your hot water is caused by hydrogen gas reacting with bacteria in the tank, and that reaction is accelerated by a magnesium anode rod. The fix is to replace the magnesium anode rod with an aluminum or zinc-aluminum rod, then disinfect the tank by pouring a gallon of hydrogen peroxide through the anode rod opening, letting it sit for two hours, and then flushing the tank.
Black Specks in Hot Water
Tiny black specks in your hot water usually come from a deteriorating rubber dip tube or from the anode rod breaking down. Some older dip tubes were made from a plastic formulation that degrades over time, breaking into small fragments. If you see these specks, check the dip tube and replace it if it is crumbling.
Gas vs Electric Water Heater Troubleshooting Differences
Understanding the fundamental differences between gas and electric water heaters helps you troubleshoot more efficiently. The two types share a tank and basic plumbing, but the heating mechanism, safety systems, and failure modes are entirely different.
Key Component Differences
Gas water heaters use a burner assembly at the bottom of the tank, a gas control valve, a thermocouple or thermopile, a pilot light, and a flue that exhausts combustion gases through the center of the tank. Electric water heaters use one or two immersion heating elements screwed into the side of the tank, thermostats that directly control each element, and a high-temperature cutoff switch.
Safety Considerations
Gas water heaters carry the risk of carbon monoxide poisoning and gas leaks. Any time you work on a gas water heater, check for proper venting, ensure the flue is clear, and never modify the gas supply without shutting off the gas first. Electric water heaters carry the risk of electrocution. Always shut off power at the breaker and verify with a voltage tester before touching any electrical component.
Common Failure Modes Compared
Gas heaters most commonly fail due to pilot light issues, thermocouple failure, and sediment buildup that insulates the bottom of the tank from the burner. Electric heaters most commonly fail due to burned-out heating elements, tripped reset buttons, and faulty thermostats. Both types suffer from sediment, anode rod depletion, and tank corrosion over time.
Tankless water heaters have their own unique troubleshooting needs, including error codes, scale buildup in the heat exchanger, and minimum flow rate requirements. If you are considering a switch from a tank to a tankless system, check out our guide to electric tankless water heaters for detailed product recommendations and sizing information.
Water Heater Maintenance Tips to Prevent Problems
Most water heater problems are preventable with basic maintenance. A few hours per year can add years to the life of your unit and save you from unexpected cold showers. Here is a seasonal maintenance checklist to keep your water heater running smoothly.
Annual Flushing
Flush your tank once a year to remove sediment. The procedure is described in the Strange Noises section above. If you live in an area with hard water, consider flushing every six months. Sediment is the number one enemy of water heater efficiency and longevity. It insulates the bottom of the tank from the heat source, forces the unit to work harder, and creates the popping noises that indicate trouble.
Anode Rod Inspection
Check the anode rod every two to three years. As described in the Discolored Water section, the anode rod sacrifices itself to protect your tank. Once it is consumed, the tank begins to corrode. Replacing a spent anode rod costs a fraction of what a new water heater costs, yet most homeowners never check it.
T&P Valve Testing
Test the temperature and pressure relief valve once a year. Lift the lever briefly and let it snap back. You should hear water flowing through the discharge tube. If the valve does not release water, or if it continues to leak after closing, replace it. A failed T&P valve is a serious safety hazard.
Temperature Setting
Set your water heater thermostat to 120 degrees Fahrenheit. Higher settings waste energy, increase the risk of scalding, and accelerate sediment formation. If 120 degrees feels too cool at the tap, the issue is more likely related to pipe insulation or distance from the heater than the thermostat setting.
Seasonal Maintenance Checklist
- Spring: Flush the tank to remove winter sediment buildup. Test the T&P valve. Check the anode rod if it has been more than two years.
- Summer: Inspect the area around the water heater for moisture or corrosion. Check connections for leaks that might have developed from thermal expansion.
- Fall: For gas heaters, inspect the flue and draft hood for blockages before heating season. Check the burner flame through the viewing window. A healthy flame is blue with slight yellow tips.
- Winter: Insulate exposed hot water pipes to reduce heat loss. For heaters in unheated spaces, check that the area stays above freezing to prevent damage.
When to Call a Professional Plumber
Some water heater problems are well within the reach of a competent DIYer. Others require professional tools, training, and permits. Knowing the difference saves you money on simple fixes while keeping you safe on complex ones.
When to DIY
You can safely handle these repairs yourself: flushing the tank, replacing the anode rod, testing and replacing the T&P valve, replacing heating elements on an electric unit, and adjusting thermostat settings. These tasks require basic hand tools and a multimeter, and there are plenty of resources to guide you through each one.
When to Call a Professional
Call a licensed plumber for any of these situations: suspected gas leaks (call immediately), any modification to gas piping, tank replacement, persistent leaks you cannot locate, repeated breaker trips that do not resolve with element replacement, and any situation where you feel uncomfortable or unsure. There is no shame in calling for help. A botched repair on a water heater can cause flooding, fire, or carbon monoxide exposure.
DIY vs Professional Cost Comparison
Understanding the cost difference helps you make informed decisions. Replacing a heating element yourself typically costs under 30 dollars for the part and takes about an hour. Having a plumber do the same job might run 150 to 300 dollars including labor and the service call. Flushing the tank is essentially free if you do it yourself, but a professional flush service runs about 100 to 150 dollars.
On the other hand, replacing a gas valve or thermocouple involves working with gas connections, and a mistake can be dangerous. Professional thermocouple replacement runs around 150 to 250 dollars. A full tank replacement, which involves plumbing, gas or electrical work, and often permits, runs 800 to 3,000 dollars depending on the unit and your area.
FAQ
What is the most common problem with a hot water heater?
The most common water heater problem is sediment buildup in the tank. Over time, minerals from your water supply settle at the bottom of the tank, creating a layer that insulates the water from the heat source. This causes popping noises, reduces heating efficiency, and decreases the effective capacity of the tank. Annual flushing prevents most sediment-related issues.
Why am I only getting 5 minutes of hot water?
Getting only a few minutes of hot water before it runs cold usually points to one of three issues: a failed lower heating element on an electric heater (the upper element heats the top portion only), a broken dip tube that allows cold water to mix with hot at the top of the tank, or significant sediment buildup that has reduced the tank’s effective capacity. Start by flushing the tank, then test the heating elements.
How many years does a water heater usually last?
A traditional tank water heater lasts 8 to 12 years on average. Gas models tend to last 8 to 10 years, while electric models can reach 10 to 12 years with proper maintenance. Tankless water heaters last significantly longer, typically 15 to 20 years. Regular maintenance, including annual flushing and anode rod inspection, can add several years to any water heater’s lifespan.
What are the first signs of a water heater going bad?
The early warning signs of a failing water heater include: rusty or brown-tinted hot water (indicating internal corrosion), rumbling or popping sounds during heating (sediment buildup), water pooling around the base of the unit (potential tank leak), inconsistent water temperature, and visible rust on the exterior of the tank or connections. If you notice two or more of these signs, start planning for a replacement.
How do I know if my water heater thermostat is bad?
A faulty thermostat causes inconsistent water temperatures. You might get scalding hot water followed by lukewarm water, or the water never reaches the set temperature. To test it, use a multimeter to check for continuity at the thermostat terminals after shutting off power. No continuity means the thermostat needs replacement. A thermostat that fails to shut off power to the element when the set temperature is reached is also defective and should be replaced immediately.
Is it safe to use a leaking water heater?
It depends on the source of the leak. A leaking drain valve or loose pipe fitting can often be repaired safely without shutting down the unit. However, if the tank body itself is leaking, you should turn off power or gas and shut off the water supply immediately. A tank leak means the structural integrity is compromised, and it could rupture. Do not ignore any leak. Even slow drips cause water damage and mold growth over time.
Conclusion
Water heaters troubleshooting does not have to be intimidating. Most problems boil down to a handful of common causes: power or gas supply issues, component failures, sediment buildup, and leaks. By working through the symptoms systematically, you can diagnose and often fix the problem yourself without waiting days for a service appointment.
The most valuable thing you can do for your water heater is maintain it regularly. Annual flushing, anode rod inspections every two to three years, and periodic T&P valve testing will prevent the majority of the problems covered in this guide. A well-maintained water heater can serve you reliably for over a decade.
Remember that safety always comes first. Gas leaks and electrical hazards are real risks. If you smell gas, leave immediately and call your gas company. If you are ever unsure about a repair, calling a licensed plumber is always the right call. The cost of a service visit is far less than the cost of a flood, fire, or injury.
Whether you are dealing with a simple pilot light relight or trying to decide if it is time for a full replacement, the troubleshooting steps in this guide give you a clear path forward. Start with the quick reference table, match your symptoms, and follow the detailed instructions for your specific issue. Your hot water will be back before you know it.