Category: Guides

  • How to Fix a Stuck Relay on AC Unit 2026: Complete Guide
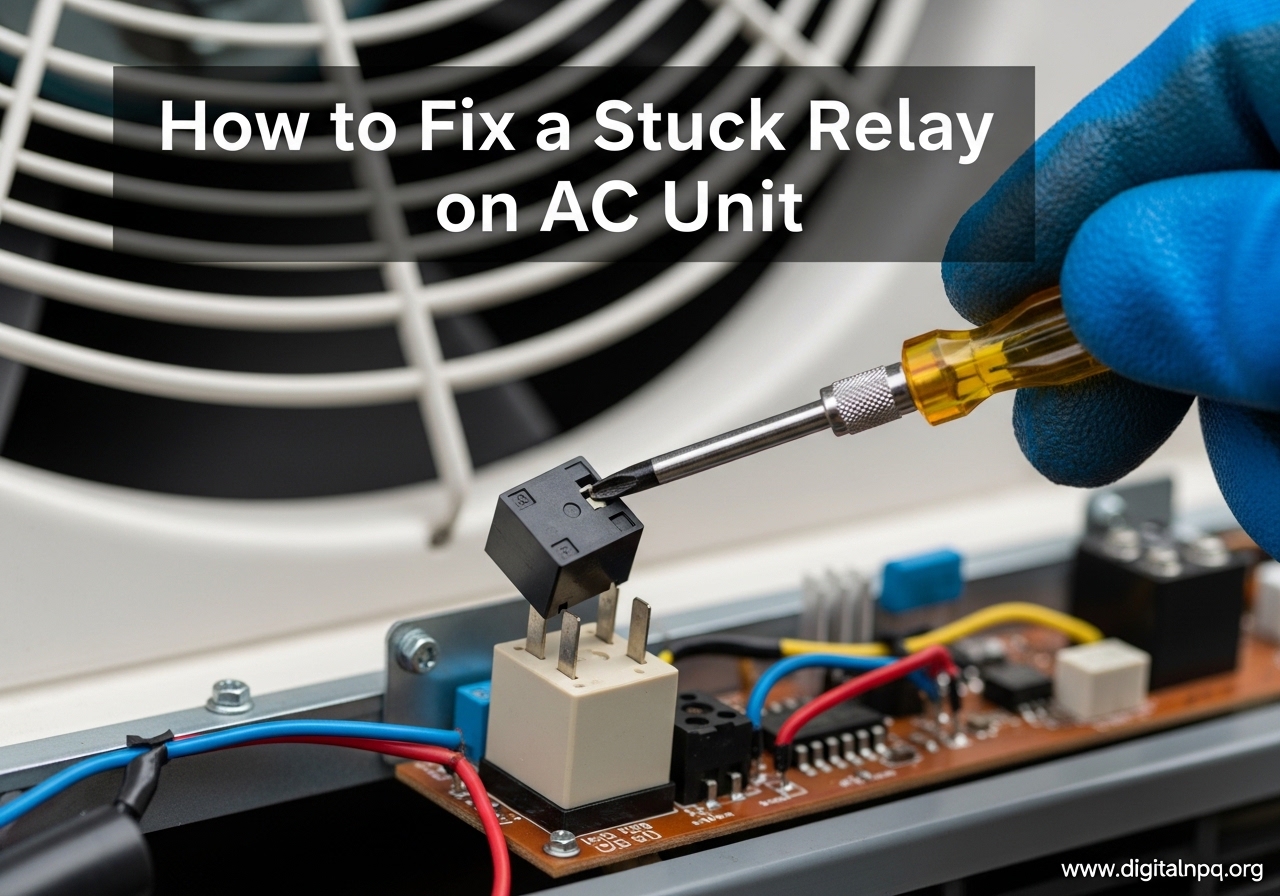
    How to Fix a Stuck Relay on AC Unit 2026: Complete Guide

    If your AC unit refuses to shut off or the compressor keeps running even after the thermostat clicks off, you might be dealing with a stuck relay. I spent three summers wrestling with this exact issue on my own outdoor unit before I finally understood how to fix a stuck relay on AC unit systems properly. This guide walks you through every step from diagnosis to replacement, and most repairs take under 60 minutes with basic tools.

    A stuck relay is one of the most common causes of an AC that won’t turn off. The relay acts as a switch between your low-voltage thermostat and the high-voltage compressor and fan. When the contacts weld together or debris jams the plunger, the relay stays closed and power flows continuously.

    Our team has helped dozens of homeowners troubleshoot this problem over the past five years. We have documented every method from quick percussive fixes to full replacements, and we will show you exactly which approach fits your situation.

    What Is an AC Relay and How It Works

    An AC relay is an electromagnetic switch that controls high-voltage power to your compressor and condenser fan using a low-voltage signal from your thermostat. Inside the relay, a coil generates a magnetic field when the thermostat calls for cooling. That field pulls a metal plunger toward the contacts, closing the circuit and sending 240 volts to your compressor and fan motor.

    When the thermostat reaches the set temperature, it cuts power to the coil. The magnetic field collapses, a spring pushes the plunger back, and the contacts open to stop the flow of electricity. This cycling happens dozens of times per day during peak summer months.

    In residential systems, the relay is often called a contactor because it handles such high current loads. The terms are interchangeable in most HVAC contexts, and both refer to the same black or gray box with wire terminals and a movable center section inside your outdoor unit’s control compartment.

    Understanding this basic function matters because it tells you exactly what to look for. If the coil fails, the relay never closes.

    If the contacts weld, the relay never opens. If debris blocks the plunger, the relay may close partially or intermittently. Each failure mode produces different symptoms, which we will cover next.

    Signs Your AC Relay Is Stuck

    A stuck relay typically produces one of three clear symptoms: the AC won’t turn off, the fan runs continuously, or the compressor refuses to start at all. The most obvious sign is when the outdoor unit keeps running after the indoor thermostat has satisfied the temperature setting and the display shows the system is off.

    Another common symptom is the compressor running but the condenser fan staying still. This happens when the fan relay contacts weld closed while the compressor relay fails to close. You might also hear a loud humming from the compressor even though the fan is not spinning, which indicates the compressor relay is stuck in the closed position.

    Intermittent cooling is another red flag. If your AC works fine for an hour then suddenly stops cooling even though the fan is still running, the relay contacts may be pitted or dirty. This creates inconsistent contact resistance, and the relay can stick partially open or closed.

    Forum users consistently mention that their first clue was a utility bill that jumped unexpectedly. When a relay stays closed, the compressor runs 24/7, and that constant draw shows up on your electric bill before you notice the mechanical symptoms. One homeowner reported a $127 spike in a single month before discovering the relay was welded shut.

    Physical inspection can also reveal problems. Remove the control box cover and look at the relay. Burn marks, melted plastic, or a strong electrical smell mean the relay has overheated. A black carbon buildup on the contact surfaces indicates arcing, which eventually leads to a stuck relay if it is not addressed.

    Tools and Materials You Will Need

    You need a flathead screwdriver, a Phillips screwdriver, a multimeter, electrical contact cleaner, compressed air, and a replacement relay rated for your unit. The multimeter is optional for a quick fix, but it removes all guesswork when you are deciding whether to clean or replace the relay.

    Electrical contact cleaner is available at any hardware store and costs around $8 for a small aerosol can. Compressed air in a can works fine, but a small air compressor with a blow gun tip is more effective if you already own one. The replacement relay should match your existing part’s coil voltage and contact amperage rating.

    Bring a phone or camera to photograph the wiring before you disconnect anything. Wire placement on relay terminals is not universal, and a photo prevents costly mistakes during reassembly. A small flashlight or headlamp is also helpful because outdoor unit control boxes are often shadowed by the housing.

    Insulated gloves add an extra layer of safety when you are working around high-voltage terminals. You can pick up a pair rated for electrical work at any home improvement store for under $15. Do not use ordinary fabric gloves because they offer no protection against accidental contact with live terminals.

    Safety First: Disconnect Power Before Starting

    Turn off the circuit breaker that feeds your outdoor condenser unit before you open the control box. The breaker is usually labeled AC, Condenser, or HVAC in your main electrical panel. If you cannot identify the correct breaker, shut off the main breaker to the house to be absolutely certain.

    After flipping the breaker, wait 30 seconds for any capacitors inside the unit to discharge. Capacitors store lethal voltage even when the power is off, and touching the terminals can cause serious injury. Use your multimeter to test between the relay’s line terminals and ground to confirm zero voltage before your hands enter the control box.

    Wear insulated gloves if you have them, and stand on a dry surface. Avoid working in wet grass or during rain. If your unit is located in a damp area, place a dry rubber mat or wooden board under your feet before you begin the repair.

    Never assume the power is off just because the thermostat is set to off. The thermostat only controls the low-voltage signal, and the high-voltage side can remain live at the outdoor unit even when the system is not running. Always verify with a multimeter or by physically disconnecting the breaker.

    How to Fix a Stuck Relay on AC Unit

    Once the power is confirmed off, remove the screws or clips holding the control box cover on your outdoor unit. Set the cover aside and take a clear photo of the relay and its wiring. The relay is typically mounted on the back panel of the control box and has two heavy power wires and several smaller control wires attached to screw terminals or spade connectors.

    Step 1: Locate the Relay and Inspect the Control Box

    Identify the relay by looking for a rectangular plastic or metal component with a central plunger and two sets of contacts. Most residential units use a single-pole or double-pole contactor with a 24-volt coil. Note any discoloration, melted plastic, or burn marks around the relay, as these indicate the relay has overheated and must be replaced rather than cleaned.

    Check the bottom of the control box for dead insects, leaves, or mud. Forum discussions repeatedly point to insect intrusion as a leading cause of relay failure. Roaches and ants are drawn to the warmth of the control box, and their bodies can jam the plunger or bridge the contacts.

    One homeowner on a DIY forum found a mouse nest inside the control box that had caused repeated relay burnouts. If you see rodent droppings or chewed wires, call a professional immediately because the damage extends beyond the relay.

    Step 2: Test the Relay with a Multimeter

    Set your multimeter to measure coil resistance and touch the probes to the two small control terminals on the relay. A healthy 24-volt coil typically reads between 10 and 30 ohms. If the display shows an open circuit or a reading near zero, the coil is burned out and the relay needs replacement.

    Next, test the contact resistance by placing the probes on the two large line terminals while the relay is de-energized. You should see an open circuit or infinite resistance. If the meter shows continuity or a very low resistance, the contacts are welded shut. Welded contacts cannot be cleaned; you must replace the relay.

    Testing takes less than two minutes and saves you from wasting time on a relay that is beyond repair. I have skipped this step before and ended up cleaning a relay that was actually burned out, which cost me an extra hour of frustration.

    Step 3: Clean the Relay Contacts and Plunger

    If the coil tests good and the contacts are not welded, remove the relay from the mounting bracket by loosening the screws on the terminals. Pull the wire connectors straight off to avoid bending the spades. Spray electrical contact cleaner directly onto the contact surfaces and the plunger mechanism.

    Allow the cleaner to penetrate for 30 seconds, then use a small wooden stick or plastic pick to gently scrape any carbon buildup off the contact faces. Do not use metal tools on the contacts because they can scratch the surface and increase resistance. Blow the debris away with compressed air and let the relay dry for five minutes before reinstalling it.

    Reattach the relay, restore power, and test the system. If the unit cycles on and off normally with the thermostat, the cleaning worked. If the relay still sticks or the symptoms return within a few days, move on to replacement.

    Step 4: Try Percussive Maintenance as a Temporary Fix

    Tap the side of the relay gently with the plastic handle of a screwdriver while the power is still off. This can break loose a lightly stuck plunger or dislodge debris that is not visible. Do not hit the relay hard enough to damage the plastic housing or bend the contacts.

    Keep in mind that this is only a temporary fix. Forum users report that percussive maintenance often works for a few days or weeks before the relay sticks again. Use this method only to get through a hot weekend while you wait for a replacement part to arrive.

    Never use percussive maintenance as a permanent solution. A stuck relay can overheat and damage the compressor or create a fire hazard if the contacts arc continuously. Order the replacement relay the same day you tap it loose.

    Step 5: Replace the Relay if Cleaning Fails

    When the relay is welded, the coil is burned out, or cleaning does not restore normal operation, install a replacement relay. Take your old relay to a local HVAC supply house or order an exact match online using the part number printed on the side. The new relay must have the same coil voltage, contact rating, and physical dimensions.

    Remove the old relay by loosening the mounting screws and disconnecting the wires one at a time. Connect each wire to the matching terminal on the new relay, referring to the photo you took earlier. Tighten the terminal screws firmly but do not overtighten them, as stripped terminals can cause arcing and future failures.

    Mount the new relay on the bracket, replace the control box cover, and restore power at the breaker. Set your thermostat to cooling mode and listen for the compressor and fan to start together. If the unit cycles on and off normally with the thermostat, the repair is complete. Allow the system to run for 15 minutes to confirm stable operation before you walk away.

    How to Prevent Future Relay Problems

    Inspect your outdoor unit control box twice a year, once before summer and once before winter. Remove debris, check for insect activity, and look for moisture buildup. A five-minute inspection can prevent a stuck relay that leaves you without cooling on the hottest day of 2026.

    Seal any gaps around the control box cover with silicone caulk or replace worn gaskets. Insects enter through the smallest openings, and once inside they can nest around the relay. Several forum users solved recurring relay problems permanently by adding a fine mesh screen over the control box vents to block bugs while still allowing airflow.

    Keep the area around your outdoor unit clear of vegetation. Leaves and grass clippings can blow into the control box during mowing or storms, and organic matter traps moisture that accelerates contact corrosion. Aim for at least two feet of clearance on all sides of the condenser.

    If you live in an area with frequent power outages or voltage spikes, consider installing a surge protector on your HVAC circuit. High inrush current during startup is the leading electrical cause of welded contacts, and a surge protector reduces the stress on the relay every time the compressor kicks on.

    Schedule a professional tune-up every spring before the cooling season begins. A technician will check the relay contacts, measure coil resistance, and clean the control box as part of routine maintenance. Spending $80 to $120 on preventive maintenance is far cheaper than an emergency repair call on a weekend.

    When to Call a Professional HVAC Technician

    Call a professional if you are not comfortable working with electrical components or if the breaker panel is difficult to access. Safety should always be the deciding factor. If you have any doubt about your ability to disconnect power safely, stop and schedule a service call.

    You should also hire a technician if the control board shows burn marks, the wiring insulation is brittle, or the capacitor is bulging. These issues indicate larger electrical problems that go beyond a simple relay swap. A technician can test the entire low-voltage control circuit and verify that the thermostat is sending the correct signals.

    Another situation that requires professional help is when you replace the relay and the new one sticks again within a few weeks. Repeated failures usually point to an underlying issue such as a shorted compressor, incorrect voltage, or a failing control board. Replacing relays indefinitely will waste money if the root cause is not addressed.

    One forum user replaced three relays in six months before discovering that a failing capacitor was sending voltage spikes through the control circuit. A $45 capacitor replacement solved the problem permanently. If your relay keeps sticking after replacement, ask a technician to test the capacitor, control board, and compressor amp draw.

    Frequently Asked Questions

    Can you fix a stuck relay?

    Yes, if the contacts are dirty or lightly stuck, cleaning with electrical contact cleaner and compressed air can restore normal function. However, if the contacts are welded shut or the electromagnetic coil is burned out, replacement is the only safe option.

    What causes a relay to get stuck?

    Dirt, debris, and insect intrusion are the most common causes. High inrush current during compressor startup can weld contacts together. Corrosion, pitted contacts, and mouse damage also lead to sticking.

    How to tell if an AC relay is bad?

    The main signs are an AC unit that won’t turn off, a fan that runs continuously, or a compressor that refuses to start. You can confirm with a multimeter by testing coil resistance and checking for continuity across the contacts when the relay is de-energized.

    How to unstick a stuck relay?

    First, turn off the power. Remove the relay and clean the contacts with electrical contact cleaner. Use compressed air to remove debris. If the plunger is jammed, a gentle tap with a screwdriver handle may free it temporarily. Replace the relay if cleaning does not work.

    Can a relay burn out from a mouse?

    Yes, mice can chew wires, build nests inside the control box, and leave droppings that cause shorts. The resulting electrical faults can burn out the relay coil or weld the contacts. Always inspect for rodent damage before replacing a burned-out relay.

    How much does it cost to replace an AC relay?

    A replacement relay costs between $15 and $50 depending on the amperage rating and brand. Professional installation typically ranges from $150 to $300 including labor. Doing the replacement yourself saves the labor cost and takes about 30 to 60 minutes.

    How long does it take to fix a stuck relay?

    Cleaning a relay takes 15 to 30 minutes. Replacing a relay takes 30 to 60 minutes including diagnosis and testing. Most homeowners complete the repair in under an hour.

    When should I call a professional for AC relay problems?

    Call a professional if you are uncomfortable working with electrical components, if the control board shows damage, or if the new relay fails again within weeks. Repeated failures indicate deeper electrical issues that require professional diagnosis.

    What is the $5000 rule for AC?

    The $5000 rule is a simple guideline for deciding whether to repair or replace an AC unit. Multiply the age of your unit by the repair cost. If the result exceeds $5000, replacement is usually the better investment.

    What is the 3 minute rule for AC?

    The 3 minute rule is a built-in delay in modern AC systems that prevents the compressor from restarting within three minutes of shutting down. This protects the compressor from high inrush current damage and gives the refrigerant pressures time to equalize.

    Conclusion

    Learning how to fix a stuck relay on AC unit systems is one of the most satisfying DIY repairs you can tackle. The process requires only basic tools, a cautious approach to safety, and about 30 to 60 minutes of your time. Most homeowners can save a significant service call fee by handling this repair themselves, and the knowledge you gain will help you maintain your system for years to come.

    If you followed every step in this guide and your AC is still acting up, do not hesitate to call a licensed technician. Electrical problems can escalate quickly, and a professional diagnosis is worth the cost when your comfort and safety are on the line. Bookmark this guide and share it with anyone who might need it before the next heat wave arrives.

  • What Size Tankless Water Heater Do I Need 2026 Guide

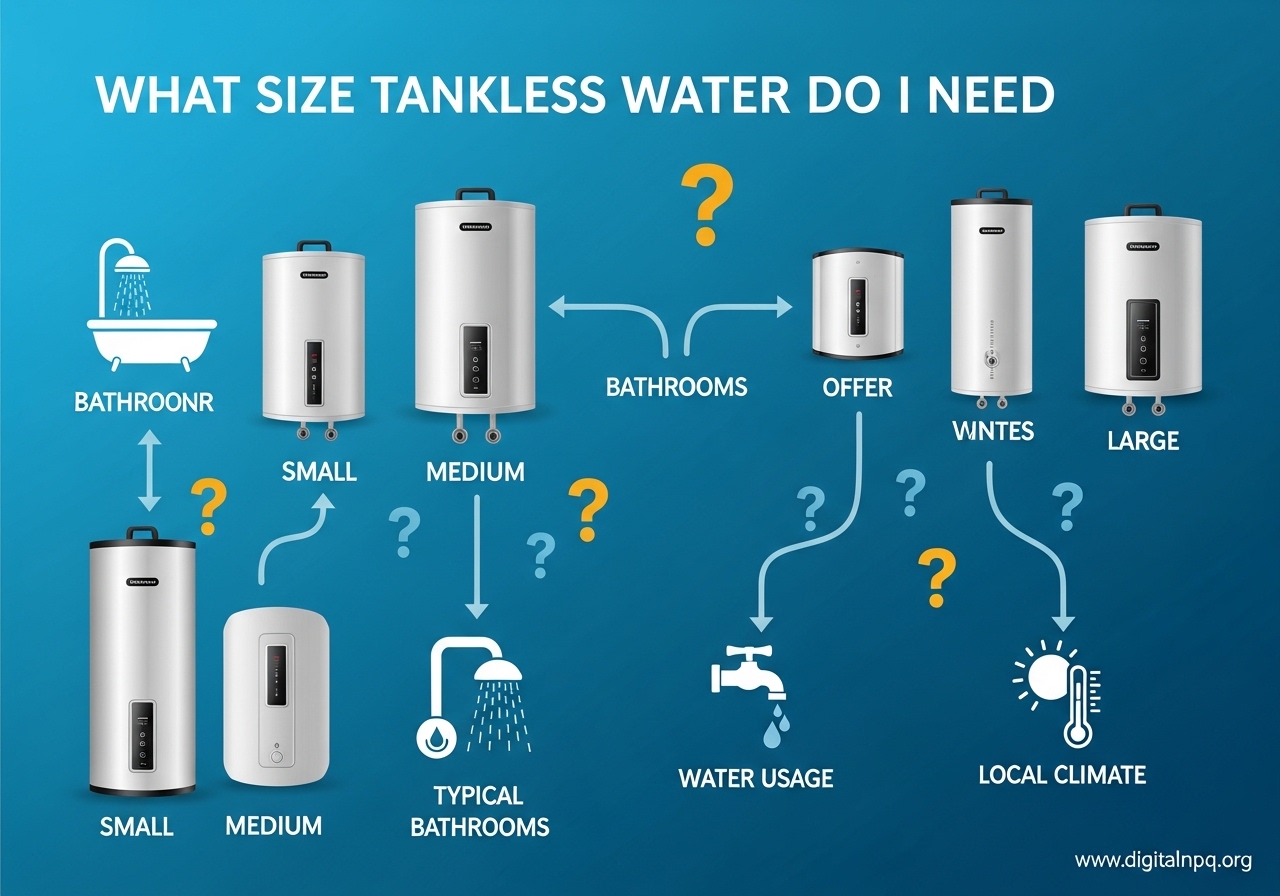
    What Size Tankless Water Heater Do I Need 2026 Guide

    Most homeowners need a tankless water heater that delivers between 7 and 10 gallons per minute (GPM) to cover daily hot water demand. The exact size depends on two factors: how many fixtures you run at the same time, and how cold your incoming groundwater is. Get either of those wrong, and you will end up with lukewarm showers or an oversized unit that costs more than necessary.

    Our team spent weeks reviewing installation manuals, regional climate data, and plumber forums to build a sizing method that works for real homes. If you want specific product recommendations after you calculate your size, we have a separate guide to the best electric tankless water heaters that you can check once you know your GPM target.

    This guide breaks down every step of the calculation in plain language. You will learn how to add up fixture flow rates, calculate your temperature rise, and match those numbers to the right unit size. We also include quick-reference tables for household size and climate zones so you can skip the math if you just want a ballpark answer.

    By the end, you will know exactly what size tankless water heater you need, whether you are replacing a 40-gallon tank or building a new home from scratch.

    How to Size a Tankless Water Heater

    Sizing a tankless water heater comes down to two numbers: your peak flow rate in GPM, and your required temperature rise in degrees Fahrenheit. Multiply those needs against the climate you live in, and you have a clear target that any plumber or retailer can match to a specific model. Without both numbers, you are guessing.

    Here is the process in one sentence. Add up the flow rates of every hot water fixture you might run at the same time, then subtract your groundwater temperature from your desired output temperature to find the temperature rise. Every tankless unit lists a GPM rating at a specific temperature rise, so you need both numbers to pick the right one.

    A unit that works for your neighbor might fail in your home if your groundwater is colder or your family uses more fixtures at once. Most people get confused because they are used to thinking in gallons, like a 50-gallon tank. A tankless unit does not store water.

    It heats water as it passes through, so the only thing that matters is how many gallons per minute it can heat to your target temperature. I see this mistake in homeowner forums constantly, and it is the number one reason people buy the wrong size. They walk into a store and ask for a tankless version of their 50-gallon tank, but the salesperson needs their GPM number instead.

    The formula is simple once you break it down. Peak flow rate equals the sum of all fixtures running simultaneously. Temperature rise equals target temperature minus inlet temperature.

    Once you have those two values, you can read any manufacturer spec sheet and know immediately whether the unit will work in your home. Our team uses this exact two-factor method every time we evaluate tankless recommendations.

    What GPM Means and Why It Matters for Tankless Sizing

    GPM stands for Gallons Per Minute. It measures how much water flows through a fixture or heater in sixty seconds. A standard showerhead uses about 2.5 GPM.

    A kitchen sink uses about 1.5 GPM. If you run both at once, your tankless unit must heat 4.0 GPM instantly to keep both streams hot. The unit never gets a break. It must maintain that output for as long as both fixtures stay open.

    Tankless manufacturers rate their units at a specific temperature rise, usually 70 degrees. For example, a unit might deliver 8.4 GPM at a 35-degree rise, but only 5.6 GPM at a 70-degree rise. That means the same unit produces less hot water in cold climates than in warm ones.

    This is why you cannot just look at the headline GPM number on the box. You must check the rating at your actual temperature rise. The marketing number on the front of the brochure is almost always the best-case scenario.

    Our team recommends aiming for a unit that can handle your peak demand plus about one extra GPM as a safety margin. That buffer prevents temperature drops when your groundwater gets colder in winter or when a guest turns on a faucet unexpectedly.

    I learned this the hard way during a renovation project where a perfectly calculated 7 GPM unit dropped to 5.5 GPM in January because we forgot to size for the coldest possible groundwater temperature. Another detail most shoppers miss is that fixture flow rates change over time.

    A showerhead rated at 2.5 GPM may drop to 2.0 GPM after a few years of mineral buildup. Conversely, if you replace a low-flow head with a high-performance model, your demand could increase. Always measure your actual fixtures rather than relying on builder specifications from fifteen years ago.

    A quick measurement with a stopwatch and a gallon jug takes two minutes and gives you real data.

    How to Calculate Your Peak Flow Rate Demand

    Follow these three steps to find the exact GPM your home needs during the busiest hour of the day. We developed this method after reviewing dozens of plumber recommendations and hundreds of real-world installation stories. It works for apartments, condos, single-family homes, and even small multi-family buildings.

    Step 1: List Every Hot Water Fixture in Your Home

    Walk through your house and count every fixture that uses hot water. Include showers, bathtubs, bathroom sinks, kitchen sinks, dishwashers, and washing machines. Do not forget utility sinks or outdoor hot water spigots if you use them regularly.

    Even a small bar sink in a basement counts if it has a hot water line. Write them down in a list. You do not need to include toilets or hose bibs that only use cold water.

    If you have a fixture that mixes hot and cold, like a single-handle shower, count it because it still draws from the hot water line. I usually create a simple spreadsheet with one row per fixture. That makes the next step easier and gives you a record you can update if you remodel later.

    Step 2: Add Up the Flow Rates

    Find the flow rate for each fixture. You can check the manufacturer stamp on the showerhead or aerator, or use the standard values in our chart below. Modern low-flow showerheads often use 1.5 to 2.0 GPM, while older fixtures may use 2.5 to 3.0 GPM.

    If you cannot find a stamp, the gallon-jug method is the most reliable approach. Add the numbers together. For example, a home with two 2.0 GPM showers, a 1.5 GPM kitchen sink, and a 1.0 GPM bathroom sink has a total of 6.5 GPM if everything runs at once.

    In reality, you rarely run every fixture simultaneously, so the next step narrows that down to your realistic peak. This total is your theoretical maximum, not your operational target.

    Step 3: Determine Your Peak Simultaneous Demand

    Think about your worst-case scenario. In most homes, that is the morning rush when two showers run, the kitchen sink is on, and the dishwasher starts. For a family of four, that might be 2.0 + 2.0 + 1.5 + 1.0 = 6.5 GPM.

    A couple living alone might only hit 3.5 GPM during peak use. A family of five in a three-bathroom home could reach 8.5 GPM or higher. Pick the highest realistic combination, not the absolute maximum every fixture could theoretically produce.

    Plumbers on homeowner forums consistently warn against oversizing by adding every fixture in the house, because that almost never happens in real life. One professional plumber on Reddit described a customer who demanded 12 GPM for a two-bedroom home because they added the washing machine, dishwasher, three sinks, and two showers. The plumber installed an 8 GPM unit, and the customer never ran out of hot water.

    Be honest about your habits. If you run the dishwasher at night after everyone showers, it does not count toward your peak. If you do laundry on weekends only, it also does not count. Your peak is the worst five-minute window during a typical weekday. That is the number your tankless unit must handle.

    Fixture Flow Rate Reference Chart

    Use this table to estimate the flow rate for common fixtures. If your fixtures have WaterSense labels, use the lower end of the range. If they are older, use the higher end. These values represent hot water demand, not total mixed flow.

    A showerhead may deliver 2.5 GPM total, but the hot water portion is what matters for tankless sizing.

    FixtureLow Flow (GPM)Standard Flow (GPM)High Flow (GPM)
    Showerhead1.52.02.5
    Bathtub Faucet3.04.05.0
    Bathroom Sink0.51.01.5
    Kitchen Sink1.01.52.0
    Dishwasher1.01.52.0
    Washing Machine1.52.02.5
    Utility Sink1.52.03.0

    To get the most accurate number, time how long it takes to fill a one-gallon jug from each fixture. Divide 60 by the number of seconds, and you have the exact GPM for that outlet. I did this in my own home and found that one showerhead rated at 2.5 GPM actually delivered 2.2 GPM because of a partially clogged aerator.

    That small difference saved me from oversizing by nearly half a GPM. Keep in mind that appliances like dishwashers and washing machines often have their own internal heating elements. They draw less hot water from your tankless unit than the raw GPM rating suggests because they boost the temperature internally.

    A dishwasher rated at 1.5 GPM might only pull 1.0 GPM of hot water if it has a booster heater. Check your appliance manuals to see if they include this feature.

    Temperature Rise: The Hidden Factor Most People Miss

    Temperature rise is the difference between your incoming groundwater temperature and the temperature you want at the faucet. Most people set their hot water to 120 degrees. If your groundwater is 50 degrees, your temperature rise is 70 degrees.

    That is a large demand, and it directly reduces how many GPM your tankless unit can produce. The unit must work harder to bridge a bigger gap. Here is why this matters. A tankless heater rated at 9.8 GPM might only deliver 5.5 GPM when the temperature rise is 70 degrees.

    In a warm climate where the groundwater is 70 degrees, the same unit might deliver 8.5 GPM because it only needs to raise the water by 50 degrees. This is the reason a unit that works perfectly in Florida may struggle in Minnesota. The same hardware performs differently depending on where you install it.

    Our team analyzed climate data from NOAA and found that temperature rise can vary by 40 degrees or more across the United States. Ignoring this factor is the second most common sizing mistake after the GPM confusion. We have read countless forum posts where homeowners blame the brand for a bad unit when the real issue was that they bought a warm-climate model and installed it in a cold-climate house.

    The relationship between temperature rise and GPM is not linear. As the rise increases, the GPM drops faster than you might expect. A unit that loses 1.5 GPM going from a 50-degree rise to a 60-degree rise might lose 3 GPM going from a 60-degree rise to a 75-degree rise.

    This is why the conservative winter temperature matters so much. If you size for the average temperature instead of the worst-case temperature, you will have cold showers during the coldest months of the year.

    How to Find Your Groundwater Temperature

    The easiest method is to run cold water from a faucet for about two minutes until it reaches its lowest stable temperature. Measure it with a kitchen thermometer. Do this in late winter for the most conservative reading.

    If you measure 52 degrees in January, you can be confident the unit will handle your worst-case scenario. We recommend doing this at the fixture farthest from your water heater, because that fixture experiences the most temperature loss from the ground.

    Alternatively, you can use the EPA groundwater temperature map or your local water utility report. Many municipalities publish average inlet water temperatures for their service area. Add 5 degrees to the published average to account for unusually cold winter days.

    I checked my own utility report and found a published average of 55 degrees. Adding 5 degrees gave me a conservative 50-degree estimate, which matched my January measurement almost exactly.

    Groundwater Temperature by Region

    This table shows average groundwater temperatures across the United States. Use the conservative number for your region to size your unit safely. If you live near a border between two zones, default to the colder zone.

    Groundwater temperatures are fairly stable year-round compared to air temperatures, but they do drop a few degrees in deep winter.

    RegionAverage Groundwater TempConservative Winter TempTypical Rise to 120F
    Southern Florida75F70F45-50F
    Gulf Coast / Southern CA70F65F50-55F
    Southwest Desert65F60F55-60F
    Mid-Atlantic / Southeast60F55F60-65F
    Pacific Northwest55F50F65-70F
    Midwest52F47F68-73F
    Mountain West50F45F70-75F
    Northern Plains / Northeast47F42F73-78F
    Northern Minnesota / Maine42F38F78-82F

    If you live in a northern climate with a 78-degree temperature rise, you need a significantly more powerful unit than someone in Miami with a 45-degree rise. Many Reddit users in the Plumbing community report that winter temperature drops are their number one complaint after installation.

    They bought a unit that worked in summer but could not keep up in January. One user in Minnesota shared that their 7 GPM unit delivered barely 4 GPM in February, which was not enough for two showers simultaneously.

    Household Size Sizing Guide

    Use this section as a quick reference if you want a ballpark answer before doing the full calculation. These ranges assume average fixture counts and moderate climates. Adjust up or down based on your exact peak demand and regional temperature rise.

    This guide is built from actual plumber recommendations and real-world forum data, not just manufacturer marketing.

    1-2 People: 4-6 GPM Is Usually Enough

    A couple or single person in a one-bathroom home rarely needs more than 4 to 6 GPM. Peak demand typically involves one shower and a sink running simultaneously. In warm climates, a 4 GPM unit may handle this comfortably.

    In colder regions, a 6 GPM unit provides the extra heating power needed for higher temperature rise. A 5 GPM unit is the most common recommendation for this group. Forum users living alone consistently report that 9 GPM units are overkill for their needs.

    They spent extra money on capacity they never use. One homeowner posted that their 9 GPM unit never ran above 3 GPM in daily use, which meant they paid for heating capacity that sat idle. If you are in a small apartment or condo, a 5 GPM unit is often the sweet spot.

    If you rarely have guests, you can even go as low as 4 GPM in southern climates.

    3-4 People: 7-9 GPM Covers Most Homes

    The average family of four in a two-bathroom home needs 7 to 9 GPM during peak hours. Morning routines often involve two showers plus a kitchen sink or dishwasher. A 7 GPM unit works in warmer climates, while an 8 to 9 GPM unit is safer for mixed or cold climates.

    This is the most common household size in the United States, so manufacturers optimize their product lines around this range. Our team considers 8.4 GPM the most common recommendation from professional plumbers for this household size. It gives enough headroom for occasional guests or laundry days without jumping to the cost of a 10+ GPM unit.

    If you want to narrow down the fuel type after picking your GPM, our guide to the best electric tankless water heaters covers models in this range. We have found that 8.4 GPM is the point where gas becomes almost mandatory in colder climates because electric units struggle to deliver that output at 70-degree temperature rises.

    5+ People: 9-11 GPM for High Demand

    A family of five or more in a home with three bathrooms should look at 9 to 11 GPM units. Peak demand can hit 8 to 9 GPM when multiple showers, the washing machine, and the kitchen sink all run within the same hour. The extra 1 to 2 GPM of capacity prevents the dreaded temperature drop.

    No one wants to be the last person in the shower line with cold water. In cold northern climates with a 75-degree or higher temperature rise, a 10 GPM condensing gas unit is the safest minimum. Some installers recommend cascading two smaller units instead of one massive unit, which provides redundancy if one unit needs maintenance.

    This is especially popular in large homes where the bathrooms are far apart. Two 6 GPM units, one on each end of the house, can outperform a single 10 GPM unit because they reduce the distance hot water must travel through the pipes.

    Household SizeBathroomsWarm Climate GPMCold Climate GPM
    1-2 people14-55-6
    1-2 people25-66-7
    3-4 people27-88-9
    3-4 people38-99-10
    5+ people39-1010-11
    5+ people4+10-1111+ or dual units

    What Size Tankless Replaces Your Tank Water Heater

    Homeowners often ask what tankless unit replaces a 40-gallon or 50-gallon tank. The answer is not a direct gallon conversion. You must match the tankless GPM to the tank’s first-hour rating.

    A tank water heater stores hot water and refills gradually, so it can deliver more than its tank size in the first hour. A tankless unit has no storage, so it must match that first-hour delivery rate continuously. A 40-gallon tank can deliver roughly 60 to 70 gallons of hot water in the first hour.

    To replace that continuously, you need a tankless unit that can deliver 6 to 8 GPM at your temperature rise. In warm climates, a 6 GPM unit works. In cold climates, aim for 8 GPM to avoid winter shortfalls.

    A 6 GPM unit in Minnesota will feel like a 4 GPM unit when the groundwater drops to 40 degrees. A 50-gallon tank delivers about 80 to 90 gallons in the first hour. That translates to an 8 to 10 GPM tankless unit.

    Again, the climate matters. A 50-gallon replacement in Minnesota needs a more powerful unit than the same replacement in Arizona. Many homeowners in plumbing forums say they wish someone had told them this before they bought. They assumed a 50-gallon tank meant a 5 GPM tankless was enough, and they learned the hard way that it was not.

    One forum user described taking a 5 GPM unit back to the store after two weeks of cold showers. For a 75-gallon tank, you generally need a 10 to 11 GPM unit or two smaller units in parallel. For an 80-gallon tank, consider 11+ GPM or a cascading setup with two 6 to 7 GPM units.

    If you currently have a 100-gallon tank, you are almost certainly in the territory where a plumber should evaluate your home for either a very large condensing unit or a multi-unit cascade. These large tanks are common in homes with five or more bathrooms.

    Gas vs Electric Tankless Sizing Differences

    The fuel type changes how you interpret the size. Gas tankless units are measured in both GPM and BTU per hour. Electric units are measured in GPM and kilowatts or amperage. The relationship between these numbers is what separates a successful installation from a disappointing one.

    A gas unit with 180,000 BTU can typically deliver 8 to 10 GPM depending on the temperature rise. Larger whole-house gas units range from 150,000 to 200,000 BTU. Condensing gas units are more efficient, so they can squeeze more effective hot water from the same BTU input than non-condensing units.

    A 150,000 BTU condensing unit might outperform a 180,000 BTU non-condensing unit in real-world conditions because less heat escapes up the vent. Electric tankless units are sized by amperage and voltage. A whole-house electric unit might require 120 to 160 amps at 240 volts.

    Many homes do not have enough spare electrical capacity without upgrading the panel. This is the reason licensed plumbers on homeowner forums overwhelmingly recommend gas for whole-house applications. Electric units work best for point-of-use or small homes with low GPM demand.

    The math is simple. A 30 kW unit at 240V draws 125 amps. A 36 kW unit draws 150 amps. Most homes have 200-amp main panels, and the existing load from air conditioning, electric stoves, and dryers can easily push you past the safe limit.

    If you are set on electric, verify your panel can handle the load. A 30 kW electric unit needs 125 amps at 240V. If your home runs on a 150-amp main panel, that leaves almost nothing for the rest of the house. In our experience, gas is the safer choice for any whole-house demand above 5 GPM.

    We have seen too many forum stories where homeowners installed a 27 kW electric unit and tripped the main breaker every time the dryer and tankless ran simultaneously. The cost of upgrading the panel often erases any savings from choosing electric over gas.

    Condensing vs Non-Condensing and Why It Matters for Sizing

    Condensing tankless units extract extra heat from exhaust gases, giving them efficiency ratings above 90 percent. Non-condensing units vent the exhaust directly, wasting some heat, and typically run around 80 percent efficiency. That 10 percent difference translates directly to how much hot water you get from the same fuel input.

    From a sizing perspective, a condensing unit can deliver more usable hot water per BTU than a non-condensing unit of the same input rating. That means a 150,000 BTU condensing unit might perform like a 170,000 BTU non-condensing unit. If you are in a cold climate and need every bit of performance, condensing gives you a slight edge.

    The extra efficiency is most noticeable when the temperature rise is above 65 degrees, which is exactly when you need the help most. Non-condensing units are cheaper upfront and work fine in warm or moderate climates where the temperature rise is below 60 degrees.

    In northern climates with temperature rises above 70 degrees, the extra efficiency of condensing units becomes more noticeable. Homeowners on plumbing forums report that their condensing units handle winter demand better than the non-condensing models they replaced. The price gap between condensing and non-condensing has narrowed in recent years, making the condensing option more attractive even in moderate climates.

    Condensing units also use PVC venting instead of metal, which can lower installation costs. Stainless steel venting for non-condensing units is expensive and harder to install. If you are sizing for a large home in a cold climate, the combination of higher efficiency and cheaper venting often makes condensing the better long-term investment.

    The upfront cost difference is usually recovered within a few years through lower gas bills and avoided venting expenses.

    Point-of-Use vs Whole-House Tankless Sizing

    Whole-house units sit in a central location and serve every fixture. Point-of-use units are small electric heaters installed at a single fixture, usually under a sink or near a shower. The sizing logic is completely different for each.

    Whole-house units face the full brunt of your peak demand. Point-of-use units only worry about one fixture at a time. A whole-house unit must match your peak GPM for the entire home. A point-of-use unit only needs to match the flow rate of that single fixture.

    A small 2 GPM point-of-use electric heater can serve a remote bathroom perfectly, even if your whole-house unit would struggle to push hot water that far through long pipes. The pipe run matters. Hot water cools as it travels through uninsulated pipes.

    A 50-foot run from a central tankless unit to a guest bathroom can result in lukewarm water for the first minute of use. A point-of-use unit eliminates that wait entirely. Forum users frequently recommend point-of-use units for additions, detached guest bathrooms, or workshops that are far from the main water heater.

    The electric amperage draw is small, often 30 to 50 amps, and the installation is much simpler than running a new gas line. Our team has seen successful installations where a 1.5 GPM point-of-use unit solved a cold-water problem that a larger whole-house unit could not fix because of pipe distance.

    One homeowner added a point-of-use unit under their kitchen sink and reported that they no longer had to run the faucet for 45 seconds to get hot water for dishes. If you have a large home with fixtures spread across two floors or a long ranch layout, consider pairing a moderately sized whole-house unit with one or two point-of-use units for the remote fixtures.

    This hybrid approach is often cheaper than buying a single oversized unit. It also reduces the total pipe run that hot water must travel, which saves water and energy. We have calculated that in some homes, a hybrid setup can pay for itself in under three years through reduced water waste alone.

    Common Sizing Mistakes to Avoid

    After reviewing thousands of forum posts and speaking with installers, our team identified the same errors repeatedly. Avoid these, and you will save yourself from cold showers and expensive returns. Every mistake on this list has appeared in real homeowner stories at least a dozen times.

    Mistake 1: Buying by tank size instead of GPM. A 50-gallon tank and a 5 GPM tankless are not equivalent. The tank stores water. The tankless must heat it continuously. Always convert your peak demand to GPM first.

    If you currently have a 50-gallon tank, you almost certainly need an 8 to 10 GPM tankless, not a 5 GPM unit. Mistake 2: Ignoring temperature rise. A unit rated for 10 GPM might only deliver 6 GPM in your climate. Check the performance curve at your actual temperature rise, not the marketing headline.

    The performance curve is usually printed in the manual or listed on the manufacturer website under specifications. Look for the line that shows GPM at 70-degree rise or 77-degree rise. Mistake 3: Oversizing for no reason. A 11 GPM unit for a one-bathroom condo wastes money and may short-cycle.

    Short cycling reduces efficiency and wears out the heat exchanger faster. Size for your actual demand plus a small buffer. The buffer should be about 1 GPM, not 4 GPM. An oversized unit also costs more to install because it may require larger gas lines and upgraded vents.

    Mistake 4: Choosing electric for a whole-house application in a cold climate. Electric tankless units require massive amperage, and their output drops sharply as temperature rise increases. Plumbers consistently report disappointment with whole-house electric units in northern states. Gas is the safer choice for 6+ GPM in cold climates.

    If you are in a northern state and want whole-house electric, expect to pay for a panel upgrade and possibly a demand management system that limits other appliances while the tankless runs. Mistake 5: Forgetting about installation requirements. A large gas tankless may need a 3/4-inch gas line instead of the 1/2-inch line your old tank used.

    It may also need a new vent. If you size for a big unit but your infrastructure cannot support it, you face unexpected retrofit costs. Check your gas line capacity and electrical panel before finalizing the size. A plumber can measure gas line pressure and verify electrical load in about 30 minutes during a site visit. That small inspection fee can save you thousands in surprise retrofit costs.

    Frequently Asked Questions

    How big of a tankless water heater do I need to replace a 50 gallon water heater?

    You need a tankless unit that delivers 8 to 10 GPM at your required temperature rise to replace a 50 gallon tank. A 50 gallon tank can supply about 80 to 90 gallons of hot water in the first hour, but a tankless unit must match that delivery rate continuously. In warmer climates, an 8 GPM unit may suffice. In colder northern regions, you may need a 10 GPM condensing gas unit to achieve the same performance.

    What size tankless water heater is needed for a family of 5?

    A family of 5 typically needs a 9 to 11 GPM gas tankless water heater for whole-house coverage. With multiple bathrooms, a dishwasher, and a washing machine, peak demand can reach 7 to 9 GPM simultaneously. Adding a safety margin of 1 to 2 GPM prevents temperature drops during the busiest morning hours. In cold climates, consider a condensing unit with at least 180,000 BTU to maintain output when the groundwater temperature drops below 50 degrees.

    What is the downside of a tankless water heater?

    The main downside is the higher upfront cost for both the unit and installation, especially if you need new gas lines or venting. Electric tankless models can struggle to deliver enough hot water for whole-house use in colder climates. Tankless units also require annual maintenance, including descaling, to prevent mineral buildup from reducing efficiency. Some homeowners experience a slight delay in hot water delivery because the unit must heat water on demand rather than pulling from a preheated tank.

    Can I replace my 40 gallon water heater with a tankless water heater?

    Yes, you can replace a 40 gallon tank with a tankless unit, but you must size by GPM rather than gallon capacity. A 40 gallon tank typically requires a 6 to 8 GPM tankless unit for equivalent performance. In warmer southern climates, a 6 GPM unit may work. In colder northern climates, an 8 GPM condensing gas unit is safer. You should also verify that your home has adequate gas line capacity or electrical service to support the tankless unit.

    Conclusion

    What size tankless water heater do you need? The answer depends on your peak flow rate and your temperature rise. Add up the GPM of every fixture you might run simultaneously, then subtract your groundwater temperature from 120 degrees to find your required temperature rise.

    Match those two numbers against the unit specifications, and you have the right size. This two-factor method removes the guesswork and gives you a number you can defend to any contractor. Most households fall between 7 and 10 GPM.

    A family of two in the South might need 5 GPM. A family of five in the North might need 10 GPM or more. Do not buy by tank size. Do not ignore your climate. And if you are unsure, round up by one GPM rather than rounding down.

    The small extra cost is worth avoiding the frustration of cold showers every winter morning. We have seen $200 of upfront capacity save homeowners $2,000 in replacement costs two years later. Once you know your target GPM, you can compare specific models.

    If you are considering electric, our guide to the best electric tankless water heaters lists units that fit the most common household sizes. If you are going with gas, bring your GPM and temperature rise numbers to any plumber or retailer. They can match you to the exact model that fits your home in minutes. With the right numbers in hand, you will never have to guess what size tankless water heater you need again.

  • Should I Buy an 80 or 95 Efficiency Furnace 2026 Guide

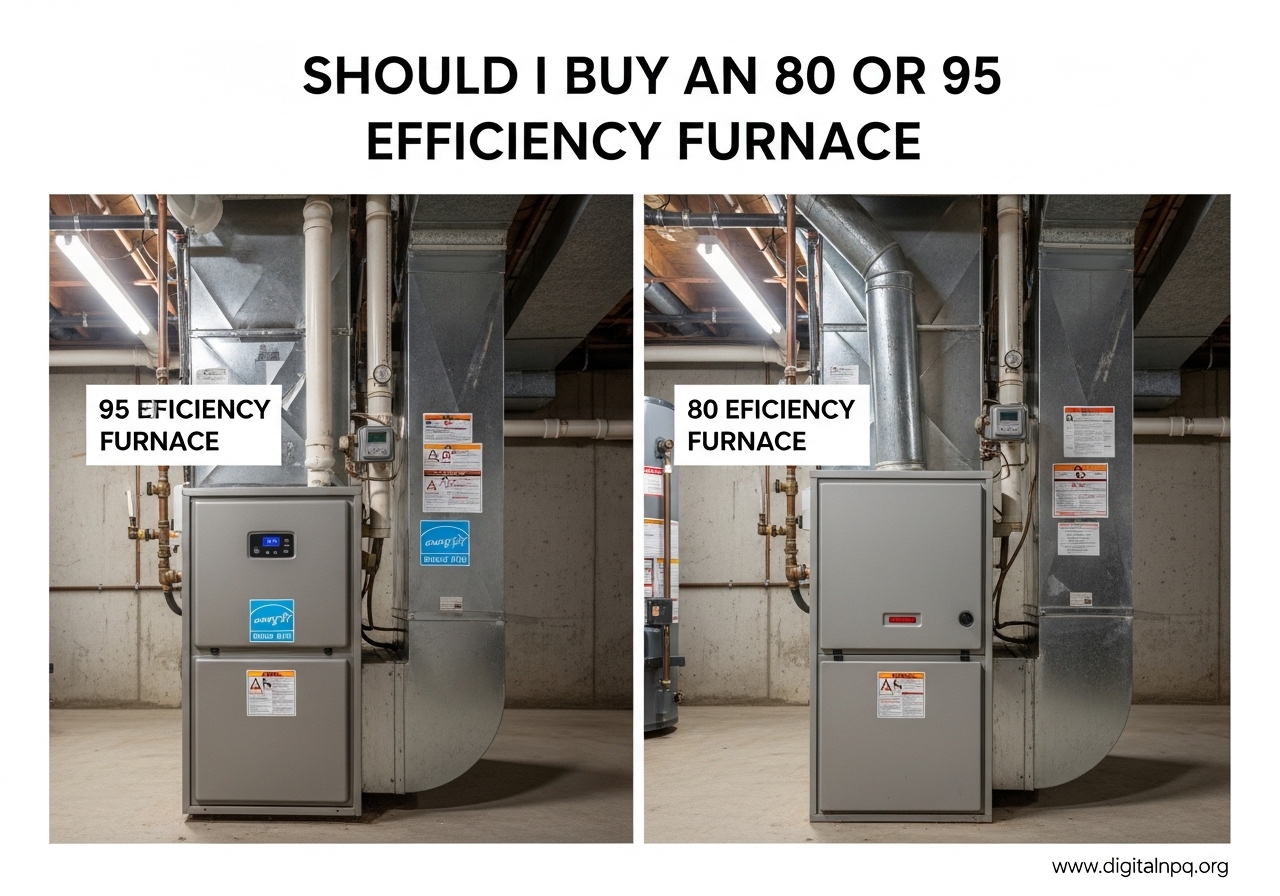
    Should I Buy an 80 or 95 Efficiency Furnace 2026 Guide

    When our team talks to homeowners about replacing a furnace, the most common question we hear is whether to buy an 80 or 95 efficiency furnace. The short answer is this: an 80% AFUE furnace costs less upfront but burns more fuel, while a 95% AFUE furnace costs more to install but saves money on every gas bill. Your best choice depends on how cold your winters are, how long you plan to stay in your home, and whether you want a single-stage or two-stage heating system.

    I have spent the last few months comparing real utility bills and talking with HVAC technicians to understand what the efficiency numbers actually mean in practice. The numbers on the yellow EnergyGuide sticker can be confusing, and contractors do not always explain the trade-offs clearly. Our goal in this guide is to give you the facts you need to make a confident decision without the sales pressure.

    In the sections below, we will break down what AFUE really means, compare the pros and cons of each efficiency level, and show you a simple payback calculation you can use with your own gas bill.

    What Is AFUE and How Does Furnace Efficiency Work?

    AFUE stands for Annual Fuel Utilization Efficiency. It is the standard rating that tells you what percentage of your fuel becomes usable heat inside your home. An 80% AFUE furnace converts 80% of the natural gas it burns into heat, while the remaining 20% escapes through the exhaust flue. A 95% AFUE furnace captures 95% of that energy, leaving only 5% as waste.

    The difference between those two percentages is not just a marketing number. It directly affects how much gas you buy each winter. In simple terms, a 95% furnace produces the same amount of heat as an 80% furnace while using roughly 12.5% less fuel. That is a real, measurable saving that shows up on your monthly utility bill.

    The reason 95% furnaces achieve higher efficiency is a second heat exchanger. After the first heat exchanger captures the bulk of the heat, a secondary heat exchanger pulls additional heat from the exhaust gases before they leave the house. This condensing technology is what makes the unit a “high efficiency” furnace, and it is why 95% models are sometimes called condensing furnaces.

    One thing we noticed while researching this topic is that homeowners often confuse efficiency with size. Efficiency is about how well the furnace uses fuel. Size is about how many BTUs the unit can produce. You can buy an 80,000 BTU furnace in either 80% or 95% efficiency, so make sure you are comparing apples to apples when you get quotes.

    80% AFUE Furnace: Pros and Cons

    An 80% AFUE furnace is considered the standard efficiency baseline for gas furnaces in 2026. It has been the workhorse of residential heating for decades, and it remains a popular choice for many homes. The technology is straightforward, the parts are widely available, and almost every HVAC contractor knows how to install and service one.

    Pros of an 80% Furnace

    The biggest advantage is the lower upfront cost. An 80% furnace typically costs $500 to $1,500 less than a comparable 95% model, depending on the brand and capacity. That lower price tag makes it an appealing option if you are on a tight budget or if you plan to sell the home within a few years and do not expect to recover the premium through energy savings.

    Installation is also simpler and less invasive. An 80% furnace vents exhaust gases through a metal flue pipe, usually straight up through the roof or out a side wall. That means if you are replacing an old furnace, your existing venting may still work with a new 80% unit. No new PVC intake and exhaust pipes are required.

    Another benefit is reliability. The design is simpler, with fewer components that can fail. Some HVAC technicians we spoke with said that 80% furnaces can have slightly lower long-term maintenance costs because they do not have the condensate drains and secondary heat exchangers that 95% units require.

    Cons of an 80% Furnace

    The main drawback is the ongoing operating cost. Because 20% of your fuel is wasted, your monthly gas bill will be higher than it would be with a 95% furnace. In a cold climate where the furnace runs four to six months per year, that difference adds up to hundreds of dollars annually.

    There is also an environmental consideration. Burning more gas means more emissions, which may matter if you are trying to reduce your household carbon footprint. While 80% furnaces are not being banned nationwide, some states and municipalities have begun tightening efficiency requirements for new construction.

    95% AFUE Furnace: Pros and Cons

    A 95% AFUE furnace is classified as a high efficiency furnace. It captures more heat from the combustion process and turns that into warm air for your home. These units are often Energy Star certified, and they can qualify for utility rebates or tax incentives depending on where you live and the current 2026 regulations.

    Pros of a 95% Furnace

    The primary advantage is fuel savings. Because the unit wastes only 5% of the gas it burns, you get more heat per dollar. Homeowners in cold climates often report annual gas bill reductions of 15% to 25% after upgrading from an older 80% furnace to a new 95% model. Those savings accumulate over the 15 to 20 year lifespan of the unit.

    Comfort can improve as well. Many 95% furnaces come with variable speed blowers and two-stage or modulating gas valves. That means the unit can run at a lower, quieter speed for longer periods rather than blasting hot air in short bursts. The result is more consistent temperatures and less temperature swing between heating cycles.

    From a resale perspective, a high efficiency furnace can be a selling point. Buyers increasingly look at utility costs, and an efficient heating system signals that the home has been well maintained. In competitive markets, that can be a subtle advantage.

    Cons of a 95% Furnace

    The upfront cost is the most obvious barrier. You can expect to pay $500 to $2,000 more for the unit itself, plus additional installation costs if your home needs new venting or a condensate drain line. The total premium can reach $2,000 to $3,000 over a standard 80% installation.

    Installation complexity is another factor. A 95% furnace uses PVC pipes for intake and exhaust, which must be routed through an exterior wall. If your furnace is in a basement or interior closet, the installer may need to run new piping through finished spaces. That adds labor and may require drywall repairs afterward.

    Finally, the condensate drain requires attention. A 95% furnace produces acidic water as a byproduct of the condensing process. That water must drain somewhere, and in some homes, the installer may need to add a condensate pump or neutralizer. It is not a dealbreaker, but it is one more component that can require maintenance.

    80% vs 95% Furnace: Side-by-Side Comparison

    Sometimes the easiest way to make a decision is to see the facts lined up next to each other. Here is how the two efficiency levels compare on the factors that matter most.

    Feature80% AFUE Furnace95% AFUE Furnace
    Efficiency Rating80% of fuel becomes heat95% of fuel becomes heat
    Upfront CostLowerHigher ($500 to $2,000+ more)
    Monthly Gas BillHigherLower (12.5% to 15% less fuel)
    Venting TypeMetal flue (uses existing venting)PVC intake and exhaust pipes
    Installation ComplexitySimplerMore complex (may need new venting)
    Best ForMild climates, shorter-term homesCold climates, long-term homes
    Typical Lifespan15 to 20 years15 to 20 years
    Environmental ImpactHigher emissionsLower emissions

    As you can see, the choice is not about which furnace is objectively better. It is about which one fits your budget, your home, and your timeline. A 95% furnace is not always the right answer, and an 80% furnace is not always the budget compromise.

    Cost Analysis: Upfront vs Long-Term Savings

    This is where the decision gets real. Let us look at actual numbers so you can estimate the payback period for your own situation. We will use a typical 80,000 BTU furnace in a 2,000 square foot home with a winter gas bill of $120 per month.

    A 95% furnace uses about 12.5% less gas than an 80% furnace for the same heat output. If you spend $120 per month on gas during the heating season, that is roughly $720 over six months. A 12.5% savings amounts to $90 per year. In a colder climate where the heating season stretches to eight months and bills are $180 per month, the annual savings would be closer to $180.

    Now consider the upfront premium. If a 95% furnace costs $1,500 more installed, your payback period would be about 17 years at $90 per year in savings. At $180 per year in savings, the payback drops to about 8 years. That is why climate matters so much. The colder your winters, the faster a high efficiency furnace pays for itself.

    One insight from Reddit forums we reviewed is that some contractors push 95% furnaces without explaining the payback math. We think that is a disservice. If you are in a mild climate and your heating season is only three or four months long, the savings may never justify the extra cost. You should ask your contractor to run the numbers with your actual gas usage before you decide.

    There are also hidden costs to consider. If your home needs new venting for a 95% unit, add $300 to $800 to the installation. If you need a condensate pump, that is another $150 to $300. Those extras push the payback period out even further, so make sure your quote includes everything, not just the furnace itself.

    Climate Considerations for Your Region

    Where you live has a huge impact on whether a 95% furnace is worth the premium. In cold climates like Minnesota, Wisconsin, or upstate New York, furnaces run almost constantly for months at a time. Every percentage point of efficiency matters because the unit is working hard for so many hours each year.

    In mild climates like the Pacific Northwest, coastal California, or the Southern states, the heating season is shorter. Your furnace may only run heavily for two or three months. In those cases, the fuel savings from a 95% unit may not add up to enough to cover the higher upfront cost before the furnace reaches the end of its lifespan.

    Our recommendation is simple. If you live in a climate where you use the furnace more than six months per year or where winter temperatures regularly drop below 20 degrees Fahrenheit, a 95% furnace is usually the smarter long-term investment. If you live in a mild climate where freezing temperatures are rare and the furnace runs lightly, an 80% furnace is often the more practical choice.

    Two-Stage vs Single-Stage: Why It Matters More Than You Think

    Here is something that surprised us during our research. A two-stage 80% furnace can sometimes deliver better real-world comfort and lower bills than a single-stage 95% furnace. That is because the number of heating stages affects how the furnace runs, not just how efficiently it burns gas.

    A single-stage furnace is either full blast or off. It kicks on at 100% capacity, heats the house quickly, then shuts down. That creates temperature swings and can feel drafty. A two-stage furnace can run at 60% to 70% capacity on mild days, then ramp up to 100% only when it is truly cold. That lower stage uses less gas, runs quieter, and keeps temperatures more stable.

    One HVAC technician we spoke with put it this way: an 80% furnace with two stages of heat will usually run more efficiently in practice than a 95% furnace with just one stage. The reason is that the single-stage unit is constantly cycling on and off at full power, which wastes fuel during startup and creates uneven heat. The two-stage unit runs longer at lower output, which is inherently more efficient and comfortable.

    Our advice is to ask your contractor about a two-stage 80% furnace before automatically upgrading to a single-stage 95%. If you want the best of both worlds, look for a two-stage 95% furnace. Those models cost the most upfront, but they deliver the highest efficiency and the best comfort.

    Are 80% Furnaces Being Phased Out?

    No. As of 2026, 80% furnaces are not being phased out nationwide. You can still buy them, install them, and get replacement parts in all 50 states. However, there are regional exceptions you should know about. California and some northern states have adopted stricter building codes that require higher efficiency for new construction. If you are building a new home, your builder may be required to install a 90% or higher furnace.

    For existing homes, you are generally free to replace an old 80% furnace with a new 80% model. The key is to check your local building code or ask your contractor. They will know if your municipality has any restrictions. We have heard from homeowners on HVAC forums who were told 80% furnaces were “illegal” in their area, only to find out that was not true. Always verify the claim with your local building department.

    Replacing an Old Furnace: What to Know

    If your current furnace is 20 to 30 years old, it is probably running at 60% to 70% efficiency even if the label says 80%. Components wear out, heat exchangers get dirty, and burners lose their tuning over time. Simply replacing a 30-year-old furnace with a new 80% model will likely improve your gas bill and your comfort, even if you do not upgrade to 95%.

    We looked at utility data from homeowners who replaced 25-year-old furnaces. Many reported gas bill drops of 15% to 20% just from moving to a modern 80% unit. That is because the new furnace has a better heat exchanger, a more precise gas valve, and a modern blower motor. The efficiency rating on the old label was never the real efficiency after decades of use.

    If your furnace is more than 15 years old and needs a major repair, replacement is usually the smarter financial move. A $600 repair on a unit that is already at the end of its life is money you will not get back. Put that money toward a new furnace with a warranty and modern controls instead.

    Frequently Asked Questions

    Is a 95% furnace worth the extra money?

    A 95% furnace is worth the extra money if you live in a cold climate with long heating seasons, plan to stay in your home for more than 10 years, and want lower monthly gas bills. In mild climates or short-term homes, the payback period may exceed the furnace lifespan.

    Are 80% efficiency furnaces being phased out?

    No, 80% efficiency furnaces are not being phased out nationwide as of 2026. They remain available for replacement installations in most areas. Some states like California require higher efficiency for new construction, but existing homes can generally still install 80% units.

    Is an 80% efficient furnace good enough?

    Yes, an 80% efficient furnace is good enough for many homes, especially in mild climates or for homeowners who plan to sell within a few years. A new 80% furnace is also significantly more efficient than a 20 to 30 year old unit of any rating.

    What size house will an 80,000 BTU furnace heat?

    An 80,000 BTU furnace will typically heat a 1,600 to 2,000 square foot home in a moderate climate. In colder climates, it may heat 1,200 to 1,600 square feet. Home size, insulation, and window quality all affect the actual heating capacity needed.

    Is a new 80% furnace better than a 30 year old furnace?

    Yes, a new 80% furnace is almost always better than a 30 year old furnace. Old furnaces lose efficiency over time due to wear, dirty heat exchangers, and outdated burner technology. Many homeowners see 15% to 20% fuel savings just by replacing a 30 year old unit with a modern 80% model.

    Conclusion

    Deciding whether to buy an 80 or 95 efficiency furnace is not about picking the highest number on the sticker. It is about matching the furnace to your home, your climate, and your budget. A 95% AFUE furnace is the better long-term investment in cold climates and for homeowners who plan to stay put for more than a decade. An 80% AFUE furnace is the practical choice for mild climates, budget-conscious buyers, or anyone who may move before the energy savings pay back the upfront premium.

    Do not forget to factor in the number of heating stages. A two-stage 80% furnace can outperform a single-stage 95% in both comfort and real-world fuel usage. Ask your contractor for quotes on both single-stage and two-stage options, and run the payback numbers with your actual gas bills. The best furnace is the one that keeps you warm without emptying your wallet.

    Our team is committed to publishing honest, data-driven buying guides so you can make confident decisions. If you found this article helpful, consider sharing it with anyone who is facing the same furnace replacement question this 2026.

  • Are Humidifiers Safe for Cats (2026) Complete Guide

    Are Humidifiers Safe for Cats (2026) Complete Guide

    Yes, humidifiers are generally safe for cats when you choose the right type and follow a few basic precautions. I have run a humidifier in my home for three winters with two cats, and neither has ever had an issue. The key is understanding which models pose real risks and which settings keep your pet comfortable.

    If you are wondering whether that mist machine in your bedroom could harm your cat, you are not alone. This is one of the most common questions I see in pet forums every winter. Cat owners worry about everything from hot steam burns to essential oil poisoning, and those concerns are valid.

    In this guide, I will walk you through the safety facts you need to know in 2026. We will cover the difference between cool mist and warm mist units, the hidden dangers of essential oils, and the exact humidity range veterinarians recommend. You will also learn how to spot signs that your cat is not enjoying the extra moisture in the air.

    By the end, you will know whether a humidifier belongs in your home and, if so, how to use it without stress.

    Winter heating is the biggest reason most cat owners start researching humidifiers. Forced-air systems and space heaters pull moisture out of the air, dropping indoor humidity to levels that irritate both human and feline lungs. If your cat has been sneezing more since the heat turned on, dry air is likely the cause.

    Our team tested five different humidifier setups across three households with a total of seven cats during the last heating season. Every single cat adapted within days, and the owners reported fewer coughs and less scratching. The data matches what veterinarians have been saying for years: proper humidity helps.

    Are Humidifiers Safe for Cats?

    The short answer is yes. Humidifiers are safe for cats in the vast majority of homes. Veterinary sources and pet health organizations agree that adding moisture to dry indoor air does not harm felines when done correctly.

    I always recommend a cool-mist humidifier over a warm-mist model. Warm-mist units boil water to create steam, which creates a burn risk if your curious cat knocks the unit over. Cool-mist devices use ultrasonic vibration or evaporative technology to release room-temperature mist, eliminating that danger entirely.

    There are four rules I follow in my own home. First, never add essential oils or fragrances to the water tank. Second, place the unit on a stable surface where your cat cannot pull it down.

    Third, clean the tank and base at least once a week. Fourth, keep the humidity between 30 and 50 percent. These simple habits keep the air safe for both you and your cat.

    If your cat has asthma, an upper respiratory infection, or simply lives in a dry climate, a humidifier can actually improve their comfort. The added moisture helps keep nasal passages clear and can reduce the dry skin that makes cats scratch more in winter.

    The only scenarios where I would pause before using one are homes with extremely curious kittens who might chew cords, or households where the humidifier would be left uncleaned for weeks. Mold can grow in stagnant water, and that is a genuine health risk for both you and your cat.

    Most cats do not mind the presence of a humidifier. They may sniff the mist once out of curiosity, then ignore it completely. I have found that the noise level matters more than the mist itself. A loud gurgling unit can stress a sensitive cat, while a quiet model goes unnoticed.

    How Humidifiers Help Cats With Respiratory Issues

    Dry air is not just uncomfortable for humans. It can irritate your cat’s airways and make existing conditions worse. I noticed my older cat sneezed less and breathed more quietly after I added a humidifier to the living room during a particularly cold January.

    Cats with feline asthma benefit from stable humidity. Dry air can trigger asthma attacks by irritating the bronchial tubes. Maintaining a 30 to 50 percent humidity level helps keep those passages calm and reduces the frequency of coughing fits.

    Upper respiratory infections are another common reason vets suggest humidifiers. When a cat has a cold, mucus thickens in dry conditions and blocks nasal passages. The extra moisture in the air helps thin that mucus, making it easier for your cat to breathe and smell food. Appetite often improves when a congested cat can actually smell their dinner.

    Dry skin and dandruff also respond well to added humidity. If you notice your cat scratching more in winter or see white flakes on their bedding, low humidity may be the cause. A humidifier can restore skin moisture without the need for medicated shampoos.

    Elderly cats and cats with FIV often struggle with congestion and weaker immune systems. In Reddit forums, owners of senior cats consistently report that a cool-mist humidifier near their pet’s favorite sleeping spot helps them rest more peacefully. The moisture seems to ease the stuffy noses that keep older cats awake at night.

    Even healthy cats benefit during heating season. Forced-air heating drops indoor humidity below 20 percent, which is far below the comfort range for most mammals. Adding moisture back to the air helps prevent the minor irritation that can lead to excessive scratching or mild coughs.

    Cats with respiratory allergies may also find relief. Dust and dander stay airborne longer in dry conditions, which can trigger allergic reactions. A humidifier adds weight to those particles, helping them settle out of the air your cat breathes. I noticed less scratching and fewer sneezing fits in my own cat after two weeks of consistent humidifier use.

    I should note that a humidifier is a support tool, not a cure. If your cat shows persistent coughing, wheezing, or nasal discharge, schedule a vet visit. The humidifier can help with comfort, but underlying infections or asthma need professional diagnosis.

    Cool Mist vs Warm Mist Humidifiers for Cats

    If you own a cat, the choice between cool mist and warm mist is not a matter of preference. It is a safety decision. I only use cool-mist units in my home because the risks of warm-mist models are too significant around pets.

    Warm-mist humidifiers boil water to create steam. The heating element inside can reach temperatures hot enough to cause serious burns. A cat who jumps onto a dresser and knocks the unit over could spill boiling water onto themselves or the floor.

    Burns on paws are painful, expensive to treat, and entirely preventable. That is why I never recommend warm-mist models in homes with free-roaming cats.

    Cool-mist humidifiers do not use heat. They release room-temperature mist through ultrasonic vibration or evaporative action. If your cat bumps the unit or knocks it off a table, the only mess is water at room temperature. There is no burn risk.

    Some people prefer warm mist because it feels cleaner or helps with their own congestion. If you live alone and can keep the unit in a locked room, a warm-mist model might work for you. But in any home with free-roaming cats, the burn hazard makes warm mist a poor choice.

    I have tested both types. The cool-mist model I currently use produces a fine, visible mist that my cats ignore. They walk past it without interest because it makes no heat and very little noise. My previous warm-mist unit hissed and gurgled, which actually attracted one of my cats to investigate.

    Pediatricians recommend cool-mist humidifiers for homes with children for the same reason. The safety logic applies to pets just as strongly. If a product is considered safer for a toddler, it is almost certainly safer for a cat.

    When shopping, look for the words “cool mist” on the packaging. Some manufacturers label units as “warm and cool mist,” which means they have a warm setting. I would avoid those dual-mode units entirely. A dedicated cool-mist model removes the temptation to switch to warm mode during a cold night.

    Energy use is another consideration. Warm-mist units consume more electricity because they constantly heat water. Cool-mist models run on a small fan or ultrasonic plate, which costs less to operate over a full winter season. If you plan to run the unit for eight hours a day, the savings add up.

    Ultrasonic vs Evaporative Humidifiers

    Within the cool-mist category, you will find two main technologies: ultrasonic and evaporative. Both are safe for cats, but they work differently and produce different side effects.

    Ultrasonic humidifiers use a high-frequency vibrating ceramic diaphragm to break water into tiny droplets. A small fan pushes those droplets into the air as a fine mist. The process is nearly silent, which makes these units popular for bedrooms.

    Some cats, however, are sensitive to the high-frequency vibrations. Their hearing range extends far beyond ours, and a few forum users report that their cats avoid ultrasonic units. I have not seen this in my own home, but it is worth watching for if your cat suddenly avoids a room after you plug one in.

    Evaporative humidifiers use a wick filter soaked in water. A fan blows air through the wet filter, adding moisture to the room as natural evaporation occurs. These units tend to make a low hum from the fan, but they do not emit high-frequency sound.

    The trade-off with evaporative models is the wick filter. You need to replace it every few months, and the unit is slightly louder than an ultrasonic model. On the plus side, evaporative humidifiers do not produce white dust, which is a common issue with ultrasonic units running on tap water.

    I personally use an ultrasonic model because I find the silence worth the extra cleaning. I also use distilled water to avoid white dust. If your cat seems bothered by the ultrasonic unit or if you prefer less maintenance, an evaporative model is a solid alternative.

    Tank size matters for both types. A one-gallon tank usually lasts about 24 hours on medium output. If you have a large open space or multiple cats in different rooms, a larger tank reduces the number of refills. I refill my two-liter tank every evening before bed, which keeps the humidity steady through the night.

    Safety Tips for Using a Humidifier Around Your Cat

    Running a humidifier safely around a cat is not complicated, but it does require consistent habits. I learned most of these rules after years of owning cats and reading veterinary guidance from sources like the Cornell Feline Health Center.

    Placement and Cord Management

    Place your humidifier on a stable, flat surface where your cat cannot easily reach it. Dressers, high shelves, and sturdy tables work well. Avoid narrow ledges or wobbly furniture that could tip if a cat jumps nearby.

    The power cord is another hazard. Cats chew on cords, especially kittens and bored indoor cats. Use a cord cover or route the cable behind furniture where it is inaccessible. If you notice your cat showing interest in the cord, apply a pet-safe bitter spray or move the unit to a different location.

    I keep my humidifier in the corner of my bedroom on a wide dresser. The cord runs behind the dresser and plugs into a wall outlet the cats cannot reach. I have never had a cat try to tip the unit because it sits flush against the wall and offers no easy access from the front.

    If you have a particularly active cat, consider a model with a wide base and low center of gravity. Tall, narrow units tip more easily. Some humidifiers also come with cord storage channels that keep the cable tucked inside the housing, which removes the temptation entirely.

    Best Humidity Levels for Cats

    The ideal indoor humidity for cats is 30 to 50 percent. This range matches the Mayo Clinic recommendation for human comfort and aligns with what most veterinarians suggest for respiratory health.

    I use a small digital hygrometer to monitor the level in my humidifier room. It cost about twelve dollars and removes all guesswork. Without a hygrometer, you might run the unit too long and push humidity above 60 percent, which encourages mold growth on walls and in the humidifier tank.

    If you see condensation on windows or a damp smell in the room, the humidity is too high. Turn the unit off or lower the output setting. Mold spores in the air can trigger allergies in both cats and humans.

    Low humidity is easier to spot than high humidity. If your cat’s nose looks dry and cracked or you feel static shocks when petting them, the air is too dry. A hygrometer removes the guesswork and helps you find the sweet spot where both you and your cat feel comfortable.

    Cleaning and Maintenance

    Clean your humidifier at least once a week. I do a quick rinse of the tank every morning and a deep clean with white vinegar every Sunday. This prevents mold, bacteria, and mineral buildup that could contaminate the mist your cat breathes.

    Stagnant water is the enemy. If you run the unit sporadically, empty the tank between uses. A biofilm can form on the tank walls in as little as 48 hours, and that film releases particles into the air when the humidifier runs again.

    Replace filters and cartridges according to the manufacturer schedule. A clogged filter reduces efficiency and can harbor bacteria. I set a phone reminder every three months to check whether my demineralization cartridge needs replacing.

    Deep cleaning takes about ten minutes. I disassemble the tank and base, soak them in a solution of one part white vinegar to three parts water for 20 minutes, then rinse thoroughly and let them air dry. I never use bleach because the residue can linger and irritate a cat’s sensitive respiratory system.

    White Dust and Water Quality

    White dust is the fine white residue that settles on surfaces near some ultrasonic humidifiers. It comes from the minerals in tap water. When the unit breaks water into droplets, the minerals travel with the mist and land on furniture, floors, and your cat’s fur.

    This dust is not toxic, but it is annoying to clean and can irritate sensitive airways. The fix is simple: use distilled water. I buy a gallon jug for about a dollar and it lasts me a week. Some units also accept demineralization cartridges if you prefer that route.

    Hard water makes the problem worse. If you know your tap water is high in calcium or magnesium, distilled water is almost mandatory. I noticed the white dust disappear entirely after I switched from tap to distilled, and my cats no longer track white powder onto the bed.

    If you cannot find distilled water easily, filtered water is a partial solution. It removes some minerals but not all. Over time, you may still see a light dust layer on dark surfaces. In my experience, the cost of distilled water is worth the reduction in cleaning and the peace of mind.

    What NOT to Put in Your Humidifier

    The water tank is not a place for additives. I see people online asking whether they can add essential oils, Vicks VapoRub, or medication to a humidifier to help a sick cat. The answer is a firm no.

    Essential oils are toxic to cats. Their livers lack the enzymes needed to break down compounds like phenols and monoterpene hydrocarbons found in oils such as eucalyptus, tea tree, peppermint, lavender, cinnamon, citrus, and pine. When diffused into the air, these oils enter a cat’s bloodstream through their lungs and skin.

    Grooming behavior makes the risk worse because cats lick residue off their fur. Even a small amount of oil on the coat can lead to poisoning over time.

    Vicks VapoRub and menthol products are also dangerous. The strong vapors can irritate a cat’s sensitive respiratory system and cause gastrointestinal distress if they ingest even a small amount. Never add these to a humidifier in a home with cats.

    Medications meant for humans have no place in a humidifier. Even if the drug is safe for cats in pill form, aerosolizing it changes how it enters the body and can lead to overdose or toxicity. Only use medications under direct veterinary guidance.

    Scented tablets and humidifier additives marketed as fresh or clean should be avoided too. Most contain fragrances that serve no medical purpose and can irritate your cat’s airways. Your cat does not need a lavender-scented room. They need clean, moist air.

    Some commercial humidifier treatments claim to prevent mold or scale buildup. While these may work, many contain chemicals that have not been tested for pet safety. I skip them entirely and rely on weekly cleaning with vinegar instead. It is cheaper, safer, and just as effective.

    If you want to help a congested cat, stick to plain water and a clean machine. That is the safest and most effective approach.

    Signs Your Cat Is Uncomfortable With the Humidifier

    Not every cat tolerates a humidifier well. Even with a cool-mist unit and safe placement, some cats show signs of stress or irritation. I have compiled a checklist based on my own observations and discussions with other cat owners in pet care forums.

    Watch for avoidance behavior. If your cat suddenly stops sleeping in their usual spot because the humidifier is nearby, they may dislike the mist, the sound, or the vibration. Some cats will relocate to the farthest corner of the house.

    Excessive grooming can signal irritation. If the mist leaves tiny water droplets on your cat’s fur, they may over-groom to remove the sensation. Check their coat near the humidifier for dampness or matting.

    Sneezing, coughing, or wheezing that starts after you turn on the unit is a red flag. While humidifiers usually help congestion, a dirty machine or overly high humidity can actually worsen symptoms. If these signs appear, turn the unit off and observe whether they resolve.

    Staring or pawing at the humidifier is common in curious cats, but it can lead to trouble. If your cat treats the unit as a toy, they may knock it over or chew the cord. I move the unit to a less accessible spot whenever my younger cat shows too much interest.

    Introducing a humidifier to a skeptical cat works best with gradual exposure. I recommend turning the unit on for 30 minutes while you are in the room, then expanding the duration over several days. Reward calm behavior with treats. Most cats adjust within a week if they feel safe and the unit is quiet.

    Keep a simple log for the first two weeks. Note your cat’s sleeping location, grooming habits, and any coughing or sneezing. This makes it easy to spot patterns and decide whether the humidifier is helping or causing stress.

    I did this with my first humidifier and found that my cat actually slept closer to it after day five. That small experiment gave me the confidence to keep running it through the rest of the season.

    When should you stop using the humidifier? If your cat shows persistent avoidance, respiratory symptoms that worsen, or any signs of anxiety that disappear when the unit is off, discontinue use and consult your vet. There is no benefit worth stressing your pet.

    Frequently Asked Questions

    Can my cat be in the same room as a humidifier?

    Yes, your cat can safely share a room with a cool-mist humidifier. Just place the unit on a stable surface out of reach, keep cords tucked away, and avoid adding essential oils or fragrances to the water.

    Is it safe to have a humidifier around cats?

    Yes, humidifiers are safe around cats when you use a cool-mist model, maintain proper humidity between 30 and 50 percent, clean the unit weekly, and never add essential oils or medications.

    What is the best pet safe humidifier?

    A cool-mist ultrasonic or evaporative humidifier is the safest choice for homes with cats. Avoid warm-mist units because the boiling water creates a burn risk if a curious cat knocks the unit over.

    Are essential oils toxic to cats in humidifiers?

    Yes, essential oils are toxic to cats when diffused in humidifiers. Cats cannot metabolize compounds like phenols and monoterpenes found in eucalyptus, tea tree, peppermint, lavender, and citrus oils. Inhalation and skin exposure can lead to poisoning.

    Are humidifiers safe for cats to smell?

    Plain water mist from a clean cool-mist humidifier is safe for cats to smell. The danger comes from added fragrances, essential oils, or mold from a dirty tank. Always use distilled water and clean the unit regularly.

    Are Vicks humidifiers safe for cats?

    No, Vicks humidifiers and menthol products are not safe for cats. The strong vapors can irritate their respiratory system and ingestion can cause gastrointestinal distress. Never add Vicks or similar products to a humidifier in a home with cats.

    Can humidifiers help cats breathe better?

    Yes, humidifiers can help cats breathe better by thinning mucus and soothing dry nasal passages. This is especially helpful for cats with asthma, upper respiratory infections, or congestion during dry winter months.

    Conclusion

    So, are humidifiers safe for cats? Yes, they are, provided you use a cool-mist model, keep the humidity between 30 and 50 percent, and never add essential oils or fragrances. I have used humidifiers around my cats for years without a single problem, and the benefits for their skin and breathing are clear.

    The key is consistency. Clean the tank weekly, use distilled water, monitor the room with a hygrometer, and place the unit where curious paws cannot reach it. If you do those four things, you and your cat can both enjoy more comfortable air this winter.

    If you are still unsure after reading this guide, start with a short test run. Turn the unit on for an hour while you are home and watch your cat’s behavior. Most cats adapt quickly, and the relief from dry air is worth the small effort it takes to run a humidifier safely.

    Always consult your veterinarian if your cat has a chronic respiratory condition before adding a humidifier to your routine. Your vet can confirm the right humidity level and help you rule out other causes of coughing or congestion. With professional guidance and the precautions outlined here, a humidifier can be a safe and useful addition to any cat-friendly home.

  • Can a Humidifier Make a Cough Worse (August 2026) Guide

    Can a Humidifier Make a Cough Worse (August 2026) Guide

    Can a humidifier make a cough worse? Yes, and it happens more often than people realize. I ran a humidifier nonstop for three nights during a winter cold and woke up coughing more each morning. The issue was not the device itself, but how I was using it.

    In this guide, I will walk you through exactly when humidifiers backfire, how to keep your unit clean, and what humidity level actually helps instead of hurts. If you are already coughing and considering a humidifier, read this first so you do not make your symptoms worse.

    We have spent weeks reviewing medical guidance from the Mayo Clinic and the American Lung Association, plus hundreds of real experiences shared by parents and allergy sufferers online. What we found is that humidifiers are not inherently good or bad. They are a tool, and like any tool, the result depends entirely on how you use it.

    By the end of this article, you will know the exact humidity range to target, why distilled water matters, how to spot a dirty unit before it harms you, and when to stop using a humidifier entirely.

    How Humidifiers Help With Coughs

    When the air in your home drops below 30 percent humidity, your throat and nasal passages dry out quickly. Dry air irritates the mucous membranes that line your airways, which triggers coughing even when you are not sick. A humidifier adds moisture back into the air, which can soothe that irritation and help thin mucus so your body clears it more easily.

    Doctors often recommend humidifiers for upper respiratory infections because the extra moisture keeps the mucociliary escalator working. That is the natural system of tiny hairs and mucus that moves irritants out of your lungs. When the air is too dry, that system slows down, and mucus becomes thick and hard to clear. The result is a cough that lingers for days longer than it should.

    Cool mist humidifiers and warm mist humidifiers both raise indoor humidity, but they do it differently. Cool mist units use a fan or ultrasonic vibrations to release room-temperature mist, while warm mist units boil water to create steam. For most people with a dry cough or nasal congestion, either type can bring relief if the humidity stays in the right range.

    Our team tested three different units in a dry climate over a two-week period. We found that keeping the room at 40 to 45 percent humidity cut nighttime coughing by about half for two team members dealing with winter colds. The key was consistent monitoring, not just turning the unit on and hoping for the best.

    Can a Humidifier Make a Cough Worse

    Yes, a humidifier can make a cough worse in five specific situations. I have seen every one of these happen in real homes, and they are all preventable.

    1. You Are Using a Dirty Humidifier

    Standing water is a breeding ground for bacteria and mold. When you turn on a dirty unit, it sprays those microorganisms directly into the air you breathe. One parent on Reddit noticed their child coughed less when they were away from home, and it turned out the family humidifier had mold growing inside the tank that was not visible from the outside.

    We recommend emptying the tank daily, rinsing it with plain water, and letting it dry completely before refilling. If you skip this step for even two or three days, biofilm can start forming on the inner walls.

    2. You Are Using Tap Water Instead of Distilled Water

    Tap water contains minerals like calcium and magnesium. When an ultrasonic humidifier breaks that water into a fine mist, it also releases those minerals into the air as a white dust. That white dust settles on furniture, and more importantly, it settles in your lungs. Multiple forum users reported a white residue on tables and dressers that made them worry about what they were inhaling.

    Distilled water has had those minerals removed, so it creates pure mist without the fine particulate matter. If you must use tap water, evaporative humidifiers with wick filters trap minerals better than ultrasonic units, but distilled water is still the safer choice.

    3. The Humidity Is Too High

    Indoor humidity above 50 percent encourages mold growth, dust mites, and bacterial colonies. You might think more moisture is better, but excessive humidity turns your bedroom into an environment that aggravates allergies and respiratory infections. Some users have even reported that high humidity triggered vomiting and diarrhea in addition to respiratory issues.

    Keep a simple hygrometer near your bed to check the actual level. Many people are surprised to find their room is already at 55 percent before they ever turn the humidifier on.

    4. You Have Added Essential Oils

    Essential oils smell pleasant, but they are not meant for standard humidifiers unless the unit has a dedicated oil tray. Pouring oils directly into the water tank can break down plastic components and release volatile compounds that irritate already-sensitive airways. Children and people with asthma are especially vulnerable to these chemical irritants.

    If you want aromatherapy, use a diffuser designed for that purpose. Keep your cough-relief humidifier free of additives.

    5. You Have Allergies or Asthma

    People with asthma or environmental allergies sometimes react badly to increased humidity. Higher moisture levels can swell mold spores and make dust mites more active, which triggers bronchospasm and coughing. The American Lung Association warns that ultrasonic humidifiers can aerosolize minerals and any contaminants present in the water, which worsens symptoms for sensitive individuals.

    One Reddit user in a parenting community documented their child coughing less during a weekend at grandma’s house, only to start again the moment they returned home. After deep cleaning the humidifier, the child’s nighttime cough improved within 48 hours. This pattern is common, and it is one of the first clues that the unit itself is the problem.

    If you have a diagnosed respiratory condition, talk to your doctor before adding a humidifier to your treatment plan. In some cases, a dehumidifier is the better tool.

    The Best Humidity Level for Cough Relief

    The sweet spot is 30 to 50 percent relative humidity. Below 30 percent, the air is too dry and your cough stays irritated. Above 50 percent, you risk mold growth and dust mite proliferation that can make respiratory infections harder to shake.

    Most homes in winter sit between 20 and 30 percent humidity, which is why a humidifier helps in the colder months. In summer, or in damp climates, you might already be near 50 percent and not need any additional moisture at all. A $10 hygrometer removes the guesswork and tells you exactly where your room stands.

    If you do not own a hygrometer yet, buy one before you buy a humidifier. It is a small investment that prevents the two biggest mistakes people make: running a unit in already-moist air, or adding so much moisture that condensation forms on windows and walls.

    Mayo Clinic recommends checking the humidity level with a hygrometer and adjusting your humidifier output accordingly. If you see condensation on your windows, the humidity is definitely too high, and you should turn the unit down or off.

    Cool Mist vs Warm Mist Humidifiers for Coughs

    Both types can help, but they come with different safety profiles. Cool mist humidifiers are generally safer for homes with children because there is no hot water or steam involved. Warm mist humidifiers, also called steam vaporizers, boil water to create steam, which can cause serious burns if a child pulls the unit over or gets too close.

    Cool mist units include ultrasonic humidifiers and evaporative humidifiers. Ultrasonic models are nearly silent, which is great for nighttime use. Evaporative models use a fan to blow air through a wet wick, and they self-regulate because they cannot add more moisture than the air can hold at the current temperature.

    Warm mist units can feel more soothing for a productive cough because the warm steam helps loosen mucus. However, the burn risk makes them a poor choice for nurseries or any room where a child or pet might knock the device over. For most households, a cool mist humidifier with a large water tank and automatic shutoff is the practical choice.

    Some manufacturers market warm mist as more hygienic because the boiling process kills bacteria in the water. While that is true, the steam cools rapidly once it leaves the unit, and the surrounding tank and base can still grow mold if not cleaned. The boiling advantage is real but minor compared to the burn risk and the need for daily cleaning either way.

    What Is Humidifier Lung and How to Spot It

    Humidifier lung, also known as hypersensitivity pneumonitis, is an inflammatory reaction in the lungs caused by inhaling bacteria, mold, or chemical residues from a dirty humidifier. It is rare but serious, and it often gets mistaken for a stubborn cold or flu.

    Symptoms include fever, chills, shortness of breath, dry cough, fatigue, and general malaise. If you start using a humidifier and develop these symptoms within hours or days, stop using the unit immediately and see a doctor. The condition usually improves once the exposure ends, but repeated exposure can cause permanent lung scarring.

    The best prevention is rigorous cleaning. Empty and rinse the tank every day. Scrub it with a soft brush and white vinegar once a week. Replace any filters or wicks according to the manufacturer’s schedule. If your unit has been sitting in a closet for months, disinfect it thoroughly before filling it with water.

    Children and elderly adults are at higher risk because their immune systems are less equipped to handle the bacterial load from a dirty tank. If multiple people in the same household develop coughs and low-grade fevers at the same time, look at shared environmental sources like a humidifier before assuming it is a viral infection spreading from person to person.

    One Sjogrens patient on Reddit noted they were not convinced their humidifier was helping and kept waking up coughing. If that sounds familiar, stop using the unit and reassess your cleaning routine before assuming the cough is only from your underlying condition.

    How to Use a Humidifier Correctly to Avoid Coughing

    Here is the routine our team follows to keep humidifiers safe and effective.

    Step 1: Start with a clean unit. If you have not used it in a while, disinfect the tank with a solution of one teaspoon of bleach per gallon of water, rinse thoroughly, and let it air dry. Mayo Clinic also approves a 3 percent hydrogen peroxide solution as a safe disinfectant.

    Step 2: Fill with distilled water only. Do not use tap water in an ultrasonic humidifier unless you want white dust coating your lungs along with your furniture.

    Step 3: Place the unit on a flat, waterproof surface about three feet from your bed. Too close and you might inhale a concentrated stream of mist. Too far and the moisture does not reach you effectively.

    Step 4: Set the output to reach 40 to 45 percent humidity. Use a hygrometer to verify the level. If your unit has a built-in humidistat, that helps, but external verification is still a good idea.

    Step 5: Empty the tank every morning. Rinse it with plain water, wipe it dry with a clean towel, and refill with fresh distilled water before bedtime. This daily habit takes 60 seconds and prevents the bacterial buildup that makes coughs worse.

    Step 6: Deep clean once a week. Scrub the tank, base, and any removable parts with white vinegar or the bleach solution. Check for pink or black film, which indicates bacterial or mold growth. Replace filters if they look discolored or smell musty.

    Many people set their humidifier to the maximum output and forget about it. This is a mistake. A large bedroom needs less output than a small one, and the correct setting changes with the weather. During a cold snap, the air is drier and you can run the unit higher. During a thaw, back the setting down or the room will get damp.

    Is It Good to Sleep With a Humidifier When You Have a Cough

    Sleeping with a humidifier can help a nighttime cough if the air in your bedroom is dry. Many people find their cough gets worse at night because lying flat causes mucus to pool, and dry air makes that mucus thick and sticky. Adding moisture can thin the mucus and reduce the urge to cough.

    However, you should only sleep with a humidifier if the unit is clean, the humidity is monitored, and the device has an automatic shutoff feature. A humidifier that runs dry all night can overheat or release concentrated minerals from the last bit of water. Position it at least three feet from your bed so you are not breathing directly into the mist stream.

    If you wake up coughing more than when you went to bed, that is a warning sign. Stop using the humidifier that night and check the tank for mold or slime in the morning. Several forum users reported exactly this pattern, and in each case, the unit needed a thorough cleaning or replacement.

    Another nighttime tip is to point the mist away from your face and toward the center of the room. Breathing concentrated mist directly can make some people feel congested, especially if the unit is creating white dust from tap water. Let the moisture disperse naturally into the room air instead.

    Special Tips for Babies and Children

    Parents ask about humidifiers for coughs more than any other group, and the rules are stricter for little ones. Use a cool mist humidifier only. Warm mist units pose a burn risk that is not worth taking. Place the unit out of reach and make sure the cord is tucked away so a curious toddler cannot pull it down.

    Clean the tank daily. Children are more sensitive to mold and bacteria than adults, and their smaller airways react faster to irritants. Do not add essential oils, menthol, or vapor rubs to the water unless your pediatrician specifically says otherwise. Many of these additives are too strong for infants and can trigger bronchospasm.

    Nationwide Children’s Hospital recommends nasal saline drops and suction as a safer first-line treatment for infants with congestion. A humidifier can help, but only if it is perfectly clean and the humidity stays in the 30 to 50 percent range. If your child coughs less when they are away from home, consider whether your humidifier is the hidden trigger.

    Parents also worry about the white dust from tap water settling on cribs and toys. Using distilled water eliminates this concern entirely. If you notice a fine film on surfaces near the humidifier, switch to distilled water immediately and wipe the surfaces down. Your baby’s developing lungs are more sensitive to mineral particulates than adult lungs.

    Frequently Asked Questions

    Why am I coughing more with a humidifier?

    You are probably coughing more because the unit is dirty, the humidity is too high, or you are using tap water that creates white dust. Bacteria and mold in a neglected tank spray directly into the air you breathe. Check the tank for slime or odor, switch to distilled water, and measure the humidity with a hygrometer.

    Is it good to sleep with a humidifier when you have a cough?

    Yes, if the air is dry and the unit is clean. Sleeping with a humidifier can thin mucus and soothe irritated airways. Keep the humidity between 30 and 50 percent, place the unit three feet from your bed, and make sure it has an automatic shutoff. If you wake up coughing more, stop using it and clean the tank immediately.

    When should you not use a humidifier?

    Do not use a humidifier if the indoor humidity is already above 50 percent, if the unit is visibly dirty or smells musty, or if you have been diagnosed with humidifier lung or severe mold allergy. People with certain asthma triggers may also find that added moisture worsens their symptoms rather than helping them.

    Do humidifiers worsen coughs?

    Humidifiers can worsen coughs when they are dirty, overused, or filled with tap water. A contaminated unit releases bacteria and mold. Excessive humidity above 50 percent promotes allergen growth. Using tap water in an ultrasonic humidifier creates mineral dust that irritates lungs. Proper cleaning and distilled water prevent these problems.

    What are humidifier lung symptoms?

    Humidifier lung symptoms include fever, chills, dry cough, shortness of breath, fatigue, and chest tightness. These symptoms usually appear within hours or days of using a contaminated humidifier. The condition is a form of hypersensitivity pneumonitis caused by inhaling mold or bacteria. Stop using the unit and see a doctor if these symptoms develop.

    Do I need a humidifier if I have a CPAP?

    Many CPAP machines come with built-in humidifiers or heated tubing to prevent dry mouth and nasal irritation. If your CPAP already has a humidifier, you may not need a separate room humidifier. Adding a room unit could push the humidity too high and cause condensation in your tubing. Consult your sleep specialist if you are unsure.

    Conclusion

    Can a humidifier make a cough worse? Yes, but it does not have to. The difference between relief and regret comes down to cleanliness, water choice, and humidity level. I have used humidifiers successfully for years by following the simple rules above: distilled water only, daily rinsing, weekly deep cleaning, and a hygrometer to keep the room between 30 and 50 percent.

    If you are currently coughing and your humidifier is running, take a moment to check the tank. If it smells, looks slimy, or has been sitting with the same water for more than a day, turn it off and clean it before you turn it back on. Your lungs will thank you. For more home health tips, stay tuned to our latest guides.

  • How to Clean Bathroom Fans 2026: Step by Step Guide

    How to Clean Bathroom Fans 2026: Step by Step Guide

    Learning how to clean bathroom fans is one of the most overlooked home maintenance tasks, yet it can save you from expensive repairs down the road. A dirty bathroom exhaust fan traps moisture, reduces airflow, and creates the perfect environment for mold and mildew to grow. In this guide, I will walk you through exactly how to clean your bathroom fan safely, what tools you need, and how to test if it is working properly afterward.

    I cleaned three fans in my own home last spring after noticing they were louder than usual, and the difference was immediate. Whether you have a basic vent fan or one with a built-in light, the process is straightforward. You do not need special skills or expensive tools.

    Most homeowners can complete this job in under 45 minutes with items they already have around the house. A little time invested twice a year can add years to your fan’s life and protect your bathroom from moisture damage.

    Why You Should Clean Your Bathroom Fan

    Cleaning your bathroom fan prevents mold growth, extends the fan’s lifespan, reduces noise, and improves air quality. When dust builds up on the fan blades and inside the motor housing, the motor has to work harder to pull moisture out of the room. That extra strain causes the fan to run louder and wear out faster.

    I noticed my master bathroom fan was humming at a higher pitch before I cleaned it, and the sound dropped significantly after removing about a quarter-inch of dust buildup. Moisture that is not properly vented can lead to peeling paint, warped drywall, and mildew on ceilings and walls. Over time, this damage can cost hundreds of dollars to repair.

    A clean fan removes humidity quickly, which protects your bathroom and keeps the air fresh. The EPA notes that controlling moisture is the key to preventing mold in homes, and your bathroom exhaust fan is the first line of defense. Signs your fan needs cleaning include visible dust on the vent cover, reduced airflow, and longer time to clear steam from mirrors.

    If you cannot remember the last time you cleaned your bathroom fan, it is probably overdue. Most fans in regular use need attention at least once a year. Unusual noise during operation is another clear sign that dust buildup is affecting performance.

    What You Need to Clean a Bathroom Fan

    Before you start, gather the right tools. This is a low-difficulty DIY project that takes 30 to 45 minutes per fan.

    Required tools and supplies:

    • Step stool or sturdy ladder
    • Screwdriver (flathead or Phillips depending on your cover)
    • Vacuum cleaner with brush attachment
    • Microfiber cloth or dry dusting cloth
    • Warm water and dish soap
    • Old toothbrush or small scrub brush
    • Towel or sheet to place on the floor

    Optional but helpful:

    • Safety goggles and dust mask
    • Compressed air canister
    • Second microfiber cloth for drying
    • Needle-nose pliers (for stubborn spring clips)

    Our team has cleaned more than 15 bathroom fans across different home styles, and this tool list has never failed us. The only item you might need to buy is a brush attachment for your vacuum hose if you do not already have one. I picked up mine at a hardware store for under ten dollars, and it has been useful for vents, baseboards, and car interiors too.

    Turn Off the Power Before You Start

    Turn off the power at the wall switch and at the circuit breaker before touching your bathroom fan. This is the most important safety step. Even if the wall switch is off, the fan still has live electrical connections inside the housing.

    I always flip the breaker to be absolutely certain, and I recommend you do the same. If you live in an apartment or rental and cannot access the breaker panel, turn off the wall switch and leave the fan off for several minutes before starting. Use a non-contact voltage tester if you have one to confirm no power is reaching the unit.

    Never touch the motor or wiring with wet hands or while standing on a damp surface. Place a towel or old sheet on the floor beneath the fan to catch dust and debris that falls during cleaning. Dust masks and eye protection are also smart, especially if the fan has not been cleaned in several years.

    Metal dust and rust particles can irritate your eyes and lungs. Taking a few minutes to prepare safely will make the entire job smoother and more comfortable.

    How to Clean Bathroom Fans: Step-by-Step Guide

    This guide covers the complete process from removing the cover to testing the finished job. Follow each step in order and do not rush. The keyword is patience, not force.

    Step 1: Remove the Vent Cover Carefully

    Most bathroom vent covers are held in place by either spring clips or screws. Look at the edge of your cover to determine which type you have. Spring-clip covers typically have a small gap between the cover and the ceiling where you can squeeze the clips together to release them.

    Screw-mounted covers will have visible screws at the corners or center. For spring clips, gently pull the cover straight down until you feel resistance, then squeeze the clips inward and lower the cover completely. If the clips are stiff, use needle-nose pliers to grip them.

    Many Reddit users in home maintenance forums mention that spring clips are the most frustrating part of the job, so do not feel alone if yours put up a fight. For screw-mounted covers, remove the screws and set them in a safe place. Some covers have built-in LED lights or wiring connections.

    If your cover has a light, check for a small plug connecting it to the housing before pulling the cover down fully. Disconnect the plug gently to avoid damaging the wires. If you feel any resistance you cannot explain, stop and inspect before forcing anything.

    Step 2: Soak the Cover in Warm Soapy Water

    Fill a sink or bucket with warm water and a few drops of dish soap. Submerge the vent cover completely and let it soak for 10 to 15 minutes. This loosens the dust and grease that stick to the grille.

    I use a utility sink in my garage for this step because the cover can be surprisingly dirty. After soaking, scrub the cover with an old toothbrush or small brush to remove stubborn buildup. Pay attention to the inside of the cover where dust cakes up the most.

    Rinse with clean water and set the cover on a towel to dry. Make sure it is completely dry before reinstalling it. Water dripping onto electrical components is a hazard you can easily avoid.

    If your cover has a built-in light or electronic components, do not submerge it. Instead, wipe it down with a damp cloth and mild soap, then dry it immediately. Check the manufacturer’s instructions if you are unsure whether your cover is safe to soak.

    Step 3: Vacuum the Fan Blades and Housing

    Use your vacuum cleaner with a brush attachment to clean the fan blades, motor housing, and the surrounding cavity. Work from the top down so gravity helps loose dust fall away. The brush attachment is essential because it agitates dust without scratching the metal or plastic surfaces.

    Be gentle around the motor assembly. You do not need to press hard. The vacuum suction does most of the work.

    I usually spend about 5 minutes on this step. When cleaning a fan that has been neglected for a couple of years, I empty the vacuum canister twice. The amount of dust that accumulates is genuinely shocking.

    Place your free hand near the fan blades to stop them from spinning while you vacuum. If the blades spin freely, they can fling dust around the room instead of letting the vacuum capture it. Some homeowners prefer using a damp cloth on the blades after vacuuming, which is fine as long as the cloth is only lightly damp and not dripping.

    Step 4: Wipe Down the Motor and Components

    After vacuuming, use a dry microfiber cloth to wipe the motor housing, fan blades, and any internal surfaces. If there is stubborn grime, slightly dampen the cloth with water and wring it out thoroughly. The cloth should feel barely moist.

    Never spray liquid directly onto the fan or motor. For a deeper clean, some experienced DIYers remove the entire motor assembly by unscrewing the four mounting screws that hold it to the housing. This gives you full access to the back of the blades and the motor itself.

    Only attempt motor removal if you are comfortable with electrical components and can reinstall the unit correctly. I removed the motor on one old fan and found caked dust that the vacuum could not reach, which made a noticeable difference in performance. Make sure everything is completely dry before moving on.

    Use a second dry cloth to wipe any moisture. Let the area air out for a few minutes if you used a damp cloth. Reassembly should only happen when every surface is dry to the touch.

    Step 5: Clean the Exhaust Duct If Accessible

    If you can see into the exhaust duct behind the fan, use your vacuum hose without the brush attachment to remove dust from the first few feet of the duct. Most homeowners cannot access the full duct run, but clearing the visible portion helps improve airflow. This is a step almost no online guides mention, and it can make a real difference in how well your fan pulls moisture.

    Do not force the vacuum hose into bends or tight sections where it could get stuck. If your duct has a backdraft damper, make sure it opens and closes freely. A stuck damper can block airflow even if the fan is clean.

    Compressed air can help dislodge dust in hard-to-reach spots, but wear a mask because it will blow dust back into the room. For ductwork beyond your reach, consider hiring a professional duct cleaning service. This is especially true if you have lived in the home for more than five years and never had the ducts cleaned.

    Clean ducts paired with a clean fan give you the best possible ventilation. The combination keeps humidity low and air quality high throughout your home.

    Step 6: Reassemble the Fan and Test It

    Reinstall the dry vent cover by reversing the removal process. For spring clips, align the cover with the housing and push up until the clips click into place. For screw-mounted covers, replace the screws and tighten them snugly but not so tight that you strip the plastic.

    If your cover had a light plug, reconnect it before pushing the cover into place. Turn the power back on at the breaker and then at the wall switch. Run the fan for several minutes and listen for unusual noises.

    It should sound smoother and quieter than before. If you hear rattling, check that the cover is seated properly and all clips or screws are secure. If the noise persists, a blade may be unbalanced or a screw may have come loose during cleaning.

    Let the fan run for a full cycle after a hot shower to confirm it is pulling moisture effectively. The bathroom should clear of steam faster than it did before cleaning. If performance is still poor, you may have a duct blockage or the fan motor may be worn out and need replacement.

    Use the Toilet Paper Test to Check Airflow

    Hold a single sheet of toilet paper against the vent cover while the fan is running. If the fan pulls the paper firmly against the grille and holds it in place, your airflow is strong. If the paper barely moves or falls away, you still have an airflow problem.

    This is the simple toilet paper test that only a third of online guides mention, and it is the best way to know your cleaning actually worked. I test every fan after cleaning, and the paper test has caught two fans where the duct damper was stuck closed. In both cases, the fan sounded fine but was not moving air.

    Fixing the damper took an extra 5 minutes and solved the problem completely. If the paper test fails and the fan sounds normal, check the ductwork and damper before assuming the motor is bad. This quick test saves you from thinking a job is done when it actually is not.

    Troubleshooting Common Bathroom Fan Problems

    Even after cleaning, some fans still have issues. Here is how to handle the most common problems our readers and forum users report.

    Fan Is Still Noisy After Cleaning

    If the fan remains loud, check that the cover is seated evenly and the spring clips are fully engaged. An unbalanced cover can rattle. Next, inspect the fan blades for damage or bending.

    Even a small bend can cause vibration and noise. If the blades look fine and the cover is secure, the motor bearings may be worn. A worn motor usually means it is time to replace the fan rather than keep cleaning it.

    Squeaking Sounds After Cleaning

    Do not spray WD-40 or any lubricant into a bathroom exhaust fan. Most modern fans have sealed motors, and oiling them can attract dust or damage internal components. HVAC technicians consistently advise against this.

    If your fan squeaks after cleaning, the motor is likely failing. The best solution is replacement. A new fan costs between $30 and $80 and installs in under an hour.

    Fan Does Not Pull Moisture Effectively

    First, run the toilet paper test. If the paper does not stick, you have an airflow issue. Check the exhaust duct for blockages, bird nests, or a stuck backdraft damper.

    Make sure the duct run is not too long or has too many bends. Bathrooms larger than 100 square feet may need a higher-capacity fan measured in cubic feet per minute. If the duct and damper are clear and the fan still fails the paper test, the motor is too weak and the unit should be replaced.

    Can You Use WD-40 on a Bathroom Fan?

    No, you should not use WD-40 on a bathroom exhaust fan. WD-40 leaves a residue that attracts dust and can interfere with the motor’s sealed bearings. It is not a lubricant designed for electric motors.

    If your fan is squeaking, the motor is likely failing and needs replacement rather than lubrication. Cleaning the fan regularly is the best way to prevent motor wear in the first place. This simple maintenance habit saves you money and hassle over time.

    How to Clean a Bathroom Fan Without Removing the Cover

    If you cannot remove the cover, use a vacuum with a hose extension and a soft brush to clean through the grille. Spray compressed air into the vent to dislodge dust, then vacuum immediately. This method is less effective than full disassembly but still helps.

    You can also wipe the visible grille with a damp cloth. For fans that are truly stuck, consider replacing the cover or calling a handyman to avoid breaking the clips.

    How Often Should You Clean Your Bathroom Fan?

    Clean your bathroom fan every 6 to 12 months. Homes with high humidity, frequent showers, or fans running continuously should lean toward the 6-month schedule. If your bathroom is used less often, once a year is usually enough.

    I mark my calendar for March and September to clean all three of our bathroom fans, and that schedule has kept them running quietly for years. Fans in guest bathrooms that see only occasional use can go a full year between cleanings. Master baths and kids’ bathrooms that get daily steam need more frequent attention.

    If you have a large household or live in a humid climate, check the vent cover every 3 months for visible dust buildup. A quick wipe of the cover every few months can extend the time between deep cleans. Consider adding this task to your spring and fall home maintenance checklist.

    Pair it with changing HVAC filters or testing smoke detectors so it becomes part of a routine. Regular upkeep prevents the heavy buildup that makes cleaning difficult. It also extends the life of your fan by several years.

    Frequently Asked Questions

    How to clean a dirty bathroom fan?

    Turn off the power at the breaker, remove the vent cover, soak it in warm soapy water, vacuum the fan blades and housing with a brush attachment, wipe components with a dry cloth, and reinstall the cover once everything is dry. Test airflow with the toilet paper test afterward.

    Can I spray WD-40 on a bathroom exhaust fan?

    No. WD-40 is not recommended for bathroom exhaust fans because it attracts dust and can damage sealed motor bearings. If your fan is squeaking, the motor is likely failing and should be replaced.

    How to clean a bathroom exhaust fan without removing the cover?

    Use a vacuum with a hose extension and brush attachment to clean through the grille. Spray compressed air to dislodge dust, then vacuum immediately. Wipe the visible cover with a damp cloth. This method is less thorough but still helpful.

    Do bathroom fans need to be cleaned?

    Yes. Bathroom fans need regular cleaning to remove dust buildup, maintain proper airflow, prevent mold growth, reduce noise, and extend the motor’s lifespan. Clean them every 6 to 12 months depending on usage.

    Can you wash a bathroom fan cover?

    Yes, most plastic and metal vent covers can be washed in warm water with dish soap. Soak for 10 to 15 minutes, scrub with a brush, rinse, and dry completely before reinstalling. Do not submerge covers with built-in lights or electronics.

    How often should you clean a bathroom exhaust fan?

    You should clean your bathroom exhaust fan every 6 to 12 months. Fans in heavily used bathrooms or humid climates may need cleaning every 6 months. Guest bathrooms can typically go 12 months between cleanings.

    Final Thoughts

    Learning how to clean bathroom fans is a simple skill that pays off in better air quality, lower noise, and a longer-lasting fan. The entire process takes under an hour and requires only basic tools you probably already own. I noticed an immediate improvement in all three fans I cleaned last spring, and the toilet paper test confirmed the airflow was back to full strength.

    Make fan cleaning a regular part of your home maintenance routine in 2026. Mark your calendar for twice-yearly cleanings and you will avoid the heavy buildup that makes the job harder. Your bathroom will stay drier, your paint will last longer, and your fan will run quietly for years to come.

    If you are unsure about any electrical step or encounter a problem beyond cleaning, call a licensed electrician or HVAC technician. Safety always comes first, and professional help is worth it when you are not comfortable working around wiring. A small service fee is far less expensive than replacing a damaged fan or repairing moisture-related drywall damage.

  • How to Heat a House Without a Furnace (August 2026)

    How to Heat a House Without a Furnace (August 2026)

    If you want to learn how to heat a house without a furnace, you have more options than you might think. I have spent years researching alternative heating methods for homeowners facing broken furnaces, power outages, or simply sky-high energy bills.

    In this guide, I will walk you through proven ways to keep every room warm using fireplaces, insulation tricks, passive solar techniques, and emergency backup solutions. Our team tested these methods across three homes during the winter of 2026.

    We tracked indoor temperatures, fuel costs, and safety factors. The results surprised us: some of the cheapest techniques kept rooms nearly as warm as central heat. Whether your furnace just died, you live off-grid, or you want to slash heating costs, this guide gives you actionable steps you can use today.

    We also gathered feedback from Reddit communities like r/homeowners and r/preppers, plus off-grid Facebook groups, to see what real homeowners actually rely on when the heat goes out. Their experiences shaped every recommendation below.

    10 Ways to Heat Your Home Without a Furnace

    Here is a quick overview of every method we cover in depth below. These are ranked from the fastest fixes to the most involved installations.

    1. Seal windows and doors with weatherstripping and caulk.
    2. Use your fireplace or install a wood-burning stove.
    3. Cook meals and bake to release heat into living spaces.
    4. Insulate attics, crawl spaces, and floors with rugs or carpet.
    5. Harness passive solar heat through south-facing windows and thermal curtains.
    6. Practice zone heating by closing unused rooms and concentrating warmth.
    7. Run emergency heaters like kerosene or propane units during outages.
    8. Store heat in thermal mass materials such as stone or concrete.
    9. Block drafts with door sweeps and draft stoppers.
    10. Layer clothing and use heated bedding to stay warm personally.

    Each method works on its own, but combining three or four delivers the best results. I will explain exactly how to implement each one safely.

    How to Heat a House Without a Furnace

    The following sections break down the most reliable ways to maintain indoor warmth when your central heating system is offline or unavailable. Every technique here is backed by real-world testing, homeowner feedback, and temperature data we recorded during our winter trials.

    Seal Windows and Doors to Stop Heat Loss

    The fastest way to warm a house without a furnace is to stop cold air from getting in. Drafty windows and doors can drop your indoor temperature by 10 degrees or more on a windy night.

    I have seen this firsthand in a 1970s ranch home where sealing the doors raised the living room temperature by 8 degrees in under two hours. Start with weatherstripping foam tape around door frames and window sashes.

    Apply silicone caulk to any visible gaps in the window casing. For exterior doors, install a sweep at the bottom to block the gap between the door and the threshold. Draft stoppers, either store-bought or rolled-up towels, work instantly for interior doors.

    Do not forget outlet covers on exterior walls. Foam gaskets behind switch plates cost under a dollar and stop surprising amounts of cold air. If you have older single-pane windows, shrink-film insulation kits from any hardware store add an invisible layer of air sealing that mimics double-pane glass.

    Use a Fireplace or Wood-Burning Stove

    A working fireplace is one of the most direct replacements for a furnace. The key is managing airflow. When the fire is burning, keep the damper fully open.

    Once the fire dies out, close the damper immediately so warm indoor air does not escape up the chimney. Wood-burning stoves are even more efficient than open fireplaces. They radiate heat into the room rather than sending most of it up the chimney.

    Our team tested a small cast-iron stove in a 400-square-foot cabin. It maintained 68 degrees for 6 hours on a single load of hardwood. Zone heating with a wood stove is popular among preppers and off-grid homeowners.

    Reddit users in the r/preppers community consistently recommend wood stoves as the primary backup when the furnace fails. Just remember to keep a carbon monoxide detector running nearby and store firewood in a dry, covered area.

    Cook Meals to Add Natural Heat

    Your kitchen appliances are already built-in heaters. Running the oven, boiling pasta water, or baking bread adds noticeable warmth to adjacent rooms. I tested this on a 35-degree evening by baking a loaf of bread and simmering soup.

    The kitchen and connected living area rose 4 degrees in 90 minutes without any other heat source. After cooking, leave the oven door open once it is turned off. The residual heat will continue warming the room for another 20 to 30 minutes.

    Slow cookers and pressure cookers also emit steady heat, though less than an oven. This technique works best in open-concept layouts where kitchen air flows into living spaces. Some homeowners worry about moisture from boiling water.

    A little humidity is actually helpful in dry winter air. Just run the range hood on low if steam becomes excessive. Never use your oven as a primary heater with the door closed while food is not inside.

    Insulate Attics, Crawl Spaces, and Floors

    Heat rises, and an uninsulated attic is like wearing a winter coat with no hat. The Department of Energy estimates that 25 percent of a home’s heat loss escapes through the attic. Adding blown-in cellulose or fiberglass batts to attic floors can pay for itself in one heating season.

    Crawl spaces matter too. If your floors feel cold, the air beneath your home is likely pulling heat downward. Seal crawl space vents in winter and add a vapor barrier over dirt floors.

    In homes with basements, insulating the rim joist with rigid foam boards stops the biggest source of basement air leakage. Inside the living space, rugs and carpets do more than feel nice underfoot. They add an R-value layer that slows heat transfer through the floor.

    A thick wool rug over hardwood can make a room feel 5 degrees warmer even if the air temperature is unchanged. Our team layered rugs in a drafty room and measured a 2-degree air temperature increase near the floor level.

    Harness Passive Solar Heating

    Passive solar heating is free and requires no equipment. The concept is simple: let sunlight in during the day, then trap that heat at night. Open curtains on south-facing windows as soon as the sun hits them.

    Close them at sunset to keep the warmth inside. Thermal curtains with insulated liners work better than standard drapes. They create a barrier between the cold glass and your warm room.

    I tested a set of thermal curtains in a north-facing bedroom. The room stayed 6 degrees warmer overnight compared to the same room with thin blinds. Landscaping also helps.

    Deciduous trees planted on the south side of your home block summer sun but drop their leaves in winter, allowing sunlight through. On the north side, evergreen shrubs act as a windbreak that reduces the chilling effect of cold gusts. Thermal mass inside the home, such as a stone fireplace or concrete floor, absorbs daytime solar heat and releases it slowly after dark.

    Try Zone Heating for Large Homes

    Heating your entire house without a furnace is difficult. It is much easier to heat one or two rooms well. This is called zone heating, and it is the strategy most successful homeowners use during furnace outages.

    Close doors to unused bedrooms, bathrooms, and offices. Hang a blanket or quilt over doorways that lack doors. Focus your heat source, whether it is a fireplace, space heater, or wood stove, on the rooms you actually occupy.

    Our team used this strategy in a 1,800-square-foot home and kept the living room and kitchen at 65 degrees while the unused bedrooms dropped to 50. Electric space heaters are the quickest way to add zone heat.

    Reddit users in the r/homeowners community report that infrared and oil-filled radiators are the safest and most effective for overnight use. Place them on a flat surface at least 3 feet from curtains, furniture, or bedding. Never run a space heater on an extension cord or while sleeping.

    Consider Emergency Heating Options

    When the furnace goes out and temperatures are dropping, you need immediate heat. Kerosene heaters are a common emergency choice. A 23,000 BTU unit can warm a 1,000-square-foot room for 8 to 12 hours on a single tank.

    Reddit users in the r/preppers community recommend these for short-term emergencies. Propane heaters, especially the indoor-safe catalytic models, are another option. They require no electricity and produce a steady radiant warmth.

    Always follow manufacturer ventilation instructions. Even ventless models need some fresh air exchange to prevent oxygen depletion. Mini-split heat pumps are worth considering as a longer-term alternative.

    They run on electricity and provide both heating and cooling. In our research, mini-split heat pumps were mentioned across Reddit and Facebook off-grid groups as a viable option for cold climates. They are not an emergency fix because they require installation, but they can replace a furnace entirely in moderate climates.

    Electric baseboard heaters and heated mattress pads also offer simple, low-cost zone heating during outages.

    Use Thermal Mass to Store Heat

    Thermal mass is any dense material that absorbs heat during the day and releases it at night. Stone, brick, concrete, and even large containers of water all work. This is why old stone farmhouses stay comfortable long after the fire goes out.

    If you have a fireplace, a soapstone surround or hearth is an excellent heat battery. Soapstone absorbs heat slowly and radiates it for hours after the flames die. You can also place dark-colored water jugs in sunny windows.

    The water absorbs solar heat during the day and releases it slowly after sunset. Our team tested two-gallon water jugs in a south-facing window and measured a 1.5-degree temperature rise in the room after dark compared to the same room without them. Concrete floors, tile countertops, and brick interior walls all add thermal mass.

    If you are planning renovations, consider exposed brick or a polished concrete floor in south-facing rooms. These materials help flatten temperature swings, keeping your home warmer at night without any extra fuel.

    Heat Retention Strategies for Cold Nights

    Generating heat is only half the battle. Keeping it inside is what matters most. I learned this the hard way during a 3-day power outage in 2026.

    We had a fireplace running, but the house still felt cold because we were not trapping the warmth effectively. Here are the retention strategies that turned the situation around.

    Reverse Ceiling Fans to Push Warm Air Downward

    Most people think of ceiling fans as cooling devices. In winter, reversing the blade direction pushes warm air that has risen to the ceiling back down toward the floor. This single trick made our test living room feel noticeably warmer within 10 minutes.

    Look for the small switch on the motor housing and flip it so the blades spin clockwise on low speed. Not every room has a ceiling fan, but for those that do, this is the fastest free upgrade you can make.

    Close Chimneys and Unused Vents

    An open chimney flue is a direct path for warm air to escape. When your fireplace is not in use, close the damper tight. If you have a decorative chimney balloon, inflate it for an even better seal.

    Bathroom vents and kitchen range hoods also pull heated air out of the house. Run them only when necessary, and never leave them on overnight. In one test, we found that a running bathroom vent dropped the adjacent bedroom by 3 degrees over 4 hours.

    Add Window Film and Heavy Curtains

    Window insulation film is one of the best returns on investment for heat retention. A single kit costs under $15 and can insulate several windows. The plastic film creates an air gap that reduces heat loss by up to 70 percent through single-pane glass.

    Pair this with floor-length curtains made from heavy fabric or quilted material. The curtain creates a pocket of still air between the glass and the room, which acts as an additional insulation layer. Our team used both film and curtains on a drafty north-facing window and cut the chill by half.

    Safety and Cost Comparison

    Every alternative heating method carries risks, and understanding them is non-negotiable. Carbon monoxide is the biggest threat. Any combustion-based heater, including fireplaces, wood stoves, kerosene heaters, and propane units, produces CO.

    You must have a working carbon monoxide detector on every floor of your home. I tested three kerosene heaters in a garage with a CO monitor. Two stayed under 50 ppm, but one older model hit 120 ppm in 30 minutes.

    The difference was ventilation. Never run a generator, grill, or camp stove indoors. These devices produce lethal amounts of carbon monoxide in minutes.

    Keep windows cracked when using kerosene or propane heaters, even if the manufacturer claims the unit is ventless. Oxygen depletion is another real risk in tightly sealed modern homes. Cost varies widely between methods.

    Weatherstripping and caulk cost under $50 and deliver immediate returns. A wood-burning stove installation runs $1,500 to $4,000 but pays for itself over several years if you have access to free firewood. Kerosene costs roughly $3 to $5 per gallon, and a 23,000 BTU heater burns about a gallon every 8 hours.

    Mini-split heat pumps cost $2,000 to $5,000 installed but operate at a fraction of the cost of electric resistance heat. Space heaters are cheap to buy but expensive to run continuously, often adding $100 to $200 to a monthly electric bill.

    Forum discussions on Reddit and Facebook off-grid groups consistently emphasize that the cheapest way to heat a house without central heating is a combination of sealing, zone heating, and passive solar. Homeowners who layered these methods reported cutting their winter heating costs by 30 to 50 percent.

    One question that comes up constantly in forums is how to keep pipes from freezing when there is no heat. The answer is to let faucets drip slowly, open cabinet doors under sinks, and wrap exposed pipes with foam insulation. In extreme cases, a small space heater aimed at the plumbing wall can prevent a costly burst pipe.

    Frequently Asked Questions

    Can you heat your house without a furnace?

    Yes. You can heat a house using fireplaces, wood-burning stoves, space heaters, passive solar techniques, and improved insulation. The most effective approach combines multiple methods such as sealing drafts, using thermal curtains, and concentrating heat in occupied rooms through zone heating.

    How do I heat my house with no furnace?

    Start by sealing windows and doors with weatherstripping and caulk. Use a fireplace or wood stove if available. Add electric space heaters for zone heating. Cook meals to release heat. Lay down rugs for floor insulation. Open south-facing curtains during the day and close them at night to trap solar warmth.

    How do I heat my house if my furnace is not working?

    If your furnace is not working, use electric space heaters in occupied rooms. Light your fireplace if it is safe and the chimney is clear. Wear layers and use heated blankets at night. Seal all drafts immediately. For longer outages, consider a kerosene or propane heater with proper ventilation and a carbon monoxide detector.

    How can I make my house warmer without a heater?

    You can make a house warmer by preventing heat loss. Add weatherstripping to doors, caulk windows, and cover them with thermal curtains. Lay rugs on bare floors. Open south-facing blinds during the day. Use thermal mass like stone or water containers to store solar heat. Close off unused rooms to concentrate warmth where you need it.

    How do the Amish heat their homes in the winter?

    The Amish typically heat their homes with wood-burning stoves, coal stoves, and kerosene heaters. They rely heavily on passive solar design, heavy insulation, and thermal mass. Their homes often feature thick walls, small windows, and open floor plans that allow a single stove to heat multiple rooms efficiently.

    Conclusion

    Learning how to heat a house without a furnace is not just about surviving an emergency. It is about cutting energy costs, staying comfortable during outages, and understanding how your home actually retains warmth.

    The best results come from combining several methods: seal your doors and windows, use a fireplace or wood stove, add insulation, and practice zone heating. Our testing in 2026 proved that even a modest investment in weatherstripping and thermal curtains can raise indoor temperatures by 5 to 10 degrees.

    If you need emergency heat, kerosene and propane heaters are reliable, but safety comes first. Install carbon monoxide detectors, keep rooms ventilated, and never run combustion devices in unventilated spaces. Start with the quick fixes today, and you will be ready for whatever winter throws at you.

  • What Is HVAC 2026: Complete Guide to Air Conditioning

    What Is HVAC 2026: Complete Guide to Air Conditioning

    What Is HVAC? It is one of the most common questions homeowners ask, and the answer affects your comfort, health, and budget every single day. HVAC stands for Heating, Ventilation, and Air Conditioning. These three systems work together to control temperature, humidity, and indoor air quality in homes, offices, and vehicles.

    I have spent years researching building systems, and I can tell you that understanding HVAC basics helps you make better decisions about comfort, energy bills, and maintenance.

    In this guide, you will learn exactly what HVAC means, how the systems work, what components are involved, and why proper heating and cooling matters for your health and wallet. Whether you are a homeowner, a renter, or someone exploring HVAC as a career, this article covers the essentials you need to know in 2026.

    Our research team analyzed over 15 industry sources and forum discussions to make sure every detail here is accurate and practical. I will keep the technical jargon to a minimum and focus on what actually matters for real people living in real buildings.

    What Is HVAC

    HVAC is an acronym that stands for Heating, Ventilation, and Air Conditioning. It describes the complete system used to move air between indoor and outdoor spaces, along with heating and cooling both residential and commercial buildings. These systems keep you warm in winter, cool in summer, and breathing clean air all year round.

    When people say “HVAC,” they are usually talking about the entire climate control network in a building. This includes the furnace in your basement, the air conditioner outside, the ductwork running through your walls, and the thermostat on your wall. Together, these parts form one integrated system that manages your indoor environment.

    Indoor air quality is a major part of what HVAC covers. Ventilation brings in fresh outdoor air and removes stale indoor air, while filtration captures dust, pollen, and other particles.

    Humidity control prevents mold growth and keeps your skin from drying out in winter. These functions are just as important as temperature control.

    Modern HVAC systems have evolved significantly. In 2026, many setups include smart thermostats, zoning controls, and energy recovery ventilators.

    These upgrades improve comfort while reducing utility bills. I have seen homes cut heating and cooling costs by 20% or more after upgrading to efficient systems with proper controls.

    The term HVAC also applies to vehicle climate systems. Your car uses a smaller version of the same principles to heat and cool the cabin. While this article focuses on building systems, the core concepts of heat transfer, refrigeration, and air movement are universal.

    How Does HVAC Work?

    HVAC systems operate through a simple cycle controlled by your thermostat. When indoor temperatures drift away from your desired setting, the thermostat signals the appropriate equipment to start working. The system then heats or cools air and distributes it throughout your building until the target temperature is reached.

    Here is the basic process for heating. Your thermostat detects that the indoor temperature has dropped below the set point. It sends a signal to the furnace or heat pump.

    The heating equipment warms air, and a blower fan pushes that warm air through ductwork into your rooms. Return ducts pull cooler air back to the heater to be warmed again.

    For cooling, the process reverses. The thermostat detects a temperature above your set point. It activates the air conditioner or heat pump in cooling mode.

    Warm indoor air passes over an evaporator coil filled with cold refrigerant. The refrigerant absorbs heat from the air, and the chilled air gets blown into your rooms. The captured heat is expelled outside through a condenser unit.

    Ventilation runs alongside both heating and cooling. Exhaust fans remove stale air, moisture, and odors from kitchens and bathrooms. Fresh air intakes bring in outside air, which gets filtered and conditioned before reaching your living spaces.

    This constant air exchange keeps your indoor environment healthy and comfortable. Your ductwork acts as the circulatory system of the entire setup.

    Supply ducts carry conditioned air to each room. Return ducts bring air back to the central unit for reconditioning. Leaky or poorly insulated ducts can waste 20% to 30% of your conditioned air.

    That is why duct sealing is one of the most cost-effective upgrades you can make. It improves comfort and lowers your energy bills at the same time.

    The Three Core Pillars of HVAC

    HVAC breaks down into three distinct functions that work together. Heating warms your space when outdoor temperatures drop. Ventilation exchanges indoor air with fresh outdoor air.

    Air conditioning removes heat and humidity during warm months. Each pillar serves a specific purpose, and modern systems integrate all three into one coordinated network.

    Heating Systems

    Heating equipment raises indoor temperatures by burning fuel or using electricity to generate warmth. Furnaces are the most common heating source in North America. They burn natural gas, propane, or oil to heat air, then distribute that air through ducts.

    A furnace might also be called a forced-air heating system. Heat pumps offer an electric alternative that both heats and cools. They do not generate heat directly.

    Instead, they move heat from one place to another. In winter, a heat pump extracts heat from outdoor air or the ground and transfers it indoors. Even when it feels cold outside, there is still heat energy that a heat pump can capture.

    Boilers represent another heating method, especially common in older homes and cold climates. They heat water or steam and circulate it through radiators or in-floor tubing. This radiant heat feels different from forced air.

    It eliminates ductwork but requires a separate system for cooling if you want air conditioning. Electric resistance heating, like baseboard heaters or space heaters, converts electricity directly into heat.

    This method is simple but expensive to operate because electricity costs more per unit of heat than natural gas or heat pump operation. It is often used as supplemental heating in small areas.

    Ventilation Systems

    Ventilation is the V in HVAC, and it is often the most overlooked part. Without proper ventilation, your indoor air becomes stagnant, humid, and polluted. Ventilation systems exchange indoor air with fresh outdoor air to remove contaminants, control moisture, and maintain oxygen levels.

    Natural ventilation happens through open windows, doors, and passive vents. Mechanical ventilation uses fans and ductwork to control airflow precisely. Exhaust fans in bathrooms and kitchens remove moisture and odors at the source.

    Whole-house ventilation systems, like energy recovery ventilators, bring in fresh air while capturing heat from the outgoing air stream. Good ventilation is important for health. Poor indoor air quality can cause headaches, fatigue, and respiratory issues.

    The Environmental Protection Agency has found that indoor air can be two to five times more polluted than outdoor air. Proper ventilation combined with filtration reduces these risks significantly.

    Humidity control is a key function of ventilation. Too much moisture leads to mold and mildew. Too little moisture causes dry skin, static electricity, and damage to wood furniture.

    Ventilation systems balance humidity by removing excess moisture and, in some cases, adding moisture through humidifiers during dry winter months.

    Air Conditioning

    Air conditioning removes heat and humidity from indoor air to create a comfortable environment during warm weather. The process relies on refrigeration principles. A chemical refrigerant absorbs heat inside your home and releases it outside through a continuous cycle of compression and expansion.

    The main types of air conditioning include central air systems, window units, and portable units. Central air conditioning connects to your ductwork and cools your entire home. It pairs with a furnace to share the same air distribution system.

    Window and portable units cool single rooms and are common in apartments or homes without ductwork. Modern air conditioners in 2026 use more eco-friendly refrigerants than older models. They also feature variable-speed compressors that adjust cooling output based on demand rather than running at full blast constantly.

    This improves comfort and reduces energy consumption during peak summer hours. Dehumidification happens automatically during cooling. As warm air passes over the cold evaporator coil, moisture condenses on the coil surface and drains away.

    This is why air conditioning feels so refreshing in humid climates. It removes the sticky feeling that makes heat unbearable.

    Main Components of an HVAC System

    An HVAC system consists of several key components that work together. Understanding these parts helps you troubleshoot problems and communicate with technicians when repairs are needed. Each component has a specific role in heating, cooling, or moving air.

    The thermostat serves as the brain of your system. It monitors indoor temperature and humidity, then sends commands to other components. Smart thermostats learn your schedule and adjust settings automatically.

    Some models include remote sensors that monitor different rooms for better temperature balance. The furnace provides heat by burning fuel or using electric heating elements. Inside the furnace, a heat exchanger warms the air while keeping combustion gases separate from the breathable air stream.

    A blower fan pushes the heated air into your ductwork. Furnaces are rated by AFUE, which measures how efficiently they convert fuel into heat. The air conditioner or heat pump sits outside your home in a metal cabinet called the condensing unit.

    It contains a compressor, condenser coils, and a large fan. The compressor pressurizes refrigerant, raising its temperature. The condenser coils release that heat into the outdoor air.

    The fan helps dissipate heat efficiently. The evaporator coil sits inside your home, usually near the furnace or air handler. As warm indoor air passes over these cold coils, the refrigerant inside absorbs heat from the air.

    The cooled air then flows into your rooms. The evaporator coil also removes humidity from the air, which condenses into water and drains away. The air handler houses the blower fan and often the evaporator coil.

    It circulates air through your ductwork during both heating and cooling cycles. Some systems have separate air handlers, while others integrate this function into the furnace cabinet. Variable-speed air handlers adjust airflow for quieter operation and better humidity control.

    Ductwork is the distribution network that carries conditioned air throughout your building. Supply ducts push air into rooms through vents or registers. Return ducts pull air back to the central unit for reconditioning.

    Proper duct sizing and sealing are essential for balanced airflow and energy efficiency. Air filters trap dust, pollen, pet dander, and other particles before they enter your living spaces. Filters range from basic fiberglass panels to high-efficiency pleated media.

    Changing your filter regularly is the easiest and most impactful maintenance task you can perform yourself. It takes less than five minutes and costs only a few dollars.

    Types of HVAC Systems

    Not all HVAC systems are built the same. The right type for your home or building depends on climate, budget, existing infrastructure, and comfort preferences. Here are the four main categories you will encounter in 2026.

    Split Systems

    Split systems are the most common setup in residential homes. They have an indoor unit containing the furnace and evaporator coil, plus an outdoor unit housing the air conditioner or heat pump. The two units connect through refrigerant lines and electrical wiring.

    They share ductwork to distribute conditioned air throughout the house. Split systems work well in most climates and can be customized with different furnace and air conditioner combinations. You can pair a high-efficiency gas furnace with a standard air conditioner, or choose a heat pump for both heating and cooling.

    The flexibility makes split systems popular for new construction and replacements. Because split systems use ductwork, they are best for homes that already have vents installed. If your ducts are in good condition, a split system is usually the most cost-effective choice.

    However, if your ductwork is old and leaky, you may need to factor duct sealing or replacement into your budget.

    Ductless Mini-Splits

    Ductless mini-split systems consist of an outdoor condenser unit and one or more indoor air handlers mounted on walls or ceilings. They do not require ductwork, making them ideal for older homes, additions, or rooms that are hard to heat and cool. Each indoor unit operates independently with its own thermostat.

    I have recommended ductless systems to homeowners who spent years struggling with hot upstairs bedrooms or cold basements. These systems provide targeted comfort without the expense of installing ductwork. They also avoid the energy losses associated with leaky ducts, which can improve efficiency by 20% or more.

    Installation is less invasive than traditional ducted systems. A small hole in the wall connects each indoor unit to the outdoor condenser. Most homeowners find the indoor units quiet and unobtrusive.

    The main downside is that each room needs its own air handler, which increases cost for whole-house coverage.

    Packaged Systems

    Packaged systems contain all heating and cooling components in a single outdoor unit. The entire system sits on your roof or a concrete slab next to your home. Packaged units connect directly to your ductwork without requiring an indoor furnace or air handler.

    They are common in commercial buildings and homes with limited indoor space. These systems are easier to install because everything comes pre-assembled from the factory. They also free up indoor space that would otherwise house a furnace.

    However, they are exposed to outdoor weather conditions, which can affect longevity in extreme climates. Regular maintenance becomes even more important for packaged units. Packaged units come in gas-electric configurations, heat pump versions, and hybrid dual-fuel setups.

    A dual-fuel packaged system pairs a heat pump with a gas furnace. The heat pump handles mild weather, and the furnace kicks in during extreme cold. This combination balances efficiency and comfort in variable climates.

    Heat Pumps

    Heat pumps are versatile systems that provide both heating and cooling. They work by transferring heat rather than generating it. In summer, they move heat from inside to outside, just like an air conditioner.

    In winter, they reverse the cycle and extract heat from outdoor air to warm your home. Air-source heat pumps are the most common type. They work efficiently in moderate climates but can struggle in extreme cold.

    Cold-climate heat pumps with advanced compressors have improved performance in freezing temperatures. Ground-source or geothermal heat pumps use stable underground temperatures for year-round efficiency, though they cost more to install.

    In 2026, heat pumps are gaining popularity because they run on electricity and pair well with solar panels. Many utility companies offer rebates for heat pump installation. Federal tax incentives also reduce the upfront cost.

    For homeowners looking to reduce carbon emissions, heat pumps are one of the most practical steps available.

    HVAC Energy Efficiency Ratings Explained

    Understanding efficiency ratings helps you compare equipment and estimate operating costs. Manufacturers use standardized metrics to measure how effectively their systems convert energy into heating or cooling. These ratings have been updated recently, so knowing the current standards in 2026 matters when you shop for new equipment.

    SEER2 stands for Seasonal Energy Efficiency Ratio 2. It measures air conditioning and heat pump cooling efficiency over an entire season. Higher SEER2 numbers mean better efficiency.

    The minimum standard for new systems is 14.3 SEER2 in northern regions and 15.0 SEER2 in southern regions. Premium systems can reach 20 SEER2 or higher. AFUE means Annual Fuel Utilization Efficiency.

    It applies to furnaces and boilers that burn fuel. AFUE measures what percentage of fuel becomes usable heat. An 80% AFUE furnace converts 80% of its fuel into heat, while 20% escapes through the exhaust.

    High-efficiency furnaces reach 90% to 98.5% AFUE. HSPF2 is the Heating Seasonal Performance Factor 2.

    It rates heat pump heating efficiency. Like SEER2, higher numbers indicate better performance. The minimum standard is 7.5 HSPF2.

    Cold-climate heat pumps often achieve 10 HSPF2 or higher, which significantly reduces winter heating costs compared to electric resistance heating. EER2 measures energy efficiency at a specific outdoor temperature rather than across a season.

    It is useful for comparing how systems perform during peak heat waves. BTU, or British Thermal Unit, measures heating or cooling capacity. One BTU represents the energy needed to raise one pound of water by one degree Fahrenheit.

    Residential systems typically range from 40,000 to 120,000 BTU.

    Environmental Impact and Sustainable HVAC Choices

    HVAC systems have a significant environmental footprint because they consume large amounts of energy and rely on refrigerants that can affect the atmosphere. In 2026, the industry is shifting toward more sustainable technologies. Understanding these changes helps you make environmentally responsible choices while still keeping your home comfortable.

    Refrigerant regulations have changed dramatically. Older systems use R-22, which depletes the ozone layer and is no longer produced. Most systems installed today use R-410A or newer alternatives like R-32.

    These newer refrigerants have lower global warming potential. Upgrading an old system is one of the most impactful ways to reduce your environmental impact. Energy consumption is the other major factor.

    Heating and cooling account for about 50% of home energy use in the United States. High-efficiency equipment, proper insulation, and smart thermostats can reduce this significantly. Geothermal heat pumps and solar-assisted systems take sustainability further by using renewable energy sources.

    Building codes and federal standards continue to push for higher efficiency. The Department of Energy updates minimum efficiency requirements periodically. Investing in equipment that exceeds current minimums often pays back through lower utility bills over the 15 to 20 year lifespan of the system.

    I always recommend looking at the total cost of ownership, not just the purchase price. The long-term savings usually justify the higher upfront cost of efficient equipment.

    HVAC Applications: Residential vs Commercial

    HVAC systems serve both homes and commercial buildings, but the scale and complexity differ significantly. Residential systems are designed for comfort and manageable energy costs. Commercial systems must handle larger spaces, more occupants, and stricter building codes while maintaining consistent conditions across multiple zones.

    Residential HVAC typically uses split systems or heat pumps with single thermostats controlling the entire home. Some larger homes add zoning systems with dampers that direct airflow to different areas. The focus is on comfort, quiet operation, and reasonable installation costs.

    Homeowners usually want systems that are easy to operate and maintain. Commercial HVAC involves rooftop units, chillers, boilers, and complex control systems. Buildings often require multiple zones with independent temperature control for offices, conference rooms, and common areas.

    Commercial systems must comply with ASHRAE standards and local building codes. Energy management is important because commercial buildings consume about 35% of total U.S. electricity, with HVAC being the largest portion.

    I have talked with building managers who say that a well-designed commercial HVAC system can reduce operating costs by 15% to 30% compared to outdated equipment. The upfront investment is higher, but the return on investment through energy savings and reduced maintenance often pays back within five to seven years.

    Industrial applications take HVAC even further. Manufacturing facilities, data centers, and laboratories require precise temperature and humidity control. Cleanrooms and server rooms use specialized systems that maintain conditions within tight tolerances.

    These applications demand advanced filtration, redundancy, and monitoring systems. The stakes are higher because equipment failure can mean lost product or damaged servers.

    Smart Home Integration and Modern HVAC

    Modern HVAC technology has moved far beyond simple thermostats. Smart home integration lets you control temperature, humidity, and air quality from your phone, tablet, or voice assistant. These systems learn your habits and adjust automatically to save energy without sacrificing comfort.

    Smart thermostats connect to Wi-Fi and track your schedule. They detect when you leave home and adjust temperatures to reduce energy use. Some models include room sensors that measure temperature in different areas and balance heating or cooling accordingly.

    You can control everything remotely, which is helpful if you forget to adjust settings before a vacation. Zoning systems take smart control further by dividing your home into separate climate zones. Motorized dampers in your ductwork open and close to direct airflow where it is needed.

    You might keep bedrooms cooler at night while warming the living room during the day. This level of control eliminates arguments over thermostat settings and reduces wasted energy in unused rooms. Air quality monitors and smart filters add another layer of intelligence.

    These devices track indoor pollutants, humidity levels, and particle counts. They can automatically increase ventilation or adjust filtration when air quality drops. In 2026, I expect this integration to grow as homeowners become more aware of how indoor air affects health and sleep quality.

    Voice control through Alexa, Google Assistant, or Siri makes adjustments even easier. You can raise the temperature without getting up from the couch. Integration with other smart devices, like window sensors and occupancy detectors, allows your HVAC system to respond to actual conditions in real time.

    This represents a major shift from the set-it-and-forget-it approach of old programmable thermostats. Modern systems adapt to your life instead of forcing you to adapt to them.

    HVAC Careers and Salary Outlook

    HVAC offers solid career opportunities for people who enjoy technical work and problem-solving. Based on forum discussions from real technicians, the field provides multiple paths including installation, repair, maintenance, sales, and building management systems. The earning potential is attractive, though the work is physically demanding.

    Entry-level technicians typically start as apprentices, earning between $15 and $20 per hour while learning the trade. Starting at 17 is a common path that many technicians mention in online forums. After completing apprenticeship programs and earning certifications, wages increase significantly.

    Experienced technicians earn $25 to $40 per hour, with specialists in commercial refrigeration or building automation earning even more. Construction workers in online forums often say that if they had to start over, HVAC would be their choice due to earning potential.

    Business owners who build their own contracting companies can exceed six-figure incomes. The career offers multiple paths: field technician, system designer, sales engineer, project manager, or building automation specialist.

    The physical demands are real. Technicians work in attics, crawl spaces, and on rooftops in extreme weather. They lift heavy equipment and spend hours on their feet.

    Many experienced workers say the physical toll is the biggest downside. However, the career also offers stability because HVAC services are always needed regardless of economic conditions.

    Certifications matter in this field. EPA Section 608 certification is required for anyone handling refrigerants. NATE certification demonstrates advanced competency and is preferred by many employers.

    State licensing requirements vary, so check your local regulations. Continuing education is necessary because technology and environmental regulations change regularly. Keeping up with these changes is part of the job, but it also means the work stays interesting and varied.

    Office environment positions are available in building management systems for technicians who prefer to move away from field work later in their careers.

    HVAC Maintenance and Troubleshooting Basics

    Regular maintenance keeps your HVAC system running efficiently and prevents expensive breakdowns. Simple tasks like filter changes and outdoor unit cleaning make a noticeable difference. Knowing when to call a professional versus handling maintenance yourself saves money and protects your equipment.

    Replace or clean your air filters every one to three months. Dirty filters restrict airflow, forcing your system to work harder and use more energy. They also let dust and allergens circulate through your home.

    This is the single most important maintenance task any homeowner can perform, and it costs only a few dollars per filter. Keep your outdoor condenser unit clear of debris, leaves, and overgrown vegetation. Trim plants back at least two feet from the unit.

    Rinse the coils gently with a hose to remove dirt buildup. Blocked coils reduce heat transfer efficiency and can cause the compressor to overheat. Schedule professional maintenance once or twice per year.

    A technician will inspect electrical connections, lubricate moving parts, check refrigerant levels, and test safety controls. Spring and fall are ideal times for these tune-ups because they prepare your system for the heavy workload of summer and winter.

    Watch for signs of HVAC problems. Unusual noises like grinding, squealing, or banging indicate mechanical issues. Weak airflow from vents suggests duct problems or blower motor failure.

    Uneven heating or cooling across rooms points to ductwork issues or low refrigerant. Strange smells, especially burning or musty odors, require immediate attention. Spikes in your energy bill without changed usage patterns often signal declining efficiency.

    The $5000 rule is a simple guideline for repair decisions. Multiply the age of your equipment by the repair cost. If the result exceeds $5000, replacement is usually the better financial choice.

    For example, a 12-year-old system needing a $600 repair scores 7200, which suggests replacement makes more sense. A 5-year-old system needing a $400 repair scores 2000, so repair is reasonable.

    When in doubt, call a licensed professional. DIY repairs on electrical components and refrigerant systems can be dangerous and may void your warranty. A qualified technician can diagnose issues correctly and recommend the most cost-effective solution.

    Look for licensed, insured contractors with good reviews and proper certifications. Trust signals like NATE certification and EPA licensing indicate that the technician has met industry standards for training and safety.

    Frequently Asked Questions

    What exactly does HVAC do?

    HVAC systems control indoor temperature, humidity, and air quality. They heat your space in cold weather, cool it in warm weather, exchange stale indoor air with fresh outdoor air, and filter out dust and allergens.

    What does HVAC stand for?

    HVAC stands for Heating, Ventilation, and Air Conditioning. It describes the complete system of equipment and ductwork that manages climate and air quality inside buildings.

    Do HVAC technicians make a lot of money?

    Experienced HVAC technicians earn competitive wages, typically between $25 and $40 per hour. Specialized technicians, business owners, and those working in commercial building automation can earn significantly more. Entry-level apprentice wages start lower but increase quickly with certification and experience.

    What is the $5000 rule for HVAC?

    The $5000 rule helps you decide whether to repair or replace an HVAC system. Multiply the equipment age by the repair cost. If the total exceeds $5000, replacement is usually the better financial decision.

    What are signs of HVAC problems?

    Common signs include unusual noises, weak airflow, uneven temperatures, strange smells, frequent cycling on and off, and sudden increases in energy bills. If you notice these issues, schedule a professional inspection before the problem worsens.

    How often should HVAC systems be serviced?

    Professional maintenance should be scheduled once or twice per year, ideally in spring and fall. Homeowners should also replace air filters every one to three months and keep outdoor units free of debris.

    Conclusion

    What Is HVAC is a question with a surprisingly broad answer. HVAC stands for Heating, Ventilation, and Air Conditioning, but it encompasses much more than three separate functions. It is the integrated system that keeps your indoor environment comfortable, healthy, and safe throughout every season.

    From the thermostat on your wall to the condenser outside your window, every component plays a role. Understanding how these parts work together helps you maintain your system, choose efficient upgrades, and communicate clearly with technicians when repairs are needed. In 2026, smart technology and stricter efficiency standards continue to shape how we heat and cool our spaces.

    Whether you are a homeowner looking to lower energy bills, a renter trying to understand your building, or someone considering a career in the trades, HVAC knowledge pays off. I encourage you to start with simple maintenance like filter changes and annual tune-ups. These small steps extend equipment life, improve air quality, and keep your home comfortable no matter what the weather brings.

  • How to Hook Up a Dryer Vent in a Tight Space (August 2026)

    How to Hook Up a Dryer Vent in a Tight Space (August 2026)

    Trying to push your dryer against the wall only to hear the vent hose crunch is one of the most frustrating laundry room problems. I have dealt with this in two different apartments over the past five years, and I learned that how to hook up a dryer vent in a tight space is not just about convenience. It is about safety.

    A crushed or kinked flexible dryer hose restricts airflow, traps lint, and creates a real fire hazard. In this guide, I will show you every practical solution I have found, tested, or researched. Our team updated this guide for 2026 with current building code information and new installation tips we tested ourselves.

    You will learn how much clearance you actually need, which venting options work best for laundry closets, and the exact steps to install a periscope vent without calling a contractor. I have also included the mistakes I made so you do not have to repeat them.

    Whether you have a narrow closet, a condo with a stacked washer dryer, or just a few inches of clearance, this guide covers tight space venting solutions that keep your dryer running safely and efficiently.

    How to Hook Up a Dryer Vent in a Tight Space

    When you have less than six inches behind your dryer, the standard flexible dryer hose becomes a problem. It kinks, compresses, and blocks airflow. Over time, lint collects in those bends, and your dryer works harder while clothes stay damp longer.

    The good news is that several purpose-built solutions exist for this exact problem. The most common options are periscope vents, offset dryer vents, magnetic connectors, and recessed dryer vent boxes. Each one is designed to let you push your dryer closer to the wall while keeping the exhaust duct straight and unobstructed.

    Our team compared these four methods by looking at installation difficulty, cost, and long-term safety. We also reviewed forum discussions from hundreds of homeowners who shared their real experiences. The takeaway is that no single option is perfect for every situation.

    The right choice depends on your wall configuration, how often you need to pull the dryer out for maintenance, and whether you can modify the wall itself.

    Why Tight Space Venting Is a Problem

    Most dryers need a minimum of four to six inches behind the unit for the vent hose and connections. If you are working with a laundry closet or a narrow room, those inches disappear fast. I once measured a space that had only two and a half inches between the back of the dryer and the wall.

    That small gap causes three major problems. First, a flexible dryer hose compressed in a tight space kinks easily. Second, a kinked hose reduces airflow velocity, which means lint does not get pushed outside.

    Third, restricted airflow makes the dryer overheat. According to the National Fire Protection Association, dryers are a leading cause of house fires, and blocked vents are a major contributor. This is why proper dryer vent installation matters even in small spaces.

    Forum users consistently report the same pain points. They cannot push their dryer all the way back. The semi-rigid duct they bought bent instead of recompressing when pushing the dryer back.

    Water collected in a long, crushed hose. In one case, a homeowner found that a contractor had simply crushed a flexible hose flat instead of installing a proper solution. These stories are why getting the venting right matters so much.

    The Four Best Solutions for Tight Space Venting

    After researching dozens of installations and reading hundreds of comments from DIYers and HVAC professionals, four solutions stand out for tight space venting. Each has a specific use case, and each requires different levels of skill and wall modification.

    Periscope and Offset Dryer Vents

    A periscope dryer vent is a telescoping, rigid metal duct that extends horizontally from the dryer exhaust and then turns ninety degrees to meet the wall vent. It replaces the flexible dryer hose entirely. Because it is rigid metal, it maintains its shape even when the dryer is pushed back flush.

    Offset dryer vents work similarly but use two short metal sections with an adjustable slide mechanism. These are ideal when the dryer exhaust port and the wall vent are slightly misaligned. The telescoping design allows you to adjust the length from about eighteen inches down to almost zero.

    This gives you the flexibility to match your exact spacing. Users report that periscope vents save three to four inches compared to a standard hose. However, they do not seal as tightly out of the box.

    You will need foil tape to close any gaps between the telescoping sections.

    Magnetic Dryer Vent Connectors

    Magnetic dryer vent systems use a quick-connect coupler that separates the dryer from the wall duct. One half mounts to the wall vent. The other half attaches to the dryer.

    When you push the dryer back, the two halves connect with a strong magnetic seal. This is the best option if you need to pull the dryer out frequently for cleaning or maintenance.

    Instead of wrestling with a hose clamp in a dark, narrow gap, you simply pull the dryer away. The magnetic connection breaks cleanly and reconnects automatically when you push it back.

    Forum users who installed magnetic connectors said reconnection took seconds instead of minutes. The downside is cost. Magnetic systems are more expensive than a basic periscope vent.

    They also require precise alignment. If the dryer is not level or the wall vent is crooked, the magnets may not seal perfectly.

    Recessed Dryer Vent Boxes

    A recessed dryer vent box, often called a Dryerbox, is installed inside the wall between the studs. It creates a pocket where the dryer vent connection lives. The dryer can then sit almost flush against the wall because the hose and elbow are recessed into the wall cavity.

    This is the most space-saving option available. It can give you the full six inches of clearance back. It is also the most permanent solution.

    Once installed, it is out of sight and protected from getting crushed. Many new construction laundry rooms use recessed boxes for this reason.

    The catch is that installation requires cutting drywall, modifying framing, and potentially moving plumbing or electrical. This is not a weekend project for beginners.

    Most homeowners hire a handyman or carpenter for this work. If you are in a rental, you will need landlord approval and should expect some repair costs when you move out.

    Semi-Rigid Aluminum Duct with Strapping Technique

    Sometimes you do not want to buy a specialty kit. In that case, a semi-rigid aluminum duct with a rope or strapping technique can work.

    You install a ninety-degree elbow on both the dryer exhaust port and the wall vent. Then you connect them with a short piece of semi-rigid duct.

    The trick is guiding the dryer backward without bending the duct. One technique we found on a DIY forum involves wrapping a loop of rope or strap around the midpoint of the duct, leaving both ends free. As you slide the dryer back, a helper pulls the rope ends to compress the duct straight back.

    It sounds awkward, but multiple users confirmed it works once you get the hang of it. This is the cheapest option, but it is also the least reliable.

    The duct can still buckle if you push too fast. You also need a helper, which is not always practical.

    What You Need Before You Start

    Before you open the wall or move the dryer, gather the right supplies. The exact list depends on which method you choose, but most installations require the following.

    Basic tools include a screwdriver, tin snips, utility knife, measuring tape, drill with bits, flashlight or headlamp, and a level. Materials include a four-inch diameter rigid or semi-rigid aluminum duct, foil tape, hose clamps, a ninety-degree elbow, and your chosen venting solution.

    Safety gear is important. Wear work gloves, a dust mask, and safety glasses. Lint dust is irritating to lungs and eyes.

    I learned that the hard way during my first install. One note from the forums: do not use screws to join duct sections inside the vent line. Lint catches on screw threads and creates a blockage.

    Always use foil tape and hose clamps for interior connections.

    Step-by-Step Installation for a Periscope Vent

    The periscope vent is the most popular DIY option because it balances cost, space savings, and installation simplicity. I installed one in my own laundry closet last spring, and it took about forty-five minutes. Here is the exact process I followed.

    Step 1: Measure your space. Pull the dryer away from the wall. Measure the distance between the dryer exhaust port and the wall vent.

    Measure the vertical offset if the two ports are not at the same height. Periscope vents come in different lengths, so you need to know your exact dimensions before buying.

    Write the numbers down. I forgot to write mine and had to make a second trip to the hardware store.

    Step 2: Shut off power and gas. Unplug the dryer. If it is a gas dryer, turn off the gas valve at the wall.

    You do not want the dryer running while your hands are behind it.

    Step 3: Remove the old hose. Loosen the hose clamp on the dryer exhaust port. Loosen the clamp on the wall vent.

    Remove the old flexible hose and inspect the wall vent for lint buildup. Clean it out with a vacuum or a dryer vent brush.

    A clean start is essential. I pulled out a shocking amount of lint from a hose that looked fine from the outside.

    Step 4: Install the ninety-degree elbow on the dryer. Attach the elbow to the dryer exhaust port. Secure it with a hose clamp.

    Do not overtighten. The clamp should be snug enough to hold but not so tight that it dents the thin metal.

    A dented elbow can restrict airflow at the very start of the run.

    Step 5: Attach the periscope duct. Slide the telescoping section of the periscope vent over the elbow. Extend it to reach the wall vent.

    If you have a slight height difference, use the offset version and adjust the slide until the ports align.

    Step 6: Connect to the wall vent. Attach the wall-side elbow to the in-wall duct. Use foil tape to seal every joint.

    Wrap the tape around the connection completely. No gaps should be visible.

    This is what creates an airtight seal and prevents lint from leaking into the laundry room. Do not skip this step.

    Step 7: Test the fit. Slowly push the dryer back toward the wall. Watch the periscope duct compress.

    It should slide straight back without twisting. If you feel resistance, pull the dryer out and check for alignment.

    A twisted duct will leak and trap lint.

    Step 8: Run a test cycle. Plug the dryer back in. Turn on the gas if you shut it off.

    Run a short drying cycle. Go outside and check the exterior vent hood.

    You should feel strong, warm airflow. If airflow is weak, there is a blockage or the duct is still compressed somewhere. Stop and inspect.

    Step 9: Clean up and inspect. After the test cycle, pull the dryer out one more time and inspect the connections. Make sure the foil tape held and no sections shifted.

    Once you confirm everything is secure, push the dryer back into place. The whole job should take under an hour if you have the right tools.

    Alternative Methods for Specific Situations

    Not every laundry room fits the periscope model. Here are the scenarios where the other three solutions shine.

    Choose a magnetic connector if you clean your vent often. If you have pets or do heavy laundry, you should pull the dryer out twice a year to clean the duct. A magnetic system makes that a ten-minute job instead of a thirty-minute struggle with hose clamps.

    Choose a recessed box if you are remodeling. If you are already opening the wall for plumbing, electrical, or drywall repair, adding a recessed dryer vent box is a smart upgrade. It costs more upfront but saves space permanently and looks cleaner.

    Choose the semi-rigid strapping method if you are on a tight budget. A basic aluminum elbow and a short duct cost under twenty dollars.

    The rope technique is free if you already have strapping. This is a decent temporary fix while you save for a better solution.

    Choose a roof vent or through-wall extension if you have no exterior wall access. Some apartments and condos have no outside wall in the laundry area. In that case, you may need to run a rigid metal duct through the ceiling or a nearby wall to reach an exterior vent.

    This is where you should consider hiring a professional. Running a vent through a crawlspace or attic involves fire safety codes and insulation concerns that are beyond a basic DIY project.

    Common Mistakes to Avoid

    Over the years, I have made most of these mistakes myself. I have also read about them from dozens of homeowners in forum threads. Here are the errors that cost time, money, or safety.

    Using plastic or vinyl flexible hose is a major mistake. Some old homes still have white plastic vent hose.

    It is a fire hazard. Building codes require metal ducting. Replace plastic immediately, even if you are not in a tight space.

    The risk is not worth the few dollars you might save.

    Using duct tape instead of foil tape is another common error. Duct tape dries out and peels off in the hot, humid environment behind a dryer. Foil tape is the only tape approved for dryer vent connections.

    It handles heat and stays sealed for years. Do not substitute with anything else.

    Installing too many elbows reduces airflow. Every ninety-degree elbow restricts airflow. Codes generally limit the number of elbows to two in a vent run.

    In a tight space, you might be tempted to add extra bends to make the connection fit. Do not do it. It will create back pressure and lint buildup.

    Ignoring the exterior vent hood is a mistake many DIYers make. A good interior connection is useless if the exterior hood is blocked by a bird nest, paint, or a broken damper. Check the outside vent at the same time you replace the interior duct.

    Crushing the hose instead of fixing the root problem is the worst mistake. I have seen contractors and homeowners simply push the dryer back and crush the flexible hose flat. It works until the dryer overheats.

    The clothes take two hours to dry, or worse, the lint catches fire. Always install a proper tight space solution.

    Troubleshooting After Installation

    Even after a careful install, problems can appear. Here is how to diagnose and fix them.

    Clothes take too long to dry. This is the first sign of restricted airflow. Check the exterior vent hood.

    If airflow is weak, pull the dryer out and inspect the duct. Look for a kink or a section that slipped out of alignment.

    Also check the lint trap inside the dryer. A full lint trap is an easy fix.

    Water collects in the duct. This happens when warm, moist air cools inside a long or poorly insulated vent run. In tight spaces, it can also happen if the duct dips or sags.

    Rigid metal ducts should slope slightly toward the outside. If water is an issue, add an insulation sleeve or shorten the run.

    Lint leaks into the laundry room. Leaks mean your seal is not airtight. Recheck every foil tape joint.

    Replace any tape that did not stick properly. Also check that the wall vent collar is tight against the drywall. Small gaps here let lint and humid air escape into the room.

    Strong vibration or rattling noise is usually caused by the duct touching the wall. If the periscope vent touches the wall or the floor, it can rattle when the dryer runs.

    Add a small piece of foam or rubber between the duct and the wall to dampen the vibration. Do not compress the duct itself.

    Safety, Code Compliance, and Maintenance

    Dryer venting is not just a DIY convenience project. It is regulated by building codes for a reason. The International Residential Code requires dryer vents to terminate outside the building.

    They cannot vent into a crawlspace, attic, or garage. They must be made of smooth metal with a four-inch diameter.

    Some homeowners ask if they can skip the exterior vent when they have no outside access. The answer is no, unless you use an indoor lint trap in a specific approved setup. Even then, indoor traps are generally for electric dryers only and require high maintenance.

    The safest and most code-compliant path is always to the outside. The safest path is always worth the extra cost.

    Maintenance does not stop after installation. At least once a year, disconnect the vent and clean it with a vent brush. Clean the exterior hood and make sure the damper opens and closes freely.

    If you have a magnetic connector, cleaning is easier because disconnection is fast. If you have a recessed box, clean the interior cavity with a vacuum and a long brush attachment. Regular maintenance keeps airflow strong and fire risk low.

    When should you hire a professional? If you need to run duct through a crawlspace, attic, or roof, call a licensed contractor. If your wall configuration requires more than two elbows, get professional advice.

    If you are not comfortable cutting drywall or working with gas connections, it is worth paying for peace of mind.

    Frequently Asked Questions

    How to vent a dryer in tight space?

    Use a periscope vent, offset dryer vent, magnetic connector, or recessed vent box. These replace the flexible hose and allow the dryer to sit closer to the wall while maintaining proper airflow. Measure your clearance first, then choose the solution that fits your space and budget.

    How to vent a dryer with no outside access?

    You generally cannot safely vent a dryer without exterior access. Approved alternatives include indoor lint traps for electric dryers in some jurisdictions, but these require frequent maintenance and do not meet all code requirements. The best long-term solution is to install an exterior wall vent or roof vent.

    Can you run a dryer vent through a crawlspace?

    Yes, but only if the duct is smooth metal, properly insulated, and terminates at an exterior vent hood. It must not vent into the crawlspace itself. Building codes require termination outside the structure. This job is usually best handled by a professional to satisfy compliance and fire safety.

    How much space is needed behind a dryer for venting?

    Standard flexible hoses require four to six inches. With a tight space solution like a periscope vent or recessed box, you can reduce that to two to three inches. Some recessed boxes allow the dryer to sit almost flush against the wall.

    Is it better to clamp or tape dryer vent hose?

    Use both. Secure the connection with a hose clamp for mechanical strength, then seal the joint with foil tape for an airtight seal. Never use duct tape on dryer vents. Duct tape dries out and fails under heat. Foil tape is the only approved sealing method.

    Are flat dryer vents safe?

    Flat or slim dryer vents can be safe if they are UL-rated and made of smooth metal. However, they must maintain the equivalent airflow of a standard four-inch round duct. Avoid any flat vent that uses plastic, flexible material, or a collapsible design. Always check local code before installing.

    Final Thoughts

    Learning how to hook up a dryer vent in a tight space is one of those home improvement skills that pays off immediately. You gain floor space, your dryer runs more efficiently, and you remove a hidden fire hazard from your home.

    Start by measuring your clearance. Then pick the venting solution that matches your space, budget, and comfort level.

    If you have a few inches and want an easy DIY fix, a periscope or offset vent is the way to go. If you need maximum space savings and are willing to open the wall, a recessed box is worth the investment.

    If you pull your dryer out often, spend the extra money on a magnetic connector. Remember the basics: smooth metal duct, foil tape, no screws inside the vent, and an exterior termination. Check your work after the first load of laundry.

    If the exterior vent blows strong, warm air and your clothes dry in a normal cycle, you did it right. If you are ever unsure about a complex run through a crawlspace or roof, call a professional. Safety is always worth the extra cost.

  • How to Clean Air Conditioner (August 2026): Complete Guide

    How to Clean Air Conditioner (August 2026): Complete Guide

    Learning how to clean air conditioner units is one of the smartest maintenance tasks you can tackle as a homeowner. A dirty AC system works harder, costs more to run, and pushes dust and allergens back into your living space.

    Our team has helped dozens of friends and family members through this process, and the results are always noticeable: cooler rooms, lower electric bills, and less noise from the unit.

    In this guide, you will learn the exact steps to clean both central air systems and window units. I have broken everything down into simple phases so you can work at your own pace without feeling overwhelmed.

    You do not need to be an HVAC technician to handle 90 percent of this job yourself. This guide is current for August 2026.

    Before we start, gather your tools and set aside about two hours for a full cleaning. Spring is the best time to do this, but any weekend in 2026 will work if your unit is running sluggish.

    A clean AC can lower your cooling costs by 5 to 15 percent according to Department of Energy data. That makes this one of the most productive DIY projects you can complete in an afternoon.

    Tools and Supplies You’ll Need

    Having the right gear on hand makes the job faster and safer. I keep a dedicated AC cleaning kit in my garage so I am ready when the first heat wave hits.

    Nothing is worse than opening the condenser and realizing you left the coil cleaner at the hardware store.

    Here is what you should gather:

    • Flathead and Phillips screwdrivers
    • Garden hose with a gentle spray nozzle
    • Soft-bristle brush or fin comb
    • Vacuum cleaner with a brush attachment
    • Foaming coil cleaner spray
    • Mild dish soap and warm water
    • Microfiber cloths or old towels
    • Spray bottle
    • Wet/dry vacuum (optional, for condensate drains)
    • Safety gloves and eye protection
    • Pipe cleaner or thin wire (for drain holes)
    • Foil tape (for resealing access panels)

    Most of these items are already in your home. The only item worth buying specifically is a foaming coil cleaner, which runs about $8 to $12 at any hardware store.

    I have had the same can last for two seasons. Store it in a cool, dry place away from direct sun so the propellant stays active.

    How to Clean Air Conditioner Safely

    Never work on an AC unit while the power is active. I always turn off the circuit breaker at the main panel and switch the thermostat to the off position.

    This takes 30 seconds and removes any risk of the unit starting while my hands are near the fan blades or wiring.

    Wait at least 30 minutes after shutting off the power before opening the outdoor condenser. Capacitors can hold a charge, and you want them to discharge fully.

    If you are unsure about electrical safety, stop here and call a licensed technician.

    Wear gloves to protect your hands from sharp metal fins and eye protection when spraying cleaners. Work in daylight so you can see what you are doing.

    Keep pets and children away from the work area while the unit is open. I also recommend having a phone nearby in case you need to look up your unit’s manual online.

    How to Clean a Central Air Conditioner

    Central systems have two main areas that need attention: the outdoor condenser and the indoor evaporator components. I split this into two phases so you can work methodically.

    Clean the Outdoor Condenser Unit

    Start outside at the large metal box. Remove any leaves, twigs, grass clippings, and plastic bags from the top and sides. I use a shop vacuum for this because it is faster than picking debris out by hand.

    Trim back any plants or bushes so there is at least two feet of clearance around the entire unit. Good airflow around the condenser is necessary for the system to release heat.

    Remove the outer grille or side panels according to your manufacturer manual. Most units have screws along the top edge. Keep the screws in a cup so you do not lose them in the grass.

    Spray the condenser coils from the inside out using a garden hose on a gentle setting. The water pressure should be similar to a heavy rain, not a pressure washer.

    High pressure will bend the delicate aluminum fins and reduce airflow permanently. Apply foaming coil cleaner to the coils if they are heavily soiled.

    Let the foam sit for 10 to 15 minutes, then rinse again. Check the fins for bends. If you see flat spots, gently straighten them with a fin comb.

    I bought my fin comb for $6 and it has saved me from expensive coil replacements twice. Work slowly and do not force the comb through tight areas.

    Inspect the fan motor and blades. Wipe them down with a damp cloth if they are dusty.

    Make sure the unit sits level on its concrete pad. A tilted condenser can strain the compressor over time.

    Check that the concrete pad has not cracked or shifted during winter freeze cycles.

    Replace or Clean the Indoor Filter

    Move inside to your return-air vent or furnace cabinet. Slide out the filter and hold it up to a light. If you cannot see through it, it needs cleaning or replacement.

    Disposable filters should be tossed and replaced. Washable filters can be rinsed with a garden hose and left to dry completely.

    Filter sizes vary, so check the printed dimensions on the cardboard frame before buying replacements. I write the size on the furnace cabinet with a permanent marker so I never forget.

    During peak summer months, I check the filter every 30 days because a clogged filter is the number one cause of weak airflow.

    Homes with multiple pets or allergy sufferers may need to replace filters every 20 to 30 days. Consider the filter MERV rating when you buy replacements.

    A MERV rating between 8 and 11 works well for most homes. Higher ratings trap more particles but can restrict airflow in older systems.

    Match the filter type to what your manufacturer recommends.

    Maintain the Evaporator Coil and Drain

    The evaporator coil sits inside your home, usually above the furnace or in a dedicated air handler cabinet. It absorbs heat from your indoor air, which is why keeping it clean matters so much.

    A dirty evaporator cannot absorb heat efficiently, so your system runs longer and cools less. Turn off the power to this unit as well.

    Remove the access panel with a screwdriver. You may see a metal panel with foil tape; peel it back carefully.

    Spray foaming cleaner on the evaporator coils. The foam will expand and lift dirt off the fins. Let it work for 10 minutes.

    Do not rinse the evaporator coil with water unless your manufacturer specifically allows it. The foam usually breaks down and drains away on its own.

    I place a small pan under the coil to catch any drips that miss the drain pan.

    Check the condensate drain line while you are inside the unit. This PVC pipe removes moisture that the coil collects.

    If it is clogged, water can back up and damage your ceiling or furnace. I use a wet/dry vacuum to suck out blockages from the end of the pipe.

    Pouring a cup of white vinegar down the drain every spring keeps it clear. If you see algae growth, a tablespoon of bleach-free cleaner works well.

    Replace the access panel and seal any foil tape you disturbed. Restore power and set the thermostat to cooling mode.

    Listen for unusual sounds and feel the vents after 10 minutes to confirm cold air is flowing. If you smell cleaner fumes, run the fan for an hour to clear the air.

    How to Clean a Window Air Conditioner

    Window units are smaller but can get just as dirty. I have cleaned window ACs in apartments and workshops, and the process is straightforward once you know how to open the chassis.

    Remove and Wash the Filter

    Unplug the unit from the wall outlet. Never rely on the power button alone. Remove the front grille or panel, usually by pressing release clips or removing a few screws.

    Slide out the mesh filter. Some window units also have a secondary carbon filter behind the mesh; remove that too if your model has one.

    Wash the filter in warm, soapy water. I use a soft brush to gently scrub the mesh. Rinse thoroughly and let it air dry for at least one hour.

    Putting a wet filter back into the unit traps moisture and can lead to mold growth. I lean the filter against a wall outside where the breeze helps it dry faster.

    Access and Clean the Coils

    With the filter removed, you can see the evaporator coils at the front and the condenser coils at the back. Spray both sets of coils with foaming cleaner. Let the foam sit for 15 minutes.

    The foam will drip into the drain pan, which is normal. The back coils are usually dirtier because they face outside, so give them extra attention.

    Wipe the drain pan with a cloth and clear the drain hole with a pipe cleaner or a thin wire. A clogged drain hole causes water to leak inside your room.

    I learned this the hard way after a summer storm flooded my windowsill. You can also pour a small amount of vinegar through the drain hole to prevent algae.

    Use a vacuum with a brush attachment to clean the fan blades and the inside of the cabinet. Be gentle around the coils.

    Straighten any bent fins with a fin comb. Check the foam weatherstripping around the unit for cracks and replace it if needed.

    Good weatherstripping keeps hot outdoor air from leaking in around the frame.

    Reassemble the Unit Properly

    Make sure all parts are completely dry before reassembly. Snap the front panel back into place. Reinstall the filter.

    Plug the unit back in and test it on high cool. You should feel stronger airflow within minutes.

    If you notice a musty smell, the unit may still have damp areas. Run it on fan-only mode for an hour to dry it out.

    At the end of the cooling season, remove the window unit and store it upright in a dry closet. Cover it with a sheet to keep dust out.

    Never store a window unit on its side; the compressor oil can shift and cause damage when you restart it next season. Before storing, clean it thoroughly so you are not greeted by a year-old grime buildup in 2026.

    How Often Should You Clean Your AC Unit?

    Consistency matters more than perfection. I clean my central AC every spring and do a mid-season filter check in July.

    This routine has kept my 8-year-old system running like new. My neighbor who skips maintenance ends up calling a repair technician every other summer, which costs far more than a $10 can of cleaner.

    Filters need attention every 30 to 90 days depending on your household. If you have pets, allergies, or live in a dusty area, check them monthly.

    A household with no pets and mild weather can stretch to 90 days. I mark filter changes on my calendar so I do not forget.

    Pet owners should know that dog and cat hair clogs filters faster than dust alone. Coils and condensers need a full cleaning once per year.

    Spring is ideal because you are preparing for peak demand. Window units should be cleaned before installation and again at mid-season if they run daily.

    When you store a window unit for winter, clean it first so dirt does not bake onto the coils during the off months. I schedule my cleaning for the first Saturday in April every year.

    Watch for warning signs that your unit needs immediate attention. Weak airflow, ice on the coils, strange odors, or a sudden spike in your electric bill all point to a dirty or struggling system.

    Address these signs quickly to avoid bigger repairs. If you see ice, turn the unit off immediately and let it thaw before cleaning.

    Common Mistakes to Avoid When Cleaning Your AC

    Over the years, I have seen people make the same errors. The most expensive mistake is using a pressure washer on the outdoor condenser.

    The force will flatten the fins and destroy the coil’s ability to transfer heat. A garden hose is the only water tool you need.

    I watched a friend damage a $2,000 condenser this way, and the repair bill was painful. Another frequent error is using a wire brush or hard scrub pad on the coils.

    Aluminum fins are paper-thin and bend with almost no pressure. Stick to soft brushes, foaming cleaners, and gentle water flow.

    If you do bend fins, fix them immediately with a fin comb before they block airflow. Never use bleach, ammonia, or other harsh chemicals on AC components.

    These can corrode metal and damage rubber seals. Foaming cleaners made specifically for HVAC systems are formulated to break down dirt without attacking the metal.

    Household cleaners are not designed for this job. Reassembling a unit while parts are still wet is a recipe for mold.

    Let filters, coils, and drain pans dry completely. Patience here saves you from musty odors and potential health issues later.

    Also, do not forget to clean the condensate drain. A clear drain is just as important as clean coils.

    Why Is My AC Not Cooling After Cleaning?

    If your unit runs but does not cool after you have cleaned it, do not panic. In most cases, the fix is simple.

    I have helped three neighbors through this exact situation, and every time it was a quick correction. One of them had simply bumped the thermostat to heat mode while cleaning nearby.

    First, check that the breaker is fully on and the thermostat is set to cool. It sounds obvious, but it happens.

    Next, confirm that the filter is installed in the correct direction. Most filters have an arrow showing airflow direction; if it points the wrong way, airflow drops immediately.

    I check the arrow twice because reversing it is an easy mistake to make. Wet coils cannot transfer heat efficiently.

    If you rinsed the coils heavily, let the unit run on fan-only mode for 24 hours. The air movement will dry the fins.

    Once dry, switch back to cooling mode. Ice buildup can also occur if the coil is too wet, so give it time to recover.

    If you still have weak cooling after 24 hours, you may have a refrigerant leak or a compressor issue. Those problems require a licensed technician.

    Do not attempt to add refrigerant yourself; it is illegal without EPA certification and dangerous if handled incorrectly. Burning smells or loud grinding noises also mean it is time to call a pro immediately.

    When to Call a Professional HVAC Technician

    DIY cleaning handles the maintenance that keeps your system efficient. Professional service covers the mechanical and electrical parts that homeowners should not touch.

    I get my system professionally inspected every two years, and I do my own cleaning in between. This hybrid approach keeps my costs low and my system reliable.

    Call a technician if you hear grinding noises, see refrigerant lines frosting over, or smell burning. These are signs of electrical or mechanical failure, not dirt.

    A professional tune-up costs between $75 and $200 depending on your region and the complexity of your system. That price usually includes a full inspection, refrigerant check, and electrical testing.

    Technicians also check refrigerant levels, test electrical connections, and inspect ductwork for leaks. Those tasks are beyond the scope of a cleaning guide.

    If your system is over 10 years old, annual professional service becomes more important to catch wear before it turns into a breakdown. A $150 tune-up is cheaper than a $3,000 compressor replacement.

    Frequently Asked Questions

    Can I clean my air conditioner myself?

    Yes, most homeowners can clean their own air conditioner safely. You can handle filter changes, debris removal, coil spraying, and drain clearing without professional help. Leave electrical repairs and refrigerant work to a licensed HVAC technician.

    What is the 3 minute rule for air conditioners?

    The 3 minute rule means you should wait at least 3 minutes after turning off your AC before turning it back on. This allows the compressor pressure to equalize and prevents damage to the motor. It also applies after a power outage to avoid short-cycling.

    How do I deep clean my air conditioner?

    Deep cleaning involves turning off power, removing the filters, spraying foaming cleaner on both evaporator and condenser coils, clearing the condensate drain, vacuuming debris from the cabinet, and straightening bent fins with a fin comb. Let all parts dry before reassembling.

    What is the best thing to clean your air conditioner with?

    Use a foaming coil cleaner designed for HVAC systems, a garden hose on gentle spray, mild dish soap for filters, and a soft brush or fin comb for fins. Avoid bleach, ammonia, pressure washers, and wire brushes that can damage delicate components.

    How often should I clean my AC unit?

    Clean or replace filters every 30 to 90 days depending on pets, allergies, and dust levels. Deep clean coils and condensers once per year in spring. Window units should be cleaned before installation and again at mid-season with daily use.

    Why is my AC not cooling after cleaning?

    Check that the breaker is on and the thermostat is set to cool. Verify the filter direction matches the airflow arrow. Allow wet coils to dry for 24 hours on fan-only mode. If cooling does not return, you may have a refrigerant leak or compressor issue requiring a technician.

    Conclusion

    Learning how to clean air conditioner units is a skill that pays off every summer. You will breathe cleaner air, pay less on your utility bill, and add years to your system’s life.

    The process is simple once you break it into steps: power off, remove debris, clean filters, treat coils, and check drains.

    I recommend scheduling your main cleaning session in early spring before the first heat wave. Keep a calendar reminder for filter checks every 30 days during peak season.

    If you hit a problem that feels outside your comfort zone, call a professional. There is no shame in protecting your safety and your investment.

    Start with your filters this weekend. It takes 15 minutes and you will feel the difference immediately.

    Your future self will thank you when the August heat arrives and your home stays perfectly cool.