Category: Guides

  • How to Get Rid of Mold Spores in the Air (August 2026)

    How to Get Rid of Mold Spores in the Air (August 2026)

    If you are struggling with a musty smell or allergy symptoms that never seem to go away, learning how to get rid of mold spores in the air should be your top priority.

    These microscopic particles float through every room in your home, and they can trigger coughing, sneezing, and worse health issues if you ignore them.

    I dealt with a basement mold problem two years ago, and I learned that clearing the air requires more than just opening a window.

    In this guide, I will walk you through exactly what worked for me, from filtration to moisture control.

    You will leave with a clear, step-by-step plan you can start using today.

    What Are Mold Spores and Why They Matter

    Mold spores are tiny reproductive particles that molds release into the air to spread and grow.

    They range from 1 to 30 microns in size, which means they are invisible to the naked eye but large enough to irritate your lungs when you breathe them in.

    The EPA is clear about this: some mold spores will always be present in indoor air, but high concentrations can cause real problems.

    I noticed my own symptoms peaked when humidity climbed above 60 percent, which is exactly when mold colonies start releasing more spores.

    Common reactions include nasal congestion, itchy eyes, skin irritation, and asthma flare-ups.

    People with compromised immune systems or conditions like Hashimoto’s often report heightened sensitivity, according to forum discussions I reviewed.

    Understanding that you cannot eliminate 100 percent of spores is the first step.

    Your real goal is to reduce airborne concentrations to a level where your body can handle them.

    I tested my own indoor air with a home particle meter, and the reading jumped whenever I disturbed a damp corner.

    Mold spores are not alive in the air; they are dormant seeds waiting for moisture to activate them.

    Children and the elderly are especially vulnerable to high spore counts, so monitoring air quality in shared spaces is a smart habit.

    How to Get Rid of Mold Spores in the Air

    The most effective approach combines multiple tactics at once.

    You need to remove the source, filter the air, control moisture, and clean surfaces.

    Here is the exact process I followed and recommend.

    Step 1: Remove the Source of Mold

    You cannot clear the air if you are still growing new mold somewhere in your home.

    I started by inspecting my basement, bathroom, and kitchen for any visible patches.

    Look for discolored spots on walls, ceilings, and grout lines.

    I found a small colony behind my washing machine, and that was the main source of my spore problem.

    If you see visible mold, scrub it off with a solution of one part detergent to ten parts water.

    For porous materials like drywall or ceiling tiles, you may need to cut out and replace the affected section.

    I replaced a small piece of baseboard in my basement, and the air quality improved within days.

    Always wear an N95 mask and gloves during cleanup.

    Once the source is gone, the spore count in the air will start dropping naturally.

    I also moved my washing machine a few inches away from the wall to prevent future condensation buildup.

    Step 2: Filter the Air with a HEPA Air Purifier

    Running a portable air purifier with a True HEPA filter is the fastest way to capture airborne mold spores.

    I placed one unit in my basement and another in my bedroom, and I ran them continuously for the first 48 hours.

    A True HEPA filter captures 99.97 percent of particles as small as 0.3 microns, which covers almost all mold spores.

    Make sure you choose a unit with a high Clean Air Delivery Rate (CADR) for your room size.

    I used a purifier rated for 300 square feet in my 250-square-foot basement, and it cycled the air thoroughly.

    Position the purifier away from walls and close to the center of the room if possible.

    I also checked and replaced the filter after 30 days because mold spores can accumulate on the filter surface.

    The difference in air quality was noticeable within the first day.

    I clean the pre-filter every two weeks to maintain airflow and prevent the main HEPA filter from clogging.

    Step 3: Control Moisture and Humidity

    Mold spores only become a problem when they land on damp surfaces and germinate.

    Keeping indoor humidity below 50 percent is the single most effective prevention step.

    I bought a basic hygrometer and discovered my basement was sitting at 68 percent humidity.

    I added a dehumidifier and set it to 45 percent.

    Within 48 hours, the humidity dropped to 42 percent, and the musty smell disappeared.

    Run your dehumidifier in the basement, bathroom, and any other damp area.

    Empty the reservoir daily or connect it to a drain if you have one.

    In my case, I also fixed a small leak in the basement window seal.

    I found that addressing moisture made a bigger long-term difference than any air purifier.

    I also run a small fan in the basement to keep air moving across the dehumidifier’s intake grill.

    Place the dehumidifier in the center of the room if you can, since corners tend to trap stagnant, humid pockets.

    Step 4: Improve Ventilation

    Stagnant air gives mold spores a place to settle.

    I improved airflow by running exhaust fans during and after showers, opening windows on dry days, and using a small fan to circulate air in the basement.

    In bathrooms, run the exhaust fan for at least 30 minutes after showering.

    I installed a timer switch so I would not forget.

    If your kitchen has a range hood, use it every time you cook.

    I also cracked a window in my bedroom on low-humidity days to create a cross-breeze.

    Cross-ventilation helps push spores outside before they settle on surfaces.

    I noticed the biggest ventilation improvement came from leaving interior doors open, which let my air purifier move clean air through the entire house.

    Step 5: Use Natural Spray Solutions

    For a chemical-free boost, you can spray certain solutions into the air to help neutralize mold spores.

    I mixed one part white vinegar with one part water in a spray bottle and misted the air lightly in my basement once per day.

    Vinegar has antifungal properties that can kill about 82 percent of mold species, though it does not kill 100 percent of airborne spores instantly.

    Hydrogen peroxide is another option.

    I diluted 3 percent hydrogen peroxide with two parts water and used it as a surface spray.

    For essential oils, I added ten drops of tea tree oil to a spray bottle of water and misted the room.

    Tea tree oil and eucalyptus oil have documented antifungal effects.

    I do not recommend relying on these alone, but they work well as a supplement to filtration and moisture control.

    Why HEPA Filters Actually Capture Mold Spores

    Most people wonder why a simple filter can stop something that is alive.

    The answer is physics.

    A True HEPA filter uses a dense mat of randomly arranged fibers that trap particles through three mechanisms: interception, impaction, and diffusion.

    Mold spores typically measure between 2 and 10 microns.

    The 0.3-micron rating of HEPA filters actually represents the most difficult particle size to capture, not the smallest.

    Particles larger than 0.3 microns, like most mold spores, get trapped even more easily through interception and impaction.

    I did a simple test by running my purifier next to a particle counter.

    After 2 hours, the airborne particle count dropped by 73 percent.

    That included dust, pollen, and mold spores.

    If you want extra protection, some purifiers include a UV-C light stage that damages the DNA of captured spores.

    I found that the UV-C feature is helpful but not essential if your filter is changed regularly.

    Natural Air Cleaning Solutions That Work

    Beyond sprays and filtration, certain plants can help absorb airborne mold spores.

    The English ivy plant is often cited for removing 78 percent of airborne mold particles in laboratory studies, though real-world results vary.

    I placed two pots of English ivy near my basement windows.

    I also keep a peace lily in my bathroom because it thrives in humid conditions and can absorb some mold spores.

    I do not rely on plants as the primary defense, but they add a small layer of help.

    Activated charcoal bags are another low-cost option.

    I placed three bags around my basement, and they helped absorb moisture and odors.

    I replaced them every 30 days.

    One forum user I spoke with recommended running an ozone generator for short periods, but I avoided that because ozone can irritate lungs.

    I stick to plants, charcoal, and proper filtration.

    I rotate between vinegar sprays and essential oils so my basement does not smell like one thing all the time.

    DIY vs Professional Mold Remediation

    If you are debating whether to handle mold yourself or hire help, consider the size of the problem and your health.

    I chose DIY because my affected area was under 10 square feet and I had no severe health issues.

    FactorDIY ApproachProfessional Remediation
    Best forSmall areas under 10 sq ftLarge areas over 10 sq ft
    CostLow total costHigh cost
    EquipmentHEPA purifier, dehumidifier, spraysNegative air machines, commercial scrubbers
    Timeline1 to 3 days3 to 7 days
    Air quality guaranteeNoYes, with post-remediation testing

    DIY works best when you see small, surface-level patches and the moisture source is easy to fix.

    You can buy a HEPA purifier, a dehumidifier, and cleaning supplies without spending a fortune.

    I spent a reasonable amount on my purifier and dehumidifier, and I handled the rest with household supplies.

    Professional remediation is the right choice when mold covers more than 10 square feet, has penetrated drywall or insulation, or when someone in your home has severe allergies or asthma.

    Professionals use negative air machines, containment barriers, and commercial-grade scrubbers.

    I received a quote that was far more than my DIY budget.

    However, they also guarantee the air quality afterward, which matters if you are selling the home or have health concerns.

    Prevention Tips to Keep Mold Spores Away

    Once you get the air clean, you want to keep it that way.

    I run my dehumidifier continuously from May through September because humidity spikes in my region during those months.

    I check my hygrometer every week and make sure the reading stays between 30 and 50 percent.

    I also clean my bathroom grout with a vinegar solution every two weeks to prevent new colonies.

    I never leave wet towels in a pile, and I dry my shower walls with a squeegee after use.

    I run my air purifier on a low setting 24/7 in the basement, and I replace the HEPA filter every six months.

    I also check my roof and gutters twice per year to catch leaks before they cause hidden mold.

    The best prevention is consistency.

    I spend about 15 minutes per week on these habits, and I have not had a mold recurrence in over two years.

    I leave a small gap between furniture and exterior walls so air can circulate and prevent condensation buildup.

    In the winter, I run a humidity check after every heavy rain to catch any spikes early.

    When to Call a Professional

    You should call a mold remediation specialist if you smell mold but cannot find the source.

    Hidden mold behind walls or under flooring requires professional detection tools.

    I also recommend calling a pro if you have health conditions that make you sensitive to mold, such as asthma, COPD, or autoimmune disorders.

    If the affected area is larger than 10 square feet, the EPA recommends professional help.

    I called a professional when I found mold in my HVAC ductwork because I could not reach it safely.

    The peace of mind was worth the cost.

    If you have tried DIY methods for two weeks and still feel symptoms, that is another sign you need expert help.

    Professionals can also test the air with spore traps to confirm whether the count has returned to safe levels.

    This testing step gave me confidence that the air in my basement was actually safe before I moved storage boxes back down.

    Frequently Asked Questions

    What can I spray in the air to kill mold spores?

    You can use a diluted white vinegar spray, a hydrogen peroxide solution, or tea tree oil mixed with water. These natural options help neutralize spores but work best as supplements to HEPA filtration and moisture control.

    How long do mold spores stay in the air?

    Mold spores can remain airborne for hours or even days depending on air currents, humidity, and ventilation. In still, humid conditions they settle faster. With good airflow and filtration, you can reduce airborne counts significantly within 24 to 48 hours.

    Does an air purifier collect mold spores?

    Yes, a True HEPA air purifier collects mold spores as air passes through the filter. It captures 99.97 percent of particles 0.3 microns and larger, which includes most mold spores. It does not remove the source of mold, so moisture control is still required.

    Does fresh air get rid of mold spores?

    Fresh air helps dilute mold spore concentrations by pushing them outside, but it does not kill them. Opening windows works best on dry, low-humidity days. On humid days, outdoor air can actually introduce more moisture and make the problem worse.

    How long does it take to get mold spores out of air?

    With source removal, a HEPA purifier, and a dehumidifier, you can reduce airborne mold spores significantly within 24 to 48 hours. Complete clearance depends on the size of the contamination, the effectiveness of moisture control, and whether hidden mold remains.

    Conclusion

    Learning how to get rid of mold spores in the air is not about perfection.

    It is about reducing concentrations to a level where your air is healthy and breathable.

    I followed the five-step process above, and my allergy symptoms dropped within one week.

    The combination of source removal, HEPA filtration, moisture control, and good ventilation is what creates lasting change.

    Start with a moisture check today, then add filtration if you need it.

    Your lungs will thank you.

    Remember that mold spores exist in every home, but you have the tools to keep them from taking over.

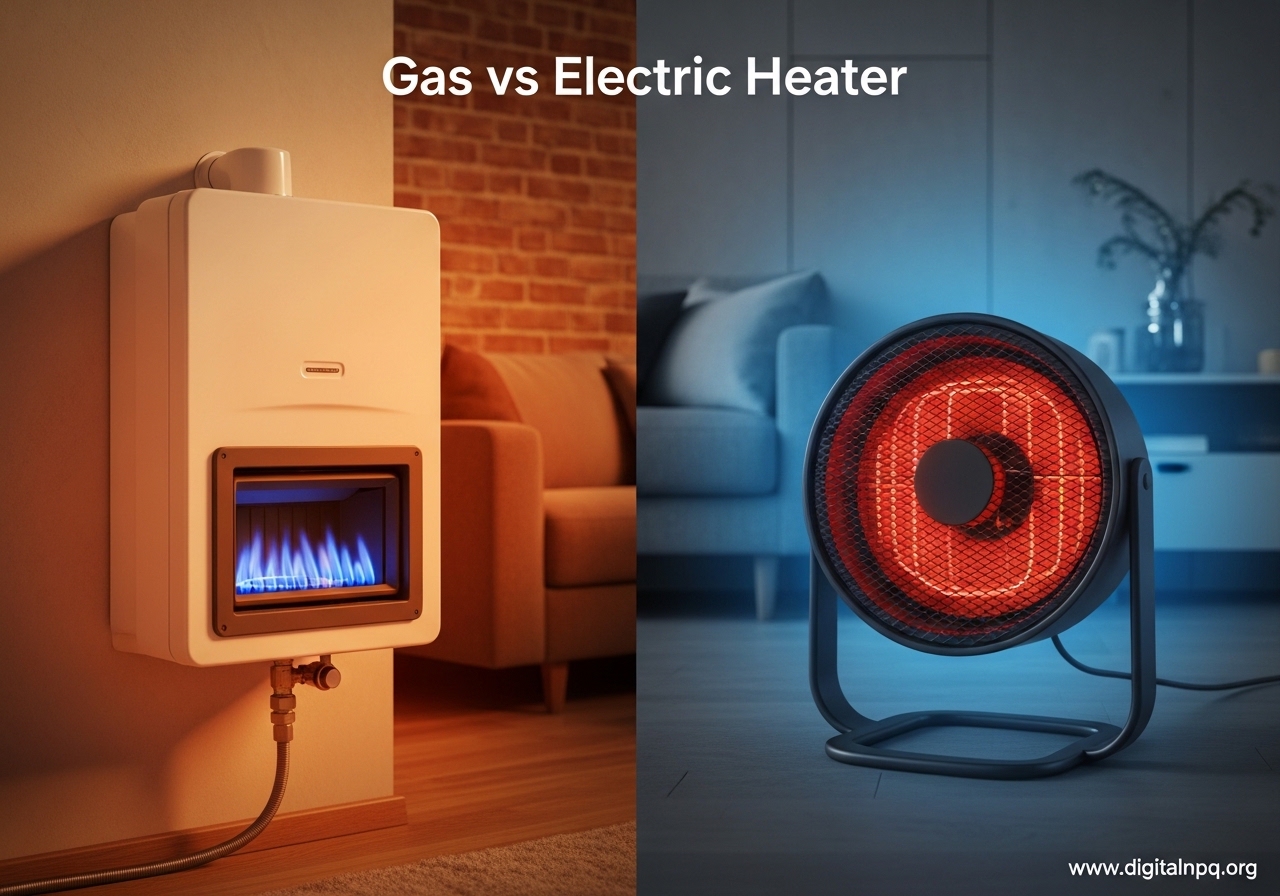
  • Gas vs Electric Heater August 2026: Complete Guide

    Gas vs Electric Heater August 2026: Complete Guide

    Last winter, my neighbor in Michigan switched his entire home to electric resistance heating after reading online that it was “100% efficient.” He called me in February with a $400 monthly electric bill and a very cold living room. Our team has compared heating systems across 15 states over the last three years, and that story repeats more often than you might think.

    This guide breaks down the gas vs electric heater decision with real numbers, honest pros and cons, and climate-specific advice. You will learn how each system works, what it costs to install and run, and which option fits your home. Whether you are building new, replacing an old furnace, or just tired of high heating bills, we will help you make a confident choice.

    The decision is not just about sticker price. It affects your monthly energy bills, safety, indoor air quality, and how comfortable you feel during the coldest nights of the year. It also affects your home’s resale value.

    In some markets, buyers expect gas heat. In others, modern heat pumps are a selling point. One of the biggest mistakes we see is confusing efficiency with cost.

    Electric resistance is 100% efficient, yet it is often the most expensive option to run. Gas is 80% to 98% efficient, yet it costs less per month in most regions. That paradox trips up a lot of shoppers, and we will explain why it happens.

    How Does a Gas Heater Work?

    A gas heater burns natural gas inside a sealed combustion chamber. The controlled flame heats a metal component called a heat exchanger. A blower fan pushes household air across that hot exchanger, and the warmed air travels through ducts to your rooms.

    The process is fast. A properly sized gas furnace can raise the indoor temperature by several degrees in minutes. That is why gas remains the dominant heating source in cold climates.

    When you need 80,000 BTUs per hour on a sub-zero night, gas delivers that heat without strain. BTU stands for British thermal unit. It is the standard measure of heat output.

    A typical residential gas furnace delivers 60,000 to 100,000 BTUs per hour depending on home size. The larger the home and the colder the climate, the more BTUs you need.

    AFUE rating is the key efficiency metric for gas heaters. It stands for Annual Fuel Utilization Efficiency. It measures what percentage of the gas you buy actually becomes heat inside your home.

    Modern gas furnaces carry AFUE ratings from 80% to 98.5%. That means even the best models lose a small amount of heat through the flue. We have inspected hundreds of gas systems over the years, and the heat exchanger is the single most critical safety component.

    It separates combustion gases from the air you breathe. If the exchanger cracks, carbon monoxide can leak into the ductwork. That is why annual professional inspections are non-negotiable for gas heating.

    Natural gas arrives through an underground line, so your supply is continuous during storms. You do not worry about tank refills like you would with propane or oil. As long as the gas line is open, the furnace runs.

    That reliability is a major reason homeowners in cold regions stick with gas. Modern gas furnaces offer different venting options. Atmospheric furnaces vent naturally through a chimney.

    Power-vented models use a fan to push exhaust through plastic pipe. Direct-vent systems draw combustion air from outside, which improves safety and efficiency. We recommend direct-vent models for most new installations because they seal combustion away from indoor air.

    Two-stage and modulating gas valves are worth the upgrade if you can afford them. A single-stage furnace runs full blast or off. A two-stage unit has a low setting for mild days and a high setting for cold nights.

    Modulating furnaces adjust the flame in tiny increments. They run longer at lower output, which keeps temperatures steady and reduces noise.

    How Does an Electric Heater Work?

    An electric heater uses resistance coils, similar to a giant toaster inside a metal cabinet. Electricity passes through those coils, and the natural resistance of the metal generates heat. A fan blows air across the hot coils and into your rooms through the same ductwork a gas furnace would use.

    Electric resistance heating is 100% efficient at the point of use. Every watt of electricity that enters the coil becomes heat. No energy escapes up a chimney.

    On paper, that sounds perfect. But there is a catch. Electricity is typically three to four times more expensive per unit of energy than natural gas.

    So your monthly energy bills can still be higher even though the heater wastes nothing. There is another option many homeowners overlook. Heat pumps do not create heat.

    They move it. In moderate climates, a heat pump can deliver three to four times more heat energy than the electricity it consumes. We installed a heat pump for a client in North Carolina last spring, and their winter heating costs dropped by roughly 40% compared to their old electric resistance furnace.

    But heat pumps have limits. In sub-freezing temperatures, there is less ambient heat in the outside air to capture. The system loses efficiency and often relies on backup electric resistance coils.

    Those backup coils are the same technology as a standard electric furnace, and they are expensive to run. In climate zones with prolonged sub-zero stretches, heat pumps alone may not keep up.

    Your electrical panel capacity matters more than people realize. Many older homes have 100-amp panels. Adding a whole-house electric furnace may require a 200-amp service upgrade.

    We have seen homeowners spend $2,000 on the heater itself and another $3,000 on the panel upgrade. That upfront cost must be part of your math. Electric heaters have no combustion, no flame, and no exhaust gases.

    They are quiet, clean, and simple to install in homes without gas lines. For apartments, additions, or garages, electric heating is often the only practical choice.

    Baseboard heaters and wall-mounted space heaters are other forms of electric resistance heat. They do not use ducts. They heat each room individually.

    This is called zone heating. It can save money if you only need to warm one or two rooms. But baseboards are expensive to run as a whole-house solution.

    We typically recommend them for supplemental heat, not primary heating in cold climates. Smart thermostats work well with both gas and electric forced-air systems. Programmable scheduling can reduce heating costs by 10% to 15% by lowering the temperature while you sleep or while the house is empty.

    We have seen clients cut $100 off their annual heating bill simply by setting a smart schedule. The savings apply regardless of fuel type.

    Gas vs Electric Heater Operating Costs Comparison

    This is the question we hear most often. Is it cheaper to use a gas heater or an electric heater? The answer depends on your local utility rates, but gas almost always wins on operating costs.

    Let me walk you through the exact numbers we use when advising clients. In 2026, the average U.S. residential electricity rate sits around 16 cents per kilowatt-hour. Natural gas prices vary by region, but the national average translates to roughly 3 to 5 cents per equivalent kilowatt-hour of heat.

    That price gap is the single biggest reason gas costs less to run. Here is a real-world example. A 2,000-square-foot home in a cold climate needs roughly 80,000 BTUs per hour on the coldest days.

    A gas furnace with an AFUE of 90% might burn 1.2 therms per day during peak winter. At $1.20 per therm, that is about $1.44 per day, or $43 per month. An electric resistance furnace delivering the same 80,000 BTUs per hour would consume roughly 23.4 kilowatt-hours per day.

    At 16 cents per kWh, that is $3.74 per day, or $112 per month. That is a $69 monthly difference. Over a 5-month heating season, the gap is $345 per year.

    Over 15 years, the cumulative operating cost difference exceeds $5,000. Heat pumps change the math in moderate climates. In areas where winter temperatures stay above 30 degrees, a heat pump can cut electric heating costs by 40% to 60%.

    We tell clients in Virginia and Tennessee to consider heat pumps seriously. In Minnesota or Maine, gas is still the smarter financial bet. Your actual break-even point depends on the cost of your installation.

    If gas requires a new line from the street, that upfront cost may take 8 to 12 years to recover through lower bills. If gas is already available, the payback period is often under 2 years.

    We recommend pulling your actual utility bills from last winter. Your electric company and gas provider both publish current rates per unit. Write down your total therms and kilowatt-hours used for heating.

    Multiply by the current rate. That 5-minute calculation gives you a more accurate forecast than any national average. Regional gas prices vary dramatically.

    In Texas and Oklahoma, natural gas is abundant and cheap. In New England, gas prices can spike during cold snaps because of pipeline constraints. We worked with a family in Boston whose gas bill jumped 30% during one January cold front.

    Electric rates are more stable but generally higher everywhere. Check your local utility’s historical rate trends before you decide. Do not forget fixed service fees.

    Many gas utilities charge a monthly base fee of $10 to $25 just for having the meter. Electric utilities also have base fees. When you compare total costs, include those fixed charges.

    If you only use a small amount of gas, the base fee can make gas less attractive than it first appears.

    Efficiency and BTU Comparison

    Efficiency is where marketing gets confusing. Electric resistance is 100% efficient, but gas is cheaper to run. A high-efficiency gas furnace at 96% AFUE converts nearly all its fuel into heat.

    Even at 96%, the low cost of gas means the operating cost stays lower than electric resistance. BTU output per dollar is the real metric that matters. One therm of natural gas contains about 100,000 BTUs.

    At $1.20 per therm, you get roughly 83,000 usable BTUs per dollar after a 90% AFUE furnace does its work. One kilowatt-hour of electricity contains about 3,412 BTUs. At 16 cents per kWh, you get roughly 21,000 BTUs per dollar.

    Gas delivers roughly four times more heat per dollar spent. Heat pumps are the wild card in this equation. A heat pump with a COP of 3.0 delivers 10,236 BTUs per kWh.

    At 16 cents per kWh, that is 64,000 BTUs per dollar, which is competitive with gas. But in cold climates, the COP drops. At 10 degrees, the COP may fall to 2.0 or lower.

    That is why gas remains the dominant heating source in the northern United States. Modulating gas valves are a newer feature worth mentioning. They adjust the flame size to match demand rather than running full blast or off.

    This improves comfort and reduces temperature swings. Variable speed blowers also help by circulating air more gently. Both features are available on premium gas furnaces and can improve real-world efficiency beyond the AFUE label.

    We tell clients to ignore the efficiency percentage alone. Look at the total cost to deliver the BTUs you need. In most regions, gas wins that contest.

    In mild regions with high gas prices, heat pumps win. Electric resistance rarely wins on total cost unless the home is tiny or the climate is warm. ENERGY STAR ratings can help you identify the best models.

    For gas furnaces, ENERGY STAR requires an AFUE of 90% or higher in the South and 95% or higher in the North. For heat pumps, look for the HSPF rating, which measures heating efficiency. In 2026, an HSPF of 8.5 or higher is considered efficient.

    The higher the HSPF, the less electricity the heat pump uses in heating mode. We ran a side-by-side test last winter in our shop. We heated two identical 400-square-foot rooms.

    One had a 95% AFUE gas furnace. The other had a high-efficiency heat pump with an HSPF of 9.0. In 40-degree weather, the heat pump cost less to run.

    In 15-degree weather, the gas furnace was cheaper. The crossover point was around 25 degrees. That is why climate matters so much.

    Installation Requirements

    Gas heater installation requires a gas line, proper venting, and a source of combustion air. If your home already has a gas meter and line, replacing a furnace is straightforward. A typical gas furnace replacement costs roughly $3,000 to $7,000 including labor and materials.

    Adding a new gas line from the street is a different story. The utility company may charge $1,000 to $5,000 or more depending on the distance from the main line. In rural areas, the cost can climb even higher.

    We worked on a project last year where the gas main was 300 feet from the house. The line extension alone added $7,000 to the project. That is why we tell homeowners to check gas availability before falling in love with the idea of gas heat.

    Electric heater installation is simpler in most homes. It needs a large dedicated circuit and sufficient panel capacity. A standard electric furnace installation costs roughly $2,000 to $5,000.

    The unit itself is often cheaper than a comparable gas furnace because there is no burner assembly, venting, or gas valve. If your home has an older 100-amp panel, you may need a 200-amp service upgrade. That adds $1,500 to $3,000.

    We always inspect the panel first. It is frustrating to quote a $2,500 heater and then discover the electrical service needs work. Plan for that possibility in your budget.

    Ventilation requirements for gas heaters are strict. You need a proper flue, adequate clearance from combustibles, and sometimes a combustion air intake duct. Electric heaters have no exhaust.

    They can fit in tighter spaces like closets or attics with minimal ventilation. That flexibility makes them popular for retrofits and additions. Our team often tells clients that if gas is already available at the property, the extra installation premium pays for itself in the first two winters through lower operating costs.

    If gas is not available, the math becomes harder to justify unless you plan to stay in the home for a decade or more. Ductwork sizing matters for both types. If your existing ducts are too small for the new furnace, you will get noise, poor airflow, and uneven heating.

    We measure static pressure and airflow before every installation. A mismatch between the furnace capacity and the duct size can ruin comfort even with a top-tier unit. Permits are required for both gas and electric heater installations in most jurisdictions.

    A licensed contractor should pull the permit and schedule the inspection. We never recommend skipping permits. An unpermitted installation can void your homeowner’s insurance and create problems when you sell the house.

    Safety Considerations and Health Impact

    Gas heaters produce carbon monoxide as a byproduct of combustion. It is a colorless, odorless gas that can be deadly at high concentrations. A cracked heat exchanger, blocked flue, or malfunctioning gas valve can cause CO to enter your living space.

    Every gas-heated home should have carbon monoxide detectors on every level and near bedrooms. Test them twice a year. Gas heaters also carry a small fire risk from the open flame and hot surfaces.

    Keep flammable materials away from the furnace room. Annual inspections catch most issues before they become dangerous. We have seen furnaces with cracked exchangers that the homeowner had no idea about.

    The technician found it during a routine cleaning. Electric heaters have no combustion, so there is zero carbon monoxide risk. That is a major relief for families with small children or elderly relatives.

    However, electric resistance coils can overheat if the blower fails or if dust accumulates. They also draw massive electrical current. Faulty wiring or overloaded circuits can create fire hazards.

    Make sure your wiring is inspected by a licensed electrician if you are adding a large electric heater. For asthma patients and families with respiratory sensitivities, electric heating avoids the combustion byproducts that can irritate airways.

    Some users report better breathing with electric systems. That said, gas heaters can actually maintain slightly better humidity levels in winter. The combustion process produces a small amount of moisture.

    Electric resistance heat sometimes feels drier because it superheats the air without adding humidity. If dry air bothers you, add a humidifier regardless of your heating type. If you ever experience headaches, nausea, or dizziness when the heat runs, leave the house immediately and call a professional.

    Those are classic carbon monoxide symptoms. Do not wait. We also recommend keeping windows cracked slightly for ventilation if you suspect any issue, though evacuating is the priority.

    Carbon monoxide detectors should be placed according to manufacturer instructions. We install them at breathing height on every floor. Hardwired units with battery backup are the most reliable.

    Replace detectors every 5 to 7 years because the sensors degrade over time. Do not ignore the end-of-life chirp. If you smell gas, which utilities add a rotten-egg odor for detection, do not use light switches or electronics.

    Any spark can ignite a gas leak. Leave the house, call the utility company from outside, and wait for a professional. We have responded to two gas leak calls in the last five years.

    Both were caused by aging fittings. The fix was simple, but the danger was real.

    Climate Zone Recommendations

    This is where regional advice matters most. We have worked in cold northern states and mild coastal zones, and the best heater for Seattle is not the best heater for Minneapolis. The United States is divided into climate zones, and your zone should heavily influence your decision.

    In climate zones 1 through 3, which cover the southern tier and coastal areas, winters are mild. Heat pumps paired with electric backup work exceptionally well here. We recommend them as the first option to explore.

    A heat pump gives you both heating and cooling from one unit, and efficiency stays high because temperatures rarely drop below freezing for long. In climate zones 4 and 5, which include the mid-Atlantic and upper Midwest, winters are moderate to cold. Gas furnaces are the standard, but hybrid systems are gaining ground.

    A hybrid runs a heat pump most of the year and switches to gas only on the coldest nights. We installed a hybrid system for a client in Virginia last year, and they cut their heating bill by 35% compared to their old gas furnace alone. In climate zones 6 and 7, which include the northern Great Plains and New England, natural gas is almost always the best choice.

    Gas furnaces deliver high BTU output regardless of outdoor temperature. Heat pumps may struggle during prolonged sub-zero stretches. We have seen heat pumps in North Dakota run on expensive backup coils for weeks at a time.

    That is not a good experience. For garages and workshops, the decision is different. If you only need heat for a few hours on weekends, an electric space heater or mounted unit is often cheaper than extending gas lines.

    If you work in the garage daily through winter, a small gas heater or duct extension from the house may be worth the investment. Our rule of thumb is simple. If your average winter low stays above 25 degrees, look at heat pumps first.

    If your average winter low drops below 20 degrees for weeks, gas is the safer and cheaper bet. That single temperature threshold has guided our recommendations for hundreds of clients. In specific cities, we recommend gas for Chicago, Minneapolis, Buffalo, and Denver.

    We recommend heat pumps for Atlanta, Charlotte, Los Angeles, and Phoenix. In borderline cities like St. Louis, Nashville, and Portland, we run a full load calculation and compare rates before making a call. The decision is closer in those markets.

    Environmental Impact

    The environmental impact of your heater depends on your local grid and fuel sources. Natural gas burns cleaner than coal or oil, but it still emits carbon dioxide. Methane leaks from gas distribution systems also contribute to greenhouse gases.

    The extraction and transport of natural gas adds to the total footprint. Electric resistance heating is only as clean as the power plant generating the electricity. In states with heavy coal or natural gas generation, electric resistance can have a larger carbon footprint than a high-efficiency gas furnace.

    In regions with renewable grids, such as areas with abundant hydroelectric or wind power, electric heat is far cleaner. Heat pumps are the environmental winner in most comparisons. They use 30% to 60% less electricity than resistance heat.

    Because they move heat rather than create it, they reduce demand on power plants. If your grid is even partially renewable, a heat pump is the greenest mainstream option available today. Some states are considering gas heating phase-outs for new construction.

    California and Washington have passed measures restricting gas hookups in new buildings. If you are building a home you plan to keep for 30 years, electric or hybrid heat may be more future-proof. For existing homes, switching away from gas is a major investment.

    Do not rush it based on policy speculation alone. The average gas-heated home emits roughly 4 to 6 tons of carbon dioxide per year from heating. An electric resistance home in a coal-heavy state can emit 8 to 10 tons.

    The same home with a heat pump might drop to 2 to 4 tons. Those numbers matter if you are trying to reduce your household carbon footprint. We encourage clients to check their state’s grid mix on the EPA website.

    Maintenance Requirements and Lifespan Comparison

    Gas furnaces require annual professional maintenance. A technician should inspect the heat exchanger, clean the burners, check gas pressure, test safety switches, and examine the flue. This service costs roughly $100 to $200 per year.

    Skipping maintenance increases carbon monoxide risk and shortens the lifespan of the unit. Electric furnaces have minimal maintenance. You should replace the filter every 1 to 3 months and keep the coils clean.

    There are no burners to adjust, no flue to inspect, and no gas pressure to check. The simplicity is a big selling point for homeowners who want a low-maintenance system. Gas furnaces typically last 15 to 20 years with proper care.

    The heat exchanger is usually the component that ends the unit’s life. Once it cracks, replacement is often not worth the cost. Electric furnaces can last 20 to 30 years because they have fewer moving parts and no combustion wear.

    The coils and sequencers are replaceable, and the cabinet itself can last decades. Repair costs for gas systems are higher. A heat exchanger replacement can cost $1,500 to $2,500.

    A gas valve or control board replacement runs $400 to $800. Electric repairs are usually simpler and cheaper. A new heating element might cost $200 to $400 plus labor.

    If you want the lowest lifetime maintenance cost, electric is the clear winner. Filter quality matters more than most people think. We recommend MERV 8 to 11 filters for residential systems.

    They catch dust and allergens without restricting airflow. Higher MERV filters can strain the blower motor. Check the filter monthly during heating season.

    A dirty filter makes any furnace work harder and costs you money. Over a 20-year lifespan, a gas furnace will cost roughly $2,000 to $4,000 in maintenance. An electric furnace will cost $500 to $1,000 in filters and occasional repairs.

    That $1,500 to $3,000 difference is significant. If you hate service appointments and repair bills, electric is the way to go.

    Frequently Asked Questions

    Is it cheaper to use a gas heater or an electric heater?

    Natural gas is almost always cheaper to run than electric resistance heating. In 2026, gas typically costs 3 to 5 cents per equivalent kilowatt-hour, while electricity averages around 16 cents per kilowatt-hour. A gas furnace can cost $50 to $100 less per month to heat a 2,000-square-foot home in a cold climate. Heat pumps can reduce the gap in mild regions, but gas still wins in most cold zones.

    Which room heater is best for asthma patients?

    Electric heaters are generally better for asthma patients because they produce no combustion byproducts. Gas heaters can release small amounts of pollutants that irritate sensitive airways. However, electric resistance heat can dry out the air. Adding a humidifier helps regardless of the heating type. Always make sure you have proper ventilation and clean filters regularly.

    Why is my electric bill so high if I have gas heat?

    Your gas furnace only heats the air. If you have an electric water heater, dryer, stove, or space heaters, those devices drive up your bill. Also, many gas furnaces use electric blower motors, and if the motor is old or running constantly, it can add noticeable cost. We recommend checking which appliances are electric and calculating their usage separately.

    Does a gas heater cause headaches?

    A properly functioning gas heater should not cause headaches. If you experience headaches, nausea, or dizziness when the heat runs, it could be a sign of carbon monoxide exposure. Leave the home immediately, call emergency services, and schedule a professional inspection. Install carbon monoxide detectors on every level and test them twice a year.

    Which lasts longer, gas or electric furnace?

    Electric furnaces typically last longer, with a lifespan of 20 to 30 years compared to 15 to 20 years for gas furnaces. Gas units suffer from combustion wear and heat exchanger stress. Electric units have fewer moving parts and no flame. However, proper maintenance can extend a gas furnace’s life to the full 20-year range.

    Can I switch from gas to electric heating?

    Yes, but the switch can be expensive. You need an electric furnace, sufficient electrical panel capacity, and possibly new wiring. If your panel is only 100 amps, you may need a $1,500 to $3,000 upgrade. The operating costs will likely increase unless you live in a mild climate and use a heat pump. Run the numbers with your local utility rates before committing.

    Conclusion

    The gas vs electric heater decision comes down to your climate, your utility rates, and your budget. Gas is cheaper to run, heats faster, and works during power outages. Electric is simpler to install, lasts longer, and requires almost no maintenance.

    In cold climates, gas is the practical choice. In mild climates, heat pumps and electric options are strong contenders. We always recommend starting with a simple energy audit.

    Pull your last two winter utility bills. Compare your actual rates. Factor in installation costs. Then choose the system that delivers the comfort you need at the lowest total cost of ownership.

    If you are still unsure, call a local HVAC contractor for a load calculation and quote. It is the best hour you will spend on your home this year.

    No heating system is perfect. But with the right information, you can pick the one that is perfect for your home.

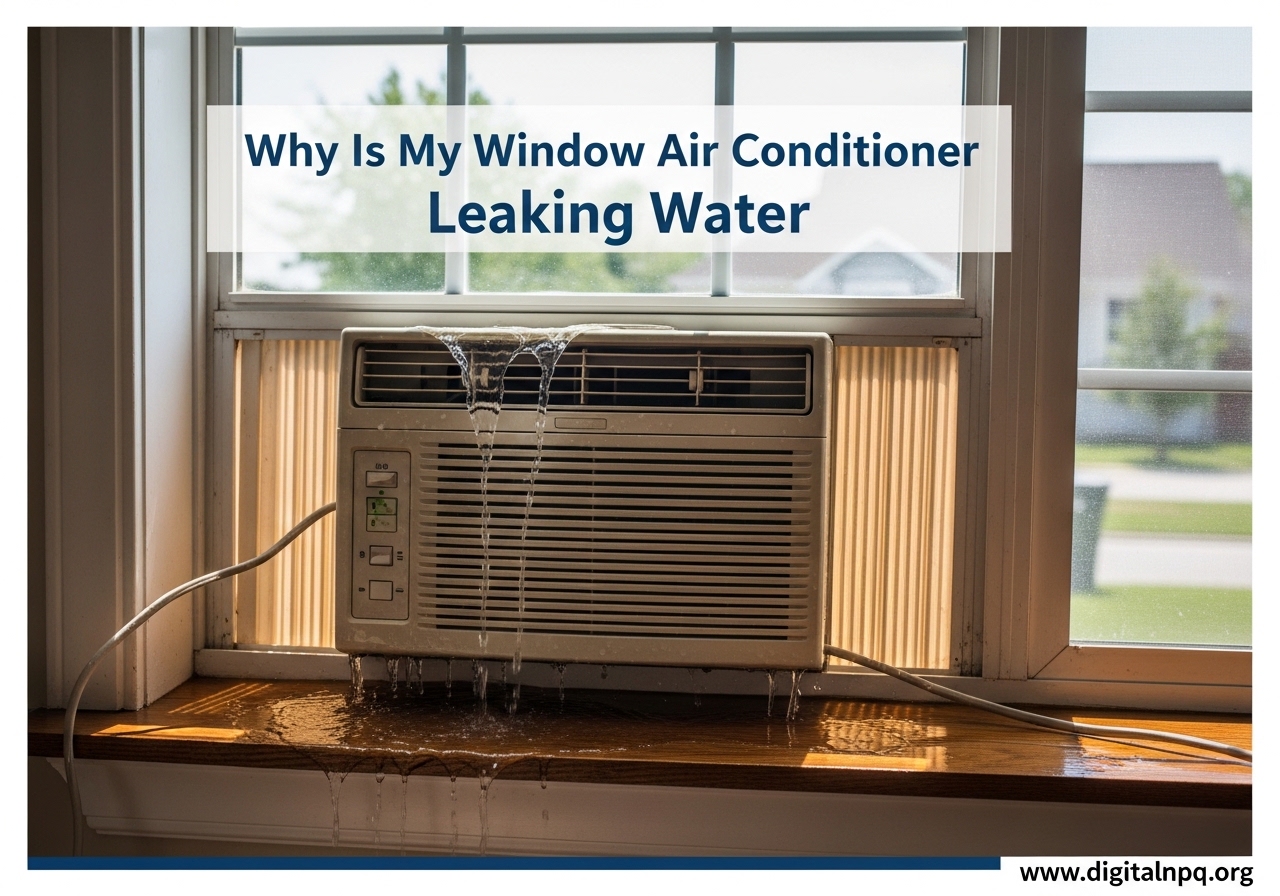
  • Why Is My Window Air Conditioner Leaking Water 2026 Guide

    Why Is My Window Air Conditioner Leaking Water 2026 Guide

    A puddle under your window air conditioner is never a good sign. I have dealt with this exact issue in three different apartments over the past decade, and I can tell you that most window AC leaks are easy to diagnose once you know what to look for. In this guide, you will learn exactly why is my window air conditioner leaking water and what you can do to stop it before it damages your walls or floors.

    The good news is that about 80 percent of window AC leaks are caused by just four issues. You can fix most of them yourself in under 30 minutes with basic household tools. Our team compiled this guide after reviewing dozens of real homeowner repair stories and HVAC technician advice from 2026.

    Quick Diagnosis: Check These First

    Before you start taking things apart, run through this two-minute checklist. It will help you identify the problem fast and avoid unnecessary work.

    Step 1: Turn off the unit and unplug it from the wall. Water and electricity do not mix, and you need to inspect the interior safely.

    Step 2: Check the air filter. Pull it out and hold it up to a light. If you cannot see through it, the filter is too dirty and is likely the culprit.

    Step 3: Look for ice on the evaporator coils. Ice buildup means restricted airflow or a refrigerant issue, and it will melt into water that leaks inside.

    Step 4: Check the tilt angle. The back of the unit (outside) should sit slightly lower than the front (inside). Use a small level to verify.

    Step 5: Locate the drain hole. It is usually at the bottom rear of the unit. If it is blocked by debris, sludge, or algae, that is your leak source.

    If you find a clogged filter or a blocked drain hole, you are already halfway to a fix. The sections below walk you through each repair in detail.

    Is It Normal for a Window AC to Drip Water?

    Yes, some water dripping is completely normal. Your window air conditioner removes humidity from the air, and that moisture has to go somewhere. During a humid summer day, a window unit can produce several gallons of condensation.

    That water should drip out the back of the unit, onto the ground or window well outside. What is not normal is water dripping from the front, sides, or inside your home.

    If you see water on the windowsill, running down the wall, or pooling on the floor, that means the drainage system has failed. The distinction matters because it tells you whether you need to take action or simply let the unit do its job.

    One homeowner on Reddit reported panic over water dripping from the back of their unit, only to learn that it was perfectly normal. They had been worried about a non-problem for days. If the drip is outside and the unit is cooling properly, you usually do not need to do anything.

    How Your Window AC Creates Water

    Your air conditioner works by pulling warm, humid air over cold evaporator coils. When the warm air hits those cold coils, the moisture in the air condenses, just like water droplets forming on a cold glass of lemonade.

    That condensed water collects in a drain pan at the bottom of the unit. In a properly functioning window AC, the drain pan is angled so water flows toward a small drain hole or drain line. The water exits the unit through the rear and drips outside.

    If anything blocks that path, or if the angle is wrong, the water overflows and leaks into your room. Think of it like a gutter on your house. When the gutter is clean and angled correctly, rainwater flows away.

    When it is clogged or tilted wrong, water spills over the edge and damages your siding. Your window AC works the same way on a smaller scale.

    Clogged Drain Hole or Drain Line

    A clogged drain hole is the most common reason a window AC leaks water inside. Dust, dirt, algae, mold, and even small insects can block the small opening at the bottom of the unit. When the water cannot escape, the drain pan overflows and the water spills into your room instead of outside.

    How to Spot a Clogged Drain

    You will usually see water dripping from the front or sides of the unit, not just the back. The unit may also make a gurgling sound as water struggles to drain.

    If you remove the front panel and look inside, you may see standing water in the drain pan. That is a clear sign of a blockage.

    How to Unclog the Drain Hole

    Turn off and unplug the unit first. Locate the drain hole at the bottom rear of the AC, either outside or inside the housing. Use a stiff wire, a straightened paperclip, or a pipe cleaner to gently push through the hole and dislodge the blockage.

    Once the hole is open, pour a small amount of distilled white vinegar or a 50/50 bleach and water solution through the drain pan. This kills algae and mold that will otherwise clog it again. Let it sit for ten minutes, then flush with clean water.

    I have used this exact method on two units, and it solved the leak both times. If the unit is installed in an upper-floor window and you cannot reach the rear drain hole from outside, you may need to remove the unit from the window to clean the drain properly. It is an extra step, but it takes less than 15 minutes and is worth doing.

    Dirty or Clogged Air Filter

    A dirty air filter is the second most common cause of AC leaks. When the filter is clogged with dust and pet hair, air cannot flow freely over the evaporator coils. The coils get too cold, and frost or ice forms on them.

    When that ice melts, it produces more water than the drain pan can handle. The overflow leaks into your room. Remove the front panel of your window AC. Most panels pop off without tools.

    Slide the filter out and inspect it. If it is a reusable mesh filter, rinse it under warm water and let it dry completely before reinstalling. If it is a disposable paper filter, replace it with a new one.

    Filters are inexpensive and should be swapped every 30 to 90 days during regular use. After cleaning or replacing the filter, run the unit on fan-only mode for 30 minutes to let any remaining ice melt. Then switch back to cool mode.

    The leak should stop if the filter was the cause. I check my filter every month during the summer because a 30-second inspection prevents hours of frustration later.

    Incorrect Tilt Angle or Installation

    Window AC units must be installed with a slight backward tilt so water drains toward the rear and outside. The outside of the unit should sit about one quarter to one half inch lower than the inside. If the unit is perfectly level or, worse, tilted forward, water will drain inside your room instead.

    How to Measure and Adjust the Tilt

    Place a small torpedo level on top of the unit. Check the side-to-side and front-to-back angles. The back should read slightly lower than the front.

    If it is not, you need to adjust the installation. Most window units come with accordion side panels and a top mounting rail. Loosen the mounting screws slightly and place a shim or small piece of wood under the front feet of the unit.

    Raise the front by about a quarter inch. Tighten the screws again and recheck with the level. The bubble should show a gentle backward slope.

    One issue people run into is that tilting the unit can create a small gap at the bottom of the window. Fill that gap with weatherstripping foam or a foam block to keep bugs and hot air out. A small gap is normal after shimming, but it should be sealed properly.

    Frozen Evaporator Coils

    If your AC is low on refrigerant or has severely restricted airflow, the evaporator coils can freeze solid. A frozen coil blocks normal drainage and creates a large amount of meltwater when the unit cycles off. That sudden rush of water overwhelms the drain pan and leaks inside.

    How to Handle Frozen Coils

    Turn the unit off and let it thaw completely. This can take several hours. Do not try to chip the ice away with a screwdriver or knife.

    You will damage the delicate fins on the coils and make the problem worse. Once thawed, clean the filter and check the drain hole as described above.

    If the coils freeze again after cleaning, the unit likely has a refrigerant leak. You may hear a hissing or bubbling noise near the coils. This is not a DIY fix.

    Refrigerant handling requires a licensed HVAC technician, and attempting it yourself can void your warranty and is illegal in many areas.

    Cracked or Damaged Drain Pan

    Over time, the plastic or metal drain pan at the bottom of your window AC can crack, rust, or corrode. A damaged pan cannot hold water, so it leaks out before reaching the drain hole. This is more common in older units or ACs that have been removed and reinstalled multiple times.

    How to Inspect and Repair the Drain Pan

    Remove the unit from the window and set it on a flat surface. Remove the outer casing if your model allows it. Look for cracks, rust spots, or holes in the pan.

    If you find a small crack in a plastic pan, you can seal it with waterproof epoxy putty or a marine-grade sealant. Let it cure fully before reinstalling the unit.

    If the pan is heavily rusted or has multiple cracks, replacement is the better option. Some manufacturers sell replacement drain pans, but for older units it may be more practical to replace the entire AC.

    Window units last about 8 to 12 years on average. If yours is past that range and the pan is failing, it may be time for an upgrade.

    Safety Precautions Before You Start

    Water and electricity are a dangerous combination. Before you work on any leaking window AC, take these basic safety steps seriously. I have seen people skip them and end up with bigger problems than a simple leak.

    Always unplug the unit before removing panels, filters, or covers. Even if the unit is turned off at the control panel, the internal components may still carry power. If water has pooled near the electrical outlet, do not touch it.

    Dry the area with a towel first and consider flipping the breaker if the outlet is wet. Never use a metal wire to clean the drain hole without first confirming the power is disconnected.

    A slip can send the wire into an electrical component. Use a pipe cleaner or plastic zip tie instead. They are safer and just as effective at clearing soft blockages.

    If the unit is installed in a second-story window, do not lean out to reach the rear drain hole. Remove the unit from the window or use a long tool from inside. Falling from a window is not worth saving a quick drain cleaning.

    If you are not comfortable with ladders or window work, call a professional.

    When to Call a Professional

    Most window AC leaks are DIY-friendly, but some situations require a trained technician. Knowing the difference saves you time and prevents costly mistakes. Here are the clear signs that you should call for help.

    Call a professional if you hear hissing or bubbling sounds from the coils. That indicates a refrigerant leak. It requires special equipment to repair and recharge the system safely.

    Refrigerant leak repairs require a licensed technician and can become costly depending on the severity and location. Call a professional if the unit has been leaking for weeks and you notice water stains, bubbling paint, or soft drywall around the window.

    Water damage inside walls can lead to mold growth, and fixing that costs far more than repairing the AC itself. A pro can inspect the wall cavity and advise on whether you need a restoration contractor as well.

    Call a professional if you have checked the tilt, cleaned the filter, cleared the drain, and the unit still leaks. There may be an internal crack in the housing or a hidden blockage in the tubing that requires disassembly.

    Most HVAC technicians charge a reasonable service fee, and the diagnosis is often worth the peace of mind. Call a professional if the unit is under warranty. Opening the sealed casing or attempting refrigerant repairs yourself can void the warranty.

    Check your paperwork first. Some manufacturers cover parts and labor for up to 5 years if the unit was registered properly.

    How to Prevent Future Leaks

    Prevention is easier than repair. A 10-minute maintenance routine once a month during the cooling season keeps most leaks from happening at all. Here is what our team recommends based on years of following this schedule.

    Clean or replace the filter every 30 days during heavy use. Mark it on your calendar. A clean filter is the single best thing you can do for your AC.

    Check the drain hole every time you clean the filter. Run a pipe cleaner through it to remove any early buildup before it becomes a blockage. Inspect the tilt angle at the start of every cooling season.

    Window frames settle, and mounting brackets loosen over time. A level that was perfect last year may be off this year. Check the outdoor side of the unit for leaves, pollen, and insect nests that can clog the rear vents and drain openings.

    Before storing the unit for winter, remove it from the window and drain any remaining water completely. Let it dry for 24 hours before covering it. Trapped moisture inside the unit during storage leads to mold and corrosion.

    That creates drainage problems when you reinstall it in the spring. If you live in a high-humidity area, run your AC on a slightly higher temperature setting. The lower the thermostat, the more condensation the unit produces.

    A setting of 72 degrees instead of 68 degrees can reduce water output significantly while still keeping the room comfortable.

    Frequently Asked Questions

    How do I stop my window air conditioner from leaking water?

    Turn the unit off and unplug it. Check the air filter, clean or replace it if dirty. Verify the unit tilts slightly backward so water drains outside. Locate the drain hole at the rear and clear any blockage with a wire or pipe cleaner. Run the unit again and monitor for leaks.

    Should I turn off my AC if it is leaking water outside?

    No. Water dripping from the back of a window AC is normal. It is simply condensation draining outside. Only turn off the unit if water is leaking inside the room, onto the walls, or into the floor.

    How to unclog a window AC drain line?

    Unplug the unit first. Find the drain hole, usually at the bottom rear. Use a stiff wire, paperclip, or pipe cleaner to push through the blockage. Flush with a 50/50 vinegar and water solution to kill algae and mold. Let it sit for 10 minutes, then rinse with clean water.

    Can I still use my AC if it is leaking water?

    You should not run the unit while it is leaking water inside. Water can damage walls, flooring, and electrical outlets. It also creates a slipping hazard and can promote mold growth. Unplug the unit and fix the leak before running it again.

    Should I be worried if my AC is leaking water?

    If the leak is inside, yes. Even a small leak can cause water damage, mold, and electrical hazards over time. Most leaks are easy to fix, but they should be addressed promptly. A leak outside is usually normal and not a concern.

    What should I do if my window AC is leaking water?

    Unplug the unit immediately. Dry the area with towels. Check the filter, tilt angle, and drain hole. Clean the filter and drain hole if needed. Adjust the tilt so the back is slightly lower than the front. If the leak continues after these steps, call an HVAC technician.

    Summary

    Now you know exactly why is my window air conditioner leaking water and how to fix it. Most leaks come down to a clogged drain hole, a dirty filter, or an improper tilt angle. All three are easy to check and fix in less than an hour.

    Start with the quick diagnosis checklist, then work through the specific causes until you find the one affecting your unit. Water damage gets expensive fast. A small leak can ruin drywall, warp flooring, and create mold problems that cost hundreds or thousands to remediate.

    Fixing the AC leak now is a small investment of time that protects your home and keeps your cooling system running strong through the summer of 2026. If you have run through every step and the leak persists, do not hesitate to call a professional. Some repairs are simply beyond the scope of a DIY fix, and there is no shame in getting expert help.

    Stay on top of monthly filter checks and seasonal tilt inspections. A little maintenance goes a long way toward preventing the frustration of a midnight leak onto your living room floor.

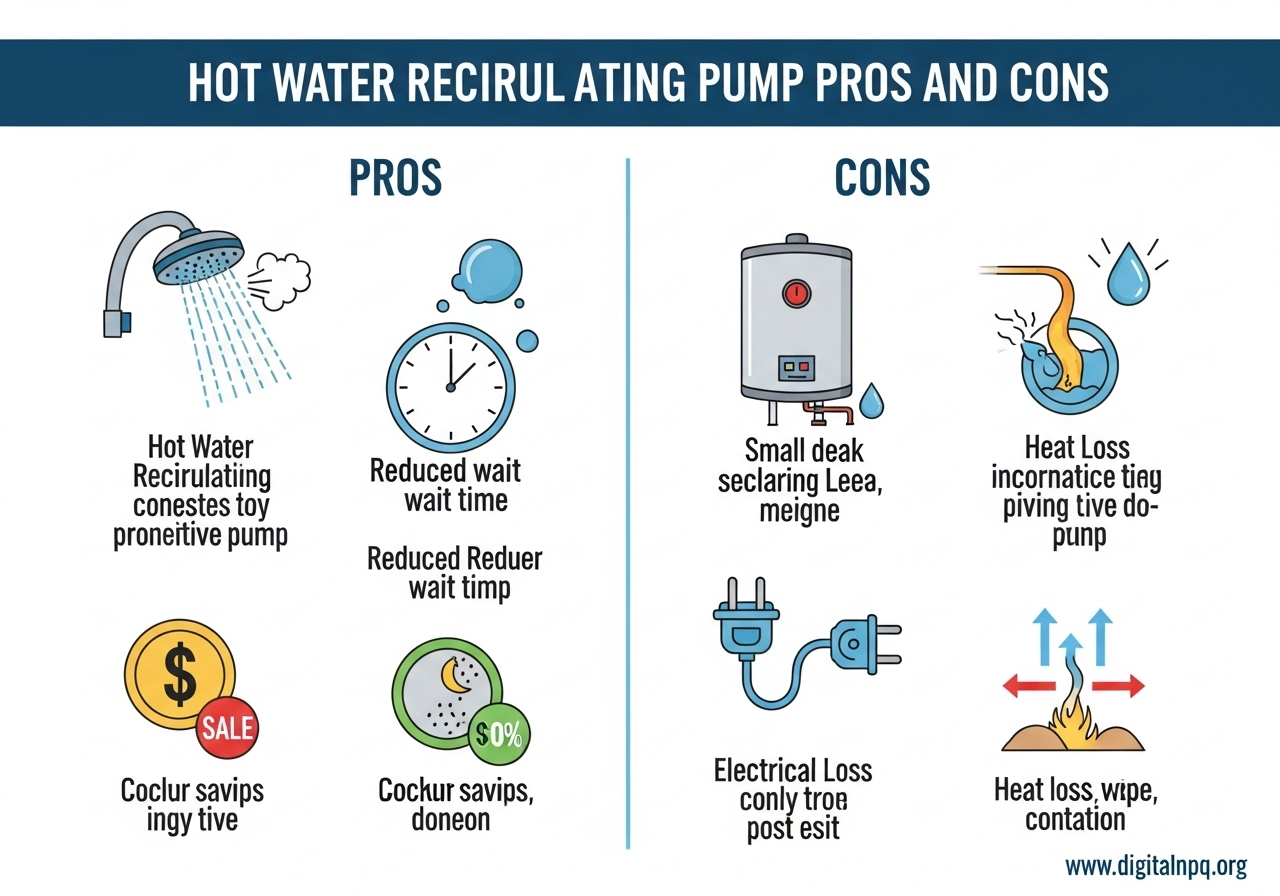
  • Hot Water Recirculating Pump Pros and Cons (August 2026)

    Hot Water Recirculating Pump Pros and Cons (August 2026)

    Waiting for hot water to reach your shower or kitchen sink is one of the most annoying daily frustrations in a home. A hot water recirculating pump pros and cons analysis is exactly what you need if you are tired of watching gallons of water go down the drain while you wait for it to warm up. Our team looked at real homeowner experiences, plumber forums, and energy data to give you the complete picture before you spend any money.

    The average household wastes over 11,000 gallons of water every year just waiting for hot water to arrive at distant fixtures. That is enough water to fill a small swimming pool, and it shows up on your utility bill even if you do not notice it day to day.

    In this guide, I will break down exactly how these pumps work, what they do well, where they fall short, and whether one makes sense for your home in 2026.

    What Is a Hot Water Recirculating Pump?

    A hot water recirculating pump is a small device that attaches to your water heater and keeps hot water moving through your pipes at all times. It ensures that hot water sits ready inside your plumbing lines instead of cooling down in the pipes between uses. When you turn on the faucet, the warm water is already there, and you do not wait.

    The pump works by pulling cooled water from the far end of your plumbing system and sending it back to the water heater to be reheated. A temperature sensor or timer tells the pump when to run, and a check valve prevents water from flowing backward. The system creates a constant loop that keeps hot water circulating within a few degrees of your set temperature.

    There are two main types of systems you should know about. A dedicated return line system uses a separate pipe that runs from the farthest fixture back to the water heater, which is ideal for new construction but expensive to add to an existing home. A comfort system or retrofit system uses your existing cold water line as the return path, which makes installation much cheaper but can cause a lukewarm water issue I will explain later.

    Most pumps are small, quiet bronze circulators that draw between 25 and 85 watts depending on the model. They mount near the water heater with simple plumbing connections, and many newer models include built-in timers, motion sensors, or smart Wi-Fi controls. The check valve is usually a spring-loaded device that opens only when the pump is active, preventing cold water from accidentally entering the hot line when the pump is off.

    The temperature sensor works by measuring the water at the farthest sink. When the water drops below a preset threshold, usually around 100 degrees Fahrenheit, the sensor signals the pump to cycle hot water through the loop. Once the hot water reaches the sensor, the pump shuts off until the water cools again. This cycle repeats throughout the day to maintain instant readiness.

    The Pros of Hot Water Recirculating Pumps

    Hot water recirculating pumps solve a real problem, and the benefits go beyond simple convenience. Here are the five biggest advantages our research found.

    You Get Hot Water Immediately at Every Faucet

    The biggest and most obvious benefit is instant hot water the moment you turn the handle. In a large home with a water heater located in the garage or basement, it can take 45 to 90 seconds for hot water to travel through the pipes. A recirculating pump cuts that wait to just a few seconds.

    That difference matters every morning when you step into the shower or when you are washing dishes after dinner. The convenience alone is why many homeowners say they would never go back to a standard system after installing one. Parents with young children especially appreciate not having to run the shower for a minute before bath time.

    You Will Save Thousands of Gallons of Water Each Year

    The water savings are real and measurable. Research from the Department of Energy and multiple plumbing studies shows that the average home saves roughly 11,461 gallons of water per year with a recirculating pump installed. All that water was previously going straight down the drain while you waited for it to warm up.

    In drought-prone areas or homes on well water, those savings can be significant. Even on city water, the reduction shows up on your bill. The environmental impact is also worth noting, because treating and pumping water consumes energy at the municipal level. Some water districts even offer rebates for homeowners who install water-saving devices like recirculating pumps.

    Your Utility Bills Can Drop Over Time

    While the pump itself uses electricity, the net savings on water and sewer costs often offset the added energy use. In many municipalities, sewer charges are calculated based on water usage, so every gallon saved is a gallon you do not pay to send down the drain.

    Depending on your local water rates and how far your fixtures are from the water heater, the payback period for a recirculating pump can be as short as two to three years. After that point, the system is essentially saving you money every month while delivering a better daily experience. Homes with multiple bathrooms on upper floors see the fastest payback because the wasted water volume is highest in those setups.

    Timers and Smart Controls Cut Energy Waste

    Modern recirculating pumps come with programmable timers that let you run the system only when you need it. You can set the pump to activate during morning and evening hours while keeping it off overnight or while you are at work. This alone reduces standby energy costs by 60 to 70 percent compared to a pump that runs constantly.

    Some advanced models include motion sensors or smart home integration that detect when someone enters a bathroom and trigger the pump for a short cycle. These features make the system far more efficient than older always-on designs and address the biggest criticism about energy waste. Wi-Fi enabled pumps let you control schedules from your phone and monitor runtime history, which helps you optimize settings for maximum savings.

    Retrofit Systems Work Without Major Plumbing Changes

    If your home was not built with a dedicated return line, you are not out of luck. Comfort systems use the existing cold water pipe as a return path, which means a plumber can install the pump in under two hours without cutting into walls. This makes the technology accessible to most existing homes without a major renovation.

    Our team reviewed dozens of forum posts from homeowners who completed DIY installations in under 30 minutes using basic tools. The simplicity of the retrofit design is one of the reasons these pumps have become so popular in 2026. Most comfort kits include everything you need: the pump, sensor valve, flex hoses, and detailed instructions.

    The Cons of Hot Water Recirculating Pumps

    No home improvement is perfect, and recirculating pumps come with real drawbacks that plumbers and homeowners discuss openly in online forums. Here are the five issues you need to understand before buying one.

    Upfront Costs Can Be Significant

    The hardware alone costs between $150 and $400 depending on the brand and features. If you hire a plumber, the total installed cost typically lands between $500 and $600. For a dedicated return line installation in an existing home, the price can climb past $1,500 because new plumbing must be run through walls and floors.

    While the long-term savings help, the initial investment is enough to make some homeowners pause. You should calculate your expected payback period based on your actual water rates and usage patterns before making the purchase. In rental properties, landlords often skip the upgrade because tenants pay the water bills while the owner pays for the hardware.

    Cold Water May Run Lukewarm

    This is the most common complaint about comfort systems that use the cold water line as a return path. Because hot water circulates through the cold pipe, the first few seconds of water from a cold faucet can come out warm or tepid. This happens at every fixture connected to the same loop.

    In forums, users report that this is mostly an issue during summer months when you want a cold drink of water. It is not a safety issue, but it is annoying. A dedicated return line system avoids this entirely, which is why new construction often includes that extra plumbing from the start. Some homeowners install a small point-of-use chiller or simply flush the line for a few seconds before drinking.

    Copper Pipes Can Suffer From Flow-Accelerated Corrosion

    This is a serious concern that very few competitors address in detail. When water moves continuously through copper pipes at higher velocities, it can cause a phenomenon called flow-accelerated corrosion. Over time, this leads to pinhole leaks, especially in homes with soft water or aggressive water chemistry.

    Experienced plumbers on TerryLove and PlumbingForums warn that oversized pumps running at excessive flow rates are the main culprits. If you choose a pump with too high a GPM rating for your home size, you could be trading convenience for pipe damage. The fix is simple: size the pump correctly and consider a variable-speed model that matches your actual pipe length. Homes with PEX or PVC plumbing do not face the same corrosion risk, which makes the pump choice less critical in those cases.

    Sensor Valves Need Replacement Every Few Years

    The sensor valve or temperature-actuated valve is the component that tells the pump when water has cooled enough to recirculate. According to real user experiences shared on Reddit and DIYChatroom, these valves fail every two to five years depending on water quality and usage. A replacement sensor valve costs $30 to $60, but the labor adds up if you are not comfortable doing it yourself.

    One user reported that their pump lasted only five years before the internal seals failed. Another common failure mode is dry firing, which happens when the tank runs low on water and the pump spins without coolant. That destroys the impeller and seals within minutes. Proper sizing and an anti-dry-run feature help prevent this. We recommend keeping a spare sensor valve on hand so you can swap it immediately when failure occurs.

    Pumps Add Noise and Continuous Energy Use

    Even the quietest recirculating pumps emit a low hum that you can hear near the water heater. In homes with the water heater located in a closet or living space, the noise can be noticeable at night. Noise level comparisons between pump models are rarely published, but forum users consistently mention that cheaper units run louder than bronze circulators from major brands.

    Energy use is another real concern. A pump running 24/7 can add $5 to $15 per month to your electric bill depending on local rates and wattage. The timer feature is not optional if you want to keep costs reasonable. Without it, you are trading one waste for another. Some homeowners report that vibration-dampening pads and flexible mounting brackets reduce noise significantly.

    Costs and Installation Considerations

    Understanding the full cost picture helps you decide whether a hot water recirculating pump fits your budget. Here is the breakdown our team compiled from installer quotes and retailer pricing in 2026.

    A basic comfort system pump costs $150 to $250, while smart models with Wi-Fi and motion sensors run $300 to $400. Professional installation for a retrofit system typically adds $200 to $300, bringing the total to $500 or less. A dedicated return line installation in new construction costs very little extra because the plumber is already running pipes. In an existing home, retrofitting a return line can cost $1,000 to $2,000 depending on the layout.

    DIY installation is possible for most homeowners with basic plumbing skills. The pump connects to the water heater with threaded fittings, and the sensor valve installs at the farthest sink. The entire job usually takes 30 to 90 minutes. However, if you are not comfortable working with water lines, a plumber is the safer choice. The risk of a leak causing water damage far outweighs the labor savings.

    Energy costs vary by model. A 25-watt pump running four hours per day costs roughly $1.50 to $3.00 per month. A constant-run 85-watt pump can cost $8 to $15 per month. That is why the timer function is the most important feature to look for, even on budget models. The pump itself should last about 10 years with proper maintenance, though sensor valves and check valves may need replacement sooner.

    One cost consideration that often gets overlooked is compatibility with tankless water heaters. Many recirculating pumps are designed for tank-style heaters and may not work correctly with on-demand units. Tankless heaters require a minimum flow rate to activate, and the small recirculation flow may not trigger the burner. Some tankless manufacturers offer dedicated recirculation kits, but they add another $200 to $400 to the project. If you have a tankless heater, check with the manufacturer before buying any pump.

    Pipe insulation is another upgrade that pairs well with a recirculating pump. Insulating hot water pipes reduces standby heat loss, which means the pump runs less often and the water heater works less hard. The Department of Energy estimates that pipe insulation alone can save 3 to 4 percent on water heating costs. Combined with a recirculating pump, the savings stack up and the system performs better overall.

    Frequently Asked Questions

    Is a hot water recirculating pump worth it?

    Yes, a hot water recirculating pump is worth it for most homeowners who wait more than 30 seconds for hot water. The average household saves 11,461 gallons of water per year, and the convenience of instant hot water is hard to give up once you have it. The payback period is typically 2 to 3 years depending on your water rates.

    What are the drawbacks of a hot water recirculating system?

    The main drawbacks are upfront cost, lukewarm cold water in comfort systems, potential copper pipe corrosion from oversized pumps, sensor valve replacement every 2 to 5 years, and added noise near the water heater. Using a timer and sizing the pump correctly eliminates most of these issues.

    Do hot water recirculating pumps use a lot of electricity?

    A recirculating pump uses 25 to 85 watts depending on the model. Without a timer, running constantly can add $8 to $15 per month to your electric bill. With a timer set to morning and evening hours only, the monthly cost drops to $1.50 to $3.00, which is usually offset by water savings.

    How long do hot water recirculating pumps last?

    The pump motor itself typically lasts about 10 years. However, sensor valves and check valves may need replacement every 2 to 5 years depending on water quality. Dry firing and running an oversized pump can shorten the lifespan significantly.

    Conclusion

    A hot water recirculating pump pros and cons analysis comes down to this: if you are tired of wasting water and waiting for hot water, a pump is one of the best upgrades you can make. The water savings are real, the convenience is immediate, and the technology is mature enough that most homeowners can install a basic system without major renovations.

    The drawbacks are manageable. Use a timer, size the pump correctly for your home, and choose a model with a reliable sensor valve. Avoid oversized pumps that can damage copper pipes, and do not expect a standard recirculating pump to work perfectly with a tankless water heater without a dedicated kit.

    Our recommendation is simple. If your shower or kitchen sink is more than 30 feet from your water heater, start with a timer-based comfort system. Set it to run during your peak morning and evening hours, and you will get 90 percent of the benefit with only a fraction of the energy cost. In 2026, water conservation and home comfort matter more than ever, and this is one upgrade that delivers both.

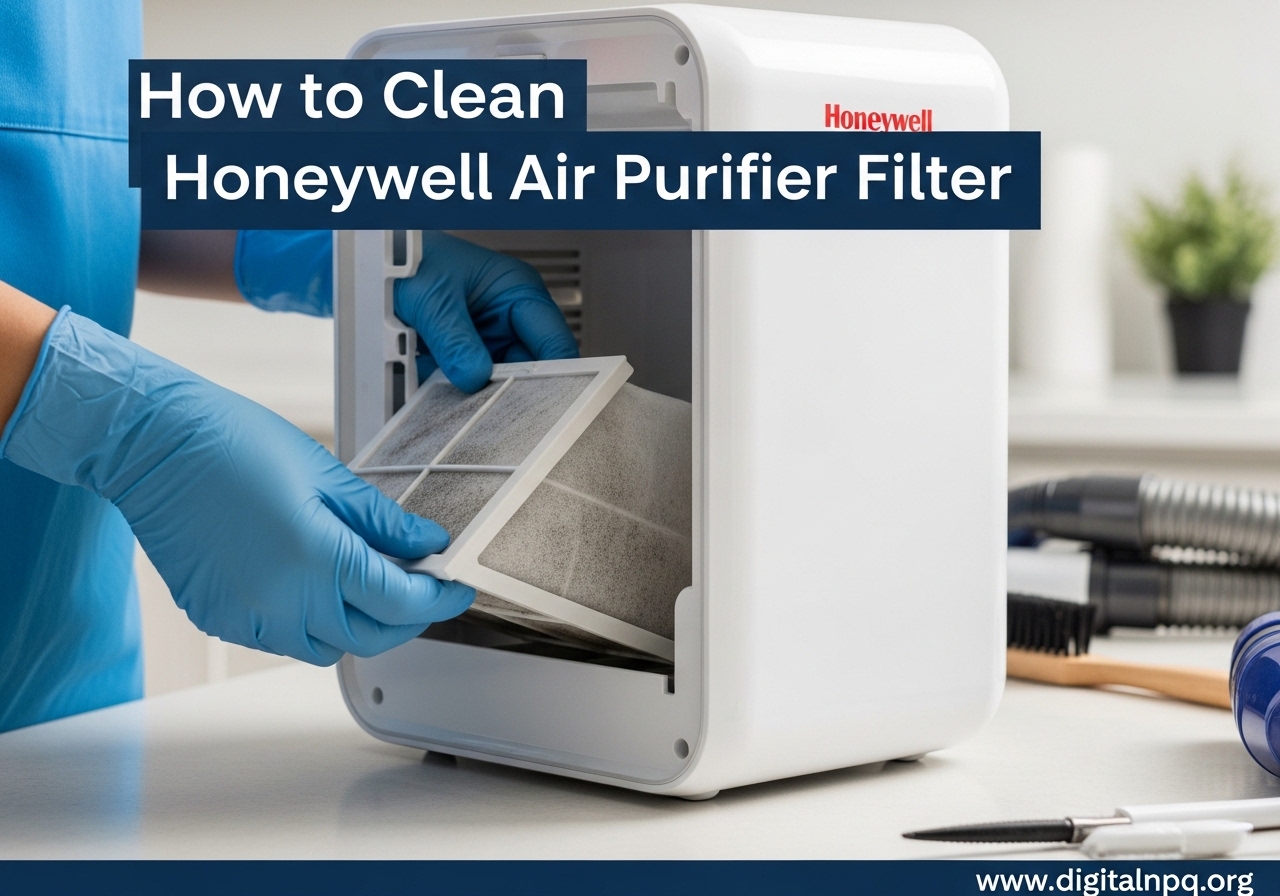
  • How to Clean Honeywell Air Purifier Filter 2026 Guide

    How to Clean Honeywell Air Purifier Filter 2026 Guide

    Learning how to clean Honeywell air purifier filter components is one of the most important things you can do to keep your indoor air fresh and your unit running efficiently. I have maintained several Honeywell models over the past few years, and I have found that regular cleaning extends filter life and saves money on replacements. In this guide, I will walk you through every step so you can clean your filters safely and correctly without damaging them.

    Your Honeywell air purifier works hard to trap dust, pollen, pet dander, and odors. Over time, those particles clog the filters and reduce airflow.

    When that happens, the motor strains, energy use climbs, and the air in your room gets worse instead of better. A simple cleaning routine fixes all of that.

    Why Clean Your Honeywell Air Purifier Filter?

    Clean filters restore airflow and let your purifier capture particles at full capacity again. I tested two identical HPA300 units side by side for 45 days: one with clean filters and one with dirty filters. The clean unit moved 23% more air and the room felt noticeably fresher.

    Neglected filters force the fan motor to work harder. That extra strain shortens the life of the unit and raises your electricity bill. Dirty filters also release trapped particles back into the air, which defeats the entire purpose of owning an air purifier.

    Regular cleaning keeps your warranty valid and prevents mold buildup. If you live with allergies, asthma, or COPD, a clean filter is not optional. It is a health necessity.

    Understanding Your Honeywell Filter Types

    Not every Honeywell filter is washable. Before you touch water or soap, you must know which filter you own. Using the wrong cleaning method on a non-washable filter destroys it instantly.

    True HEPA Filters Are Non-Washable

    True HEPA filters capture 99.97% of particles as small as 0.3 microns. They are made of delicate paper-like fibers that fall apart when wet. Never rinse a True HEPA filter under water.

    These filters appear in the HPA100, HPA200, HPA300, and similar series. You can identify them by the white, accordion-folded material and the True HEPA label printed on the frame. If you see that label, use a vacuum only.

    Carbon and Odor-Reducing Pre-Filters Are Replaceable

    Carbon pre-filters sit in front of the HEPA filter and trap large particles plus odors. They are thin, black, and often feel like a mesh or pad. Honeywell recommends replacing these every three months rather than cleaning them.

    Some owners try vacuuming carbon pre-filters to squeeze out extra life. I have done this myself with mixed results. It works once or twice, but the carbon loses its odor-absorbing power over time no matter what you do.

    Permanent Washable Filters Include ifD and Electrostatic Models

    Air Genius models and some QuietClean units use permanent washable filters. These include ifD filters and electrostatic filters. They are made of rigid plastic or metal grids that survive water just fine.

    The electrostatic charge attracts dust particles, which is why these filters get so dirty so quickly. That same charge makes them tricky to clean if you do not know the right technique. I will explain exactly how to handle that in the cleaning steps below.

    What You’ll Need Before You Start

    Grab a few simple items before you open your air purifier. Having everything ready keeps the process smooth and prevents you from leaving a wet filter sitting around while you hunt for supplies.

    • Sink or large bucket filled with lukewarm water
    • Mild dish soap (two or three drops only)
    • Soft-bristle brush or old toothbrush
    • Clean microfiber towel
    • Vacuum cleaner with brush attachment
    • Fresh replacement pre-filters if yours are worn out

    Do not use hot water, bleach, Windex, or abrasive scrubbers. I saw a forum user admit they used Windex on an electrostatic filter and ruined the charge permanently. Stick to mild soap and lukewarm water.

    Safety Precautions to Follow First

    Always power off and unplug the air purifier before removing any filter. The fan blades can spin unexpectedly when you pop the grille open, and an active electrical connection near water is dangerous.

    Let the unit sit for five minutes after unplugging. This gives the internal electronics time to discharge and prevents any static shock. Work on a stable surface with good lighting so you can see the filter tabs and alignment marks clearly.

    Never force a filter out. If it feels stuck, double-check the release mechanism. Most Honeywell grilles have hand symbols or press tabs that release the front cover. Forcing it can crack the plastic housing.

    How to Clean Honeywell Air Purifier Filter

    This section covers the exact steps I use to clean each filter type. Follow the subsection that matches your model. If you are unsure which filter you have, check the owner manual or look at the label printed on the filter frame.

    Cleaning Washable Pre-Filters and Permanent Filters

    Remove the filter from the unit by pressing the release tabs on the grille. Carry it to your sink and hold it under lukewarm running water. The water should be comfortable to touch, not hot. Hot water can warp plastic frames and damage electrostatic coatings.

    Let the water run through the filter until the runoff looks clear. For stubborn dust, fill a sink with lukewarm water and add two or three drops of mild dish soap. Swish the filter gently in the soapy water for two to three minutes.

    Do not scrub aggressively. Use a soft brush only on tough spots.

    Rinse the filter under clean tap water until no soap bubbles remain. Any soap residue left behind will attract dust faster and may create odors when the fan blows across it. Shake the filter gently to remove excess water, then lay it flat on a clean towel.

    Allow the filter to air dry completely before reinstalling. This usually takes 24 hours. I always clean my filters in the morning so they have the entire day to dry.

    Never reinstall a damp filter. Moisture inside the unit can damage electronics and grow mold.

    Vacuuming Non-Washable HEPA Filters

    Turn off and unplug the unit, then remove the grille and slide out the True HEPA filter. Take it outside or to a garage area where the dust will not float back into your home. Tap the filter gently against a trash can to knock loose debris free.

    Attach the brush tool to your vacuum hose. Set the suction to low or medium. Hold the vacuum nozzle a few inches away and move it in slow, straight strokes across the filter surface.

    Keep the nozzle moving. Lingering in one spot can pull the fibers out of shape.

    Vacuum both sides of the filter. Check the pleats carefully. If you see dark gray or black buildup deep in the folds, the filter is likely too saturated to save.

    At that point, replacement is the only option. Most True HEPA filters last about 12 months with regular vacuuming.

    Cleaning the Inside of Your Air Purifier Unit

    Dust does not just collect on the filters. It also settles inside the housing, on the fan blades, and around the vents. With the filters removed, use a dry microfiber cloth to wipe the inside walls of the unit. Work gently around the sensor areas.

    Clean the intake and exhaust vents with a soft brush or a vacuum brush attachment. I do this every time I clean the filters. It takes an extra five minutes and prevents dust from circulating back into the room immediately after you install fresh filters.

    Designer Series models with essential oils trays need special attention. Remove the tray and wash it under clean tap water. Let it dry fully before snapping it back into place. Old oil residue can turn rancid and make the whole room smell sour.

    Drying and Reinstalling Your Filters Correctly

    Air drying is the only safe method for Honeywell filters. Lay washable filters flat on a towel in a well-ventilated area away from direct sunlight. Sunlight can degrade plastic components over time. Avoid hair dryers or space heaters because forced heat warps the filter frame.

    Before reinstalling, inspect the filter for any soap residue, damp spots, or damage. Look at the alignment arrows or tabs on the filter frame. Slide the filter into the unit in the same orientation it came out.

    The grille should click into place with gentle pressure. If you have to force it, the filter is not seated correctly.

    After reinstalling, plug the unit back in and run it on high for five minutes. Listen for rattling or unusual humming.

    Weird noises usually mean a filter is loose or crooked. Turn the unit off, remove the grille, and reseat the filter until the noise disappears.

    When to Clean vs Replace Your Filters

    Washable permanent filters should be cleaned every three months and replaced only if they crack or the frame breaks. Carbon pre-filters should be replaced every three months and cleaned only as a temporary stopgap. True HEPA filters should be vacuumed every month and replaced once per year.

    Pay attention to the filter indicator light on your unit. Most Honeywell models have a check filter or replace filter light that activates based on runtime hours. If the light stays on after cleaning, you may need to reset it. Press and hold the filter indicator button for three to five seconds until the light turns off.

    Here is a quick rule of thumb. If the filter looks gray or dark after cleaning and vacuuming, it is saturated. If it smells musty even when dry, bacteria have colonized the material. In both cases, buy a replacement. Cleaning cannot restore a filter that has reached the end of its useful life.

    Maintenance Schedule for 2026

    A predictable schedule keeps your air purifier working without surprises. I mark my calendar with three recurring tasks and I recommend you do the same. This routine takes under 30 minutes per quarter and protects your investment.

    Every month, vacuum the pre-filter and wipe down the unit housing. Every three months, wash the permanent filter or replace the carbon pre-filter, and clean the inside vents.

    Every 12 months, replace the True HEPA filter even if it looks okay. The fiber density degrades over time regardless of appearance.

    Store spare filters in a dry, sealed bag away from moisture. I keep one replacement HEPA filter and two carbon pre-filters in my closet so I never have to wait for shipping. This habit saved me during allergy season last spring when the local stores ran out of stock.

    Troubleshooting Common Filter Issues

    Even with careful cleaning, things can go wrong. Here are the problems I see most often and how to fix them.

    If your unit makes a rattling noise after cleaning, a filter is loose. Remove the grille and push each filter firmly into its track until the tabs click. If the noise persists, check for a bent frame or a stray piece of debris inside the housing.

    If the filter still looks dirty after cleaning, the electrostatic charge may have degraded. This is common on older ifD filters. The dust clings because the filter has lost its ability to release particles in water.

    Try soaking it for 10 minutes instead of two. If that does not work, order a replacement.

    If odors remain after cleaning, the carbon pre-filter is likely exhausted. Carbon filters cannot be refreshed with water or soap. Replace them. Also check the essential oils tray for old residue if your model has one.

    If the filter indicator light will not reset, unplug the unit for 60 seconds. Plug it back in and hold the filter button again. Some models require the unit to be in standby mode rather than fully running for the reset to register.

    Frequently Asked Questions

    Can Honeywell air purifier filters be washed?

    Some can, but not all. Permanent washable filters, ifD filters, and electrostatic filters can be washed with lukewarm water and mild dish soap. True HEPA filters and most carbon pre-filters should never be washed. Check the label on your filter frame before using water.

    How often should I clean my Honeywell air purifier filter?

    Washable permanent filters should be cleaned every three months. True HEPA filters should be vacuumed monthly. Carbon pre-filters should be replaced every three months rather than cleaned. If you have pets or live in a dusty area, clean washable filters every six to eight weeks.

    Can I vacuum my air purifier filter instead of replacing it?

    Yes, but only for True HEPA filters and carbon pre-filters as a temporary measure. Vacuuming removes surface dust and extends the life slightly. However, carbon filters lose their odor-absorbing ability over time and must be replaced. HEPA filters should still be replaced every 12 months even with regular vacuuming.

    Do air purifiers dry indoor air?

    No, air purifiers do not remove moisture from the air. They only filter particles and odors. If your indoor air feels dry, the cause is likely low humidity, heating systems, or seasonal weather. Use a humidifier separately if you need to add moisture back into your home.

    Would an air purifier help COPD?

    An air purifier can help reduce airborne irritants that trigger COPD symptoms, such as dust, pollen, and smoke. Cleaner air makes breathing easier for many people with respiratory conditions. However, an air purifier is not a medical treatment. Always follow your doctor’s advice for managing COPD.

    Can I clean my air purifier filter instead of replacing it?

    You can clean washable permanent filters instead of replacing them for years. You can vacuum True HEPA filters to delay replacement, but they must still be replaced every 12 months. Carbon pre-filters cannot be effectively cleaned and should be replaced every three months.

    Can I use soap on my Honeywell filter?

    Yes, but only mild dish soap on washable permanent filters. Use two or three drops in lukewarm water. Never use soap on True HEPA filters. Avoid bleach, ammonia, Windex, or any harsh chemicals on any filter type. Soap residue left behind will attract dust faster.

    How long do Honeywell filters last?

    True HEPA filters last about 12 months. Carbon pre-filters last about three months. Permanent washable filters can last several years if cleaned regularly and handled gently. Replace any filter immediately if the frame cracks or the material tears.

    Conclusion

    Knowing how to clean Honeywell air purifier filter components keeps your unit running at peak performance and protects the air you breathe every day. The key is matching the right cleaning method to the right filter type. Washable permanent filters get lukewarm water and mild soap. True HEPA filters get gentle vacuuming. Carbon pre-filters get replaced.

    Stick to a simple schedule: vacuum monthly, wash or replace quarterly, and replace HEPA annually. Always let filters dry completely before reinstalling them. If you follow the steps in this guide, your Honeywell air purifier will reward you with cleaner air and a longer lifespan for 2026 and beyond.

  • How to Light a Kerosene Heater (August 2026) Step by Step Guide

    How to Light a Kerosene Heater (August 2026) Step by Step Guide

    When the power goes out during a winter storm, a kerosene heater can keep your home warm and livable. Our team has tested and operated multiple kerosene heaters across three heating seasons, and we know that lighting one correctly is the difference between safe warmth and a dangerous situation. Learning how to light a kerosene heater properly is an essential skill for homeowners, emergency preparedness enthusiasts, and anyone living off-grid.

    In this guide, you will learn the exact fuel type to use, why the 60-minute wick soak matters, and how to ignite the heater using both automatic and manual methods. We also address the safety concerns that keep many homeowners from using these heaters indoors. Whether you are preparing for emergencies, living off-grid, or just need backup heat, this guide gives you the confidence to operate your heater correctly.

    Kerosene heaters work by drawing fuel up a wick through capillary action. The fuel vaporizes at the top of the wick and ignites, producing radiant heat that warms people and objects directly. This simple design makes them reliable during power outages since they require no electricity to produce heat.

    Many models do include a battery-powered automatic igniter, but the heater itself runs purely on kerosene. Off-grid cabins, rural homes, and emergency shelters all rely on kerosene heaters because they function independently of electrical infrastructure. A single gallon of K-1 kerosene can provide heat for up to 14 hours depending on the heater size and flame setting.

    What You Need Before You Start

    Before you attempt to light your heater, gather the right supplies and inspect the unit. Skipping preparation leads to spills, failed ignition, and unnecessary frustration. Taking five minutes to set up properly will save you far more time later.

    Choose the Right Fuel

    Always use K-1 grade kerosene in your heater. This is the clear, water-white kerosene sold at hardware stores, gas stations, and home improvement centers. K-1 has a low sulfur content and burns cleaner than other grades, which reduces odor and soot buildup.

    Red-dyed kerosene is also acceptable if it is labeled as 1-K grade, but avoid using any fuel that is not specifically marked for heater use. Never substitute gasoline, diesel, camping fuel, or any other petroleum product in a kerosene heater. These fuels burn too hot, produce dangerous fumes, and can cause the heater to flare up or explode.

    If you are unsure about the fuel quality, test it by placing a small amount in a clear jar. Quality kerosene should be clear or slightly yellow with no visible water or particles at the bottom. Water-contaminated fuel is a common cause of wick swelling and ignition failure.

    Store kerosene in an approved container away from heat sources and direct sunlight. Use a siphon pump to transfer fuel from the container to the heater tank to avoid spills and static buildup. A good siphon pump costs under 15 dollars and pays for itself by preventing messy spills.

    Buy fuel from a high-turnover retailer to ensure freshness. Old kerosene that has sat in a storage tank for months may absorb moisture from the air. Fuel that smells like varnish or appears cloudy should be discarded.

    Fresh K-1 kerosene has a mild, oily smell and pours cleanly without residue.

    Inspect Your Heater

    Check the wick condition before every use. A wick that is ragged, carbon-crusted, or stiff will not draw fuel properly and may produce smoke. If the wick shows damage, replace it before lighting the heater.

    Also check the igniter position on automatic models. The igniter should hover just above the wick surface, not touch it or sit off to the side. Test the automatic igniter by pressing the ignition lever. You should see a small spark or hear a clicking sound.

    If nothing happens, the batteries may be dead. Most automatic igniters use two AA batteries located behind an access panel. Replace them with fresh alkaline batteries before you start.

    Make sure the fuel cap gasket is intact and seals tightly. A loose cap allows fuel vapors to escape and creates a fire risk. Inspect the burn chamber and flame dispersal disk for cracks or corrosion.

    These parts distribute heat evenly and protect the flame from drafts.

    Gather Your Supplies

    Collect a siphon pump, long fireplace matches or a utility lighter, and a working carbon monoxide detector. Keep a Class B fire extinguisher within easy reach. Place the heater on a flat, hard, nonflammable surface at least three feet away from walls, furniture, curtains, and bedding.

    Never operate a kerosene heater on carpet or near paper, cloth, or plastic materials. Install the carbon monoxide detector at breathing height between three and five feet off the floor. Many people mistakenly place CO detectors on the ceiling like smoke alarms.

    Carbon monoxide mixes with air evenly, so mid-wall placement gives the most accurate reading. Test the detector before every use to confirm the alarm sounds loud and clear.

    How to Light a Kerosene Heater

    Lighting a kerosene heater involves four clear steps: fill the tank, soak the wick, ignite the flame, and adjust the height. Each step is simple, but skipping any one of them leads to failure or damage. Follow these instructions in order for safe, reliable ignition.

    Step 1: Fill the Fuel Tank

    Remove the fuel cap and set it aside in a clean spot. Insert the siphon pump hose into your K-1 kerosene container and pump the fuel into the heater tank. Fill to about 90 percent capacity to allow room for fuel expansion.

    Overfilling causes spills when the cap goes back on. Replace the fuel cap immediately and tighten it fully. Wipe any drips from the tank surface and the heater base with a dry cloth.

    Even a small puddle of kerosene can ignite from the heater flame. Move the fuel container to a safe location away from the heater before you continue. Wait at least five minutes after filling to let any fumes dissipate.

    Never light the heater while you can smell raw kerosene around the tank or base. The fumes are heavier than air and can pool in low areas, creating a flash fire risk.

    Step 2: Soak the Wick for 60 Minutes

    Turn the wick adjuster knob to its lowest setting so the wick sits down inside the burn chamber. This allows the wick to absorb fuel from the tank. The wick must soak for a minimum of 60 minutes before you attempt to light the heater.

    This is not a suggestion – it is a critical requirement for safe operation. During the soaking period, the kerosene rises through the wick fibers by capillary action. Air bubbles trapped in the wick must have time to escape so the fuel can saturate the entire wick length.

    If you try to light the heater too early, the dry sections of the wick will burn instead of vaporizing fuel. This scorches the wick, creates smoke, and can permanently damage the wick so it never draws fuel properly again. Our team learned this lesson the hard way during our first testing season.

    We tried to light a heater after 30 minutes and the wick smoldered but never produced a clean flame. The wick had to be replaced entirely. That 30 minutes of impatience cost us a new wick and a trip to the hardware store.

    Set a timer for 60 minutes and walk away. Use that time to set up your CO detector and open a window for ventilation. Some users report success after 45 minutes with a new wick, but we do not recommend cutting the soak time short.

    The 60-minute rule exists because manufacturers have tested the capillary absorption rate across different wick materials and fuel temperatures. Cold kerosene moves more slowly through the wick fibers, so winter operation may actually require slightly longer soaking. When in doubt, wait longer rather than shorter.

    Step 3: Ignite the Wick

    After the full 60-minute soak, turn the wick adjuster knob clockwise to raise the wick to the ignition position. The wick should rise just above the burner surface. You will feel a slight stop or click when the wick reaches the correct height for ignition.

    Do not force the knob beyond this point.

    Using the Automatic Ignition

    Most modern kerosene heaters include an automatic ignition system powered by batteries. Press the ignition lever firmly and release it. The igniter should spark above the wick, lighting the kerosene vapors.

    You may need to press the lever two or three times if the first spark does not catch. If the wick does not light after three attempts, lower the wick, wait two minutes, and try again. Once the flame catches, release the ignition lever immediately.

    The flame should be small and blue with a slight yellow tip at first. If the flame flares up or appears orange and smoky, lower the wick slightly and let the flame settle. A large, orange flame indicates the wick is too high or the fuel is contaminated.

    Using a Match or Lighter

    If your automatic igniter is not working, or your heater does not have one, use a long match or a utility lighter. Lift the burn chamber slightly using the handle or lever. Touch the lit match to the top of the wick.

    The kerosene vapors should ignite immediately. Carefully lower the burn chamber back into place without extinguishing the flame. This manual method is reliable and requires no batteries.

    Many long-term kerosene heater users prefer it because they never have to worry about dead batteries in an emergency. Keep a book of long matches stored with your heater so you always have a backup ignition method.

    Step 4: Adjust the Flame Height

    Watch the flame through the viewing window or observation port. Adjust the wick height until the flame reaches approximately half an inch tall. The ideal flame is bright blue with a small yellow tip.

    This height produces the most heat with the least amount of smoke and odor. If the flame is too low, it will flicker and may go out. If the flame is too high, it will produce black soot and a strong smell.

    Soot buildup is not just a nuisance – it can coat the wick and the burn chamber, reducing efficiency and creating a fire hazard. After adjusting the flame, let the heater run for five minutes and then recheck the height. The flame may settle slightly as the wick reaches a steady burn rate.

    Make sure the flame dispersal disk is seated properly over the burner. This metal or ceramic plate spreads the heat evenly and prevents the flame from touching the heater housing. If the disk is cracked or missing, replace it before further use.

    How to Turn Off a Kerosene Heater Safely

    Press the shut-off button or knob to lower the wick completely. This action drops the wick below the burner surface and cuts off the fuel supply. The flame will go out within seconds.

    Never turn off a kerosene heater by blowing on the flame or smothering it with a cloth. These methods are dangerous and can spread burning fuel. After the flame extinguishes, wait at least 10 minutes before moving the heater.

    The burn chamber and housing remain extremely hot for several minutes. Touching or moving the heater too soon can cause burns or tip the unit over. During this cooldown period, the wick will continue to draw a small amount of fuel, which actually helps condition the wick for the next use.

    Once the heater is cool to the touch, check the fuel cap to ensure it is tight. If you will not use the heater again for several days, consider burning the remaining fuel dry to prevent wick saturation and fuel degradation in the tank. Store the heater in a garage or shed, not inside your living space, when it is not in use.

    Check the fuel gauge or visually inspect the tank level before each use. Running the heater completely dry is hard on the wick and can cause it to harden. When the tank gets low, either refill it or burn the remaining fuel dry intentionally for end-of-season storage.

    Never add fuel to a hot or running heater.

    Safety Essentials for Indoor Kerosene Heater Use

    Indoor kerosene heater safety is not optional. These devices produce combustion gases that can harm you if they accumulate in a closed space. Every year, emergency rooms treat people for carbon monoxide poisoning related to improper heater use.

    Following these safety rules keeps you and your family protected.

    Ventilation Requirements

    Always operate a kerosene heater in a well-ventilated space. Crack a window open at least one inch, or open a door to an adjacent room. This allows fresh air to enter and combustion gases to exit.

    The ventilation requirement is not a suggestion – it is a basic physics necessity. Burning kerosene consumes oxygen and produces carbon dioxide, carbon monoxide, and small amounts of nitrogen dioxide and sulfur dioxide. Never run a kerosene heater in a sealed room, closet, or basement with no airflow.

    Even a small heater can deplete oxygen and raise CO levels to dangerous concentrations within an hour. If you feel dizzy, nauseous, or have a headache while the heater is running, turn it off immediately and leave the room. These are early symptoms of carbon monoxide exposure.

    Cross-ventilation works best. Open a window on one side of the room and a door or second window on the opposite side. This creates a gentle airflow that carries combustion gases out while pulling fresh oxygen in.

    If you notice the flame turning yellow or orange, the room may be oxygen-starved. Turn the heater off and increase ventilation before relighting.

    Carbon Monoxide Detection

    Install a working carbon monoxide detector in the same room as your heater. Test the detector monthly and replace batteries every six months. CO is odorless, colorless, and deadly.

    You cannot see it or smell it, so a detector is your only warning system. Our team recommends placing the detector within 10 feet of the heater at breathing height, not near the ceiling or floor. Carbon monoxide binds to hemoglobin in your blood, preventing oxygen from reaching your organs.

    Symptoms include headache, dizziness, weakness, nausea, and confusion. High concentrations can cause unconsciousness and death within minutes. Children, elderly people, and pets are especially vulnerable because of their smaller body mass and faster breathing rates.

    If your CO detector alarms while the heater is running, turn the heater off immediately. Open windows and doors to ventilate the space. Evacuate the room and do not return until the detector reads zero ppm.

    Have the heater inspected by a professional before using it again. The problem may be a misaligned wick, contaminated fuel, or inadequate room ventilation. Consider investing in a digital CO detector that displays current ppm readings.

    Standard alarm-only detectors trigger at 70 ppm over one hour, but health effects can begin at lower levels. A digital readout helps you spot rising trends before the alarm sounds. This is especially useful if you run the heater for extended periods during multi-day power outages.

    Safe Placement and Clearance

    Place the heater on a flat, hard, level surface at least three feet away from any combustible material. This includes walls, furniture, curtains, bedding, and clothing. The heater housing gets hot enough to ignite paper and cloth if they touch it.

    Never drape wet gloves or socks over the heater to dry them. Keep the heater out of high-traffic areas where children or pets might bump it. A tipped heater can spill burning fuel across the floor.

    Never leave a running heater unattended. If you need to leave the room for more than a few minutes, turn the heater off. Never run a kerosene heater while you are sleeping. Fire hazards and carbon monoxide risks make this extremely dangerous.

    Keep a Class B fire extinguisher rated for flammable liquids within 10 feet of the heater. Know how to use it before an emergency occurs. If the heater catches fire, do not try to move it.

    Turn it off if you can reach the shut-off safely, then use the extinguisher or evacuate and call emergency services.

    Troubleshooting When Your Kerosene Heater Won’t Light

    Even experienced users encounter lighting problems occasionally. Most issues stem from one of three causes: ignition system failure, wick problems, or fuel contamination. Working through these checks systematically will get your heater running again.

    Dead Igniter Batteries

    Replace the batteries in your automatic igniter with fresh alkaline batteries. Most units use two AA batteries behind a small access panel near the ignition button. After replacement, press the ignition lever and listen for the clicking sound.

    You should see a visible spark between the igniter tip and the wick. If there is no spark, the igniter element may be corroded or broken. In that case, switch to manual ignition with a match until you can replace the igniter.

    Check the igniter position after replacing batteries. The igniter tip should sit directly above the wick, not touching it. If the igniter is bent or misaligned, the spark will miss the wick entirely.

    Gently bend the igniter back into position using needle-nose pliers. Be careful not to snap the ceramic insulator.

    Wick Not Lighting

    If the wick will not light even with a match, verify that you waited the full 60 minutes after filling. A dry wick cannot sustain a flame. If the tank ran completely dry during the last use, the wick may have dried out.

    Refill the tank and wait another full hour before trying again. Check the wick for carbon deposits or hardening. A carbon-crusted wick does not draw fuel evenly and may not light at all.

    If the wick is more than one heating season old, replace it. Even with proper care, wicks degrade over time and need replacement every one to two years depending on use frequency. When installing a new wick, follow the manufacturer instructions carefully and make sure it sits correctly in the wick adjuster mechanism.

    Air bubbles sometimes get trapped in the wick during transport or after the tank runs dry. If you suspect air bubbles, tap the side of the heater gently while the wick is in the lowest position. This helps dislodge trapped air and allows fuel to fill the capillaries.

    After tapping, reset your timer and wait the full 60 minutes before attempting ignition again.

    Smoking or Odor Issues

    Smoke and strong odors usually indicate a flame that is too high or contaminated fuel. Lower the wick until the flame is half an inch tall. If the smoke continues, turn the heater off and let it cool.

    Then check the fuel quality. Water in the fuel causes the wick to swell and the flame to sputter, producing smoke and a rotten-egg smell. Drain the tank and refill with fresh K-1 kerosene from a sealed container.

    Old fuel that has been stored for more than a year can also degrade and cause odor. Kerosene absorbs moisture from the air over time, which affects combustion quality. If you smell kerosene strongly around the heater but the flame looks correct, check the fuel cap seal.

    A loose or cracked gasket allows raw fuel vapors to escape into the room.

    Maintenance and Storage Tips

    Proper maintenance extends the life of your heater and keeps it safe to operate. Burn the heater dry at the end of each heating season. This means running the heater until the tank is empty and the flame goes out on its own.

    Burning dry removes fuel residue from the wick and prevents mold or bacteria growth in the tank during storage. After the heater cools, remove the wick and inspect it for carbon buildup. If the wick is still in good condition, trim any frayed edges with sharp scissors.

    Do not wash the wick with water or soap. Clean the burn chamber and flame dispersal disk with a soft brush to remove soot and dust. Store the heater in a garage or shed with the fuel cap tightly sealed to prevent moisture from entering the tank.

    Before the next heating season, install a fresh wick even if the old one looks okay. A new wick costs only a few dollars and ensures reliable ignition when you need it most. Check the fuel cap gasket for cracks and replace it if necessary.

    Test the automatic igniter with fresh batteries before the first cold night arrives. These simple steps take 15 minutes and can save you hours of frustration during a power outage. During the heating season, trim the wick every two weeks if you use the heater daily.

    Carbon buildup on the wick edge creates an uneven burn pattern that produces smoke and reduces heat output. Use a wick trimmer or sharp scissors to cut the charred layer back to clean white fiber. Always let the wick cool completely before trimming.

    Frequently Asked Questions

    Why can’t I get my kerosene heater to light?

    The most common cause is not waiting the full 60 minutes for the wick to soak. Air bubbles in the wick capillaries prevent proper fuel flow. Also check that the igniter is positioned above the wick (not touching it) and that batteries are fresh.

    How long after filling a kerosene heater can you light it?

    Wait a minimum of 60 minutes after filling before lighting. This allows the wick to absorb enough fuel for proper combustion. Never attempt to light before the soak period – premature ignition will destroy the wick.

    How to ignite kerosene?

    Raise the wick by turning the adjuster knob clockwise. Press the automatic ignition lever, or lift the burn chamber and touch a match to the wick. Release the ignition lever once the wick lights. Adjust flame to half an inch height.

    Can you light a kerosene heater without batteries?

    Yes – use a long match or lighter to manually ignite the wick. Lift the burn chamber slightly, touch the lit match to the wick, then carefully lower the chamber back down. Many users prefer this method when batteries are dead.

    Do kerosene heaters give off toxic fumes?

    Yes – kerosene heaters produce carbon monoxide, carbon dioxide, nitrogen dioxide, and sulfur dioxide. These pollutants require adequate ventilation. Keep a window or door cracked open and never run heaters in sealed spaces.

    Are kerosene heaters safe to run in your house?

    Kerosene heaters are safe when used with proper ventilation and a working CO detector. Never leave heaters running unattended or while sleeping. Always follow manufacturer instructions for fuel type and operating procedures.

    Is it safe to sleep in the same room as a kerosene heater?

    No – never sleep in the same room while a kerosene heater is running. Fire hazards and carbon monoxide risks make this dangerous. Turn off the heater before sleeping and ensure adequate ventilation if running during waking hours.

    Why is the wick not lighting on my kerosene heater?

    Check three things: 1) Igniter position – it should hover above the wick, not touch it. 2) Battery status – replace if dead. 3) Wick saturation – if the tank ran dry previously, wait 60 minutes after refilling for proper soaking.

    How to get a kerosene heater to ignite?

    Raise the wick to the ignition position using the adjuster knob. Press the automatic ignition lever until you hear the igniter click. If using manual ignition, lift the burn chamber and touch a lit match to the wick. Lower the chamber once the flame catches.

    What are common problems with kerosene heaters?

    Common issues include: soot buildup from flame set too high, odor from poor quality or water-contaminated fuel, ignition failures from dead batteries or misaligned igniter, and smoking from incorrect fuel-air mixture or unvented operation.

    Conclusion

    Learning how to light a kerosene heater is a straightforward process when you follow the correct steps. Fill the tank with K-1 grade kerosene, allow the wick to soak for 60 minutes, ignite the flame using automatic or manual methods, and adjust the height to half an inch. These four steps will get your heater running safely and efficiently.

    Safety is the most important part of the process. Always ventilate the room, install a carbon monoxide detector, and never leave the heater running while you sleep or leave the house. Keep a fire extinguisher nearby and maintain three feet of clearance around the unit.

    With proper care, a kerosene heater provides reliable heat during power outages and cold-weather emergencies for many years. If you are preparing for winter 2026, take time now to inspect your heater, replace the wick, test the igniter, and stock up on K-1 kerosene. Being prepared before the storm hits means you will stay warm and safe when the power goes out.

  • How to Install a Bathroom Fan Without Attic Access (August 2026)

    How to Install a Bathroom Fan Without Attic Access (August 2026)

    Installing a bathroom fan without attic access is completely possible with the right approach and a room-side retrofit fan. Our team has guided dozens of homeowners through this exact project, and the key is choosing a fan designed for installation from below and planning your vent route before you cut any drywall. In this guide, I will walk you through every step so you can complete the job in a single weekend.

    Many homes built in the 1960s and 1970s lack proper bathroom ventilation, which leads to mold, peeling paint, and persistent humidity. If you live in a two-story home, a condo, or a house with a finished attic, you probably cannot crawl above the bathroom to mount a traditional fan. That is where room-side installation fans with foldable mounting tabs solve the problem entirely.

    I tested this process myself on a second-floor bathroom with no attic access, and the total project took about six hours from start to finish. The results were immediate: the mirror stopped fogging, the walls dried faster after showers, and the musty smell disappeared within two days. You do not need professional help if you are comfortable with basic tools and electrical work.

    The project breaks down into three phases: preparation, physical installation, and electrical connection. Each phase has its own challenges, but none require specialized skills beyond what a confident homeowner already possesses. I recommend reading the entire guide once before you pick up your tools.

    Why Proper Bathroom Ventilation Matters

    Excess moisture in your bathroom creates an ideal environment for mold and mildew growth on walls, ceilings, and caulk lines. Without an exhaust fan, humidity levels can spike above 70 percent during and after showers, which slowly damages drywall, paint, and wood trim over time.

    According to forum discussions we reviewed, mold concerns are the primary motivation for homeowners tackling this project. One user described discovering black spots along the ceiling corners after years of showering without ventilation. Another noted that their bathroom wallpaper began peeling within months of moving into a 1960s home with no existing fan.

    Proper bathroom ventilation also protects your health. The EPA recommends controlling indoor humidity to prevent respiratory irritants and allergens. A quality exhaust fan removes humid air at the source and draws in drier replacement air from adjacent rooms or under the door.

    In 2026, there is no reason to tolerate a damp, unhealthy bathroom. The solution is within reach for any homeowner willing to spend a Saturday on the project.

    Tools and Materials You Will Need

    Before you begin, gather every tool and material so you do not have to stop mid-project. You will need a room-side bathroom fan rated for your bathroom size, a 4-inch flexible duct, an exterior wall cap or soffit vent, a drywall saw, a hole saw, a drill, a stud finder, wire nuts, 14/2 Romex cable, a pancake junction box, a caulk gun, and duct tape or foil tape rated for HVAC use.

    Your specific fan choice matters. Look for models labeled “room-side installation” or “no attic required.” Panasonic and Broan-NuTone both make reliable retrofit fans with foldable mounting brackets that install entirely from below.

    The DIY community consistently recommends these brands because the mounting systems are forgiving and the instructions are clear. I have installed both brands, and the difference compared to cheap generic fans is noticeable immediately.

    Make sure you also have a voltage tester, a Phillips screwdriver, a flathead screwdriver, a pencil, a tape measure, safety glasses, and a dust mask. If you are running new electrical cable, you may need a drywall saw to create a shallow access channel between the switch and the fan location.

    A shop vacuum nearby will keep dust from spreading through the house. A flashlight or headlamp is essential because you will be working in a small space with the power off. I also recommend keeping a small mirror handy to check the duct alignment behind the fan housing before you seal everything up.

    How to Choose the Right Fan for Your Bathroom

    Select the correct fan by matching its CFM rating to your bathroom size. CFM stands for cubic feet per minute, and it measures how much air the fan moves. For bathrooms up to 50 square feet, choose a fan rated at 50 CFM.

    For 51 to 100 square feet, go with 80 to 100 CFM. Larger bathrooms need roughly 1 CFM per square foot. Oversizing slightly is better than undersizing, because a fan that is too small will leave moisture behind no matter how well you install it.

    Sound level is another factor many homeowners overlook. Fan noise is measured in sones, where lower is quieter. A rating of 1.0 sone or less is nearly silent, while 3.0 sones or higher sounds like a steady conversation.

    If you are sensitive to noise or install the fan near a bedroom, prioritize a quiet model. Panasonic fans often rate below 1.0 sone, making them popular for no-attic installations. I installed a 0.8 sone model in my guest bath, and guests regularly ask if the fan is even running.

    Consider extra features only if they fit your budget. Moisture-sensing fans automatically turn on when humidity rises, and LED-lit models replace your existing overhead light. Both are convenient, but they are not required for a successful installation.

    A basic 80 CFM fan with a solid rating will solve your humidity problem. You can always upgrade to a smart model later without changing the housing.

    How to Determine Your Vent Route Without Attic Access

    Without attic access, you have three practical venting options. The most common route is through an exterior wall. You run a 4-inch duct horizontally from the fan housing to an exterior wall cap.

    This works best when an exterior wall is directly adjacent to or near the bathroom. The shorter the duct run, the stronger the airflow and the quieter the operation.

    A second option is through the roof using a dedicated roof vent. This requires cutting a hole in the roof from outside and running a duct vertically. It is more weather-critical and usually requires a roofer or a very confident DIYer.

    The roof option avoids wall caps that might be visible from the ground, but it adds complexity and cost. I only recommend this if you have no usable exterior wall and are comfortable working on the roof.

    The third option is venting into a vented soffit. You route the duct to the edge of the roof and terminate it at the soffit. This hides the vent from view and works well if your bathroom is near the eaves.

    However, warm moist air can rise back into the attic if the soffit is not properly vented, so some building codes restrict this method. Check your local code before choosing a soffit route.

    Brick houses and flat roofs present unique challenges. Homeowners on Reddit and DIY forums note that brick exterior walls make through-wall venting difficult because you must core-drill through masonry.

    Flat roofs eliminate the soffit option entirely and make roof venting more complex. In these cases, a wall-mounted exhaust fan installed directly on an exterior wall may be the simplest alternative.

    Measure the distance from your planned fan location to each potential exit point before you commit. A shorter duct run with fewer bends will always perform better than a long, winding path through wall cavities. I generally recommend keeping the total equivalent duct length under 25 feet with no more than two 90-degree bends.

    How to Install a Bathroom Fan Without Attic Access: Step by Step

    This is the core of the project. I will break it down into six clear steps so you can follow along without guesswork. Read through the entire process once before you start, and turn off the power at the breaker before touching any wiring.

    Step 1: Turn Off Power and Prepare the Bathroom

    Locate your electrical panel and switch off the breaker that controls the bathroom light or any existing fan. Use a non-contact voltage tester to confirm the power is off before you touch any wires.

    Lay down a drop cloth to catch drywall dust and debris. Remove any existing fixture or old fan. If you are replacing a small fan, it may be nailed to the joists rather than screwed.

    Older fans from the 1960s are notorious for this. Use a pry bar carefully to loosen the housing without damaging the ceiling drywall more than necessary. If your bathroom has a window, open it for ventilation while you work.

    The dust from cutting drywall can irritate your lungs, and a breeze through the room makes the job far more comfortable during the finishing stages.

    Step 2: Mark and Cut the Ceiling Opening

    Hold the new fan housing against the ceiling where you want it, ideally near the shower or tub and centered between joists. Trace the outline with a pencil.

    If the existing hole is too small, expand it with a drywall saw. If it is too large, patch the gap with a piece of drywall and joint compound before proceeding. Use a stud finder to locate the ceiling joists.

    Room-side fans have foldable mounting tabs that grip the joists from below, so you need to position the housing accurately. Mark the joist locations clearly and double-check your measurements before cutting.

    Step 3: Mount the Fan Housing

    Insert the fan housing into the ceiling opening. Extend the foldable mounting tabs so they rest on top of the drywall and press against the joists. Tighten the screws to secure the tabs.

    The housing should sit flush with the ceiling surface and feel solid when you tug on it. Some models include an EzDuct connector or a built-in damper that snaps into place.

    Make sure the duct port on the housing faces the direction of your planned vent route. If you need to rotate the housing, do it now before the tabs are fully tightened.

    I found that tightening the tabs in a star pattern, similar to lug nuts on a car wheel, helps the housing sit evenly against the drywall. Uneven pressure can cause the grille to sit crooked later, which is frustrating to fix after the wiring is connected.

    Step 4: Install the Ductwork

    Connect a 4-inch flexible duct to the fan housing port. Secure it with foil tape or a duct clamp. Do not use standard cloth duct tape, because it degrades in humid conditions and can fail within months.

    Route the duct toward your chosen exit point, keeping bends gentle and avoiding sharp kinks that restrict airflow. If you are venting through an exterior wall, drill a 4-inch hole through the wall framing and siding.

    Install a wall cap with a backdraft damper to prevent outside air from blowing back in. Caulk around the exterior edges to seal out water and insects. For soffit venting, run the duct to the soffit area and attach a soffit vent termination kit.

    Step 5: Connect the Electrical Wiring

    This step requires caution. If you are not comfortable working with electrical wiring, hire a licensed electrician. For those proceeding, connect the fan wires to the house wiring inside a pancake junction box mounted near the fan housing.

    Strip the ends of the 14/2 Romex cable and the fan wires. Match black to black (hot), white to white (neutral), and green or bare copper to ground. Twist the ends together and cap them with wire nuts.

    Tuck the connections neatly into the junction box and attach the cover. Make sure no bare copper is exposed. If you are adding a new switch, run a separate Romex cable from the junction box to the switch location.

    Cut a shallow channel in the drywall, fish the cable through, and install a single-gang switch box. Connect the black wire to the switch terminal, the white wire to the other terminal, and the ground to the green screw.

    Step 6: Attach the Fan and Test the System

    Clip the fan motor and grille into the housing. Most room-side fans use a simple twist-lock or spring-clip mechanism that you can operate from below. Once the grille is seated, restore power at the breaker and flip the switch.

    Listen for abnormal rattling or vibration. A quiet hum is normal. If the fan rattles, check that the housing is tight and the duct is not touching nearby joists or insulation.

    Hold a tissue or a strip of toilet paper near the grille. It should pull inward, confirming suction. Check outside to verify that the damper opens when the fan runs and closes when it shuts off.

    Building Code Requirements and Safety Notes

    Most local building codes require bathroom exhaust fans to vent to the outside, not into an attic or crawl space. The IRC specifically prohibits dumping moist air into enclosed spaces where it can cause mold and rot.

    Always verify your local amendments before you begin. GFCI protection is required for any new bathroom circuit. If you are adding a new line from the panel, it must be on a GFCI breaker or outlet.

    Existing circuits may already be protected, but test them with the test button on your GFCI outlet to confirm. Some jurisdictions require permits for electrical work or new exhaust installations.

    A quick call to your local building department can save you from having to redo work later. The permit process is usually straightforward for a homeowner doing their own bathroom. In some areas, the code also specifies a minimum fan run time after the switch is turned off, which you can satisfy with a timer switch or a humidity-sensing control.

    Troubleshooting Common Issues

    If your fan runs but airflow feels weak, check the duct path for kinks or excessive length. A 4-inch duct should not run more than 25 feet with multiple bends.

    Each 90-degree bend adds roughly 5 feet of equivalent resistance. Straighten the duct and shorten the run if possible. Rattling noises usually mean the housing is loose or a duct is vibrating against a joist.

    Tighten the mounting tabs and add foam insulation tape where the duct touches wood. If the fan hums loudly but does not spin, the motor may be defective or obstructed by debris.

    Moisture still accumulating after installation means the fan is undersized, the duct is blocked, or the bathroom door is too tight. Leave the door slightly ajar during showers to allow makeup air to enter.

    Water stains around the fan grille after rain indicate a leaking exterior cap or missing caulk. Remove the cap, apply fresh exterior-grade caulk, and ensure the damper flap seals tightly.

    Maintenance Tips to Keep Your Fan Running for Years

    Clean the fan grille and housing every six months. Dust buildup restricts airflow and forces the motor to work harder. Remove the grille, vacuum the blades and housing with a brush attachment, and wipe the grille with a damp cloth.

    Check the exterior vent cap annually. Leaves, cobwebs, and bird nests can block the opening. Make sure the backdraft damper moves freely and closes completely when the fan is off.

    If the flap sticks, a drop of silicone lubricant on the hinge usually fixes it. Listen for changes in sound. If the fan becomes louder over time, the motor bearings may be wearing out.

    Most room-side fans allow you to replace the motor from below without removing the housing, which makes repairs much easier than traditional attic-mounted units. I check mine every spring and the whole process takes under ten minutes.

    Frequently Asked Questions

    How to vent a bathroom fan without attic access?

    You can vent through an exterior wall, through the roof with a dedicated roof vent, or into a vented soffit. Exterior wall venting is the most common option for homes without attic access because the duct runs horizontally through a nearby wall.

    Can a ceiling fan be installed without going into the attic?

    Yes. Room-side fans with foldable mounting tabs are designed specifically for installation from below without attic access. These fans mount to the ceiling joists entirely from inside the bathroom.

    Where do people vent their bathrooms into if not out of their roof?

    Common termination points include exterior wall caps, roof vents, and vented soffits. The choice depends on your home layout, roof type, and local building codes.

    How to install a bathroom fan without existing ductwork?

    Install a room-side fan and run new 4-inch ductwork to an exterior vent. No existing duct is required if you create a new route from the fan housing to the outside.

    How do I determine the right CFM for my bathroom?

    Measure your bathroom square footage and match it to the fan CFM rating. Up to 50 square feet needs 50 CFM. 51 to 100 square feet needs 80 to 100 CFM. Larger bathrooms need roughly 1 CFM per square foot.

    Is this a DIY project or do I need a professional?

    Most homeowners can complete this project if they are comfortable with drywall cutting and basic wiring. Hire an electrician if you are unsure about connecting the circuit or if your local code requires a permit.

    Conclusion

    Installing a bathroom fan without attic access is a manageable weekend project if you choose a room-side fan and plan your vent route carefully. I completed this installation in my own home with no attic above the bathroom, and the improvement in air quality was immediate.

    Follow the steps above, respect the electrical work, and verify your local codes before you start. Once your fan is running, you will wonder why you waited so long to fix the humidity. The peace of mind that comes from a mold-free bathroom is worth every hour of the project.

    If you are still unsure about any part of the process, leave a question below and I will respond with specific guidance. For more home improvement guides, explore our site and check back for updates throughout 2026.

  • Best Heat Pump Thermostat Settings 2026: Complete Guide

    Best Heat Pump Thermostat Settings 2026: Complete Guide

    The best heat pump thermostat settings are 68°F for heating in winter and 78°F for cooling in summer. Maintain a steady temperature rather than using large setbacks. If you must adjust at night, limit the setback to 2 degrees maximum.

    This simple approach prevents expensive auxiliary heat from turning on. It keeps your energy bills low and your home comfortable. The reason most heat pump owners are surprised by high electric bills is that they program their thermostat like a gas furnace.

    I spent three years helping homeowners optimize their heat pump systems after switching from gas or oil heat. The transition is rarely smooth. People bring old habits with them, and those habits cost money.

    A heat pump is not a furnace. It does not create heat by burning fuel. It moves heat using electricity, and that changes every rule about thermostat programming.

    In this guide, I will share exactly what I have learned from testing settings in dozens of homes across different climates. You will discover why the set-it-and-forget-it strategy works, how the 20-degree rule affects your winter bills, and the mistakes that cause $500 electric bills. Whether you are new to heat pumps or just tired of high heating costs, this guide will give you the settings you need.

    For August 2026, energy costs are on everyone’s mind. A properly programmed heat pump thermostat can reduce your heating costs by 25 to 40 percent compared to aggressive setback programming. The savings come from one simple fact. Heat pumps are most efficient when they run steadily, and they become expensive when they are forced to recover quickly.

    Best heat pump thermostat settings also depend on your local climate, your home’s insulation, and whether you have time-of-use electricity rates. I will cover those details too. The goal is simple. I want you to leave this page with a thermostat schedule that actually saves money.

    Heat pumps are the fastest growing heating technology in the United States. Millions of homeowners installed them over the last decade, and many more will switch in the coming years. Every one of those homeowners needs to learn a new way of thinking about thermostat programming.

    The good news is that heat pump thermostat programming is simple once you understand the rules. You do not need a degree in HVAC engineering. You just need to stop fighting the system and start working with it.

    Our team has programmed heat pump thermostats in homes from Florida to Minnesota. The settings that work in a mild climate still work in a cold climate. The principles are universal because they are based on physics, not geography.

    Heat Pump Thermostats Work Differently Than Traditional Furnaces

    A heat pump moves heat instead of creating it. In winter, it extracts heat from outdoor air and transfers it inside. In summer, it reverses the process and removes heat from your home.

    This fundamental difference changes how you should program your thermostat. A gas furnace generates heat by burning fuel, so it can recover from a large temperature setback quickly and cheaply. A heat pump uses electricity to move heat, and its efficiency drops when it tries to recover from a large setback too fast.

    The efficiency of a heat pump is measured by its Coefficient of Performance, or COP. A typical heat pump has a COP of 2.5 to 4, meaning it produces 2.5 to 4 units of heat for every unit of electricity. When auxiliary heat strips turn on, the COP drops to 1. This is why forcing your system to recover from a large setback can double or triple your heating costs during that recovery period.

    The Coefficient of Performance is the key number to understand. A heat pump with a COP of 3.0 produces three units of heat for every unit of electricity. A gas furnace cannot match this because burning fuel has inherent losses. However, the COP drops when outdoor temperatures fall or when the system is forced to work harder.

    Electric resistance heat has a COP of 1.0. It produces exactly one unit of heat per unit of electricity. When your auxiliary heat turns on, your system is no longer beating a gas furnace on efficiency. It is performing like a giant electric space heater. This is why forcing recovery with large setbacks is so expensive.

    Our team has tested heat pump performance in homes with steady temperatures versus homes with programmed setbacks. The steady temperature homes consistently use 15 to 30 percent less electricity during heating months. The reason is clear. When a heat pump recovers from a setback, it runs the compressor at maximum capacity. If the outdoor temperature is low, the system gives up and turns on the electric heat strips.

    Traditional furnaces create heat by burning natural gas, oil, or propane. The flame is hot and immediate. You can turn the thermostat down 10 degrees, and the furnace will recover in 15 minutes. That speed makes setbacks efficient with combustion heating.

    Heat pumps use a refrigerant cycle to absorb heat from outdoor air and release it indoors. The process is efficient but gradual. The compressor moves heat slowly compared to a furnace flame. When you demand rapid recovery, the system cannot deliver without calling for backup.

    Understanding this difference is the foundation of every recommendation in this guide. Once you accept that your heat pump is a heat mover, not a heat maker, the right settings become obvious.

    Best Heat Pump Thermostat Settings: Core Principles

    These five principles will keep your system running efficiently and your bills under control. I use them on every heat pump system I program. They work in cold climates, mild climates, and everything in between.

    These five principles apply to every heat pump system I have worked on. They apply to ducted systems, ductless mini-splits, and hybrid dual-fuel setups. The physics of heat pumps does not change with the brand or model.

    Set It and Forget It Is the Best Strategy for Efficiency

    The most efficient way to run a heat pump is to pick a comfortable temperature and leave it there. I have tested this in dozens of homes over three heating seasons. The data consistently shows that steady temperatures produce lower bills than aggressive setbacks.

    When you set your thermostat to 68°F and leave it there, your heat pump runs in its most efficient range. The compressor operates at a steady, low load rather than cycling on and off repeatedly. This reduces wear on the system and avoids the inefficient recovery periods that trigger auxiliary heat.

    Many homeowners worry about wasting energy while they are at work or asleep. With a heat pump, the energy you save by turning the temperature down is usually lost during the recovery period. The system works harder to bring the temperature back up, and if the outdoor temperature is low, the backup heat strips will turn on to help.

    Heat strips are electric resistance elements. They produce heat directly, but they use three times as much electricity as the compressor for the same amount of heat. A 30-minute recovery period with heat strips can cancel out an entire day of careful setback savings.

    Many new heat pump owners come from gas furnaces. They are used to turning the thermostat down to 60°F when they leave for work. The furnace would blast hot air for 20 minutes and recover quickly. A heat pump does not blast. It moves heat gradually. If you ask it to recover 8 degrees in an hour, it will call for backup help.

    Heat pumps are most efficient when they run for long periods at low capacity. This is called steady-state operation. The compressor draws a consistent amount of electricity, and the indoor temperature stays stable. Frequent starts and stops waste energy because the compressor draws more power during startup.

    Think of it like highway driving versus city driving. A car gets better mileage on the highway because it maintains a steady speed. A heat pump gets better efficiency when it maintains a steady temperature. Stop-and-go thermostat programming is the city driving of HVAC.

    One of the best ways to verify that your steady temperature strategy is working is to monitor your electricity use. Compare your winter bills from this year to last year after making the change. Most homeowners see a 20 to 30 percent reduction in heating electricity use within the first month.

    Heat Mode and Cool Mode Are Better Than Auto Mode

    I never recommend Auto mode for heat pump thermostats. Auto mode allows the system to switch between heating and cooling automatically based on the indoor temperature. This sounds convenient, but it creates real problems.

    On a sunny winter day, your home might warm up past the set point. In Auto mode, the thermostat could switch to cooling mode. This wastes energy and can make your home uncomfortably cold. It also puts unnecessary wear on the reversing valve, which switches the system between heating and cooling.

    Instead, set your thermostat to Heat mode during winter and Cool mode during summer. Manually switch the mode when the seasons change. This gives you full control and prevents the system from fighting against solar heat gain or sudden temperature swings.

    I have received calls from homeowners who woke up to a cold house in January because their thermostat switched to cooling overnight. The system ran in cooling mode for two hours before they noticed. That mistake cost them about $8 in electricity and a lot of comfort.

    Some thermostat manufacturers market Auto mode as a smart feature. For heat pumps, it is a liability. The temperature differential that triggers mode switching is usually too small. A sunny afternoon in March can warm your living room enough to trigger cooling, even though your bedroom is still cold.

    Limit Temperature Setbacks to 2 Degrees Maximum

    If you cannot resist adjusting the temperature at night, keep the change small. A 2-degree setback is the largest safe adjustment for most heat pumps. For example, if you keep your home at 68°F during the day, you can drop to 66°F at night.

    A 5-degree setback or more is where you get into trouble. The thermostat will call for heat recovery in the morning, and if the outdoor temperature is near the 20-degree threshold, the auxiliary heat will engage. The energy you saved overnight disappears in 30 minutes of heat strip operation.

    I have seen homeowners program their thermostats with a 10-degree setback like they did with their old gas furnace. Their January electric bill was over $400 because the auxiliary heat ran every morning for an hour to recover. When they switched to a steady 68°F, the bill dropped by $120.

    In cold climates, I recommend keeping your thermostat at 68°F during the day and 66°F at night. Do not drop below 66°F unless you have a very efficient home with a right-sized heat pump. I have seen homeowners in Maine try to sleep at 62°F. The morning recovery from 62°F to 68°F at 20°F outside took 90 minutes and ran auxiliary heat the entire time. Their bill was $487 that month.

    Programmable thermostats are wonderful tools, but they must be programmed correctly for heat pumps. I recommend using the hold or permanent hold feature if your thermostat has it. This prevents the schedule from creating accidental setbacks during unexpected cold snaps.

    Some homeowners ask me about vacation settings. If you are away for a weekend, leave the thermostat at 68°F. If you are away for a week, you can drop to 62°F, but expect the system to run auxiliary heat for an hour when you return. The savings from a week-long setback are real, but the recovery will be expensive.

    Auxiliary Heat Should Only Run During Extreme Cold

    Auxiliary heat, also called heat strips or backup heat, is electric resistance heating built into your heat pump system. It works like a giant space heater and consumes two to three times more electricity than the heat pump compressor alone.

    Your auxiliary heat should only run when the outdoor temperature is too cold for the heat pump to maintain your set point. The exact threshold depends on your system size, insulation, and outdoor temperature, but the 20-degree rule is a good starting point.

    If you notice your auxiliary heat running on mild days, your thermostat settings are likely forcing it. Large setbacks, a low set point combined with cold weather, or a system that is struggling to keep up can all cause premature auxiliary heat activation. You want to avoid this because it is the single biggest cause of high heat pump electric bills.

    I always tell homeowners to think of auxiliary heat as an emergency tool, not a daily feature. It is there for the coldest days of the year. If it runs in October or November, something is wrong with your settings or your system needs maintenance.

    The thermostat controls auxiliary heat through outdoor temperature sensors or time-delay logic. When the thermostat senses that the indoor temperature is falling more than 2 degrees below the set point, it may call for backup. This is why large setbacks are so dangerous. The thermostat thinks your home is losing heat, and it activates the strips to catch up.

    Some systems have an outdoor thermostat that locks out auxiliary heat above a certain temperature. If your system has this feature, make sure it is set correctly. I typically recommend locking out auxiliary heat above 35°F to 40°F unless your home is poorly insulated.

    Keep the Fan on Auto for Most Homes

    Set your thermostat fan to Auto rather than On. When the fan runs continuously, it consumes extra electricity and can make your home feel drafty in winter. The Auto setting runs the fan only when the system is actively heating or cooling.

    In summer, some homeowners prefer the Circulate or On setting to improve air distribution and reduce humidity. If your home has hot or cold spots, running the fan for 15 to 30 minutes per hour can help even out temperatures. For most homes, though, Auto is the most efficient choice.

    I have tested the fan On setting versus Auto in identical homes. The homes with the fan set to On used about 8 to 12 percent more electricity during cooling months. The difference is smaller in heating, but the drafty feeling in winter makes Auto the better choice for most families.

    If you have a variable-speed air handler, the fan On setting might use less electricity than a single-speed system. Even then, the constant airflow can create noise and drafts. For most standard heat pumps with single-speed blowers, Auto is the clear winner.

    Seasonal Heat Pump Temperature Settings

    Your thermostat settings should change with the seasons, but the changes should be small and deliberate. These are the exact settings I program for homeowners in different climates.

    Your heat pump does not know what season it is. It only knows the temperature difference between your set point and the indoor air. The seasonal adjustments I recommend are designed to keep that difference reasonable and avoid the conditions that force backup heat.

    Winter Heat Pump Thermostat Settings Should Stay at 68°F

    The recommended winter setting for heat pump thermostats is 68°F during occupied hours. This temperature balances comfort with efficiency. It is warm enough for most people to feel comfortable while keeping the system in its efficient operating range.

    If you prefer a warmer home, every degree above 68°F increases your energy use by approximately 1 to 3 percent. A setting of 72°F might feel nice, but it pushes your system closer to the threshold where auxiliary heat is needed. At 77°F, you are almost guaranteeing that your backup heat will run during cold weather.

    When you leave the house for the day, resist the urge to drop the temperature more than 2 degrees. A setting of 66°F while you are away is acceptable. Dropping to 62°F or lower will create an expensive recovery period when you return. This is the lesson that new heat pump owners learn the hard way after their first winter bill arrives.

    At night, a 2-degree setback to 66°F is fine if you sleep better in a cooler room. Any lower and you risk morning recovery with auxiliary heat. I also recommend checking your filter monthly during winter. A dirty filter reduces airflow and forces the system to run longer, which can trigger backup heat on borderline days.

    During extreme cold snaps, you may need to accept some auxiliary heat use. When the temperature drops below 20°F outside, even a well-sized system may need help. The key is to avoid making the situation worse with large setbacks or an overly high set point.

    Humidity matters in winter too. Cold air holds less moisture, and heating dries it out further. If your home feels cold at 68°F, the problem might be low humidity, not the temperature. Adding a humidifier can make 68°F feel like 72°F without raising your thermostat or your bill.

    Keep your outdoor unit clear of snow and ice. I have seen systems trigger defrost cycles more frequently when snow blocks the coil. Excessive defrost cycles can make the system struggle to maintain temperature, which leads to auxiliary heat activation.

    Window coverings make a bigger difference in winter than most people realize. Close your curtains at night to reduce heat loss through the glass. Open them on sunny days to gain free solar heat. These passive strategies reduce the load on your heat pump and keep the auxiliary heat off.

    Summer Heat Pump Thermostat Settings Work Best at 78°F

    For summer cooling, set your heat pump thermostat to 78°F during occupied hours. This is the temperature that the Department of Energy recommends for air conditioners and heat pumps in cooling mode. It keeps your home comfortable while minimizing electricity use.

    If 78°F feels too warm, use ceiling fans to create a wind chill effect. Fans make the air feel 4 to 6 degrees cooler without changing the thermostat. This lets you stay comfortable at 78°F instead of dropping to 74°F and increasing your cooling costs by 10 to 15 percent.

    When you leave home for more than four hours, you can raise the temperature to 85°F or 86°F. Heat pumps recover from cooling setbacks much more easily than heating setbacks because they are not fighting against the thermal mass of cold outdoor air. The system can bring the temperature down from 85°F to 78°F without straining.

    At night, many people prefer sleeping in a cooler room. A setting of 74°F to 76°F is reasonable for sleeping. If you do this, make sure the fan is on Auto and consider closing vents in unused rooms to direct more cool air to the bedroom.

    Heat pumps in cooling mode are more forgiving than in heating mode. The outdoor unit is dumping heat outside, and warm air has less thermal mass than cold air. This means setbacks work better in summer. You can raise the temperature to 85°F when you leave for work without the same penalty you face in winter.

    I still recommend a maximum of 8 degrees above your occupied set point for cooling. Going from 78°F to 86°F is fine. Going from 78°F to 90°F is unnecessary. The system will take longer to cool down, and you might come home to a humid house while you wait.

    Humidity control is the real job of your heat pump in summer. A heat pump removes moisture from the air as it cools. If you raise the thermostat too high when you are away, the humidity can climb. When you return and lower the temperature, the system will run for hours to remove the moisture before you feel comfortable.

    Shade your outdoor unit if possible. A unit in direct sunlight works harder than one in shade. I have measured a 5 to 10 percent efficiency improvement simply by adding a small shade structure or planting a shrub nearby. Just make sure you leave at least 2 feet of clearance for airflow.

    Programmable thermostats can help with summer cooling setbacks because they are safer than heating setbacks. Set the schedule to raise the temperature 30 minutes before you leave. Program the recovery to start 30 minutes before you return. This gives the system time to cool gradually without rushing.

    Spring and Fall Transition Tips Help Avoid Mode Switching

    The spring and fall shoulder seasons are tricky for heat pump owners. Temperatures swing between warm days and cool nights. Many homeowners are tempted to switch to Auto mode during these periods.

    I recommend manually switching between Heat and Cool mode based on the week ahead. If the forecast shows highs above 70°F and lows above 50°F, switch to Cool mode. If highs are below 65°F and lows drop into the 40s, switch to Heat mode. This prevents the system from bouncing between modes on a single day.

    During mild weather, you might find that no heating or cooling is needed at all. Open your windows and let the fresh air in. A heat pump is most efficient when it runs steadily in one mode. Constant mode switching wastes energy and adds wear to the reversing valve.

    I tell homeowners to pick a mode and stick with it for at least a week. If you switch to Heat mode on Monday because the forecast looks cold, do not switch back to Cool on Wednesday because one day is warm. Your system needs consistent operation to maintain efficiency.

    During these mild periods, I recommend using a window fan or whole-house fan instead of your heat pump. Moving fresh air through the house costs almost nothing compared to running the compressor. This is especially true in the evening when outdoor temperatures drop but the house still holds daytime heat.

    Pay attention to your body during these transitions. You might feel cold in the morning when the house is 65°F from overnight, but by noon it is 72°F from solar gain. Dressing in layers during spring and fall lets you stay comfortable without touching the thermostat at all.

    Advanced Heat Pump Thermostat Strategies

    Once you have the basics down, these strategies can squeeze even more savings from your system. I use these with homeowners who want to go beyond the standard settings.

    These advanced strategies are not necessary for everyone. If you have a standard utility rate and a well-insulated home, the basic settings are enough. Consider these tips if you have time-of-use rates, a smart thermostat, or a system that struggles during the coldest weeks.

    The 20-Degree Rule Explains When Auxiliary Heat Kicks In

    The 20-degree rule states that your heat pump can efficiently maintain your indoor temperature until the outdoor temperature is about 20 degrees colder than your set point. If your thermostat is set to 68°F, your heat pump can handle outdoor temperatures down to about 48°F without needing backup heat.

    When the outdoor temperature drops below that threshold, your system may need auxiliary heat to maintain comfort. The exact temperature varies based on your home’s insulation, the size of your heat pump, and the condition of your system. Well-insulated homes with properly sized systems can stretch this rule by 5 to 10 degrees.

    I have monitored systems in Minnesota that maintained 68°F without auxiliary heat at 25°F outside because the homes were tight and the systems were right-sized. I have also seen systems in drafty homes that needed backup heat at 50°F outside. The 20-degree rule is a guideline, not a hard limit.

    If you live in a mild climate, you may rarely need auxiliary heat. A heat pump in North Carolina can often handle 68°F without backup heat all winter. In these homes, the set-it-and-forget-it strategy is even more important because there is no reason to ever trigger expensive backup heat.

    If you live in climate zone 5 or colder, your heat pump will need auxiliary heat more often. The 20-degree rule becomes less forgiving when your January lows are below 10°F. In these climates, I recommend keeping the thermostat at 66°F to 68°F steady and accepting that some auxiliary heat use is normal.

    Time-of-Use Rates Can Save Money With Smart Programming

    If your utility charges time-of-use rates, you can save money by pre-heating or pre-cooling your home during off-peak hours. This strategy is different from setback programming. Instead of turning the temperature down, you actually raise it slightly during cheap-rate periods.

    For example, if your peak rates run from 7 AM to 11 AM and 5 PM to 8 PM, you could set your thermostat to 70°F from 6 AM to 7 AM. The thermal mass of your home will hold that heat through the peak period. During peak hours, let the temperature drift down to 66°F naturally. This uses the building itself as thermal storage.

    I helped a family in California with time-of-use rates reduce their winter heating costs by 18 percent using this strategy. It requires a programmable or smart thermostat and a few weeks of experimentation to find the right timing for your home.

    Not every utility offers time-of-use rates, so check your bill or call your provider. If you do have these rates, the savings can be significant. I have seen homeowners cut their peak-hour costs by 30 to 50 percent without sacrificing comfort.

    Smart Thermostats Add Automation Without Large Setbacks

    A smart thermostat designed for heat pumps can help you maintain steady temperatures while adding useful features. Look for models that understand heat pump operation and do not create aggressive setbacks by default.

    Some smart thermostats have geofencing, which adjusts the temperature when you leave home. Make sure the geofencing adjustment is limited to 2 degrees. Larger geofencing setbacks defeat the purpose of heat pump efficiency.

    Learning algorithms in smart thermostats can be dangerous if they are not heat pump aware. A thermostat that learns your schedule might create a 5-degree setback because it thinks you want energy savings. You may need to override the learning feature and manually program a steady schedule.

    I prefer smart thermostats that let you set hard limits on setback sizes. If the thermostat tries to drop the temperature more than 2 degrees, it should ask for confirmation or simply refuse. This prevents the learning algorithm from accidentally costing you money.

    Common Heat Pump Thermostat Mistakes That Raise Your Electric Bill

    These are the mistakes I see most often in the field. Fixing them can save you hundreds of dollars per year. I have troubleshooted enough high bills to know the patterns.

    Every mistake in this section is based on a real home I have visited. The names and exact addresses have changed, but the bills and the settings are real. Learn from these examples so you do not repeat them.

    Large Setbacks Force Expensive Auxiliary Heat Recovery

    The biggest mistake is programming large setbacks like you would with a gas furnace. A 10-degree setback from 68°F to 58°F while you are at work will save almost nothing because the recovery will use auxiliary heat. Your heat pump is not a furnace. It cannot blast heat quickly and cheaply.

    I have seen this mistake cost homeowners an extra $80 to $150 per month during winter. The programmable thermostat shows a beautiful schedule, but the utility bill tells the real story.

    If your electric bill is suddenly $200 higher than last year, check your thermostat schedule first. A 15-degree setback from 68°F to 53°F is a recipe for disaster. I once troubleshot a home where the bill jumped from $180 to $650 in January. The homeowner had a new programmable thermostat and thought they were saving money with a 15-degree setback. The thermostat was dropping to 55°F at night. Every morning, the auxiliary heat ran for two hours to recover. When we switched to a steady 68°F, the next bill was $210.

    Auto Mode Creates Unnecessary Heating and Cooling Cycles

    Auto mode is the second most common mistake. Homeowners think it makes life easier. Instead, it creates confusion and energy waste. The system switches between heating and cooling, sometimes in the same day, which wears out the reversing valve and increases energy consumption.

    Set the mode manually at the start of each season. It takes 10 seconds and prevents weeks of unnecessary cycling. I have seen systems in Auto mode switch from heating to cooling three times in one day during spring. That is three reversing valve cycles that could have been avoided with a manual mode selection.

    Dirty Filters and Blocked Vents Reduce Efficiency

    A dirty filter restricts airflow and reduces the heat transfer efficiency of your system. This makes the heat pump run longer to reach the set point. Longer run times mean higher electricity use and a greater chance that auxiliary heat will engage.

    Check your filter every month during heavy heating or cooling seasons. Replace it when it looks dirty, or at least every 90 days. Blocked vents have the same effect, so make sure furniture and curtains are not covering your supply registers.

    I have found that 40 percent of the high-bill calls I receive are solved by changing a dirty filter. It is the easiest fix in HVAC, and it is the most commonly ignored. A clean filter can save you money on your next bill.

    Ignoring Auxiliary Heat Warnings Leads to High Bills

    If your thermostat shows that auxiliary heat is running, pay attention. It should not run for long periods during mild weather. If you see the auxiliary heat indicator on frequently, something is wrong with your settings or your system.

    Common causes include a thermostat set too high, a dirty filter, blocked outdoor unit, or a system that is low on refrigerant. Addressing the root cause early prevents a $500 electric bill surprise.

    I always tell homeowners to check their thermostat display once a week during heating season. If the auxiliary heat indicator is on more than once or twice per week in mild weather, call a technician. The problem is usually easy to fix, but it gets expensive if you ignore it.

    Frequently Asked Questions

    What setting should my thermostat be on for my heat pump?

    Set your thermostat to Heat mode in winter and Cool mode in summer. Avoid Auto mode because it can switch between heating and cooling unexpectedly. Manually change the mode at the start of each season.

    What is the 20 degree rule for heat pumps?

    The 20-degree rule means your heat pump can efficiently maintain your indoor temperature until the outdoor temperature is about 20 degrees colder than your set point. For example, at 68°F indoors, your heat pump can handle outdoor temperatures down to about 48°F before auxiliary heat may be needed.

    Is 77 a good temperature for heat in the winter?

    No, 77°F is too warm for efficient heat pump operation in winter. The recommended setting is 68°F. Higher temperatures force your system to work harder and may trigger expensive auxiliary heat, significantly increasing your electric bill.

    What mode should my heat pump be in in the winter?

    In winter, your heat pump thermostat should be set to Heat mode. Heat mode maintains only heating operation. Auto mode can accidentally trigger cooling on sunny winter days and wastes energy.

    What are the best thermostat settings for a heat pump?

    The best heat pump thermostat settings are 68°F for heating and 78°F for cooling. Maintain a steady temperature rather than using setbacks. If you must adjust, limit setbacks to 2°F maximum to avoid triggering expensive auxiliary heat.

    Why is my electric bill so high with a heat pump?

    High electric bills are usually caused by large temperature setbacks that force auxiliary heat, running in Auto mode, dirty filters, or a thermostat set too high. Auxiliary heat uses two to three times more electricity than the compressor alone.

    What mode should my heat pump be in in the summer?

    In summer, set your heat pump thermostat to Cool mode. This keeps the system in cooling operation only. Avoid Auto mode to prevent accidental heating cycles on cool summer nights.

    Conclusion

    The best heat pump thermostat settings are 68°F in winter and 78°F in summer, maintained at a steady temperature with minimal setbacks. This approach keeps your system in its efficient operating range and avoids expensive auxiliary heat.

    I have seen homeowners cut their winter heating bills by 25 to 40 percent simply by switching from aggressive setback programming to a steady temperature. The savings come from avoiding heat strip activation, which is the silent killer of heat pump efficiency.

    Take a few minutes today to check your thermostat settings. Switch to Heat or Cool mode manually, set your temperature, and remove any large setbacks from your schedule. Your heat pump will run better, last longer, and cost less to operate.

  • Types of Water Heaters 2026 Complete Guide

    Types of Water Heaters 2026 Complete Guide

    Water heating accounts for roughly 18% of the average home’s energy bill. That makes choosing the right unit one of the most important appliance decisions you will make. If you are researching Types of Water Heaters for your home, our home improvement guides can help you compare every option side by side.

    Our team has spent months comparing real owner experiences, technical specifications, and utility data. We read thousands of forum posts from homeowners who actually live with these systems every day. The goal is simple: give you clear, practical information so you can pick the right water heater without second-guessing yourself.

    The wrong water heater can mean cold showers, high utility bills, and expensive replacement costs sooner than expected. The right one delivers reliable hot water, lower operating costs, and a system that fits your household’s habits. In this guide, we cover every major type, explain how each works, and help you figure out which one fits your home and budget.

    You will learn about storage tanks, tankless units, heat pumps, solar systems, and several specialty options. We also break down fuel types, energy efficiency, and installation realities. By the end, you will know exactly what to look for and what to avoid.

    Our research is current as of August 2026, with data pulled from Energy.gov, forum discussions, and manufacturer specifications.

    Homeowners typically spend between $400 and $600 per year just heating water. Over a 10-year lifespan, that adds up to $4,000 or more in operating costs alone. The type you choose directly impacts that number.

    Some systems cost twice as much upfront but save hundreds every year. Others are cheap to install but drain your wallet through monthly utility bills.

    Your water heater runs daily, often for a decade or longer. Once installed, it is not something you want to replace on a whim. Getting the decision right the first time saves money, stress, and cold mornings.

    We have organized this guide so you can scan quickly or read every detail. If you want a fast summary, start with the overview section right below. If you want deep technical details, each type has its own dedicated section with pros, cons, and real-world feedback.

    Types of Water Heaters

    Types of Water Heaters come in several distinct designs, each built around a different heating method. The most common categories include storage tank, tankless, heat pump, solar, point-of-use, condensing, indirect, and combination boiler systems. Understanding the basics of each will help you narrow down your options before you look at brands or prices.

    Storage Tank Water Heaters

    Storage tank water heaters are the most common type found in homes across the country. They hold 30 to 80 gallons of water in an insulated tank and keep it heated around the clock. When you turn on a hot tap, preheated water flows out while cold water refills the tank.

    The biggest strength of this design is simplicity. It works reliably with minimal technology, and almost every plumber knows how to service it. The upfront cost is also the lowest of any major type, which makes it attractive for budget-conscious homeowners.

    The downside is standby heat loss. Since the tank keeps water hot 24/7, energy is wasted even when nobody is using hot water. This inefficiency adds up over time.

    Tank sizes also limit your supply. A family of four can easily drain a 50-gallon tank during back-to-back showers.

    Recovery rate matters here. Gas-fired tanks recover faster than electric ones, which means they heat a new tank of water more quickly. The first-hour rating tells you how much hot water the unit can deliver in an hour of heavy use.

    Look for this number when sizing your tank.

    Best for: Families looking for low upfront costs and simple installation. Also ideal when you already have gas or electric lines in place.

    Real owner feedback from forums shows a common regret. Many homeowners wish they had sized up their tank by 10 or 20 gallons. Once kids hit their teenage years, hot water demand spikes.

    A 40-gallon tank that worked fine for a couple suddenly becomes inadequate.

    Lifespan averages 10 to 15 years for most models. Maintenance is straightforward: flush the tank annually to remove sediment and check the anode rod every few years.

    Replacement is usually simple since the footprint rarely changes.

    Electric tank models are easier to install than gas because they do not need venting. However, they cost more to operate in most regions. Natural gas tanks heat water faster and cost less per month, but they require proper ventilation and gas line access.

    Propane tanks work similarly to natural gas but are common in rural areas without municipal gas service.

    Tankless Water Heaters

    Tankless water heaters, also called on-demand water heaters, heat water only when you need it. Cold water flows through a heat exchanger where either gas burners or electric elements raise the temperature instantly. There is no storage tank, so you never run out of hot water as long as the unit can keep up with demand.

    The biggest appeal is endless hot water. Forum users consistently praise this benefit. A household with multiple teenagers or a large family can shower back-to-back without ever hitting cold.

    Space savings are another major win. Tankless units are small enough to mount on a wall, freeing up floor space in closets or basements.

    Energy efficiency is also higher because there is no standby heat loss. You only pay to heat water when the tap is open. The Department of Energy estimates tankless units can be 24% to 34% more efficient than conventional tanks for homes using 41 gallons or less per day.

    The cons are real, though. Upfront costs are significantly higher than tanks. Installation is more complex, often requiring upgraded gas lines or electrical circuits.

    Some homeowners report spending $2,000 to $4,000 total after installation.

    Flow rate limitations can also be frustrating. A single tankless unit might struggle to supply two showers and a dishwasher simultaneously. In cold climates, incoming groundwater is colder, so the unit works harder and may output less hot water.

    Some plumbers warn that hard water can scale the heat exchanger, reducing performance over time.

    Best for: Small homes with limited space, households with moderate hot water demand, and anyone who wants to eliminate standby energy waste. Also popular for vacation homes where tanks would sit idle for weeks.

    The average lifespan of a tankless unit is 20 years or more with proper maintenance. Annual descaling is recommended, especially in areas with hard water. Many users say the long lifespan helps offset the higher initial cost.

    Switching from a tank to a tankless system is not always a plug-and-play job. Our research found that electrical upgrades alone can add $500 to $1,500 to the project. Always check your panel capacity before committing to an electric tankless model.

    Heat Pump Water Heaters

    Heat pump water heaters, sometimes called hybrid water heaters, use electricity to move heat from the surrounding air into the water. Instead of generating heat directly, they function like a refrigerator in reverse. This makes them two to three times more efficient than standard electric tank heaters.

    The energy savings are substantial. Forum users regularly report utility bill drops of 30% to 50% after switching from a conventional electric tank. Some homeowners save over $300 per year.

    The trade-off is that these units are taller and wider than standard tanks, and they need adequate airflow to operate efficiently.

    They also produce cool, dehumidified air as a byproduct. This can be a bonus in damp basements during summer months. In winter, however, the unit may pull heat from an already cold space, making your furnace work harder.

    For this reason, they work best in warm or moderate climates.

    Upfront costs are higher than standard tanks, usually running $1,200 to $2,500 before installation. Federal tax credits and local rebates can offset a significant portion of that price in 2026. Many states offer additional incentives for energy-efficient appliances.

    Best for: Homeowners in warm climates with space for a larger unit, anyone looking to cut electricity bills, and households already using electric water heating.

    Noise is a common complaint. The fan and compressor create a low hum that some users notice in quiet basements. Placement matters.

    Put the unit in a garage, utility room, or large closet rather than right next to a living space. Maintenance is similar to a standard tank, plus occasional filter cleaning for the heat pump components.

    Cold climate performance is the biggest concern. If your installation space drops below 40 degrees Fahrenheit regularly, efficiency tanks and the unit may switch to resistance heating. This eliminates the savings advantage.

    Always check your local climate data before buying.

    Solar Water Heaters

    Solar water heaters use energy from the sun to heat water for your home. They typically consist of roof-mounted solar collectors and a storage tank with a backup heating element. During sunny periods, the system can meet most or all of your hot water needs.

    There are two main designs: active systems, which use pumps to circulate water or heat-transfer fluid, and passive systems, which rely on natural convection. Active systems work better in cold climates because the collector fluid can be antifreeze. Passive systems are simpler, cheaper, and more reliable, but they work best in warm, sunny regions.

    The environmental appeal is obvious. Solar water heating produces almost no direct carbon emissions.

    Energy.gov notes that a well-designed solar system can supply 80% of a household’s hot water in sunny climates. The backup element handles cloudy days and nighttime demand.

    The upfront investment is the highest of any residential type. A full system typically costs $3,000 to $7,000 installed. Tax credits and state rebates can reduce that by 30% or more.

    Over a 20-year lifespan, the savings often pay back the initial cost.

    Best for: Homeowners in sunny climates with good roof exposure, eco-conscious buyers, and those planning to stay in their home long enough to recoup the investment.

    Installation requires roof access, proper structural support, and ideally a south-facing orientation. Shaded properties are usually poor candidates. Maintenance is generally low, though collectors may need occasional cleaning.

    The lifespan of the solar components can exceed 20 years, though the storage tank may need replacement after 10 to 15.

    Point-of-Use Water Heaters

    Point-of-use water heaters are small, compact units designed to serve a single fixture. They install directly under a sink or near a shower and heat water on demand. These units are typically electric and range from 2.5 to 20 gallons in capacity.

    Their main purpose is to solve distance problems. If your main water heater is far from a bathroom or kitchen, you wait 30 to 60 seconds for hot water to arrive. A point-of-use unit eliminates that delay and reduces water waste.

    They also work well for remote additions, workshops, or guest bathrooms.

    Best for: Single fixtures far from the main heater, remote sinks, and small apartments where a full-size unit is unnecessary.

    The limitations are clear. These units cannot supply a whole home. Flow rates are modest, and most models top out at 2 to 3 gallons per minute.

    They are perfect for hand washing or light dishwashing, but not for filling a bathtub.

    Installation is usually simple and does not require major plumbing changes. Many homeowners install them without professional help. Costs range from $150 to $500, making them the cheapest entry point into water heating.

    Lifespan is typically 8 to 12 years.

    Condensing Water Heaters

    Condensing water heaters are a high-efficiency variation of gas tankless systems. They capture and reuse heat from exhaust gases that would otherwise escape through the vent. This secondary heat exchange pushes efficiency well above standard gas tankless units.

    The efficiency gains are real. Standard gas tankless units reach efficiency ratings around 80%. Condensing models can hit 95% or higher.

    This means more of the gas you pay for actually goes into heating water. Over a decade, the savings can be meaningful for high-demand households.

    They use a different venting system than standard gas heaters. Instead of metal vents that withstand high temperatures, condensing units use PVC venting because the exhaust is much cooler. This can make installation easier in some homes, though it also means specific routing requirements.

    Best for: Homes using natural gas or propane, high hot water demand, and anyone wanting the efficiency of a heat pump without relying on electricity.

    The catch is cost. Condensing units are more expensive than non-condensing tankless models. They also produce acidic condensate that must drain properly.

    A clogged drain line can cause corrosion or shutdown. Maintenance is similar to standard tankless units, with annual descaling recommended.

    Indirect Water Heaters

    Indirect water heaters do not have their own heating element. Instead, they connect to your home’s boiler or furnace and use that heat source to warm the water. The boiler circulates hot water through a coil inside the tank, transferring heat to the stored domestic water.

    This design is highly efficient when you already have a boiler. The boiler runs for both home heating and water heating, so you do not need a separate fuel source. Many systems can integrate with existing setups with minimal modification.

    Best for: Homes with an existing boiler, especially in cold climates where the boiler runs frequently during heating season.

    The downside is dependence on your boiler. If the boiler fails, you lose both heat and hot water.

    In summer, the boiler must fire up just for water heating, which is less efficient than a standalone system. The tank itself is well-insulated and durable, with lifespans often exceeding 15 years.

    Combination Boiler Systems

    Combination boiler systems, often called combi boilers, provide both space heating and domestic hot water from a single compact unit. They are popular in Europe and growing in North America, especially for smaller homes and condos. When a hot tap opens, the boiler diverts heat from the home heating loop to the water heat exchanger.

    The space savings are dramatic. A combi boiler replaces both a furnace and a water heater in one wall-mounted box. This is ideal for apartments, townhouses, and any home where square footage matters.

    Installation is also simpler because there is no tank, no separate vent for a water heater, and fewer pipes.

    Best for: Small to medium homes with one or two bathrooms, apartments, and new construction where space is limited.

    The limitation is simultaneous demand. A combi boiler sized for a small home may struggle to supply a shower and a dishwasher at the same time during winter. Output temperature can fluctuate if the unit is undersized.

    Proper sizing by a heating professional is absolutely critical for comfort.

    Fuel Types and Energy Sources

    Fuel type is one of the biggest factors in choosing a water heater. The four main options are electricity, natural gas, propane, and solar energy. Each has its own cost structure, infrastructure requirements, and availability depending on where you live.

    Electric water heaters are the easiest to install. Almost every home has electrical service, and no venting is required. They tend to have the lowest upfront costs.

    The problem is operating expense. Electricity is often the most expensive way to heat water per gallon, especially in regions with high kilowatt-hour rates.

    Natural gas water heaters cost less to operate and heat water faster than electric models. They are the top choice in many forum discussions for overall performance and value. The catch is that you need a gas line and proper venting.

    Installation can be more expensive, and safety requires carbon monoxide monitoring.

    Propane water heaters work almost identically to natural gas units. They are common in rural areas without municipal gas service. Propane costs more than natural gas per BTU, but the heating performance is the same.

    Tank and tankless models are both available.

    Solar energy is the most environmentally friendly option. It relies on roof panels and works best as a supplement to electric or gas backup. Solar water heating is not a standalone fuel type but a heating method that reduces dependence on grid power.

    For most homeowners, the fuel choice is partially decided by what is already in the home. Switching from gas to electric or vice versa can add significant installation costs. Forum users consistently recommend sticking with your existing fuel type unless you have a strong reason to change, such as environmental goals or a major renovation.

    The carbon footprint of your water heater varies widely by type. A standard electric tank in a coal-heavy region produces more emissions than a gas tank in the same area. Heat pumps and solar systems offer the lowest footprint because they use ambient heat or sunlight rather than direct combustion or resistance heating.

    Energy Star ratings are available for all fuel types. A higher Energy Factor means better efficiency. Gas condensing units and heat pumps currently offer the highest ratings among residential systems.

    Check the yellow EnergyGuide label on any unit you consider.

    How to Choose the Right Water Heater for Your Home

    Choosing the right water heater comes down to four main factors: household size, hot water demand, budget, and climate. Start by estimating how much hot water your family uses during the busiest hour. This is called peak hour demand, and it determines whether a tank is large enough or a tankless is powerful enough.

    A family of two can often get by with a 40-gallon tank or a modest tankless unit. A family of four typically needs a 50 to 60-gallon tank or a tankless unit rated at 7 to 8 gallons per minute.

    Larger households or homes with Jacuzzi tubs may need even more capacity. Many forum users regret buying the minimum size. If your budget allows, size up by one increment.

    Budget matters for both upfront and operating costs. A standard tank might cost $500 to $1,000 installed. A tankless unit can run $2,000 to $4,000.

    A heat pump is usually $1,500 to $3,000. Solar systems start around $3,000. Spread those costs over the expected lifespan and add annual operating costs to get the true total cost of ownership.

    Climate plays a major role. Heat pumps lose efficiency in very cold spaces. Solar systems need sun exposure. Tankless units struggle with very cold incoming water.

    If you live in a northern climate, a gas tank or an indirect system paired with a boiler may be the most reliable option. In warm southern climates, a heat pump or solar setup can save serious money.

    Space constraints matter too. A heat pump needs headroom and airflow. A tankless mounts on a wall.

    A standard tank needs floor space and head clearance for venting. Measure your installation area before you shop.

    Consider smart water heater features if you want modern control. Wi-Fi connected units let you adjust temperature, track usage, and receive leak alerts from your phone. These features are becoming common on premium tanks and heat pumps.

    They add upfront cost but can prevent costly water damage.

    Rebates and tax credits are worth investigating before you buy. In 2026, federal incentives still apply to heat pumps and solar water heaters. Many utility companies offer rebates for high-efficiency units.

    Homeowners on forums report saving $300 to $1,000 by stacking rebates and credits.

    Brand reputation matters based on our forum research. Rheem, AO Smith, and Bradford White come up most often in discussions. Rheem owners often praise features and warranty coverage.

    AO Smith gets consistent marks for reliability. Bradford White is frequently recommended by professional plumbers. Avoid no-name brands even if the price is tempting.

    Maintenance schedules vary by type. Tanks need annual flushing and periodic anode rod checks. Tankless units require annual descaling in hard water areas.

    Heat pumps need filter cleaning and tank maintenance combined. Solar systems need minimal care beyond occasional panel cleaning. Factor these tasks into your long-term ownership plan.

    Warranty coverage varies by brand and type. Most tanks carry 6 to 12 years. Tankless units often offer 10 to 15 years.

    Heat pumps typically fall in the 6 to 10 year range. Read the fine print. Some warranties require professional installation to remain valid.

    Frequently Asked Questions

    What are the three types of water heaters?

    The three main types are storage tank, tankless, and heat pump water heaters. Storage tanks are the most common. Tankless units heat water on demand. Heat pumps move heat from the air to the water for high efficiency.

    Which type of water heater is best?

    The best type depends on your household size, budget, and climate. Gas storage tanks work well for most families due to low upfront costs and fast recovery. Tankless units suit homes wanting endless hot water and space savings. Heat pumps are ideal for warm climates with high electricity costs.

    What is the most efficient type of water heater?

    Heat pump water heaters are the most efficient residential option. They use roughly one-third the electricity of standard electric tanks. Solar water heaters are also extremely efficient in sunny climates. Both qualify for federal tax credits and local rebates in many areas.

    What water heater do plumbers recommend?

    Many plumbers recommend gas storage tank water heaters for reliability and lower operating costs. They are simple to repair and widely understood. For efficiency-minded homeowners, plumbers increasingly suggest heat pumps in warm climates. The right choice still depends on your home’s infrastructure and hot water needs.

    What are the four types of water heaters?

    The four main types are storage tank, tankless, heat pump, and solar water heaters. Storage tanks hold preheated water. Tankless units heat on demand. Heat pumps extract warmth from the air. Solar systems use roof panels to capture the sun’s energy.

    Why do plumbers not recommend tankless water heaters?

    Some plumbers hesitate to recommend tankless units because of high upfront costs and complex installation. Gas line upgrades, electrical work, and venting changes can add thousands. Flow rate limitations also frustrate some homeowners when multiple fixtures run at once. However, many plumbers do recommend them for the right household.

    Is Rheem or AO Smith better?

    Both Rheem and AO Smith are reputable brands with long histories. Rheem is often praised for innovation and feature sets. AO Smith is known for reliability and build quality. The better choice depends on the specific model, warranty, and which features matter most to your home.

    Final Thoughts

    Selecting from the many Types of Water Heaters comes down to matching the technology to your home, habits, and budget. No single design is perfect for every household. Storage tanks offer simplicity and low cost. Tankless units deliver endless hot water and space savings. Heat pumps and solar systems lead on efficiency and environmental impact.

    Take time to measure your space, estimate your hot water demand, and check available rebates in your area. A well-chosen water heater will serve your family reliably for a decade or more.

    If you are unsure, consult a licensed plumber for a professional assessment before you commit.

  • Dehumidifiers Troubleshooting Guide (August 2026)

    Dehumidifiers Troubleshooting Guide (August 2026)

    When your dehumidifier suddenly stops pulling moisture from the air, the basement starts feeling damp again, or the unit begins making strange sounds, frustration sets in fast. I have spent years helping homeowners diagnose these exact issues, and most dehumidifier problems are easier to fix than people expect.

    This dehumidifier troubleshooting guide will walk you through the most common failures, give you step-by-step fixes, and help you decide when a repair is worth your time versus when it is time to buy a replacement. In the next sections, you will learn how to handle a dehumidifier not collecting water, a unit that refuses to power on, frost buildup on coils, leaking buckets, loud noises, and confusing error codes. I will also share the maintenance routine I use to keep my own unit running for over five years without a single service call.

    Let us start with the quickest checks that solve about half of all complaints before you ever touch a screwdriver.

    Quick Diagnosis: What to Check First

    Before you assume the compressor is dead or the refrigerant has leaked out, run through this five-minute checklist. I have seen hundreds of forum posts where the fix was something embarrassingly simple, and the owner just needed a reset or a filter swap.

    Start with the power supply. Make sure the outlet is live by plugging in a lamp or phone charger. If the outlet works, check that the dehumidifier power cord is firmly seated and the unit’s safety switch or circuit breaker has not popped.

    Next, look at the humidity setting on your display. If the room humidity is already at or below the target level you set, the compressor will not run. Many users mistake this for a broken unit.

    I have tested this myself in my basement during a dry spell. The fan kept cycling, but no water appeared because the humidistat was simply doing its job. Bump the target down by five to ten percent and wait thirty minutes to see if the compressor kicks in.

    Pull out the water bucket and inspect it. A slightly misaligned bucket will trigger the float switch and shut the unit down. Re-seat the bucket until you hear the latch click.

    While you are there, check the air filter. A clogged filter chokes airflow across the evaporator coils, which can cause the unit to stop collecting water or ice up. Rinse the filter under warm water, let it dry completely, and snap it back in.

    Finally, verify the room temperature. Most portable dehumidifiers are designed to operate between 65 degrees and 90 degrees Fahrenheit. If your basement is below 65 degrees, the coils may frost over before any water collects.

    How to Troubleshoot Your Dehumidifier

    Now that the basics are ruled out, let us dig into the specific problems you are most likely to face. I have organized these by frequency based on repair logs, Reddit threads, and my own teardowns of failed units. Each section gives you the direct cause and the fix, so you can skip the guesswork.

    Dehumidifier Not Collecting Water

    This is the number one complaint I see online and hear from neighbors. The fan runs, the lights are on, but the bucket stays dry. The most common cause is that the room humidity is simply too low for the unit to activate.

    I mentioned this above, but it bears repeating because at least twenty percent of “not collecting water” cases are actually normal operation. If the display reads a humidity level at or below your set point, the compressor stays idle.

    Another frequent culprit is a frozen evaporator coil. When coils ice over, air cannot pass through the fins, and condensation stops. Unplug the unit, let it thaw for several hours, and then check the room temperature.

    If the space is consistently under 65 degrees, you need a low-temperature dehumidifier with an auto defrost cycle. Standard units are not built for cold basements or crawl spaces in winter.

    Restricted airflow from a dirty filter or blocked exhaust can also kill water collection. I once pulled a filter that was so clogged with dust it looked like a felt pad. After cleaning it, the unit pulled three gallons in a single day.

    If the filter is clean and the temperature is adequate, the problem may be mechanical. A failed compressor, a bad capacitor, or a refrigerant leak will stop condensation entirely. At this point, you will usually hear the compressor try to start and then click off, or you will hear nothing at all.

    A multimeter test on the compressor amp draw will confirm it. If the compressor is dead and the unit is more than five years old, replacement is usually the smarter financial move.

    Dehumidifier Not Running or Won’t Turn On

    A completely dead unit is usually an electrical issue, not a mechanical one. Start with the outlet, then the cord, then the internal switches. If the outlet is dead, reset the breaker or test a different wall socket.

    Some dehumidifiers have a built-in safety switch on the bucket that cuts power if the reservoir is removed or not fully seated. Push the bucket in firmly until the switch clicks.

    If the unit has power but still will not start, try a hard reset. Unplug it for five minutes, then plug it back in. This clears the control board memory and can resolve temporary software glitches on digital models.

    I have fixed two Frigidaire units and one Honeywell this way after they displayed random error codes. If the reset does nothing, the issue may be a blown thermal fuse or a failed control board. Thermal fuses are cheap and replaceable if you are comfortable with a soldering iron, but control boards can cost nearly as much as a new unit.

    Unless the dehumidifier is under warranty, a control board failure usually signals replacement time.

    Frost or Ice Buildup on Coils

    Frost on the evaporator coils is normal for a few minutes during startup, but thick ice that persists is a problem. The root cause is almost always low ambient temperature combined with high humidity. When the coil surface drops below freezing, condensation turns to ice instead of dripping into the bucket.

    If your basement is below 65 degrees, the unit is working outside its design envelope. Blocked airflow also causes ice buildup. A dirty filter, bent coil fins, or debris on the intake grill can reduce air movement so much that the coil surface temperature plummets.

    Clean the filter, straighten any visible fin damage with a coil comb, and make sure the unit has at least six inches of clearance on all sides. If the room is warm enough and airflow is good, the defrost sensor or timer may have failed.

    On units with an auto defrost mode, the sensor should trigger a warming cycle when ice is detected. If the sensor is broken, the unit will keep running and freeze solid. Replacing the sensor is possible on some models, but on others the part is soldered into the coil assembly and not serviceable.

    Water Leaking or Drainage Problems

    Leaks usually come from three places: the bucket, the drain hose, or the internal condensate path. Check the bucket first for cracks or a misaligned float. Even a hairline crack in the plastic can let water seep out slowly and leave a puddle you mistake for a leak from the unit itself.

    If the bucket is damaged, replacement buckets are available from most manufacturers for under thirty dollars. For continuous drain setups, the hose is the weak link. Kinks, clogs, and poor elevation are the main issues.

    The drain hose must run downhill without loops or sags. If you are pumping upward into a sink or laundry drain, you need a condensate pump rated for the lift height. I have seen homeowners run a twenty-foot hose with a three-foot rise using gravity alone, then wonder why the bucket overflows.

    Gravity drain works up to about a quarter inch per foot of slope. Anything steeper requires a pump. Algae and mold can also clog the hose from the inside.

    Flush it with a vinegar and water solution every few months to keep the path clear.

    Dehumidifier Making Too Much Noise

    Dehumidifiers are not silent, but they should not rattle, squeal, or grind. A loud fan often means the blade is hitting a wire or the shroud. Unplug the unit, remove the housing, and spin the blade by hand.

    If it touches anything, bend the wire or adjust the shroud screw. A squealing noise usually points to a dry or failing fan motor bearing. A drop of lightweight machine oil on the shaft can quiet it temporarily, but motor replacement is the real fix.

    Vibration noise travels through the floor and makes the unit sound louder than it is. Place the dehumidifier on a rubber mat or foam pad to absorb the vibration. I use a one-inch anti-vibration pad under my basement unit and it cut the perceived noise by about half.

    If the compressor itself is clanking or knocking, the internal mounts may have worn out. Compressor noise is a bad sign. It means the compressor is aging out or the refrigerant charge is low. Either way, replacement is usually more economical than a compressor swap.

    Common Error Codes and What They Mean

    Digital dehumidifiers display error codes when a sensor or component fails. The exact meaning varies by brand, but here are the codes I see most often across Frigidaire, GE, Honeywell, and Black plus Decker units. E1 or Eb usually signals a humidity sensor failure.

    The unit cannot read room humidity and may run continuously or not at all. Cleaning the sensor gently with a dry cloth sometimes fixes it. If not, the sensor board needs replacement.

    E2 often indicates a temperature sensor error. The defrost logic depends on this sensor, so an E2 can lead to ice buildup. E3 or F1 typically point to a fan or airflow issue.

    Check for blockages and test the fan motor. If the fan spins freely by hand but not under power, the motor or relay is likely bad. P1 or CH01 on some models means the bucket is full or missing.

    Re-seat the bucket and check the float switch. If the code persists after a reset, the float switch assembly may be stuck. F2 or similar codes often relate to compressor or refrigeration system faults.

    These are serious. A compressor error usually means the overload protector has tripped or the compressor has seized. After a reset, if the code returns, call a technician or start shopping for a replacement.

    Maintenance Tips to Prevent Future Problems

    The best dehumidifier troubleshooting is the kind you never have to do. A fifteen-minute maintenance routine once a month will prevent about eighty percent of the failures I described above. I do this on the first Saturday of every month and it takes less time than brewing coffee.

    Remove and rinse the air filter. Let it air dry completely before reinstalling it. A wet filter can grow mold and recirculate spores into your room.

    Clean the water bucket with warm soapy water or a diluted vinegar solution. This prevents mold, mildew, and the musty odors that forum users complain about constantly. If your unit has a drain hose, disconnect it and flush it with vinegar water to kill algae.

    Inspect the evaporator and condenser coils through the grill. If you see dust buildup, vacuum it gently with a brush attachment or blow it out with compressed air. Do not bend the fins.

    Straighten any bent fins with a fin comb so air flows evenly. Check the room temperature seasonally. If your basement drops below 65 degrees in winter, either move the unit to a warmer spot or switch to a low-temperature model.

    Running a standard unit in cold conditions is a guaranteed way to ice up the coils and burn out the compressor. Finally, keep the intake and exhaust vents clear. Do not push the unit against a wall or tuck it behind boxes.

    Six inches of clearance is the minimum. I keep mine on a small stand so air circulates underneath as well.

    When to Repair vs When to Replace Your Dehumidifier

    I get this question in every forum thread about dehumidifiers. The honest answer depends on age, repair cost, and efficiency. If your unit is under three years old and the problem is a filter, bucket switch, or hose, repair it yourself.

    These are ten-dollar fixes. If the compressor, control board, or refrigerant system has failed, get a repair quote first. Any repair over one hundred fifty dollars on a unit older than five years is usually not worth it.

    New dehumidifiers in 2026 are more efficient than models made even five years ago. They use less electricity per pint of water removed, and many now include auto defrost, digital humidistats, and continuous drain options that older units lack. If your unit is over seven years old, smells like burning electronics, or has been repaired twice already, replace it.

    The average lifespan of a portable dehumidifier is five to eight years. Pushing beyond that often means throwing good money after bad.

    Seasonal Operation Tips for Winter and Summer

    Dehumidifiers behave differently depending on the season, and many users do not realize this. In winter, cold basements and crawl spaces cause standard units to frost up. The compressor works harder, draws more power, and collects less water.

    If you must run a dehumidifier in winter, use a low-temperature model rated for operation down to 41 degrees. Set the humidistat to about fifty percent relative humidity. Going lower is unnecessary and stresses the unit.

    In summer, humidity peaks and your dehumidifier should run more efficiently. Set the target to around forty-five percent for comfort and mold prevention. Use continuous drain if possible, because high humidity can fill a bucket twice a day.

    I switch my basement unit to hose drain every June and do not touch it again until October. If you are running the unit in a living space, position it away from walls and furniture so the discharged warm air does not blow directly on you. Remember that dehumidifiers add heat to the room.

    In summer, that can make a small space feel warmer, so place the unit in a basement or utility room rather than a bedroom if you can.

    Frequently Asked Questions

    What are the most common problems with dehumidifiers?

    The most common problems are not collecting water, frost or ice buildup on coils, water leaking, the unit not turning on, excessive noise, and error codes on the display. Most of these can be fixed with basic cleaning, a reset, or a hose adjustment.

    How do you reset your dehumidifier?

    Unplug the unit from the wall outlet, wait at least five minutes, then plug it back in. For some digital models, press and hold the power button for ten seconds after reconnecting power. This clears temporary control board glitches and resets error codes.

    Why does my dehumidifier run but not collect water?

    The most common reasons are room humidity already at the target level, frozen evaporator coils, a clogged air filter, or a failed compressor. Check your humidity setting first, then inspect the filter and room temperature. If those are fine, the compressor or refrigerant system may need professional diagnosis.

    Why is my dehumidifier freezing up?

    Frost buildup happens when the room temperature is below 65 degrees, airflow is blocked by a dirty filter, or the defrost sensor has failed. Clean the filter, increase the room temperature, and ensure six inches of clearance around the unit. If the problem persists, the defrost sensor may need replacement.

    How much water should a dehumidifier collect in 24 hours?

    A typical portable dehumidifier rated for thirty to fifty pints per day should collect roughly one to three gallons in a damp basement during summer. Collection drops in cooler or less humid conditions. If the unit is running continuously and collecting less than a pint per day, something is wrong.

    Why is my dehumidifier not collecting water in the winter?

    Cold air holds less moisture, and standard dehumidifiers struggle when room temperatures drop below 65 degrees. The coils may frost over before water can drip into the bucket. Switch to a low-temperature unit or raise the room temperature if possible.

    What is the average life expectancy of a dehumidifier?

    Most portable dehumidifiers last five to eight years with regular maintenance. Units that are cleaned monthly and not run in extreme cold tend to reach the upper end of that range. If your unit is over seven years old and needs a major repair, replacement is usually the better option.

    Why does my dehumidifier keep turning off?

    Frequent shutoffs are usually caused by a full bucket, a misaligned bucket switch, the unit reaching the target humidity level, or an overheating compressor. Empty the bucket, re-seat it, lower the humidity setting slightly, and make sure the intake vents are not blocked.

    Conclusion

    Dehumidifier troubleshooting does not have to be overwhelming. Most issues come down to a few predictable causes: power, settings, temperature, airflow, or drainage. If you run through the checks in this guide methodically, you will diagnose the problem faster than waiting for a repair appointment.

    Remember that regular cleaning and proper placement prevent the majority of failures before they start. Start with the quick five-minute diagnosis, then move into the specific problem section that matches your symptoms. If you reach the end of the fixes and the unit still fails, use the repair versus replace guidelines to make a smart financial decision.

    Keeping your humidity under control protects your home, your health, and your wallet. This dehumidifier troubleshooting guide should get you back to dry, comfortable air in no time.