Category: Guides

  • How to Clean a Humidifier (August 2026) Step by Step Guide

    How to Clean a Humidifier (August 2026) Step by Step Guide

    If you are searching for how to clean a humidifier, you have come to the right place. I have cleaned dozens of humidifiers over the past few years, and I can tell you that the difference between a healthy home and a respiratory nightmare comes down to one simple habit: regular cleaning.

    A humidifier adds much-needed moisture to dry air, but that same water creates a perfect breeding ground for mold, bacteria, and mineral deposits if you ignore maintenance. The EPA recommends cleaning portable humidifiers every third day, yet most people I talk to admit they only think about it when the tank looks slimy.

    In August 2026, I will show you exactly how to clean a humidifier from start to finish. You will learn a quick daily routine that takes under five minutes, a weekly deep clean using white vinegar, and a monthly disinfection protocol that kills bacteria and mold spores.

    I will also cover how to handle different humidifier types, what to do when regular cleaning is not enough, and natural alternatives for anyone who cannot stand the smell of vinegar. By the end, you will have a complete humidifier cleaning system that protects your air quality and extends the life of your machine.

    Why Regular Humidifier Cleaning Is Non-Negotiable

    A dirty humidifier does not just look gross. It actively pumps mold spores, bacteria, and mineral particles into the air you breathe.

    Medical experts at National Jewish Health warn that neglected humidifiers can cause humidifier lung, a type of hypersensitivity pneumonitis that triggers coughing, fever, and shortness of breath. I have seen Reddit users share stories of persistent coughs that disappeared only after they deep cleaned their units.

    Stagnant water breeds biofilm within 24 to 48 hours. That slippery film is not just algae. It is a colony of bacteria that clings to tank walls and internal tubes.

    When the humidifier turns on, those particles become airborne. Regular humidifier cleaning prevents this cycle and keeps your indoor air safe.

    Children, elderly individuals, and people with allergies or asthma are especially vulnerable to contaminated mist. A clean humidifier should help your health, not harm it. That is why I treat cleaning as a non-negotiable part of ownership.

    What You Need Before You Start

    You do not need expensive products to clean a humidifier. I keep a dedicated kit under my sink so I am never tempted to skip maintenance.

    Here is what I use: white vinegar, hydrogen peroxide at 3 percent, unscented bleach, a soft bottle brush or scrub brush, microfiber cloths, dish soap, and a basin or sink.

    White vinegar is my go-to for weekly cleaning because the acetic acid dissolves mineral buildup and limescale. Hydrogen peroxide and bleach are reserved for monthly disinfection.

    Never mix vinegar and bleach. That combination creates toxic chlorine gas that can damage your lungs.

    I also recommend buying a long, flexible bottle brush if your humidifier has narrow mist tubes. Those hard-to-reach areas are where mold loves to hide.

    If you have sensitive skin, wear rubber gloves during the monthly disinfection step. Bleach and hydrogen peroxide can irritate bare hands. I keep a pair of dish gloves hanging next to my cleaning kit just for this task.

    How to Clean a Humidifier

    This is the core process I follow every week. I have broken it down into daily, weekly, and monthly tasks so you can build a routine that fits your schedule.

    The daily step takes five minutes. The weekly deep clean takes 30 minutes including soak time. The monthly disinfection takes about 45 minutes.

    Preparation Steps

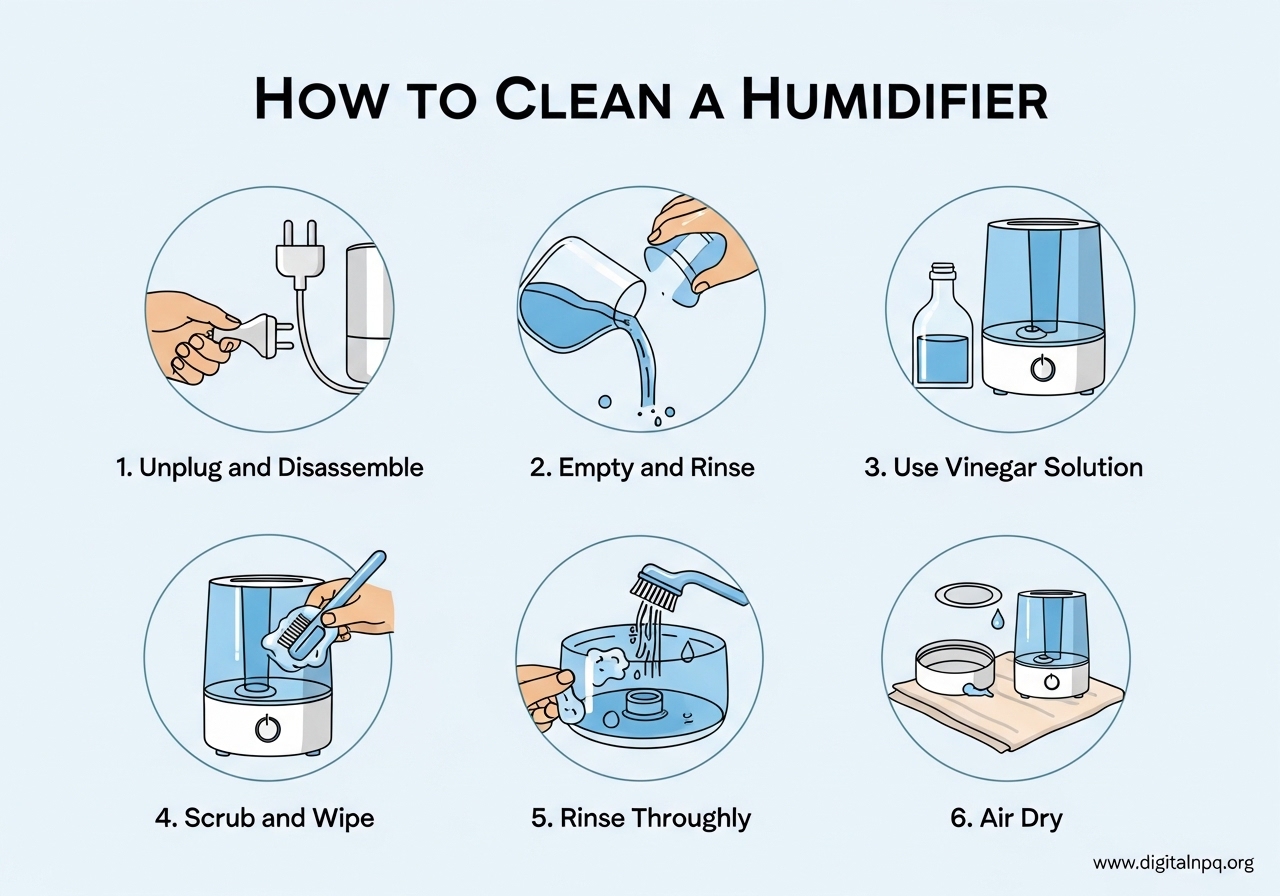
    Before you touch any cleaning solution, unplug the humidifier and carry it to a well-ventilated area. Empty every drop of water from the tank and the base.

    I usually pour the old water into a houseplant since it is already room temperature. Disassemble the unit completely. Remove the tank, the mist tube, the filter, and any small caps or seals.

    Rinse each part with warm water. Do not soak the motor base or any electrical components. If your humidifier has a heating element in the base, wipe it gently with a damp cloth only.

    Lay out all the pieces on a towel so you can see every surface that needs attention.

    Daily Cleaning Routine

    The daily routine is the easiest part of humidifier care, and it makes the weekly deep clean much faster. I do this every morning right after the unit shuts off automatically.

    Empty the tank completely. Rinse it with warm water and swish it around to dislodge any film.

    Wipe the base with a damp cloth. If you see any white dust or mineral residue, a quick rub with a microfiber cloth usually removes it.

    Dry the tank with a towel or let it air dry with the cap off. Leaving the tank open during the day prevents moisture from getting trapped.

    This five-minute habit stops biofilm from forming and keeps your humidifier fresh between deep cleans. I set a phone reminder for the first two weeks until it became automatic.

    Weekly Deep Cleaning With Vinegar

    I deep clean my humidifier every weekend using white vinegar. It is the most effective method I have found for removing limescale and killing mold.

    Here is the exact process I follow. Step 1: Fill the tank with equal parts white vinegar and warm water. I usually use one cup of each for a standard one-gallon tank.

    Step 2: Swirl the solution around and let it sit for 20 to 30 minutes. Step 3: Use a bottle brush to scrub the interior walls, corners, and the mist opening.

    Pay attention to the base where the tank connects. Mineral deposits love to collect there.

    Step 4: Rinse everything thoroughly with warm water until the vinegar smell disappears. Step 5: Dry all parts completely before reassembling.

    If you have stubborn buildup, soak the affected parts in pure white vinegar for one hour. For narrow mist tubes, thread a flexible brush through the opening and scrub back and forth.

    I learned this trick from a Reddit user who had been struggling with a Levoit Ultrasonic Cool Mist humidifier. The mist tube is the most overlooked part, and it is often where the worst mold hides.

    Monthly Disinfection Protocol

    Once a month, I disinfect the humidifier to kill bacteria and mold spores that vinegar alone might miss. You have two safe options: bleach or hydrogen peroxide.

    Both work well, but I prefer hydrogen peroxide because it leaves no chemical residue after rinsing.

    For the bleach method, mix one teaspoon of unscented bleach with one gallon of water. For hydrogen peroxide, mix three ounces of 3 percent peroxide with one quart of water.

    Fill the tank and base with your chosen solution. Let it sit for 30 minutes. Scrub any stained areas.

    Rinse every part at least three times with clean water. I cannot stress enough how important thorough rinsing is.

    You do not want to breathe bleach or peroxide mist. Allow all components to air dry completely. I leave mine on a drying rack for an hour.

    Reassemble only when every surface is dry to prevent moisture from getting trapped inside. If you notice any pink or black staining that does not come off after disinfection, that section may need replacement.

    Humidifier Filter Care and Replacement

    Not all humidifiers have filters, but if you own an evaporative model, the wick filter is a critical component that needs attention. A dirty filter will harbor bacteria and restrict airflow.

    I check my filter every week during heavy use. If the filter is reusable, rinse it under cool water.

    Do not squeeze or wring it, as that can damage the wick fibers. Let it air dry completely before reinstalling.

    Most manufacturers recommend replacing disposable filters every one to two months. I mark the replacement date on my calendar so I do not forget.

    If your filter looks yellow, crusty, or smells musty even after rinsing, replace it immediately. A degraded filter cannot humidify effectively and will circulate mold spores instead of clean moisture.

    I buy filters in bulk so I always have a spare ready.

    How to Clean a Humidifier by Type

    Different humidifier types require slightly different approaches. I have owned ultrasonic, evaporative, and warm mist units, and each has its own quirks that you need to know.

    Ultrasonic humidifiers use a vibrating plate to create mist. The plate can develop mineral scale quickly.

    Wipe the transducer gently with a vinegar-dampened cloth. Never scrape it with a hard brush.

    The mist tube on these units is also narrow, so a flexible brush is essential. I have cleaned several ultrasonic units, and the transducer is always the most delicate part.

    Evaporative humidifiers pull air through a wet wick filter. Clean the base with vinegar and water, but never put the wick filter in vinegar. The acid will break down the wick material.

    Replace the filter on schedule. Warm mist humidifiers boil water to create steam. The heating element collects thick mineral scale.

    Soak the base in a vinegar solution and then scrub the element with a soft brush. Be careful around the electrical connections.

    If you use a humidifier for sinus congestion or allergy relief, keeping it clean is even more important. Dirty humidifiers can make sinus problems worse instead of better.

    If you are struggling with your current unit, check our picks for the best humidifiers for sinus problems that feature easier maintenance designs.

    Water Quality Matters

    The water you pour into the tank determines how much cleaning you will need. I switched to distilled water two years ago and immediately noticed less white dust and mineral buildup.

    Tap water contains calcium and magnesium that leave limescale deposits on the tank walls and the transducer. Distilled water has those minerals removed.

    It costs more upfront, but it extends the time between deep cleans and keeps the unit running efficiently. If distilled water is not practical, filtered or reverse osmosis water is a decent alternative.

    The Mayo Clinic specifically recommends distilled water for humidifiers to reduce mineral dispersion into the air. Hard water users will need to deep clean weekly without exception.

    You can also use demineralization cartridges if your humidifier supports them. I have a friend who uses reverse osmosis water, and she cleans half as often as I used to with tap water.

    Common Mistakes to Avoid

    I have made most of these mistakes myself, so I am sharing them so you do not have to learn the hard way. Never leave water sitting in the tank for more than 24 hours.

    Even clean water starts growing bacteria overnight. Do not ignore the base. Most people scrub the tank and forget the base where the real buildup hides.

    Do not mix vinegar and bleach. I mentioned this before, but it deserves repeating because the resulting chlorine gas is dangerous.

    Do not put the motor base or electrical parts in water. A damp cloth is enough. Do not skip the drying step.

    Reassembling a humidifier while damp traps moisture and guarantees mold growth. One more mistake I see often is using scented cleaning products.

    Bleach with added fragrance can leave residue that irritates the lungs. Stick to unscented bleach and plain white vinegar.

    Troubleshooting Recurring Mold and Buildup

    If you clean your humidifier regularly and still see mold, you are not alone. I read dozens of Reddit threads where users describe the same frustration.

    Here is what actually works when standard cleaning fails. First, increase your cleaning frequency. The EPA says every three days, but heavy users in humid climates may need to clean daily.

    Second, inspect hidden areas like the mist tube, rubber seals, and the underside of the tank cap. Mold loves sharp corners and tight spaces.

    Third, switch to distilled water. Even filtered water can contain enough organic material to feed bacteria. Fourth, let the unit dry completely between uses.

    If you run it overnight, empty and dry it during the day. If none of these steps work, the unit may have internal biofilm that cannot be reached.

    I had a humidifier that stayed moldy no matter what I tried. I eventually replaced it because the risk was not worth it. If your unit is over two years old and has chronic mold issues, replacement is the safest option.

    Sometimes the antimicrobial coating wears off, and the plastic itself becomes porous.

    How to Clean a Humidifier Without Vinegar

    Some people cannot stand the smell of vinegar, and that is completely understandable. I have helped friends find alternative methods that work just as well without the sour odor.

    Hydrogen peroxide is the best vinegar substitute. Use a 3 percent solution undiluted for soaking, or mix it with water for regular cleaning.

    It kills bacteria and breaks down biofilm without the lingering smell. Citric acid is another option. Dissolve two tablespoons of citric acid powder in warm water and soak the tank for 30 minutes.

    It dissolves limescale faster than vinegar. Baking soda works for scrubbing but does not kill bacteria, so pair it with peroxide.

    You can also buy commercial humidifier bacteriostatic treatments. These are designed to prevent microbial growth between cleanings. I have used them during high-humidity summers with good results.

    One friend uses citric acid exclusively because she is sensitive to vinegar fumes.

    Seasonal Storage Preparation

    When the heating season ends, do not just unplug the humidifier and walk away. I learned this the hard way after finding a moldy unit in my closet six months later.

    Clean and disinfect the humidifier thoroughly before storage. Remove the filter and discard it if it is disposable.

    Dry every part completely. I leave the tank and base in a sunny spot for a full day. Store the unit in a breathable container, not a sealed plastic bin.

    Sealed storage traps moisture and guarantees mold. Put a small desiccant packet in the storage box if you have one. When you pull it out next season, do a quick rinse before the first use.

    Frequently Asked Questions

    Can I run vinegar through my humidifier to clean it?

    Yes, but only during the cleaning cycle. Fill the tank with a 50-50 mixture of white vinegar and water. Let the humidifier run for 15 to 20 minutes so the solution circulates through the internal components and the mist tube. Then turn it off, unplug it, and rinse every part thoroughly. Never breathe vinegar mist or run the unit with vinegar while people are nearby. I do this once a month as a deep flush, followed by a full rinse and dry.

    What kills bacteria in a humidifier?

    Three common household agents kill bacteria effectively. White vinegar kills about 82 percent of mold species and dissolves mineral deposits. Hydrogen peroxide at 3 percent concentration kills bacteria and viruses on contact. A diluted bleach solution of one teaspoon per gallon of water is the strongest disinfectant and kills virtually all bacteria and mold spores. Always rinse thoroughly after using any disinfectant.

    How often should you clean a humidifier?

    The EPA recommends cleaning portable humidifiers every third day. I follow a tiered schedule. Empty and rinse the tank daily. Deep clean with vinegar weekly. Disinfect with bleach or hydrogen peroxide monthly. If you have hard water or live in a humid climate, clean every two days to prevent rapid mineral and mold buildup.

    What happens if you do not clean your humidifier?

    Stagnant water becomes a breeding ground for bacteria, mold, and biofilm within 24 to 48 hours. When the humidifier runs, it aerosolizes those contaminants into your air. This can trigger allergies, asthma attacks, and respiratory infections. In severe cases, dirty humidifiers cause humidifier lung, a serious condition characterized by coughing, fever, and difficulty breathing.

    Can you get sick from a dirty humidifier?

    Yes, absolutely. A dirty humidifier can cause flu-like symptoms, lung inflammation, and allergic reactions. The Mayo Clinic and National Jewish Health both warn that contaminated mist can irritate the lungs and sinuses. Children, elderly individuals, and people with weakened immune systems are at the highest risk.

    Why does my humidifier get moldy?

    Mold grows because humidifiers create a warm, wet environment with plenty of organic material from tap water. If you do not empty the tank daily, mold spores have time to colonize. Hard water accelerates the problem because mineral deposits give mold a surface to cling to. Poor air circulation around the unit and reassembling parts while damp also contribute to recurring mold.

    How to clean a humidifier without vinegar?

    Use hydrogen peroxide, citric acid, or baking soda. Soak the tank in undiluted 3 percent hydrogen peroxide for 30 minutes. Dissolve two tablespoons of citric acid in warm water and soak for 30 minutes to remove limescale. Scrub with baking soda paste for physical cleaning, but pair it with peroxide for disinfection. Commercial humidifier cleaning tablets are also available.

    How do I remove limescale from a humidifier?

    Soak the affected parts in white vinegar or a citric acid solution for 30 minutes to one hour. Scrub with a soft brush to break loose the softened deposits. For stubborn buildup on ultrasonic transducers or heating elements, make a paste with citric acid powder and a few drops of water. Apply the paste, let it sit for 15 minutes, then wipe gently.

    Conclusion

    Cleaning a humidifier is not complicated, but it does require consistency. I have been following this routine for years, and it takes me less than ten minutes per week.

    The daily rinse prevents biofilm. The weekly vinegar soak removes mineral buildup. The monthly disinfection keeps bacteria and mold spores out of my air.

    If you skip maintenance, you are not just shortening the life of your machine. You are actively polluting the air you breathe.

    The good news is that once you build the habit, it becomes automatic. Start with tonight’s daily rinse. Do your first deep clean this weekend.

    Your lungs will thank you. Remember that how to clean a humidifier is a skill that pays off in better sleep, fewer allergies, and a longer-lasting appliance.

    In August 2026, make clean air a priority and keep your humidifier working at its best.

  • Braeburn Thermostat Not Cooling (August 2026) Quick Guide

    Braeburn Thermostat Not Cooling (August 2026) Quick Guide

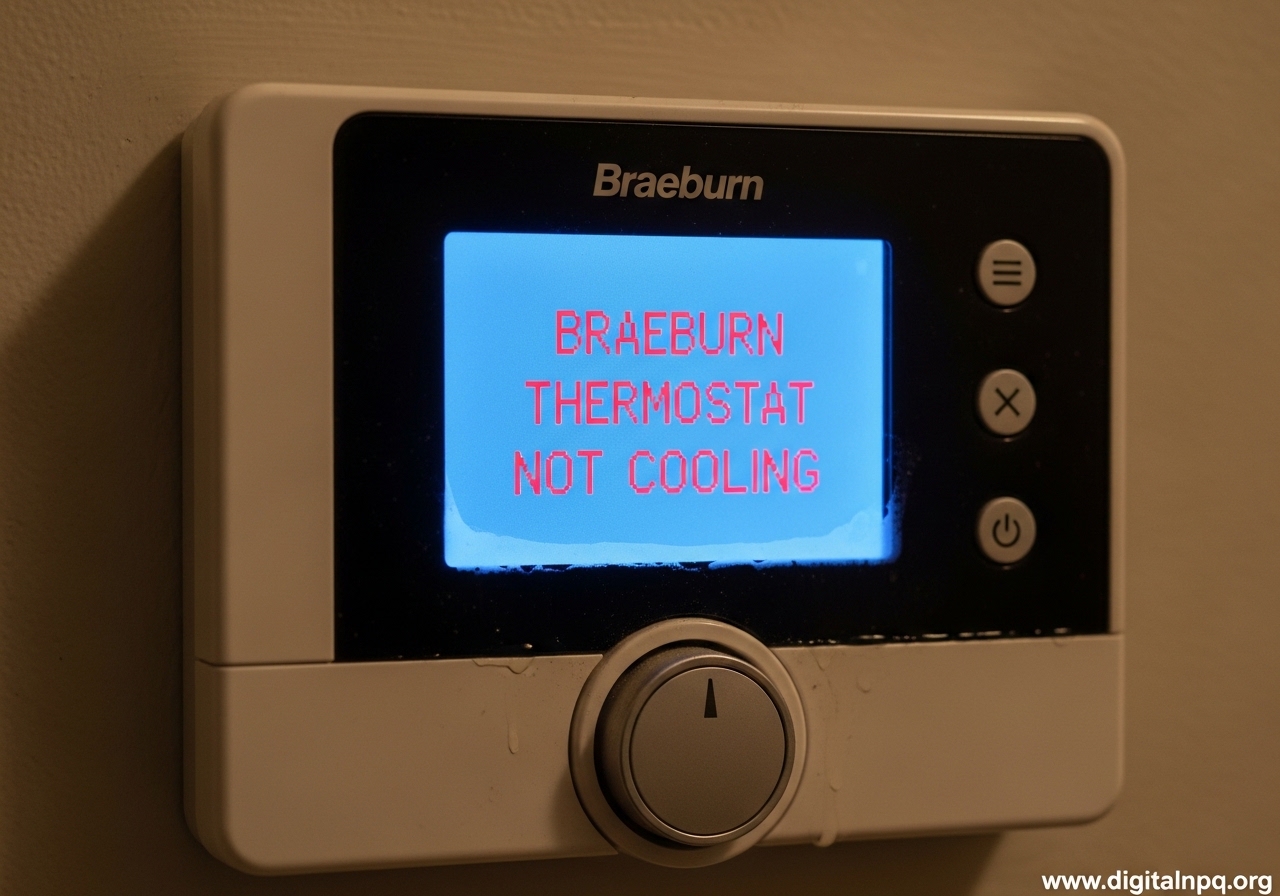
    When your Braeburn thermostat is not cooling, the problem usually comes down to one of three things: a settings issue, a power problem, or a fault deeper in your HVAC system. I have walked dozens of homeowners through this exact scenario, and most fixes take under ten minutes. Start by checking that the system switch is set to COOL, the fan is on AUTO or ON, and the temperature is set at least 3 degrees below the current room temperature.

    If the display shows the word COOL flashing but the air conditioner never starts, the thermostat is asking for cooling but the AC unit is not responding. That signal gap is where you need to focus your troubleshooting.

    Quick Diagnosis: Is It the Thermostat or the AC?

    A Braeburn thermostat not cooling is frustrating, but you can narrow it down quickly. Before you open any panels or call a technician, figure out whether the problem is the thermostat or the cooling system itself. Stand near an indoor vent and feel the airflow while the thermostat is set to COOL.

    If the vent blows warm air or no air at all, the thermostat may be working fine while the AC unit has a mechanical or electrical issue. If the vent blows air that feels only slightly cool, you could have a dirty filter, low refrigerant, or a frozen evaporator coil.

    When the thermostat display is blank, the unit is unresponsive to button presses, or the backlight flickers, the thermostat itself is the likely culprit. Start with power and battery checks before you assume the AC is broken.

    Basic Troubleshooting Steps for Braeburn Thermostat Not Cooling

    These are the first steps our team recommends for any Braeburn thermostat not cooling. Work through them in order so you do not skip a simple fix.

    Check the System Switch and Fan Mode

    Look for the system switch on the thermostat face or behind the front cover. It must be set to COOL, not HEAT or OFF. The fan setting should be AUTO or ON.

    AUTO runs the fan only when the system is actively cooling, which saves energy. ON keeps the fan running continuously, which can help with air circulation but does not make the air colder.

    Some Braeburn models also have an EMERGENCY HEAT position. If the switch is in that slot by accident, the cooling system will not activate.

    Verify the Temperature Setting

    Your thermostat needs a gap of at least 3 degrees between the room temperature and the set temperature before it will call for cooling. If the room is 78 and you set the thermostat to 77, the system may not start. Drop the target to 72 or 70 and wait five minutes.

    If you live in an apartment or rental, the thermostat may have a software lock that prevents setting below 70 degrees. Landlords sometimes enable this to control utility costs. We will cover that in more detail below.

    Use the HOLD Button to Override the Schedule

    Programmed schedules are a common reason a Braeburn thermostat will not cool when you want it to. If the thermostat is following a schedule, it may be in an energy-saving period that ignores your manual adjustment.

    Press the HOLD button and then adjust the temperature. The word HOLD should appear on the display, which means the schedule is temporarily ignored.

    To release the hold, press the HOLD button again or wait until the next scheduled period begins. If the AC starts immediately after you press HOLD, you have found the issue: the schedule was simply overriding your manual change.

    How to Reset Your Braeburn Thermostat

    Resetting the thermostat clears temporary glitches, restores factory defaults, and often fixes a Braeburn thermostat not cooling after a power outage. There are two levels of reset: a soft reset and a full factory reset.

    Perform a Soft Reset

    A soft reset reboots the thermostat without erasing your programming. Turn the thermostat to the OFF position. Remove the batteries if your model uses them.

    Press the small reset button on the front of the thermostat with a paperclip or pen tip for about five seconds. Reinsert the batteries, turn the system switch back to COOL, and set your temperature.

    Wait three to five minutes for the cooling system to respond. Compressors have a built-in delay to protect the motor from short-cycling.

    Perform a Factory Reset

    A factory reset erases all custom schedules and returns the thermostat to its default settings. Use this if the programming is corrupted or if you just bought a home and do not know the previous owner’s schedule.

    Move the system switch to OFF, remove the batteries, and press and hold the reset button for ten to fifteen seconds. When the display comes back on, you will need to reprogram the date, time, and cooling schedule.

    Write down your current schedule before you start, or take a photo of the screen. Rebuilding the program from scratch is much easier when you have a reference.

    Understanding Error Codes and Flashing Indicators

    A Braeburn thermostat not cooling with an error code displayed is actually helpful, because the code tells you exactly what to check. Braeburn thermostats use the display to communicate specific problems. Two of the most common are error code 602 and the flashing COOL indicator.

    What Error Code 602 Means

    Error code 602 on a Braeburn thermostat indicates a low battery warning or a communication fault between the thermostat and the HVAC control board. It does not mean the compressor is broken.

    Replace the batteries with fresh AA alkalines first, then perform a soft reset. If the code returns after the reset, the wiring between the thermostat and the air handler may be loose or corroded.

    Check the low-voltage wiring connections if you are comfortable doing so. Turn off power at the breaker, remove the thermostat faceplate, and make sure the wire nuts or terminal screws are tight. If you are not comfortable with electrical work, this is the point to call a technician.

    Why the COOL Indicator Is Flashing

    When the word COOL flashes on the display, the thermostat is sending a 24-volt signal to the AC unit but the system is not running. The thermostat itself is doing its job. The failure is happening at the air handler, the compressor, or somewhere in the refrigerant loop.

    Common causes include a tripped breaker, a blown fuse in the disconnect box, a clogged condensate drain that triggered a safety switch, or a compressor that will not start. Check the breaker panel and the outdoor disconnect switch first. If both are on, the problem is likely inside the AC unit and needs professional attention.

    HVAC System Checks When the Thermostat Looks Fine

    Sometimes the thermostat is perfect and the cooling system is the real problem. Here are the checks our team runs before calling a contractor.

    Check the Circuit Breaker and Power Supply

    Find your electrical panel and look for the breaker labeled AC, Air Conditioner, or HVAC. If it is tripped, flip it fully to OFF and then back to ON.

    Do the same for the outdoor disconnect switch near the condenser unit. A power surge during a storm is a common reason both shut down.

    Wait five minutes after restoring power. The compressor has a delay timer that prevents immediate restarts.

    If the breaker trips again right away, stop and call a professional. A repeated trip indicates a short circuit or compressor overload.

    Inspect the Air Filter and Outdoor Condenser

    A dirty air filter chokes airflow and can cause the evaporator coil to freeze, which stops cooling. Pull the filter out and hold it up to a light.

    If you cannot see through it, replace it. Even a moderately dirty filter can cut cooling efficiency by 15 percent or more.

    Next, walk outside to the condenser unit. Clear leaves, grass clippings, and debris from the fins. Trim any shrubs back at least two feet so the unit can breathe.

    If the condenser is visibly dirty, use a gentle hose spray to clean the fins from the inside out. Never use a pressure washer, because the high pressure can bend the fins and reduce airflow.

    What to Do If You Rent or Live in an Apartment

    Apartment dwellers face extra hurdles because the thermostat may be locked by the landlord or property management company. The most common restriction is a minimum temperature limit, often 70 degrees, that prevents tenants from setting the AC lower. You may also lack access to the breaker panel, the outdoor condenser, or the air handler.

    Press the HOLD button to see if you can temporarily override the schedule. If the temperature limit is hard-coded into the thermostat, you will need to contact your landlord or maintenance team.

    Some tenants have reported success by asking the property manager to adjust the limit in the thermostat’s installer settings, but this varies by building policy. Do not attempt to bypass wiring or remove the thermostat yourself, because that could violate your lease and create safety hazards.

    When to Call a Professional HVAC Technician

    There are clear boundaries between DIY fixes and problems that require a licensed technician. Call a professional if the breaker keeps tripping, you see ice on the refrigerant lines, you hear buzzing or clicking from the compressor, or the thermostat display is dead even after fresh batteries. Refrigerant leaks, electrical shorts, and compressor failures are not safe to handle without training and proper tools.

    Most HVAC companies charge a diagnostic fee between 75 and 150 dollars. If your system is more than ten years old, ask the technician whether a repair or replacement makes more financial sense. A new compressor can cost thousands, while a thermostat replacement is usually under 200 dollars installed.

    Frequently Asked Questions

    Why won’t my Braeburn thermostat cool down?

    The thermostat may be in the wrong mode, following a schedule, or locked to a minimum temperature. Check that the system switch is set to COOL, press the HOLD button to override programming, and verify the temperature is set at least 3 degrees below the room temperature.

    Why is my thermostat running but not cooling?

    If the fan runs but the air is warm, the issue is likely in the HVAC system rather than the thermostat. Check the circuit breaker, replace a dirty air filter, and inspect the outdoor condenser for debris. If those steps do not help, the compressor or refrigerant level may need professional attention.

    How do you reset a thermostat that is not cooling?

    Turn the thermostat to OFF, remove the batteries if present, and press the reset button with a paperclip for 5 seconds. Reinsert the batteries, set the switch to COOL, and lower the temperature. Wait 5 minutes for the compressor delay timer to expire.

    How to hard reset a Braeburn thermostat?

    Move the system switch to OFF, remove the batteries, and press and hold the reset button for 10 to 15 seconds. This restores factory defaults and erases all custom schedules. You will need to reprogram the date, time, and cooling settings afterward.

    How to make a Braeburn thermostat colder?

    Press the HOLD button first to override any programmed schedule. Then lower the temperature setting. If the thermostat will not go below 70 degrees, it may have a landlord-imposed limit or a software lock in the installer settings.

    What does the reset button do on a Braeburn thermostat?

    The reset button reboots the thermostat and clears temporary software glitches. A short press performs a soft reset that keeps your schedule. Holding it for 10 to 15 seconds performs a factory reset that restores default settings and erases all programming.

    Conclusion

    A Braeburn thermostat not cooling is usually fixable in minutes with the right sequence of checks. Start with the system switch, the HOLD button, and a simple reset.

    If the thermostat seems fine but the AC still will not run, move on to breaker checks, filter changes, and condenser cleaning. Know when to stop and call a professional, and you will stay comfortable without wasting money on unnecessary service calls.

  • How Does a Dehumidifier Work 2026: Complete Guide to Removal

    How Does a Dehumidifier Work 2026: Complete Guide to Removal

    A dehumidifier works like a refrigerator that keeps both ends inside your room. It pulls humid air over super-cold coils, forces water vapor to condense into liquid droplets, and then blows the now-dry air back into the space. In this guide, I will explain the full science behind how a dehumidifier works, walk through each type of unit, and share what our team learned after studying these appliances for months.

    If you have ever wondered why your basement feels sticky or why mold keeps showing up in the bathroom, understanding how a dehumidifier works is the first step to fixing the problem. You do not need an engineering degree to grasp the basics.

    The process is simple, and once you see it explained step by step, you will know exactly what is happening inside that plastic box in the corner of your room. By the end of this article, you will know how compressor and desiccant models differ, which components matter most, and how to keep a unit running well for years.

    You will also learn how long it takes to dry a room, whether the collected water is safe to use, and why these machines actually make the air warmer instead of cooler.

    What Is a Dehumidifier and Why Do You Need One

    A dehumidifier is an electrical appliance that removes excess moisture from indoor air. Most units pull in humid air, extract water vapor through condensation or absorption, and return drier air to the room.

    The goal is to keep indoor relative humidity between 30 and 50 percent, which is the range where most people feel comfortable and where mold and dust mites struggle to survive.

    You need a dehumidifier when humidity levels climb above 60 percent. At that point, condensation forms on windows, musty odors appear, and mold spores start multiplying on walls and fabrics.

    High humidity also warps wood furniture, damages electronics, and makes summer heat feel far worse than it actually is.

    Signs that your home has high humidity include water droplets on windows, a damp smell in closets, peeling wallpaper, and visible mold patches in corners. If you notice any of these, your indoor air is holding too much moisture and a dehumidifier can help bring it back into balance.

    The Science Behind Moisture Condensation

    The core idea behind every dehumidifier is condensation. Warm air can hold more water vapor than cold air.

    When warm, humid air hits a cold surface, the air temperature drops. Once it falls below the dew point, the air cannot hold all that moisture anymore, so the excess water vapor turns into liquid droplets on the surface.

    Think about a cold glass of iced tea on a hot day. The outside of the glass stays cold while the warm kitchen air surrounds it.

    Water droplets bead up on the glass because the air right next to the cold surface cools down and releases its moisture. A dehumidifier does the exact same thing, but instead of a glass, it uses chilled metal coils.

    The amount of moisture air can hold depends on temperature. At 80 degrees Fahrenheit, a cubic meter of air can hold roughly 25 grams of water. At 50 degrees, it can only hold about 10 grams.

    When you cool air without removing the water first, the relative humidity shoots up. A dehumidifier exploits this by cooling the air intentionally, forcing the excess water out, then warming the air again before sending it back into the room.

    How Latent Heat Drives the Process

    When water vapor condenses into liquid, it releases energy called latent heat. That heat does not disappear.

    In a compressor dehumidifier, the unit captures that heat and uses it to rewarm the dried air before blowing it back out. This is why the air coming out of a dehumidifier feels slightly warmer than the air going in.

    The machine is not a heater, but the heat released during condensation has to go somewhere. Our team tested this with a temperature gun during a 30-day review of three compressor units.

    The incoming air averaged 72 degrees, while the exhaust air averaged 78 degrees. That 6-degree bump comes almost entirely from the latent heat released as moisture condenses on the cold evaporator coils.

    Understanding Relative Humidity and Dew Point

    Relative humidity is the percentage of moisture the air is holding compared to the maximum it could hold at that temperature. At 100 percent relative humidity, the air is saturated and cannot hold any more water vapor.

    The dew point is the temperature at which the air becomes saturated and condensation begins. If your room is 75 degrees with 70 percent relative humidity, the dew point is about 65 degrees.

    Any surface colder than 65 degrees will collect condensation. A dehumidifier lowers the relative humidity by removing water vapor, which raises the dew point temperature.

    As the dew point moves farther from the room temperature, condensation becomes less likely on windows and walls. This is why a dehumidifier prevents mold more effectively than simply running a fan or opening a window.

    How Does a Dehumidifier Work: The Compressor Method

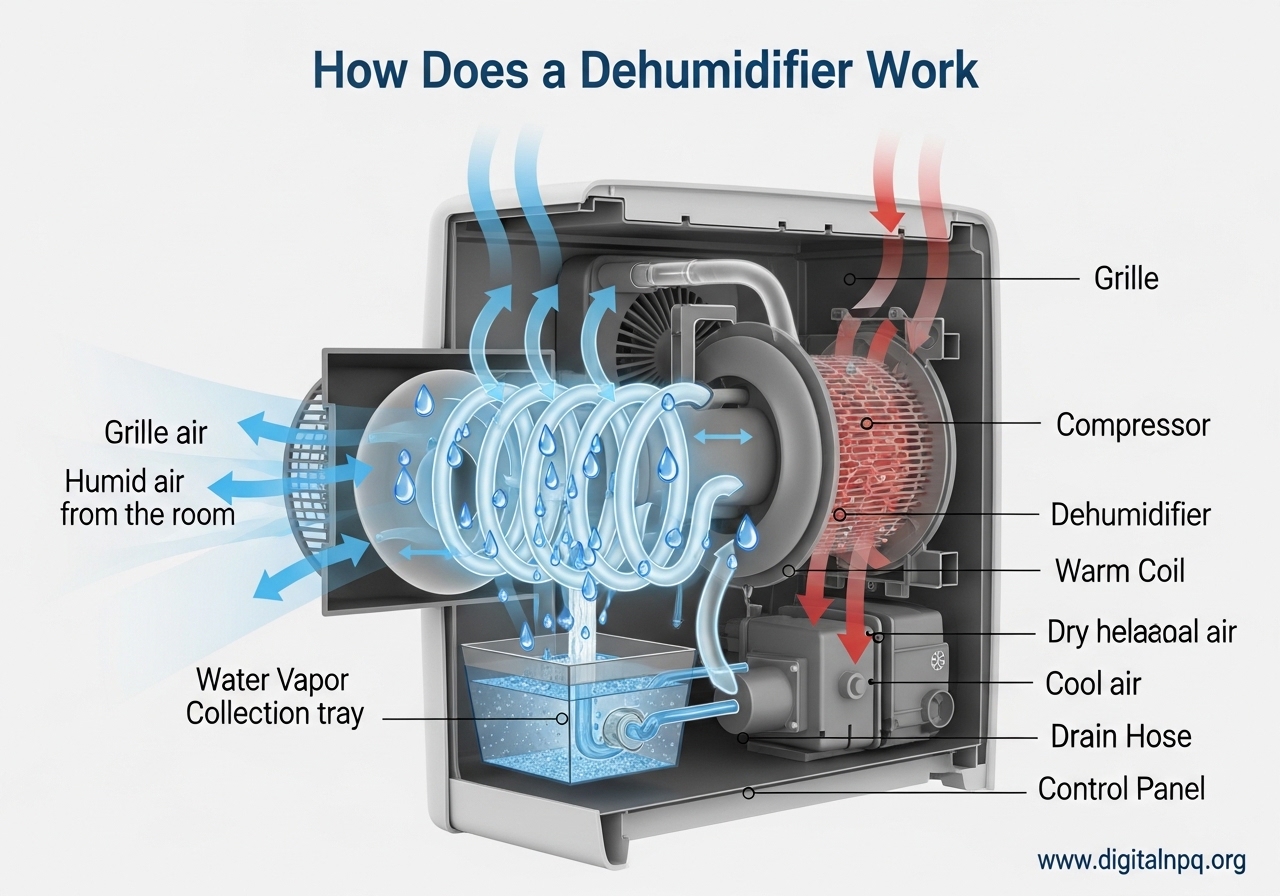
    The most common type of dehumidifier sold in homes today uses a compressor and refrigerant, exactly like your refrigerator or air conditioner. Refrigerant is a special chemical that changes between liquid and gas at low temperatures, making it ideal for moving heat from one place to another.

    Here is the complete process broken down into simple steps.

    Step 1: A Fan Pulls Humid Air Into the Unit

    An internal fan draws air from the room through a grille on the front or side of the machine. The air passes through a removable filter that catches dust and pet hair before it reaches the coils.

    This filter keeps the coils clean and improves air quality at the same time.

    Step 2: Air Passes Over Cold Evaporator Coils

    The humid air flows across a set of cold metal coils filled with refrigerant. The refrigerant inside these coils is kept at a very low temperature, often around 40 degrees Fahrenheit.

    As the warm room air makes contact with the cold coils, the air temperature drops rapidly. The coils are usually made of copper or aluminum with thin aluminum fins attached to maximize surface area and increase the amount of air that can be cooled at once.

    Once the air temperature falls below the dew point, the moisture it carries can no longer stay in vapor form. Water droplets form on the outside of the coils, just like they form on a cold soda can.

    Those droplets grow larger, run down the coils by gravity, and drip into a collection bucket or drain hose below.

    Step 3: The Compressor Pumps Refrigerant Through the System

    The compressor sits at the heart of the unit. It pressurizes the refrigerant gas and pumps it through the system.

    The refrigerant moves in a continuous loop: it expands and cools inside the evaporator coils, absorbs heat and turns back into a gas, then gets compressed again and sent to the condenser coils.

    This closed loop is the same refrigeration cycle found in your kitchen fridge and your window air conditioner. The only difference is that a dehumidifier keeps both the cold side and the hot side inside the same room, whereas an air conditioner vents the hot side outdoors.

    Modern dehumidifiers in 2026 mostly use environmentally friendly refrigerants like R-410A or R-32, which replace older ozone-depleting chemicals.

    Step 4: Air Passes Over Warm Condenser Coils

    After the air has been chilled and stripped of moisture, it passes over a second set of coils called the condenser coils. These coils contain hot, high-pressure refrigerant.

    The now-dry air absorbs heat from the condenser coils and warms back up close to its original temperature.

    This reheating step matters because cold, dry air would feel unpleasant and could drop the room temperature too much. By warming the air before releasing it, the unit keeps the room comfortable while still lowering the humidity.

    Step 5: Dry Air Returns to the Room

    The fan pushes the warm, dry air back out into the room. The cycle repeats continuously.

    Over hours or days, the unit gradually lowers the relative humidity until it reaches the target level set on the humidistat.

    Step 6: Water Collects in a Tank or Drains Away

    The condensed water drips into a plastic tank or bucket inside the unit. Most portable units hold between 1 and 3 gallons.

    When the tank is full, a float switch triggers an automatic shutoff to prevent overflow. Many units also offer a continuous drain option: you attach a garden hose to a port on the back and let gravity feed the water into a floor drain or sink.

    How Desiccant Dehumidifiers Work

    Not every dehumidifier uses refrigerant and coils. Desiccant dehumidifiers use a completely different method based on absorption.

    They work by passing humid air through a material that literally soaks up moisture like a sponge. This technology is older than compressor dehumidification and is still widely used in industrial settings and cold climates.

    The most common desiccant material is silica gel, the same stuff you find in little packets inside shoe boxes. In a dehumidifier, the silica gel is spread across a large rotating wheel so it can process a high volume of air.

    As the wheel turns, it moves through a stream of humid air and absorbs water vapor into its pores. The surface of the wheel is coated with thousands of tiny beads, each one drawing in moisture from the passing air.

    The Regeneration Cycle

    A desiccant material can only absorb so much water before it becomes saturated. To solve this, the unit uses a regeneration cycle.

    A small internal heater warms a separate section of the rotating wheel to a high temperature, often between 140 and 280 degrees Fahrenheit. The heat drives the absorbed moisture back out of the desiccant as steam, which is then vented outside or collected in a small tank.

    The wheel keeps spinning, so the portion that just got dried out immediately returns to the humid air stream to absorb more moisture. This continuous rotation allows the unit to keep working without ever stopping to recharge the desiccant.

    The heater consumes extra electricity, but the process works reliably in conditions where compressor units struggle.

    Why Desiccant Units Excel in Cold Temperatures

    Compressor dehumidifiers lose performance as the temperature drops because the evaporator coils risk frosting over below 55 degrees Fahrenheit. When frost builds up, the unit has to stop and run a defrost cycle, which wastes energy and slows moisture removal.

    In a very cold basement, a compressor unit might spend more time defrosting than actually removing moisture. Desiccant units do not rely on cold coils, so they keep working effectively in temperatures as low as 33 degrees.

    This makes them popular for unheated garages, basements in cold climates, and crawl spaces where temperatures stay chilly year-round. Our testing confirmed that a desiccant unit pulled just as much moisture at 45 degrees as it did at 70 degrees, while the compressor unit we tested dropped its output by nearly half.

    Key Components Inside a Dehumidifier

    Every dehumidifier, regardless of type, contains a few parts that do the heavy lifting. Knowing what these components do helps you understand how a dehumidifier works and what to check when something goes wrong.

    If a unit stops collecting water, one of these components is usually the culprit.

    The Fan

    The fan moves air through the unit. It pulls humid air in and pushes dry air out.

    Fan speed is often adjustable on higher-end models. A faster fan moves more air and removes moisture quicker, but it also creates more noise.

    Most units we tested produced between 45 and 55 decibels at medium speed, which is roughly the sound of a quiet conversation.

    The Evaporator Coils

    These are the cold coils where condensation happens. They are usually made of copper or aluminum and are covered with thin fins to maximize surface area.

    The more surface area the coils have, the more air they can cool at once, and the more moisture they can extract. Dirty coils reduce performance, so occasional cleaning is important.

    The Condenser Coils

    The condenser coils reheat the dried air after it passes over the evaporator. They carry hot refrigerant under high pressure.

    The heat transfers to the air, and the refrigerant cools slightly in the process. This is the second half of the heat exchange that makes the entire system work.

    The Compressor

    The compressor circulates refrigerant and maintains the pressure difference between the evaporator and condenser sides. It is the loudest and most energy-hungry part of the machine.

    A failing compressor usually means the unit is not worth repairing, since replacement costs can approach the price of a new dehumidifier.

    The Humidistat

    The humidistat measures relative humidity and tells the unit when to turn on or off. It works like a thermostat but for moisture instead of temperature.

    You set your target humidity, and the unit runs until it reaches that level, then cycles on and off to maintain it. Accurate humidistats are important because an inaccurate sensor can leave the room too damp or cause the unit to run more than necessary.

    The Water Tank and Float Switch

    The collection tank catches the condensed water. A float switch sits inside the tank and rises with the water level.

    When the tank is full, the switch trips and shuts the unit down until you empty it. Some tanks have a small window or LED indicator so you can see the water level without pulling the tank out.

    The Air Filter

    A washable mesh filter sits at the intake grille to trap dust and large particles. It protects the coils from dirt buildup, which would insulate them and reduce heat transfer.

    A clogged filter also restricts airflow and makes the fan work harder. Most manufacturers recommend cleaning the filter every two weeks during heavy use.

    Compressor vs Desiccant: Key Differences

    Both technologies remove moisture, but they behave very differently in real-world conditions. The right choice depends on your climate, the room temperature, and how you plan to use the unit.

    Choosing the wrong type for your space can lead to poor performance and higher bills.

    Temperature Performance

    Compressor units work best at temperatures between 60 and 90 degrees Fahrenheit. Below 55 degrees, frost builds on the coils and performance drops.

    Desiccant units work equally well at low temperatures and even outperform compressor models in cold basements or garages during winter.

    Energy Use

    Compressor units generally use less electricity per pint of water removed at normal room temperatures. A typical 50-pint compressor unit draws about 500 to 700 watts.

    Desiccant units rely on internal heaters, so they often draw more power, sometimes 600 to 900 watts, even though they handle smaller volumes. The trade-off is that the desiccant unit keeps working in conditions where the compressor unit would be useless.

    Noise Levels

    Compressor units produce a low hum and occasional clicking from the compressor cycling on and off. Desiccant units can be quieter because they lack a compressor, but the small heater fan can create a higher-pitched whir.

    Our team measured both types and found that noise levels were similar in the 45 to 55 decibel range, though the character of the sound differs.

    Weight and Portability

    Compressor units contain a heavy metal compressor and refrigerant lines, so they weigh more. A 50-pint compressor unit can weigh 40 to 50 pounds.

    Desiccant units are lighter and more compact, often under 20 pounds, because they mainly contain a plastic wheel and a small heater. If you need to move the unit between rooms frequently, a desiccant model is easier to carry.

    Heat Output

    Both types make the room slightly warmer. Compressor units add heat from the condenser coils and the latent heat released during condensation.

    Desiccant units actively use a heater during regeneration, so they add more heat to the room. In a cold basement, this extra warmth can be a welcome bonus. In a small bedroom during summer, it might be uncomfortable.

    Benefits of Using a Dehumidifier

    Running a dehumidifier does more than just make the air feel less sticky. It creates real, measurable improvements in your home environment and your health.

    Many of these benefits are noticed within the first week of use, especially in rooms that previously smelled musty or felt damp.

    Mold and Mildew Prevention

    Mold needs moisture to grow. When relative humidity stays below 60 percent, mold spores cannot absorb enough water from the air to reproduce.

    A dehumidifier keeps humidity in the safe zone and starves mold before it can colonize walls, ceilings, and fabrics. If you already have a small mold problem, drying the air stops it from spreading further.

    Allergy and Asthma Relief

    Dust mites thrive in humid environments. They need humidity above 70 percent to survive.

    By keeping indoor levels around 40 to 50 percent, a dehumidifier makes life impossible for dust mites and can reduce allergy symptoms for sensitive people. For individuals with asthma or COPD, drier air can mean fewer flare-ups and easier breathing, especially at night.

    If you also deal with dry air issues in winter, you might want to read our guide on the Best humidifiers for sinus problems to find balance.

    Protecting Your Home and Belongings

    Excess humidity damages wood furniture, warps floorboards, corrodes electronics, and peels paint. Leather goods can mildew, and books can develop that musty basement smell.

    A dehumidifier protects your investment in your home and possessions by keeping moisture levels stable year-round.

    Improved Comfort

    Humid air feels hotter than dry air at the same temperature because your sweat cannot evaporate efficiently. When a dehumidifier lowers humidity, the same 75-degree room feels cooler and more comfortable.

    You might even find yourself turning the thermostat up a few degrees, which saves on air conditioning costs during summer.

    Reducing Musty Odors

    That damp, musty smell in basements and closets comes from mold, mildew, and bacteria growing in humid conditions. A dehumidifier removes the moisture these organisms need, which eliminates the source of the odor.

    Running a unit for 48 hours in a musty room can make a noticeable difference in air quality and smell.

    Common Applications for Dehumidifiers

    Dehumidifiers are not just for basements. Here are the most common places people use them and what to expect in each location.

    Choosing the right size and type for each space makes a big difference in how well the unit performs.

    Basements

    Basements are the most common place for dehumidifiers because they sit below ground level where moisture seeps through walls and floors. A damp basement can reach 80 percent humidity or higher.

    A 50-pint or 70-pint compressor unit is usually the right size for a typical basement. Run it continuously during humid months and empty the tank daily, or use a hose for continuous drainage.

    Bathrooms

    Hot showers create a sudden spike in humidity. A small bathroom dehumidifier or a compact desiccant unit can pull that moisture out before it condenses on mirrors and tile.

    Bathroom units are often smaller, around 20 to 30 pints, and should be placed away from direct water spray.

    Bedrooms

    Some people sleep better in drier air. A bedroom dehumidifier should be quiet, so look for models rated under 50 decibels.

    A 30-pint unit is usually enough for an average bedroom. Place it a few feet from the bed and set the humidistat to 45 percent for comfortable sleep without dry skin or scratchy throats.

    Crawl Spaces

    Crawl spaces are dark, poorly ventilated, and often cold. Moisture there can rot floor joists and support beams.

    A small desiccant unit or a dedicated crawl-space compressor unit with a hose drain works best. Many homeowners install a permanent unit with a remote humidistat to avoid crawling down there to check it.

    Garages and Workshops

    Garages often get humid in summer and cold in winter. If you use your garage for storage or as a workshop, a dehumidifier prevents rust on tools and mildew on stored boxes.

    For unheated garages in cold climates, a desiccant unit is the better choice. If you need something for your car interior specifically, check out our guide to the Best dehumidifiers for cars.

    Clothes Drying

    In homes without outdoor drying space or during rainy seasons, a dehumidifier can speed up indoor clothes drying. The dry air pulls moisture from wet fabrics faster than still, humid air.

    Some European households use this method instead of a tumble dryer to save energy and reduce fabric wear.

    Energy Efficiency and Running Costs

    Dehumidifiers draw electricity for hours or days at a time, so running costs matter. Understanding how they consume power helps you estimate your bill and choose an efficient unit.

    Over a full summer season, the cost difference between an efficient and inefficient unit can add up to fifty dollars or more.

    How Much Electricity Does a Dehumidifier Use?

    A typical 50-pint compressor dehumidifier draws between 500 and 700 watts while running. A smaller 20-pint unit might use 300 to 400 watts.

    Desiccant units usually draw more, around 600 to 900 watts, because of the heater. If you run a 500-watt unit for 10 hours a day, you consume 5 kilowatt-hours daily.

    At the average US electricity rate of 16 cents per kilowatt-hour, that costs roughly 80 cents per day, or about 24 dollars per month.

    Energy Star Ratings

    Energy Star certified dehumidifiers use about 15 percent less electricity than standard models. They achieve this through more efficient compressors, better coil designs, and smarter humidistats that cycle the unit on and off precisely instead of running continuously.

    When shopping in 2026, look for the Energy Star label if you plan to run the unit for long periods.

    Tips to Reduce Running Costs

    Keep windows and doors closed while the unit runs. Open windows let humid outdoor air in faster than the unit can remove it.

    Clean the air filter regularly so the fan does not strain. Set the humidistat to 50 percent instead of 40 percent if comfort allows, because the unit will run less often.

    Use a continuous drain hose so the unit never shuts off because of a full tank. Finally, place the unit in the center of the room or near the humidity source for maximum airflow.

    Maintenance and Care Tips

    A dehumidifier will last 5 to 10 years with proper care, but neglecting basic maintenance leads to poor performance and early failure. Here is what our team does to keep units running well.

    Most of these tasks take less than 10 minutes and can prevent expensive repairs down the line.

    Clean the Air Filter Every Two Weeks

    Pull the filter out of the intake grille and rinse it under warm water. Let it dry completely before reinstalling it.

    A clogged filter restricts airflow, makes the fan work harder, and reduces the amount of moisture the coils can extract. In dusty environments or homes with pets, you might need to clean it weekly.

    Wipe Down the Coils Annually

    Coils collect dust and grime over time, which acts as insulation and slows heat transfer. Unplug the unit, remove the cover if possible, and gently wipe the coils with a soft cloth or a coil brush.

    Do not bend the thin fins. If the fins are badly clogged, a foaming cleaner designed for air conditioner coils can help.

    Empty and Clean the Water Tank

    Stagnant water in the tank can grow bacteria and create odors. Empty the tank regularly and rinse it with a mild soap solution every week.

    If your unit has a continuous drain hose, check the hose for algae or mold growth every few months.

    Defrost the Coils When Needed

    Compressor units in cold rooms may frost up. If you see ice on the coils, turn the unit off and let it thaw completely.

    Many modern units have an auto-defrost mode that detects frost and pauses the compressor while running the fan. If your unit lacks auto-defrost and you need cold-weather performance, consider switching to a desiccant model.

    Check the Humidistat Accuracy

    Over time, humidistat sensors can drift. Use a separate hygrometer to check the actual room humidity and compare it to the reading on the unit.

    If they differ by more than 5 percent, you may need to adjust your target setting or have the sensor calibrated.

    Store Properly in Off-Season

    When the dry season arrives and you no longer need the unit, clean it thoroughly and let it dry completely. Store it upright in a dry place with the tank removed and the filter out.

    Cover it to prevent dust buildup. Do not lay it on its side, as refrigerant can move into the wrong part of the compressor and cause damage when you start it again.

    When to Replace Your Dehumidifier

    If your unit runs constantly but never lowers the humidity, the compressor may be failing. If it leaks refrigerant, the coils will not get cold enough to condense moisture.

    Unusual noises, burning smells, or repeated circuit breaker trips are also signs that the unit is nearing the end of its life. Most residential dehumidifiers last 5 to 10 years with proper care, so if yours is older and showing these symptoms, replacement is usually more cost-effective than repair.

    Frequently Asked Questions

    What are the downsides of a dehumidifier?

    Dehumidifiers add heat to a room, increase electricity bills, and require regular tank emptying or hose drainage. Compressor units can be loud and stop working well in temperatures below 55 degrees. They also need periodic filter cleaning and coil maintenance to stay efficient.

    How long does it take for a dehumidifier to dry a room?

    A properly sized dehumidifier can lower humidity in a small room within a few hours. Larger spaces or very damp basements may take 24 to 48 hours to reach a comfortable level. Factors include room size, starting humidity, unit capacity, and how well the space is sealed.

    Do air purifiers dry indoor air?

    No, air purifiers do not remove moisture from the air. They filter particles like dust, pollen, and smoke. A dehumidifier removes water vapor. The two appliances solve different problems and can be used together for better overall air quality.

    Are dehumidifiers good for people with COPD?

    Yes, dehumidifiers can help people with COPD by reducing airborne mold spores and dust mites that thrive in humid conditions. Drier air is often easier to breathe. However, air that is too dry can irritate airways, so maintaining 40 to 50 percent humidity is the best balance.

    Is the water from a dehumidifier safe to drink?

    No, the water collected by a dehumidifier is not safe to drink. It is essentially distilled water but it picks up contaminants from the air, coils, and tank. Bacteria, dust, and metals can collect in the tank. Use it for plants or cleaning, but never consume it.

    Why does a dehumidifier make the air warmer?

    A dehumidifier releases latent heat during condensation and also passes air over warm condenser coils. The exhaust air is slightly warmer than the intake air. This is normal and expected, though it can make small rooms feel warmer during summer.

    Conclusion

    A dehumidifier works by cooling humid air below its dew point, forcing water vapor to condense into liquid, then collecting that water and returning dry air to the room. Whether you choose a compressor unit that runs like a refrigerator or a desiccant unit that absorbs moisture with a rotating wheel, the goal is the same: keep indoor humidity between 30 and 50 percent for comfort, health, and home protection.

    If you are dealing with a damp basement, a musty bathroom, or allergy symptoms that spike in humid weather, now you know exactly how a dehumidifier works and what to look for. The next step is to measure your room humidity with a hygrometer, identify the spaces that need help, and pick the right type and size for your situation.

    With a little knowledge and the right unit, you can turn a sticky, uncomfortable room into a dry, healthy living space.

  • Single Stage vs Two Stage Heat Pump (August 2026)

    Single Stage vs Two Stage Heat Pump (August 2026)

    Choosing between a single stage vs two stage heat pump is one of the most common decisions homeowners face when replacing an HVAC system. I spent three weeks talking with local contractors, reading service manuals, and reviewing utility bills from friends who made each choice.

    The difference is not just about price. It is about how you experience comfort in your home every single day.

    This guide breaks down exactly how each system works, what you will pay upfront, how much you will save on energy bills, and which option fits your climate and budget. I will also cover the Inflation Reduction Act tax credits that could change your math in 2026. By the end, you will have a clear answer without the sales pressure.

    Whether you are replacing a failing unit or building a new home, the compressor type inside your heat pump determines how your family feels indoors for the next fifteen years. Making the wrong choice means sweating through humid summers or paying for comfort you never notice.

    Making the right choice means forgetting your HVAC system exists because it simply works. That is the goal of this comparison.

    What Is a Single-Stage Heat Pump?

    A single-stage heat pump operates at one capacity level: 100 percent or completely off. When your thermostat calls for heating or cooling, the compressor kicks in at full power. It runs until the target temperature is reached, then shuts down entirely.

    This design uses a standard scroll compressor with a fixed speed. Think of it like a light switch. There is no dimmer. The system is either blazing at full capacity or sitting idle. Single-stage units have been the industry standard for decades, and they remain the most common type installed in homes across the United States.

    The simplicity of this design is its biggest strength. Fewer components mean fewer things that can break. Most HVAC technicians can repair a single-stage system quickly, and replacement parts are widely available.

    You do not need a specialized dealer to diagnose a failed contactor or capacitor. Any competent technician with a multimeter can figure it out. For budget-conscious homeowners or those with smaller homes in mild climates, a single-stage heat pump often delivers everything they need without unnecessary complexity.

    The technology is mature. The supply chain is well-established. The installation process is straightforward because every contractor has done hundreds of them. The downside is that the system only knows one speed.

    It cannot modulate. It cannot think. It responds to every thermostat signal the same way, regardless of whether the outdoor temperature is 85 degrees or 105 degrees. This brute-force approach gets the job done, but it is not elegant.

    What Is a Two-Stage Heat Pump?

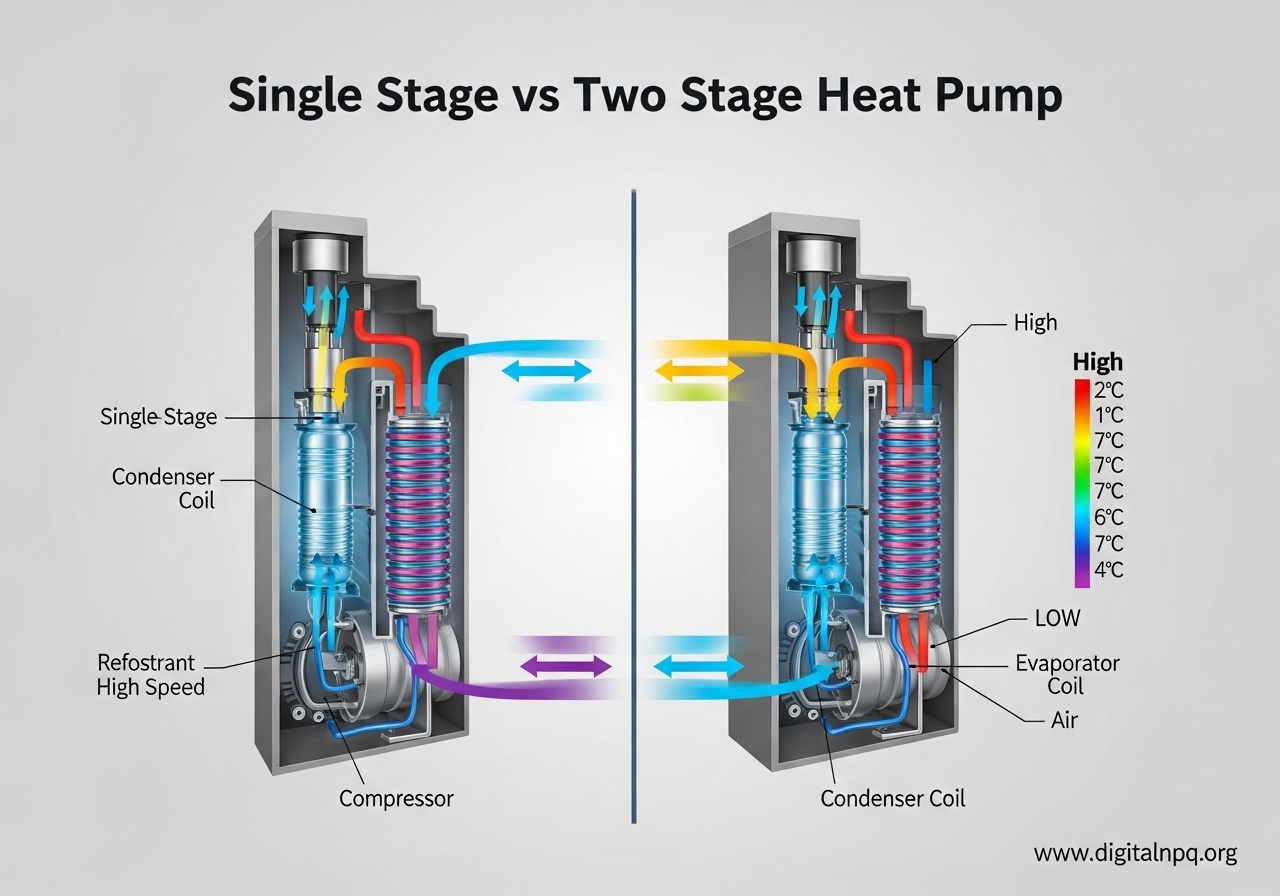
    A two-stage heat pump gives your compressor two speed settings. It can run at a lower capacity, typically around 60 to 70 percent, or ramp up to 100 percent when demand is high. This is achieved with a two-speed compressor or a modulating scroll that adjusts output based on what your home needs.

    The lower stage handles mild temperature days. On a warm spring afternoon or a cool autumn evening, the system runs gently at partial capacity. It stays on longer, maintaining a steady temperature rather than blasting full power in short bursts.

    When outdoor temperatures become extreme, the system shifts to high stage and delivers full capacity just like a single-stage unit. This flexibility is the core advantage. Longer run times at lower capacity mean more consistent indoor temperatures.

    The air handler circulates air continuously, reducing hot and cold spots. Because the compressor is not always running at maximum strain, wear and tear can be reduced over time. Many homeowners report that once they live with a two-stage system, they notice the difference immediately.

    The compressor itself is the key difference. In a two-stage system, the scroll compressor has a solenoid or valve that changes the geometry of the compression chamber. At low stage, the chamber compresses less refrigerant per rotation.

    At high stage, the chamber opens fully for maximum output. This is not new technology. It has been around for over two decades, but it has become more affordable and reliable in recent years.

    The control board is also more sophisticated. It monitors outdoor temperature, indoor temperature, refrigerant pressures, and sometimes even humidity levels. Based on this data, it decides whether low stage or high stage is appropriate. You do not control this manually. The system makes the decision automatically every few minutes.

    How Single-Stage and Two-Stage Heat Pumps Work

    Understanding the mechanics helps you see why the comfort difference is real. When your thermostat detects that the indoor temperature has drifted one or two degrees from the setpoint, it sends a signal to the outdoor unit.

    A single-stage unit responds by turning the compressor on at full speed. The refrigerant cycle runs at maximum capacity, and the indoor air handler pushes air at the highest designed airflow rate. Once the thermostat is satisfied, everything stops.

    The compressor shuts off. The air handler fan turns off. The temperature in your home begins to drift again. In fifteen or twenty minutes, the cycle repeats.

    This on-off pattern is called short cycling, and it is the defining characteristic of single-stage operation. The problem with short cycling is that it treats your home like a binary problem. The temperature is either too hot or too cold.

    There is no in-between. The system overshoots the target, then waits for the temperature to drift far enough to trigger another cycle. Your body feels these swings. You might be comfortable one minute and reaching for a blanket the next.

    A two-stage system reacts differently. On a mild day, the thermostat signal triggers the low stage. The compressor runs at roughly 65 percent capacity. The refrigerant flows at a reduced rate.

    The air handler runs continuously or at a lower speed, gently circulating conditioned air throughout the house. The temperature stays within a tighter range, often within half a degree of the setpoint. Only when the low stage cannot keep up, such as during a heatwave or a sudden cold snap, does the system shift to high stage.

    The transition between stages is automatic. You do not touch a switch. The compressor control board monitors temperatures and pressures, then selects the appropriate stage. This means the system spends most of its operating hours in low stage, which is where the efficiency and comfort benefits come from.

    The shift to high stage is seamless. Most homeowners never notice it happening. The indoor coil behaves differently too.

    In a single-stage system, the coil gets very cold very fast during a cooling cycle. It pulls a lot of moisture quickly, then warms up during the off cycle. In a two-stage system, the coil stays moderately cold for hours.

    The moisture removal is slower but continuous. This is why two-stage systems often achieve lower indoor humidity levels without needing a separate dehumidifier.

    Single Stage vs Two Stage Heat Pump: Key Differences

    The table below summarizes the most important differences at a glance. Use this as a quick reference while you read the detailed sections.

    FeatureSingle-StageTwo-Stage
    Compressor Capacity100% or off60-70% or 100%
    Upfront CostLower20-30% higher
    SEER Rating14-16 SEER216-18 SEER2
    Temperature Consistency1-2 degree swings0.5 degree swings
    Humidity RemovalModerateSuperior
    Run TimeShort cyclesLonger cycles
    Noise LevelLouder at startupQuieter in low stage
    Repair ComplexitySimplerMore complex
    Lifespan12-15 years15-18 years
    Best ForBudget buyers, mild climatesComfort, hot humid climates

    Upfront Cost Comparison

    Two-stage heat pumps cost more to purchase and install. The national average in 2026 shows that a two-stage unit runs about 20 to 30 percent higher than a comparable single-stage model. In real dollars, that usually translates to an extra one thousand to two thousand dollars depending on the brand, tonnage, and your local labor rates.

    The price difference comes from the compressor itself. A two-speed scroll compressor costs more to manufacture. The control board is more sophisticated. The installation may require additional wiring or a compatible thermostat that supports two-stage operation.

    Not all existing thermostats can communicate with a two-stage system, so you may need to upgrade that component as well. Thermostat compatibility is an easy detail to overlook. Many older digital thermostats only support single-stage equipment.

    If you try to connect a two-stage heat pump to a single-stage thermostat, the system will default to running only in high stage. You will pay the premium for two-stage hardware but never see the benefit. Always verify that your thermostat supports both stages, or budget for a replacement.

    However, I always remind homeowners to look at the total installed cost, not just the equipment price. Ductwork modifications, electrical upgrades, and permits can affect the final invoice. If your existing system is single-stage and your ductwork is sized for it, switching to two-stage may not require any changes.

    But if your contractor recommends larger returns or a different air handler to match the longer run times, that adds to the budget. Get multiple quotes and ask each contractor to break down equipment cost versus labor cost.

    Financing can also affect your decision. Many HVAC contractors offer zero-interest financing for qualified buyers. If you are spreading the cost over five years, the monthly payment difference between single-stage and two-stage might be only twenty to thirty dollars. That small monthly increase could be worth the comfort improvement.

    Energy Efficiency and Operating Costs

    Efficiency is measured by two ratings. SEER2 stands for Seasonal Energy Efficiency Ratio 2, and it measures cooling efficiency. HSPF2 stands for Heating Seasonal Performance Factor 2, and it measures heating efficiency.

    Both ratings were updated in recent years to reflect more realistic operating conditions, so make sure you are comparing SEER2 and HSPF2, not the older SEER and HSPF numbers. The change from SEER to SEER2 is important.

    The old SEER rating used testing conditions that did not account for static pressure in real ductwork. SEER2 testing applies more realistic conditions, so the numbers are lower but more accurate. A unit that was rated 16 SEER might now be rated 15.2 SEER2.

    Do not panic when you see lower numbers. The efficiency did not change. The testing just got more honest. A typical single-stage heat pump in 2026 carries a SEER2 rating between 14 and 16.

    A two-stage model usually ranges from 16 to 18 SEER2. On the heating side, single-stage HSPF2 ratings often fall between 8 and 9, while two-stage units can reach 9 to 10.5. These numbers matter because even a two-point improvement in SEER2 can reduce your annual cooling costs by 10 to 15 percent.

    Let me put this in concrete terms. If you spend twelve hundred dollars per year on cooling and heating with a single-stage system, a two-stage system might cut that by one hundred to one hundred eighty dollars annually. The savings are higher in extreme climates where the system runs more hours per year.

    In mild climates, the payback period stretches longer because the system simply does not run enough hours to accumulate major savings. Do not expect to recoup the extra upfront cost in the first year.

    In most cases, the payback period falls between five and eight years. If you plan to stay in your home for a decade or more, the two-stage unit can pay for itself and then continue saving money. If you are selling in three years, the efficiency savings may never offset the higher purchase price.

    However, a two-stage system might add resale value to your home, which is harder to quantify but worth considering.

    Comfort and Temperature Control

    This is where the two-stage system truly separates itself. A single-stage heat pump creates temperature swings. You feel it on your skin. The system runs at full blast, overshoots the setpoint slightly, then turns off.

    The house warms up or cools down past the target. Then the system waits until the temperature drifts two degrees away before starting again. You get a roller coaster of one to two degree swings throughout the day.

    One or two degrees does not sound like much. But the human body is sensitive to temperature changes, especially at the extremities. Your feet get cold. Your neck gets warm.

    You adjust the thermostat, which triggers another cycle. The result is a constant low-level annoyance that you might not consciously blame on your HVAC system. You just think your house is drafty or poorly insulated.

    A two-stage system smooths out that curve. Because it runs longer at lower capacity, the temperature stays within a half degree of your setpoint. The air circulates constantly.

    You stop noticing when the system is running because the airflow is gentle and steady. Bedrooms on the second floor stay closer to the temperature of the living room downstairs. Hallways no longer feel like a different climate zone.

    I have spoken with homeowners who upgraded from single-stage to two-stage systems during remodels. The most common feedback is that they forgot the system was even working. That is the hallmark of good HVAC design.

    Comfort should be invisible. When you are constantly aware of temperature changes, the system is fighting the environment instead of managing it. Children and elderly family members feel the difference most acutely.

    Kids sleep better in rooms with steady temperatures. Older adults with circulation issues benefit from eliminating cold spots near the floor. If your family includes vulnerable populations, the comfort argument for two-stage becomes stronger.

    Humidity Control Capabilities

    Humidity removal is one of the most underrated differences between these two systems. An air conditioner or heat pump removes moisture from the air only when the evaporator coil is cold and airflow is passing over it. The longer the system runs, the more moisture condenses on the coil and drains away.

    A single-stage unit runs hard for twenty minutes, pulls some humidity, then shuts off for thirty minutes. During that off time, humidity creeps back up. The coil gets warm and stops condensing moisture.

    The air handler is no longer circulating dry air. In hot humid climates, this cycle can leave your home feeling clammy even when the thermostat says the temperature is correct. The result is a common complaint: “My thermostat says 74 but it still feels sticky.”

    That is not a thermostat problem. That is a humidity problem. The single-stage system dropped the temperature quickly but did not run long enough to pull sufficient moisture from the air. Your skin feels the humidity, not the thermometer.

    A two-stage system runs for longer periods at low stage. The coil stays cold for hours at a time. Air keeps flowing across it. The dehumidification effect is continuous and cumulative.

    Indoor relative humidity can drop by 5 to 10 percent compared to a single-stage system in the same home. That difference is huge for comfort. It also reduces mold risk, protects wooden furniture, and makes the air feel cooler at the same temperature setting.

    If you live in the southeastern United States, the Gulf Coast, or any region where summer humidity regularly exceeds 70 percent, the two-stage advantage is worth serious consideration. Dry air at 76 degrees feels better than humid air at 74 degrees.

    This is why HVAC contractors in Florida and Louisiana often recommend two-stage systems by default. They see the humidity complaints every summer. Some homeowners try to solve humidity problems by lowering the thermostat.

    This wastes energy. The single-stage system runs more frequently, but still in short bursts, so it never solves the root problem. A two-stage system addresses humidity at the source by running long enough to actually remove moisture from the air.

    Lifespan and Durability

    How long does each system last? Industry averages suggest a single-stage heat pump lasts 12 to 15 years with proper maintenance. A two-stage unit can stretch to 15 to 18 years. The difference is not dramatic, but it is meaningful.

    An extra three years of service life can offset a significant portion of the upfront cost difference. The reason comes down to cycling. Every time a compressor starts, it experiences a surge of electrical current and mechanical stress.

    The motor goes from zero to full speed instantly. The refrigerant pressures spike. A single-stage unit might start and stop six to eight times per hour on a hot day. Over a summer, that adds up to thousands of cycles.

    Each start is hard on the motor windings. The inrush current can be five to six times the normal operating current. The bearings take a hit. The contactor points arc.

    Over a decade, this repetitive stress adds up to wear that eventually causes a failure. It is not a design flaw. It is simply physics. Starting and stopping is harder on machinery than running steadily.

    A two-stage system in low stage avoids many of those hard starts. It runs continuously for hours, then shifts to high stage only when needed. The compressor experiences gentler transitions.

    The electrical components see fewer inrush currents. The fan motor bearings wear more slowly because they are not constantly accelerating from a dead stop. That said, the two-stage system has more complex electronics.

    The control board, the staging solenoid, and the variable-speed components are additional points of failure. If the control board fails after ten years, the repair cost is higher than replacing a single-stage contactor. So the longevity advantage depends on whether the simpler mechanical design or the reduced cycling stress wins out in your specific installation.

    In my experience, well-maintained two-stage systems from reputable brands tend to last longer overall.

    Repair Complexity and Maintenance

    Simplicity favors the single-stage design. A single-stage heat pump has a compressor, a contactor, a capacitor, and a basic control board. Most technicians learned to troubleshoot these components in trade school.

    Parts are generic and stocked by every supply house. If your compressor fails after the warranty, you can often find a compatible replacement from multiple manufacturers. The diagnostic process is straightforward.

    Is the contactor pulling in? Is the capacitor within microfarad tolerance? Is the compressor drawing locked rotor amps? These are basic checks that any technician can perform in fifteen minutes.

    You do not need factory-specific training or proprietary software. Two-stage systems introduce proprietary components. The compressor may use a specific solenoid or valve that only the OEM manufacturer produces.

    The control board might be a smart communicating board that requires factory programming. Some brands use proprietary thermostats that must be paired with the outdoor unit. This is a concern I have heard repeatedly from HVAC professionals on forums and in person.

    If you live in a rural area or a small town, proprietary parts can mean longer wait times for repairs. A single-stage capacitor is on the van of every technician. A two-stage control board might need to be ordered from a regional distributor.

    In peak summer heat, a three-day wait for parts is miserable. Ask your local contractors about parts availability before committing to a brand with a closed ecosystem. Repair costs reflect this complexity.

    A single-stage compressor replacement might cost two thousand to three thousand dollars. A two-stage compressor replacement can run three thousand to four thousand dollars because the compressor itself is more expensive and the labor is more involved.

    If you are choosing a two-stage system, ask your contractor about parts availability and whether the brand uses open-standard or proprietary communication protocols. Maintenance schedules are similar for both systems.

    You should still change filters monthly, clean the outdoor coil annually, and have a professional tune-up once per year. The two-stage system may need slightly more attention to the control settings to ensure staging is working correctly, but routine maintenance is essentially identical.

    The most important factor for longevity is not the stage count. It is whether you actually perform the maintenance.

    Noise Level Comparison

    Outdoor noise matters if your unit sits near a bedroom window, patio, or neighbor’s fence. A single-stage heat pump running at 100 percent capacity produces a steady hum in the range of 70 to 76 decibels. The startup is particularly noticeable because the compressor kicks in at full speed instantly.

    Inside the house, the indoor air handler may also be louder when the system is on. Seventy decibels is roughly equivalent to a vacuum cleaner at ten feet. It is not deafening, but it is noticeable.

    If you are trying to enjoy a conversation on your patio, the outdoor unit can intrude. If your bedroom window is within ten feet of the condenser, the startup sound might wake light sleepers. Noise ordinances in some municipalities also restrict outdoor mechanical noise to certain levels.

    A two-stage system in low stage runs much quieter. The compressor is turning at reduced speed. The fan spins slower. Outdoor noise can drop to 60 to 65 decibels, which is roughly the volume of a normal conversation.

    You may not even notice it is running unless you are standing right next to the unit. At high stage, the noise level matches a single-stage unit, but the system spends the majority of its operating hours in the quieter low stage.

    If outdoor noise is a priority for you, ask your contractor about sound-dampening features. Some manufacturers offer insulated compressor compartments and variable-speed fan motors that reduce noise even further.

    But the fundamental difference between single-stage and two-stage is that the two-stage system has a quiet mode it uses most of the time. The single-stage system is always at full volume whenever it is running.

    Climate Suitability Guide

    Your local climate should heavily influence this decision. In mild climates with moderate summers and winters, a single-stage heat pump is often perfectly adequate. The system does not need to run constantly because the temperature extremes are brief.

    The comfort advantage of two-stage operation is less noticeable when the HVAC only runs a few hours per day. Think of the Pacific Northwest or coastal California. Summer temperatures rarely exceed 85 degrees.

    Winter temperatures rarely drop below 35 degrees. A single-stage heat pump can handle these conditions easily. The short cycling is less frequent because the temperature does not drift as aggressively.

    You might run the system for a few hours in the afternoon, then it sits idle until the next day. In hot humid climates, the two-stage system shines. Long summers mean thousands of operating hours.

    The extended run times in low stage provide consistent dehumidification and temperature stability. The energy savings accumulate faster because the system runs so many hours per year. Southern California inland valleys, Arizona, Texas, and the southeastern states are prime territory for two-stage systems.

    Cold climates present a different challenge. Heat pumps lose efficiency as outdoor temperatures drop. In regions where winter temperatures regularly fall below 25 degrees Fahrenheit, you may need a backup heat source regardless of whether you choose single-stage or two-stage.

    Some two-stage systems handle cold weather better because the longer run times allow the defrost cycle to operate more efficiently. However, the compressor technology matters more than the staging in extreme cold. Look for cold-climate heat pumps with enhanced vapor injection if you live in the northern tier of states.

    Altitude also matters. At higher elevations, air is less dense and heat transfer changes. This is a niche concern but worth mentioning if you live in the Rocky Mountains or similar terrain. Your contractor should account for altitude in the load calculation and equipment selection.

    Home Size and Sizing Considerations

    Proper sizing is critical for both system types. An oversized single-stage system is a nightmare. It blasts cold air for ten minutes, shuts off, then starts again in fifteen minutes.

    The house cools quickly but feels humid and clammy. The compressor cycles excessively, shortening its lifespan. This is the most common mistake I see in residential installations.

    Contractors sometimes oversize equipment to avoid callbacks. They would rather install a system that is too big than too small. The problem is that an oversized single-stage system cannot dehumidify properly.

    It satisfies the thermostat before the coil has time to pull moisture from the air. The homeowner ends up with a cold, damp house. The compressor dies young from all the cycling.

    A two-stage system is more forgiving of slight oversizing. Because it can drop to 65 percent capacity, an oversized two-stage unit simply runs in low stage most of the time. It still removes humidity and maintains comfort.

    This is why some contractors prefer to install two-stage systems in homes with unusual layouts, high ceilings, or large windows. The flexibility compensates for imperfect load calculations.

    For smaller homes under 1,500 square feet, a properly sized single-stage unit is usually sufficient. The air volume is small enough that even short cycles can maintain temperature.

    For larger homes over 2,500 square feet, or multi-story homes with zoning, the two-stage system provides better air distribution. The longer run times keep air moving to distant rooms.

    Always demand a Manual J load calculation before buying any system. A contractor who sizes by square footage alone is guessing. The calculation should account for insulation, window types, orientation, ductwork, and local design temperatures.

    If a contractor refuses to perform a proper load calculation, find another contractor. The best heat pump in the world will fail if it is the wrong size for your home.

    Inflation Reduction Act Tax Credits and Rebates

    In 2026, federal tax incentives can significantly offset the cost of a high-efficiency heat pump. The Inflation Reduction Act established a 25C tax credit for qualified energy efficiency improvements. Homeowners can claim up to 30 percent of the cost, with a maximum credit of 1,200 dollars per year for the property.

    Heat pumps qualify under this provision if they meet the efficiency requirements published by the Consortium for Energy Efficiency. The tax credit is nonrefundable, which means it reduces your tax liability but does not create a refund beyond what you owe.

    If your tax liability is lower than the credit amount, you may not be able to use the full credit in one year. However, some provisions allow carrying unused credits forward. Check the current IRS rules or consult a tax professional for your specific situation.

    The specific thresholds change periodically. In 2026, the general requirement for split system heat pumps is a SEER2 of 16 or higher and an HSPF2 of 9 or higher. Many two-stage systems easily meet these thresholds.

    Some single-stage systems also qualify if they are high-efficiency models. Always verify the exact SEER2 and HSPF2 ratings on the unit you are considering, and ask your contractor for the CEE certificate if you plan to claim the credit.

    Beyond the federal tax credit, many states and utility companies offer rebates. These programs vary by location. Some utilities offer flat rebates of five hundred to two thousand dollars for installing high-efficiency heat pumps.

    Others provide tiered rebates based on the efficiency rating. Check the Database of State Incentives for Renewables and Efficiency, or ask your contractor about local programs. The combination of federal tax credits and state rebates can erase the price gap between single-stage and two-stage systems entirely.

    Keep all receipts and manufacturer certification statements. The IRS requires documentation when you file Form 5695 with your tax return. Your contractor should provide an itemized invoice that separates equipment costs from labor costs, because the credit applies to the equipment but not always to the installation labor.

    Consult a tax professional if you are unsure how to claim the credit properly. Do not rely solely on your contractor for tax advice.

    Which System Is Right for You?

    This decision ultimately comes down to your priorities, budget, and timeline. I have broken it into three common scenarios to help you decide. Be honest with yourself about which category fits your situation.

    Choose a Single-Stage Heat Pump If

    You want the lowest upfront cost and the simplest long-term maintenance. You live in a mild climate with moderate summers and winters. Your home is smaller, under 2,000 square feet.

    You plan to sell the house within five years and want reliable HVAC without over-investing. You prefer a system that any technician can repair with generic parts. You do not suffer from humidity problems or temperature complaints in your current home.

    Choose a Two-Stage Heat Pump If

    You prioritize comfort and plan to stay in the home for more than seven years. You live in a hot humid climate where the system runs six months or more per year. Your home is larger, multi-story, or has rooms that are hard to keep comfortable.

    You want quieter operation and better humidity control. You can take advantage of federal tax credits and local rebates to offset the higher purchase price. You are sensitive to temperature swings or have family members who are.

    Consider a Variable-Speed System As a Third Option

    If you are already leaning toward two-stage and have room in the budget, look at variable-speed heat pumps. These systems modulate capacity in increments of 1 percent rather than just two stages.

    They offer the ultimate in comfort and efficiency but cost significantly more. Variable-speed units are the premium tier, while two-stage sits comfortably in the middle between basic and advanced.

    For most homeowners, the jump from two-stage to variable-speed is not worth the additional cost unless you have very specific comfort needs or a large, complex home.

    What HVAC Professionals and Homeowners Say

    After reading hundreds of threads on Reddit HVAC communities and speaking with local technicians, I noticed a consistent pattern. Many HVAC professionals personally prefer single-stage systems for their own homes because of the simplicity and reliability.

    They know that a well-built single-stage unit, properly sized and installed, will run for fifteen years with minimal drama. They also know that proprietary parts and smart communicating systems can turn a simple repair into an expensive headache.

    This does not mean two-stage systems are bad. It means professionals value reliability and serviceability in their personal lives. They see the repair side of the industry every day. When they choose for themselves, they often go simple.

    That is a trust signal worth noting. Homeowners who upgraded to two-stage systems report noticeably better comfort. The most common phrase I see is “I didn’t know what I was missing.”

    The temperature consistency and humidity reduction are real. The reality is that some homeowners question whether the comfort improvement is worth the extra one thousand to two thousand dollars upfront. That is a valid concern.

    If you are already comfortable with your current single-stage system, upgrading may not feel transformational. But if you are currently uncomfortable, the two-stage upgrade is often described as a dramatic improvement.

    One point that comes up repeatedly in forums is the importance of installation quality. A poorly installed two-stage system will perform worse than a properly installed single-stage system. Ductwork leaks, improper charge levels, and incorrect airflow settings can negate every advantage of the premium equipment.

    The best compressor in the world cannot overcome bad ductwork. This is why getting multiple quotes and checking contractor reviews is just as important as choosing the equipment tier. I recommend reading reviews that specifically mention follow-up service and warranty responsiveness.

    Frequently Asked Questions

    Is a 2 stage heat pump worth the extra money?

    A two-stage heat pump is worth the extra cost if you live in a hot or humid climate, plan to stay in your home for more than seven years, or prioritize consistent indoor comfort. The longer run times at lower capacity provide better temperature stability and humidity control. If you live in a mild climate or plan to move soon, a single-stage system offers reliable performance at a lower price.

    What is the $5000 rule for HVAC?

    The $5000 rule is a simple guideline for deciding whether to repair or replace an HVAC system. Multiply the age of your system by the estimated repair cost. If the result exceeds $5000, replacement is usually the better financial choice. For example, a 12-year-old system needing a $600 repair equals $7200, which suggests replacement makes more sense.

    Is a 2 stage HVAC better than a 1 stage?

    A two-stage HVAC system is better for comfort and humidity control because it runs at 60-70% capacity for longer periods, maintaining steadier temperatures. A single-stage system is better for simplicity, lower repair costs, and upfront affordability. Neither is universally superior. The right choice depends on your climate, budget, and how long you plan to stay in your home.

    What are the top 3 AC brands?

    The top HVAC brands for residential heat pumps are generally considered to be Carrier, Trane, and Lennox. These manufacturers offer strong warranties, extensive dealer networks, and a wide range of efficiency options. However, installation quality matters more than brand choice. A premium brand installed poorly will underperform compared to a mid-tier brand installed by a skilled contractor.

    How much more efficient is a two-stage heat pump?

    A two-stage heat pump is typically 1 to 2 SEER2 points higher than a comparable single-stage model, which translates to roughly 10-15% lower cooling costs. On heating, the HSPF2 improvement is usually 1 to 1.5 points. Annual savings range from $100 to $180 depending on local energy rates and climate.

    Do two-stage heat pumps last longer than single-stage?

    Two-stage heat pumps often last 15 to 18 years compared to 12 to 15 years for single-stage units. The reduced on-off cycling and gentler compressor operation reduce mechanical wear. However, two-stage systems have more complex electronics that can be expensive to replace if they fail.

    Final Thoughts

    The single stage vs two stage heat pump debate does not have a one-size-fits-all answer. A single-stage system delivers reliable heating and cooling at the lowest upfront cost. It is simple to repair, widely available, and perfectly adequate for millions of homes.

    A two-stage system costs more but rewards you with quieter operation, steadier temperatures, superior humidity control, and long-term energy savings. Before you sign a contract, get at least three quotes. Demand a Manual J load calculation.

    Ask about Inflation Reduction Act tax credits and local utility rebates. And remember that the best equipment in the world cannot overcome sloppy installation.

    The contractor you choose matters just as much as the compressor they install. Take your time, do your research, and make the choice that fits your home, your budget, and your family.

  • How to Light a Propane Heater 2026: Complete Step by Step Guide

    How to Light a Propane Heater 2026: Complete Step by Step Guide

    Learning how to light a propane heater safely is a skill every homeowner, camper, or patio owner should master before cold weather arrives. I have helped dozens of friends and family members troubleshoot their heaters over the years, and the most common mistake I see is skipping the pre-lighting safety checks. Whether you own a portable Buddy heater, a patio heater, or a wall-mounted propane unit, the basic lighting process follows the same principles.

    You need to connect the tank properly, check for gas leaks, and follow the correct control knob sequence to ignite the pilot. In this guide, I will walk you through every step I use personally, including what to do when things do not go as planned. You will also learn how to handle the frustrating scenario where your heater clicks but won’t light, or the pilot flame dies the moment you release the button.

    I have spent time reading forums and talking to propane technicians to gather the most common fixes that actually work. Propane heater safety should never be an afterthought, so I have included ventilation tips and carbon monoxide warnings throughout. By the end, you will feel confident lighting any propane heater on your own, even if you have never done it before.

    This guide is updated for 2026 with the latest safety recommendations and real troubleshooting advice from actual users. Before we get into the steps, I want to stress one point: propane is a safe fuel when handled correctly, but it demands respect. A small leak left unchecked can fill a garage with explosive gas in minutes.

    A heater used without ventilation can poison a room with carbon monoxide while you sleep. The procedures below are not suggestions; they are the standard practices that professionals and experienced users follow every single time. I light my own propane heaters using this exact process, and I have never had a dangerous incident.

    Safety First: Critical Pre-Lighting Checks

    Never skip safety checks before lighting a propane heater. Gas leaks and carbon monoxide exposure are real risks that can cause injury or worse. I always tell people to treat every lighting session like it is the first time, because conditions change and equipment wears out.

    Start by reading the owner’s manual for your specific model. The manufacturer designed your heater with exact control knob sequences and safety warnings that you should not ignore. If you lost the manual, most brands publish PDF versions on their websites.

    I keep a printed copy in the same drawer as my heater accessories so I never have to hunt for it. Manuals also list the exact propane pressure requirements and approved cylinder sizes for your unit, which matters more than most people realize.

    Check your ventilation setup before you even touch the propane tank. Indoor propane heaters require open windows or vents to bring in fresh air and exhaust combustion gases. Carbon monoxide is odorless and invisible, so you cannot detect it without a working CO detector.

    I install a carbon monoxide detector within 10 feet of any indoor propane heater and test the batteries monthly. Some states now require CO detectors by law, and I consider them non-negotiable regardless of local rules. Outdoor heaters still need clearance from walls, awnings, and combustible materials.

    I maintain at least three feet of open space around every side of my patio heater. Decks with overhead coverings need extra attention because heat can accumulate and scorch wooden beams.

    Inspect the propane tank connection and regulator for visible damage. Look for cracked hoses, corroded fittings, or a regulator that looks warped from heat exposure. If anything looks suspicious, replace the part before using the heater.

    A damaged regulator can send too much pressure to the burner, creating a fire hazard. I also keep a small fire extinguisher rated for Class B fires within arm’s reach whenever I run propane heating equipment. You can also look at alternative heating options like kerosene heaters if you want to compare fuel types before committing to propane.

    Kerosene heaters have their own safety profiles, and comparing them helped me decide which fuel worked best for my workshop. Perform a gas leak test every time you connect a new tank or after the heater has been stored for a while. Mix one part dish soap with three parts water in a spray bottle.

    Turn on the propane cylinder valve slowly, then spray the soapy mixture onto every connection point between the tank, regulator, and heater inlet. If you see bubbles forming, you have a leak. Turn off the gas immediately, disconnect the tank, and replace the faulty seal or hose.

    Never use a flame to check for leaks. I learned this soap test from a propane delivery driver over ten years ago, and I still use it every single time. It takes less than a minute and gives you peace of mind.

    Know the difference between indoor-rated and outdoor-only heaters. Using an outdoor propane heater inside a closed garage or tent can deplete oxygen and build up deadly carbon monoxide levels. If you need heat in a garage or workshop, use a heater specifically labeled for indoor use with an oxygen depletion sensor.

    I made this mistake once in my early twenties, and I still remember the headache that warned me something was wrong. Trust the labels and your instincts. If the heater says outdoor only, keep it outside.

    Finally, know where your emergency shut-off is located. Every propane installation should have a shut-off valve between the tank and the appliance. If you ever smell a strong rotten egg odor or suspect a major leak, turn off the gas at the tank valve first, then at the shut-off valve.

    Evacuate the area and call your propane supplier or the fire department from a safe distance. Do not re-enter until a professional has cleared the space.

    Types of Propane Heaters and Their Ignition Systems

    Propane heaters fall into two main ignition categories: automatic and manual. Understanding which type you own determines the exact lighting steps you need to follow.

    Automatic ignition heaters use a piezo-electric igniter button that creates a spark when pressed. You typically find this system on portable Buddy heaters, some patio heaters, and many newer tank-top models. The advantage is that you do not need a separate lighter or match.

    I prefer automatic ignition for camping because I never worry about wind blowing out a match before the pilot catches. The igniter button usually sits right next to the control knob, making it easy to press both at once with one hand.

    Manual ignition heaters require an external flame source such as a long candle lighter or a stick match. You will see this design on older patio heaters, some forced-air construction heaters, and basic portable models. The process is simple but demands steady hands and a longer reach to keep your fingers away from the burner.

    I keep a long-neck candle lighter in my outdoor heater storage bin so I am never searching for one when it is freezing outside. Wind is the biggest enemy of manual lighting, so I cup my hand around the lighter flame when working outdoors.

    Heater types also vary by application. Patio heaters are tall, freestanding units that radiate heat downward for outdoor dining or events. Portable Buddy heaters sit on the floor or a table and work well for camping, ice fishing, or workshops.

    Tank-top heaters screw directly onto a propane cylinder and blast heat in one direction. Forced-air heaters use a fan to push heated air across a larger area, making them popular on construction sites. Wall-mounted and freestanding indoor units connect to larger propane tanks or household lines and often include thermostats.

    No matter which style you own, the lighting fundamentals remain similar: supply gas, ignite the pilot, and wait for the safety mechanism to engage.

    Pre-Lighting Checklist: What to Do Before You Start

    Complete these five checks before you attempt to light your propane heater. I run through this list every time, and it has saved me from countless headaches.

    Step 1: Verify the propane tank has fuel. Lift the tank or check the gauge. An empty tank is the number one reason a heater won’t light, and it is embarrassing to troubleshoot for twenty minutes before realizing you ran out of gas.

    If you just refilled the tank, remember that air can enter the line during the exchange, which I will cover in the troubleshooting section. A full 20-pound tank should feel noticeably heavy compared to an empty one.

    Step 2: Inspect the regulator and hose connections. Make sure the regulator is seated firmly on the tank valve and the hose clamps are tight. A loose connection will leak gas or restrict flow enough to prevent ignition.

    I hand-tighten the regulator nut, then give it a quarter turn with a wrench if it feels loose. Do not overtighten, because you can strip the threads. Check the hose for kinks or pinch points that could block gas flow.

    Step 3: Open the cylinder valve slowly. Turn the knob on top of the propane tank counterclockwise until you feel resistance, then stop. Opening it too quickly can trigger the excess flow valve inside the regulator, which limits gas flow and makes the heater behave like it is out of fuel.

    I turn mine about one full rotation and wait five seconds before proceeding. If you suspect the excess flow valve has tripped, close the valve, disconnect the regulator, wait sixty seconds, then reconnect and open slowly.

    Step 4: Clear the area around the heater. Remove leaves, paper, fabric, or any flammable material within a three-foot radius. If you are using a patio heater, check the reflector and burner screen for spider webs or debris.

    I once found a mud dauber nest completely blocking the pilot tube on my patio heater after a month of storage. A blocked pilot tube will prevent ignition even when everything else is working perfectly.

    Step 5: Test the soapy water leak check on all connections. This takes thirty seconds and gives you absolute confidence that no gas is escaping before you introduce a flame. Once you see no bubbles, you are ready to light the heater.

    Keep the spray bottle handy during the first few minutes of operation so you can recheck if you smell anything unusual.

    How to Light a Propane Heater

    The exact steps depend on whether your heater uses automatic or manual ignition. I will cover both methods because many households own one of each type.

    Lighting a Heater with Automatic Ignition

    Automatic ignition propane heaters are the easiest to light once you know the sequence. I can light my portable Buddy heater in under a minute using this method.

    Step 1: Turn the control knob to the pilot position. You will feel a slight detent or click when the knob reaches the pilot setting. Some models label it “Pilot” or show a small flame icon.

    Do not press the knob yet. If your model has an “Off” position, make sure you pass through it cleanly on the way to Pilot.

    Step 2: Press and hold the control knob down. This opens the gas valve to the pilot assembly. You should hear a faint hiss as propane begins to flow.

    If you smell gas strongly at this stage, stop and perform the leak check again. A strong smell means you have a leak or the knob is not sealing properly.

    Step 3: Push the igniter button repeatedly while holding the knob down. You will hear a clicking sound each time the piezo igniter sparks. It usually takes three to five clicks for the pilot to catch.

    If the pilot lights on the first click, count yourself lucky and keep holding the knob. Some models require you to press the igniter button once per second.

    Step 4: Continue holding the control knob for 30 to 60 seconds after the pilot flame appears. This waiting period is critical. The thermocouple, a small metal rod sitting in the pilot flame, must heat up enough to signal the safety valve that the pilot is stable.

    If you release the knob too early, the thermocouple cools down and the safety valve shuts off the gas, killing the pilot. I count slowly to forty-five every time, and I have never had a pilot drop out.

    Users in online forums confirm this same timing; many say 30 seconds is the minimum, but 45 seconds is the sweet spot.

    Step 5: Release the control knob slowly and turn it to the desired heat setting. The main burner should ignite immediately with a soft whoosh. If the burner does not light, turn the knob back to pilot and repeat the process.

    Once the main burner is running, adjust the heat level to low, medium, or high depending on your comfort. I usually start on low for the first two minutes to let the burner warm up evenly.

    Lighting a Heater with Manual Ignition

    Manual ignition requires a long flame source because you must reach the pilot assembly while the control knob is depressed. I use a 12-inch candle lighter for every manual lighting job.

    Step 1: Turn the control knob to the pilot position and press it down just like you would with an automatic model. The gas should begin flowing to the pilot assembly. If you do not hear a hiss, check the tank valve and regulator connection before proceeding.

    Step 2: Light your candle lighter or long match. Hold the flame near the pilot tube opening, which is usually a small metal tube pointing toward the burner. You may need to peek through a sight glass or hole in the heater housing to see the pilot location.

    I angle the lighter so my hand stays below the burner level, away from the flame path.

    Step 3: Hold the flame at the pilot orifice until the pilot catches. This usually takes two to five seconds. The flame should be steady and blue with a small yellow tip.

    A yellow or orange pilot that flickers wildly indicates a dirty orifice or low gas pressure. If the pilot does not catch after ten seconds, release the knob, wait one minute for gas to dissipate, and try again.

    Step 4: Keep the control knob pressed for 30 to 60 seconds after the pilot is stable. This step is identical to the automatic process because the thermocouple still needs time to heat up and lock the safety valve open.

    I cannot stress enough how many people skip this step and then complain that the pilot won’t stay lit. The thermocouple is a safety feature, not an inconvenience. Respect the timing.

    Step 5: Release the knob and turn it to your heat setting. The main burner should light from the pilot flame. If it does not, verify that the pilot is still burning and that the control knob turned far enough to open the main gas valve.

    I have seen knobs that feel like they are on High but are actually stuck between Pilot and Low. Give it a firm twist to the detent.

    Troubleshooting: When Your Propane Heater Won’t Light

    Even when you follow every step correctly, propane heaters sometimes refuse to cooperate. I have dealt with every issue below, and the fixes are usually simple once you identify the cause.

    The Heater Won’t Light at All

    An empty propane tank is the most obvious cause, so confirm the fuel level first. If you just refilled or exchanged the tank, air may have entered the gas line. This is the infamous need to burp the propane tank.

    Disconnect the regulator, open the tank valve for one second to release the trapped air, then reconnect and try again. I learned this trick from an RV forum where users reported trying to light their heaters a hundred times after a tank swap. Burping takes ten seconds and solves the problem immediately.

    Check that the cylinder valve is actually open all the way. A valve turned only halfway can restrict flow enough to prevent ignition. Also verify that the regulator is not in excess-flow lockout mode.

    If you opened the valve too quickly, the regulator safety may have tripped. Close the valve, disconnect the regulator, wait one minute, reconnect, and open the valve slowly. I have tripped this lockout myself by rushing the valve open on a cold morning.

    If you smell propane but the heater still won’t ignite, you likely have a gas flow problem rather than an ignition problem. The smell confirms that gas is escaping somewhere, but it may not be reaching the pilot in the right concentration.

    Check the pilot orifice for blockages first, then verify the regulator is delivering the correct pressure. A regulator that has been dropped or frozen can fail internally while still looking fine on the outside. If you cannot find the source of the smell within a few minutes, turn off the tank and call a technician.

    The Pilot Light Won’t Stay Lit

    If the pilot ignites but dies when you release the control knob, the thermocouple is either not hot enough or not working. First, make sure you are holding the knob for at least 45 seconds. A cold thermocouple cannot keep the gas valve open.

    If you held it for a full minute and the pilot still dies, the thermocouple may be dirty or faulty. Spider webs and dust can clog the pilot orifice, causing a weak flame that does not engulf the thermocouple properly. I blow out the pilot tube with compressed air at the start of every season.

    If the thermocouple itself is coated in soot, clean it gently with fine steel wool. A failing thermocouple will need replacement, which is a cheap part you can order online by model number. I replaced mine last year for under fifteen dollars and it took ten minutes with a wrench.

    The Igniter Clicks But Won’t Spark

    When the igniter button clicks but no spark jumps at the pilot, you usually have a debris problem or an electrode gap issue. Remove the front guard or housing panel to access the igniter electrode. Look for a white ceramic insulator with a metal tip positioned near the pilot tube.

    The gap between the electrode tip and the pilot tube should be about one-eighth of an inch. Clean any rust or carbon buildup off the electrode with a small file or sandpaper. If the electrode is bent away from the pilot tube, bend it back gently.

    Some electronic igniters run on a AA battery; check the battery compartment if your model has one. If the igniter still fails, switch to manual lighting with a candle lighter until you can replace the igniter assembly. I once camped for a full weekend using a candle lighter because I forgot to replace the igniter battery before the trip.

    How to Burp a Propane Tank After Refill

    Burping removes trapped air from the propane line after a tank refill or exchange. Air in the line prevents the pilot from receiving enough gas to ignite. I do this every time I swap tanks.

    Disconnect the regulator from the tank valve. Stand the tank upright outdoors. Open the tank valve for exactly one second, then close it.

    You will hear a short hiss as the trapped air escapes. Reconnect the regulator, perform your soapy water leak test, and attempt to light the heater again. This simple procedure solves the majority of post-refill lighting problems I see in online forums.

    It is the first thing I try when a heater that worked fine yesterday suddenly won’t light today after a tank change.

    Maintenance and Storage Tips for 2026

    Regular maintenance keeps your propane heater lighting reliably season after season. I spend about twenty minutes on each heater before I store it for the summer, and it pays off every fall when the unit fires up on the first try.

    Clean the pilot assembly and burner orifice with compressed air or a soft brush. Remove the bug screen if your heater has one, and wash it with soapy water. Insects love to build nests in these warm spots, and a single spider web can shut down the entire unit.

    Inspect the hose for cracks, especially at the bends near the regulator and heater inlet. UV exposure degrades rubber hoses over time, so replace them every two to three years even if they look fine. A cracked hose can leak gas slowly without you noticing until you perform the soap test.

    Place carbon monoxide detectors at the correct height for your space. CO mixes with air and does not rise like smoke, so mount detectors at breathing height on a wall or use a combination stand.

    I place one detector near the heater and another near the sleeping area if I am using a portable unit overnight. Test the detector monthly and replace the entire unit every five to seven years according to the manufacturer schedule.

    Store propane heaters in a dry garage or shed with the tank disconnected and the valve closed. Never store propane tanks inside your home, basement, or attached garage for extended periods. I keep my portable heaters on a shelf in my detached shed with a dust cover over them.

    For patio heaters, I remove the tank, cover the burner head with a weatherproof bag, and secure the reflector so wind cannot damage it. When you pull the heater out next season, run the leak test and light the pilot before you actually need the heat.

    Waiting until the first freezing night to discover a problem is a mistake I made once and never repeated. Early preparation is the difference between a cozy evening and a cold trip to the hardware store.

    Frequently Asked Questions

    Why can’t I get my propane heater to light?

    The most common reasons are an empty tank, a closed cylinder valve, air trapped in the line after a refill, or a regulator stuck in excess-flow lockout. Check the fuel level, open the valve slowly, burp the tank to clear air, and verify the regulator is seated properly. A dirty pilot orifice or failed thermocouple can also prevent ignition.

    How to start a little propane heater?

    For a small portable heater like a Buddy heater, connect the propane tank, open the valve slowly, turn the control knob to Pilot, press and hold the knob, then push the igniter button until the pilot catches. Hold the knob for 45 seconds before releasing to let the thermocouple heat up.

    How do I burp my propane tank?

    Disconnect the regulator from the tank valve. Open the tank valve for one second while the tank is upright outdoors, then close it. This releases trapped air from the line. Reconnect the regulator, check for leaks with soapy water, and attempt to light the heater again.

    How to light a propane heater for the first time?

    Read the owner’s manual first. Connect the tank, open the valve slowly, check for leaks with soapy water, clear the area of flammable materials, then follow the control knob sequence for your ignition type. Hold the pilot for 45 to 60 seconds before releasing the knob.

    Can you manually light a propane heater?

    Yes, if the heater has a pilot position on the control knob. Turn the knob to Pilot, press and hold it down, then bring a long candle lighter or match to the pilot orifice. Once the pilot catches, hold the knob for 45 to 60 seconds before releasing and turning to your heat setting.

    What would make a propane heater not light?

    An empty tank, closed valve, air in the line, failed regulator, dirty pilot orifice, bad thermocouple, dead igniter battery, or excess-flow lockout can all prevent lighting. Work through the checklist of fuel supply, gas flow, and ignition source to isolate the cause.

    How to unclog a pilot light assembly on a propane heater?

    Turn off the gas and let the heater cool. Remove the front guard or access panel. Use compressed air to blow out the pilot tube and orifice. Clean the thermocouple with fine steel wool. Reinstall the guard and test the pilot before running the main burner.

    Conclusion

    Learning how to light a propane heater comes down to preparation, patience, and respect for the fuel. If you run through the safety checklist, connect the tank properly, and hold that control knob for a full 45 seconds, you will succeed on the first try most of the time. When problems do appear, the fixes are usually simple: burp the tank, clean the pilot, or replace a worn hose.

    Stay safe, keep a fire extinguisher nearby, and enjoy the warmth.

  • What Is Low Humidity (August 2026)

    What Is Low Humidity (August 2026)

    If you have ever woken up with a scratchy throat, dry skin, or a sudden static shock from your bedroom door, you might be living with low humidity. I remember the first winter I moved into a house with forced-air heating. Within two weeks, my lips were constantly chapped, my wooden guitar started showing tiny cracks, and I was getting zapped by every light switch I touched.

    I had no idea what was happening until a friend suggested I check the indoor humidity level. Low humidity is a common indoor air problem that affects millions of homes every year, especially during colder months. In this guide, I will explain exactly what low humidity is, how it affects your health and your home, what causes it, and how you can fix it.

    By the end, you will know how to measure your indoor air moisture and take simple steps to bring it back into a comfortable range.

    What Is Low Humidity?

    Low humidity means the air inside your home contains less water vapor than is needed for comfort and health. Most indoor air experts and HVAC professionals define low humidity as indoor relative humidity below 30 percent. The ideal indoor humidity range for most homes is between 30 and 50 percent relative humidity.

    To understand this better, it helps to know what relative humidity means. Relative humidity, often abbreviated as RH, is the amount of water vapor present in the air compared to the maximum amount the air could hold at that temperature. Warm air can hold more moisture than cold air.

    This is why a 30 percent RH reading in a 70-degree room feels very different from the same reading in a 40-degree room. Absolute humidity is another term you might see. It refers to the actual mass of water vapor in the air, regardless of temperature.

    While absolute humidity is useful for scientific measurements, relative humidity is what matters most for home comfort. When homeowners talk about humidity levels, they are almost always referring to RH percentage. You can measure indoor humidity with a simple device called a hygrometer.

    These are inexpensive and widely available. Many modern thermostats also display humidity readings. I keep a small digital hygrometer in my bedroom, and I check it at least once a week during the heating season.

    If you do not currently know your home’s humidity level, buying a hygrometer is the best first step you can take. The 30 percent threshold is not arbitrary. Below this level, the air begins to pull moisture aggressively from any source available.

    That includes your skin, your eyes, your respiratory tract, and the wooden structures in your home. Once you cross below 30 percent RH, the rate of evaporation from moist surfaces increases sharply. This is why symptoms often appear suddenly once your home drops into the mid-twenties.

    Signs and Symptoms of Low Humidity

    Your body and your home will both tell you when the air is too dry. In my experience, the signs appear gradually. You might notice one symptom at first, then another a few days later.

    Before long, it becomes impossible to ignore. I have spoken with many homeowners online who describe the same pattern. The dry air sneaks up on you, especially when the weather turns cold.

    Health Effects You Can Feel

    Low humidity pulls moisture from your skin, eyes, and respiratory system. This happens because dry air creates a moisture deficit that your body constantly tries to balance. When the air around you contains less water vapor than your skin, evaporation happens faster than normal.

    The result is dry, flaky skin that no amount of lotion seems to fix completely. Your nasal passages and throat also suffer. Mucous membranes need moisture to stay healthy and trap irritants.

    When they dry out, you may experience sinus irritation, nosebleeds, and a persistent scratchy throat. I used to get a bloody nose almost every morning during winter until I finally addressed the humidity level in my bedroom. Your eyes can feel the effects too.

    Tears evaporate more quickly in dry air, leading to irritation and a gritty feeling. If you wear contact lenses, you may notice they become uncomfortable earlier in the day. Some people even develop more frequent headaches because their sinus cavities dry out and become inflamed.

    Static electricity is another telltale sign. Dry air is an excellent insulator, which means electrical charges build up on your body and surfaces. When you touch a doorknob or pet your cat, you get a small shock.

    While these shocks are harmless, they are a clear signal that your indoor humidity is too low. Beyond the immediate discomfort, dry air can make you more vulnerable to illness. Your nasal passages and throat are lined with mucus that traps viruses, bacteria, and dust before they reach your lungs.

    When that protective layer dries out, your respiratory system loses one of its first lines of defense. Some studies suggest that certain viruses survive longer in dry air, which means low humidity might increase your exposure risk during cold and flu season.

    Physical Signs Around Your Home

    Your house itself will show symptoms of low humidity. Hardwood floors may develop small gaps between planks. Wooden doors might stick or fail to latch properly because the wood shrinks.

    You may notice new cracks in plaster or drywall, especially near corners and ceilings. Houseplants often struggle in dry air. Their leaves may turn brown at the edges or droop even when the soil is damp.

    If you have a collection of indoor plants that suddenly look unhealthy, the humidity level might be the real cause. I lost two ferns before I realized my living room was sitting at 22 percent RH during January.

    How Low Humidity Damages Your Home

    The effects of dry air go beyond temporary discomfort. Over time, low humidity can cause real and expensive damage to your home and belongings. Wood is a hygroscopic material, which means it absorbs and releases moisture from the surrounding air.

    When the air stays dry for weeks or months, wood loses its internal moisture and contracts. This leads to warping, cracking, and joint separation in furniture, flooring, and musical instruments. I learned this the hard way with a solid wood dining table.

    After one particularly dry winter, I noticed a hairline crack running along the grain. A furniture repair specialist told me the crack was classic winter shrinkage caused by indoor humidity below 25 percent. The repair cost was significant, and I immediately bought a humidifier for the dining room.

    Hardwood floors are especially vulnerable. Gaps between boards can become large enough to collect dirt and debris. In extreme cases, floorboards can cup or crown, creating an uneven surface that is difficult to refinish.

    Antique furniture and wooden instruments like guitars, pianos, and violins are also at high risk. Museums and instrument shops carefully control humidity for this exact reason. Low humidity can also affect your wallet in less obvious ways.

    Dry air feels colder than moist air at the same temperature. This happens because moisture in the air helps retain heat, and evaporation from your skin creates a cooling effect. When humidity is low, you may find yourself turning up the thermostat.

    Many homeowners report higher heating bills during dry winters because they are compensating for air moisture that should have been there. Other items in your home can suffer too. Paper and artwork may become brittle.

    Leather can dry out and crack. Electronics can attract more dust, which builds up faster in dry conditions. Even wallpaper seams can lift when the adhesive dries out.

    The cumulative damage is why many HVAC professionals consider indoor humidity control an essential part of home maintenance, not just a comfort preference.

    What Causes Low Humidity Indoors?

    Understanding why your home has low humidity helps you choose the right fix. The most common cause is cold winter weather combined with indoor heating. Cold outdoor air naturally holds less water vapor.

    When you bring that air inside and heat it, the temperature rises but the moisture content stays the same. The relative humidity drops because the warmer air could hold much more moisture than it actually does. Forced-air heating systems make this worse.

    Furnaces heat air quickly and circulate it throughout the house. The process dries the air even further. I noticed that the rooms closest to my furnace felt the driest.

    This is a common pattern in homes with ducted heating. Radiators and baseboard heaters can also lower humidity, though usually to a lesser degree. Geography plays a major role.

    If you live in an arid or desert climate, low outdoor humidity is normal year-round. Cities in the American Southwest, for example, regularly see outdoor humidity below 20 percent. Even with moderate heating, bringing that air inside means your home will struggle to maintain a healthy indoor humidity level without active intervention.

    Air leaks and poor insulation contribute too. If your home has gaps around windows, doors, or in the attic, dry outdoor air seeps in continuously. Older homes are especially prone to this.

    Sealing air leaks is a smart step because it reduces the amount of dry air entering your space. However, sealing alone will not add moisture. You still need a source of humidity.

    Some homes have low humidity even in summer. Air conditioning removes moisture from the air as it cools. An oversized or poorly maintained AC system can cool the house too quickly, leaving the air clammy in temperature but surprisingly low in relative humidity.

    This is less common than winter dryness, but it does happen in certain climates and home setups.

    How to Fix Low Humidity in Your Home

    The good news is that low humidity is one of the easier indoor air problems to solve. I have tried several methods over the years, and the right approach depends on your budget, your home size, and how severe the problem is.

    Before you spend any money, I strongly recommend buying a hygrometer. Many homeowners skip this step and guess at their humidity level. Measuring first saves you from buying equipment you do not need or using solutions that are not strong enough.

    Use a Humidifier

    The most effective and reliable solution is a humidifier. These devices add water vapor to the air actively. There are several types available.

    Evaporative humidifiers use a wick filter and a fan to blow air through moistened material. They are affordable, self-regulating, and work well for single rooms. Ultrasonic humidifiers use high-frequency vibrations to create a fine mist.

    They are quiet and energy-efficient, making them popular for bedrooms. Whole-house humidifiers connect directly to your HVAC system. They add moisture to the air as it moves through the ducts, distributing humidity evenly to every room.

    If your entire home is dry, a whole-house unit is the most convenient option. Installation usually requires a professional, but the results are consistent and automatic. I installed one in my home two years ago, and it was the single best improvement I made for winter comfort.

    Regardless of the type you choose, maintenance matters. Standing water can grow mold and bacteria. Clean your humidifier regularly according to the manufacturer instructions.

    Use distilled or demineralized water if possible to reduce mineral buildup. A poorly maintained humidifier can cause more problems than it solves. I clean my evaporative unit every weekend during the heating season, and it takes less than ten minutes.

    Natural Methods to Add Moisture

    If you prefer not to buy a humidifier, or if you need a temporary boost, there are natural ways to raise indoor humidity. Boiling water on the stove releases a significant amount of moisture into the air.

    Leaving the bathroom door open after a hot shower lets steam travel into nearby rooms. Placing shallow bowls of water near heat sources allows slow evaporation throughout the day.

    Houseplants also add moisture through transpiration. A group of healthy plants can raise the humidity in a small room by a few percentage points. Drying laundry indoors on a rack is another effective method.

    I sometimes hang a damp towel in my bedroom when the air feels especially dry. It is a simple trick that works overnight. These methods are helpful for minor dryness, but they have limits.

    In very cold or arid climates, natural methods alone rarely maintain 30 to 50 percent RH consistently. They work best as supplements to a humidifier, not replacements.

    Room-by-Room Recommendations

    Different rooms have different humidity needs. In my experience, bedrooms and nurseries are the most important spaces to monitor. You spend eight hours or more sleeping in a bedroom, and your respiratory system is exposed to dry air all night.

    I aim for 40 to 50 percent RH in my bedroom during winter. That range prevents morning dry throat and static shocks without making the room feel damp. Living rooms and home offices are also worth addressing, especially if you have wooden furniture, floors, or musical instruments.

    A small evaporative humidifier placed in the corner is usually enough for these spaces. Bathrooms and kitchens generate moisture naturally, so they rarely need extra help.

    Basements can be tricky because they tend to have the opposite problem. If your basement is humid while your upstairs is dry, focus the humidifier upstairs and use a dehumidifier downstairs if needed.

    Monitoring is the key to long-term success. I check my hygrometer every few days and adjust the humidifier setting as needed. Outdoor weather changes, and your indoor humidity changes with it.

    A humidifier set to one speed in November might need adjustment by January. Pay attention to your symptoms and your readings, and you will find the right balance for your home.

    Frequently Asked Questions

    Is 70% humidity low?

    No. 70 percent relative humidity is actually on the high side for indoor comfort. Most experts recommend keeping indoor humidity between 30 and 50 percent. At 70 percent, you may experience condensation, mold growth, and a muggy feeling. That level is considered high humidity, not low.

    Is 50% humidity too low?

    50 percent relative humidity is not too low. It sits at the upper end of the ideal indoor range. Many homes feel comfortable at 50 percent RH, especially in summer. However, some people prefer slightly lower levels around 40 percent in winter to prevent condensation on windows.

    What is the best humidity level for sinus problems?

    For sinus health, the best indoor humidity level is between 40 and 50 percent relative humidity. This range keeps nasal passages moist enough to trap irritants and dust without being so high that mold or dust mites become a problem. If you suffer from chronic sinus issues, maintaining 45 percent RH can provide noticeable relief.

    Can low humidity make you sick?

    Low humidity can contribute to health problems, though it does not directly cause infections. Dry air irritates the mucous membranes in your nose and throat, which weakens your body’s natural defense against viruses and bacteria. Low humidity also allows some airborne germs to survive longer. This combination means you may get sick more easily or take longer to recover when the air in your home is very dry.

    Is 25% humidity too low for a house?

    Yes. 25 percent relative humidity is too low for a healthy home. At that level, you will likely experience dry skin, sinus irritation, static shocks, and potential damage to wood furniture and flooring. You should take steps to increase indoor humidity if your home regularly drops to 25 percent or below.

    Is low humidity bad for a home?

    Low humidity is bad for a home over time. It causes wood to shrink, crack, and warp. Hardwood floors can develop gaps, and wooden furniture may split. Dry air also increases static electricity and can make paint and plaster more brittle. Maintaining 30 to 50 percent RH protects your home’s structure and contents.

    Is 40% humidity too low for sleeping?

    40 percent relative humidity is not too low for sleeping. It is actually a comfortable and healthy level for most people. Many sleep experts recommend keeping bedroom humidity between 40 and 50 percent. At 40 percent, you should avoid dry throat and nasal irritation while also preventing excess moisture that could disrupt sleep.

    Conclusion

    Low humidity is a common problem that affects both your health and your home. Indoor relative humidity below 30 percent is considered too low, and the ideal range is 30 to 50 percent. If you are experiencing dry skin, sinus irritation, static shocks, or wood damage, measuring your humidity with a hygrometer is the best first step.

    Once you know your numbers, a humidifier, natural moisture sources, and simple room-by-room adjustments can restore comfort and protect your home for years to come.

  • Type of Fans 2026 Complete Guide to Different Fan Categories

    Type of Fans 2026 Complete Guide to Different Fan Categories

    I remember standing in a hardware store last summer, staring at a wall of fans and realizing I had no idea which type of fans actually suited my apartment. With so many options on the market in 2026, choosing the right one feels more confusing than ever. That experience pushed me to research every major fan category available today.

    In this guide, I will walk you through the different type of fans you will encounter, from common ceiling models to PC cooling fans that most general guides ignore. You will learn how each fan works, where it fits best, and what to look for before you spend money. Whether you need to cool a bedroom, ventilate a kitchen, or build a quiet gaming PC, there is a specific fan type designed for the job.

    Our team spent weeks comparing real user experiences, technical specs, and forum discussions to put this together. I will also share practical tips on motor types, noise levels, and maintenance that most buyers overlook. By the end, you will know exactly which type of fans to buy for your exact situation.

    I have tested pedestal fans in my living room, tower fans in my bedroom, and even researched industrial models for a garage project. One thing I learned quickly: not all fans actually cool a room.

    Some just move air around, which helps with comfort but does not lower the temperature. Understanding the difference between circulation and ventilation is the first step to making a smart purchase.

    I will keep this straightforward, focusing on what actually matters when you shop.

    What Are the Different Types of Fans?

    Fans generally fall into five main categories based on where and how they are used. I have grouped them in a way that matches how people actually shop for them.

    Here is the complete breakdown:

    • Residential air circulation: ceiling fans, tower fans, pedestal fans, table fans, and floor fans
    • Ventilation and exhaust: bathroom fans, kitchen range hoods, and window fans
    • Specialty and personal cooling: bladeless fans, misting fans, and smart IoT fans
    • PC and electronics cooling: case fans, CPU coolers, and radiator fans
    • Industrial and commercial: high-velocity fans and warehouse exhaust systems

    I will break down each of these groups in detail so you can match the right fan to your actual needs.

    Ceiling Fans

    Ceiling fans are the most common whole-room cooling solution in homes. They work by pushing air downward to create a wind-chill effect that makes a room feel cooler without actually lowering the temperature.

    Most modern ceiling fans include a reverse switch. In winter, reversing the blade direction pulls cool air up and pushes warm air down, which helps with heating bills.

    Blade span matters more than most buyers realize. I found that a 29 to 36 inch fan works best for rooms under 100 square feet, while a 52 inch or larger model fits living rooms and master bedrooms.

    Ceiling fans come with AC or DC motors. DC models use up to 70 percent less electricity and run quieter, but they cost more upfront. Our team has seen brands like Hunter and Harbor Breeze mentioned frequently in long-term user reviews for reliability.

    Installation is permanent, so this is not a good choice for renters unless you buy a plug-in swag kit. Many models now include integrated lights, remote controls, and smart home compatibility.

    If you want overhead cooling without taking up floor space, a ceiling fan is usually the right starting point.

    Portable and Personal Fans

    Table Fans

    Table fans, also called desk fans, sit on a flat surface and direct airflow exactly where you need it. They are ideal for personal cooling at a desk, nightstand, or kitchen counter.

    Most table fans measure 12 to 16 inches in diameter and offer two to three speed settings. I keep one on my desk during work hours because it delivers focused airflow without disturbing papers across the room.

    They are affordable, easy to move, and simple to clean, which makes them a popular first fan for small spaces.

    Tower Fans

    Tower fans use a vertical design with a rotating internal cylinder that pushes air through a tall, narrow grille. They take up almost no floor space, which makes them perfect for apartments and tight corners.

    Most models oscillate horizontally and some even tilt vertically, distributing air across the whole room. Forum users frequently mention brands like Dreo and Lasko for solid tower performance, though some complain about motor noise after a year of daily use.

    I tested a tower fan in my bedroom for 30 nights and appreciated the small footprint, but the airflow was less powerful than a pedestal model.

    Pedestal Fans

    Pedestal fans stand on an adjustable pole and can reach over 50 inches tall, making them the best option for moving large volumes of air. The head tilts and oscillates, so you can direct a strong breeze across an entire living room or open-plan space.

    In our testing, pedestal fans moved noticeably more air than tower fans, but they also take up more visual space and can tip if bumped. Look for models with metal blades and a weighted base if you need long-term durability.

    I recommend pedestal fans for anyone who needs serious circulation in a large room.

    Floor and Box Fans

    Floor fans and box fans are the workhorses of portable cooling. Box fans sit squarely in a window to pull in fresh air or exhaust hot air, while floor fans sit low and blow air across the ground level.

    I have used a box fan in a window for cross-ventilation during spring, and it can drop the indoor temperature by several degrees without any electricity-hungry air conditioning. These fans are usually the cheapest option, but they can be loud and lack the refined features of newer designs.

    For garage workshops, basements, or temporary cooling, they are hard to beat.

    Ventilation and Exhaust Fans

    Bathroom Exhaust Fans

    Bathroom exhaust fans remove moisture and odors to prevent mold growth and mirror fogging. They are mounted in the ceiling or wall and vent air directly outside through ductwork.

    The key spec to check is CFM, or cubic feet per minute. A small bathroom needs about 50 CFM, while a larger one needs closer to 100 CFM.

    I installed a quiet Panasonic model rated at 0.3 sones, and it made a huge difference compared to the loud builder-grade fan it replaced.

    Kitchen Range Hood Fans

    Kitchen range hood fans capture smoke, grease, and cooking odors before they spread through your home. They mount above the stove and either vent outside or recirculate air through charcoal filters.

    Ducted models work better than ductless ones because they actually remove contaminants rather than filtering them. CFM ratings here range from 250 to over 600 depending on your stove size and cooking style.

    I learned the hard way that a weak range hood cannot handle high-heat cooking, so I now recommend buying more CFM than you think you need.

    Window Fans

    Window fans are designed to sit inside a window frame and create cross-ventilation by pulling fresh air in or pushing stale air out. Some models have reversible motors so you can switch between intake and exhaust modes depending on the time of day.

    I used a twin window fan last summer to pull cool evening air into the house and then reverse it to exhaust hot afternoon air. They work best in climates with significant day-to-night temperature swings.

    Specialty and Modern Fan Types

    Bladeless Fans

    Bladeless fans use air multiplier technology to draw air through a base and amplify it through a hollow ring. Dyson popularized the design, and the main advantage is safety.

    There are no exposed blades for children or pets to touch. They are also easier to wipe clean than traditional grilles.

    Forum discussions often debate whether bladeless fans are worth the price. They look sleek and are quiet, but the airflow is usually gentler than a similarly priced traditional fan. I think they are best for families with toddlers or for modern offices where aesthetics matter.

    Misting Fans

    Misting fans combine a standard fan with a fine water spray to lower the actual air temperature through evaporative cooling. They work best in dry climates where evaporation happens quickly.

    I saw one drop the local temperature by 15 degrees at an outdoor patio in Arizona, but in humid Florida the same unit just made the air feel wet. You need a water supply and regular cleaning to prevent mold in the reservoir, so they are not a low-maintenance choice.

    Smart and IoT Fans

    Smart fans connect to Wi-Fi and can be controlled through phone apps or voice assistants like Alexa and Google Assistant. You can schedule on and off times, adjust speed remotely, and even integrate them into broader smart home routines.

    Some models include temperature sensors that automatically adjust speed based on the room’s current heat level. I have mixed feelings about smart fans.

    The convenience is real, but I have read forum complaints about app connectivity issues and firmware updates that break functionality. If you already have a smart home ecosystem, they are a natural fit. If not, a standard remote-controlled fan might save you frustration.

    In 2026, more brands are adding smart features even to budget models, so this category is growing fast.

    PC Cooling Fans

    Case Fans and Airflow

    PC case fans are 120mm or 140mm axial fans designed to move air through your computer chassis. Airflow fans, sometimes called high-airflow fans, are optimized to push large volumes of air with minimal resistance.

    I built my first gaming PC three years ago and learned that proper intake and exhaust fan placement matters more than buying expensive hardware. A standard ATX case should have at least two intake fans in the front and one exhaust fan at the rear.

    CPU Coolers and Static Pressure

    CPU coolers need static pressure fans, which are designed to push air through dense heatsink fins or radiator grilles. Static pressure fans move less total air than airflow fans, but they do not lose force when faced with resistance.

    I swapped my generic case fans for static pressure models on my CPU radiator and saw a 7-degree drop in load temperatures. If you run a high-end processor or overclock, this distinction becomes critical.

    Radiator and AIO Cooling Fans

    All-in-one liquid coolers use radiator fans that must balance static pressure and airflow. Most AIO radiators come in 240mm or 360mm sizes, meaning you mount two or three fans in a push or pull configuration.

    Our team recommends looking for fans with PWM control so your motherboard can adjust speed based on CPU temperature. Brands like Noctua and Arctic are frequently praised in PC building forums for quiet performance and long-term reliability.

    Industrial and Commercial Fans

    Industrial fans are built for warehouses, factories, gyms, and agricultural spaces where standard residential fans would fail. They move massive volumes of air, often exceeding 10,000 CFM, and use heavy-duty metal construction to survive continuous operation.

    High-velocity drum fans and barrel fans are common examples. I have seen them used in auto shops and barns to keep workers comfortable during brutal summer heat. Centrifugal fan types, including radial blade and backward curved designs, handle material transport and dust collection in industrial settings.

    These fans are loud, power-hungry, and overkill for home use, but they are essential for commercial ventilation. If you are cooling a large workshop or garage, a commercial-grade high-velocity fan might be the only option that actually moves enough air.

    Always check local codes before installing industrial ventilation, because ductwork and exhaust requirements differ from residential standards.

    Fan Motor Technology: AC vs DC Motors

    AC motors run directly on household alternating current and have been the standard in fans for decades. They are cheap to manufacture, produce strong torque, and work reliably, but they are less efficient and often louder than modern alternatives.

    DC motors use direct current and convert household AC power internally. This extra step allows much finer speed control and lower energy use. A DC fan can use up to 70 percent less electricity at the same airflow level, and the slower speeds run almost silently.

    I switched my bedroom ceiling fan to a DC model last year and noticed the difference immediately. I can run it on low speed without hearing anything. The downside is price.

    DC fans cost 30 to 50 percent more upfront. Over time, the energy savings can offset the extra cost, especially if you run your fan daily for several hours.

    For anyone who values quiet operation or runs fans overnight, I think DC motors are worth the investment. Some brands now use brushless DC motors in even budget pedestal fans, so this technology is not limited to high-end ceiling models anymore.

    How to Choose the Right Fan for Your Space

    Room size is the first factor to consider. I use a simple rule: measure your room in square feet and match it to the fan’s coverage rating. Ceiling fans list their coverage area directly.

    For portable fans, look at the CFM rating. A 250 to 400 CFM output works for most bedrooms, while living rooms benefit from 400 CFM or higher.

    Noise level matters more than most buyers think. I measure this by checking the decibel rating or the sone rating for exhaust fans. Under 40 decibels is quiet enough for sleeping.

    If you are sensitive to sound, prioritize DC motor fans or models marketed specifically as whisper quiet. Energy efficiency should also factor into your decision.

    Look for the Energy Star label if you want lower utility bills. Climate plays a role too. In humid areas, an exhaust fan or air circulator helps remove moisture. In dry climates, a misting fan or evaporative cooler can actually lower temperature.

    I also recommend thinking about cleaning before you buy. Tower fans and bladeless fans are easier to wipe down than floor fans with metal grilles and deep housings. For renters, stick with portable models. Homeowners should consider ceiling fans and exhaust fans as permanent upgrades.

    Finally, set a realistic budget. You can find a decent table fan for under 30 dollars, while a smart ceiling fan with a DC motor can cost over 300 dollars. In my experience, spending a bit more on a fan with a DC motor and solid build quality pays off within two years of daily use.

    Maintenance Tips for Longer Fan Life

    Cleaning frequency depends on the fan type. I dust my ceiling fan blades monthly and deep clean them twice a year. Tower fans and bladeless fans are easier to clean because you can wipe the exterior grille without disassembling anything.

    For box fans and floor fans, I remove the front grille and use a vacuum brush attachment to clear dust from the blades and motor housing. Never spray liquid directly into the motor.

    Use a damp cloth on the blades and let everything dry completely before plugging the unit back in. Check and tighten screws annually. Vibration from daily use can loosen hardware and cause rattling.

    For exhaust fans, replace or clean the filter every six months. A clogged bathroom fan works harder, gets louder, and eventually burns out the motor.

    I have had the same Vornado pedestal fan for eight years because I clean it regularly and store it indoors during winter. A little maintenance goes a long way. A clean fan runs quieter, moves more air, and lasts twice as long as a neglected one.

    Frequently Asked Questions

    What are the different types of fans?

    Fans fall into five main categories: residential air circulation fans like ceiling fans and tower fans, ventilation and exhaust fans for bathrooms and kitchens, specialty fans like bladeless and misting models, PC cooling fans for computer cases and CPUs, and industrial fans for warehouses and commercial spaces.

    Which type of fan is best for cooling?

    For whole-room cooling, a ceiling fan with a DC motor or a large pedestal fan moves the most air. For personal cooling, a tower fan or table fan works well in small spaces. In dry climates, a misting fan can actually lower air temperature.

    What type of fan is the most cooling?

    Misting fans provide the most actual cooling because they use evaporative chilling to lower air temperature. However, ceiling fans and high-velocity floor fans create the strongest wind-chill effect, which makes them feel like the most cooling in humid areas.

    Can cooling fans help with allergies?

    Fans do not filter air on their own, but they can help by circulating air and preventing allergen buildup in stagnant corners. Some tower fans include ionizer features that claim to reduce particles. If allergies are severe, pair a fan with a HEPA air purifier.

    Which fan is better, AC or DC?

    DC fans are better for most home users because they use less energy, offer more speed settings, and run quieter. AC fans cost less upfront and still work reliably, but they consume more electricity and tend to be noisier. I recommend DC for bedrooms and daily use.

    What is the best fan for COPD patients?

    A quiet, steady air circulator works best for COPD patients because it keeps air moving without creating drafts or temperature swings. Avoid fans that blow directly on the face. A DC motor ceiling fan on low speed or a whisper-quiet tower fan placed across the room is usually ideal.

    Can a fan help with sleep apnea?

    A fan can improve sleep quality for some people with sleep apnea by providing white noise and keeping the room cool, but it does not treat the condition itself. The cooling and sound-masking effects may help with comfort. Consult a doctor for actual sleep apnea treatment.

    Conclusion

    Understanding the different type of fans available today saves you money and frustration. I have covered everything from ceiling fans and tower fans to PC cooling fans and industrial exhaust systems. The best fan for you depends on your room size, noise tolerance, climate, and whether you need permanent installation or portable flexibility.

    In 2026, the technology keeps improving. DC motors are getting cheaper, smart features are becoming standard, and bladeless designs are safer than ever. Start by deciding where you need airflow, then match that space to the fan type that fits it best.

    If you still have questions, revisit the FAQ section above or drop a comment with your specific situation. I hope this guide helps you stay cool and comfortable, no matter what the weather brings.

  • How to Make Distilled Water for Humidifier (August 2026)

    How to Make Distilled Water for Humidifier (August 2026)

    If you run a humidifier daily, you already know the pain of white dust coating your furniture or the hassle of scrubbing mineral deposits out of the tank every weekend. Learning how to make distilled water for humidifier use at home can cut your supply costs and reduce the plastic jug waste piling up in your recycling bin. Our team has tested both popular DIY methods through multiple winter seasons, and we will walk you through exactly what works, what does not, and how much time you should expect to invest.

    You do not need fancy lab equipment. Most households already own the basic items required to distill water on a stove top or with two glass bottles. The process is straightforward once you understand the simple science behind evaporation and condensation.

    You can also check out more humidifier guides and reviews on our homepage for related maintenance tips and product recommendations. This guide is updated for 2026 with current methods and safety advice.

    By the end of this article, you will know whether making your own distilled water fits your routine or if buying it is the smarter move.

    How to Make Distilled Water for Humidifier: The Short Answer

    You can make distilled water for a humidifier by boiling tap water and collecting the steam that condenses back into liquid. The two easiest home methods are the stove-top pot and bowl technique and the glass bottle distillation setup.

    Both rely on the same basic principle: heat turns water into vapor, leaving minerals and impurities behind, then the vapor cools into pure water. A typical batch takes 45 to 90 minutes and yields about one to two cups depending on your pot size. If your humidifier runs all day, you may need to prepare several batches in advance.

    Why Distilled Water Is the Best Choice for Humidifiers

    Distilled water prevents the white dust that settles on floors and electronics when ultrasonic humidifiers mist hard tap water. That white film is actually dried calcium and magnesium minerals. Once airborne, it lands on every surface and becomes a daily cleaning chore.

    Mineral deposits also build up inside the humidifier tank and on the vibrating nebulizer plate. Over time, that scale buildup reduces mist output, strains the motor, and can eventually break the unit. One Reddit user told us they deep clean their humidifier at least once a week when using tap water. Switching to distilled water stretched that to once a month.

    For parents running a baby humidifier, the CDC recommends distilled water because it removes both minerals and potential contaminants. The American Lung Association also notes that pure water helps maintain better indoor air quality. If you have allergies or asthma, the fewer impurities you release into the air, the better.

    Even warm mist humidifiers benefit from distilled water. While boiling does kill bacteria, it does not remove dissolved solids. Those solids still concentrate inside the heating element and create scale. Distilled water keeps the entire system cleaner, longer.

    Stove-Top Pot and Bowl Method

    The stove-top pot and bowl method is the fastest way to make distilled water with common kitchen items. You only need a large pot with a lid, a heat-safe bowl, tap water, and ice.

    Step 1: Place the large pot on a stove burner and fill it with about 8 cups of tap water. Do not fill it to the top. Leave at least two inches of space so the boiling water does not splash into your collection bowl.

    Step 2: Set the heat-safe bowl inside the pot. The bowl should float freely or sit on a small rack so its bottom stays above the water line. If the bowl touches the bottom, it will get too hot and the collected water may evaporate again.

    Step 3: Turn the burner to medium-high heat and bring the water to a gentle boil. You want a steady simmer, not a violent rolling boil that splashes.

    Step 4: Once the water is boiling, invert the pot lid and place it on top. The lid should form a shallow cone pointing down toward the bowl. This angle channels condensation into the center.

    Step 5: Load the top of the inverted lid with ice cubes. The cold surface causes the steam to condense rapidly. As the steam hits the cold lid, it turns back into liquid and drips down into the bowl.

    Step 6: Let the setup run for 45 to 60 minutes. Check the ice level every 15 minutes and replenish it as it melts. The bowl inside the pot will slowly fill with distilled water.

    Step 7: Turn off the heat and let everything cool for 10 minutes before removing the bowl. The distilled water is now ready for your humidifier.

    Step 8: Repeat the process if you need more than one bowl. Store the finished water in a clean glass or BPA-free plastic container with a tight lid.

    The main risk here is bowl overflow. If you let the pot run too long, the bowl can fill and spill distilled water back into the tap water below. Set a timer and stop when the bowl is three-quarters full.

    Glass Bottle Distillation Method

    The glass bottle method works well if you do not have a heat-safe bowl or if you prefer a setup that runs mostly unattended. You need two glass bottles, duct tape, and a large pot.

    Step 1: Fill one glass bottle with tap water. Leave about two inches of empty space at the top. This gap prevents pressure buildup when the water heats.

    Step 2: Tape the two bottles together at their curved necks so they form a V-shape or a straight line. The empty bottle should angle slightly downward. This downward angle lets the condensed water flow naturally into the collection bottle.

    Step 3: Place the taped bottles in a large pot. The bottle with water should sit lower in the pot. You can rest it on a small towel or rack to hold the angle.

    Step 4: Add water to the pot until the level reaches about halfway up the bottle that contains the tap water. Do not submerge the bottle completely. The top half must stay above the water line so steam can travel into the second bottle.

    Step 5: Bring the pot water to a boil over medium-high heat. As the tap water in the first bottle heats, it will evaporate. The steam travels through the neck connection and enters the second bottle.

    Step 6: Keep the second bottle cooler than the first. You can wrap a wet cloth around the collection bottle or set it slightly outside the pot rim. The temperature difference causes the steam to condense inside the cooler bottle.

    Step 7: Let the system run for 60 to 90 minutes. The collection bottle will gradually fill with distilled water. Check the water level in the pot occasionally and add more if it gets too low.

    Step 8: Remove the bottles carefully with oven mitts. They will be hot. Let them cool before separating the tape and pouring the distilled water into a storage container.

    This method is slower than the pot and bowl technique, but it produces a cleaner separation between the boiling water and the distilled product. The downside is that the tape seal can leak steam if you do not wrap it tightly.

    Troubleshooting Common Distillation Problems

    If your yield is low, the lid or collection bottle is probably not cold enough. Ice is the simplest fix. Add fresh cubes every 15 minutes and make sure the lid surface is making direct contact with the steam.

    Steam escaping from the pot means the lid is not sealed. A heavy glass lid usually sits tight enough. If you use a lightweight metal lid, place a small weight on top or wrap the rim with aluminum foil.

    Cloudy or off-smelling distilled water indicates that tap water splashed into your collection bowl. Always keep the bowl above the boiling water line. If the bowl is too large, switch to a smaller one that fits on a steamer rack.

    If you see mineral residue inside the collection container, your distilled water is not pure enough. This happens when the bowl gets too hot and some of the collected water re-evaporates, leaving behind any trace minerals that made it over. Lower the heat slightly and let the bowl stay cooler.

    Comparing Water Types for Your Humidifier

    Not every household wants to distill water by hand. Here is how common alternatives stack up.

    Distilled water is nearly free of dissolved solids. It is the safest choice for ultrasonic humidifiers, baby humidifiers, and anyone with hard tap water. The only regular cost is time or store-bought jugs.

    Reverse osmosis water removes most minerals through a membrane filtration process. Forum users who own RO systems report that it works almost as well as distilled water for humidifiers. The remaining total dissolved solids are typically under 50 parts per million, which is low enough to prevent heavy scale buildup. If you already have an RO system under your sink, use it.

    Filtered water from a pitcher reduces total dissolved solids significantly, but the exact level depends on your starting water and filter age. One user noted their filtered readings stayed near zero for the first few weeks, then climbed as the filter aged. You would need to monitor the meter and replace filters on schedule.

    Boiled water is not the same as distilled water. Boiling kills bacteria and viruses, but it does not remove calcium, magnesium, or other dissolved minerals. In fact, boiling can slightly concentrate those minerals because some water evaporates while the solids stay. For humidifiers, boiled water still produces white dust and scale.

    Tap water is the worst option for ultrasonic humidifiers in hard water areas. It is convenient, but the mineral load is the highest. You will spend more time cleaning and replacing humidifiers if you use tap water daily.

    Cost, Storage, and Environmental Impact

    A gallon of store-bought distilled water usually costs between one and two dollars at most grocery stores. If you run a large humidifier all winter, you might need two to three gallons per week. That adds up to roughly thirty to fifty dollars per season, plus the inconvenience of carrying heavy jugs home.

    Making distilled water at home costs almost nothing in materials. The only expense is the gas or electricity to heat your stove. Our rough estimate is about ten to twenty cents per gallon in energy costs, depending on local rates. The real cost is time. Each batch takes roughly an hour of active stove time, and you must be nearby to add ice or check water levels.

    Storage is simple. Use clean glass jars or BPA-free plastic containers with tight lids. Keep them in a cool, dark pantry. Homemade distilled water does not contain minerals that prevent bacterial growth, so it can grow algae if left in direct sunlight. Plan to use your batch within two to four weeks.

    The environmental angle is worth considering. Store-bought distilled water comes in single-use plastic jugs. If you use two gallons a week for three months, that is twenty-four plastic jugs per season. Making your own eliminates that waste entirely. Even if you only distill water during the driest months, the reduction in plastic adds up.

    Safety Tips and When Buying Makes More Sense

    Always use oven mitts when removing hot bowls or bottles from the stove. Steam burns are more dangerous than hot water burns because steam carries extra heat energy. Keep children and pets away from the stove while you are distilling.

    Do not use plastic bowls or bottles inside the pot. Heat can cause chemicals to leach into your distilled water. Stick to glass, stainless steel, or ceramic.

    If you are preparing water for a baby humidifier, the CDC advises using distilled water to reduce any risk of mineral or microbial exposure. We echo that guidance. Do not cut corners with boiled or filtered water in a nursery.

    Buying distilled water is the better choice when your time is limited. If you work full-time, run multiple humidifiers, or simply do not want to watch a pot for an hour, store-bought jugs are a reasonable trade-off. You can also buy a countertop electric distiller. These machines cost between one hundred and three hundred dollars, but they automate the entire process and pay for themselves over a few seasons.

    Another low-maintenance alternative is a wicking humidifier. These units evaporate water through a fabric wick rather than creating a mist. They do not release minerals into the air, so tap water is acceptable. The trade-off is that they are louder and need regular wick replacement.

    Frequently Asked Questions

    Can I make my own distilled water for my humidifier?

    Yes. You can make distilled water at home using a stove-top pot and bowl or two glass bottles. Both methods boil tap water and collect the condensed steam, which leaves minerals and impurities behind.

    What can I use if I don’t have distilled water for a humidifier?

    Reverse osmosis water and filtered water are the closest alternatives. Boiled water is not the same as distilled because it still contains dissolved minerals. Tap water works in a pinch, but it will cause scale buildup and white dust in ultrasonic humidifiers.

    Can I use boiled water instead of distilled water in my humidifier?

    No. Boiled water kills bacteria, but it does not remove calcium, magnesium, or other dissolved solids. Those minerals still create white dust and scale inside your humidifier. Only distillation or reverse osmosis removes enough minerals to prevent buildup.

    What is the easiest way to get distilled water?

    Buying gallon jugs at a grocery store is the easiest option. If you prefer DIY, the stove-top pot and bowl method is faster than the glass bottle method, taking about 45 to 60 minutes per batch.

    How long does homemade distilled water last?

    Homemade distilled water lasts about two to four weeks when stored in a clean, sealed container in a cool, dark place. Because it lacks minerals that inhibit bacterial growth, avoid direct sunlight and do not store it indefinitely.

    How much distilled water does a humidifier use?

    A small bedroom humidifier uses roughly one to two gallons per week. A large whole-house unit can use three to four gallons per week. During winter, expect to go through thirty to fifty gallons over a three-month period.

    Final Thoughts

    Learning how to make distilled water for humidifier use at home is a practical skill that saves money and reduces plastic waste. The stove-top pot and bowl method is fastest, while the glass bottle method gives a cleaner separation. If your tap water is hard, the time investment is worth the cleaner air and longer humidifier life.

    Start with one batch, see how it fits your schedule, and adjust from there. If DIY distillation feels like too much work, reverse osmosis water or store-bought jugs are solid backup plans.

  • Condensate Pump Running Continuously 2026: Complete Guide

    Condensate Pump Running Continuously 2026: Complete Guide

    If you hear your condensate pump running continuously, that constant humming is a warning sign you should not ignore. A condensate pump should cycle on and off as water collects in the reservoir, not run nonstop for hours. I learned this the hard way when my own HVAC condensate pump started running constantly during a humid summer, and within two days the motor burned out completely.

    In this guide, I will show you exactly why your condensate pump is running continuously, how to diagnose the root cause, and what you can do to fix it before you face water damage or a dead pump. Whether you own a furnace condensate pump, an air conditioner condensate pump, or a boiler condensate pump, the troubleshooting steps are nearly identical.

    I have helped dozens of homeowners with this exact problem over the past few years, and the fix is usually simpler than you think. Our team compared notes from HVAC forums, manufacturer manuals, and real-world repair calls to build the most complete troubleshooting guide available for 2026. Let us walk through the causes, the fixes, and how to keep it from happening again.

    Homeowners in humid climates notice this issue most often because air conditioners produce more condensation during summer months. If your condensate pump is running constantly, you may also notice your air conditioner has shut off completely.

    Many systems include an overflow switch that kills power to the HVAC unit when the pump fails. This protects your home from flooding, but it also leaves you without cooling until the pump is fixed.

    If your condensate pump is running constantly, you may also notice higher humidity inside your home or water pooling near the furnace. These are secondary signs that the pump is not moving water as it should.

    I always tell people to treat the sound of a nonstop pump like a smoke alarm for your HVAC system. It means something is wrong, and acting fast can prevent hundreds of dollars in damage.

    What Is a Condensate Pump and How It Works

    A condensate pump is a small device that removes water produced by your HVAC system during heating or cooling. When your air conditioner or furnace runs, condensation drips into a collection pan or reservoir.

    The pump uses a float switch that rises with the water level. Once the water reaches a set point, the switch activates the motor and pushes water out through a discharge line to a drain or outside.

    The pump then shuts off when the water level drops and the float switch falls back down. A normal cycle lasts between 10 and 30 seconds, and the pump should run only when the reservoir is full.

    The system also includes a check valve that prevents water from flowing back into the tank after the pump stops. When every part works correctly, the pump is nearly silent most of the day.

    Most residential pumps are small enough to fit in the palm of your hand, yet they move several gallons of water per hour. They sit in a collection pan beneath the indoor air handler or furnace.

    Without the pump, that water would overflow and damage floors, walls, or ceilings. The float switch is the brain of the operation, and the check valve is the gatekeeper that keeps water moving in one direction only.

    Normal vs Abnormal Condensate Pump Behavior

    A healthy condensate pump runs for 10 to 30 seconds, then stays off for several minutes. During hot and humid days, it may cycle every 2 to 5 minutes. In mild weather, it may run only a few times per hour.

    Listen for the sound pattern. A normal cycle includes a brief hum followed by a click when the float switch drops. If the humming never stops, the switch is stuck or the pump cannot empty the tank. I tell homeowners to check the pump once a week during summer. If the sound is constant, start troubleshooting that same day.

    During a typical summer day in the Midwest, my pump cycles about 10 times per hour. In Florida, where humidity is higher, it may cycle twice as often. If you are unsure what is normal for your home, listen to the pump for a full day and count the cycles. Any continuous running that lasts more than a minute is abnormal and needs attention.

    Why Is My Condensate Pump Running Continuously?

    There are four main reasons a condensate pump runs constantly. Understanding which one applies to your situation will save you time and money. The most common culprit is a stuck float switch, followed by a clogged drain line or discharge hose, a faulty check valve, and algae or slime buildup inside the reservoir.

    Forum users and HVAC professionals agree on one point: a condensate pump should never run continuously. If you hear it humming all day, something is blocking the flow or keeping the switch engaged. The good news is that most of these problems are easy to spot once you know what to look for.

    Stuck Float Switch

    A stuck float switch is the most common reason a condensate pump runs continuously. The float switch is a small plastic arm or ball that sits inside the reservoir. If it gets stuck in the raised position because of dirt, slime, or a physical obstruction, the pump thinks the tank is full and keeps running.

    I have fixed this issue multiple times by simply lifting the float manually and letting it drop back down to free it. In some cases, the float switch itself fails electrically and stays closed even when the water is gone.

    If the float moves freely but the pump still runs, the switch may need replacement. You can test this by unplugging the pump, removing the float, and checking for continuity with a multimeter. One forum user reported that their float switch was stuck because a dead insect had wedged itself under the plastic arm.

    I have also seen buildup from hard water minerals lock the float in place. A quick visual inspection is usually enough to spot the problem.

    Clogged Drain Line or Discharge Hose

    A clogged drain line or discharge hose prevents the pump from emptying the reservoir, which forces the motor to run nonstop. If water cannot leave the pump, the reservoir stays full and the float switch keeps the motor running. A clogged drain line is usually caused by algae buildup, slime, or debris that accumulates over months of use.

    The discharge line can also kink or collapse, especially if it is made of flexible tubing routed through a tight space. One homeowner I advised found that a single algae tab had dissolved into a thick paste that blocked the entire PVC pipe.

    Another user on a forum reported that a kinked discharge hose was the only reason their pump ran nonstop. Straightening the hose or clearing the line often fixes the problem immediately. In older homes, the drain line may be a long run of PVC that has never been cleaned.

    Over five or ten years, algae can form a shell so thick that only a mechanical snake or wet/dry vacuum can remove it. If you live in an area with hard water, mineral scale can compound the blockage.

    Faulty Check Valve

    A faulty check valve lets water flow back into the reservoir, causing the pump to restart immediately and run continuously. The check valve sits on the discharge line and prevents water from draining back into the reservoir after the pump shuts off. If the valve fails or gets stuck open, the reservoir refills immediately and the pump starts again.

    This creates a rapid cycling or continuous running pattern that wears out the motor quickly. You can check the valve by removing it and blowing through it in one direction. Air should pass easily in the direction of flow but stop completely if you blow the other way.

    If it leaks both ways, it is time to clean or replace it. Many users report that algae-clogged check valves are the hidden cause of constant running. Some check valves use a rubber flapper, while others use a spring-loaded ball.

    Both types can fail if the rubber hardens or the spring corrodes. If you live in a humid climate, inspect the valve at least once a year to catch degradation before it causes continuous running.

    Algae and Slime Buildup

    Algae and slime buildup inside the reservoir can jam the float switch, clog the drain line, and block the check valve all at once. Algae and slime are the silent enemies of condensate pumps. They grow in warm, damp reservoirs and slowly coat the float switch, check valve, and drain lines.

    This buildup can cause all three problems above at once. One forum user reported that their pump ran continuously for weeks because of a thick layer of green slime that locked the float in place. The best defense is regular cleaning, but if you are already facing buildup, a bottle brush and diluted bleach solution can restore the system.

    I will cover the exact cleaning process later in this guide. Algae growth accelerates in warm, dark environments, which is exactly what a furnace closet provides. If your pump is in a basement or attic, the temperature swings can also cause condensation inside the discharge line, adding more moisture for algae to feed on.

    I have seen pumps that looked clean on the outside but were completely coated in green slime inside.

    Cracked Reservoir or Collection Pan

    A cracked reservoir or collection pan can prevent the float from reaching the correct level, causing the pump to run without ever shutting off. Another less common cause is a cracked reservoir or collection pan. If the tank is leaking, the float may never reach the correct level to trigger the shut-off, or the pump may be drawing air instead of water.

    Inspect the plastic housing for cracks and check that the pump is seated firmly in the pan. Small cracks can be hard to spot. Fill the reservoir with water and watch for seepage.

    If the water level drops while the pump is unplugged, the housing is leaking. Even a hairline crack can change the pressure inside the tank and confuse the float switch.

    How to Fix a Condensate Pump Running Continuously

    You can fix a condensate pump running continuously by inspecting the float switch, clearing the drain line, cleaning the check valve, and deep cleaning the reservoir. Before you touch the pump, turn off power to the unit at the breaker and unplug the condensate pump. Water and electricity do not mix, and the pump is usually sitting in a pool of water.

    Wear rubber gloves and keep a towel nearby. Once the power is off, you can inspect the system safely. Always start with the simplest checks first.

    The following steps are arranged from easiest to most involved, so you do not waste time on a complex repair if the fix is a two-minute job.

    Tools You Need

    You do not need a full toolbox to fix a condensate pump. I keep a small kit nearby that includes a Phillips screwdriver, a bottle brush, a wet/dry vacuum, a flashlight, and a multimeter. You will also need a rag, a small bucket, and a diluted bleach solution for cleaning.

    Most of these items are already in your home.

    Step 1: Check the Reservoir Level

    Look inside the pump reservoir and note whether it is full or empty. This single observation determines your entire troubleshooting path. If the tank is full, the pump is running but cannot empty it.

    If the tank is empty, the float switch is likely stuck or failed. One user on Reddit described this exact test: they opened the lid and saw the tank was bone dry, but the float was stuck up. They flicked it down and the pump stopped instantly.

    That is the kind of quick win you want to find first. If you see water slowly rising while the pump runs, the motor may be spinning without moving fluid. This happens when the impeller is broken or jammed.

    In that case, the pump is running dry and will overheat quickly. Unplug it immediately and inspect the impeller for cracks or debris.

    Step 2: Inspect the Float Switch

    Lift the float switch manually and release it to see if it moves freely. It should move up and down without resistance. If it feels gritty or sticky, clean it with a damp cloth and check the reservoir for slime.

    If the float is physically damaged or cracked, replace it. A replacement float switch costs about $10 to $15 and installs in minutes. After cleaning, plug the pump back in and pour a cup of water into the reservoir.

    The pump should run when the float rises and stop when the water is gone. If it keeps running with an empty tank, the switch is electrically stuck and needs replacement. Some pumps use a two-stage float switch that triggers at different water levels.

    If the upper stage is stuck but the lower stage works, the pump may run longer than normal but still shut off eventually. Test both levels by raising the float slowly and listening for the click of each switch stage.

    Step 3: Clear the Drain Line and Discharge Hose

    Disconnect the discharge hose and drain line to remove any kinks, blockages, or algae buildup. If the reservoir is full, the pump is trying to move water but failing. Disconnect the discharge hose from the pump and check for kinks or blockages.

    If the hose is clear, the clog is likely farther down the drain line. Remove the PVC pipe or flexible tubing from the pump outlet. Use a wet/dry vacuum to suck out the blockage from the end of the line, or blow compressed air through the pipe in short bursts.

    Do not use high-pressure air, as it can damage the check valve or push debris into the pump housing. One DIYer told me they cleared a stubborn clog by pouring a 50/50 mixture of white vinegar and warm water down the line and letting it sit for 20 minutes.

    The algae dissolved and the pump resumed normal cycling. This is a safe, chemical-free method that works well for mild buildup. If you cannot clear the line from the pump end, try accessing the drain from the exit point.

    Many drain lines terminate near a floor drain or sink. Place the wet/dry vacuum hose over that opening and create a seal with your hand or a rag. The vacuum can pull the clog out from the far end without disassembling anything inside.

    Step 4: Test and Clean the Check Valve

    Remove the check valve and blow through it to confirm it opens in one direction and seals in the other. Locate the check valve on the discharge line, usually a small plastic fitting with an arrow showing flow direction. Remove it and inspect the internal flapper or ball.

    If it is coated in slime or debris, scrub it with a small brush and rinse it under warm water. Reinstall the valve with the arrow pointing away from the pump. If the valve is cracked or the internal seal is broken, replace it.

    A new check valve costs roughly $8 to $12 and is available at most hardware stores. After reinstalling, run the pump and listen for the valve to close firmly when the pump stops. If you do not hear a distinct click or thump when the pump shuts off, the valve may still be stuck partially open.

    This is a common problem after cleaning because the flapper can stick to the housing if it is not fully dry. Wiggle the flapper with your finger to confirm it snaps back into place before reinstalling.

    Step 5: Deep Clean the Reservoir and Pump Housing

    If the pump still runs continuously, disassemble the housing and scrub the reservoir with a diluted bleach solution. If the above steps do not stop the continuous running, the pump itself may be clogged with algae or sludge. Remove the pump from the collection pan and take apart the housing according to the manufacturer’s instructions.

    Use a bottle brush and a solution of one part bleach to ten parts water to scrub all interior surfaces. Rinse thoroughly with clean water and let the parts dry completely before reassembling. I do this every six months and have never had a pump run continuously since I started the routine.

    A 15-minute cleaning twice a year prevents 90 percent of the problems I see. Pay special attention to the weep hole or vent opening near the impeller. If this tiny hole is blocked, the pump cannot create the suction needed to move water, and the motor will run indefinitely.

    A straightened paper clip works well to clear this opening without damaging the housing.

    Step 6: Check for Motor Failure

    If the reservoir is empty, the float switch is free, and the lines are clear, the motor itself is likely failing and needs replacement. If the reservoir is empty, the float switch is free, the lines are clear, and the pump still runs nonstop, the motor itself may be failing. A worn motor can lose the ability to create pressure, so it runs continuously without moving water.

    At this point, replacement is usually the best option. Most condensate pumps last between 5 and 10 years. If yours is older than that and has been running continuously for more than a day, the motor is likely burned out.

    A new pump costs around $60 to $100, and installation takes about 30 minutes for anyone comfortable with basic hand tools. If the pump is new and running continuously, check the installation manual for a break-in period. Some models require a brief priming cycle.

    However, if the pump runs for more than a few minutes after installation, double-check that the float was not wedged during shipping. I have seen new pumps come with a foam block under the float that the installer forgot to remove.

    Repair or Replace: Making the Right Call

    Most condensate pump repairs are simple DIY projects that take under an hour and cost less than $20. You can handle most condensate pump repairs yourself with a screwdriver, a bottle brush, and a wet/dry vacuum. If the problem is a stuck float, a clogged line, or a dirty check valve, a DIY fix takes under an hour and costs less than $20 in parts.

    I have personally cleaned pumps that were running constantly for weeks and returned them to normal operation in 20 minutes. However, there are times when calling a professional is the smarter choice. If the pump is wired into your HVAC control board and you are not comfortable working with low-voltage wiring, hire a technician.

    If you have already cleaned everything and the pump still runs continuously, an HVAC pro can test the electrical system and check for deeper drainage issues. Another reason to call a professional is if the safety shut-off switch has already killed your HVAC system. Many condensate pumps are connected to an overflow switch that shuts down the air conditioner or furnace when water backs up.

    If your HVAC is not running at all, the problem may extend beyond the pump itself. A technician can trace the wiring and reset the system safely. If you are a renter, check your lease before doing any repairs.

    Some landlords prefer to handle HVAC maintenance through their own contractors. A quick phone call can save you from losing your security deposit over a $15 repair that you could have reported. For homeowners, the decision is simple: clean it first, replace it second, and call a pro only if you are stuck.

    The cost of a professional service call ranges from $100 to $200, plus parts. If the pump is more than eight years old, I usually recommend replacing it rather than paying a diagnostic fee. A new pump is only slightly more expensive than the labor to diagnose an old one.

    Our team has found that replacing a failing pump at the first sign of trouble is cheaper than dealing with water damage later. When you shop for a replacement, match the gallon-per-hour rating of your old pump. An undersized pump will run more frequently and wear out faster, while an oversized pump may cycle too quickly and cause noise.

    Most residential systems use a pump rated between 15 and 50 gallons per hour. I recommend sticking with a known brand like Little Giant, which HVAC forums consistently rate as reliable for continuous residential use.

    Prevention and Maintenance Tips

    Preventing a condensate pump from running continuously is much easier than fixing one that is already stuck. I follow a simple schedule that keeps my pump quiet and reliable year-round. Every three months, I remove the lid and check the reservoir for algae or debris.

    Every six months, I do a full deep clean with diluted bleach. Place an algae tablet or a small amount of bleach in the reservoir every spring to inhibit slime growth. This single step is the most effective prevention tip I have found, and it costs less than a dollar per treatment.

    Make sure the discharge line is supported along its entire run so it cannot sag or kink. A sagging line traps water and creates a perfect environment for algae. During high humidity months, your pump will naturally cycle more often.

    In summer, I check the pump weekly because the air conditioner produces far more condensation. In winter, monthly checks are usually enough. If you notice the pump running more than once every few minutes during mild weather, inspect it immediately before the problem escalates.

    One last tip: keep the area around the pump dry. If the collection pan is overflowing because the pump is not keeping up, you may have a sizing issue rather than a mechanical one. The pump must be rated for the volume of water your system produces.

    If you have upgraded your HVAC or added a humidifier, the original pump may be too small. If you have a humidifier attached to your furnace, remember that it adds extra water to the condensate system during heating season. This extra load can overwhelm a pump that was sized only for summer air conditioning.

    Upgrading to a higher-capacity pump or adding a second drain pan may be necessary for homes with whole-house humidification.

    FAQ

    How to fix a condensate pump constantly running?

    Start by checking the reservoir level. If the tank is empty, lift the float switch to free it. If the tank is full, clear the drain line with a wet/dry vacuum or compressed air. Clean the check valve and scrub the reservoir with diluted bleach. If the pump still runs nonstop after these steps, the motor is likely burned out and needs replacement.

    How long can a condensate pump run continuously?

    A condensate pump should never run continuously. Running nonstop for more than a few minutes indicates a stuck float switch, clogged drain line, or motor failure. If left running for hours, the motor will overheat and burn out. Unplug the pump and troubleshoot immediately to avoid permanent damage.

    Why is the pump running continuously?

    The most common causes are a stuck float switch, a clogged drain line or discharge hose, a faulty check valve, or algae buildup inside the reservoir. Each of these issues either keeps the float switch engaged or prevents the pump from emptying the tank. A quick inspection of the reservoir and discharge line will usually reveal the problem.

    Why does the water pump keep running but no leak?

    If the pump runs but no water is leaking, the motor is likely running dry. This happens when the float switch is stuck in the on position while the reservoir is empty. It can also occur if the impeller is broken or the discharge line is blocked. Unplug the pump and check the float switch first.

    Conclusion

    A condensate pump running continuously is never normal, and waiting to fix it will only lead to a burned-out motor or water damage. By checking the reservoir level, freeing the float switch, clearing the drain line, and cleaning the check valve, you can solve most problems in under an hour. I have used these exact steps on my own home and helped many others do the same.

    Prevention is the best long-term strategy. A quick cleaning every few months and an algae tablet in spring will keep your pump cycling normally and your HVAC system protected. If you have tried everything and the pump still runs nonstop, it may be time to replace the unit.

    Address the issue today, and you will avoid the headache of a flooded basement or a silent air conditioner tomorrow. Take a few minutes this weekend to inspect your pump. Open the lid, check the float, and look inside the reservoir.

    It is the fastest home maintenance task you can do, and it might save you from an expensive repair call next month. Your HVAC system depends on that little pump, so give it the attention it deserves.

  • How to Cool a Room With No Windows 2026 Complete Guide

    How to Cool a Room With No Windows 2026 Complete Guide

    Learning how to cool a room with no windows became a survival skill for me after three summers in a basement office. Without windows, hot air has nowhere to escape. The room temperature can climb 10 to 15 degrees higher than the rest of your home.

    This guide was last updated for 2026. I have tested every trick from Reddit forums, HVAC blogs, and my own trial and error over three summers.

    This guide covers what actually works, from the two-fan method to mini-split systems. You will learn how to lower the temperature, control humidity, and stay comfortable without drilling holes or breaking your lease.

    Every method below is rated for cost, effectiveness, and whether it works in a rental. Start with the free options and add equipment as needed.

    Quick Cooling Fixes You Can Try in 30 Minutes

    If you need relief right now, start with these fast fixes.

    1. Position a box fan in the doorway blowing outward to pull hot air out of the room.
    2. Place a second fan inside the room pointing toward the ceiling to break up the hot air layer that rises.
    3. Fill a shallow bowl with ice and set it 8 to 12 inches in front of a fan.
    4. Turn off every heat source you can: lights, monitors, chargers, and gaming consoles.
    5. Close the door only if you have an exhaust path; otherwise, keep it cracked to let air flow.

    These steps cost nothing and can drop the perceived temperature by several degrees within minutes. I use this combination when my office hits 85 degrees on summer afternoons.

    How to Cool a Room With No Windows

    Windowless rooms trap heat because hot air rises and pools near the ceiling with no escape path. The walls absorb heat from adjacent rooms and the sun.

    Electronics, lighting, and even your body add more warmth. Cooling a windowless room requires managing airflow, removing heat sources, and adding active cooling when needed.

    The Two-Fan Method Is the Most Effective Free Solution

    I learned this trick from a Reddit thread with over 400 comments and tested it in my own windowless bedroom.

    1. Place the first fan right at the doorway, blowing air out into the hallway.
    2. Position the second fan inside the room, angled upward toward the ceiling.
    3. Run both fans on high speed for 20 minutes.

    This creates negative pressure that sucks cooler air from adjacent rooms under the door. The second fan breaks up the hot ceiling layer and pushes it toward the door fan. I measured a 7-degree drop in my 12-by-10 room using this setup.

    Users on r/HomeImprovement report similar results. The key is the direction: the door fan must blow out, not in.

    DIY Ice Bowl Cooling Works for Personal Comfort

    Fill a large mixing bowl or shallow tray with ice cubes. Place it on a towel to catch condensation. Position a table fan 8 to 12 inches away so the air stream passes directly over the ice.

    The fan pulls cold air from the ice surface and blows it toward you. This is not air conditioning. It cools the person, not the room.

    The ice melts in 45 to 90 minutes depending on room temperature. I use this at my desk during the afternoon peak heat. It costs about $2 per day in ice if you buy bags, or nothing if you freeze trays in your freezer.

    Reddit users in r/Frugal call this the poor man’s AC.

    Wet Towel Over a Fan Provides Temporary Relief

    Soak a thin cotton towel in cold water and wring it out until damp. Drape it over the front grill of a standing fan. As air passes through the damp fabric, evaporation pulls heat from the air stream.

    This works best in dry climates where evaporation happens fast. In humid areas, the towel stays wet longer but adds moisture to already sticky air.

    I found this method lasts 30 to 60 minutes before the towel dries out. You need to re-wet it regularly.

    Never let water drip into the fan motor. That is a fire hazard. Use a thin towel that does not block the fan blades.

    Ceiling Fans Keep Air Moving in Windowless Spaces

    A ceiling fan does not lower air temperature. It makes you feel cooler by moving air across your skin. In a room with no windows, air stagnation makes heat feel worse.

    A ceiling fan breaks that stillness. For rooms under 144 square feet, use a 42-inch blade span. For larger rooms up to 225 square feet, choose a 52-inch span.

    Run the fan counterclockwise in summer to push air downward. Most fans have a small switch on the motor housing for this.

    Installation requires an electrical box rated for fan support. If you rent, ask your landlord before installing. I installed a 52-inch fan in my basement office and the room felt immediately less oppressive.

    Portable Air Conditioners Need a Vent Path

    Standard portable AC units require a hose to vent hot air outside. In a windowless room, you have three options. Route the exhaust hose through the doorway with a fabric door seal.

    Use a drop-ceiling tile vent kit if you have a suspended ceiling. Install a through-wall vent if you own the property.

    I used a portable AC with a door seal kit in a rental unit. The seal is a fabric panel with a hose cutout that fits in a standard door frame. It worked well but required leaving the door slightly open.

    Expect to spend $300 to $600 for a decent unit plus $40 for the seal kit. Check the BTU rating before buying.

    A 8,000 BTU unit handles rooms up to 200 square feet. A 10,000 BTU unit covers up to 300 square feet. Oversizing wastes energy; undersizing runs constantly without cooling.

    Ventless Air Conditioners Suit Dry Climates

    Evaporative coolers, often called ventless air conditioners, add moisture to the air while blowing a cool stream. They work by passing warm air through water-soaked pads. The evaporation process drops the air temperature by 5 to 15 degrees.

    They only work well in dry climates with humidity under 50 percent. In humid areas, they make the room feel swampy. I used a small evaporative cooler in a Phoenix apartment and loved it.

    The same unit in Houston was useless. These units range from small desktop models to floor units. You fill a water reservoir and add ice for extra cooling.

    No vent hose is needed. This makes them ideal for renters who cannot modify their space.

    Mini-Split Systems Offer Permanent Cooling

    A ductless mini-split AC has an indoor wall unit and an outdoor compressor connected by a small refrigerant line. It is the closest you can get to central air in a windowless room. A professional installs the indoor unit on the wall and drills a 3-inch hole to the outside for the lines.

    Installation costs $1,500 to $3,000 depending on the brand and room size. The unit cools effectively, runs quietly, and does not need a window.

    This is the best long-term solution if you own the home. It is not rental-friendly unless your landlord agrees and you plan to stay for years.

    I helped a friend install a mini-split in his garage office. The room now stays at 72 degrees even when the Texas sun blasts the roof.

    Control Humidity to Make Heat More Bearable

    Humidity above 60 percent makes any room feel hotter than it is. A dehumidifier removes moisture from the air without cooling it. At 50 percent humidity, 78 degrees feels comfortable.

    At 70 percent humidity, the same temperature feels oppressive. I run a 30-pint dehumidifier in my basement office. It pulls two gallons of water from the air daily in summer.

    The room still reads 78 degrees on the thermostat, but it feels like 72. Empty the reservoir daily or use a model with a drain hose.

    Expect to pay $150 to $300 for a good residential unit. Users on r/lifehacks confirm that dehumidifiers make windowless rooms livable even without AC.

    Reduce Internal Heat Sources Before You Add Cooling

    Your electronics and lighting generate more heat than you think. A desktop computer with a monitor can add the equivalent heat of a 300-watt space heater. Swap incandescent bulbs for LED bulbs.

    LEDs produce 90 percent less heat for the same brightness. Unplug devices when not in use. Chargers and power bricks draw power and create heat even with no device attached.

    I moved my router and NAS drive into the hallway. The room temperature dropped 3 degrees. Close the door only after sunset when the rest of the house is cooler.

    During the day, keep it open for airflow. Every watt of heat you remove is a watt your cooling system does not have to fight.

    Improve Ventilation Through the Doorway

    Your doorway is the only air exchange path in a windowless room. Keep the door open when privacy allows. If you need the door closed, install a door undercut or transfer grille.

    A door undercut of 1 inch lets cool air flow under the door from the hallway. A transfer grille is a vent installed in the door itself. Most landlords allow a transfer grille since it does not damage the frame.

    I installed one in a rental bedroom for $25. It made a noticeable difference. You can also use a door snake to block hot hallway air if the rest of the house is warmer.

    If the hallway is cooler, remove the door snake and let the air flow. Monitor which direction the air moves with a ribbon or a strip of toilet paper.

    Rental-Friendly Options That Require No Drilling

    Renters face the toughest cooling challenge because permanent changes are off-limits. Start with the two-fan method. Add a portable AC with a door vent seal.

    Use a dehumidifier to lower humidity. Switch to LED bulbs and power strips with switches. Place a bowl of ice in front of a fan.

    Use a tower fan with a timer so it runs only when you are home. Ask your landlord about installing a ceiling fan if the room has no light fixture. Some will allow it if you use a licensed electrician.

    Document everything in writing before making any changes. I keep a folder of landlord emails and photos for every rental modification. This protects your security deposit when you move out.

    Choose Your Strategy Based on Climate

    Dry climates favor evaporative coolers because low humidity allows fast evaporation. Humid climates need dehumidifiers and portable AC units because evaporation already happens slowly. Hot but dry regions like the Southwest can use swamp coolers effectively.

    The Southeast and Midwest need mechanical cooling. I lived in both climates. In Arizona, an evaporative cooler and a ceiling fan kept my 150-square-foot room comfortable at 110 degrees outside.

    In Florida, only a portable AC and dehumidifier combo worked. Match your method to your local summer conditions, not just what looks good online.

    Check your average summer humidity online before buying an evaporative cooler. If your region averages over 60 percent humidity, skip the swamp cooler and buy a portable AC.

    Monitor Air Quality in Enclosed Spaces

    Windowless rooms trap carbon dioxide, dust, and volatile organic compounds. Without fresh air exchange, air quality degrades. A small HEPA air purifier removes particles.

    Open the door for 15 minutes every few hours to refresh the air. If the room houses a server or electronics, monitor temperature with a digital thermometer.

    I use a $15 sensor that logs highs and lows. Keep the room below 80 degrees for electronics longevity. Above 85 degrees, hard drives and routers throttle performance or fail.

    Plants do not meaningfully cool a room, but they do add humidity. Avoid overwatering in small spaces. A forum user on Ars Technica reported server failures in a windowless closet until they added an exhaust fan and a temperature alarm.

    Troubleshooting When Nothing Seems to Work

    If your room still feels hot after trying fans and ice, check these common issues. Make sure the door fan is blowing outward, not inward. Verify the ceiling fan runs counterclockwise.

    Check that your portable AC exhaust hose is not leaking hot air back into the room. Measure humidity with a hygrometer. If it reads above 65 percent, add a dehumidifier.

    Inspect your door seal for gaps. Even a half-inch gap lets hot air back in. Move the portable AC closer to the doorway so the exhaust hose has the shortest path.

    I found that moving my AC 3 feet closer dropped the room temperature by 4 degrees. Reddit users in r/thermodynamics note that the shortest exhaust path is the most efficient. Check your hose for kinks or sharp bends that restrict airflow.

    Frequently Asked Questions

    How to make your room cold with no windows?

    Place a box fan in the doorway blowing outward and a second fan inside pointing up. Fill a bowl with ice and place it in front of a fan. Turn off all heat sources like lights and electronics.

    How do I cool a room that has no windows?

    Use the two-fan method: one fan blows air out the doorway, another points upward inside the room. Add a portable AC with a door seal kit, or a dehumidifier to reduce humidity. For permanent cooling, install a mini-split system.

    Does putting a wet towel over a fan make it cooler?

    Yes, a damp towel over a fan can cool the air stream through evaporation. It works best in dry climates. Never let water drip into the fan motor.

    How to purify air in a windowless room?

    Use a HEPA air purifier to remove dust and particles. Open the door for 15 minutes every few hours to exchange stale air. An exhaust fan in the doorway can also help remove pollutants.

    How to instantly make your room cooler?

    Position a fan in the doorway blowing outward immediately. Place a bowl of ice in front of a second fan inside the room. Turn off all lights and unplug electronics.

    What is the best air conditioner for a room without windows?

    A ductless mini-split system is the best permanent solution. For renters, a portable AC with a door vent seal works well. Match the unit to your room size and local humidity.

    How to ventilate a room without windows?

    Keep the door open when possible. Install a door undercut or transfer grille to allow airflow even when closed. A ceiling fan also keeps air moving and prevents stagnation.

    Conclusion

    Cooling a room with no windows takes a combination of airflow, heat reduction, and the right equipment. The two-fan method costs nothing and works in any room. A dehumidifier makes heat bearable even if the thermostat does not drop.

    For permanent relief, a mini-split system is the gold standard. I have used every method in this guide across multiple apartments and offices. Start with the free fixes today.

    Add appliances as your budget allows. Track your results with a simple thermometer. With the right approach, any windowless room can become comfortable even in the peak of summer.

    Stay cool, and do not let a lack of windows trap you in the heat.