Category: Guides

  • Humidifiers vs Air Purifiers (August 2026): Which Do You Need

    Humidifiers vs Air Purifiers (August 2026): Which Do You Need

    If you have been staring at two different air treatment devices wondering which one your home actually needs, you are not alone. The humidifiers vs air purifiers question comes up constantly in online forums, doctor offices, and hardware stores. I have spent months researching both devices, reading through hundreds of user experiences, and testing them in my own home to figure out what really matters.

    Here is the short version: an air purifier cleans the air by removing pollutants, allergens, and airborne particles. A humidifier adds moisture to dry air. They solve completely different problems, and understanding that difference is the first step to breathing easier at home.

    In this guide, I will walk you through exactly how each device works, which health conditions they help with, and how to decide which one your household needs. I will also cover whether you can use both at the same time (spoiler: yes, but there are some tricks to getting it right).

    Humidifiers vs Air Purifiers: The Quick Answer

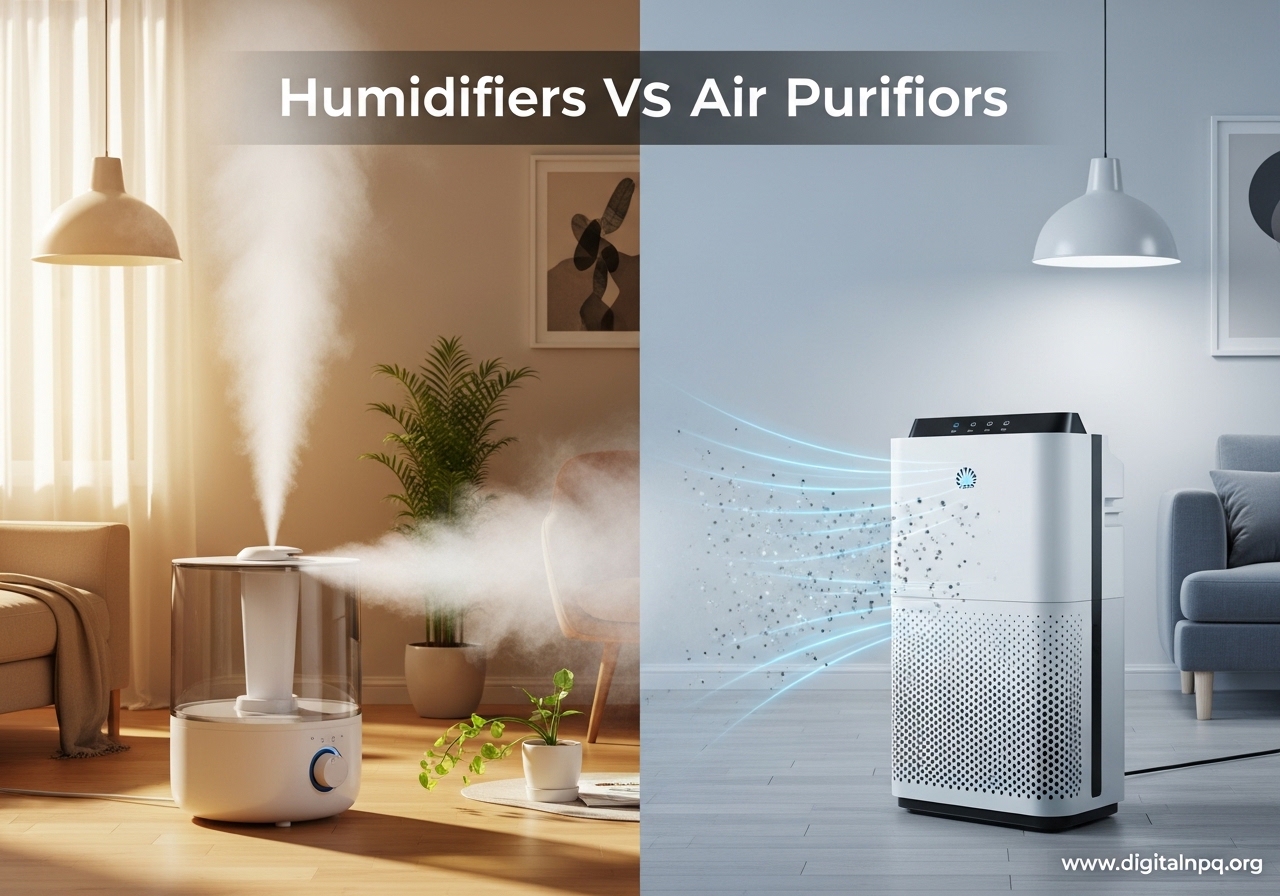
    An air purifier pulls indoor air through a series of filters to trap dust, pollen, pet dander, mold spores, smoke particles, and other pollutants. It then releases cleaner air back into the room. Air purifiers do not add any moisture to the air.

    • Best for: Allergies, asthma, pet owners, smoke removal, general air quality improvement
    • Downsides: Requires regular filter replacements, does not help with dry air or dry skin

    A humidifier releases water vapor or steam into the air to increase the moisture level in a room. It does not filter or clean the air in any way.

    • Best for: Dry skin, sinus congestion, dry throat, cracked lips, static electricity, dry climates, winter heating season
    • Downsides: Can promote mold growth if overused, requires regular cleaning to prevent bacteria buildup, does not remove allergens

    The simplest way to think about it: if your air is dirty, get an air purifier. If your air is dry, get a humidifier. If it is both dirty and dry, you might need both.

    What Is an Air Purifier and How Does It Work?

    An air purifier is a device designed to remove airborne contaminants from indoor air. Think of it as a cleaning machine for the invisible stuff floating around your home. It does not change the humidity level or temperature of your air. Its only job is to capture and remove pollutants.

    Most air purifiers work through a straightforward process. A fan pulls air from the room into the unit. That air passes through one or more filters that trap particles of various sizes. The cleaned air is then pushed back out into the room. This cycle runs continuously, gradually reducing the concentration of airborne pollutants.

    HEPA Filtration: The Gold Standard

    The most important component in most quality air purifiers is the HEPA filter. HEPA stands for High-Efficiency Particulate Air, and these filters are rated to capture at least 99.97% of particles that are 0.3 microns in diameter. For context, a human hair is about 70 microns thick, so HEPA filters catch particles that are roughly 230 times smaller than a strand of hair.

    This matters because the most harmful airborne particles, including pollen, dust mites, pet dander, and mold spores, fall right in the size range that HEPA filters capture most effectively. When I started using a HEPA air purifier in my bedroom, I noticed significantly less dust collecting on surfaces within the first week.

    Activated Carbon Filters

    Many air purifiers also include an activated carbon filter, either as a separate layer or integrated into the main filter. Activated carbon is excellent at trapping gases, volatile organic compounds (VOCs), and odors. If you cook frequently, have pets, or live near a busy road, the carbon layer helps remove smells and chemical vapors that HEPA filters cannot catch.

    CADR Rating: What It Means

    When comparing air purifiers, you will often see a CADR number. CADR stands for Clean Air Delivery Rate, and it measures how quickly an air purifier can clean the air in a specific room size. A higher CADR means faster air cleaning. The Association of Home Appliance Manufacturers (AHAM) tests and certifies these ratings, so they are a reliable benchmark when you are comparing different models.

    For a standard bedroom (around 200 square feet), look for a CADR of at least 100. For larger living spaces (400 to 500 square feet), you want a CADR of 200 or higher.

    What Is a Humidifier and How Does It Work?

    A humidifier is a device that adds moisture to indoor air by releasing water vapor or steam. If you have ever woken up with a painfully dry throat, cracked lips, or static shocks every time you touch a doorknob, low humidity is likely the culprit. A humidifier directly addresses these problems by raising the moisture level in your indoor air.

    The ideal indoor relative humidity level falls between 30% and 50%. Anything below 30% is considered too dry and can cause physical discomfort, damage wood furniture, and even make you more susceptible to respiratory infections. Anything above 50% creates a welcoming environment for mold, dust mites, and bacteria.

    Types of Humidifiers

    Not all humidifiers work the same way. Here are the main types you will find:

    Evaporative humidifiers use a fan to blow air through a wet wick or filter. The air absorbs moisture naturally and carries it into the room. These are self-regulating to some extent because when humidity is already high, less water evaporates from the wick. They tend to be affordable and widely available.

    Ultrasonic humidifiers use high-frequency sound vibrations to create a fine water mist that is released into the air. They are very quiet and energy efficient. However, if you use tap water instead of distilled water, they can release a fine white mineral dust into the room. Several users on forums have reported this issue, and I have seen it firsthand. Always use distilled or demineralized water with ultrasonic models.

    Warm mist humidifiers boil water to create steam, which is then cooled slightly before being released. The boiling process kills bacteria and mold in the water, which is a plus for cleanliness. The downside is that they use more electricity and can be a burn hazard around children.

    Cool mist humidifiers release room-temperature moisture. They are generally safer around kids and pets since there is no hot water or heating element involved. Both evaporative and ultrasonic models fall into this category.

    Why Humidity Matters More Than You Think

    I used to think humidity was just a comfort issue until I learned that dry air actually dries out the mucous membranes in your nose and throat. Those membranes are your body’s first line of defense against viruses and bacteria. When they dry out, you become more vulnerable to infections. Research has shown that maintaining humidity between 40% and 60% can help reduce the survival rate of airborne viruses.

    Dry air also pulls moisture from your skin, leading to itching, cracking, and worsening of conditions like eczema. It can dry out wooden furniture, cause paint to peel, and create annoying static electricity buildup. A humidifier addresses all of these problems at the source.

    Key Differences Between Humidifiers and Air Purifiers

    While both devices are designed to improve your indoor air quality, they approach the problem from completely different angles. Understanding the core differences helps you pick the right tool for your specific situation.

    Function

    An air purifier removes things from the air. A humidifier adds something to the air. That is the fundamental distinction. Air purifiers pull air through filters to trap particles and gases. Humidifiers release water vapor to increase moisture levels. They are solving opposite sides of the indoor air quality equation.

    Health Impact

    Air purifiers directly reduce your exposure to airborne allergens, dust, smoke, and pollutants. If you sneeze indoors, wake up congested, or have asthma triggered by dust or pet dander, an air purifier targets those triggers.

    Humidifiers relieve symptoms caused by dry air, including dry skin, chapped lips, sore throat, sinus congestion, and nosebleeds. They do not remove allergens, but they can soothe irritated airways that have been dried out.

    Maintenance Requirements

    Air purifiers are relatively low maintenance. You need to replace the filters every 6 to 12 months depending on usage and air quality, and occasionally vacuum the pre-filter. That is about it.

    Humidifiers require more frequent attention. You should clean them at least once a week to prevent mold and bacteria growth. The water tank needs to be emptied and refilled daily if you are using it continuously. Minerals from tap water can build up over time, so regular descaling is necessary. This is one of the biggest complaints I see from users in forums, and it is a valid concern.

    Energy Usage and Cost

    Here is an area where most competitors do not provide specifics. Air purifiers typically consume between 20 and 100 watts of power depending on fan speed and room size. Running one on medium speed for 24 hours costs roughly 5 to 15 cents per day in electricity, depending on your local rates.

    Evaporative and ultrasonic humidifiers use similar amounts of energy, typically 15 to 40 watts. Warm mist humidifiers are the exception, consuming 200 to 400 watts because they need to boil water. If energy efficiency matters to you, stick with evaporative or ultrasonic models.

    In terms of ongoing costs, air purifiers require replacement filters that range from moderate to expensive depending on the brand. Humidifiers have lower replacement costs for wicks and filters but require a steady supply of distilled water if you want to avoid mineral buildup.

    Health Benefits: Which Device Helps With What?

    This is where the humidifiers vs air purifiers comparison gets practical. Different health conditions respond to different treatments, and picking the wrong device will not help you feel better. Let me break down the most common health concerns and match each one to the right device.

    Allergies (Pollen, Dust Mites, Pet Dander)

    Winner: Air purifier. If seasonal allergies or year-round allergies are your main problem, an air purifier with a HEPA filter is your best bet. It physically removes the allergens from the air before they reach your respiratory system. Dust mites, pollen, and pet dander are all large enough particles that HEPA filters capture them effectively.

    A humidifier will not remove allergens from your air. In fact, if you push humidity above 50%, you could actually make dust mite allergies worse because dust mites thrive in humid environments.

    Asthma

    Winner: Air purifier (primary), humidifier (supportive). Asthma attacks are often triggered by airborne irritants like dust, smoke, pollen, and pet dander. An air purifier removes these triggers from your environment. Many asthma patients on forums report significant improvement after adding a HEPA air purifier to their bedroom.

    However, if you live in a dry climate where the air irritates your airways independently of allergens, a humidifier can help soothe that irritation. Some asthma sufferers benefit from using both devices, especially during winter months when indoor heating dries out the air.

    Dry Skin and Eczema

    Winner: Humidifier. Dry air pulls moisture directly from your skin. If you have eczema, psoriasis, or just generally dry and itchy skin, increasing indoor humidity can provide real relief. Multiple users in eczema support forums report that running a humidifier in their bedroom helped reduce flare-ups and itching, especially during winter.

    An air purifier will not directly help with dry skin, though if your eczema is triggered by dust mite allergies (which is common), an air purifier could address the underlying allergic trigger while the humidifier addresses the dryness.

    Sinus Congestion and Dry Throat

    Winner: Humidifier (primary), air purifier (supportive). When your sinuses are congested and your throat feels scratchy, dry air is usually a contributing factor. Adding moisture to the air helps thin mucus and soothe inflamed nasal passages. Many doctors recommend running a humidifier at night for patients dealing with chronic sinus issues.

    That said, if your congestion is caused by allergies, an air purifier removes the allergens that are causing the inflammation in the first place. For chronic sinus sufferers, the combination of both devices often works best.

    Cold and Flu Recovery

    Winner: Humidifier. While neither device can cure a cold or flu, a humidifier can make you more comfortable by keeping your airways moist. This helps with cough, sore throat, and nasal congestion. Some research suggests that maintaining humidity between 40% and 60% may also help reduce the survival time of airborne viruses.

    When to Use a Humidifier vs Air Purifier

    Sometimes you just need someone to tell you which device to get. Here are clear signs that point to one or the other.

    Signs You Need an Air Purifier

    You should consider getting an air purifier if you notice any of these situations in your home:

    1. You wake up with a stuffy nose, sneezing, or watery eyes on a regular basis
    2. You can see dust collecting on surfaces within days of cleaning
    3. You have pets that shed, and pet hair or dander is visible around the house
    4. You or someone in your household has been diagnosed with asthma or allergies
    5. You live near a busy road, construction site, or area with frequent air quality warnings
    6. You notice lingering cooking smells or odors that do not dissipate quickly
    7. Someone in your home smokes or you deal with wildfire smoke

    Signs You Need a Humidifier

    You should consider a humidifier if these sound familiar:

    1. You get static electricity shocks when touching doorknobs or metal surfaces
    2. Your skin feels tight, itchy, or dry, especially after waking up
    3. Your lips crack frequently despite using lip balm
    4. You wake up with a dry throat or nosebleeds during winter
    5. Wooden furniture or floors in your home are cracking or warping
    6. You live in a dry climate or run your heating system constantly during winter
    7. Your hygrometer reads below 30% humidity

    Seasonal Guidance

    The season you are in often determines which device you need most. During spring and summer, allergens like pollen and mold spores are at their peak, making an air purifier the priority. During fall and winter, indoor heating systems dry out the air significantly, pushing humidity levels well below 30%, which makes a humidifier more immediately useful.

    If you live in a humid climate like the southeastern United States, you might never need a humidifier at all. If you live in an arid climate like the Southwest, you might need a humidifier year-round. Your local environment matters more than any general recommendation.

    Room-by-Room Recommendations

    In the bedroom, I recommend starting with whatever addresses your biggest complaint. If you wake up congested from allergies, put an air purifier there first. If you wake up with a dry throat and cracked skin, start with a humidifier.

    In the living room or family room, an air purifier usually makes more sense since these high-traffic spaces collect more dust, pet dander, and cooking odors from adjacent kitchens.

    In a baby nursery, both devices can be valuable, which I will cover in more detail in the next section.

    Can You Use an Air Purifier and Humidifier Together?

    Yes, you can absolutely use both devices at the same time. They do completely different things, so there is no conflict in their core functions. Many people, including myself, run both in the same room during winter when the air is both dry from heating and stuffy from closed windows.

    However, there are a few practical considerations to keep in mind when running both devices simultaneously.

    Placement Matters

    The number one tip from community discussions and my own testing is to place the devices on opposite sides of the room. If you put a humidifier right next to an air purifier, the moisture from the humidifier can interfere with the purifier’s particle sensors. Several users on Reddit have reported that their air purifier’s air quality indicator goes into overdrive whenever the humidifier is running nearby.

    This happens because the humidifier is releasing water droplets into the air, and the air purifier’s sensor reads those droplets as particles. It is not harmful, but it can cause your purifier to run at higher speeds unnecessarily. Keeping at least 6 to 10 feet of distance between the two devices usually solves this issue.

    Combo Units: Are They Worth It?

    You will find products on the market that combine both air purification and humidification into a single unit. The idea is appealing because you only need to buy and maintain one device instead of two. However, forum users who have tried these combo units report mixed results.

    The main complaints are that combo units tend to be expensive, do not excel at either function compared to dedicated devices, and create a more complex maintenance routine. When the humidifier component needs cleaning, you have to take apart the entire unit including the air purification system.

    If you have limited space or budget and want both functions, a combo unit is worth considering. If you want the best performance from each function, separate devices are the way to go.

    Monitoring When Using Both

    When running both devices, I strongly recommend getting a hygrometer to monitor humidity levels. It is easy to accidentally push humidity above 50% when running a humidifier in a room that also has limited ventilation. A simple hygrometer costs very little and gives you real-time feedback on whether your humidifier settings are appropriate.

    Also, be extra diligent about cleaning the humidifier when you are running it alongside an air purifier. The air purifier will circulate air throughout the room, which means any mold or bacteria from a dirty humidifier tank will be distributed more widely.

    Special Considerations: Babies, Pets, and Specific Conditions

    Certain situations call for a more targeted approach. Here is what I have found works best for some of the most common scenarios people ask about.

    For a Baby Nursery

    Pediatricians frequently recommend humidifiers for baby nurseries, especially during winter. Babies have smaller airways that are more susceptible to dryness, and a humidity level around 40% to 50% helps keep their nasal passages comfortable. Cool mist humidifiers are the standard recommendation because they eliminate the burn risk associated with warm mist models.

    An air purifier in the nursery can also be beneficial, particularly if you have pets, if the nursery has carpet (which traps dust and allergens), or if anyone in the household smokes. A quiet air purifier with a HEPA filter running on low speed can help keep the air clean without disturbing sleep.

    Many parents end up using both in the nursery: the humidifier for moisture and the air purifier for cleanliness. Just keep them on opposite sides of the crib area.

    For Pet Owners

    If you have pets, an air purifier is almost always the higher priority. Pet dander, hair, and the dust from cat litter are significant airborne allergens that a HEPA filter captures effectively. I have two cats myself, and running an air purifier near the litter box area made a noticeable difference in odor and air quality.

    A humidifier can still help if you or your pets suffer from dry skin. Many pet owners report that their dogs and cats experience less dandruff and scratching when indoor humidity is maintained at proper levels. But for air quality purposes, the air purifier does the heavy lifting.

    For Eczema Sufferers

    Eczema is strongly linked to dry skin, so maintaining proper humidity is critical. A humidifier should be your first investment if eczema is your primary concern. Keep your indoor humidity between 40% and 50%, and run the humidifier in the room where you sleep.

    However, some eczema cases are triggered or worsened by dust mite allergies. If your dermatologist or allergist has identified dust mites as a trigger, adding an air purifier with a HEPA filter can help reduce your exposure. The combination of proper humidity and reduced allergen exposure addresses both the symptom and the trigger.

    For Immune-Compromised Individuals

    If you or someone in your household is undergoing chemotherapy, has COPD, or has a weakened immune system, an air purifier is essential. These individuals are far more susceptible to airborne pathogens, and a HEPA air purifier helps reduce their exposure to bacteria, mold spores, and other contaminants.

    Humidification can provide comfort for dry mucous membranes, but the priority should be on clean air. If you add a humidifier, be extremely diligent about cleaning it because a dirty humidifier can actually introduce bacteria into the air, which is the opposite of what you want.

    Maintenance and Safety Tips

    Neither device is a set-it-and-forget-it solution. Proper maintenance is what keeps them effective and safe. I have seen too many people abandon their devices because they did not maintain them properly and ended up with moldy humidifiers or clogged air purifiers.

    Humidifier Maintenance

    Clean your humidifier at least once a week. This is non-negotiable. Bacteria and mold can grow in the water tank within just a few days, and running a dirty humidifier means you are spraying those contaminants into the air you breathe.

    Use distilled or demineralized water whenever possible. Tap water contains minerals that can leave white dust on your furniture (especially with ultrasonic models) and build up inside the machine over time. If distilled water is not practical, at least use filtered water.

    Empty the tank daily if you are not using it. Standing water is a breeding ground for microorganisms. Let the tank dry completely before refilling.

    Check humidity levels regularly. If your humidifier does not have a built-in hygrometer, buy a standalone one. Never let indoor humidity exceed 50% because that is when mold growth becomes a real risk.

    Air Purifier Maintenance

    Replace filters according to the manufacturer’s schedule, which is typically every 6 to 12 months for HEPA filters and every 3 to 6 months for activated carbon filters. Running a purifier with a clogged filter is worse than not running one at all because it cannot effectively clean the air and may even release trapped particles back into circulation.

    Vacuum or wash the pre-filter monthly if your model has one. The pre-filter catches larger particles like pet hair and dust bunnies, extending the life of your main HEPA filter.

    Keep the air intake and output vents clear. Placing your air purifier in a corner behind furniture significantly reduces its effectiveness. Give it at least a foot of clearance on all sides.

    Mold Prevention

    Mold is the biggest safety concern with humidifiers, and it is worth addressing directly. Mold thrives in environments above 50% humidity, so monitoring your levels is your first line of defense. If you notice condensation on your windows, that is a sign your indoor humidity is too high.

    Regular cleaning prevents mold from growing inside the humidifier itself. If you see pink or black residue in the tank, clean it immediately with a mixture of white vinegar and water. Some manufacturers recommend using hydrogen peroxide for deeper cleaning.

    If you are using both devices together, the air purifier can actually help capture mold spores that might be released by an improperly maintained humidifier. But do not rely on this as your primary defense. Clean the humidifier properly and maintain appropriate humidity levels.

    FAQ

    Is it better to sleep with a humidifier or air purifier?

    It depends on your main concern. If allergies or asthma keep you up at night, an air purifier is the better choice because it removes airborne triggers like dust mites and pet dander from your bedroom. If you wake up with a dry throat, cracked lips, or congested sinuses caused by dry air, a humidifier will help more. Many people benefit from running both in the bedroom, placed on opposite sides of the room to avoid sensor interference.

    Do air purifiers help with dry air?

    No, air purifiers do not add moisture to the air. They only remove pollutants, allergens, and particles. If dry air is your problem, you need a humidifier. Air purifiers and humidifiers address completely different issues: one cleans the air and the other adds moisture to it.

    What are the negatives of a humidifier?

    The main drawbacks of humidifiers are the maintenance requirements and the risk of mold growth. You need to clean the water tank weekly to prevent bacteria and mold buildup. Using tap water can leave white mineral dust on surfaces, especially with ultrasonic models. If humidity exceeds 50%, you risk promoting mold growth and dust mite proliferation in your home. Warm mist models also use more electricity and pose a burn hazard around children.

    Do air purifiers work better than humidifiers?

    Neither device is universally better than the other because they solve different problems. Air purifiers are more effective for removing allergens, dust, smoke, and pollutants from the air. Humidifiers are more effective for relieving dry skin, sinus congestion, and throat irritation caused by low humidity. The right choice depends entirely on what issue you are trying to address.

    Can a humidifier make allergies worse?

    Yes, a humidifier can worsen allergies if it pushes humidity above 50%. Dust mites thrive in humid environments, so excessive moisture can increase dust mite populations. Mold also grows more readily in high humidity. Additionally, a dirty humidifier tank can spray bacteria and mold spores into the air, directly triggering allergic reactions. Keep humidity between 30% and 50% and clean your humidifier weekly to avoid these issues.

    What is the best air purifier for COPD?

    For COPD patients, the best air purifier is one with a true HEPA filter and an activated carbon layer. The HEPA filter captures fine particles that can irritate compromised lungs, while the activated carbon removes gases and VOCs that can trigger flare-ups. Look for a CADR rating appropriate for the room size where the patient spends the most time, and run it continuously. Always consult with a pulmonologist for device recommendations specific to your condition.

    Conclusion

    The humidifiers vs air purifiers decision does not have to be complicated once you understand what each device actually does. An air purifier cleans your air by capturing dust, allergens, smoke, and pollutants. A humidifier adds moisture to relieve dry skin, sinus irritation, and static electricity. They are complementary tools, not competing ones.

    Start by identifying your biggest indoor air quality problem. Is your air dirty or dry? If it is dirty, start with an air purifier. If it is dry, start with a humidifier. If it is both, which is common during winter in heated homes, get both and place them on opposite sides of the room.

    Whichever device you choose, the key is consistency. Run it regularly, maintain it properly, and monitor the results. Your indoor air quality affects how you sleep, how you feel, and how healthy your home environment is. Getting the right device for your specific situation makes a real, noticeable difference.

  • How to Dehumidify a Room (August 2026): Complete Guide

    How to Dehumidify a Room (August 2026): Complete Guide

    If you have ever walked into a room and immediately felt that heavy, sticky air pressing against your skin, you already know the problem. Excess humidity turns a comfortable living space into a breeding ground for mold, dust mites, and that persistent musty smell no amount of air freshener can mask. Learning how to dehumidify a room is one of the most practical skills any homeowner or renter can pick up, and it does not always require buying expensive equipment.

    In this guide, I will walk you through every method I have researched and tested, from free natural solutions to electric dehumidifiers. You will learn how to measure your indoor humidity, which rooms need the most attention, and how to keep moisture from coming back. Whether you are dealing with a damp basement, a foggy bathroom, or a bedroom that feels like a sauna, this article has you covered.

    Signs Your Room Has Too Much Humidity

    Before you start pulling moisture out of the air, it helps to confirm that excess humidity is actually your problem. The signs are usually obvious once you know what to look for.

    Condensation on your windows is the most visible clue. If you wake up to water droplets running down the glass every morning, your indoor humidity is too high. This is especially common in bedrooms and bathrooms during colder months when the temperature difference between indoor and outdoor air causes water vapor to condense on cold surfaces.

    Musty or earthy odors are another dead giveaway. That damp smell lurking in corners, closets, or behind furniture means mold or mildew is already growing somewhere nearby. Trust your nose on this one. If a room smells different from the rest of your home, there is probably a moisture problem hiding somewhere.

    Look for dark spots on walls, ceilings, or around window frames. These mold patches can start as tiny specks but spread quickly in humid conditions, especially on drywall, grout, and painted surfaces. Peeling wallpaper, bubbling paint, and warping wood floors or furniture are also red flags that moisture is wreaking havoc on your home materials.

    If your allergies seem worse indoors than outdoors, high humidity could be feeding dust mite populations and mold spores. Both thrive when relative humidity sits above 50%. And if your laundry takes two or three days to dry on a rack indoors, the air in your home is already saturated with water vapor and cannot absorb any more.

    Ideal Humidity Levels for Your Home

    The EPA recommends keeping indoor relative humidity between 30% and 50%. This range strikes the right balance between comfort, health, and protecting your home from moisture damage. It is low enough to discourage mold growth and dust mite reproduction, but high enough to prevent dry skin and static electricity.

    Anything above 60% relative humidity creates conditions where mold thrives, dust mites multiply rapidly, and wood starts to warp. Anything below 30% can cause dry skin, irritated sinuses, sore throats, and static electricity buildup that can even damage electronics.

    The easiest way to know where you stand is to buy a hygrometer, a small and inexpensive device that measures relative humidity. You can find basic digital hygrometers for under fifteen dollars at most hardware stores or online. Place it in the room you are concerned about and check it at different times of day. Humidity levels fluctuate based on weather, cooking, showering, and heating or cooling cycles.

    Different rooms have slightly different ideal ranges. Bathrooms and kitchens naturally run higher during use, briefly spiking to 60% or more after a hot shower or while boiling pasta. The key is making sure humidity drops back to the 30-50% range within an hour or two after those activities stop. Basements should stay consistently below 50%, and crawl spaces below 60%, according to building science guidelines.

    Where Does Indoor Humidity Come From?

    Understanding the sources of moisture in your home makes it much easier to fight back. Indoor humidity comes from a combination of external factors and daily activities.

    Weather and climate play the biggest external role. In humid regions, warm outdoor air holds large amounts of water vapor that seeps into your home through open windows, doors, and even through porous building materials. During rainy periods, ground moisture rises through basement floors and crawlspace walls.

    Daily activities add surprising amounts of moisture. A typical family of four produces between 4 and 6 liters of water vapor per day just from breathing and perspiring. Cooking adds another 2 to 3 liters, especially when boiling or simmering. A single hot shower releases about half a liter of moisture into the air. Drying a load of laundry indoors can add 2 to 3 liters as the water evaporates from wet fabric.

    Other sources include indoor plants, aquariums, unvented gas heaters, and plumbing leaks. Even something as simple as a dripping faucet under the sink contributes humidity over time. If you live in an older home without a proper damp-proof course, ground moisture can wick up through the walls from the soil below.

    How to Dehumidify a Room: 9 Proven Methods

    Here are the most effective ways to reduce humidity in any room, ordered roughly from simplest to most involved. For the best results, combine several methods rather than relying on just one.

    1. Improve Ventilation

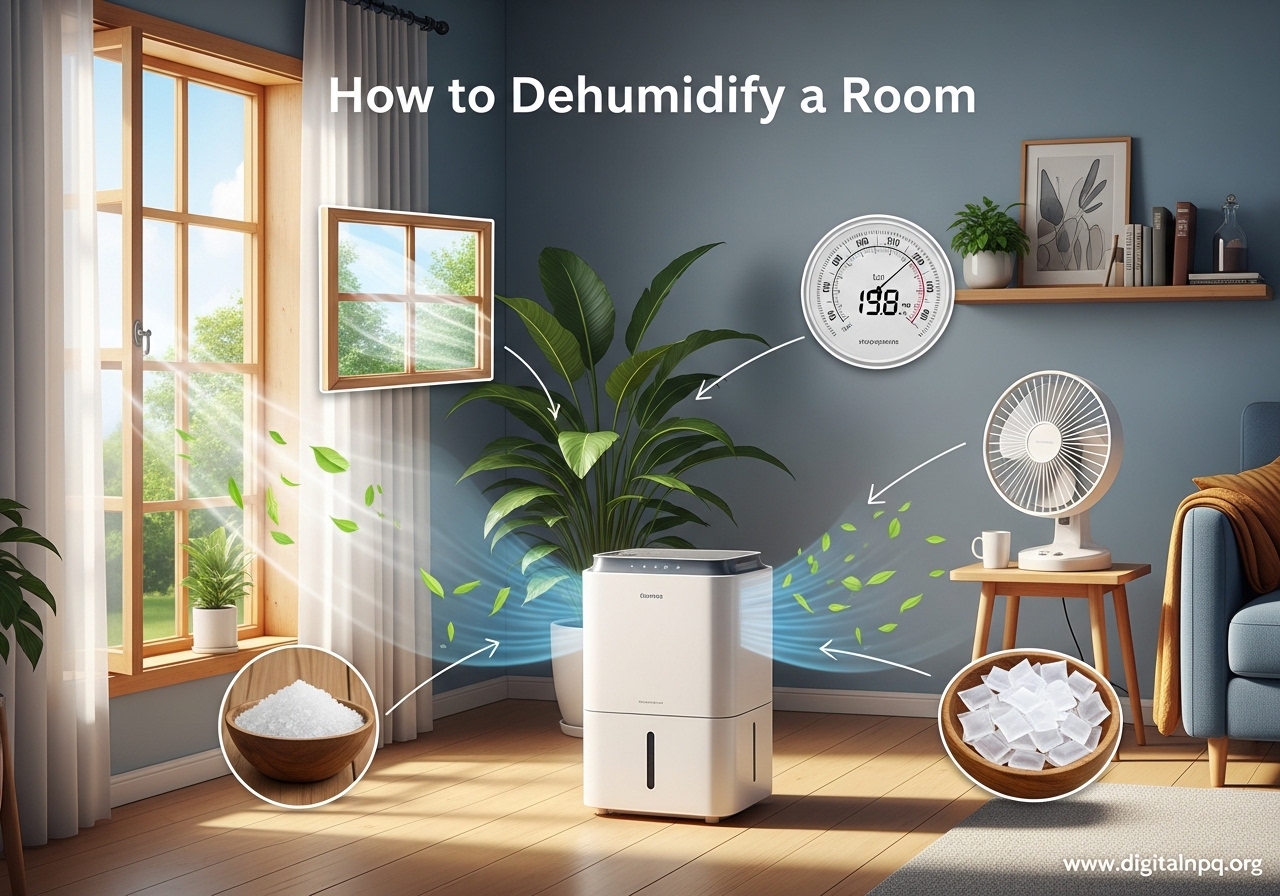
    The single fastest way to lower indoor humidity is to exchange humid indoor air with drier outdoor air. Open windows on opposite sides of your home to create cross-ventilation, which pulls stale, moisture-laden air out and draws fresher air through.

    This works best when the outdoor humidity is lower than indoor humidity. On a dry, breezy day, even 15 to 30 minutes of open windows can make a noticeable difference. Obviously, this strategy does not work well on rainy or extremely humid days, and it is less effective in humid climates where outdoor air holds as much moisture as indoor air.

    2. Use Exhaust Fans

    Your bathroom and kitchen exhaust fans are specifically designed to remove moisture at the source. Run the bathroom fan during every shower and for at least 30 minutes afterward. In the kitchen, turn on the range hood fan whenever you are boiling water, simmering soups, or washing dishes by hand.

    Make sure your exhaust fans actually vent to the outside of your home, not just into the attic or between walls. A fan that recirculates moist air is not doing you any favors. If you rent and cannot modify the ducting, a portable fan aimed at an open window can serve a similar purpose. The key is moving humid air out, not just stirring it around.

    3. Run an Electric Dehumidifier

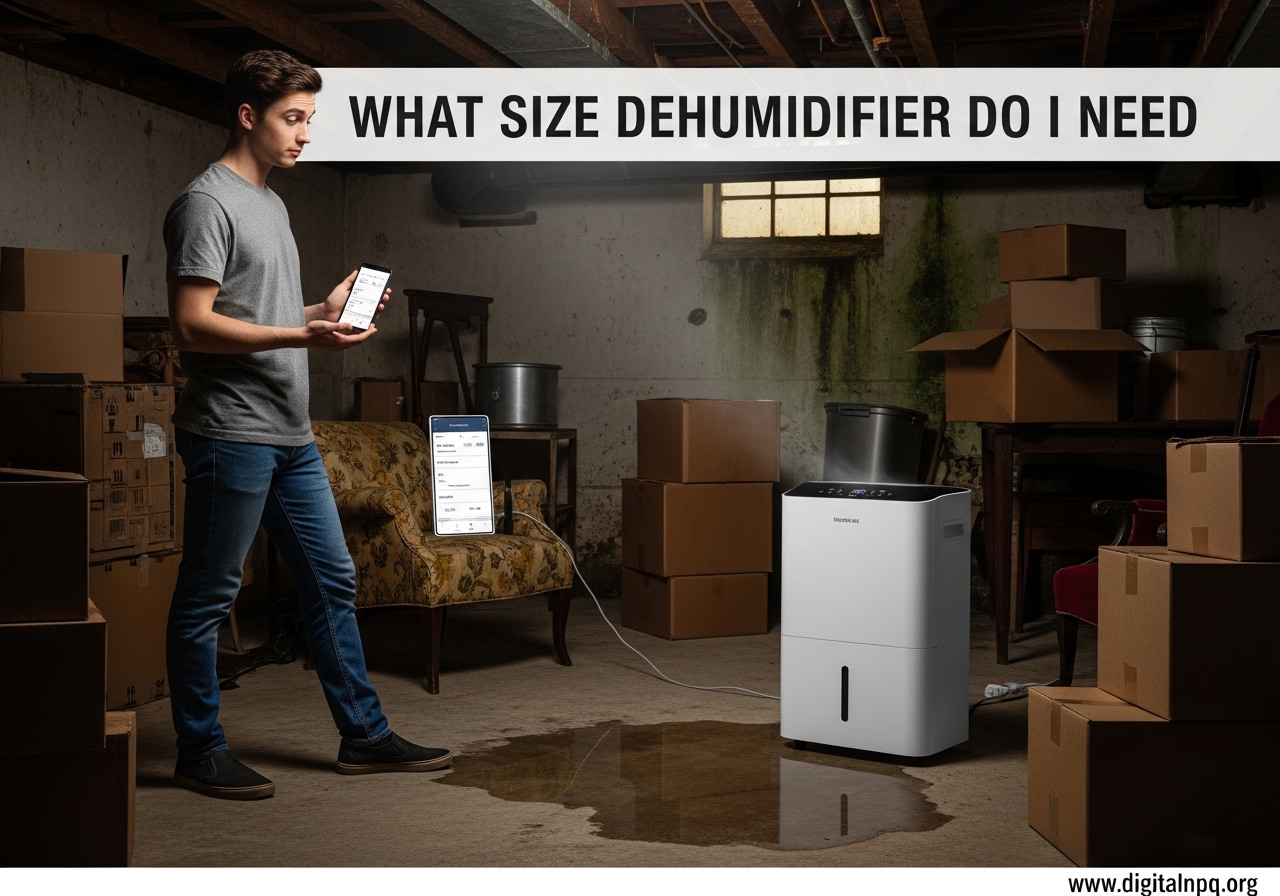
    When natural methods are not enough, an electric dehumidifier is the most effective tool available. These units draw in humid air, cool it to condense the water vapor, collect the water in a tank or drain hose, and release drier air back into the room. Most models can extract between 20 and 70 pints of water per day depending on their capacity.

    For most rooms, a 30-pint dehumidifier handles spaces up to about 1,500 square feet. Larger or very damp spaces like basements may need a 50-pint unit. Look for models with a built-in humidistat so you can set your target humidity and let the machine cycle on and off automatically. Continuous drainage via a hose connection saves you from emptying the tank every day, which is especially useful for basements and other spaces you do not check daily.

    4. Use Baking Soda as a Moisture Absorber

    Baking soda is one of the simplest DIY moisture absorbers. Place an open box or a wide bowl of baking soda in a small, enclosed space like a closet, cabinet, or small bathroom. The powder naturally absorbs moisture from the surrounding air over time.

    This method is slow and works best in small, confined areas rather than open rooms. You will need to replace or stir the baking soda every few weeks as it becomes saturated. It is not going to solve a serious humidity problem on its own, but it helps in tight spots and costs almost nothing to try.

    5. Try Calcium Chloride Crystals

    Calcium chloride is a more powerful desiccant than baking soda and is the active ingredient in many commercial moisture absorber products like DampRid. You can buy it in bulk at hardware stores or online at a fraction of the cost of branded products.

    Fill a container with calcium chloride crystals and place it in a damp area. The crystals attract and absorb moisture from the air, eventually dissolving into a brine solution that you pour out. This method works well in small rooms, closets, RVs, and boats. It is faster and more effective than baking soda, though you need to check and empty the container regularly, especially during very humid periods.

    6. Get Moisture-Absorbing Houseplants

    Certain houseplants naturally absorb moisture from the air through a process called transpiration. While no single plant will dehumidify an entire room, a collection of the right plants can help take the edge off moderate humidity while also improving indoor air quality.

    The best options include peace lilies, Boston ferns, English ivy, spider plants, and tillandsia (air plants). Peace lilies are particularly effective because they thrive in humid conditions and absorb moisture through both their leaves and roots. Boston ferns are another strong choice that naturally grows in damp, forested environments. A cluster of five to eight plants in a moderately sized room can make a small but measurable contribution to lower humidity.

    Keep in mind that houseplants are a supplementary strategy, not a primary solution. They work best alongside other methods, and you need to avoid overwatering them since soggy soil actually adds humidity back into the air.

    7. Use Your Air Conditioner

    Air conditioners naturally dehumidify as a byproduct of how they work. The cooling coils inside an AC unit condense water vapor from the air, and that water drains away through a condensate line. If you already have central air or a window unit running, you are getting some dehumidification for free.

    For better humidity control, set your AC fan speed to low rather than high. Slower air movement across the coils gives the system more time to pull moisture out of the air. Some newer AC units also have a dedicated dehumidify or dry mode that prioritizes moisture removal over temperature cooling. This mode runs the compressor and fan at different speeds to maximize water extraction without overcooling the room.

    8. Fix Leaks and Eliminate Water Sources

    Dehumidifying a room is an uphill battle if water is constantly entering from somewhere. Check for leaky pipes under sinks, around toilets, and near water heaters. Inspect your roof and windows for water stains that indicate slow leaks. Make sure your gutters and downspouts direct water away from your foundation rather than pooling near the base of your walls.

    Ground moisture seeping through basement floors and walls is another common and overlooked source. If your basement or crawl space has a dirt floor, covering it with a heavy plastic vapor barrier can dramatically reduce the amount of moisture entering your home from below. Even concrete floors in older basements allow moisture through, and a concrete sealer or epoxy coating can help block it.

    9. Dry Clothes Outside or Use a Vented Dryer

    Hanging wet laundry on indoor drying racks is one of the fastest ways to pump gallons of water into your home air. A single load of wet laundry can release 2 to 3 liters of moisture as it dries. If you must dry clothes indoors, do it in a well-ventilated room with a fan and an open window, or better yet, use a tumble dryer vented to the outside.

    If you live in an apartment without outdoor drying space, a condenser dryer or heat pump dryer captures the moisture internally rather than releasing it into the room. This is a worthwhile investment if indoor drying is a regular habit. Heat pump dryers cost more upfront but use significantly less energy than traditional vented dryers, which helps offset the initial expense over time.

    How to Dehumidify a Room Without a Dehumidifier

    Not everyone wants to buy an electric dehumidifier, and in many situations, you can bring humidity down without one. The key is combining several free or low-cost methods at the same time and staying consistent with them.

    Start with ventilation. Open windows when outdoor air is drier than indoor air, and use fans to keep air moving throughout your home. Stagnant air lets moisture settle on surfaces, which is exactly what causes condensation and mold growth. A small desk fan or box fan placed to circulate air across a room can make a real difference in preventing damp spots from forming.

    Set up DIY moisture absorbers in problem areas. Baking soda works for small enclosed spaces. Calcium chloride crystals are more powerful and can handle small rooms or closets. Rock salt is another option that some people report success with, though it is less effective than calcium chloride. Place your absorbers in the dampest spots, like near windows with condensation, in closet corners, or behind furniture against exterior walls.

    Change your daily habits. Take shorter showers, ideally under 10 minutes, keep the bathroom door closed while showering, and run the exhaust fan for at least 30 minutes after. Cover pots while cooking to trap steam, and always use the range hood fan. Stop drying clothes indoors if you can avoid it. These behavioral changes cost nothing and can reduce your indoor humidity by 10 to 15 percentage points over time.

    Add a few moisture-absorbing houseplants like peace lilies and Boston ferns. They will not solve a serious problem alone, but every bit helps when you are layering multiple strategies. Group them in the dampest rooms for the most benefit.

    Finally, address any water leaks or moisture sources. Even a slow drip under a sink adds humidity to the air over time. Fixing the source is always more effective than trying to remove moisture after it has already entered the room. A quick check of all visible pipes, connections, and appliance hoses takes about 15 minutes and can reveal problems you did not know existed.

    Room-Specific Dehumidification Tips

    Different rooms have different humidity sources, and the best approach depends on where the moisture is coming from. Here is a room-by-room breakdown with targeted strategies.

    Bathroom

    Bathrooms are usually the most humid rooms in any home. Every hot shower sends large amounts of water vapor into the air, easily pushing humidity above 70% within minutes. Your first line of defense is the exhaust fan. Run it during every shower and keep it going for 30 minutes after you finish. If your bathroom does not have a fan, a portable fan aimed at the slightly open window works as a substitute.

    Keep the bathroom door closed while showering to prevent moisture from spreading to the rest of your home. After showering, squeegee or wipe down the walls and glass to remove standing water before it evaporates back into the air. Taking shorter showers, ideally under 10 minutes, also makes a real difference. Some people have reported success keeping a small container of calcium chloride crystals on the bathroom counter to absorb residual moisture between showers.

    Kitchen

    Cooking, boiling water, running the dishwasher, and washing dishes all add moisture to kitchen air. A rolling boil on the stove can add over a liter of water to the air per hour. Turn on your range hood fan before you start cooking and leave it running for 15 minutes after you finish. Cover pots and pans with lids whenever possible to trap steam before it escapes into the room.

    Check that your range hood actually vents outdoors rather than recirculating air through a charcoal filter. If it only recirculates, it is not removing any moisture at all. A window fan pulling air out is a simple workaround. Also check for plumbing leaks under the kitchen sink, which are easy to miss since the cabinet door stays closed most of the time.

    Bedroom

    Bedrooms accumulate humidity overnight from breathing and perspiration. Two people sleeping in a closed bedroom can produce over a liter of moisture during an eight-hour sleep. This is why bedroom windows often have condensation in the morning, especially during colder months when the glass temperature drops below the dew point of the indoor air.

    Keep bedroom doors slightly open at night to allow air circulation, and leave closet doors open during the day so trapped moisture can escape. Use breathable cotton or linen bedding rather than synthetic materials that trap heat and moisture against your skin. If condensation is a recurring problem, keeping a small window cracked at night can help, especially in cooler weather when the outdoor air is dry.

    Basement

    Basements face humidity from two directions: moisture seeping through foundation walls and floors from the surrounding soil, and humid indoor air settling downward because cool air sinks. This makes basements the most challenging rooms to dehumidify and also the rooms where high humidity causes the most damage.

    Start by sealing any visible cracks in the foundation and applying waterproof sealant to basement walls. A vapor barrier on the floor helps block ground moisture. If you have a sump pump, make sure it is working properly and that the discharge line directs water well away from your foundation. Most basements eventually need an electric dehumidifier rated for the square footage, ideally one with continuous drainage so you are not constantly emptying the tank. Aim for a unit rated at 50 pints or more for basements larger than 1,000 square feet.

    Common Mistakes to Avoid When Dehumidifying

    Even with the right methods, certain mistakes can undermine your efforts or even make the problem worse. Knowing what not to do is just as important as knowing what works.

    Over-dehumidifying is a real issue. Running a dehumidifier nonstop without checking the actual humidity level can push your indoor air below 30%, which causes dry skin, cracked lips, static shocks, and can damage wooden furniture and musical instruments. Always use a hygrometer to monitor levels and set your dehumidifier’s humidistat to stay within the 30-50% range.

    Placing your dehumidifier in the wrong spot reduces its effectiveness dramatically. Keep it at least 6 inches away from walls and furniture so air can circulate freely around the unit. Place it in the center of the room or near the most concentrated moisture source, not in a corner where air movement is limited. Closing the doors and windows in the room you are dehumidifying also helps, since an open dehumidifier trying to dry the whole house works much less efficiently.

    Forgetting to empty the water tank is probably the most common mistake. A full tank means the dehumidifier stops working until you empty it, and humidity starts climbing again immediately. If you find yourself forgetting, switch to continuous drainage with a hose, or set a daily phone reminder until emptying the tank becomes a habit.

    Ignoring the root cause of your moisture problem is the biggest long-term mistake. A dehumidifier manages symptoms, but fixing a leaky pipe, improving drainage around your foundation, or installing proper ventilation addresses the source. Without fixing the source, you will be running that dehumidifier forever and paying for the electricity to do it.

    Finally, closing all windows and doors tight without any ventilation traps moisture inside. Some airflow is necessary even when you are trying to control humidity. The goal is controlled ventilation, not a sealed box. Running an exhaust fan or cracking a window periodically gives moist air a path out.

    Frequently Asked Questions

    How can I dehumidify my room naturally?

    Open windows when outdoor air is drier than indoor air to create cross-ventilation. Place baking soda or calcium chloride crystals in open containers around the room to absorb moisture. Add houseplants like peace lilies and Boston ferns that naturally pull humidity from the air. Run exhaust fans in the bathroom and kitchen, take shorter showers, and avoid drying clothes indoors. Combining several of these methods together gives the best results without using any electricity.

    What pulls moisture out of a room?

    Electric dehumidifiers are the most effective option, pulling gallons of water from the air each day. Calcium chloride crystals are the strongest DIY absorber, drawing moisture until they dissolve into a liquid brine. Baking soda absorbs moisture more slowly but works well in small enclosed spaces. Air conditioners also remove humidity as a natural byproduct of cooling. Good ventilation with exhaust fans and open windows exchanges humid indoor air for drier outdoor air.

    Is 70% humidity too high for a bedroom?

    Yes, 70% humidity is well above the EPA recommended range of 30-50%. At 70%, mold grows readily, dust mites thrive, and condensation forms on windows and walls. Sleep quality also suffers because high humidity prevents sweat from evaporating, making you feel hot and uncomfortable. If your bedroom reads 70% on a hygrometer, start ventilating immediately and consider running a dehumidifier to bring it down to a healthy level.

    Does salt act as a dehumidifier?

    Salt does absorb some moisture from the air because it is hygroscopic, meaning it attracts water molecules. Rock salt in particular can pull moisture from a small enclosed space like a closet or cabinet. However, salt is much less effective than calcium chloride or an electric dehumidifier. It works slowly and only in very small areas. For anything beyond a tiny closet, you will need stronger methods.

    How do you dehumidify a room quickly?

    Open windows on opposite sides of the room for cross-ventilation. Run exhaust fans in nearby bathrooms and the kitchen. Turn on your air conditioner, which removes moisture as it cools. Place a fan near an open window to push humid air out. If you have a dehumidifier, set it to its highest setting and close the windows so it only processes the indoor air. For a bathroom after a shower, wipe down wet surfaces immediately to prevent evaporation.

    How do you dehumidify a room in winter?

    Winter humidity is tricky because cold air holds less moisture, but heating that cold air indoors can create condensation problems. Run exhaust fans more frequently. Keep indoor temperature consistent rather than letting it drop and spike. Use a dehumidifier set to 40-50% humidity. Vent your tumble dryer outside. Wipe condensation off windows each morning before it evaporates back into the air. Avoid drying clothes on indoor racks during winter months.

    Do air purifiers help with humidity?

    Most standard air purifiers do not remove moisture from the air. They filter particles like dust, pollen, and pet dander but do not affect water vapor levels. Some combination units include a dehumidification function, but a standard air purifier alone will not lower your room’s humidity. You need a dedicated dehumidifier or the natural ventilation and absorption methods covered in this guide.

    Conclusion

    Learning how to dehumidify a room is really about understanding where the moisture comes from and using the right combination of methods to deal with it. Start simple: open windows, run your exhaust fans, and pick up a hygrometer to see where your humidity actually stands. Add DIY absorbers like calcium chloride or baking soda in small problem areas.

    If those steps are not enough, an electric dehumidifier is a reliable investment that handles the heavy lifting. Just remember to fix the root cause, whether that is a leak, poor ventilation, or daily habits like indoor clothes drying, so you are not fighting the same battle month after month. Address the source first, then manage the remaining humidity with the tools and methods that fit your situation.

    Keep your humidity in that sweet spot of 30-50%, and your home will feel more comfortable, smell fresher, and stay free of mold and moisture damage for years to come.

  • How to Drain a Water Heater 2026: Complete Step by Step Guide

    How to Drain a Water Heater 2026: Complete Step by Step Guide

    If your hot water has started smelling off, looking discolored, or making popping sounds from the tank, sediment buildup is almost certainly the culprit. Learning how to drain a water heater is one of those maintenance tasks that takes about 30 minutes but can add years to your appliance’s lifespan. I have drained plenty of water heaters over the years, both my own and for family members, and the process is far less intimidating than most homeowners expect.

    The basic idea is simple: you connect a garden hose to the drain valve at the bottom of the tank, let the old water (and all the sediment it carries) flow out, then flush the tank clean before refilling it. Whether you have a gas water heater or an electric water heater, the core steps are the same. Tankless water heater owners need a slightly different approach, which I cover separately below.

    In this guide, I will walk you through the entire process from start to finish. I will also cover the tools you need, common problems you might run into, and clear answers to the questions most homeowners ask before attempting this for the first time.

    Why You Should Drain Your Water Heater Regularly

    Over time, minerals like calcium and magnesium settle at the bottom of your hot water tank. This is especially true if you live in an area with hard water. The sediment layer builds up slowly, and most homeowners never notice until the damage has already started.

    That buildup causes several problems. First, it acts as an insulating barrier between the heat source and the water, forcing your water heater to work harder and use more energy to heat the same amount of water. Second, sediment can trap water against the tank bottom, causing it to overheat and potentially crack the glass lining inside the tank. Third, you may notice a rumbling or popping noise when the unit runs, which is the sound of water bubbling through the sediment layer.

    Other warning signs include hot water that runs out faster than usual, a slight brownish tint to your hot water, or water that has an unusual metallic smell. Any of these symptoms mean it is time to drain the tank.

    Most manufacturers and professional plumbers recommend draining your water heater once per year. If you live in a region with hard water, you may want to do it every six months instead. I drain mine annually and the water that comes out is always cloudier than I expect, even though our area has moderately soft water.

    Tools and Materials You Will Need

    Before you start, gather everything in one place. There is nothing worse than running to grab a tool while water is flowing. Here is what you need:

    • A standard garden hose long enough to reach from the water heater to a floor drain, outside area, or large bucket
    • A pair of work gloves to protect your hands from hot water and hot metal
    • A few old towels for any spills or drips
    • A flathead screwdriver (some drain valves open with a screwdriver slot rather than a handle)
    • A bucket if you do not have a floor drain nearby
    • Teflon tape (optional, for resealing the drain valve connection if it leaks after closing)

    That is it. No special plumbing tools, no expensive equipment. The whole setup takes about five minutes.

    How to Drain a Water Heater: Step-by-Step Instructions

    This process works for both gas and electric tank-style water heaters. I have noted the differences between the two where they matter. The entire job typically takes 20 to 40 minutes depending on your tank size and how much sediment has accumulated.

    Step 1: Turn Off the Power Source

    For an electric water heater, find the dedicated circuit breaker in your electrical panel and switch it off. Do not just turn down the thermostat; you need the unit completely de-energized. Heating elements that run dry will burn out quickly and require replacement.

    For a gas water heater, turn the gas control knob to the “pilot” setting. This keeps the pilot light on but stops the main burner from firing. If you prefer, you can turn the knob fully off, but relighting the pilot adds an extra step at the end.

    Step 2: Turn Off the Cold Water Supply

    Find the cold water shutoff valve on the pipe that feeds into the top of the water heater. It is usually a gate valve or ball valve located within a few feet of the tank. Turn it clockwise until it stops. This prevents new water from entering the tank while you are trying to drain it.

    Step 3: Attach a Garden Hose to the Drain Valve

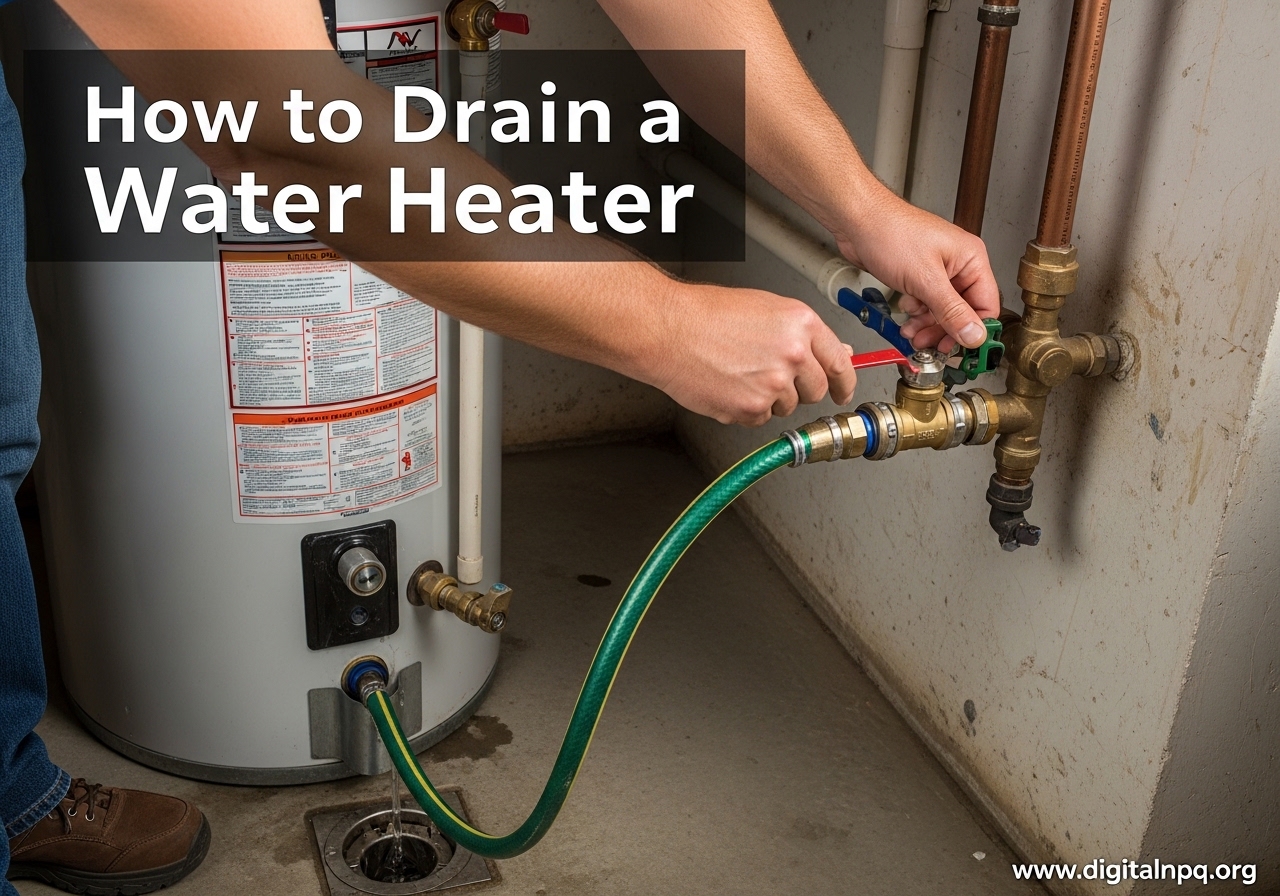
    Screw one end of your garden hose onto the drain valve at the bottom of the tank. The valve looks like a small spigot, similar to an outdoor hose bib. Run the other end of the hose to a floor drain, a driveway, or a large bucket. Make sure the hose connection is tight to avoid leaks at the valve.

    If you do not have a floor drain, you can run the hose through a window or door to an outside area. Just be aware that the water coming out will be hot at first, so keep children and pets away from the discharge point.

    Step 4: Open a Hot Water Faucet Nearby

    Go to the nearest faucet that produces hot water, preferably one on the same floor as the water heater, and turn it on fully to the hot setting. This allows air to enter the tank as water drains out, which creates proper flow through the drain valve. Without this step, the tank can create a vacuum and drain very slowly or not at all.

    Step 5: Open the Drain Valve

    Open the drain valve slowly. If your valve has a handle, turn it counterclockwise. If it has a slot for a screwdriver, turn it with your flathead. Water should start flowing through the hose immediately.

    Let the tank drain completely. A standard 40-gallon tank typically takes about 10 to 15 minutes to empty, while a larger 50 or 80-gallon tank may take 20 to 30 minutes. The initial water will be hot, so be careful near the hose connection point.

    Step 6: Flush the Tank With Fresh Water

    Once the flow slows to a trickle, turn the cold water supply back on for about 30 seconds to a minute at a time. This stirs up any remaining sediment from the bottom of the tank and flushes it out through the hose. Watch the water coming out of the hose.

    When the water runs clear instead of cloudy or brownish, you are done flushing. This may take two or three short bursts of cold water. Some sediment is stubborn, and in tanks that have not been drained in years, it might take a few extra flushes.

    Step 7: Close the Drain Valve and Disconnect the Hose

    Turn the drain valve clockwise until it is fully closed. Remove the garden hose from the valve. Have a towel ready because a small amount of water will likely spill when you disconnect. Double-check that the valve is completely shut; even a slow drip can cause water damage over time.

    Step 8: Refill the Tank Before Restoring Power

    With the drain valve closed and the hose disconnected, keep the cold water supply turned on. The tank will begin refilling. Keep the hot water faucet you opened earlier running. When water starts flowing steadily from that faucet without sputtering air, the tank is full.

    This is a critical step for electric water heaters. Never restore power to an electric water heater before the tank is completely full. Running the heating elements dry will destroy them. Once you see a steady stream from the hot faucet, go ahead and turn the circuit breaker back on for electric units, or turn the gas control knob from “pilot” back to the desired temperature setting for gas units.

    Check the area around the drain valve one more time for any drips. If you notice a small leak, try tightening the valve by hand. If that does not work, a plumbing repair clamp or a few wraps of Teflon tape on the valve threads can help.

    How to Drain a Tankless Water Heater

    Tankless water heaters do not store standing water, so they do not accumulate sediment in the same way tank units do. However, they do build up mineral scale inside the heat exchanger over time, which reduces efficiency and can eventually cause the unit to shut down with an error code. Descaling a tankless unit requires a slightly different setup.

    You will need a five-gallon bucket, a submersible pump (sometimes called a transfer pump), two connection hoses, and about two to three gallons of plain white vinegar. Some manufacturers sell descaling kits that include everything you need in one package.

    Start by turning off the power to the tankless unit at the circuit breaker and shutting off the gas supply if it is a gas model. Close both the hot and cold isolation valves on the unit. Connect one hose from the cold isolation valve to the submersible pump sitting in the bucket, and another hose from the hot isolation valve back into the bucket. Pour the vinegar into the bucket.

    Open both isolation valves, turn on the pump, and let the vinegar circulate through the heat exchanger for about 45 minutes to an hour. The vinegar dissolves the mineral scale inside the coils. After the cycle is done, close the isolation valves, remove the hoses, and flush the system with clean water for a few minutes by opening the cold water supply briefly with the hot water valve directing water to a drain.

    Reconnect everything, restore power and gas, and run hot water at a faucet to confirm the unit is heating properly. The whole process takes about 60 to 90 minutes. I recommend doing this once a year, or more often if you have hard water.

    Troubleshooting Common Problems

    Even with straightforward instructions, things do not always go smoothly. Here are the most common problems homeowners encounter and how to deal with each one.

    Clogged Drain Valve

    This is probably the single most common issue. Sediment can block the drain valve opening, and water either trickles out or does not come out at all. If this happens, try turning the cold water supply on briefly while the drain valve is open. The incoming water pressure can dislodge the blockage.

    If that does not work, you can try inserting a straightened wire coat hanger gently into the valve opening to break up the clog. Be careful not to damage the valve. As a last resort, you may need to replace the drain valve entirely, which involves draining the tank first by siphoning or bailing, then unscrewing the old valve and installing a new one with Teflon tape on the threads.

    Water Not Flowing Through the Hose

    If water is not coming out at all, the most likely cause is that you did not open a hot water faucet to allow air into the system. Go back and open a hot faucet somewhere in the house. Without that air inlet, the tank creates a vacuum that prevents drainage.

    Also check that the hose is not kinked, the drain valve is actually open, and the cold water supply is turned off. Any one of these can stop or slow the flow significantly.

    Leaking Drain Valve After Closing

    Drain valves, especially the plastic ones found on many budget water heaters, are a common failure point. If yours continues to drip after you have closed it tightly, try wrapping the threads with Teflon tape. For a faster fix, you can screw a brass hose cap onto the end of the drain valve to create a secondary seal.

    If the valve itself is cracked or stripped, it needs to be replaced. A brass drain valve replacement costs a few dollars at any hardware store and is a worthwhile upgrade over the factory plastic valve.

    What If the Tank Has Not Been Drained in Years

    This comes up more often than you might think. Many homeowners, including some professional plumbers I have spoken with on forums, admit they rarely drain their own units. If the tank has not been flushed in several years, expect the water to come out very dark and the process to take longer.

    Flush the tank multiple times until the water runs clear. Do not be alarmed by the amount of sediment that comes out. The bigger concern is whether the anode rod is still functional, since a neglected tank may have a depleted anode rod that offers no corrosion protection. If your tank is more than five years old and has never been drained, consider having the anode rod inspected by a plumber.

    When to Call a Professional

    Most homeowners can handle draining a water heater themselves. However, you should call a licensed plumber if the drain valve is completely seized and you cannot open it, if you notice rust or corrosion on the tank body itself, or if the pressure relief valve is leaking or will not reset. Any of these could indicate bigger problems that a simple flush will not solve.

    If you are simply not comfortable working with gas lines or electrical panels, there is no shame in hiring a professional. The typical service call for water heater maintenance runs between $75 and $200 depending on your area and the scope of work.

    FAQ

    What is the easiest way to drain a water heater?

    The easiest method is to turn off the power and cold water supply, attach a garden hose to the drain valve at the bottom of the tank, open a nearby hot water faucet to allow air into the system, and open the drain valve. Let the tank empty completely, then briefly turn the cold water back on to flush out remaining sediment. Close the valve, refill the tank, and restore power. The entire process takes about 20 to 30 minutes for a standard residential unit.

    Can I drain my own hot water heater?

    Yes, most homeowners can safely drain a water heater without professional help. The process requires only a garden hose and basic tools. The key safety steps are turning off the power source (circuit breaker for electric, gas control knob for gas models) and being careful with hot water during the initial draining. If you can operate a hose connection and a shutoff valve, you can handle this maintenance task yourself.

    How long does it take to drain a 40 gallon water heater?

    A 40-gallon water heater typically takes 10 to 15 minutes to drain completely once the drain valve is open. Including setup, flushing sediment, refilling the tank, and restoring power, the full process takes about 20 to 40 minutes. Tanks with heavy sediment buildup may take slightly longer because of multiple flush cycles.

    Do I need to open a faucet when draining a water heater?

    Yes, opening a hot water faucet is necessary for proper drainage. It allows air to enter the tank as water flows out, preventing a vacuum from forming inside. Without an open faucet, the tank drains very slowly or may not drain at all. Open any hot water faucet in the house on the same floor as the water heater for best results.

    How often should I drain my water heater?

    Most manufacturers recommend draining your water heater once per year. If you live in an area with hard water, draining every six months is advisable because minerals accumulate faster. Regular annual draining removes sediment, improves heating efficiency, and can extend the life of your tank by several years.

    What happens if you never drain your water heater?

    If you never drain your water heater, sediment from dissolved minerals builds up at the bottom of the tank over time. This reduces heating efficiency, increases your energy bills, causes rumbling or popping noises, shortens the lifespan of the tank, and can lead to premature failure of the heating elements or the tank itself. In severe cases, sediment can clog the drain valve and damage the pressure relief valve.

    Conclusion

    Draining a water heater is one of the simplest and most impactful maintenance tasks a homeowner can do. It costs almost nothing, takes less than an hour, and can prevent premature tank failure, lower energy bills, and improve the quality of your hot water. The process is the same whether you have a gas or electric unit: shut off power and water, connect a hose, drain and flush, then refill and restore power.

    Put it on your calendar once a year. If you live in a hard water area, aim for every six months. Your water heater will run more quietly, heat more efficiently, and last longer for the effort. And if you run into a clogged valve, a stuck relief valve, or anything that feels beyond your comfort zone, calling a plumber is always a sound decision.

  • How to Clean HEPA Filter (August 2026): The Complete Guide

    How to Clean HEPA Filter (August 2026): The Complete Guide

    If you own an air purifier, vacuum cleaner, or HVAC system, chances are it relies on a HEPA filter to keep your air clean. Over time, those filters collect dust, pollen, pet dander, and other airborne particles until they look like they have had enough. That is when most people start wondering how to clean a HEPA filter without ruining it.

    The answer is not as simple as you might think. Some HEPA filters are designed to be washed and reused, while others will lose their filtering ability the moment water touches them. Cleaning the wrong type of filter can actually make your air quality worse, not better.

    In this guide, I will walk you through everything you need to know about HEPA filter cleaning. You will learn how to identify your filter type, the proper cleaning methods for each kind, and when you are better off simply replacing it. I have spent hours researching manufacturer guidelines, Reddit discussions from communities like r/CleaningTips and r/VacuumCleaners, and scientific test data to give you the most accurate advice possible.

    What Is a HEPA Filter and How Does It Work

    HEPA stands for High-Efficiency Particulate Air. To meet the true HEPA standard, a filter must capture at least 99.97% of airborne particles that are 0.3 microns in diameter. That includes dust mites, mold spores, pollen, pet dander, and even some bacteria.

    The filter works through a dense mat of randomly arranged fibers, usually made from fiberglass. As air passes through this mesh, particles get trapped through four mechanisms: interception, impaction, diffusion, and electrostatic attraction. The fibers do not just act like a sieve. Instead, particles stick to the fibers through a combination of physical processes.

    You will find HEPA filters in three main places around your home. Air purifiers use them to clean room air. Vacuum cleaners use them to trap fine dust that would otherwise blow back into your living space. And HVAC systems in some homes use HEPA-grade filtration to clean the air circulating through your ducts.

    The reason HEPA filters are so effective is also the reason they eventually need attention. All those trapped particles build up over time, restricting airflow and reducing the filter’s ability to capture new contaminants. That is why knowing how to clean HEPA filter media properly, or when to replace it, matters so much for maintaining good indoor air quality.

    Can You Clean a HEPA Filter

    The short answer is: it depends entirely on what type of HEPA filter you have. This is the most important thing to understand before you do anything else.

    Some HEPA filters are explicitly labeled as washable or permanent. These are designed with materials that can handle gentle water exposure without degrading. Manufacturers like Dyson, Levoit, and Shark produce certain models with washable HEPA filters, and their user manuals include specific cleaning instructions.

    The majority of HEPA filters, however, are disposable. These use delicate fiberglass fiber mats that break down when exposed to water, soap, or physical agitation. If you wash a disposable HEPA filter, the fiber structure gets damaged. Test data from Smart Air Filters showed that washing disposable HEPA filters improved airflow but significantly reduced particle capture efficiency. In plain terms, air moved through faster but was not getting cleaned as well.

    Reddit users on r/Frugal have shared similar experiences. Many tried washing disposable filters to save money, only to find their allergy symptoms returned within days. The filter might look cleaner, but its ability to trap microscopic particles was compromised.

    So before you start any cleaning process, you need to figure out which type of filter you are dealing with. That brings us to the next section.

    How to Identify Your Filter Type

    Before you attempt any HEPA filter maintenance, take five minutes to identify exactly what kind of filter you have. This step saves you from potentially ruining an expensive component.

    First, check the filter itself for labels. Many manufacturers print “washable,” “permanent,” “cleanable,” or “do not wash” directly on the filter housing or frame. If you see “do not wash” or no cleaning instructions at all, treat it as disposable.

    Second, consult your device’s user manual. This is the most reliable source of information. The manual will tell you whether the HEPA filter in your specific model is washable and, if so, exactly how to clean it. If you lost the physical manual, most manufacturers offer PDF versions on their websites.

    Third, look at the filter material. Washable HEPA filters tend to have a more plastic-like, durable mesh structure. Disposable filters usually have a soft, papery, or fabric-like pleated material that feels fragile to the touch.

    Fourth, check the product specifications online. Search for your air purifier, vacuum, or HVAC model number followed by “HEPA filter type.” Product pages and replacement filter listings almost always specify whether the filter is washable or disposable.

    When in doubt, assume the filter is disposable. It is always safer to replace a filter than to wash one that was never designed for water exposure. A damaged HEPA filter provides a false sense of security while letting particles pass right through.

    How to Clean a HEPA Filter: Step-by-Step Instructions

    Once you have confirmed your filter type, follow the appropriate cleaning method below. Each method targets a specific filter category, so make sure you are using the right one.

    Method 1: Cleaning a Washable HEPA Filter

    If your filter is confirmed washable, follow these steps carefully. I cannot stress enough how important it is to be gentle throughout this process.

    Step 1: Turn off and unplug your device. Never attempt to remove a filter while the device is running. Unplugging prevents any accidental startups while your hands are inside the unit. This is a basic safety precaution that applies to air purifiers, vacuums, and HVAC systems alike.

    Step 2: Remove the filter carefully. Open the access panel according to your device’s instructions. Slide or lift the filter out gently, keeping it level so you do not dump accumulated dust back into the device or onto your floor. Take note of the airflow direction arrow on the filter frame. You will need this when reinstalling.

    Step 3: Tap off loose dust. Hold the filter over a trash bin and give it a few gentle taps. This removes the loose surface dust and makes the washing step more effective. Do not shake it aggressively or bang it against anything.

    Step 4: Rinse under lukewarm running water. Use lukewarm water, never hot. Hold the filter at a slight angle and let water run through the pleats from the clean side to the dirty side. This pushes trapped particles out the way they came in rather than driving them deeper into the fibers. Keep the water pressure low. A gentle stream from your kitchen sink or a hose without a nozzle works best.

    Step 5: Use mild detergent if needed. For filters with stubborn grime or oily residue, add a small amount of mild dish detergent to the water. Gently swish the filter around in the soapy water. Never scrub, brush, or use any abrasive tools on the filter media. Rinse thoroughly afterward to remove all soap residue, as leftover detergent can attract more dust and create odors.

    Step 6: Air dry completely for at least 24 hours. This is the step most people get wrong. The filter must be 100 percent dry before it goes back into your device. Set it in a well-ventilated area, ideally near an open window or in a room with a fan running. Some manufacturers recommend 24 to 48 hours of drying time. Do not use a hair dryer, heat gun, or oven to speed things up. Heat warps the filter media and ruins its filtering ability.

    Step 7: Reinstall the filter. Once completely dry, place the filter back into your device. Make sure the airflow direction arrow points the correct way. Close the access panel and plug the device back in.

    Method 2: Cleaning a Non-Washable HEPA Filter

    Cleaning a non-washable HEPA filter is limited to surface-level maintenance. You cannot truly restore a disposable filter to like-new condition, but you can extend its useful life slightly with careful techniques.

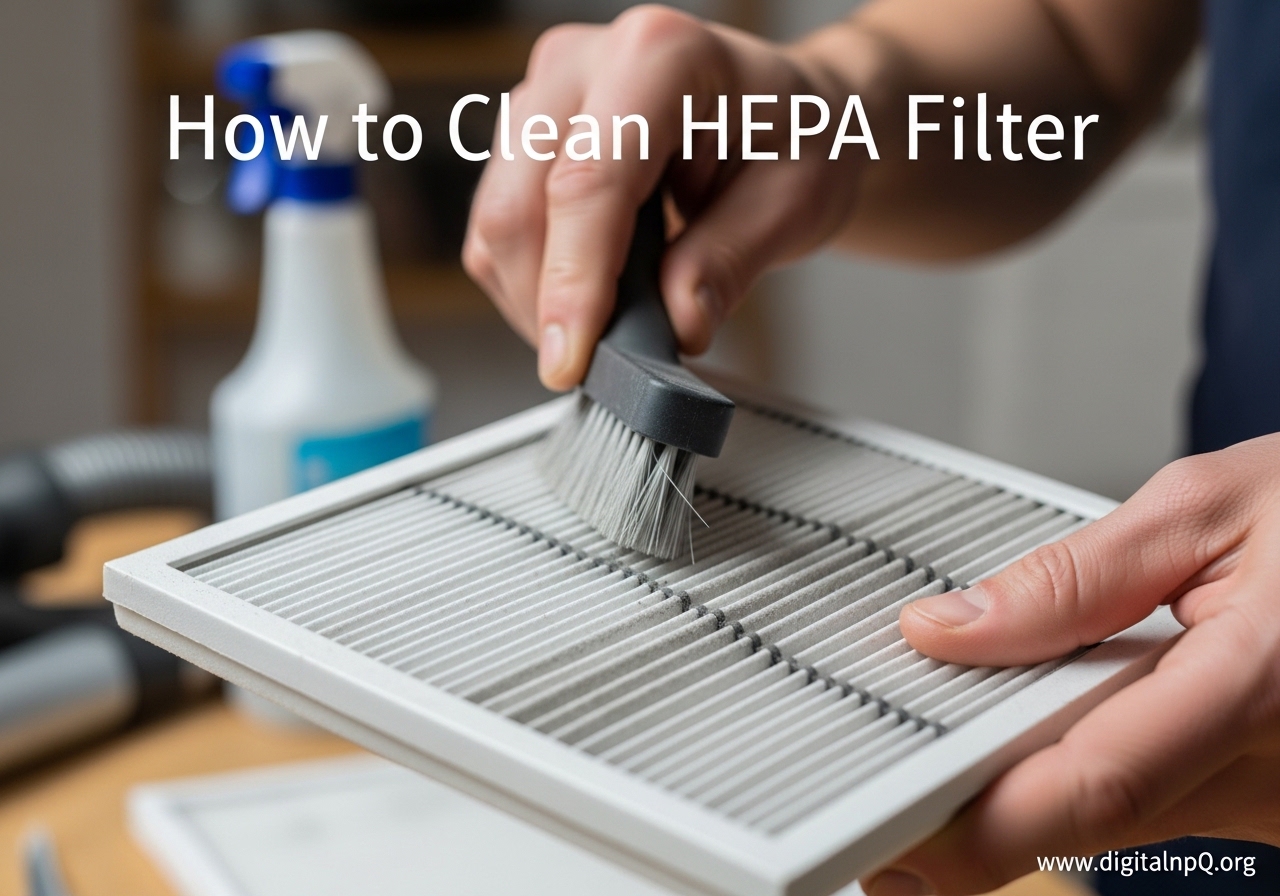
    Option A: Gentle vacuuming. Use your vacuum cleaner’s soft brush attachment on the lowest suction setting. Lightly run the brush along the filter surface to pick up loose dust and debris. Move in the direction of the pleats and avoid pressing down. This removes some surface particulate matter but will not reach the particles trapped deeper in the fiberglass fibers. Forum users on r/VacuumCleaners report that vacuuming provides minimal but real improvement in airflow.

    Option B: Compressed air at low pressure. If you have a can of compressed air or a compressor with adjustable pressure, you can blow loose dust out of the filter. Use the lowest pressure setting and hold the nozzle at least 6 inches away from the filter surface. Short bursts work better than a continuous stream. Always wear a mask and do this outdoors or in a well-ventilated area, because you are blowing fine particles into the air.

    Important warning: Both of these methods provide only marginal improvement. They will not restore a clogged disposable filter to full efficiency. If your filter is heavily soiled or has been in use for 6 to 12 months, replacement is the only real solution.

    Method 3: Cleaning by Device Type

    Air purifier HEPA filters: Most standalone air purifiers use cylindrical or rectangular HEPA filters. Check the manual for washability. Models from Levoit, Coway, and Blueair often have pre-filters that are washable, while the HEPA component itself is usually disposable. Always clean the pre-filter first, as a dirty pre-filter forces the HEPA filter to work harder and clog faster.

    Vacuum cleaner HEPA filters: Many modern vacuums, including models from Dyson and Shark, include washable HEPA filters. Dyson recommends rinsing their washable filters under cold water and letting them dry for at least 24 hours. Shark washable filters follow a similar process. For non-washable vacuum HEPA filters, tapping out loose dust is about the only maintenance option.

    HVAC HEPA filters: Whole-house HEPA filters in HVAC systems are almost always disposable due to their size and the volume of air they process. Check the filter access panel, replace according to the manufacturer schedule, and do not attempt to wash them. The risk of mold growth from trapped moisture is too high in an HVAC system.

    Signs Your HEPA Filter Needs Cleaning or Replacement

    Your HEPA filter will tell you when it needs attention. You just need to know what to look for. Here are the most reliable indicators.

    Reduced airflow. If your air purifier or vacuum feels like it is barely pushing air, a clogged filter is the most likely culprit. When the dense fiber mat fills with particles, air struggles to pass through. You will notice weaker suction in vacuums or less air output from purifiers.

    Visible discoloration or dust buildup. A clean HEPA filter usually has a uniform white or off-white color. If it has turned gray, brown, or yellow throughout, it is loaded with captured particles. Surface dust you can see means the internal fiber structure is likely saturated as well.

    Musty or unpleasant odors. HEPA filters can develop a sour or musty smell when they absorb moisture or when trapped organic material begins to break down. Reddit users on r/CleaningTips frequently ask about this issue. If your air purifier starts blowing air that smells worse than the room air, the filter is the problem.

    Increased allergy symptoms. If you or your family members start experiencing more sneezing, congestion, or itchy eyes despite running your air purifier regularly, the filter may no longer be capturing allergens effectively. This is especially common during peak pollen seasons.

    The device is running louder than usual. A clogged filter forces the motor to work harder, which often results in increased noise. If your purifier or vacuum suddenly sounds like it is straining, check the filter.

    Manufacturer-recommended schedule has passed. Most manufacturers suggest replacing or cleaning HEPA filters every 6 to 12 months for air purifiers, every 6 months for vacuums, and every 3 to 6 months for HVAC systems. Even if the filter looks okay, exceeding these timelines means you are likely running at reduced efficiency.

    Common Mistakes to Avoid When Cleaning HEPA Filters

    Over the years of researching and testing HEPA filter maintenance, I have seen the same errors come up again and again. Avoiding these mistakes can save you from ruining a perfectly good filter.

    Using hot water. Hot water softens and deforms the fiber materials in HEPA filters. Even washable filters should only be rinsed with lukewarm or cool water. The fiber structure depends on maintaining its precise arrangement, and heat compromises that structure.

    Using high water pressure. Blasting your filter with a pressure washer or a high-pressure hose nozzle tears the delicate fiber mesh. One Reddit user on r/Roborock reported destroying their robot vacuum’s filter in seconds with a garden hose on its jet setting. Use a gentle stream of water, the kind you would use to rinse vegetables.

    Scrubbing or brushing the filter media. Never use a brush, sponge, or cloth to scrub the pleated filter surface. The fiberglass or synthetic fibers are incredibly fine and fragile. Physical abrasion breaks the fibers and creates gaps where particles can pass through unfiltered.

    Using harsh chemicals, bleach, or strong detergents. Chemicals degrade the filter material and leave residues that can be blown back into your air. Stick with a small amount of mild dish soap if absolutely necessary, and rinse thoroughly. Bleach is particularly damaging and should never be used on any HEPA filter.

    Not letting the filter dry completely. Reinstalling a damp filter is one of the most common and most harmful mistakes. Moisture trapped in the filter creates an ideal environment for mold and bacteria growth. Instead of cleaning your air, a damp filter can actively contaminate it. Always allow a minimum of 24 hours of drying time, and honestly, 48 hours is better.

    Washing a non-washable filter. I know replacement filters are expensive, and the temptation to wash a disposable one is real. But test data consistently shows that washing disposable HEPA filters damages the fiber structure and significantly reduces particle capture. You end up with a filter that looks clean but performs poorly.

    Cleaning vs Replacing: When to Make the Call

    This is the question I see most often in forums and comments. People want to know whether it is worth cleaning their filter or if they should just buy a new one. Here is how I think about it.

    For washable HEPA filters: Clean them regularly according to the manufacturer schedule, which is usually every 1 to 3 months. Even washable filters do not last forever. Most have a lifespan of 1 to 3 years before the fiber structure degrades enough to warrant replacement. If you notice that cleaning no longer restores airflow or performance, it is time for a new filter.

    For disposable HEPA filters: Do not try to wash them. Gentle vacuuming or compressed air can extend their life by a few weeks or maybe a month, but it is not a long-term solution. Plan to replace disposable filters every 6 to 12 months depending on usage and air quality conditions.

    Cost considerations: Replacement HEPA filters for air purifiers typically range from moderate to expensive depending on the brand. Vacuum HEPA filters are usually less costly. HVAC HEPA filters fall somewhere in between. Cleaning a washable filter costs nothing but your time. But trying to extend the life of a disposable filter by washing it risks poor air quality and potential health effects, which can cost far more in the long run.

    Environmental impact: This is a valid concern. Disposable HEPA filters create waste, and many end up in landfills. If environmental impact matters to you, look for devices that use washable or permanent HEPA filters when it is time to replace your current unit. Some manufacturers also offer recycling programs for used filters.

    The bottom line: If your filter is washable, clean it regularly and replace it when performance drops. If it is disposable, budget for regular replacements and accept that as part of the cost of clean air. Trying to stretch a disposable filter too far is a false economy that affects your health and comfort.

    FAQ

    Can a HEPA filter be cleaned and reused?

    Yes, but only if it is specifically labeled as washable or permanent by the manufacturer. Washable HEPA filters can be gently rinsed with lukewarm water, air dried for 24 to 48 hours, and reinstalled. Disposable HEPA filters should not be washed because water damages the fiberglass fiber structure and significantly reduces particle capture efficiency. Always check your filter label or device manual before attempting to clean any HEPA filter.

    Can all HEPA filters be washed?

    No. Only HEPA filters explicitly labeled as washable, permanent, or cleanable can be safely washed. The majority of HEPA filters on the market are disposable and use delicate fiberglass fibers that break down when exposed to water. Washing a disposable HEPA filter damages its internal structure, reducing its ability to capture particles. Check your manufacturer’s instructions to confirm whether your specific filter is washable.

    How do I wash my HEPA filter?

    To wash a washable HEPA filter, follow these steps: (1) Turn off and unplug the device. (2) Remove the filter carefully. (3) Tap off loose dust over a trash bin. (4) Rinse under lukewarm water from the clean side to the dirty side using low water pressure. (5) Use mild dish detergent if needed and rinse thoroughly. (6) Air dry completely for at least 24 hours in a well-ventilated area. (7) Reinstall the filter with the airflow arrow pointing the correct direction.

    Can you clean a HEPA filter with compressed air?

    Yes, compressed air can be used to remove loose dust from both washable and non-washable HEPA filters. Use the lowest pressure setting and hold the nozzle at least 6 inches from the filter surface. Apply short bursts rather than a continuous stream. This method only removes surface particles and will not fully restore a clogged filter. Always wear a mask and work in a well-ventilated area or outdoors to avoid inhaling blown particles.

    How often should I clean my HEPA filter?

    For washable HEPA filters, clean them every 1 to 3 months depending on usage and air quality conditions. If you have pets, live in a dusty area, or run your air purifier constantly, lean toward monthly cleaning. For non-washable filters, gentle vacuuming can be done every 2 to 3 months, but plan to replace them entirely every 6 to 12 months. Always follow your device manufacturer’s recommended maintenance schedule.

    Can I use soap or bleach to clean my HEPA filter?

    A small amount of mild dish soap is acceptable for washable HEPA filters if they have stubborn grime. Rinse thoroughly to remove all soap residue. Never use bleach, harsh chemical cleaners, or strong detergents on any HEPA filter. Chemicals degrade the filter fibers and leave residues that can be blown back into your air. Bleach is particularly damaging and can permanently ruin the filter’s ability to capture particles.

    Conclusion

    Learning how to clean a HEPA filter the right way comes down to one critical first step: knowing your filter type. If your filter is washable, a gentle rinse with lukewarm water followed by thorough air drying will keep it performing well for years. If it is disposable, resist the urge to wash it and plan for regular replacements instead.

    Regular HEPA filter maintenance keeps your air purifier, vacuum cleaner, or HVAC system running efficiently and protects your indoor air quality. A clogged or damaged filter cannot do its job, and that directly affects the air you breathe every day.

    Take a few minutes this week to check your filters. Look for the washable label, consult your device manual, and set a reminder for your next cleaning or replacement date. Your lungs will thank you for it.

  • What Size Dehumidifier Do I Need (August 2026)

    What Size Dehumidifier Do I Need (August 2026)

    If your basement smells like a swamp or your windows are constantly dripping with condensation, you are probably asking yourself: what size dehumidifier do I need? It is one of the most common questions homeowners face when dealing with excess moisture, and getting the answer right makes the difference between a comfortable home and a perpetual battle with dampness.

    Indoor humidity should stay between 30% and 50% year-round. When it creeps above 60%, you start seeing the telltale signs: musty odors, warped wood, peeling paint, and the kind of sticky air that makes everything feel off. A properly sized dehumidifier pulls that excess moisture out and keeps your home in the safe zone.

    The problem is that picking the wrong size is shockingly easy. Buy too small and the unit runs around the clock without ever catching up. Buy too large and you waste money on capacity you never use. I have helped dozens of friends and family members figure this out, and the process boils down to three straightforward steps: measure your space, assess your moisture level, and match the right capacity to both.

    In this guide, our team walks you through each step with real numbers, room-by-room recommendations, and a sizing chart that takes the guesswork out of the equation. Whether you are dealing with a damp basement, a humid bedroom, or an entire house that needs drying out, you will have a clear answer by the end.

    Signs Your Home Needs a Dehumidifier

    Before we dive into sizing, it helps to confirm you actually need a dehumidifier. I have seen people buy one thinking their humidity was the problem, only to discover it was poor ventilation or a hidden leak. Here are the most reliable signs that a dehumidifier is the right call.

    Musty odors that linger. That distinctive damp, earthy smell is a dead giveaway. It means mold spores are already active somewhere in your home, usually in a basement or behind walls where moisture collects.

    Visible condensation on windows or pipes. If your windows are fogged up on the inside or you see water beading on cold water pipes, your indoor air is carrying more moisture than it should. This is especially common in winter when cold surfaces meet warm, humid air.

    Warped wood, buckling floors, or peeling paint. Wood absorbs moisture from the air and expands. Over time, this causes hardwood floors to buckle, doors to stick, and paint to bubble and peel away from walls.

    Allergy symptoms that get worse indoors. Dust mites and mold both thrive in high-humidity environments. If your sneezing, coughing, or congestion ramps up when you are inside your home, excess humidity could be the trigger.

    Hygrometer readings above 60%. This is the most objective test. A basic digital hygrometer costs about ten dollars and gives you an accurate reading within minutes. If your indoor relative humidity sits above 60% for more than a day or two, a dehumidifier is the most direct solution.

    Understanding Dehumidifier Capacity: Pints Per Day Explained

    The single biggest source of confusion I see on forums like Reddit is the difference between a dehumidifier’s capacity and its tank size. These are completely different things, and mixing them up leads to bad buying decisions.

    Capacity (pints per day) measures how much moisture the unit can remove from the air in a 24-hour period. A 50-pint dehumidifier can extract up to 50 pints of water from the air each day. This is the number that determines whether the unit can handle your space.

    Tank size is simply how much water the internal bucket holds before you need to empty it. Most tanks hold between 1 and 2 gallons (8 to 16 pints). A unit with a 50-pint capacity and a 12-pint tank just means you need to empty it about four times per day if you are not using continuous drainage. The tank has nothing to do with how powerful the unit is.

    The DOE 2020 Standard Change (Important)

    If you have been researching dehumidifiers, you might notice that older articles talk about 70-pint and 50-pint units, while newer labels show 50-pint and 30-pint units for the same machines. This is not because the units got weaker. In 2020, the Department of Energy changed the testing conditions to reflect more realistic, lower-temperature operation. Under the new DOE standard, the same physical dehumidifier that used to be rated at 70 pints is now rated at approximately 50 pints. The actual machine did not change, only the testing method and the number on the label.

    This matters because if you read an old article recommending a “70-pint dehumidifier for your basement,” you should look for a unit rated around 50 pints under the current standard. They are the same class of machine. All major manufacturers updated their labels by 2021, so any current model you buy will use the DOE 2020 rating.

    What Size Dehumidifier Do I Need: The 3-Step Process

    Figuring out what size dehumidifier you need comes down to a simple three-step process. You measure your space, rate your moisture level, and then cross-reference both against a sizing chart. Here is how each step works.

    Step 1: Measure Your Space (Square Footage)

    Start by calculating the square footage of the area you want to dehumidify. This is straightforward for rectangular rooms: multiply the length by the width. A room that is 20 feet long and 15 feet wide is 300 square feet.

    For irregularly shaped spaces, break the area into rectangles, calculate each one separately, and add them together. If your basement has an L-shape, treat it as two rectangles and sum the totals.

    What About Open Floor Plans?

    If the space you want to dehumidify opens into another area without a closing door, include that connected space in your measurement. Dehumidifiers do not respect imaginary boundaries. Air flows freely between connected spaces, and a unit placed in one corner will pull moisture from adjacent areas whether you planned for it or not.

    This is a common mistake. Someone buys a 30-pint unit for a 500-square-foot living room, but the living room opens into a kitchen and hallway that add another 400 square feet. The unit is now trying to dehumidify 900 square feet instead of 500, and it runs constantly without catching up.

    Ceiling Height Adjustments

    Standard dehumidifier sizing assumes 8-foot ceilings. If your space has higher ceilings, you need to account for the extra air volume. For every 2 feet above 8 feet, add roughly 10% to your square footage before checking the sizing chart. A 1,000-square-foot room with 12-foot ceilings should be treated as roughly 1,200 square feet for dehumidifier sizing purposes.

    Step 2: Assess Your Moisture Level

    Square footage alone does not tell the whole story. Two 1,000-square-foot basements might need completely different dehumidifier capacities depending on how damp they are. This is where moisture level assessment comes in.

    The best tool for this is a hygrometer, a simple device that measures relative humidity. You can pick up a digital hygrometer for under fifteen dollars. Place it in the room you want to treat and let it sit for at least a few hours to get a stable reading.

    Here is how to classify your moisture level based on what you observe:

    Moderately damp (50-60% RH). The room feels slightly humid on muggy days. You might notice a faint musty smell occasionally, but no visible condensation or water damage. This is the mildest category that still warrants a dehumidifier.

    Very damp (60-70% RH). The air consistently feels heavy and damp. Musty odors are noticeable, especially in warmer months. You might see condensation on windows in the morning or feel dampness on concrete floors. This is the most common level for basements in humid climates.

    Wet (70-80% RH). Visible condensation forms regularly on windows, pipes, and cold surfaces. You can see damp spots on walls or floors. The musty smell is persistent. Mold may be starting to appear in corners or behind furniture. This level requires serious dehumidification capacity.

    Very wet (80%+ RH). Standing water or obvious water seepage is present. Mold is visible on surfaces. The air feels oppressive and wet. This typically indicates a flooding event, major water intrusion, or severe drainage problems. You need the highest capacity available, and you may also need professional water damage remediation.

    If you do not have a hygrometer handy, you can estimate based on visual clues. Visible condensation, musty smells, and damp walls point to the wet or very wet categories. A room that just feels a bit stuffy on humid days is likely moderately damp.

    Step 3: Match Capacity to Your Space

    Now comes the step that answers the core question. Cross-reference your square footage with your moisture level to find the right pint-per-day capacity. Here is the sizing chart our team uses, based on DOE 2020 testing standards.

    For moderately damp spaces (50-60% RH):

    1. Up to 500 square feet: 10-pint dehumidifier
    2. 500 to 1,000 square feet: 14 to 18-pint dehumidifier
    3. 1,000 to 1,500 square feet: 18 to 22-pint dehumidifier
    4. 1,500 to 2,000 square feet: 22 to 28-pint dehumidifier
    5. 2,000 to 2,500 square feet: 28 to 34-pint dehumidifier
    6. Over 2,500 square feet: 34 to 40+ pint dehumidifier

    For very damp spaces (60-70% RH):

    1. Up to 500 square feet: 12 to 14-pint dehumidifier
    2. 500 to 1,000 square feet: 18 to 22-pint dehumidifier
    3. 1,000 to 1,500 square feet: 22 to 28-pint dehumidifier
    4. 1,500 to 2,000 square feet: 28 to 34-pint dehumidifier
    5. 2,000 to 2,500 square feet: 34 to 40-pint dehumidifier
    6. Over 2,500 square feet: 40 to 50-pint dehumidifier

    For wet spaces (70-80% RH):

    1. Up to 500 square feet: 14 to 18-pint dehumidifier
    2. 500 to 1,000 square feet: 22 to 28-pint dehumidifier
    3. 1,000 to 1,500 square feet: 28 to 34-pint dehumidifier
    4. 1,500 to 2,000 square feet: 34 to 40-pint dehumidifier
    5. 2,000 to 2,500 square feet: 40 to 50-pint dehumidifier
    6. Over 2,500 square feet: 50+ pint dehumidifier

    For very wet spaces (80%+ RH):

    1. Up to 500 square feet: 18 to 22-pint dehumidifier
    2. 500 to 1,000 square feet: 28 to 34-pint dehumidifier
    3. 1,000 to 1,500 square feet: 34 to 40-pint dehumidifier
    4. 1,500 to 2,000 square feet: 40 to 50-pint dehumidifier
    5. 2,000 to 2,500 square feet: 50-pint dehumidifier
    6. Over 2,500 square feet: 50+ pint dehumidifier or multiple units

    One important note: these ranges overlap by design. If your space falls near a boundary, go with the higher capacity. As multiple users on Reddit have pointed out, spending ten dollars more on a larger unit pays off in faster dehumidification, fewer cycles, and lower overall energy use. A unit that can handle the job without running at maximum effort is quieter, lasts longer, and uses less electricity per pint of water removed.

    Room-by-Room Dehumidifier Sizing Recommendations

    General charts are helpful, but most people are sizing a dehumidifier for a specific room. Here are our recommendations for the most common spaces, based on real-world testing and user feedback.

    Basements

    Basements are the number one reason people buy dehumidifiers. Because they sit below ground level, basements naturally collect moisture from surrounding soil, and they tend to have poor air circulation. Even a dry-looking basement can harbor elevated humidity.

    For a typical basement up to 1,500 square feet, a 30 to 50-pint dehumidifier (DOE 2020) handles the job in most climates. If the basement has visible dampness, water stains, or musty smells, lean toward the 50-pint end. For basements larger than 1,500 square feet or those with active water seepage, consider a 50-pint unit or even multiple units placed at opposite ends of the space.

    Forum users consistently report that undersizing a basement dehumidifier is the most common mistake. One Reddit user described running a 30-pint unit nonstop in a 1,200-square-foot basement and never getting below 65% humidity. After switching to a 50-pint unit, the space dried out to 48% within two days. The larger unit actually uses less total energy because it reaches the target humidity faster and then cycles off.

    Bathrooms

    Bathrooms generate bursts of moisture from showers and baths, but the space is usually small enough that a 20 to 30-pint dehumidifier is more than sufficient. However, before buying a dehumidifier for a bathroom, check whether improving ventilation (installing or upgrading an exhaust fan) might solve the problem more effectively. An exhaust fan vents the moisture outside rather than collecting it in a tank.

    If you do go with a bathroom dehumidifier, look for a compact model that fits in the available space and operates quietly. Bathrooms rarely need continuous dehumidification. Running a unit for an hour or two after showers is usually enough to bring humidity back to normal.

    Bedrooms

    For a standard bedroom (150 to 300 square feet), a 20 to 30-pint dehumidifier is typically adequate unless the room has unusual moisture problems. The key consideration for bedrooms is noise level. Look for units rated below 50 decibels on their low fan setting, and consider models with a dedicated sleep mode that dims the display and reduces fan speed.

    Place the dehumidifier away from the bed if possible, and set the humidistat to around 45%. This keeps the air comfortable without over-drying, which can cause its own problems with dry skin and irritated sinuses.

    Whole House

    For whole-home dehumidification, you have two options. A portable unit rated at 50 to 70 pints can handle an open-concept home up to about 2,000 square feet if placed centrally. For larger homes or homes with many separate rooms, a whole-house dehumidifier that integrates with your HVAC system is the better approach.

    Whole-house units are rated differently than portable models. They are sized based on the total cubic feet of your home and the typical humidity load for your climate zone. An HVAC contractor can perform a Manual J load calculation to determine the right size. For a typical 2,000 to 2,500-square-foot home in a humid climate, a whole-house dehumidifier rated for 90 to 130 pints per day is common.

    Crawl Spaces

    Crawl spaces are similar to basements in that they collect moisture from the ground, but they are harder to access and usually require a unit with continuous drainage. A 30 to 50-pint dehumidifier with a built-in pump or gravity drain is the standard recommendation for crawl spaces up to 2,000 square feet. You also need to ensure the crawl space has a proper vapor barrier installed on the ground; without it, no dehumidifier can keep up with the constant moisture rising from bare soil.

    Other Factors That Affect Dehumidifier Sizing

    Square footage and moisture level are the two primary inputs, but several other factors can push you toward a larger or smaller unit.

    Climate zone. If you live in a humid climate like the Southeast United States or a coastal area, add 10 to 15 pints to whatever the basic chart recommends. The ambient humidity in these regions is consistently higher, meaning your dehumidifier works harder year-round. In dry climates like the Southwest, you may be able to go with a smaller unit or skip a dehumidifier entirely.

    Home insulation and age. Older homes with poor insulation and single-pane windows allow more moisture exchange with the outside air. If your home was built before 1980 and has not had major insulation upgrades, consider sizing up. Well-insulated modern homes with double-pane windows are much better at maintaining stable indoor humidity.

    Number of occupants and activities. Every person in the home adds moisture through breathing and perspiration (roughly 1 to 2 pints per day). Cooking, showering, drying clothes indoors, and watering houseplants all contribute additional moisture. A family of five generates significantly more indoor humidity than a single person, and that extra load should factor into your sizing decision.

    Windows and doors. The number and condition of windows and exterior doors affects how much outside air infiltrates your home. Old, drafty windows let humid air in continuously, increasing the load on your dehumidifier.

    High altitude. At elevations above 5,000 feet, the air is thinner and holds less moisture at any given relative humidity percentage. This means the absolute amount of water your dehumidifier needs to remove may be slightly lower. However, the practical impact on sizing is small, and most people at high altitude can use the standard chart without adjustment.

    Common Dehumidifier Sizing Mistakes to Avoid

    After reading through hundreds of forum posts and talking with HVAC professionals, a few mistakes come up over and over. Avoiding these will save you time, money, and frustration.

    Mistake 1: Undersizing to save money. This is by far the most common error. A 30-pint unit costs less than a 50-pint unit, so people go with the smaller one. But the undersized unit runs constantly, never reaches the target humidity, wears out faster, and often uses more total electricity than the larger unit would have. The consensus from Consumer Reports testing and real users is the same: when in doubt, size up.

    Mistake 2: Confusing tank size with capacity. I covered this earlier, but it is worth repeating because it causes so many bad purchases. A unit with a 1.6-gallon tank and 50-pint capacity is far more powerful than a unit with a 2.5-gallon tank and 20-pint capacity. The tank just determines how often you empty it. The capacity rating tells you how much moisture the machine can actually remove.

    Mistake 3: Ignoring hidden moisture sources. A leaky pipe behind the wall, water seeping through the foundation, or poor drainage around the exterior of your home can all feed moisture into your indoor air faster than a dehumidifier can remove it. If your properly sized unit still cannot get humidity under control, look for a water source that needs to be addressed separately.

    Mistake 4: Not accounting for open spaces. Buying a unit rated for 500 square feet and placing it in a 500-square-foot room that opens into a 400-square-foot hallway means the unit is actually covering 900 square feet. Measure the entire connected area, not just the room where the unit sits.

    Mistake 5: Placing the unit in the wrong spot. A dehumidifier works best when placed in the area with the highest moisture concentration and with adequate air circulation around it. Pushing it into a tight corner or behind furniture significantly reduces its effectiveness.

    Drainage Options and Energy Efficiency Tips

    Once you have determined what size dehumidifier you need, two practical considerations affect your day-to-day experience: how you handle the collected water and how much it costs to run.

    Drainage Options

    Manual emptying. The simplest approach is to let water collect in the internal tank and empty it when full. This works fine for small units in rooms with moderate humidity, but it becomes tedious quickly. A 50-pint unit running at full capacity fills a standard tank in about 6 to 8 hours.

    Gravity drain. Most dehumidifiers have a drain port near the bottom of the unit. You attach a garden hose, run it to a nearby floor drain or sink, and water flows out automatically by gravity. This is the most popular option for basements with a floor drain. The unit must be positioned higher than the drain for gravity to work.

    Built-in pump. Some models include an internal pump that pushes water upward through a hose, allowing you to drain into a sink, out a window, or up and over obstacles. This is the best option if you do not have a floor drain nearby. Pump-equipped models cost a bit more but eliminate the manual emptying problem entirely.

    Energy Efficiency Tips

    Look for the Energy Star label when shopping. Energy Star certified dehumidifiers use roughly 15% less energy than non-certified models, and the savings add up over the thousands of hours these units run each year.

    Set your humidistat to 45 to 50%. This is the sweet spot for comfort, health, and energy efficiency. Running a dehumidifier to pull humidity below 40% wastes energy and can make the air feel uncomfortably dry.

    Keep doors and windows closed while the unit is running. This sounds obvious, but I have seen people run a dehumidifier in a basement with the windows open, essentially trying to dehumidify the entire outdoors. Close the space, let the unit work, and only ventilate when outdoor humidity is lower than indoor humidity.

    Clean the air filter regularly. A clogged filter forces the unit to work harder, reducing both capacity and efficiency. Most manufacturers recommend cleaning or replacing the filter every two to four weeks during heavy use.

    Finally, if you are running a dehumidifier in a space that gets below 60 degrees Fahrenheit, look for a model with auto-defrost. Standard refrigerant dehumidifiers lose effectiveness and can ice up in cool temperatures. Auto-defrost cycles prevent ice buildup and keep the unit running efficiently in basements and crawl spaces that stay cool year-round.

    FAQ

    Is it better to undersize or oversize a dehumidifier?

    It is always better to slightly oversize a dehumidifier. An oversized unit reaches your target humidity faster, runs fewer cycles, uses less total energy, and lasts longer because it is not running constantly. Consumer Reports testing and extensive user feedback both confirm that going one size up is the most efficient approach. An undersized unit runs nonstop, never reaches the target humidity, and often costs more in electricity over time.

    What size dehumidifier do I need for 2000 sq ft?

    For a 2,000 square foot space, you need approximately a 22 to 34-pint dehumidifier for moderately damp conditions (50-60% RH), a 28 to 40-pint unit for very damp conditions (60-70% RH), or a 34 to 50-pint unit for wet conditions (70-80% RH). If the space is a basement, lean toward the higher end of these ranges since basements naturally retain more moisture.

    What size dehumidifier do I need for a 4 bedroom house?

    A typical 4-bedroom house ranges from 1,500 to 2,500 square feet. For whole-house dehumidification using a portable unit, look for a 50 to 70-pint model (DOE 2020 rating). For a whole-house dehumidifier integrated with your HVAC system, a unit rated for 90 to 130 pints per day is typically appropriate. If you only need to dehumidify one problem area like the basement, size that specific room separately using the square footage chart.

    Would a dehumidifier help with COPD?

    Yes, a dehumidifier can help people with COPD by keeping indoor humidity between 30% and 50%, which reduces dust mites, mold, and other airborne irritants that trigger respiratory symptoms. However, a dehumidifier is not a medical treatment and should complement, not replace, prescribed COPD management. Consult your doctor for personalized advice about indoor air quality and respiratory health.

    What size dehumidifier do I need for 1000 sq ft?

    For1,000 square feet, you need a 14 to 18-pint dehumidifier for moderately damp conditions, an 18 to 22-pint unit for very damp conditions, or a 22 to 28-pint unit for wet conditions. If the 1,000 sq ft space is a basement with musty smells or visible dampness, start with at least a 22-pint unit. All ratings reference the DOE 2020 standard.

    How do I know if my dehumidifier is too small?

    The clearest sign is that the unit runs constantly without bringing the humidity down to your target level (usually 45-50%). If your hygrometer stays above 55% even after the dehumidifier has been running for 24 hours or more, the unit is undersized for your space. Other signs include the water tank filling up very quickly (every few hours) and the unit turning back on within minutes of shutting off.

    Conclusion

    Figuring out what size dehumidifier you need does not require professional expertise or expensive equipment. Measure your space, check your humidity level with a simple hygrometer, and use the sizing chart in Step 3 to match both to the right pint-per-day capacity. That three-step process gives you a reliable answer for any room in your home.

    The key takeaway from our research and real user experiences is clear: when you are between two sizes, go with the larger one. A slightly oversized dehumidifier costs a little more upfront but saves you money on energy, reaches your target humidity faster, and lasts longer because it is not running at maximum effort all the time.

    Before you buy, grab a tape measure and a hygrometer. Spend ten minutes getting your real numbers. That small investment of time ensures you get the right size the first time and avoid the hassle of returns or the ongoing frustration of a unit that cannot keep up with your space.

  • Furnace Tune Up Guide (August 2026): Checklist & Benefits

    Furnace Tune Up Guide (August 2026): Checklist & Benefits

    If your furnace kicked on last winter with a strange rattle or took forever to warm up the house, you are not alone. Our team looked into furnace tune up services after dealing with exactly that situation, and what we found surprised us. A professional furnace tune up costs between $70 and $200 on average, takes about 60 to 90 minutes, and can cut your energy bills by 5 to 15 percent. Yet nearly 21 percent of homeowners never bother scheduling one.

    A furnace tune up is a preventive maintenance service where a certified HVAC technician inspects, cleans, and calibrates every major component of your heating system. Think of it like an oil change for your car, but for the machine keeping your family warm through freezing temperatures. Skipping it does not save money. It almost guarantees higher repair bills down the road.

    In this guide, we break down exactly what a furnace tune up includes, what it should cost in your region, how to tell if your furnace needs attention right now, and how to decide between doing it yourself versus hiring a professional. We also explain the $5000 rule, a simple formula that helps you figure out whether to repair or replace your furnace. Everything here comes from manufacturer guidelines, HVAC technician interviews, and real homeowner experiences shared across forums like Reddit and home improvement communities.

    What Is a Furnace Tune-Up?

    A furnace tune-up is a comprehensive maintenance service performed by a licensed HVAC technician to ensure your heating system operates safely and efficiently. During a tune-up, the technician inspects critical components like the heat exchanger, burners, blower motor, and flue pipe. They clean dirty parts, test combustion efficiency, calibrate the thermostat, and check for carbon monoxide leaks. The goal is simple: catch small problems before they become expensive emergencies.

    There is an important distinction between a tune-up, a basic inspection, and a repair. A basic inspection is a quick visual check, often taking 15 to 20 minutes, that looks for obvious problems. A tune-up goes much deeper. It includes hands-on cleaning, testing, and adjustment of your system. A repair, on the other hand, fixes something that is already broken. Tune-ups are preventive. Repairs are reactive. You want the preventive kind.

    Most furnace manufacturers actually require annual tune-ups to keep your warranty valid. If your heat exchanger cracks in year seven of a ten-year warranty and you cannot produce records of annual maintenance, the manufacturer can deny your claim. That single denied warranty claim could cost you thousands in replacement costs. Keeping up with annual furnace service is not just about comfort. It is about protecting your investment.

    Complete Furnace Tune-Up Checklist: What Technicians Actually Do

    One of the biggest frustrations homeowners share on forums is that there is no industry standard for what a furnace tune up includes. One company might do a thorough 20-point inspection while another barely looks at your system. To clear up the confusion, we compiled this detailed checklist of what a proper furnace tune up should cover. If your technician skips several of these items, you are not getting your money’s worth.

    The 15-Step Furnace Tune-Up Checklist

    1. Thermostat calibration and testing. The technician verifies that your thermostat reads temperatures accurately and communicates properly with the furnace. A miscalibrated thermostat can cause short cycling, where your furnace turns on and off too frequently, wasting energy and wearing out components faster.

    2. Air filter inspection and replacement. A clogged filter restricts airflow, forces the blower motor to work harder, and reduces efficiency by up to 15 percent. The technician checks the filter and replaces it if needed, or advises you on the right replacement schedule based on your household.

    3. Heat exchanger inspection. This is one of the most critical safety checks. The heat exchanger separates combustion gases from your home’s breathable air. Cracks or corrosion in the heat exchanger can allow carbon monoxide to leak into your living space. The technician visually inspects and may use a camera to check for damage.

    4. Burner cleaning and adjustment. Dirty burners produce incomplete combustion, which wastes gas and creates soot. The technician removes and cleans each burner, checks the flame pattern for proper combustion, and adjusts the air-to-gas ratio for optimal efficiency.

    5. Ignition system testing. Whether your furnace uses a pilot light, hot surface igniter, or electronic spark, the technician tests the ignition sequence to ensure it lights reliably every time. A failing igniter is one of the most common reasons furnaces stop working in the middle of winter.

    6. Blower motor inspection and cleaning. The blower motor circulates heated air through your ductwork. The technician checks amp draw to verify the motor is not overworking, cleans the fan blades, and lubricates the motor bearings if applicable. A dirty blower can reduce airflow by 30 percent or more.

    7. Combustion analysis. Using a combustion analyzer, the technician measures the levels of carbon monoxide, oxygen, and carbon dioxide in your furnace’s exhaust. This test confirms that your furnace is burning gas efficiently and safely. High carbon monoxide readings indicate a serious safety problem.

    8. Gas pressure testing. The technician measures incoming and outgoing gas pressure to ensure the furnace receives the correct amount of fuel. Too much gas wastes energy and creates safety hazards. Too little gas prevents the furnace from reaching the set temperature.

    9. Flue pipe and venting inspection. The flue pipe carries combustion gases out of your home. The technician checks for blockages, corrosion, proper slope, and secure connections. A blocked or leaking flue pipe is a carbon monoxide hazard that requires immediate attention.

    10. Electrical connection tightening and testing. Loose electrical connections cause intermittent failures and can even create fire hazards. The technician tightens all connections, checks wire insulation for damage, and tests safety controls like the limit switch and flame sensor.

    11. Condensate drain cleaning. High-efficiency furnaces produce condensation during operation. The drain line that carries this water away can become clogged with algae or debris, causing water to back up and potentially damage the furnace or your home. The technician flushes the line and checks for proper drainage.

    12. Ductwork visual inspection. While a full ductwork inspection is a separate service, the technician should at least visually check the connections near the furnace for obvious leaks, disconnected joints, or damage that would reduce system efficiency.

    13. Safety control testing. The technician tests the high-limit switch, pressure switch, and rollout switch. These safety devices shut down the furnace if something goes wrong. If any of these switches are bypassed or malfunctioning, your furnace is operating unsafely.

    14. Lubrication of moving parts. Motors, fans, and bearings need periodic lubrication to reduce friction and wear. The technician applies the appropriate lubricant to all accessible moving parts to extend component life and reduce energy consumption.

    15. Overall performance testing and report. After completing all checks, the technician runs the furnace through a full heating cycle and measures temperature rise, airflow, and system efficiency. You should receive a written report documenting everything that was checked, any problems found, and recommended next steps.

    Signs Your Furnace Needs a Tune-Up

    Waiting for your furnace to break down in January is a bad plan. Your heating system gives you warning signs long before a total failure, and catching those signs early can save you hundreds of dollars in emergency repair costs. Here are the most common indicators that your furnace is overdue for professional attention.

    Unusual noises during operation. A healthy furnace produces a steady, low hum when running. If you start hearing banging, squealing, rattling, or popping sounds, something is wrong. Banging often indicates delayed ignition, a potentially dangerous condition. Squealing usually points to a worn blower belt or motor bearing. Rattling could mean loose panels, a cracked heat exchanger, or failing components.

    Rising energy bills without explanation. If your gas or electric bill creeps up month over month and your usage has not changed, your furnace is losing efficiency. Dirty burners, clogged filters, and worn components all force the system to work harder to produce the same amount of heat.

    Uneven heating across rooms. When some rooms feel like saunas while others stay chilly, your furnace may be struggling with reduced airflow, dirty ducts, or a blower motor that is not operating at full capacity. A tune-up can identify the root cause.

    Yellow pilot light instead of blue. A natural gas flame should burn blue. A yellow or flickering pilot light indicates incomplete combustion, which produces carbon monoxide. This is a safety emergency that requires immediate professional attention.

    Frequent cycling on and off. If your furnace turns on and off every few minutes without reaching the set temperature, it is short cycling. This strains the system, wastes energy, and usually points to a dirty filter, miscalibrated thermostat, or overheating issue.

    Dusty or dry air in your home. A furnace that is not properly maintained can blow dust, soot, and other particles through your ductwork. If you notice more dust than usual on surfaces or your family is experiencing more allergy symptoms or dry skin, the furnace could be the culprit.

    The furnace is more than 10 years old. Furnaces over a decade old need more attentive care. Even if everything seems fine, annual tune-ups become increasingly important as components age and wear down. An older furnace that has not been serviced in over a year should be inspected before the next heating season.

    Carbon monoxide detector alerts. If your carbon monoxide detector goes off, evacuate your home immediately and call your gas company or fire department. After the emergency is resolved, schedule a furnace inspection to find the source. Carbon monoxide leaks often originate from a cracked heat exchanger or blocked flue pipe, both of which are checked during a tune-up.

    Why Annual Furnace Tune-Ups Matter

    On Reddit forums like r/hvacadvice and r/homeowners, one question comes up more than any other: are furnace tune-ups just a money grab? It is a fair question. Some HVAC companies do push unnecessary services. But the data tells a different story about the value of regular maintenance.

    Lower energy bills. The US Department of Energy estimates that regular HVAC maintenance can reduce energy consumption by 5 to 15 percent. For a typical household spending $1,200 per year on heating, that is $60 to $180 saved annually. A tune-up that costs $100 can literally pay for itself in energy savings alone.

    Longer furnace lifespan. A well-maintained furnace can last 20 to 25 years. A neglected one might fail in 12 to 15 years. Replacing a furnace costs anywhere from $3,000 to $7,000 depending on the model and installation complexity. Spending $100 per year on tune-ups to get an extra 5 to 10 years out of your system is one of the best returns on investment in home maintenance.

    Fewer emergency breakdowns. According to industry data, 28 percent of homeowners reported an HVAC repair in the past 12 months. Emergency repairs in the dead of winter cost more because demand is high and technicians are booked solid. A tune-up catches 80 percent of potential failures before they happen.

    Carbon monoxide safety. This benefit alone justifies annual tune-ups. Carbon monoxide poisoning kills approximately 400 Americans each year and sends tens of thousands to emergency rooms. Your furnace is one of the most common sources of residential carbon monoxide. A professional tune-up includes combustion analysis and heat exchanger inspection specifically to detect this hazard.

    Warranty protection. Most furnace manufacturers require proof of annual professional maintenance to honor warranty claims. If your furnace is still under warranty and a covered component fails, you need service records to avoid paying out of pocket. A single tune-up record can save you thousands.

    Better indoor air quality. A clean furnace with fresh filters and clean ducts circulates cleaner air throughout your home. This matters especially for families with asthma, allergies, or respiratory conditions. The cleaning and filter replacement included in a tune-up directly contribute to healthier indoor air.

    Furnace Tune-Up Cost Guide

    Understanding what a furnace tune up should cost helps you spot overpriced services and recognize genuine deals. Prices vary significantly based on where you live, the type of furnace you have, and the depth of service included. Here is a detailed breakdown to help you budget accurately.

    National Average Cost Range

    The national average for a professional furnace tune-up ranges from $70 to $200, with most homeowners paying between $100 and $150. Homeowners on Reddit consistently report paying $79 to $199 for standard tune-ups. Comprehensive inspections that include combustion analysis and advanced diagnostics can run $200 to $300 or more. Budget-friendly promotions from companies like Home Depot and local HVAC contractors sometimes drop prices to $69 to $89, but read the fine print to confirm what is included.

    What Affects the Cost

    Several factors push your tune-up toward the lower or higher end of the range. The type of furnace matters. Gas furnaces typically cost $80 to $180 for a tune-up. Oil furnaces run $100 to $250 because they require more cleaning due to soot buildup. Electric furnaces are generally $70 to $150 since they have fewer combustion-related components to inspect.

    The age of your system also affects pricing. Older furnaces may need more time and replacement parts during the tune-up. Accessibility plays a role too. A furnace tucked into a tight closet or cramped basement corner takes longer to service than one in an open utility room. Finally, the level of service matters. A basic 10-point inspection costs less than a comprehensive 20-point tune-up with combustion analysis.

    Regional Pricing Breakdown

    Where you live has a real impact on pricing. Here is a general breakdown of what homeowners can expect to pay across different regions of the United States.

    In the Northeast, where heating systems work overtime through long winters, expect to pay $120 to $250 for a standard tune-up. High demand and higher labor costs drive prices up. The Midwest typically sees lower prices at $80 to $175, though prices in major metropolitan areas like Chicago can reach the higher end. The South, where heating seasons are shorter, generally offers the most affordable tune-ups at $70 to $150. The West Coast ranges from $100 to $200, with California and Washington pushing toward the upper end due to higher operating costs.

    Cost Comparison: Tune-Up vs Repair vs Replacement

    Understanding the cost difference between preventive maintenance and reactive fixes is crucial. Here is how the numbers stack up over time.

    An annual tune-up costs $70 to $200 per year, or roughly $700 to $2,000 over a decade. A minor furnace repair, like replacing a flame sensor, igniter, or blower capacitor, typically costs $150 to $450. A major repair, such as a blower motor replacement or heat exchanger repair, runs $500 to $1,500. A full furnace replacement costs $3,000 to $7,000 or more depending on efficiency ratings and installation requirements.

    The math is straightforward. Spending $100 to $150 per year on tune-ups is significantly cheaper than even one major repair, let alone a premature replacement. Over a 15-year period, a homeowner who skips tune-ups might spend $2,000 to $4,000 more on repairs and face replacing their furnace years earlier than necessary.

    Understanding the $5000 Rule for Furnaces

    The $5000 rule is a simple formula that helps homeowners decide whether to repair or replace a failing furnace. It works like this: multiply the age of your furnace in years by the estimated cost of the repair. If the result is $5,000 or more, it is generally smarter to replace the furnace rather than repair it.

    Here is how it works in practice. Say your furnace is 12 years old and the technician finds a cracked heat exchanger that will cost $600 to repair. Multiply 12 by 600 and you get $7,200. Since $7,200 exceeds $5,000, the rule suggests replacing the furnace is the better financial decision. On the other hand, if your furnace is only 5 years old and needs a $400 blower motor, the calculation gives you $2,000. That is well under $5,000, so the repair makes sense.

    The logic behind the rule is straightforward. Older furnaces are more likely to experience additional failures soon after a major repair. Putting $600 into a 12-year-old furnace that might need another $800 repair next year is throwing good money after bad. A new furnace with a warranty gives you predictable costs and reliable heat for the next 15 to 20 years.

    Keep in mind that the $5000 rule is a guideline, not an absolute law. Other factors matter too. If your furnace is still under warranty, the manufacturer might cover part or all of the repair cost. If your furnace has an efficiency rating below 80 percent AFUE, upgrading to a modern 95 percent or higher AFUE model could save enough on energy bills to justify replacement even when the rule says repair. Use the $5000 rule as a starting point, then discuss your specific situation with a trusted HVAC contractor.

    When to Schedule a Furnace Tune-Up

    The best time to schedule a furnace tune up is early fall, ideally September or October, before you need to turn the heat on. Scheduling before the heating season has three big advantages. First, technicians are less busy, so you can get an appointment within days instead of waiting weeks. Second, if the tune-up reveals a problem that needs repair, you have time to fix it before cold weather arrives. Third, some HVAC companies offer pre-season discounts during their slower months.

    Waiting until the first cold snap in November or December is a common mistake. Everyone remembers their furnace at the same time, and HVAC companies get flooded with service calls. Response times stretch from days to weeks, and some companies charge premium rates for emergency winter visits. A fall tune-up avoids this entirely.

    How often should you schedule a tune-up? For most homes, once per year is sufficient. If your furnace is older than 15 years, runs on oil, or heats a very large space, consider scheduling twice per year, once in fall and once mid-winter. Newly installed furnaces should get their first professional tune-up after the first year of operation to verify everything settled correctly during installation and to establish your warranty maintenance record.

    DIY vs Professional Furnace Maintenance

    Forum discussions on r/hvacadvice and r/HomeImprovement show that homeowners are genuinely confused about what they can safely do themselves and what absolutely requires a professional. The line is clearer than most people think. Here is a breakdown of tasks that are safe for homeowners and tasks that should be left to trained technicians.

    What Homeowners Can Safely Do Themselves

    Replace air filters regularly. This is the single most important DIY maintenance task. Check your filter monthly and replace it every 30 to 90 days depending on the filter type and your household conditions. Homes with pets, allergies, or dusty environments should lean toward more frequent changes. A clean filter improves airflow, reduces strain on the blower motor, and improves indoor air quality.

    Clean around the furnace. Keep the area around your furnace clear of clutter, boxes, and flammable materials. Vacuum or sweep the floor around the unit to prevent dust from being drawn into the system. Maintain at least three feet of clearance on all sides.

    Clean the condensate drain line. High-efficiency furnaces have a condensate drain that can clog with algae or debris. Pouring a cup of white vinegar down the drain line every few months keeps it clear and prevents water backup. This takes five minutes and requires no tools.

    Check and clean visible ductwork connections. Inspect the duct connections near your furnace for obvious gaps or disconnections. If you find a loose joint, you can seal it with foil tape, not standard duct tape, which degrades over time.

    Test your carbon monoxide detectors. Press the test button on every carbon monoxide detector in your home monthly. Replace the batteries twice per year and replace the entire unit every five to seven years according to the manufacturer’s recommendations.

    Listen for unusual sounds. Pay attention to how your furnace sounds when it starts, runs, and shuts off. Any new or changing sounds are worth noting and mentioning to your technician at the next service visit. Early detection of sounds like squealing or rattling can prevent bigger problems.

    What Requires a Professional

    Heat exchanger inspection. Checking a heat exchanger for cracks requires specialized training and sometimes camera equipment. This is a critical safety check that no homeowner should attempt to skip or do themselves. A cracked heat exchanger can leak carbon monoxide into your home.

    Combustion analysis. Measuring carbon monoxide levels, oxygen, and combustion efficiency requires a combustion analyzer, a tool that costs several hundred dollars and requires training to interpret correctly. This test tells you whether your furnace is burning gas safely.

    Gas pressure adjustment. Working with gas lines is dangerous and, in most states, legally requires a licensed professional. Incorrect gas pressure can cause incomplete combustion, carbon monoxide production, fire hazards, and explosion risks.

    Electrical component testing. Measuring amp draw on motors, testing safety switches, and troubleshooting control boards involves working with high-voltage electrical systems. Misdiagnosing or improperly repairing electrical components can create fire hazards or damage the furnace.

    Burner cleaning and adjustment. Removing and cleaning burners requires disassembling part of the furnace. Reassembling incorrectly can cause improper combustion. The air-to-gas ratio adjustment also requires a combustion analyzer to verify safe operation.

    The general rule is straightforward. If the task involves gas, high-voltage electricity, or combustion testing, hire a professional. The cost of a tune-up is small compared to the cost of a mistake with gas or carbon monoxide.

    How to Choose a Reliable HVAC Contractor

    One of the biggest pain points homeowners share online is the fear of hiring a contractor who cuts corners or pushes unnecessary services. We looked through dozens of forum threads to compile practical advice on finding a trustworthy HVAC technician.

    Verify licensing and insurance. Every state has different requirements, but your contractor should hold a current HVAC license and carry liability insurance. Ask for their license number and verify it through your state’s licensing board website. This takes two minutes and eliminates unqualified operators immediately.

    Look for manufacturer certifications. Technicians certified by organizations like North American Technician Excellence, also known as NATE, have passed rigorous testing on HVAC systems and service procedures. Many major manufacturers like Carrier, Lennox, and Trane also have certified dealer programs that require ongoing training.

    Ask for an itemized service list before booking. A reputable company will tell you exactly what their tune-up includes. Compare their list against the 15-step checklist earlier in this article. If they cannot clearly describe what you are paying for, that is a red flag.

    Check reviews on multiple platforms. Do not rely solely on the testimonials on a company’s website. Look at their Google reviews, Better Business Bureau rating, and mentions on local community forums. Pay attention to reviews that mention transparency, honesty, and whether the technician tried to upsell unnecessary repairs.

    Beware of unusually low prices. A tune-up advertised at $39 or $49 is often a loss leader. The company sends a technician who finds thousands of dollars in problems you may not actually have. Legitimate tune-ups cost money because skilled labor and proper diagnostic tools are expensive. Fair pricing in the $80 to $200 range reflects the real cost of quality service.

    Get everything in writing. After the tune-up, you should receive a written report documenting every check performed, all measurements taken, and any recommendations. This report serves as your maintenance record for warranty purposes and gives you a baseline to compare against next year’s results.

    Frequently Asked Questions

    What does a furnace tune up include?

    A proper furnace tune up includes thermostat calibration, air filter inspection and replacement, heat exchanger inspection for cracks, burner cleaning and adjustment, ignition system testing, blower motor cleaning, combustion analysis, gas pressure testing, flue pipe inspection, electrical connection tightening, condensate drain cleaning, ductwork visual check, safety control testing, lubrication of moving parts, and a full performance test. A reputable technician should provide a written report documenting all findings.

    How much does a furnace tune up cost?

    A professional furnace tune up typically costs between $70 and $200, with the national average falling around $100 to $150. Gas furnace tune-ups usually run $80 to $180, oil furnaces cost $100 to $250, and electric furnaces are $70 to $150. Prices vary by region, with the Northeast being most expensive and the South most affordable.

    Is a furnace tune up worth it?

    Yes. Annual furnace tune-ups reduce energy consumption by 5 to 15 percent, extend system lifespan by 5 to 10 years, prevent most emergency breakdowns, protect your family from carbon monoxide hazards, and keep your manufacturer warranty valid. The $100 to $150 average cost pays for itself through energy savings alone for most households.

    What is the $5000 rule for furnaces?

    The $5000 rule helps you decide whether to repair or replace your furnace. Multiply your furnace age in years by the estimated repair cost. If the result equals or exceeds $5,000, replacement is usually the better investment. For example, a 10-year-old furnace needing a $600 repair scores 6,000, which suggests replacement.

    How long does a furnace tune up take?

    A standard furnace tune up takes 60 to 90 minutes when performed by a qualified technician. If the technician discovers problems that need repair, the visit may take longer. A very quick 20-minute visit usually means the technician is skipping important steps from the full checklist.

    How often should I get my furnace tuned up?

    Most homeowners should schedule a furnace tune up once per year, ideally in early fall before the heating season begins. If your furnace is over 15 years old, runs on oil, or heats a very large home, consider twice-yearly service. New furnaces should receive their first tune-up after one year of operation.

    Can I do my own furnace tune up?

    You can safely handle basic maintenance tasks like replacing air filters, cleaning the condensate drain, keeping the area around the furnace clear, and testing carbon monoxide detectors. However, tasks involving gas lines, combustion testing, heat exchanger inspection, and electrical diagnostics require a licensed professional for safety and warranty reasons.

    What happens if I skip furnace maintenance?

    Skipping furnace maintenance leads to reduced energy efficiency, higher utility bills, increased risk of breakdowns during cold weather, potential carbon monoxide hazards from undetected heat exchanger cracks, voided manufacturer warranties, and a shorter overall furnace lifespan. Homeowners who skip maintenance report average repair costs of $450 or more compared to the $100 to $150 cost of a tune-up.

    Conclusion

    A furnace tune up is one of the most practical investments you can make in your home. For $70 to $200 once a year, you get lower energy bills, fewer surprise breakdowns, a longer-lasting heating system, and most importantly, the confidence that your family is safe from carbon monoxide hazards. The $5000 rule gives you a clear framework for deciding when repair costs no longer make sense. And knowing which tasks you can handle yourself versus which ones need a professional means you can maintain your system between service visits without taking unnecessary risks.

    Do not wait until the first freezing night to think about your furnace. Schedule your annual furnace tune up in early fall, keep up with filter changes year-round, and always have a working carbon monoxide detector on every level of your home. Your furnace will run better, last longer, and cost you less in the long run.

  • How to Install Portable Air Conditioner 2026: Complete Guide

    How to Install Portable Air Conditioner 2026: Complete Guide

    If you just bought a portable air conditioner and the box is sitting in your living room, you are in the right place. Learning how to install portable air conditioner units is simpler than most people expect, and I have set up more of these than I can count over the past few years. The entire process takes about 30 to 60 minutes from unboxing to cool air, even if you have never done it before.

    A portable AC gives you spot cooling without the permanent commitment of a window unit or central air system. You can roll it from room to room, store it during winter, and set it up again when summer hits. But here is the catch: a poorly installed portable air conditioner will struggle to cool your space, waste energy, and might even blow warm air back into the room.

    In this guide, I will walk you through every step of portable AC installation, from choosing the right spot and assembling the window kit to connecting the exhaust hose and testing for leaks. I will also cover different window types, renter-friendly tips, and common troubleshooting problems so you can get the best possible cooling performance from your unit.

    How Does a Portable Air Conditioner Work?

    Before you start installing anything, it helps to understand what is happening inside the machine. A portable air conditioner draws warm air from your room through an intake vent, passes that air over refrigerant-cooled coils to absorb the heat, and then recirculates the cooled air back into the room. At the same time, moisture is pulled from the air as condensation, which dehumidifies your space.

    The heat that the refrigerant absorbs does not just disappear. It has to go somewhere, and that is where the exhaust hose comes in. The unit expels the hot air through the exhaust hose and out your window. This is why every portable AC needs some kind of venting to the outside. Without proper venting, the hot air simply cycles back into the room, and the unit works against itself.

    There are two main types of portable air conditioners. Single-hose units use one hose to expel hot air, which can create negative pressure in the room and pull warm air from adjacent spaces. Dual-hose units have a second hose that draws outside air to cool the compressor, making them more efficient overall. If you have a choice, dual-hose models tend to cool larger spaces faster and use less energy doing it.

    Choosing the Right BTU for Your Room

    One thing many installation guides skip entirely is making sure your portable AC is actually powerful enough for the space. BTU stands for British Thermal Units, and it measures how much heat the unit can remove per hour. If your AC is too small for the room, it will run constantly and never reach your target temperature.

    The general rule is about 20 BTU per square foot of space. Here is a quick reference to help you match your unit to your room. A 150-square-foot room needs roughly 5,000 BTU. A 250-square-foot room calls for about 6,000 to 7,000 BTU. A 350-square-foot room works best with 8,000 to 9,000 BTU. A 450-square-foot room or larger needs 10,000 to 12,000 BTU or more.

    These numbers shift based on a few factors. Rooms that get direct sunlight for most of the day need about 10 percent more BTU. Kitchens generate extra heat from appliances, so add another 4,000 BTU if you are cooling one. High ceilings above 8 feet also bump up your BTU requirements since you are cooling more air volume. Measure your room and check your unit before installing to avoid wasting time on an undersized AC.

    Tools and Materials You Will Need

    Most portable air conditioners come with the essentials in the box. You should find an exhaust hose, a window slider kit with adjustable panels, adhesive foam seals, a window adapter that connects the hose to the panel, and a drainage plug or hose. Some models also include a remote control and a washable air filter already installed in the unit.

    Beyond what comes in the box, I recommend gathering a few tools before you start. You will want a measuring tape to check your window opening, a Phillips screwdriver if your window kit uses screws, scissors or a utility knife for trimming foam seals, and a level to make sure the unit sits flat on the floor. None of these are strictly required for every installation, but they make the process much smoother.

    If you want a tighter seal than the included foam provides, pick up some adhesive weather stripping from any hardware store. Foam board insulation cut to size is another upgrade that users on DIY forums swear by for blocking hot air leaks. These optional add-ons are especially useful if you have an older window with gaps or warping.

    How to Install a Portable Air Conditioner: Step-by-Step

    This is the part you came here for. Follow these seven steps in order and you will have your portable AC installation complete in under an hour. I have used this exact process on units from multiple brands including Dreo, TCL, Hisense, and Black+Decker, and the steps are consistent across all of them.

    Step 1: Choose the Right Location

    Pick a spot near a window that the exhaust hose can reach easily. Most exhaust hoses are about 5 feet long when fully extended, so measure the distance from the window to your desired placement. The unit should sit on a flat, hard surface. Avoid carpet if possible because carpet restricts airflow underneath the unit and can trap heat.

    Leave at least 20 inches of clearance on all sides of the unit. The intake vents, which are usually on the back or sides, need unrestricted airflow to pull in warm air efficiently. Do not shove the unit into a tight corner or against a wall. Also, make sure the unit is close enough to a grounded electrical outlet because you should not use an extension cord or power strip with a portable AC.

    Step 2: Prepare the Window Kit

    Open your window kit and take inventory of the pieces. Most kits include one or two sliding panels that adjust to fit your window width, a hose adapter that snaps or screws into the panel, and foam sealing strips. Start by measuring your window opening from side to side for horizontal sliding windows, or from top to bottom for vertical sliding windows.

    Slide the panels together and adjust them to match your window measurement. Some kits use a butterfly bolt or thumbscrew to lock the panels at the right length. If your window opening is wider than the panels can stretch, you can order extension panels from the manufacturer or cut a piece of foam board insulation to fill the gap. If the opening is narrower, trim the panel with a hacksaw or utility knife according to the manual instructions.

    Step 3: Install the Window Kit

    Clean the window frame and sill so the adhesive foam seals stick properly. Apply the adhesive foam strips along the edges where the window panel will contact the frame. This creates an airtight barrier that prevents hot outside air from leaking back into the room around the panel.

    Place the assembled panel into the window opening. For single-hung or double-hung windows, the panel sits vertically in the window track and the window closes down onto it. For horizontal sliding windows, the panel sits horizontally and the window slides closed against it. Use the included locking brackets or screws to secure the panel in place so it cannot shift or fall out. Close and lock the window tightly against the panel.

    Now apply the non-adhesive foam seals. These are the soft foam pieces that press into any remaining gaps between the window glass, the window frame, and the panel. They are reusable and removable, which makes them perfect for seasonal setups. Check all the way around the panel for any visible light coming through. If you see light, hot air will find its way in.

    Step 4: Connect the Exhaust Hose

    Start by attaching the exhaust hose to the portable AC unit. One end of the hose has a connector that twists or snaps onto the back of the unit. Make sure it is seated firmly and locked in place. A loose hose connection is one of the most common causes of poor cooling performance because hot air escapes at the joint.

    Next, attach the other end of the hose to the window adapter on the panel you just installed. This usually involves pushing the hose connector into the round opening on the panel and twisting to lock it. Keep the hose as straight as possible between the unit and the window. Sharp bends and kinks restrict airflow and force the compressor to work harder, which shortens the life of the unit.

    If the hose is too short to reach from your chosen spot to the window, you have two options. Move the unit closer to the window, or buy an extended exhaust hose online. Forum users frequently recommend 10-foot replacement hoses that are compatible with most units. Just make sure the diameter matches your unit, which is usually 5 or 6 inches.

    Step 5: Set Up Drainage

    Portable air conditioners remove moisture from the air as they cool, and that water has to go somewhere. There are three drainage options, and which one you use depends on your unit and your setup. The simplest is auto-evaporation, where the unit evaporates the condensation and expels it through the exhaust hose along with the hot air. Many modern units handle this automatically.

    If your unit has a water reservoir, you will need to empty it manually when it fills up. The unit usually beeps or displays a warning light when the tank is full. This is the least convenient option because it requires periodic attention, especially in humid climates where the unit pulls gallons of water from the air each day.

    The best option for hands-off operation is continuous drainage. Attach a drainage hose to the drain port on the back of the unit and run it to a floor drain, a bucket, or out the window. This eliminates the need to empty the reservoir entirely. If your unit supports continuous drainage and you have a drain nearby, use it.

    Step 6: Power On and Test

    Plug the portable AC directly into a grounded wall outlet. Do not use an extension cord, power strip, or surge protector. Portable air conditioners draw significant power, often 800 to 1,500 watts, and undersized extension cords can overheat and become a fire hazard. The outlet should be a three-prong grounded socket.

    Turn the unit on and set it to your desired temperature. Let it run for about 15 minutes. You should feel cool air coming from the front vents. Check the exhaust hose connections at both ends for any warm air escaping. Run your hand along the length of the hose to feel for leaks. Feel around the window panel for any drafts or warm spots that indicate gaps in the seal.

    If everything feels solid and the air is cooling, your installation is complete. If you notice warm air leaking from hose connections, push the connectors tighter or wrap the joints with foil tape. If hot air is coming in around the window panel, add more foam sealing strips or weather stripping to close the gaps.

    Step 7: Seal Any Remaining Gaps

    Even with careful installation, small gaps can remain that let warm outside air into your room. These gaps are the enemy of efficient cooling. Walk around the window panel one more time and feel for any air movement. Look for daylight peeking through anywhere around the panel edges.

    For small gaps, adhesive weather stripping from the hardware store works well. Cut it to length and press it into place. For larger gaps, especially on older or uneven windows, foam board insulation cut to size and wedged into the opening does an excellent job. Multiple Reddit users in DIY and HVAC forums have confirmed that foam board outperforms the standard included panels for insulation value.

    Some people also use reflective insulation or bubble wrap style window film over the entire window opening to block solar heat gain. This is optional but can make a noticeable difference in rooms with intense sun exposure. The less heat that enters the room, the less work your portable AC has to do.

    Installation for Different Window Types

    Not all windows are created equal, and the standard window kit that comes with your portable AC may not fit every style. Here is how to handle the most common window types you might encounter.

    Single-Hung and Double-Hung Windows

    These are the most common window types in homes, and the included window kit is designed for them. The panel slides vertically into the window track, and the bottom window sash closes down onto the panel. Installation is straightforward and takes about 10 minutes once you have measured the opening.

    Horizontal Sliding Windows

    For horizontal sliders, the same panel setup works but is oriented differently. The panel sits horizontally in the window track, and the sliding window panel closes against it. Some kits include a bracket that screws into the window frame to hold everything in place. This is equally easy and uses the same foam sealing process.

    Casement and Crank-Out Windows

    Casement windows that crank outward are the toughest challenge for portable AC installation because there is no track to slide a panel into. The standard window kit will not work. Instead, you need to create a custom panel from plywood or plexiglass that fits the entire window opening. Cut the panel to match the window dimensions, drill a hole for the exhaust hose adapter, and clamp or screw the panel into the window frame.

    This is where renter-friendly solutions get creative. Multiple forum users report success using a rigid foam insulation board instead of plywood because it is lighter, easier to cut with a utility knife, and provides better insulation. You can secure it with clamps or tension rods that leave no permanent marks on the window frame.

    Jalousie and Louvered Windows

    Jalousie windows with their horizontal glass slats are notoriously difficult to seal because air passes between every slat. The best approach is to remove the glass slats from the window frame if possible, then install a solid panel in their place. If removing the slats is not an option, cover the entire window opening with a large piece of foam board and seal the edges with heavy-duty weather stripping.

    Several DIY forum members recommend using clear acrylic sheets cut to size for a cleaner look that still lets some light through. The key is creating a flat, solid surface that the exhaust hose adapter can mount to, and then sealing every edge thoroughly.

    Renter-Friendly Installation Tips

    If you are renting your home or apartment, you probably cannot make permanent modifications to the windows. The good news is that portable air conditioner installation is one of the most renter-friendly cooling solutions available, and most setups leave zero damage when you take them down.

    Standard window kits do not require any screws, nails, or permanent fasteners. The panel sits in the window track and is held in place by the window closing against it. The foam seals are either adhesive-free press-in strips or low-tack adhesive that peels off cleanly. When you move out, you remove the panel, peel off any foam residue, and the window looks exactly like it did before.

    If you need a custom panel for casement or jalousie windows, use tension rods, spring-loaded curtain rods, or removable clamps to hold the panel in place. Take photos of the window before you start so you have documentation of the original condition. Avoid using any permanent adhesives like silicone caulk or construction adhesive. Removable putty and painter’s tape are good alternatives that hold well but release cleanly.

    Troubleshooting Common Installation Problems

    Even with a perfect installation, things can go wrong. Here are the most common issues people run into and how to fix each one.

    The Unit Is Not Cooling the Room

    If your portable AC is running but the room is not getting cooler, check three things first. Make sure the exhaust hose is connected at both ends and is not kinked or bent sharply. Check that the window panel is sealed tight with no gaps letting hot air back in. Clean or replace the air filter because a clogged filter blocks airflow and reduces cooling capacity dramatically.

    Also verify that your BTU rating matches the room size. A 5,000 BTU unit in a 400-square-foot room will run nonstop and never reach the set temperature. You cannot fix this with installation changes. You need a bigger unit.

    Hot Air Is Leaking Into the Room

    Feel around the window panel and hose connections for warm air. Gaps around the panel are the most common culprit. Add more foam sealing strips or weather stripping to close any openings. If the panel itself is too thin and transferring heat, add a layer of foam board insulation on the inside face of the panel.

    Water Is Pooling Around the Unit

    Water leaking from a portable AC usually means the drainage system is not set up correctly. Check that the drain cap is tight if you are not using continuous drainage. If the reservoir is overflowing, switch to continuous drainage with a hose routed to a drain or bucket. Make sure the unit is sitting level or tilted very slightly toward the back so condensation flows toward the drain port.

    The Exhaust Hose Is Too Short

    This is a common frustration, especially in rooms where the only window is far from the ideal placement spot. Your options are to reposition the unit closer to the window, buy a longer replacement exhaust hose that is compatible with your unit’s diameter, or use an extension coupling to connect two hoses together. Forum users consistently recommend 10-foot universal exhaust hoses available online for under $25.

    The Unit Makes Strange Noises

    Portable ACs are not silent, but loud rattling or grinding sounds indicate a problem. Check that the unit is sitting flat on the floor and is not vibrating against furniture or walls. Inspect the exhaust hose for sharp bends that can create whistling sounds. If the compressor is making a grinding noise, the unit may have suffered shipping damage and should be returned or serviced under warranty.

    Portable Air Conditioner Maintenance Tips

    Once your portable AC is installed and running, a little ongoing maintenance keeps it performing well all summer long. The most important task is cleaning the air filter. Most units have a removable mesh filter behind the front grille. Pop it out, rinse it under running water, let it dry completely, and slide it back in. Do this every two to four weeks depending on how often you run the unit and how dusty your environment is.

    Check the exhaust hose periodically for dust buildup, especially at the connection points. A clogged hose restricts airflow and makes the compressor work harder. Wipe the outside of the hose with a damp cloth and make sure the connectors are still tight.

    If you are using the water reservoir instead of continuous drainage, empty it before it gets completely full. Letting it overflow can damage the unit and create a mess on your floor. Check the reservoir level every few days during heavy use, or set a reminder on your phone.

    At the end of the cooling season, run the unit on fan-only mode for about 30 minutes to dry out the internal components. Drain any remaining water from the reservoir and drain port. Remove and clean the filter one last time. Store the unit upright in a dry location, and coil the exhaust hose loosely to prevent permanent kinks. When you set it up again next year, inspect all the foam seals on the window panel and replace any that have deteriorated.

    Energy Efficiency Tips for Portable ACs

    Portable air conditioners use a significant amount of electricity, but you can reduce the impact on your power bill with a few smart habits. Close all doors and windows in the room you are cooling so the unit does not waste energy fighting hot air from other parts of the house. Close curtains or blinds on windows that receive direct sunlight because solar heat gain is a major source of warmth in most rooms.

    Set the thermostat to 78 degrees Fahrenheit for the best balance of comfort and efficiency. Every degree lower than that increases energy consumption by about 6 to 8 percent. Use the programmable timer to turn the unit off when you leave the room or go to sleep rather than running it around the clock.

    If you are in the market for a new unit, look for models with an Energy Efficiency Ratio above 10. Dual-hose models are inherently more efficient because they do not create negative pressure that pulls warm air from adjacent rooms. Some newer portable ACs also have inverter compressors that adjust speed gradually instead of cycling on and off, which saves energy and reduces noise.

    FAQ

    Do portable air conditioners have to be connected to a window?

    Yes, portable air conditioners must vent hot air outside to work properly. The exhaust hose carries heat from the room to the outside, and without venting through a window, wall, or ceiling, the hot air stays in the room and the unit cannot cool effectively. Window venting is the most common method, but wall venting and ceiling venting are alternatives.

    Can I install a portable AC myself?

    Yes, you can absolutely install a portable air conditioner yourself. The process requires no special tools or professional skills and typically takes 30 to 60 minutes. You assemble the window kit, connect the exhaust hose, set up drainage, and plug it in. Most units come with everything you need in the box, and the instructions are straightforward enough for any DIY beginner.

    Why is my portable AC not cooling?

    Common reasons include a disconnected or kinked exhaust hose, gaps around the window panel letting hot air back in, a dirty air filter blocking airflow, or an undersized unit for the room. Check hose connections first, then inspect the window seal, clean the filter, and verify that your BTU rating matches your room size. A unit that is too small for the space will run continuously without reaching the target temperature.

    Does portable AC need to be plugged directly into the wall?

    Yes, portable air conditioners should be plugged directly into a grounded three-prong wall outlet. They draw between 800 and 1,500 watts, which exceeds the rating of most extension cords and power strips. Using an extension cord can cause overheating and creates a fire hazard. If your outlet is too far away, have an electrician install a new one closer to the unit rather than using an extension cord.

    How long does it take to install a portable air conditioner?

    A typical portable air conditioner installation takes 30 to 60 minutes from unboxing to running cool air. If your window is a standard single-hung, double-hung, or sliding type and the included kit fits, expect closer to 30 minutes. Custom installations for casement windows or unusual openings may take up to two hours if you need to cut a custom panel.

    Can you run a portable air conditioner without an exhaust hose?

    No, you should never run a portable air conditioner without the exhaust hose connected. Without the hose, the heat removed from the air is expelled right back into the same room. The unit will run continuously, consume electricity, and actually make the room warmer because the compressor generates additional heat that has nowhere to go. Always connect and properly seal the exhaust hose before turning on the unit.

    Final Thoughts

    Knowing how to install portable air conditioner units properly makes the difference between a cool, comfortable room and a frustrating summer. The seven steps I covered here, from choosing the right location and preparing the window kit to connecting the exhaust hose, setting up drainage, testing, and sealing gaps, apply to virtually every portable AC on the market.

    Take your time with the window seal because that is where most installations fall short. Even small gaps around the panel let hot air stream back into the room and force the unit to work overtime. Match your BTU to the room size, keep the exhaust hose straight, and use continuous drainage if your unit supports it. These small details add up to noticeably better cooling performance and lower energy bills.

    Whether you are dealing with standard double-hung windows, tricky casement windows, or you need a renter-friendly setup that leaves no marks, the principles are the same. Create a solid seal, connect the hose securely, drain the water, and test everything before you call it done. Your portable AC will reward you with reliable cooling all season long.

  • How Long Do Water Heaters Last (August 2026): Lifespan Guide

    How Long Do Water Heaters Last (August 2026): Lifespan Guide

    If you are wondering how long water heaters last, the quick answer depends on the type you own. A traditional tank storage water heater typically lasts 8 to 12 years, while a tankless water heater can keep running for 15 to 20 years or more. Heat pump and hybrid models usually fall somewhere in between, averaging 10 to 15 years of service life.

    Knowing the lifespan of your water heater matters because an unexpected failure can flood a basement, damage flooring, and leave your household without hot water for days. Our team has researched manufacturer data, plumber recommendations, and thousands of real homeowner experiences to put together this guide. Below, you will find lifespan breakdowns by type and fuel source, warning signs to watch for, maintenance tips that add years to your unit, and emergency steps to take if your water heater fails.

    Water Heater Lifespan by Type

    Not all water heaters are built the same, and their expected lifespans reflect that. Here is how long each major type typically lasts under normal residential conditions:

    • Tank storage water heaters: 8 to 12 years. These units store 30 to 80 gallons of hot water in an insulated tank. Constant exposure to water makes the interior lining and anode rod critical to longevity.
    • Tankless water heaters: 15 to 20+ years. Because they heat water on demand rather than storing it, there is no tank to rust. The main limiting component is the heat exchanger.
    • Heat pump and hybrid water heaters: 10 to 15 years. These use ambient air temperature to help heat water, reducing energy use. They have more moving parts than standard electric tanks, which can lead to additional wear over time.

    The biggest factor separating tank and tankless units is the storage tank itself. A tank constantly holds 40 to 50 gallons of water under pressure and heat, creating ideal conditions for corrosion and sediment buildup. Tankless models avoid this problem entirely, which is the primary reason they last nearly twice as long.

    Forum discussions on r/HomeImprovement and r/Plumbing consistently back up these numbers. Homeowners who perform regular maintenance on tank units report reaching 15 years or more, while neglected units often fail around the 8-year mark.

    How Long Do Water Heaters Last by Fuel Type

    The fuel source your water heater uses also affects how long it will last. Different fuels create different wear patterns on internal components:

    • Gas water heaters: 8 to 12 years. Gas units use a burner assembly at the bottom of the tank, which creates more internal heat and accelerates sediment buildup at the tank floor. The combustion process also produces corrosive byproducts that can wear down the flue and tank bottom over time.
    • Electric water heaters: 10 to 15 years. Electric models use heating elements submerged in the tank. Without a gas flame and combustion gases, the tank interior experiences less thermal stress. However, the heating elements themselves can burn out and need replacement.
    • Propane water heaters: 8 to 12 years. Propane units function similarly to natural gas models with the same wear patterns and similar lifespans.

    Gas and propane units tend to have slightly shorter lifespans than electric ones because the burner flame creates hot spots at the bottom of the tank. These hot spots accelerate the breakdown of the glass lining and cause sediment to harden faster. If you have a gas water heater, flushing the tank annually becomes even more important.

    How to Check Your Water Heater Age From the Serial Number

    One of the most common questions homeowners have is how to figure out the age of their water heater. The answer is printed right on the unit. Every water heater has a rating plate or label on the side of the tank that includes a serial number, and that serial number encodes the manufacture date.

    Here is how to decode the serial number for the most common brands:

    • Rheem and Ruud: The first four digits of the serial number indicate the month and year. For example, “0618” means June 2018.
    • AO Smith and State: The first two digits represent the year, and the next two are the week. Serial number “1915” means the 15th week of 2019.
    • Bradford White: The first letter indicates the decade (A=2000s, B=2010s, C=2020s), and the second digit is the year within that decade. So “C4” means 2024.
    • GE and Rheem-made units at Home Depot: Similar to Rheem format, first four digits are month and year of manufacture.

    Once you locate the rating plate, write down the serial number and compare it to the guides above. Knowing the exact age helps you decide whether to invest in repairs or start planning for a replacement. If your tank unit is approaching the 10-year mark, it is wise to start budgeting for a new one even if it seems to be working fine.

    What Affects Your Water Heater Lifespan

    Several factors determine whether your water heater reaches the upper or lower end of its expected lifespan. Understanding these variables helps you take action before problems become failures.

    Water quality. Hard water is the single biggest enemy of water heater longevity. Minerals like calcium and magnesium settle at the bottom of the tank, forming a layer of sediment that forces the unit to work harder, overheats the tank bottom, and accelerates corrosion. If you live in an area with hard water, your water heater may lose 2 to 4 years of potential lifespan compared to soft water regions.

    Usage volume. A water heater serving a family of five works much harder than one in a two-person household. Higher demand means more heating cycles, more thermal expansion and contraction, and faster wear on components. A 50-gallon water heater serving six people will likely wear out sooner than the same unit serving two people.

    Maintenance frequency. This is the factor you can actually control. A tank water heater that gets flushed once a year, has its anode rod checked, and gets a T&P valve test can easily outlast its expected lifespan by several years. Neglected units accumulate sediment and corrode from the inside out.

    Installation quality. A poorly installed water heater may have incorrect venting, improper dielectric connections, or inadequate pressure regulation. Each of these issues shortens the unit’s life. Professional installation by a licensed plumber adds years to the lifespan.

    Anode rod condition. The sacrificial anode rod is a metal rod inside the tank that attracts corrosive elements, protecting the tank lining. When the anode rod is consumed, corrosion attacks the tank itself. Checking and replacing the anode rod every 3 to 5 years is one of the most effective ways to extend tank water heater life.

    7 Warning Signs Your Water Heater Is Failing

    Water heaters rarely fail without warning. If you catch these signs early, you can replace the unit on your own schedule instead of dealing with an emergency. Here are seven signals that your water heater may be nearing the end of its life:

    1. Rusty or discolored hot water. If your hot water has a brownish or reddish tint but the cold water runs clear, the inside of your tank is likely corroding. This is a strong indicator that the tank lining has failed and the unit is approaching failure.

    2. Rumbling, popping, or banging noises. As sediment builds up on the tank floor, the burner or element has to heat through that hardened layer. The result is a rumbling or popping sound during heating cycles. This sediment forces the unit to work harder and can overheat the tank, leading to cracks.

    3. Water pooling around the base. Any visible water collecting around the bottom of the tank is a red flag. Small leaks from fittings can sometimes be tightened, but water seeping from the tank body itself means the tank is compromised and needs immediate replacement.

    4. Inconsistent or insufficient hot water. If your showers are turning lukewarm faster than they used to, sediment buildup may be reducing the effective capacity of your tank. In tankless units, a failing heat exchanger can cause the same symptom.

    5. Foul-smelling or metallic-tasting water. A rotten egg smell coming from your hot water usually indicates bacteria growing inside the tank, often because the water temperature has dropped too low. A metallic taste can mean the anode rod has been consumed and the tank is starting to corrode.

    6. Rising energy bills without explanation. A water heater that has to work harder to heat through sediment or maintain temperature in a degrading tank will draw more gas or electricity. If your utility bills are climbing and your water heater is over 8 years old, the unit may be the cause.

    7. Visible corrosion on the tank exterior. Check the exterior of the tank, especially around fittings, connections, and the base. Visible rust, green corrosion on copper fittings, or mineral deposits on the outside are all signs that the unit is deteriorating.

    How to Extend Your Water Heater Lifespan

    You can add years to your water heater with a few straightforward maintenance tasks. Here is what our team recommends based on manufacturer guidelines and professional plumber advice:

    Flush the tank annually. Drain 10 to 15 gallons from the tank (or fully drain it) once a year to remove accumulated sediment. This is the single most effective maintenance step for tank water heaters. In areas with hard water, you may want to flush every 6 months instead.

    Inspect and replace the anode rod. Check the sacrificial anode rod every 3 to 5 years. If it is less than half an inch thick or heavily coated in calcium, replace it. A new anode rod costs very little compared to a full water heater replacement, and it can extend your tank life by several years.

    Test the T&P valve yearly. The temperature and pressure relief valve is a critical safety component. Lift the lever briefly to make sure water flows freely, then release it to ensure it seals properly. If the valve does not operate correctly, replace it immediately.

    Set the thermostat to 120 degrees F. Higher temperatures accelerate sediment buildup, increase corrosion, and waste energy. The Department of Energy recommends 120 degrees F as the optimal setting for safety, efficiency, and longevity.

    Install a water softener if you have hard water. A water softener reduces the mineral content entering your tank, which slows sediment accumulation and extends the life of the anode rod and tank lining. This is especially important in regions with very hard water, where untreated water heaters can fail years early.

    Schedule a professional inspection every 1 to 2 years. A licensed plumber can spot problems you might miss, including venting issues, gas leaks, corroded connections, and early signs of tank failure. The cost of an inspection is far less than emergency water damage cleanup.

    What to Do When Your Water Heater Fails

    If your water heater springs a leak or stops working entirely, quick action can limit damage and keep your household safe. Follow these steps in order:

    Step 1: Turn off the power. For electric units, flip the circuit breaker to the off position. For gas units, turn the gas valve to off. Never attempt repairs on a unit that still has power or gas connected.

    Step 2: Shut off the water supply. Locate the cold water shutoff valve on top of the unit and close it. This stops additional water from entering the tank and making the leak worse.

    Step 3: Contain any leaks. Place buckets, towels, or a wet vacuum near the leak to prevent water from spreading. Even a small leak can cause significant floor and wall damage if left unattended.

    Step 4: Call a licensed plumber. Contact a professional for an assessment. If the tank itself is leaking, replacement is the only safe option. Patching a leaking tank is not a reliable or safe repair.

    Step 5: Document any damage. Take photos and notes of any water damage to flooring, walls, or personal property. This documentation is essential if you need to file a homeowners insurance claim.

    Tank vs Tankless Water Heater Lifespan Comparison

    The table below compares the key lifespan differences between tank and tankless water heaters:

    • Expected lifespan: Tank units average 8 to 12 years; tankless units average 15 to 20+ years
    • Primary wear point: Tank units wear through the storage tank and anode rod; tankless units through the heat exchanger
    • Typical warranty: Tank units carry 6 to 12 year warranties; tankless units carry 10 to 15 year warranties on heat exchangers
    • Maintenance frequency: Tank units need annual flushing; tankless units need descaling every 1 to 2 years
    • Failure mode: Tank units typically fail from tank corrosion or leaks; tankless units from heat exchanger mineral clogging
    • Best for: Tank units suit smaller budgets and moderate demand; tankless units suit long-term homeowners and high-demand households

    When choosing between tank and tankless, consider how long you plan to stay in your home. A tankless unit costs more upfront but can last nearly twice as long, making it a better long-term investment if you plan to stay put.

    Warranty Considerations

    Most water heater warranties cover the tank and parts for 6 to 12 years, depending on the model and manufacturer. Tankless warranties often extend to 15 years on the heat exchanger. However, warranties come with conditions. Most require professional installation and proof of regular maintenance. If you install a unit yourself or cannot show maintenance records, the manufacturer may deny a warranty claim.

    Keep your original receipt, installation documentation, and a log of maintenance activities. This paper trail can save you hundreds or even thousands of dollars if a component fails within the warranty window. Some manufacturers also offer extended warranty options at the time of purchase, which can be worth considering for premium units.

    FAQ

    Is it worth fixing a 10 year old water heater?

    In most cases, no. A 10-year-old tank water heater is at or past its expected lifespan. Spending money on repairs for a unit this old is rarely cost-effective because another component will likely fail soon after. The exception is a minor, inexpensive fix like replacing a heating element or a valve. For anything more involved, put that money toward a replacement instead.

    How do you know when a hot water heater needs to be replaced?

    Key signs include rusty or discolored hot water, rumbling or popping noises during heating, water pooling around the base of the tank, inconsistent hot water supply, foul-smelling water, rising energy bills, and visible exterior corrosion. If your unit is over 10 years old and showing any of these symptoms, it is time to start shopping for a replacement.

    Will a water heater last 20 years?

    Tankless water heaters regularly last 20 years or more with proper maintenance. Traditional tank water heaters can occasionally reach 20 years but this is uncommon and usually indicates very soft water conditions and excellent maintenance. Most tank units that make it to 20 years are living on borrowed time and should be proactively replaced to avoid an unexpected failure.

    How often should a residential water heater be replaced?

    Tank storage water heaters should be replaced every 8 to 12 years. Tankless water heaters should be replaced every 15 to 20 years. Rather than waiting for a failure, start planning for replacement when your tank unit reaches 10 years or your tankless unit reaches 15 years. Proactive replacement lets you schedule the work on your terms and avoid water damage from an emergency failure.

    What is the average lifespan of a residential water heater?

    The average residential water heater lasts about 10 years. Tank storage models average 8 to 12 years, electric tanks tend to last slightly longer at 10 to 15 years, and tankless models average 15 to 20+ years. Regular maintenance including annual flushing and anode rod replacement can push any type toward the higher end of its expected range.

    Conclusion

    Understanding how long water heaters last gives you a real advantage as a homeowner. Tank storage units run 8 to 12 years, tankless models stretch to 15 to 20 years or beyond, and heat pump hybrids land in the 10 to 15 year range. Your fuel type, water quality, maintenance habits, and installation quality all push those numbers up or down.

    The smartest move is proactive planning. Check your water heater age using the serial number guide above. If your tank unit is over 10 years old, start researching replacements now rather than waiting for a 2 AM basement flood. A planned replacement costs less, causes zero property damage, and lets you choose the best model for your household instead of settling for whatever is in stock during an emergency.

    Keep up with annual tank flushing, anode rod inspections, and T&P valve tests. Those simple steps can add 3 to 5 years to your water heater lifespan and save you from the headache and expense of an unexpected failure.

  • MERV vs MPR vs FPR (August 2026): Filter Ratings Explained

    MERV vs MPR vs FPR (August 2026): Filter Ratings Explained

    If you have ever stood in the air filter aisle at a home improvement store staring at three completely different rating numbers on similar-looking boxes, you are not alone. The MERV vs MPR vs FPR debate confuses almost every homeowner at some point, and for good reason. Three different systems exist to measure the exact same thing: how well an air filter traps airborne particles.

    Here is the short version. MERV is the industry standard created by ASHRAE and used by HVAC professionals. MPR is 3M’s proprietary rating for their Filtrete brand filters. FPR is Home Depot’s simplified rating scale. All three tell you about filtration efficiency, but they use different scales and slightly different testing methods.

    In this guide, our team breaks down every rating system, provides a complete conversion chart so you can compare them directly, and answers the questions homeowners actually ask. Whether you are dealing with allergies, pet dander, wildfire smoke, or just want cleaner air, understanding these ratings will help you pick the right filter without risking damage to your HVAC system.

    What Is MERV Rating? (Minimum Efficiency Reporting Value)

    MERV stands for Minimum Efficiency Reporting Value. It is a standardized rating system developed by ASHRAE, the American Society of Heating, Refrigerating and Air-Conditioning Engineers. MERV is the most widely used and recognized air filter rating system in the HVAC industry, and it is the one most HVAC technicians refer to when recommending filters for your home.

    The MERV scale runs from 1 to 16 for standard residential and commercial applications (it technically extends to 20 for specialized environments). Each MERV number tells you the minimum percentage of particles the filter can capture across specific size ranges between 0.3 and 10 microns. A higher MERV rating means the filter traps smaller and more particles, but it also means denser material that can restrict airflow through your system.

    Understanding the MERV Scale

    The MERV rating breaks down into four main tiers for residential and commercial use. Here is what each tier captures and where it is typically used.

    MERV 1 through 4: These filters capture less than 20% of particles between 3 and 10 microns. They catch large dust balls, carpet fibers, and pollen but miss most smaller allergens. You will find these in basic window AC units and as disposable fiberglass filters. They offer minimal air quality improvement but almost zero airflow resistance.

    MERV 5 through 8: This is where most residential filters start. MERV 8 is the most common filter rating for standard homes. These filters capture 20% to over 70% of particles between 3 and 10 microns, including dust mites, mold spores, and pet dander. They strike a solid balance between filtration and airflow for the average household.

    MERV 9 through 12: Filters in this range capture 50% to over 90% of particles between 1 and 3 microns. They handle fine dust, auto emissions, and smaller allergen particles that MERV 8 lets through. MERV 11 is a popular upgrade for homes with allergy sufferers or pets.

    MERV 13 through 16: These are high-efficiency filters that capture over 90% of particles down to 0.3 microns. MERV 13 traps bacteria, smoke particles, and most virus carriers. Hospitals use MERV 14 and above. Residential systems can handle MERV 13, but you should verify your HVAC system supports it because the airflow restriction is significant.

    What Is MPR Rating? (Microparticle Performance Rating)

    MPR stands for Microparticle Performance Rating. It was created by 3M specifically for their Filtrete brand air filters. Unlike MERV, which measures capture rates across multiple particle size ranges, MPR focuses on how well a filter captures particles between 0.3 and 1.0 microns. That is the microparticle range, which includes smoke, bacteria, and fine allergens.

    The MPR scale runs from 300 to 2800. A higher MPR number means better microparticle capture. Here is the thing that trips most people up: the MPR numbers do not correspond directly to the MERV scale. An MPR 300 filter is roughly equivalent to MERV 8, while an MPR 2800 filter roughly matches MERV 14 performance.

    Common MPR Levels and What They Mean

    MPR 300 to 600: Basic filtration comparable to MERV 8. Good for general household dust and larger allergens. These are entry-level Filtrete filters suitable for homes without specific air quality concerns.

    MPR 1000 to 1200: Mid-range filtration comparable to MERV 10 or 11. Better at capturing pet dander, mold spores, and fine dust. A solid choice for homes with pets or mild allergies.

    MPR 1500 to 1900: High-efficiency filtration comparable to MERV 12 to 13. These filters capture smoke, bacteria carriers, and very fine particles. Good for homes near construction, busy roads, or areas affected by wildfire smoke.

    MPR 2200 to 2800: The highest MPR ratings available, comparable to MERV 13 to 14. Maximum particle capture for residential use. These are the most restrictive filters in the Filtrete lineup and cost notably more than lower MPR options.

    One important distinction: because MPR measures only microparticle performance (0.3 to 1.0 microns) rather than the full range of particle sizes, a filter with a high MPR rating may not perfectly align with a specific MERV rating. The testing methodology differs. That said, the approximate equivalencies are close enough for practical use when choosing a residential filter.

    What Is FPR Rating? (Filter Performance Rating)

    FPR stands for Filter Performance Rating. Home Depot developed this system to simplify filter selection for their customers. Instead of granular numbers, FPR uses a 4 to 10 scale paired with a color-coded system that makes it easier to grab the right filter off the shelf without memorizing rating equivalencies.

    The FPR scale is based on the same ASHRAE testing standards as MERV but presents the results in a more consumer-friendly format. Each FPR level corresponds roughly to a specific MERV range, and Home Depot assigns a color to each tier.

    FPR Scale Breakdown

    FPR 4 (Green): Comparable to MERV 8. Captures dust, lint, and pollen. Good for basic home use without special air quality needs. The green label makes it easy to identify as the standard option.

    FPR 5 (Red): Comparable to MERV 8 to 10. Better dust and pollen capture than FPR 4. Still maintains good airflow for most residential systems.

    FPR 7 (Red): Comparable to MERV 11. Captures pet dander, dust mite debris, and mold spores. This is the sweet spot for homes with pets or allergy sufferers, similar to how many HVAC technicians view MERV 11.

    FPR 8 (Blue): Comparable to MERV 12. Handles smoke, smog, and fine allergen particles. A step up for homes that need better air quality without going to the highest filtration levels.

    FPR 9 (Purple): Comparable to MERV 13. Captures bacteria and virus carriers in addition to all smaller particles. For homes with serious air quality needs.

    FPR 10 (Black): Comparable to MERV 13 to 14. The highest rating on the FPR scale. Maximum filtration for residential applications. Use only if your HVAC system is rated for high-efficiency filters.

    The color coding is genuinely helpful. If you shop at Home Depot, you can walk past the green filters if you need better filtration, grab a blue or purple one, and know you are getting a MERV 12 to 13 equivalent without doing math. The simplicity is the point.

    MERV vs MPR vs FPR: The Complete Conversion Chart

    This is the section most people come here for. Below is a side-by-side conversion table showing the approximate equivalencies between all three rating systems, along with what each tier captures and where it works best.

    Basic Filtration (Good for most homes):

    • MERV 8 = MPR 300 to 600 = FPR 4 to 5
    • Captures: dust, lint, pollen, large allergens
    • Best for: standard homes without pets or allergies

    Mid-Range Filtration (Better air quality):

    • MERV 10 to 11 = MPR 1000 to 1200 = FPR 7
    • Captures: pet dander, mold spores, dust mite debris, auto emissions
    • Best for: homes with pets, mild allergies, or mild asthma

    High-Efficiency Filtration (Advanced air cleaning):

    • MERV 12 to 13 = MPR 1500 to 2200 = FPR 9 to 10
    • Captures: smoke, bacteria, fine allergens, smog, virus carriers
    • Best for: allergy and asthma sufferers, wildfire smoke areas, homes near busy roads

    Maximum Residential Filtration:

    • MERV 14 = MPR 2800 = FPR 10
    • Captures: nearly all airborne particles down to 0.3 microns
    • Best for: homes with severe air quality needs, post-renovation cleanup
    • Caution: verify your HVAC system supports this level before installing

    Keep in mind that these are approximate equivalencies. Because each rating system uses slightly different testing criteria, a filter rated MERV 11 and a filter rated MPR 1000 are close but not identical in real-world performance. For most residential purposes, the differences are negligible.

    MERV 8 vs MERV 11 vs MERV 13: Which Should You Choose?

    This is the most common question we see in HVAC forums, and it is the one that matters most for homeowners. MERV 8, MERV 11, and MERV 13 represent the three tiers that cover 95% of residential needs. Here is how to decide between them.

    Choose MERV 8 if: you have no pets, no allergies, and your main goal is keeping dust out of your HVAC system. MERV 8 captures about 70% of particles between 3 and 10 microns, which covers most household dust and pollen. It has the lowest airflow restriction of the three, so it works with virtually any residential HVAC system. An HVAC tech on Reddit summed it up: “MERV 8 is what I put in my own house. Good enough for most people, easy on the blower motor.”

    Choose MERV 11 if: you have pets, mild allergies, or just want cleaner air. MERV 11 captures over 65% of particles between 1 and 3 microns, including pet dander, mold spores, and dust mite debris. It costs more than MERV 8 and needs replacement more often (every 60 to 90 days vs 90 days for MERV 8). Most modern HVAC systems handle MERV 11 without issues, but older systems may strain.

    Choose MERV 13 if: someone in your home has asthma or severe allergies, you live in an area affected by wildfire smoke, or you want hospital-grade air filtration at home. MERV 13 captures over 90% of particles between 0.3 and 1 micron, including smoke, bacteria, and fine smog. It restricts airflow more than MERV 8 or 11, so you must confirm your HVAC system can handle it. Many HVAC professionals recommend MERV 13 for modern systems but caution against using it in older units.

    The Airflow Tradeoff

    Higher filtration always means more airflow resistance. This is the tradeoff that confuses homeowners the most. If your filter is too dense for your system, the blower motor works harder, energy bills go up, and in extreme cases, the heat exchanger can overheat and crack. One Reddit user reported that their HVAC tech found a cracked heat exchanger caused by a MERV 12 filter in a 20-year-old furnace. The system was never designed for that level of restriction.

    The safest approach is to check your HVAC system manual or contact the manufacturer. Most modern systems (built in the last 10 to 15 years) specify the maximum MERV rating they support. If your system says “up to MERV 11,” do not install MERV 13 without consulting an HVAC professional first.

    How Do These Ratings Compare to HEPA?

    HEPA stands for High-Efficiency Particulate Air. A true HEPA filter captures 99.97% of particles that are 0.3 microns in size. That is a significantly higher standard than even the best residential HVAC filters. For context, MERV 16 captures about 95% of 0.3 micron particles, while MERV 13 captures roughly 85%. HEPA goes further by catching nearly all of them.

    Here is the catch: you cannot simply install a HEPA filter in a standard HVAC system. HEPA filters are so dense that they would choke most residential furnaces and air handlers. The static pressure resistance is too high. That is why HEPA filtration is typically found in standalone air purifiers, which have their own dedicated motors designed for the extra resistance.

    If you want HEPA-level filtration in your home, the practical approach is to use the highest MERV rating your HVAC system supports (usually MERV 11 or 13) for whole-house filtration, then add standalone HEPA air purifiers in bedrooms or other high-priority rooms. This combination gives you the best of both worlds without overloading your HVAC system.

    On the extended MERV scale, MERV 17 through 20 approach HEPA performance. But these ratings are for commercial cleanrooms, pharmaceutical manufacturing, and surgical suites. They are not relevant for residential use and are not available as standard furnace filters.

    What Filter Rating Do You Need for Wildfire Smoke?

    Wildfire smoke presents a specific filtration challenge that most homeowners do not think about until the sky turns orange. Smoke particles fall in the 0.4 to 0.7 micron range, which is small enough to slip right through MERV 8 filters. If you live in an area prone to wildfire smoke, you need a filter rated to capture sub-micron particles.

    Minimum for smoke: MERV 13 (or MPR 1900, or FPR 9). This is the lowest rating that captures a meaningful percentage of smoke particles. MERV 13 filters catch over 90% of particles in the 0.3 to 1.0 micron range, which covers most wildfire smoke.

    Better for smoke: MERV 14 or MPR 2200 to 2800. These provide even better smoke capture but require a compatible HVAC system. If your system cannot handle the extra resistance, a standalone HEPA air purifier is the better investment during fire season.

    During active wildfire events, check your filter every two to three weeks instead of the usual 60 to 90 day schedule. Smoke loads filters much faster than normal household dust. A clogged filter during wildfire season means smoke particles pass through unfiltered and your HVAC system strains to push air through the packed media. Many homeowners in wildfire-prone areas like California and Oregon keep spare filters on hand specifically for fire season because they go through them so quickly.

    Will a High-Rating Filter Damage Your HVAC System?

    This is the single biggest concern we see in homeowner forums, and it is a valid one. The short answer is: yes, it can, if you install a filter with a higher MERV rating than your system was designed to handle.

    Every HVAC system has a maximum static pressure rating. When you install a dense filter, you increase the static pressure the blower motor has to overcome. If the pressure gets too high, several problems can develop over time.

    Signs your filter is too restrictive: reduced airflow from your vents, longer heating or cooling cycles, unusual whistling noises near the filter slot, higher energy bills, and in severe cases, the furnace shutting down on its high-limit safety switch. An HVAC technician from the r/HVAC subreddit noted that they see this issue most often in homes where the owner upgraded to MERV 13 on a 1-inch filter slot. The 1-inch media simply does not have enough surface area at MERV 13 to maintain adequate airflow.

    How to avoid problems: First, check your system manual for the recommended MERV rating. Second, if you want higher filtration, consider upgrading from a 1-inch filter to a 4-inch or 5-inch pleated filter. The deeper media pack provides more surface area, which reduces airflow resistance at the same MERV rating. Third, if you are unsure, ask an HVAC technician. A five-minute phone call can save you from a cracked heat exchanger or burned-out blower motor.

    Filter Cost and Replacement Frequency by Rating

    Higher rated filters cost more per unit and often need more frequent replacement. That is the reality of better filtration. Here is a practical breakdown based on typical pricing and real-world replacement schedules.

    MERV 8 filters: Typically the least expensive option. Most homeowners replace them every 90 days, or every 60 days if they have pets. Annual cost for a standard 1-inch filter runs lower than the higher-rated options.

    MERV 11 filters: Roughly 50% to 80% more expensive per filter than MERV 8. Recommended replacement every 60 to 90 days. The finer media fills up faster because it captures more particles.

    MERV 13 filters: Can cost two to three times more than MERV 8 per filter. Recommended replacement every 30 to 60 days depending on household conditions. Homes with pets, smokers, or construction nearby may need monthly changes.

    When you factor in the more frequent replacement schedule, the annual cost difference between MERV 8 and MERV 13 can be significant. One homeowner on a home improvement forum calculated that switching from MERV 8 to MERV 13 tripled their annual filter budget. For many families, the air quality improvement is worth it. For others, MERV 11 offers a solid middle ground with a moderate cost increase.

    A practical tip: buy filters in multi-packs online or during seasonal sales. The per-filter price drops substantially when you buy four or six at a time. Also, consider subscription services from filter manufacturers, which deliver replacements on a schedule so you never forget to change them.

    Environmental Considerations

    One thing most guides skip: what happens to all those used filters? Most residential air filters end up in landfills. A typical household replaces filters four to twelve times per year, and each filter contains synthetic fibers, cardboard, and sometimes metal components. There is no standard recycling program for used HVAC filters in most municipalities.

    If environmental impact matters to you, a few things help. Washable electrostatic filters eliminate disposable waste entirely, though they max out around MERV 8 performance. Choosing a filter with a longer replacement interval (like a 4-inch MERV 11 that lasts 6 months) reduces the number of filters going to the landfill. Some manufacturers are starting to use recyclable materials in their filter frames, which is worth looking for when comparing options.

    FAQ

    Is FPR or MERV better?

    Neither rating system is inherently better. MERV is the industry standard developed by ASHRAE and is what most HVAC professionals use. FPR is a simplified version created by Home Depot for easier consumer shopping. They measure the same thing on different scales. If your HVAC technician recommends a specific MERV rating, use that as your guide and convert to FPR or MPR if needed to find the right product.

    Is FPR 7 the same as MERV 11?

    Yes, FPR 7 is approximately equivalent to MERV 11. Both capture pet dander, mold spores, dust mite debris, and other mid-range allergen particles. If your HVAC technician recommended MERV 11 and you are shopping at Home Depot, grab the FPR 7 (Red) filters for the same level of filtration.

    Is MERV 11 too high for residential?

    No, MERV 11 is generally fine for most modern residential HVAC systems. It is the most commonly recommended upgrade from standard MERV 8 filters. However, if your furnace or air handler is more than 15 to 20 years old, check the manual or ask an HVAC technician before upgrading. Older systems may not have enough blower capacity for MERV 11’s additional airflow resistance.

    What MERV rating do HVAC companies recommend?

    Most HVAC companies recommend MERV 8 for standard homes and MERV 11 for homes with pets or allergy sufferers. Some technicians suggest MERV 13 for households with severe asthma or air quality concerns, but only if the system is rated for it. The consensus among HVAC professionals is that MERV 8 to 11 covers the majority of residential needs without risking system damage.

    Can a high MERV filter damage my HVAC system?

    Yes, installing a filter with a higher MERV rating than your system supports can cause problems. The denser filter media increases static pressure, forcing the blower motor to work harder. Over time, this can lead to reduced airflow, longer heating and cooling cycles, higher energy bills, and potentially a cracked heat exchanger or burned-out motor. Always check your system manual or consult an HVAC technician before using filters rated above MERV 11.

    Which air filter rating system is the industry standard?

    MERV (Minimum Efficiency Reporting Value) is the industry standard. It was developed by ASHRAE, the professional organization that sets standards for the HVAC industry. MERV is used by HVAC manufacturers, technicians, and building codes. MPR and FPR are proprietary systems created by specific brands (3M and Home Depot) for consumer marketing purposes.

    How often should I replace my air filter based on the rating?

    Higher rated filters generally need more frequent replacement because they capture more particles and fill up faster. MERV 8 filters typically last 90 days. MERV 11 filters should be replaced every 60 to 90 days. MERV 13 filters may need replacement every 30 to 60 days. Homes with pets, smokers, or nearby construction should replace filters more frequently regardless of rating.

    Are MERV, MPR, and FPR ratings interchangeable?

    They are not interchangeable in the sense that you cannot use them on the same scale directly. MERV 11 does not equal MPR 11. However, you can convert between systems using equivalency charts. MERV 11 is roughly equivalent to MPR 1000 to 1200 and FPR 7. Each system measures filtration performance using different scales and slightly different testing methods, but the approximate equivalencies are close enough for choosing a residential filter.

    Conclusion

    Understanding MERV vs MPR vs FPR comes down to one key fact: all three systems measure the same thing, just on different scales. MERV is the industry standard used by HVAC professionals. MPR is 3M’s proprietary system focused on microparticle capture. FPR is Home Depot’s simplified color-coded scale. Once you know how to convert between them, the labels stop being confusing.

    For most homes, MERV 8 (MPR 300, FPR 4) provides solid filtration without airflow issues. Step up to MERV 11 (MPR 1000, FPR 7) if you have pets or allergies. Reserve MERV 13 (MPR 1900, FPR 9) for severe air quality needs, wildfire smoke, or asthma, and only if your HVAC system is rated for it.

    When in doubt, check your HVAC system manual or call a local technician. A two-minute conversation can save you from an expensive repair bill. The right filter keeps your air clean and your system running efficiently for years to come.

  • Dehumidifier vs Fan 2026: Which Is Better for Moisture Control?

    Dehumidifier vs Fan 2026: Which Is Better for Moisture Control?

    Walk into any damp basement or steamy bathroom and you will face the same question countless homeowners ask: should you reach for a dehumidifier or a fan? The dehumidifier vs fan debate comes up constantly in homeowner forums, and for good reason. Choosing the wrong device wastes money and leaves your space just as humid as before.

    I have spent years testing both devices in real homes, from musty crawl spaces to stuffy apartments. The short answer is straightforward: a dehumidifier removes moisture from the air, while a fan simply moves air around. But knowing when each one makes sense depends on your specific situation, your budget, and what you are actually trying to fix.

    In this guide, I will break down exactly how each device works, compare them side by side with real numbers, and help you figure out which solution fits your home. Whether you are battling basement condensation, bathroom mold, or just trying to make a room more comfortable, you will have a clear answer by the end.

    One important note right up front: if your indoor humidity regularly reads above 60%, a fan alone will not solve the problem. That threshold matters more than most people realize, and I will explain why throughout this article.

    How Dehumidifiers Work

    A dehumidifier is a device designed to pull excess moisture out of the air. It does not just move air around. Instead, it physically extracts water vapor and collects it in a tank or drains it through a hose. The result is a measurable drop in relative humidity.

    Most residential dehumidifiers use a refrigeration process. Here is how it works in plain terms: a fan inside the unit draws warm, humid air from the room. That air passes over cold evaporator coils. When warm air hits cold coils, the moisture condenses into water droplets, just like dew forming on a cold glass on a summer day.

    Those water droplets drip down into a collection bucket or flow out through a drain hose. Meanwhile, the now-drier air passes over warm condenser coils and gets reheated before circulating back into the room. The entire cycle runs continuously until the built-in humidistat detects that your target humidity level has been reached.

    A typical residential dehumidifier can extract anywhere from 20 to 70 pints of water per day, depending on the model and the conditions. I have seen units pull several gallons of water out of a damp basement in a single 24-hour period. It is genuinely surprising how much moisture can be hiding in the air.

    Most modern dehumidifiers include a humidistat that lets you set your desired humidity level. The EPA recommends keeping indoor humidity between 30% and 50%. Once the room hits your target, the compressor shuts off and the unit enters standby mode. This feature saves energy and prevents over-drying the air.

    Types of Dehumidifiers

    Not all dehumidifiers use the same technology. Here are the three main types you will encounter.

    Refrigerant (compressor) dehumidifiers are the most common type for home use. They work exactly as described above, using a compressor and refrigerant coils to condense moisture. They work best in temperatures above 65 degrees Fahrenheit and are rated by how many pints of water they can remove per day. These units handle large spaces and heavy moisture loads effectively.

    Desiccant dehumidifiers use a moisture-absorbing material, usually silica gel or a similar desiccant wheel, instead of refrigerant. Air passes through the desiccant material, which absorbs water vapor directly. These units work well in cooler environments where refrigerant models lose efficiency. They are quieter but generally have lower moisture removal capacity.

    Thermoelectric (Peltier) dehumidifiers use a small electronic component that creates a temperature difference, causing condensation. These are compact, extremely quiet, and best suited for small spaces like closets or small bathrooms. They remove much less moisture than the other two types, typically just a few ounces per day.

    How Fans Work for Moisture Control

    A fan moves air. That is its primary function. It does not remove moisture from the air, it does not condense water, and it does not have a collection tank. What a fan does is create airflow, and that airflow can help with humidity in specific, limited ways.

    When air circulates, it promotes evaporation from surfaces. If you have condensation on windows or damp spots on walls, a fan can help dry those surfaces faster by moving drier air across them. This is why fans are commonly used in bathrooms after showers: they help evaporate standing water and speed up drying.

    Exhaust fans serve a slightly different purpose. A bathroom exhaust fan or kitchen range hood pulls moist air out of the room and vents it outside. This does reduce room humidity, but only because the moist air gets replaced by drier air from elsewhere in the house or from outside. The fan itself is not removing moisture from the air, it is moving humid air out.

    Here is the catch that catches many homeowners off guard: if the air outside your home is more humid than the air inside, running an exhaust fan can actually increase indoor humidity. In hot, humid climates, this is a real problem. I have seen forum posts from homeowners in Florida and the Gulf Coast who made their humidity problems worse by running fans that pulled in humid outdoor air.

    Regular fans (ceiling fans, pedestal fans, box fans) do not remove moisture at all. They create a wind-chill effect on your skin, making you feel cooler, but the actual humidity level in the room stays the same. If your goal is comfort in a moderately humid room, a fan can help you feel better. If your goal is to actually reduce humidity, a fan will not do the job.

    Types of Fans for Indoor Use

    Ceiling fans circulate air throughout a room. They are permanent installations that can run continuously with minimal energy use. Some models have a reverse setting for winter use, but neither direction removes humidity from the air.

    Pedestal and floor fans are portable units you can position wherever you need airflow. They are inexpensive, easy to move, and effective at drying wet surfaces. They do not reduce overall room humidity.

    Exhaust fans are typically installed in bathrooms, kitchens, and laundry rooms. They vent moist air outside through ductwork. For small-scale humidity control in well-sealed rooms, exhaust fans can be effective. They need to be properly vented to the exterior, not into an attic or wall cavity, or you are just moving the moisture problem somewhere else.

    Window fans pull air in or push air out through a window. They can help ventilate a room but are completely dependent on the humidity level of the air they are drawing in. On a dry, breezy day, a window fan can help. On a muggy summer evening, it will make things worse.

    Dehumidifier vs Fan: Key Differences

    This is where the dehumidifier vs fan comparison gets practical. I have tested both devices across dozens of homes, and the differences are significant.

    • Moisture removal: A dehumidifier physically extracts water vapor from the air and collects it. A fan moves air around without removing any moisture. This is the fundamental difference that matters most.
    • Energy consumption: Dehumidifiers use between 300 and 700 watts when running, depending on size and capacity. Most fans use between 50 and 100 watts. A fan costs roughly one-fifth as much to operate per hour.
    • Upfront cost: A quality dehumidifier typically runs between $150 and $350. A good fan costs between $15 and $80. The entry price difference is significant.
    • Effectiveness for high humidity: When indoor humidity exceeds 60%, a dehumidifier is the only reliable solution. Fans cannot lower the absolute moisture content of the air.
    • Noise level: Dehumidifiers produce 45 to 55 decibels due to the compressor and internal fan. Most standalone fans produce 35 to 50 decibels. Desiccant and thermoelectric dehumidifiers are quieter but less powerful.
    • Maintenance: Dehumidifiers require emptying the water tank (unless you use a drain hose) and cleaning the air filter periodically. Fans need occasional blade cleaning and dusting. Dehumidifier maintenance is more hands-on.
    • Heat output: Dehumidifiers generate warmth as a byproduct of the refrigeration cycle. A running dehumidifier can raise room temperature by 2 to 5 degrees Fahrenheit. Fans do not add heat to a room.
    • Space requirements: Dehumidifiers are larger and need floor space plus clearance for airflow. Fans come in many sizes and are generally more flexible in placement.
    • Runtime: Dehumidifiers cycle on and off automatically based on the humidistat setting. Fans typically run continuously until you turn them off manually.

    The bottom line: if your goal is to reduce the actual amount of water in the air, a dehumidifier is the right tool. If your goal is to improve air circulation, dry surface moisture quickly, or feel cooler, a fan works well.

    When to Use Each Solution

    The right choice depends entirely on your situation. Here is room-by-room and situation-by-situation guidance based on what actually works.

    Basements and Crawl Spaces

    Basements are the number one place where the dehumidifier vs fan question comes up, and the answer is almost always a dehumidifier. Basements are below ground level, surrounded by soil that holds moisture. They tend to stay cool, which means warm humid air from upstairs condenses on cold basement walls and floors.

    A fan in a basement just circulates that damp air around. It might help dry condensation on surfaces temporarily, but the overall humidity level stays high. I have seen homeowners run fans in their basements for months with zero improvement in humidity readings.

    A dehumidifier is the correct tool here. Set your target humidity to around 45-50% and let it run. If your basement is large, consider a unit rated for at least 50 pints per day. Use the continuous drain option with a hose so you do not have to empty the bucket daily.

    Crawl spaces are even more prone to moisture problems. Encapsulating the crawl space and running a dehumidifier is the standard professional recommendation. Fans alone will not cut it in a damp crawl space.

    Bathrooms and Laundry Rooms

    Bathrooms produce bursts of high humidity during and after showers. An exhaust fan is the first line of defense here. Running the exhaust fan for 20-30 minutes after a shower removes the moist air directly. This works well if the fan is properly vented to the exterior and moves enough air, at least 50 cubic feet per minute for a standard bathroom.

    If your bathroom has persistent humidity problems between showers, or if you see mold growing on walls or ceilings despite running the exhaust fan, a small dehumidifier can help. A compact unit rated for 20-30 pints per day is usually sufficient for a bathroom.

    Laundry rooms follow similar logic. If your dryer is properly vented outside and you still have humidity issues, a dehumidifier addresses the root cause. A fan just moves the damp air into adjacent rooms.

    Living Rooms and Bedrooms

    In living spaces, the right answer depends on your humidity level. Get a hygrometer, they cost about $10, and check your readings. If humidity is between 30% and 50%, you are in the ideal range. A fan for air circulation is all you need.

    If humidity consistently reads above 55-60% in living areas, you have a whole-house humidity problem. A portable dehumidifier can help individual rooms, but you may want to investigate the root cause: leaks, poor drainage around your foundation, or an undersized air conditioning system.

    For bedrooms specifically, noise matters. If you need a dehumidifier running overnight, look for one rated below 45 decibels or consider a desiccant model, which runs quieter than compressor-based units. Some people find the steady hum of a dehumidifier similar to white noise and actually sleep better with one running.

    Water Damage and Flood Recovery

    After water damage, you need aggressive moisture removal. This is not the time to rely on fans alone. Professionals use commercial dehumidifiers alongside high-powered air movers, and that combination is deliberate.

    For home water damage, a dehumidifier is essential. Extract standing water first, then run a dehumidifier continuously until humidity levels return to normal. Fans can help speed up surface drying by circulating air over wet materials, but they cannot remove the water vapor that evaporates into the air. Without a dehumidifier, that moisture just stays in the room.

    Forum users from r/homeowners consistently report that dehumidifiers made the real difference during flood recovery. Multiple users noted that fans alone failed to prevent mold growth in the days following water intrusion.

    Can You Use a Dehumidifier and Fan Together?

    Yes, and in many situations, using both devices together is the best approach. This is something most comparison articles skip, but experienced homeowners and professionals use this combination regularly.

    Here is why it works: the dehumidifier removes moisture from the air, while the fan distributes that drier air throughout the room. In a large space or a room with poor natural airflow, a dehumidifier sitting in one corner may take much longer to reduce humidity in the far corners. A fan helps circulate the dry air, making the dehumidifier more effective across the entire space.

    The optimal setup is to place the dehumidifier in the area with the highest moisture, then use a fan on low speed to push air toward the dehumidifier. This creates a gentle circulation pattern that brings moist air to the dehumidifier and sends dry air back out across the room.

    I have seen this combination drop basement humidity from 75% to 45% in about half the time it took with the dehumidifier alone. Reddit users on r/HVAC and r/basement report similar results, with multiple threads recommending this exact pairing.

    A few tips for running both together: keep the fan on a low or medium setting so it does not create so much airflow that it pulls moist air from adjacent spaces. Avoid pointing the fan directly at the dehumidifier intake, which can confuse the humidistat sensor. And monitor your energy use, running both devices will increase your electricity bill compared to running just one.

    Cost and Energy Comparison

    Cost is one of the biggest factors in the dehumidifier vs fan decision, and the numbers tell a clear story.

    Upfront cost: A quality residential dehumidifier costs between $150 and $350. A good fan costs between $15 and $80. If you are on a tight budget, a fan is much easier on the wallet up front.

    Monthly energy cost: This is where things get interesting. A typical 50-pint dehumidifier draws about 300-500 watts while running. If it runs 12 hours per day in a humid environment, that translates to roughly $25-50 per month in electricity costs at the national average rate. In extreme humidity conditions, costs can reach $60-80 per month.

    A standard fan draws about 50-100 watts. Running a fan 24 hours per day costs roughly $5-10 per month. The energy difference is significant.

    Annual cost of ownership: Over a year, running a dehumidifier during the humid season (roughly May through September in most of the US) costs about $125-250 in electricity. A fan over the same period costs about $30-60. Add the upfront cost, and your first-year total for a dehumidifier runs $275-600, compared to $45-140 for a fan.

    However, consider what you are getting for that money. A dehumidifier can prevent thousands of dollars in water damage and mold remediation. Mold removal in a single room can cost $500-3,000. Structural damage from prolonged humidity runs even higher. The dehumidifier pays for itself the first time it prevents a mold outbreak.

    Energy Star consideration: Look for Energy Star certified dehumidifiers. They use about 15% less energy than non-certified models, which can save $20-40 per year on electricity. Over the 8-10 year lifespan of a dehumidifier, that adds up.

    Pros and Cons of Each Device

    Here is a quick-reference breakdown to help you weigh the trade-offs.

    Dehumidifier Pros

    • Actually removes moisture from the air, reducing humidity at the source
    • Prevents mold and mildew growth by keeping humidity below 50%
    • Automatically cycles on and off with a built-in humidistat
    • Protects wood furniture, electronics, and building materials from moisture damage
    • Available in sizes for small rooms up to whole-house systems
    • Can drain continuously with a hose, reducing maintenance

    Dehumidifier Cons

    • Higher upfront cost than fans
    • Higher energy consumption, adding $25-80 per month to electric bills
    • Requires regular maintenance, including emptying the water tank and cleaning filters
    • Generates heat as a byproduct, raising room temperature by 2-5 degrees
    • Can be noisy, especially compressor models
    • Heavier and less portable than fans

    Fan Pros

    • Very affordable, most quality fans cost under $50
    • Low energy consumption, about $5-10 per month to run continuously
    • Lightweight and portable, easy to move between rooms
    • Quiet operation on low settings
    • Provides immediate cooling comfort through airflow
    • Helps dry surface moisture and prevents condensation on windows

    Fan Cons

    • Does not remove moisture from the air at all
    • Cannot lower humidity in enclosed or poorly ventilated spaces
    • May pull in humid air from outside or adjacent rooms, making problems worse
    • Must run continuously for any effect, no automatic shutoff
    • Does not address the root cause of humidity problems
    • Not effective for spaces with humidity above 60%

    One common pain point from forums is worth mentioning: dehumidifier water tanks need frequent emptying in humid conditions. Multiple Reddit users report emptying their tanks once or twice daily. If this is a concern, buy a unit with a drain hose connection and run it to a floor drain or sump pump. Problem solved.

    Frequently Asked Questions

    Should I get a dehumidifier or a fan?

    Get a dehumidifier if your indoor humidity reads above 60% or you notice mold, condensation, or musty smells. Get a fan if you want to improve air circulation and comfort in a room with normal humidity levels (30-50%). For persistent moisture problems, a dehumidifier is always the better investment.

    Can a fan replace a dehumidifier?

    No, a fan cannot replace a dehumidifier. A fan moves air around but does not remove moisture from it. A dehumidifier physically extracts water vapor and collects it. If you have a real humidity problem (above 60% relative humidity), only a dehumidifier will solve it. A fan can complement a dehumidifier but cannot do its job.

    What are the downsides of using a dehumidifier?

    The main downsides are higher energy costs ($25-80 per month), the need to empty the water tank regularly, noise from the compressor (45-55 decibels), heat generation that raises room temperature 2-5 degrees, and the higher upfront purchase price compared to fans. Some users also find the maintenance of cleaning filters and draining units inconvenient.

    Should a dehumidifier fan run continuously?

    No, you should not run a dehumidifier continuously. Set the humidistat to your target humidity (around 45-50%) and let the unit cycle on and off automatically. Running it nonstop wastes energy and can over-dry the air, which causes its own problems like dry skin, cracked wood, and static electricity. Most units run 8-12 hours per day during humid conditions.

    Is a fan better than a dehumidifier?

    It depends on your goal. A fan is better for air circulation, cooling comfort, and energy savings. A dehumidifier is better for actually reducing humidity, preventing mold, and protecting your home from moisture damage. They serve different purposes. Neither is universally better, but for humidity problems specifically, the dehumidifier wins.

    What does the fan setting do on a dehumidifier?

    The fan setting on a dehumidifier controls the internal fan that circulates air through the unit. On auto mode, the fan runs only when the compressor is active. On continuous mode, the fan keeps running even when the compressor cycles off. Continuous fan mode helps circulate air and maintain even humidity readings but uses slightly more energy.

    Final Recommendation

    The dehumidifier vs fan question comes down to what you are trying to accomplish. If you have high humidity, mold concerns, condensation problems, or water damage, a dehumidifier is the only device that actually removes moisture from the air. A fan cannot do that, no matter how long you run it.

    If your space has normal humidity levels and you just want better air movement and comfort, a fan is the simpler, cheaper choice. It uses far less energy and requires almost no maintenance.

    For many homeowners, the best approach is using both. A dehumidifier handles the moisture removal while a fan distributes the dry air, speeding up the process and making the whole system more efficient. This combination is what professionals use, and it is what I recommend for basements, crawl spaces, and any room with persistent humidity above 60%.

    Buy a $10 hygrometer first. Measure your humidity. If it reads above 60%, get a dehumidifier. If it reads between 30-50% and you just want better airflow, get a fan. That one measurement will answer the question for you.