
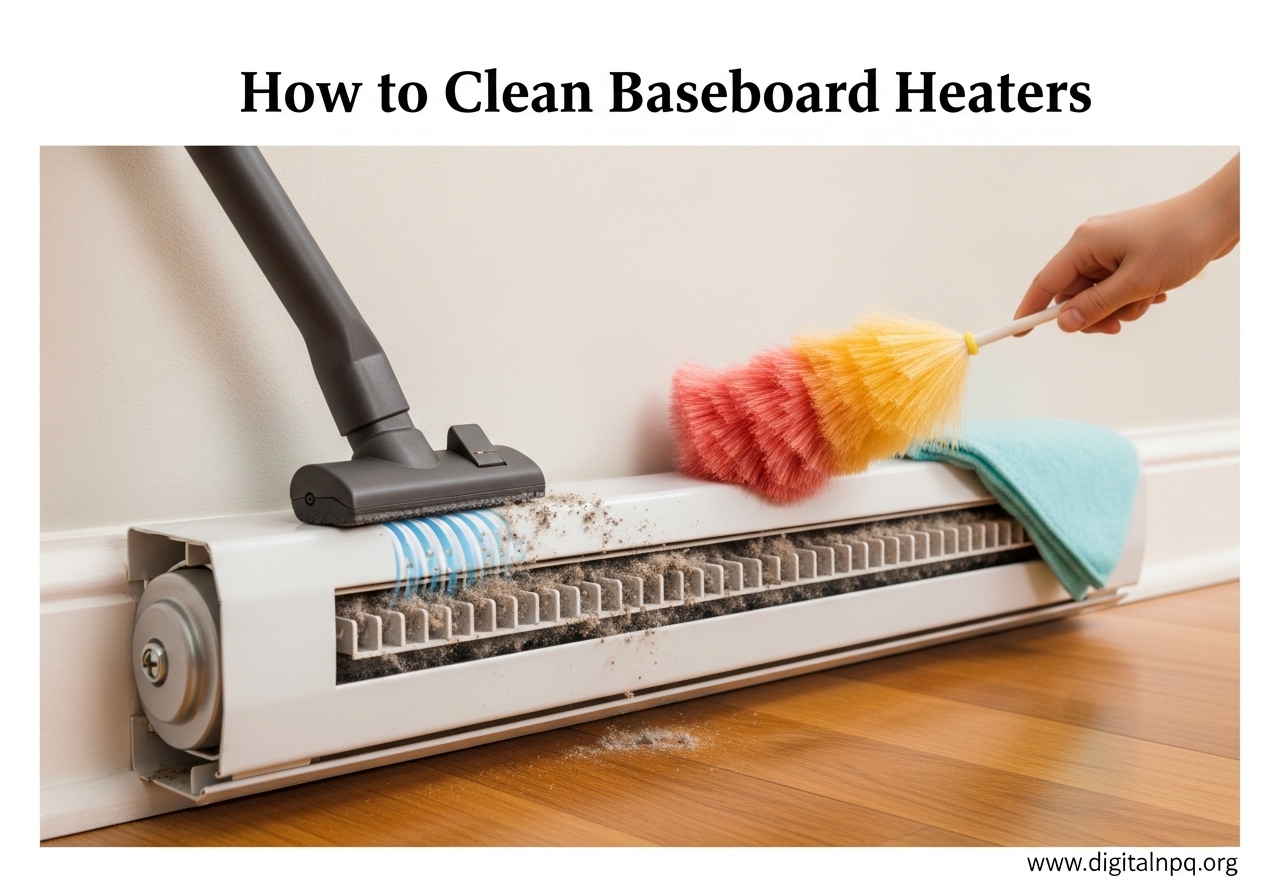
If you have never cleaned your baseboard heaters, you are not alone. Most homeowners skip this task entirely, and I was one of them until I noticed a burning smell every time I turned on the heat during the first cold snap of the year. That smell was years of accumulated dust, pet hair, and debris literally burning off the heating elements. After learning how to clean baseboard heaters properly, the smell disappeared and my heating bills dropped noticeably. This guide covers everything you need to know to tackle this job yourself, from the tools you need to the exact step-by-step process that works for both electric and hydronic units.
Dirty baseboard heaters do more than just smell bad. They can reduce your heating efficiency by up to 20%, aggravate allergies, and circulate dust and pet dander throughout your home every time the heat kicks on. Whether you have electric resistance heaters or hydronic hot water units, the cleaning process is straightforward once you know the steps. I will walk you through the entire process, including some tips I picked up from HVAC professionals and trial-and-error over the past few years.
Why Cleaning Baseboard Heaters Matters
Baseboard heaters work by drawing cool air from floor level, passing it over heated fins or elements, and releasing warm air back into the room through convection. When dust, pet hair, and debris build up on those fins, they block airflow and force the heater to work harder to produce the same amount of warmth. That means higher energy bills and less comfortable rooms.
The buildup happens faster than most people realize. Pet owners in particular will find that pet dander and fur collect in the fins within just a few months. Allergy sufferers often notice a direct correlation between dirty heaters and worsened symptoms. When the heater runs, it circulates all that trapped dust and dander right back into the air you breathe.
There is also the safety angle. A thick layer of debris on heating elements can create an unpleasant burning odor when you first turn on the heat, and in extreme cases, heavy accumulation can pose a fire risk. Regular cleaning keeps your system running safely and efficiently, extends the life of your heating units, and improves the overall indoor air quality in your home.
Tools and Supplies You Will Need
Before you start, gather everything in one place. Having the right tools ready saves time and frustration. Here is what I recommend based on what has worked best for me and what HVAC professionals suggest:
- Vacuum cleaner with brush attachment — This is your primary tool. The soft bristles loosen dust without damaging the delicate aluminum fins. A shop-vac works even better if you have one because the stronger suction pulls debris from deeper between the fins.
- Crepice tool attachment — The narrow vacuum attachment helps reach tight spaces between fins and behind the heater where dust collects heavily.
- Microfiber cloths — Use these for wiping down covers, both inside and out. Microfiber traps dust rather than just pushing it around.
- Mild dish detergent and warm water — For washing covers that have sticky residue or grease buildup. Avoid harsh chemical cleaners.
- Compressed air canister — Optional but helpful for blowing dust out of tight corners and between fins. Use it carefully to avoid blowing dust everywhere.
- Screwdriver — Most baseboard heater covers are held in place by clips or screws. A Phillips or flathead screwdriver is usually all you need.
- Needle-nose pliers — Handy for gently straightening bent fins and removing any stubborn debris stuck between them.
- Fin comb (optional) — A specialized tool for straightening bent aluminum fins. If you do not have one, needle-nose pliers work for minor bends.
- Safety glasses and dust mask — You will be working with accumulated dust and debris. Protect your eyes and lungs, especially if you have allergies.
- Drop cloth or old towels — Place these on the floor beneath the heater to catch falling dust and debris for easier cleanup.
How to Clean Baseboard Heaters: Step-by-Step Guide
This is the complete process I follow every time I clean baseboard heaters. The entire job takes about 30 to 45 minutes per heater if it has been cleaned within the last year. For heaters that have not been cleaned in several years, budget closer to an hour per unit because the buildup will be heavier.
Step 1: Turn Off Power and Let the Heater Cool Completely
Safety comes first. Go to your circuit breaker panel and turn off the power to the baseboard heaters. If your heaters have a dedicated thermostat, turn it to the off position as well. Wait at least 30 minutes for the heating elements to cool down completely. Electric baseboard heaters can reach temperatures hot enough to cause burns, so do not skip this step even if the heater has been off for a short while.
If you have hydronic baseboard heaters, you do not need to worry about electrical burns, but you should still turn off the thermostat so the system does not kick on while you are working. The hot water pipes can also be warm to the touch, so give them time to cool.
Step 2: Remove the Baseboard Heater Covers
Most baseboard heater covers are designed to be removable for cleaning. Look at the top of the cover and you will typically see it is held in place by a series of spring clips or snap-in brackets. To remove the cover, push down gently on the top edge while pulling the bottom edge toward you. The cover should pop free from the clips.
Some models use screws instead of clips. In that case, use your screwdriver to remove the screws along the top and bottom edges. Place the screws in a small container so you do not lose them. Once the fasteners are removed, lift the cover straight up and off the unit.
If the cover feels stuck, do not force it. Older covers can become wedged in place from paint or years of grime. Gently wiggle the cover back and forth while pulling outward until it releases. Set the cover aside on your drop cloth.
Step 3: Vacuum Dust and Loose Debris
With the cover removed, you will see the heating fins and elements. Before doing anything else, use your vacuum with the brush attachment to remove as much loose dust and debris as possible. Start at the top of the fins and work your way down in smooth, even strokes. Let the vacuum do the work — do not press hard against the fins because they bend easily.
Pay special attention to the bottom of the unit where dust collects in thick layers. Use the crevice tool to reach into the corners and along the back wall behind the heater. This is where years of debris tend to accumulate, especially in homes with pets.
If you are using compressed air, now is the time to use it. Blow air between the fins from one side while vacuuming from the other to capture the dislodged dust. This method is particularly effective for heaters that have not been cleaned in a long time.
Step 4: Clean the Fins Thoroughly
After vacuuming the loose debris, inspect the fins closely. You will likely see remaining dust clinging to the metal surfaces. Use a soft brush or a microfiber cloth wrapped around a ruler or paint stick to gently wipe between the fins. Work in the same direction as the fins run to avoid bending them.
For stubborn grime, lightly dampen the cloth with water or a very mild detergent solution. The key word here is lightly. You want the cloth barely damp, not wet. Excess moisture can damage electrical components or cause rust on unprotected metal parts.
While you are cleaning the fins, check for any that are bent or crushed. Bent fins restrict airflow and reduce heating efficiency. Use your needle-nose pliers or a fin comb to gently straighten them back into alignment. Work slowly and carefully because the aluminum is thin and can break if you apply too much force.
Step 5: Wipe Down the Covers Inside and Out
Take the cover you set aside earlier and clean both sides. For light dust, a dry microfiber cloth is sufficient. Wipe the inside surface first since it tends to be the dirtiest, then wipe the outside. Work from one end to the other in a single direction to avoid redistributing dust.
For covers with sticky residue or grease, use warm water with a few drops of mild dish detergent. Dampen a microfiber cloth in the solution, wring it out well, and wipe the cover down. Rinse with a clean damp cloth and dry immediately with a towel. Let the cover air dry completely before reinstalling it to prevent moisture from reaching the heating elements.
This is also a good time to check the cover for damage. If the cover is rusted, dented, or has broken clips, consider replacing it. Replacement covers are available and can give old heaters a fresh look while improving airflow through clean, unobstructed vents.
Step 6: Clean Behind and Around the Heater
With the cover still off and the fins cleaned, take a moment to clean the floor and wall behind the heater. Vacuum the floor area beneath the unit where dust has settled. Wipe the wall behind the heater with a dry cloth to remove any cobwebs or dust that has accumulated there.
This step is easy to skip but it makes a real difference. Dust behind the heater gets pulled into the fins when the heater runs, so cleaning this area helps keep the fins cleaner for longer between deep cleaning sessions.
Step 7: Reassemble and Test
Once everything is clean and dry, reinstall the cover by reversing the removal process. Line up the cover with the clips or screw holes and snap or fasten it back into place. Make sure the cover sits flush and secure with no gaps or loose edges.
Turn the power back on at the circuit breaker and set the thermostat to your preferred temperature. Listen for any unusual sounds and check that the heater warms up normally within 15 to 20 minutes. You should notice that the room reaches your target temperature faster than before, and there should be no burning smell from the freshly cleaned unit.
Electric vs. Hydronic Baseboard Heaters: Cleaning Differences
The basic cleaning process is similar for both types, but there are some important distinctions to keep in mind.
Electric baseboard heaters use resistance coils to generate heat. The coils can get extremely hot, so always confirm the power is off before cleaning. Avoid getting water anywhere near the electrical components. If you use a damp cloth on the fins, make sure it is only barely damp and never drip water onto the coils or wiring. Electric heaters also tend to attract more dust because the heating elements do not have the thermal mass that hydronic pipes do, so the fins may need more frequent attention.
Hydronic baseboard heaters use hot water flowing through pipes to heat the fins. Since there are no exposed electrical coils, you have slightly more flexibility with cleaning methods. A slightly damp cloth is generally safe to use on the fins and pipes. However, be careful around any valves or connections — you do not want to loosen anything or introduce moisture into the system. Hydronic systems also need occasional bleeding to remove air from the pipes, which is a separate maintenance task from cleaning.
Common Cleaning Mistakes to Avoid
After cleaning dozens of baseboard heaters and reading through countless forum posts from homeowners, I have seen the same mistakes come up repeatedly. Here are the ones to watch out for:
- Not turning off the power first. This is the most dangerous mistake. Electric baseboard heaters draw significant current and can cause serious burns or electrical shock if you touch the elements while they are energized. Always flip the breaker.
- Using too much water. Water and electrical components do not mix. Even with hydronic heaters, excess moisture can cause rust or damage surrounding materials. Stick to barely damp cloths.
- Bending the fins. The aluminum fins are delicate. Pressing too hard with a vacuum, brush, or cloth can crush them, which permanently reduces airflow and heating efficiency. Work gently.
- Using harsh chemical cleaners. Abrasive sprays, bleach-based products, and heavy-duty degreasers can damage the finish on covers and corrode the metal fins. Mild dish detergent and water is all you need.
- Rushing through the job. Proper cleaning takes time per unit. Trying to speed through the process usually means leaving dust behind or accidentally bending fins. Budget adequate time, especially for the first cleaning.
- Forgetting to clean behind the heater. The wall and floor behind the unit collect significant dust that gets pulled right back into the fins during operation. Skipping this step means your freshly cleaned heater will get dirty again much faster.
How Often Should You Clean Baseboard Heaters?
The ideal cleaning frequency depends on your household. For most homes, a thorough cleaning once per year is sufficient. The best time to do it is in late summer or early fall before the heating season begins, so you start the cold months with clean, efficient heaters.
Pet owners should plan to clean their baseboard heaters two to three times per year. Pet hair and dander accumulate surprisingly fast inside the fins, and the buildup reduces both efficiency and air quality. If you have multiple pets or long-haired breeds, lean toward three cleanings per year.
Allergy sufferers should clean at least twice per year — once before heating season and once midway through winter. The dust and allergens trapped in the fins get circulated every time the heater runs, which can make symptoms worse even with good air filters in your home.
For homes in particularly dusty environments or older homes with more gaps where outdoor air enters, consider adding a second annual cleaning. And if you have baseboard heaters that have not been cleaned in over five years, expect the first deep cleaning to take extra time and possibly require a second pass to remove all the compacted debris.
One quick tip between deep cleanings: running your vacuum brush attachment along the top vent of the cover once a month takes just a few minutes and helps keep surface dust from working its way inside the unit.
FAQ
What is the best way to clean baseboard heaters?
The best way to clean baseboard heaters is to turn off the power at the circuit breaker, remove the front cover, vacuum loose dust with a brush attachment, wipe the fins with a barely damp microfiber cloth, clean the cover separately with mild soap and water, then reassemble. This method works for both electric and hydronic units and takes about 30 to 45 minutes per heater.
Do you have to clean baseboard heaters?
Yes, you should clean your baseboard heaters regularly. Dirty heaters can lose up to 20% of their heating efficiency, produce a burning smell from accumulated debris, circulate dust and allergens throughout your home, and in extreme cases pose a fire risk. Annual cleaning keeps them running safely and efficiently.
How often should baseboard heaters be bled?
Hydronic baseboard heaters should be bled once per year, typically at the start of the heating season. Bleeding removes trapped air from the pipes that can cause gurgling sounds and reduce heating performance. Electric baseboard heaters do not need bleeding since they do not use water. Bleeding is a separate task from cleaning and involves opening a small valve on each unit with a bleed key or screwdriver.
Can baseboard heat cause allergies?
Yes, dirty baseboard heaters can worsen allergy symptoms. When dust, pet dander, and other allergens accumulate on the heating fins, the convection process circulates those particles back into the air every time the heater runs. Regular cleaning significantly reduces airborne allergens. Allergy sufferers who clean their baseboard heaters report noticeable improvement in symptoms, especially during winter months when heaters run most frequently.
Can I use water to clean my baseboard heaters?
You can use a barely damp cloth to wipe the fins and covers, but never spray water directly onto the unit or use soaking wet cloths. For electric baseboard heaters, excess water near the coils or wiring creates a safety hazard. A lightly dampened microfiber cloth is safe for both electric and hydronic units when used carefully. For the covers, you can wash them separately with mild soap and water as long as they are completely dry before reinstallation.
How do I clean baseboard heater fins that are bent?
Gently straighten bent fins using needle-nose pliers or a fin comb. Grip the bent portion of the fin lightly and slowly bend it back into alignment with the surrounding fins. Work slowly because the aluminum is thin and can tear if you apply too much force. If many fins are crushed over a large area, a fin comb designed for baseboard heaters can straighten multiple fins at once. Always straighten fins when the power is off and the unit is completely cool.
Conclusion
Knowing how to clean baseboard heaters is one of those straightforward home maintenance skills that pays off every single winter. The process is simple: turn off the power, remove the covers, vacuum and wipe the fins, clean the covers, and reassemble. It takes less than an hour per heater, and the results are immediate — better heating performance, lower energy bills, cleaner air, and no more burning smell when the heat turns on.
I recommend tackling this job before each heating season. If you have pets or allergies, plan for two or three cleanings per year. The tools are inexpensive, the steps are easy to follow, and the improvement in comfort and air quality makes the effort well worth it. Your baseboard heaters will thank you, and so will your heating bill.