
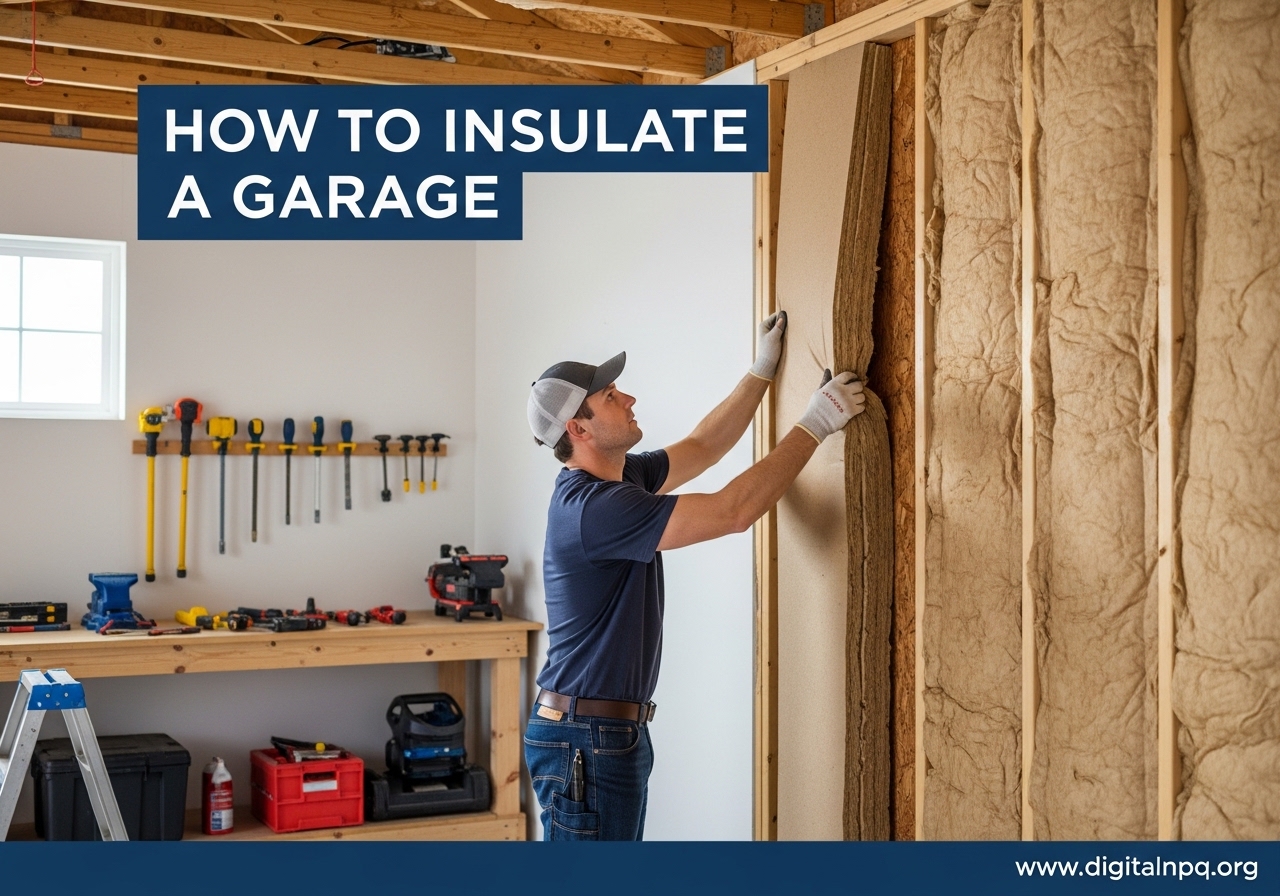
If your garage feels like an oven in summer and a freezer in winter, you are not alone. Learning how to insulate a garage is one of the most practical home improvement projects you can tackle, and it pays off in comfort, energy savings, and property value. I have helped dozens of homeowners transform their garages from unusable iceboxes into comfortable workshops, home gyms, and storage spaces. This guide walks you through every step, from choosing the right insulation materials to installing it on walls, ceilings, and doors.
Whether you have an attached garage that shares a wall with your living room or a detached unit sitting at the edge of your property, the insulation principles are the same. The difference lies in how much R-value you need and where you focus your efforts. We will cover climate-specific recommendations, material comparisons, and the common mistakes that cost homeowners time and money.
By the end of this guide, you will know exactly which insulation type fits your garage, what R-value your climate zone demands, and how to install it step by step. Let us get into it.
Why Insulate Your Garage?
Insulating your garage is not just about comfort. It is a practical decision that affects your entire home. An attached garage with poor insulation acts as a thermal bridge, letting cold air seep into your living spaces during winter and hot air push through during summer. Homeowners in places like Minnesota have reported that insulating their attached garage made a noticeable difference in the rooms directly above and beside it.
The temperature swing data from real homeowners is convincing. One Reddit user measured their uninsulated garage door surface at 140 degrees Fahrenheit on a summer day. After installing reflective insulation panels, that surface temperature dropped to 100 degrees. The air temperature inside the garage went from 120 degrees down to 95 degrees. That is the difference between a space you can actually use and one that feels dangerous.
Here are the main reasons homeowners decide to insulate their garages:
- Energy efficiency: Reduces heat transfer between the garage and adjacent living spaces, lowering heating and cooling bills.
- Temperature control: Keeps the garage usable year-round for workshops, home gyms, or hobbies.
- Vehicle protection: Prevents extreme temperature swings that can damage car batteries, tires, and fluids.
- Sound absorption: Reduces noise from power tools, music, or vehicles entering and leaving the garage.
- Moisture prevention: Limits condensation that leads to rust on tools and mold on stored items.
- Property value: A finished, insulated garage adds usable square footage and appeals to future buyers.
There is a difference between attached and detached garages worth noting. An attached garage shares walls with your home, so insulating it has a direct impact on your indoor climate and energy bills. A detached garage stands alone, so the benefits are primarily about comfort inside the garage itself and protecting whatever you store there. Both benefit from insulation, but the urgency and return on investment are higher for attached garages, especially in extreme climates.
Understanding R-Values for Garage Insulation
R-value is the single most important number in any insulation project. It measures thermal resistance, which is how effectively a material slows down heat flow. The higher the R-value, the better the insulation performs. When you are figuring out how to insulate a garage, you need to match the R-value to your climate zone and the part of the garage you are insulating.
Think of it this way: R-13 insulation resists heat flow about half as well as R-30. If you live in a cold climate and only install R-13 in your ceiling, you are leaving significant energy savings on the table. The Department of Energy publishes climate zone recommendations that serve as your baseline.
Here is a breakdown of recommended R-values based on climate zones:
- Climate Zones 1-3 (Hot – Southern US): Walls R-13 to R-15, Ceiling R-30, Garage Door R-5 to R-8
- Climate Zones 4-5 (Mixed – Central US): Walls R-15 to R-21, Ceiling R-38, Garage Door R-6 to R-10
- Climate Zones 6-7 (Cold – Northern US): Walls R-21 to R-23, Ceiling R-49, Garage Door R-8 to R-12
Your wall framing also dictates what you can install. A standard 2×4 stud wall gives you 3.5 inches of cavity depth, which limits you to about R-13 or R-15 with fiberglass batts. A 2×6 stud wall gives you 5.5 inches of depth, allowing R-19 or R-21. This is one of the most common questions on DIY forums, and the answer is straightforward: measure your stud depth before buying insulation. If you have 2×4 walls and want higher R-values, you can add a layer of rigid foam board over the studs before installing your wall covering.
For ceilings, the target R-value is much higher because heat rises and escapes through the roof. Most climate zones call for R-30 at minimum, and cold climates benefit from R-49 or higher. The ceiling is where you get the biggest return on your insulation investment.
Types of Insulation Materials
Choosing the right insulation material depends on your budget, your garage structure, and whether you want a DIY project or plan to hire a contractor. Here is how the main options compare.
Fiberglass Batts
Fiberglass batts are the most common garage insulation choice for DIYers. They come in pre-cut rolls that fit between standard stud spacing (16 or 24 inches on center). Fiberglass offers an R-value of roughly 3.2 to 4.3 per inch of thickness, so a standard 3.5-inch batt delivers R-13 to R-15.
The advantages are clear: fiberglass batts are affordable, widely available at any home improvement store, and easy to cut with a utility knife. They do not require special equipment to install. The downsides include skin irritation during handling, reduced performance if compressed, and no inherent air sealing. You need to install them carefully to avoid gaps that undermine the whole wall’s performance.
Rigid Foam Board
Rigid foam board insulation comes in three main types: extruded polystyrene (XPS), expanded polystyrene (EPS), and polyisocyanurate (polyiso). XPS delivers about R-5 per inch, EPS about R-3.8 to R-4.4 per inch, and polyiso about R-6 to R-6.5 per inch. Polyiso has the highest R-value per inch but performs poorly in very cold temperatures below 50 degrees Fahrenheit.
Foam board is excellent for garage door insulation and for adding R-value over stud walls. It also works as a continuous insulation layer that eliminates thermal bridging through the studs. The main drawback is cost, which runs higher than fiberglass per square foot. You also need to seal the seams between boards with tape or spray foam to prevent air leaks.
Spray Foam Insulation
Spray foam is the top performer for both insulation and air sealing in one step. Open-cell spray foam offers about R-3.7 per inch and is softer and less expensive. Closed-cell spray foam delivers R-6 to R-7 per inch, adds structural rigidity, and acts as its own vapor barrier. For garage applications, closed-cell is usually the better choice because it handles moisture and temperature extremes better.
The catch is cost. Professional spray foam installation is significantly more expensive than other options. DIY spray foam kits exist, but forum users consistently report that the kits are messy, the coverage is less than advertised, and the results do not match professional application. If you choose spray foam, budget accordingly and consider whether the superior air sealing justifies the cost for your situation.
Mineral Wool (Rock Wool)
Mineral wool batts offer an R-value of about 3.3 per inch, similar to fiberglass, but with distinct advantages. Mineral wool is fire resistant up to 2,000 degrees Fahrenheit, which adds a meaningful safety margin in a garage where flammable materials are stored. It also absorbs sound better than fiberglass, making it a strong choice if you use your garage as a workshop or band practice space.
Mineral wool is denser than fiberglass, which means it holds its shape in stud cavities and does not sag over time. It costs more than fiberglass but less than spray foam. The main downside is that it is heavier and requires more effort to cut precisely.
Blown-In Insulation
Blown-in insulation (cellulose or fiberglass) is the go-to choice for garages with finished walls where you cannot access the stud cavities. Small holes are drilled in the wall, insulation is blown in through a hose, and the holes are patched. It is also common for ceiling and attic applications where there is a large open space above the ceiling drywall.
Blown-in insulation requires renting a blowing machine, which most home improvement stores offer. It works well for retrofit projects but is less practical for new construction or gutted garages where you have full access to the framing. The R-value is similar to fiberglass batts at about 2.2 to 3.7 per inch depending on the material and density.
Quick Material Comparison
- Best budget option: Fiberglass batts
- Best for air sealing: Closed-cell spray foam
- Best for fire resistance: Mineral wool
- Best per-inch R-value: Polyiso rigid foam board (in warm/mixed climates)
- Best for retrofit walls: Blown-in cellulose or fiberglass
- Best for garage doors: Rigid foam board or reflective radiant barrier kits
Tools and Materials Checklist
Before starting any insulation work, gather everything you need. Running to the hardware store mid-project because you forgot a tool wastes time and breaks your momentum. Here is a complete checklist.
Safety Equipment
- N95 or P100 respirator mask (mandatory for fiberglass and mineral wool)
- Safety glasses or goggles
- Long sleeves and work gloves
- Knee pads (you will spend time on the floor)
Cutting and Measuring Tools
- Utility knife with extra blades
- Long straightedge or T-square (for cutting foam board and batts)
- Tape measure
- Pencil or marker
Fastening Tools
- Staple gun with appropriate staples (for faced batt insulation)
- Hammer or nail gun
- Caulk gun
- Drill with driver bits
Materials
- Insulation (batts, foam board, or spray foam kit)
- Vapor barrier sheeting (if required by your climate zone)
- Vapor barrier tape
- Silicone or polyurethane caulk
- Expanding spray foam (for gaps around windows, doors, and rim joists)
- Construction adhesive (for foam board on garage doors)
- Drywall, PVC panels, or other wall covering material
- Weatherstripping for garage door bottom seal
How to Insulate Garage Walls: Step by Step
This is the core section of the project. Wall insulation gives you the biggest improvement in temperature control and energy efficiency for an attached garage. Follow these steps in order and take your time on each one. Rushing leads to gaps, compression, and wasted money.
Steps to insulate garage walls:
- Clear the walls: Remove everything from the garage walls including shelving, hooks, nails, and any existing covering. You need bare studs exposed from floor to ceiling. Disconnect and remove any electrical outlets or switches, labeling the wires so you can reconnect them later.
- Inspect and seal all gaps: Check every stud bay for gaps around pipes, wires, and the rim joist where the wall meets the floor. Fill these gaps with expanding spray foam or caulk. Air sealing before insulating is critical because insulation does not stop air movement, it only slows heat transfer through solid material.
- Install vapor barrier (if needed): In cold climates (zones 5-7), install a 6-mil polyethylene vapor barrier on the warm side of the wall (facing the interior of the garage) before adding insulation. In hot-humid climates (zones 1-3), the vapor barrier goes on the exterior side. In mixed climates (zone 4), check local building codes as requirements vary.
- Measure and cut batt insulation: Measure each stud cavity individually because spacing can vary, especially in older garages. Cut the batt about half an inch wider than the cavity for a snug friction fit. Use a straightedge and utility knife to make clean, straight cuts.
- Press insulation into stud bays: Start at the top of each cavity and work downward. Push the insulation gently into place without compressing it. Compressed fiberglass loses R-value because the air pockets that provide thermal resistance are squeezed out. The batt should fill the cavity from face to face.
- Staple flanges to stud faces: If you are using faced insulation (with a paper or foil facing), staple the flanges to the front face of the studs, not the sides. Overlap the flanges slightly for a continuous barrier. Space staples every 8 to 12 inches along each flange.
- Cut around obstacles: For electrical boxes, split the batt and tuck half behind the box and half in front. For pipes, cut a notch in the batt so it fits around the pipe without leaving a gap. Small gaps around obstacles are a major source of heat loss, so take the time to fit the insulation tightly.
- Install wall covering: Insulation must be covered with a thermal barrier for fire safety. Drywall is the standard choice and provides a clean, paintable surface. PVC panels are an alternative that is moisture resistant, easy to clean, and faster to install. Secure the wall covering with screws to the studs, making sure to hit every stud for a solid installation.
One important detail: if your garage has 2×4 studs and you want more than R-15 in the walls, add a layer of 1-inch rigid foam board over the studs before installing drywall. This breaks the thermal bridge through the studs and adds R-5 to R-6.5 of continuous insulation. It does push the wall surface out slightly, but the performance gain is significant.
For electrical boxes, remember to extend them outward to match the new wall surface depth. Box extenders are cheap and take five minutes to install. Skipping this step leaves exposed wires behind the drywall, which is a fire hazard.
How to Insulate a Garage Ceiling
Ceiling insulation is where you see the biggest temperature improvement, especially in attached garages with living space above. Heat rises, and an uninsulated garage ceiling acts like a giant radiator pushing cold air up into the rooms above in winter and absorbing cool air in summer.
The approach differs depending on whether your garage has an exposed rafter ceiling or a finished ceiling with drywall already in place.
Exposed Rafter Ceiling
If your garage has open rafters with no ceiling material installed, you have the easiest path. Measure the rafter spacing (usually 16 or 24 inches on center) and install batt insulation between the rafters just like you would for walls. For cold climates, aim for R-38 to R-49, which means you may need to use thicker batts (up to 12 inches for R-38 fiberglass) or combine batts with rigid foam board.
If your rafters are not deep enough to hold the full R-value you need, you have two options. First, you can attach rigid foam board to the bottom of the rafters, then install your ceiling material over it. Second, you can fur down the rafters with additional framing to create more depth for thicker batts. The foam board approach is faster and more common.
When working overhead, use a scaffold or platform rather than a ladder. You will be holding heavy insulation above your head, and a ladder does not provide enough stability or workspace. Rent a rolling scaffold for a day if you do not have one.
Finished Ceiling (Retrofit)
If your garage already has drywall on the ceiling, blown-in insulation is your best option. Small holes (about 2 inches) are cut in the drywall between each rafter bay, insulation is blown in through a hose, and the holes are patched and painted over. This process is effective but does require renting a blowing machine.
An alternative for finished ceilings is to add rigid foam board directly over the existing drywall and then install a second layer of drywall over it. This adds continuous insulation without disturbing the existing ceiling. The downside is that you lose an inch or two of ceiling height, which matters if your garage door tracks are close to the ceiling.
Garage Attic Space
If your garage has an attic space above the ceiling, you can insulate the attic floor (which is the garage ceiling from below). Lay unfaced batts or blow in cellulose insulation between the ceiling joists. This is one of the easiest insulation jobs because gravity does the work for you. Just lay the batts in place without compressing them.
Forum users in cold climates emphasize that the garage attic is often overlooked. One homeowner in Minnesota reported that insulating the garage attic above the ceiling dropped the garage temperature swing by 15 degrees compared to just wall insulation alone.
How to Insulate a Garage Door
The garage door is often the weakest thermal link in the building envelope. Most standard garage doors are thin steel or aluminum panels with no insulation value at all. A single-layer metal door has an R-value of essentially zero, meaning it transfers heat almost as freely as if the door were not there.
You have three main approaches for garage door insulation, each with different costs and effectiveness.
Insulation Kits
Purpose-built garage door insulation kits are the easiest option. They typically include pre-cut rigid foam or reflective panels designed to fit into the horizontal channels of standard sectional garage doors. Most kits include enough panels for a standard two-car garage door and come with adhesive or fasteners.
The results from real users are positive. One homeowner reported that NASA TECH reflective panels reduced the door surface temperature from 140 degrees Fahrenheit to 100 degrees on a sunny day, and the interior air temperature dropped from 120 degrees to 95 degrees. Those are real numbers from a real garage, not manufacturer claims.
DIY Foam Board Method
You can also buy rigid foam board (XPS or EPS) and cut it to fit each panel section of your garage door. Measure each panel channel carefully because the dimensions can vary across the door. Use construction adhesive to attach the foam board to the inside of each panel. Seal the edges with foil tape to prevent air infiltration.
This method gives you more control over the R-value because you choose the foam board thickness. A 1.5-inch XPS panel delivers R-7.5, which is a significant upgrade from an uninsulated metal door. The cost is lower than a kit if you already have a utility knife and straightedge.
Reflective Radiant Barrier
Reflective insulation works differently from other types. Instead of slowing conductive heat transfer, it reflects radiant heat away from the surface. This makes it particularly effective at reducing summer heat gain through garage doors that face direct sunlight. It has a lower R-value than foam board, but the radiant barrier effect can drop surface temperatures significantly.
The best approach for most garages is to combine reflective panels with foam board for both radiant heat reflection and conductive resistance. This gives you the best of both worlds.
Critical Warning: Garage Door Weight and Balance
Adding insulation panels to your garage door adds weight. A typical two-car steel garage door weighs 150 to 200 pounds without insulation. Adding foam board or insulation kits adds another 30 to 80 pounds depending on the material. This extra weight affects the torsion springs that counterbalance the door.
After insulating your garage door, check whether the door still opens and closes smoothly and stays in place when partially opened. If the door feels heavy, falls shut, or the opener strains, you need to have the springs adjusted or replaced by a professional. This is not a DIY task. Garage door torsion springs are under extreme tension and have caused serious injuries. Call a garage door technician for spring adjustment.
Air Sealing: The Step Most People Skip
Insulation slows heat transfer, but it does not stop air movement. If your garage has gaps, cracks, and penetrations that let outside air stream in, your insulation is fighting a losing battle. Energy Star recommends air sealing before insulating, yet many DIYers skip this step entirely because it is not as satisfying as pressing fluffy batts into walls.
Here are the most common air leak points in a garage:
- Rim joist: Where the wall framing meets the concrete foundation. This is the biggest single air leak in most garages. Seal it with expanding spray foam.
- Window frames: Gaps between the window frame and rough opening. Seal with caulk on the interior and exterior.
- Garage door frame: The gap between the door frame and the framing. Use expanding foam for large gaps and caulk for small ones.
- Electrical boxes: Every outlet and switch box is a penetration. Use foam gaskets behind the cover plates and seal around the box with caulk.
- Pipe and wire penetrations: Any hole drilled through the framing for plumbing or wiring. Seal with fire-rated caulk or spray foam.
For the garage door itself, install or replace the bottom weatherstrip seal. This rubber strip compresses against the floor when the door closes, blocking air, water, and pests. Most garage doors have a channel that holds a replaceable seal, and new weatherstripping costs very little while making a big difference in drafts.
The rim joist deserves special attention. In a typical garage, the sill plate sits directly on the concrete foundation, and the rim joist sits on top of the sill plate. The joint between the concrete and the wood is almost never airtight. Cut pieces of rigid foam board to fit between each floor joist at the rim joist, press them in place, and seal around the edges with spray foam. This alone can cut drafts by 30 to 50 percent.
Vapor Barriers: When and Where You Need Them
Vapor barriers cause more confusion than almost any other part of garage insulation. Getting them wrong can trap moisture inside your walls, leading to mold, rot, and structural damage. Getting them right keeps your insulation dry and performing as intended.
A vapor barrier is a material (usually 6-mil polyethylene plastic sheeting) that prevents water vapor from moving through walls and ceilings. Water vapor moves from warm areas to cold areas, so the barrier needs to be on the warm side of the wall assembly.
Here is the breakdown by climate:
- Cold climates (zones 5-7): Install the vapor barrier on the interior (warm) side of the wall, between the insulation and the interior wall covering. This prevents warm indoor moisture from entering the wall cavity and condensing on cold exterior surfaces.
- Hot-humid climates (zones 1-3): Install the vapor barrier on the exterior side of the wall. This prevents hot, humid outdoor air from entering the wall and condensing on cooler interior surfaces.
- Mixed climates (zone 4): Requirements vary by local building codes. Some jurisdictions require a vapor barrier, others allow a vapor retarder (less restrictive), and some require nothing at all. Check with your local building department.
The biggest mistake you can make is installing vapor barriers on both sides of the wall. This creates a moisture sandwich. Any water vapor that gets into the wall cavity (and some always does through small gaps) has nowhere to escape. It condenses inside the wall, saturates the insulation, and creates mold. Always allow one side of the wall assembly to be vapor-permeable so the wall can dry out.
If you are using faced insulation (batts with paper or foil facing), the facing counts as a vapor barrier. Do not add a separate polyethylene vapor barrier if you already have faced insulation installed facing the correct direction. That would create a double barrier.
Common Mistakes to Avoid When Insulating a Garage
After reading dozens of forum posts from homeowners who insulated their garages, several mistakes show up repeatedly. Learning from these experiences saves you time and money.
Compressing Insulation to Make It Fit
Fiberglass and mineral wool insulation work by trapping air in tiny pockets. When you compress a 6-inch batt into a 4-inch cavity, you reduce the R-value because those air pockets collapse. A compressed R-19 batt performs closer to R-13. If your cavity is too shallow for the insulation you bought, return it and get the correct thickness. Never force thick insulation into thin spaces.
Skipping the Air Sealing Step
This is the most common mistake and the biggest performance killer. Insulation cannot do its job if air is streaming through gaps around it. One homeowner on a DIY forum reported spending an entire weekend installing wall insulation, only to find the garage was still drafty because he never sealed the rim joist. He had to pull sections of insulation back out to fix the problem. Seal first, insulate second. Always.
Wrong Vapor Barrier Placement
Installing the vapor barrier on the wrong side of the wall traps moisture instead of blocking it. In cold climates, the barrier goes on the interior side. In hot climates, it goes on the exterior side. Getting this backwards means moisture condenses inside the wall cavity where you cannot see it, and by the time you notice the problem, you have mold and rot.
Ignoring the Garage Door Springs
Adding insulation to your garage door changes its weight. Even a 30-pound increase can throw off the spring tension enough to cause problems. The door may not stay open on its own, the opener may struggle, or the door may slam shut unexpectedly. This is a safety hazard. After insulating the door, test the balance by disconnecting the opener and raising the door manually to chest height. It should stay there on its own. If it falls or rises, call a garage door technician for spring adjustment.
Leaving Gaps Around Obstacles
Electrical boxes, pipes, and ductwork create obstacles in stud cavities. It is tempting to cut insulation roughly and move on, but every gap is a thermal bypass that lets air circulate behind the insulation. Take the extra time to split batts around obstacles and tuck pieces tightly into irregular spaces. Small gaps add up fast across an entire wall.
Using Faced Insulation on the Wrong Side
Faced insulation has the vapor barrier built into one side. The facing must always point toward the warm side of the wall (interior in cold climates, exterior in hot climates). Installing it backwards puts the vapor barrier on the wrong side, which can trap moisture inside the wall.
Not Wearing Proper Safety Gear
Fiberglass insulation causes skin irritation, itching, and respiratory discomfort. Mineral wool is slightly better but still requires protection. Always wear a long-sleeved shirt, gloves, safety glasses, and at minimum an N95 respirator. This is not optional. The discomfort of fiberglass particles in your lungs lasts far longer than the few seconds it takes to put on a mask.
FAQ
What is the best way to insulate a garage?
The best way to insulate a garage is to use fiberglass batts or mineral wool in the walls, rigid foam board on the garage door, and blown-in or batt insulation in the ceiling. Start with air sealing all gaps and cracks, then install insulation from top to bottom (ceiling first, then walls, then door). For attached garages in cold climates, aim for R-21 walls, R-38 to R-49 ceiling, and R-8 to R-12 on the garage door.
Should an unheated garage be insulated?
Yes, insulating an unheated garage is still worthwhile. Insulation slows temperature swings, which protects stored items, vehicles, and tools from extreme heat and cold. An insulated unheated garage will stay cooler in summer and warmer in winter compared to an uninsulated one, even without active heating. If the garage is attached to your home, insulating it also reduces heat transfer into adjacent living spaces.
Can you insulate a garage yourself?
Yes, most garage insulation is a manageable DIY project. Fiberglass batts require only a utility knife, staple gun, and basic safety gear. Foam board for the garage door needs a knife and construction adhesive. The main exceptions are spray foam insulation, which requires professional equipment, and garage door spring adjustments after adding insulation weight. If you can handle basic carpentry, you can insulate a garage over a weekend.
Is it a good idea to insulate your garage?
Insulating your garage is a good idea if you use it as a workshop, home gym, or storage space, or if it is attached to your home. Benefits include temperature regulation, reduced energy costs for adjacent rooms, noise reduction, moisture control, and protection for vehicles and tools. The return on investment is highest for attached garages in extreme climates where temperature differences between the garage and living space are significant.
How much does it cost to insulate a garage?
DIY garage insulation costs vary by material and garage size. For a standard two-car garage (about 500 square feet of wall and ceiling area), fiberglass batts are the most affordable option. Rigid foam board and mineral wool cost more per square foot. Spray foam is the most expensive option and typically requires hiring a professional. The total cost depends heavily on your chosen R-value, material type, and whether you hire labor.
What R-value do I need for garage insulation?
R-value requirements depend on your climate zone. For walls: R-13 to R-15 in warm climates (zones 1-3), R-15 to R-21 in mixed climates (zones 4-5), and R-21 to R-23 in cold climates (zones 6-7). For ceilings: R-30 in warm climates, R-38 in mixed climates, and R-49 in cold climates. For garage doors: R-5 to R-8 in warm areas, R-6 to R-10 in mixed areas, and R-8 to R-12 in cold areas. Always check local building codes for specific requirements.
Should I insulate my garage ceiling?
Yes, the ceiling is often more important than the walls because heat rises and escapes through the roof. In attached garages with living space above, ceiling insulation directly affects the comfort and energy efficiency of those rooms. In detached garages, ceiling insulation prevents extreme heat buildup in summer. Aim for R-30 at minimum, and up to R-49 in cold climates.
How long does garage insulation last?
Fiberglass and mineral wool insulation last 80 to 100 years when properly installed and kept dry. Spray foam lasts 80-plus years. Rigid foam board has a similar lifespan. The main factors that reduce insulation lifespan are moisture exposure, pest damage, and physical compression. If your insulation gets wet from a leak or condensation, it needs to be replaced because wet insulation loses R-value and can grow mold.
Conclusion
Learning how to insulate a garage is one of those home improvement skills that pays for itself over and over. You start with air sealing every gap and crack, move through wall insulation with properly fitted batts or foam board, tackle the ceiling for maximum temperature control, and finish with garage door insulation to close the biggest thermal weak spot. Each step builds on the last, and together they transform a drafty, uncomfortable space into somewhere you actually want to spend time.
Start by assessing your garage: measure your stud depth, check your climate zone, and calculate how much material you need. Pick up your insulation, grab the tools from the checklist above, and set aside a weekend. The work is straightforward, the materials are affordable, and the results are immediate. You will feel the difference the first morning you walk into your garage and it does not feel like stepping into a meat locker or a sauna.