
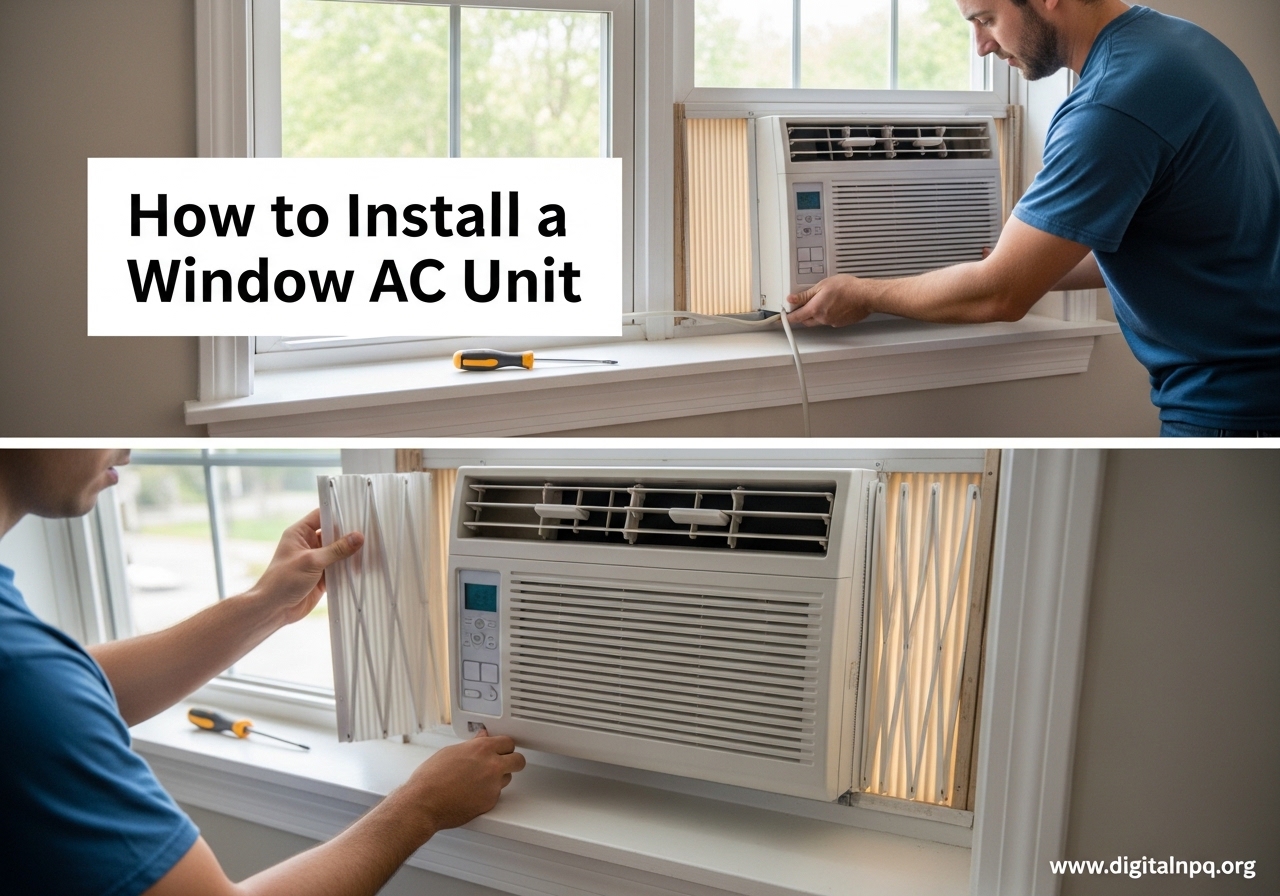
If you are staring at a boxed window air conditioner wondering whether you can handle the installation yourself, the short answer is yes. Most homeowners and renters can complete a window AC installation in about 30 to 60 minutes with basic hand tools. I have installed over a dozen window AC units in apartments, older homes, and modern builds, and the process follows the same general steps regardless of the space.
The most important thing is matching your unit to your window type and having a second person to help lift heavier models. If you are still shopping for a unit, check out our window air conditioner recommendations to find one that fits your room size and window dimensions. In this guide, I will walk you through every step of how to install a window AC unit, including special situations like sliding windows, vinyl frames, and rental-friendly setups where drilling is not an option.
How to Install a Window AC Unit: The Complete Process
Installing a window air conditioner comes down to seven core steps: prepare the window, attach the mounting rail to the unit, install the support bracket, lift the unit into place, extend the side panels, seal the gaps, and secure everything with hardware. Most new units ship with an installation kit that includes the bracket, accordion panels, screws, and foam stripping. You just need a few basic tools and about an hour of focused effort.
The process is slightly different depending on whether you have a double-hung window, a sliding window, or a casement window. I will cover the standard double-hung installation first since it accounts for roughly 80% of residential setups, then address the special cases separately.
Tools and Materials You Will Need
Before you start unboxing anything, gather your tools. Having everything ready saves time and prevents mid-project trips to the hardware store.
Here is what you need for a standard installation:
- Phillips and flathead screwdrivers – for the bracket screws and L-brackets
- Power drill – optional but makes pilot holes much easier, especially in wood frames
- Level (9-inch or larger) – to check that the unit tilts slightly backward for drainage
- Measuring tape – to confirm the window opening matches your AC unit dimensions
- Pencil – for marking bracket and screw positions
- Foam weather stripping – most kits include this, but extra is always useful
- Support bracket – typically included with the unit, or purchase a universal bracket separately
You may also want a few optional items depending on your situation. A safety bracket or chain is smart for heavy units and required by building codes in some cities. A piece of plywood cut to your sill dimensions helps level out uneven or rotted window sills in older homes. If you are renting and cannot drill, pick up some heavy-duty mounting tape or command strips rated for outdoor use.
How to Prepare Your Window for AC Installation
Window preparation is the step most people rush through, and it causes the majority of installation problems. Take ten minutes to do this right and the rest of the process goes smoothly.
Measure the Window Opening
Open your window and measure the width of the opening at the narrowest point. Compare this to the width specifications on your AC unit box. The unit should be 2 to 4 inches narrower than the minimum window width so the accordion panels can extend properly. Also measure the window sill depth from the inside edge to the outside stop. Most units need at least a 2-inch deep sill for stable placement.
Clean and Inspect the Window
Wipe down the window sill, the inside of the frame, and the sash (the part of the window that moves up and down). Dirt and debris prevent foam seals from adhering properly. Check wood frames for rot or soft spots by pressing firmly with your screwdriver. If the wood crumbles, you need to reinforce the sill with a support board before installing the unit.
Remove the Window Screen
Most window screens pop out from the inside by pressing the spring clips at the top or bottom and pushing the screen out. Set the screen aside somewhere safe. You will not need it while the AC is installed. If your screen does not come out easily, check for small tabs on the sides that need to be squeezed simultaneously.
Check Your Window Type
The standard installation steps below assume a double-hung window, which is the most common type in homes and apartments. If you have sliding windows that move horizontally, casement windows that crank outward, or vinyl window frames, skip ahead to the Special Situations section for modifications. Knowing your window type before you start prevents frustration halfway through the job.
How to Install a Window AC Unit Step by Step
This is the main event. Follow these seven steps in order and you will have a secure, well-sealed installation that cools your room efficiently and drains properly.
Step 1: Attach the Top Mounting Rail
Most window AC units come with a metal or plastic mounting rail that screws into the top edge of the unit. Line it up with the pre-drilled holes on the top of the chassis and secure it with the provided screws. The rail should sit flush against the unit with no gaps. This rail is what the window sash will rest against when closed, so it needs to be firmly attached.
Some models have the rail pre-installed. If yours does, skip this step and move on.
Step 2: Install the Support Bracket
The support bracket is the L-shaped piece that sits on the window sill and extends outward to hold the weight of the unit. Position it on the sill so the inner edge sits flush with the inside of the frame. Most brackets have adjustable legs that you extend to contact the exterior wall below the window.
Use your level across the bracket to check that it tilts slightly downward toward the outside. This slight backward tilt is critical because it allows condensation to drain outside instead of pooling inside your room. Aim for about a quarter-inch drop from front to back. Secure the bracket to the sill using the provided screws, drilling pilot holes first if you are working with wood.
Step 3: Lift the AC Unit Into Place
This is where you need a helper. Even “lightweight” window AC units weigh 40 to 80 pounds, and you are lifting them at an awkward angle above waist height. One person should hold the window open while the other slides the bottom of the unit onto the support bracket.
Slide the unit outward until the bottom edge rests on the bracket and the top mounting rail contacts the window sash. The unit should feel stable on the bracket before you let go. Lower the window sash down behind the top rail so it rests on the mounting rail. The sash holds the top of the unit in place while the bracket supports the bottom.
Step 4: Extend and Secure the Accordion Panels
Window AC units use expandable accordion-style panels to fill the gap between the unit and the window frame on each side. Slide each panel outward until it contacts the window frame. Most panels have small screws or clips that attach them to the unit chassis. Secure them according to the instructions in your manual.
The panels should extend evenly on both sides. If one side extends much farther than the other, your unit is not centered in the window. Shift it left or right on the bracket until both panels extend equally. This ensures a balanced installation and better seal coverage.
Step 5: Seal All Gaps with Foam Weather Stripping
Gaps between the unit, panels, and window frame let hot air in and cold air out. They also invite insects and rain. Press self-adhesive foam weather stripping (included in most kits) along every seam where the panels meet the window frame, where the top rail meets the sash, and along the bottom of the accordion panels.
For larger gaps wider than a quarter inch, layer two strips of foam or fill the space with a piece of rigid insulation board cut to size. Pay special attention to the gap between the two window sashes where they meet when the window is closed. This is the most commonly missed sealing point and a major source of air leaks.
Step 6: Secure the Unit with L-Brackets or Screws
Most installation kits include small L-shaped brackets that screw into the top of the lower window sash and overlap onto the upper sash. These prevent someone from opening the window from outside and they add a layer of security. Screw one bracket on each side of the sash.
If your kit does not include L-brackets, drive a screw through the top of the lower sash into the upper sash at a slight downward angle. This locks the window in the closed position. For units over 50 pounds, I also recommend adding a safety bracket or chain that connects the unit to the exterior wall. Some city building codes specifically require this, so check your local regulations.
Step 7: Test the Unit and Verify Drainage
Plug the unit into a grounded outlet. Avoid using extension cords with window AC units because they can overheat. If your outlet is too far away, hire an electrician to install a closer outlet rather than risking an electrical fire.
Turn the unit on and let it run for five minutes. Check the area around the unit for air leaks by slowly moving your hand along the seams. You should feel cold air inside and no air movement at the sealed gaps. Go outside (if accessible) and check that the unit tilts slightly backward so condensation drips away from your wall. If water pools under the unit inside your room, the tilt angle needs adjustment.
Special Situations: Different Window Types
Not every window is a standard double-hung. Here is how to adapt the installation process for other common window types.
Sliding Windows (Horizontal)
Sliding windows that move left to right require a different approach. You need a window AC unit designed for horizontal installation, or you can build a plywood frame to hold a standard unit vertically. The better option is buying a casement or slider AC unit specifically made for this window type.
The installation process is the same concept applied sideways. The support bracket attaches to the bottom track, the unit slides in horizontally, and the side panels extend vertically to fill the gaps. Some kits include a special vertical bracket for this orientation. Make sure the drain holes in the unit still face outward after installation, as tilting the unit incorrectly in a horizontal position can cause drainage problems.
Vinyl Window Frames
Vinyl windows present a challenge because most manufacturers recommend against drilling into vinyl frames. The vinyl can crack, and drilling may void the window warranty. Instead, use a no-drill support bracket that clamps onto the window sill and supports the unit from below. Several companies make universal brackets with adjustable clamps that work on vinyl sills.
For the L-brackets that normally screw into the sash, substitute heavy-duty exterior mounting tape rated for at least 50 pounds. Apply the tape to the bracket and press firmly against the vinyl sash. This holds the window closed and prevents movement without penetrating the vinyl.
Old Houses with Uneven Sills
If you live in an older home with warped, sloped, or damaged window sills, the support bracket will not sit level. Cut a piece of plywood to the dimensions of your sill and place it between the bracket and the sill to create a flat, level surface. Use shims under the plywood to correct any slope. The plywood also distributes the weight of the unit across a wider area, which is helpful if the sill has soft spots.
Many homeowners on DIY forums recommend this approach, and it works well for sills that have settled unevenly over decades. Just make sure the combined height of the plywood and bracket still allows the window to close against the mounting rail.
Rental-Friendly Installation (No Drilling)
If you rent your apartment and cannot drill into the window frame, you still have solid options. Use a universal no-drill support bracket that sits on the sill and extends outward. Secure the window sash closed with a tension rod or wooden dowel cut to fit between the sash and the top of the frame, rather than using L-brackets with screws.
Heavy-duty exterior mounting tape can hold foam stripping and smaller brackets in place. Check with your landlord before installing a window AC unit, as some leases require approval. Most landlords are fine with it as long as you are not making permanent modifications to the property.
Safety Tips and Common Mistakes to Avoid
Window AC units are heavy appliances sitting several feet off the ground. Taking safety seriously protects you, your property, and anyone walking below your window.
Always Use a Support Bracket
I never install a window AC unit without a support bracket, regardless of what the manual says about the unit being light enough to rest on the sill alone. The bracket distributes weight to the exterior wall and provides a stable platform. Without it, the entire weight of the unit sits on the window sill, which can crack or bow over time. Units heavier than 50 pounds absolutely require a bracket, and many manufacturers void the warranty if you skip it.
Consider a Safety Chain for Upper Floors
If you live on the second floor or higher, attach a safety chain or cable from the unit to the exterior wall. Several cities have building codes that mandate this for window AC units above the ground floor. The chain prevents the unit from falling out of the window if the bracket fails or the unit shifts. A simple masonry bolt into the exterior wall with a steel cable looped through the unit handle is all it takes.
Do Not Block the Drain Holes
Every window AC unit has small drain holes at the bottom rear that let condensation flow outside. If these holes get blocked by debris, weather stripping, or the bracket, water backs up inside the unit and drips onto your floor. Check the drain holes after installation by pouring a small amount of water into the drain pan inside the unit. It should flow freely to the outside.
Use a Dedicated Circuit for Large Units
Window AC units rated above 10,000 BTU typically draw enough power to warrant a dedicated electrical circuit. Plugging a large unit into a shared circuit with other appliances can trip the breaker or, worse, overheat the wiring. If your lights flicker when the compressor kicks on, move the unit to a different outlet or have an electrician add a dedicated circuit.
Common Mistakes I See Often
The most frequent mistake is not tilting the unit backward. Without that slight rearward tilt, water pools inside and drips on your floor instead of draining outside. The second most common error is leaving gaps unsealed around the accordion panels and sash. Even small gaps significantly reduce cooling efficiency. The third mistake is installing on a damaged sill without reinforcing it first, which can lead to the unit becoming unstable over time.
How to Maintain Your Window AC Unit
Proper maintenance keeps your window air conditioner running efficiently and extends its lifespan. Most maintenance tasks take just a few minutes each month.
Monthly Filter Cleaning
The air filter behind the front grille catches dust and debris. A clogged filter forces the compressor to work harder, raises your electric bill, and reduces cooling power. Pop the front grille off (it usually snaps off without tools), remove the filter, and rinse it under running water. Let it dry completely before reinstalling. If the filter is torn or excessively dirty after cleaning, replace it. Replacement filters are inexpensive and available at most hardware stores.
Check the Seals Each Season
Before you turn the unit on for the first cooling season each year, inspect all the foam weather stripping and seals. Foam degrades over time from sun exposure and temperature changes. Replace any strips that have compressed, cracked, or lost their adhesive. Fresh seals make a noticeable difference in cooling efficiency.
End-of-Season Removal and Storage
If you live in a region with freezing winters, remove the unit before the first frost. Leaving a window AC in place through winter creates drafts, risks ice damage to the unit, and blocks natural light during the darkest months of the year. To remove the unit, reverse the installation steps: unplug, remove L-brackets, pull foam stripping, collapse accordion panels, lift the unit out with a helper, and store it upright in a dry location. Cover the unit with a plastic bag or storage cover to keep dust out.
If removing the unit is not practical, buy an insulated window AC cover that fits over the exterior of the unit. These covers block cold air from entering through the unit and protect it from winter weather. They cost around $15 to $25 and pay for themselves in reduced heating costs within one season.
FAQ
Can I install a window AC unit myself?
Yes, most window AC units can be installed by one or two people without professional help. The process takes about 30 to 60 minutes and requires only basic hand tools like a screwdriver, level, and measuring tape. Most units ship with a complete installation kit including the bracket, screws, accordion panels, and foam stripping. Having a second person to help lift the unit into place is strongly recommended for units over 40 pounds.
What holds a window AC unit in place?
A window AC unit is held in place by three main components: the support bracket underneath that rests on the sill and extends to the exterior wall, the closed window sash that presses down against the top mounting rail, and the L-brackets or screws that lock the sashes together. The accordion side panels also help stabilize the unit laterally. For heavy units or upper-floor installations, a safety chain bolted to the exterior wall provides an additional layer of security.
How are window AC units attached?
Window AC units attach to the window frame using a combination of hardware. The support bracket screws into the window sill (or clamps on for vinyl windows). The top mounting rail on the unit sits behind the lower window sash. L-shaped brackets screw into the top of the lower sash and overlap onto the upper sash to prevent the window from opening. Accordion panels extend from the unit to the window frame on each side, and foam weather stripping seals all gaps.
How to install a window AC unit without drilling?
To install a window AC unit without drilling, use a universal no-drill support bracket that clamps onto the window sill instead of screwing in. Secure the window sash in the closed position using a tension rod or wooden dowel between the sash and the top of the frame. Use heavy-duty exterior mounting tape to attach foam stripping and any small brackets. This approach works well for renters who cannot modify window frames. Always check with your landlord before installing a window AC unit.
How long does it take to install a window AC unit?
A standard window AC unit installation takes about 30 to 60 minutes from unboxing to testing. The first installation may take closer to an hour as you familiarize yourself with the parts and steps. Subsequent installations on the same window typically take 20 to 30 minutes since the bracket positioning and measurements are already established. Having all your tools gathered before you start saves significant time.
Can a window AC unit fall out of the window?
Yes, a window AC unit can fall out if it is not properly secured. This is a real safety concern, especially for upper-floor installations. Units fall when the support bracket is missing or incorrectly installed, the window sash is not locked in place, or the sill is damaged and cannot support the weight. Always use the support bracket, secure the window with L-brackets, and consider adding a safety chain for installations above the ground floor. Check your local building codes, as some cities require safety chains for window AC units on upper floors.
Conclusion
Learning how to install a window AC unit is one of those practical skills that pays off every summer. The process is straightforward: prepare the window, mount the bracket, place the unit, seal the gaps, and secure it all with hardware. Whether you have standard double-hung windows, sliding windows, or vinyl frames that cannot be drilled, the principles stay the same.
The two things I always emphasize are using a support bracket (no exceptions) and having a helper for lifting. Those two steps prevent the most common problems I see, from units that sit crooked to ones that fall because they were never properly supported. If you are still choosing a unit for your space, our window air conditioner recommendations can help you find the right size and BTU rating for your room. Stay cool this summer.