
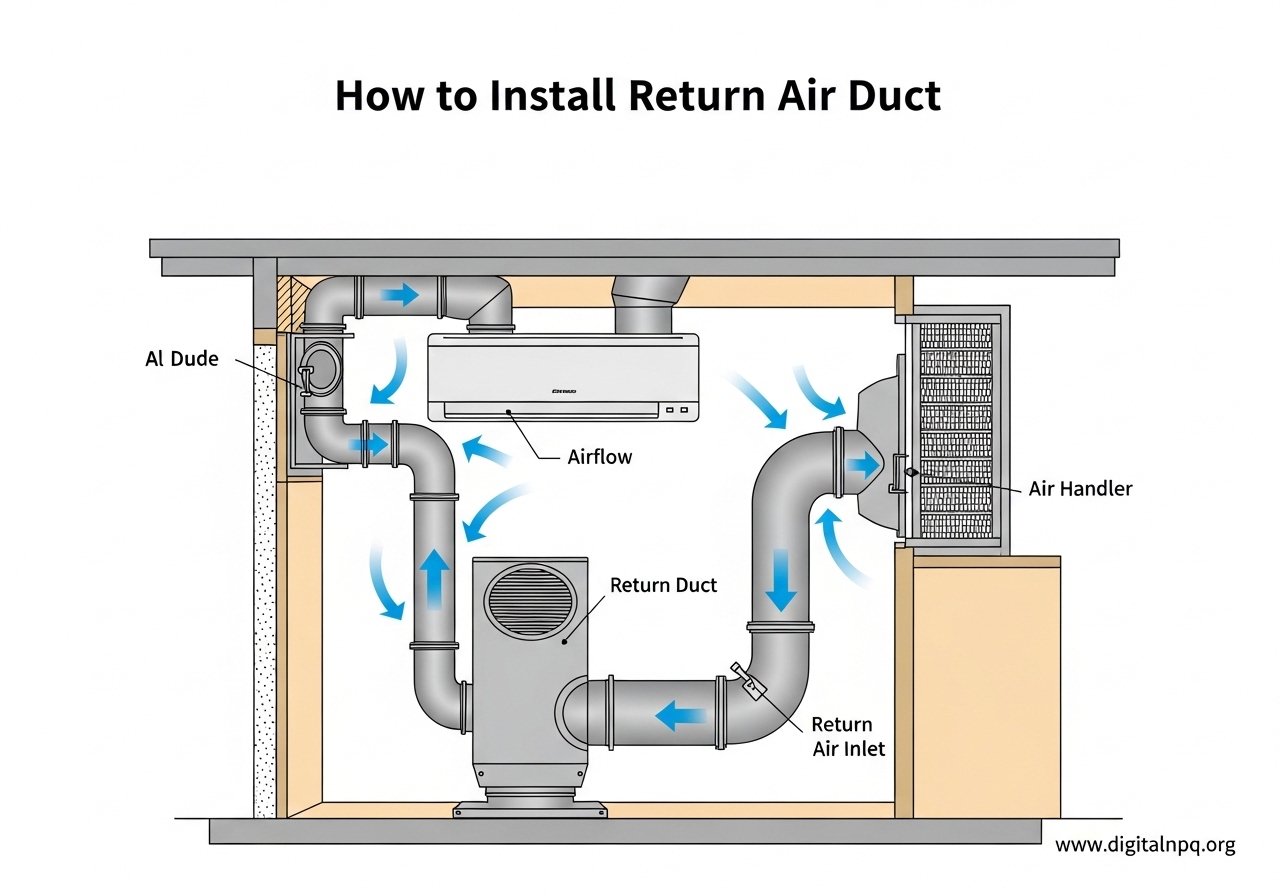
If some rooms in your house feel stuffy, uneven in temperature, or just never seem to get comfortable no matter how you set the thermostat, the problem might not be your HVAC unit at all. It could be your return air duct system. Learning how to install return air duct properly can solve airflow problems, lower your energy bills, and make every room in your home comfortable year-round.
A return air duct pulls stale air from your living spaces back to the furnace or air handler so it can be filtered, heated or cooled, and redistributed through the supply ducts. Without enough return airflow, your HVAC system works harder than it should, and certain rooms end up with poor air circulation. Most homes have a single central return vent in a hallway, but bedrooms, basements, and additions often need their own returns to maintain balanced airflow.
I have helped several homeowners add return ducts to solve closed-door comfort issues, and the improvement is immediate once the system is balanced correctly. This guide walks you through the full process, from planning the route to testing the final installation, so you can tackle this project with confidence.
Supply vs Return Ducts: What is the Difference?
Before you start cutting holes in walls, it helps to understand how the two types of ducts work together. Your HVAC system has a supply side and a return side, and both need to be properly sized and balanced for the system to work efficiently.
Supply ducts carry conditioned air, whether heated or cooled, from the furnace or air handler out to the rooms through registers and vents. You can usually feel air blowing from these vents when the system is running. Return ducts do the opposite job: they pull air from the rooms back to the HVAC unit through larger grilles, often located in hallways or on walls near the floor.
Think of it like a circle. The supply side pushes air out, and the return side pulls it back in. If the return side is undersized or missing in certain rooms, that circle gets broken. The air has nowhere to go, pressure builds up, and your system struggles. A well-designed return air duct installation ensures the total return airflow matches or slightly exceeds the supply airflow for balanced operation.
One common misconception is that return ducts only carry “cold” air. In reality, they carry whatever air is in the room, whether that is warm air in winter or cool air in summer. That air gets pulled back to the system, reconditioned, and sent out again through the supply side.
Signs You Need an Additional Return Air Duct
Not every home needs extra return ducts, but many do, especially older homes that were built with a single central return. Here are the most common signs that adding a return air vent could help your situation.
Uneven temperatures between rooms. If one bedroom is always warmer or cooler than the rest of the house, poor return airflow is often the culprit. Without a return path, air from the supply vent pressurizes the room and prevents new conditioned air from entering effectively.
Doors that are hard to open or close when the HVAC runs. This happens because air from supply registers builds pressure in a room with no return vent. The pressure pushes against the door, making it difficult to move. You might also notice whistling sounds around the door frame as air tries to escape through gaps.
High static pressure readings. If an HVAC technician has told you that your system has high static pressure, undersized or insufficient return ductwork is a likely cause. High static pressure forces the blower motor to work harder, which shortens its lifespan and reduces overall efficiency.
Your HVAC system runs constantly. When return airflow is restricted, the system cannot pull enough air back to reach the target temperature. The thermostat never gets satisfied, and the unit keeps running, driving up energy bills and wearing out components faster.
Dusty rooms or poor indoor air quality. Return ducts pull air through the filter. Without a return in a particular room, dust and allergens tend to accumulate because the air is not being cycled back through the filtration system.
Tools and Materials You Will Need
Having everything ready before you start saves time and reduces frustration. Here is a complete checklist of what you need for a typical return air duct installation.
Tools
- Tape measure and pencil for marking cuts
- Stud finder to locate wall framing and avoid wiring
- Drywall saw or reciprocating saw for cutting vent openings
- Tin snips, both left and right hand, for cutting sheet metal
- Drill with sheet metal screws and driver bits
- Level for aligning the vent grille
- Utility knife for trimming insulation and duct board
- Hammer and framing nails if you need to modify joists or studs
- Flashlight or headlamp for working in tight spaces
Materials
- Return air vent grille sized to match your duct opening, commonly 12×12, 14×14, or 20×20 inches
- Sheet metal ductwork or flexible duct line sized appropriately for your system
- Takeoff collar or starting collar to connect new duct to the existing return plenum
- Metal foil tape or duct mastic for sealing all joints
- Zip ties or metal band clamps for securing flexible duct
- Duct board or thermo-pan for framing the return box in wall cavities
- Wood framing material if building a custom return box
- Safety glasses, work gloves, and a dust mask
Safety Precautions Before You Start
Working with ductwork involves cutting metal, navigating tight spaces, and interacting with your HVAC system. Follow these safety steps to protect yourself and your home.
Shut off the HVAC system. Turn the thermostat off and flip the breaker for the furnace or air handler. You do not want the blower kicking on while you are cutting into ductwork. Lock out the breaker if others are in the house.
Wear protective gear at all times. Sheet metal edges are extremely sharp and can cause serious cuts. Wear heavy work gloves, safety glasses, and a dust mask, especially when working in older ductwork that may contain accumulated debris.
Check for wiring and plumbing before cutting. Use a stud finder with electrical detection before cutting into any wall, ceiling, or floor. You do not want to nick a wire or pipe. If you are unsure what is behind a surface, cut a small inspection hole first.
Follow local building codes and the 2-foot rule. Most building codes require that return air ducts and openings be located at least 2 feet from the furnace or combustion appliance in the same room. This prevents the return from pulling combustion gases back into the system. Check your local code requirements, as they vary by jurisdiction. If your project involves gas appliances, consider hiring a licensed professional to verify compliance.
Avoid return ducts in garages or mechanical rooms with combustion equipment. Drawing air from these spaces can introduce carbon monoxide and other hazardous fumes into your living areas. Always locate return vents in conditioned living spaces.
Step 1: Plan the Return Air Duct Route and Location
Planning is the most important step in any return air duct installation. A poorly planned route leads to restricted airflow, difficult installations, and potentially having to redo work. Take your time here and the rest of the project goes much smoother.
Calculate the correct duct size. HVAC professionals use a simple rule of thumb: you need a minimum of 150 square inches of return duct opening per ton of air conditioning. A standard 3-ton system, which covers most average homes, requires at least 450 square inches of total return opening. That could be a single 20-by-24-inch grille or multiple smaller grilles that add up to the same area. If you are adding a secondary return rather than replacing the main one, size it to handle the specific room or zone it serves.
Choose the best location for the vent grille. For wall installations, pick an interior wall if possible to avoid insulation and exterior weather barriers. The vent should be near the floor for heating-dominant climates or near the ceiling for cooling-dominant climates. For homes with both heating and cooling needs, a wall placement at mid-height is a good compromise. In basements, floor-level returns in the joist bay are common and straightforward to install.
Map the route from the vent location back to the main return trunk or plenum. The shortest, straightest path gives the best airflow. Avoid sharp turns and long horizontal runs where possible. If you need to route through joist bays, plan to use the space between the ceiling joists in a basement or between floor joists on an upper level. Flexible duct can navigate around obstacles but should be kept as short as possible because the ridged interior creates more air resistance than smooth sheet metal.
Identify the tie-in point on the existing system. Look for a convenient spot on the main return trunk line where you can install a takeoff collar. This is usually a rectangular or round fitting that you cut into the existing duct, creating a branch connection for your new return line. The takeoff should be accessible and positioned so the new duct can connect without sharp bends.
Take measurements of every segment along the route and make a materials list based on those measurements. It is better to have a little extra duct and fittings than to come up short halfway through the job.
Step 2: Cut the Vent Opening
With your plan in place, the first physical step is creating the opening where the return air grille will sit. The method differs slightly depending on whether you are working with drywall, plaster, or a floor installation.
For wall installations in drywall: Use your stud finder to confirm the bay between two studs is clear of wires and pipes. Mark the outline of the vent opening on the wall using the grille as a template. Most return grilles have a lip that covers the rough opening, so the hole should be about three-quarters of an inch smaller than the grille dimensions on each side. Drill a pilot hole in each corner, then use a drywall saw to cut along the outline. Pull out the drywall piece and clean up any loose insulation inside the wall bay.
For ceiling installations: The process is similar, but you are working between ceiling joists. Mark the opening, cut carefully, and be aware that ceiling cavities often contain more wiring and ductwork than walls. If you are installing in a finished ceiling, have someone help hold the cut section so it does not fall into the cavity above.
For floor installations: Floor return openings require cutting through the subfloor between joists. Use a reciprocating saw for this step and be mindful of finished flooring above. Floor returns are common in basement installations where you can work from below and simply cut the subfloor to create the opening.
Once the opening is cut, frame the inside of the cavity with duct board or sheet metal to create a smooth return path. This boxed-in section guides air from the grille into the duct line. Seal all interior seams with foil tape to prevent air leaks at this critical junction.
Step 3: Install and Connect the Return Air Ductwork
This is where the pieces come together. You are connecting the new vent opening to the existing HVAC system through the duct route you planned in Step 1. The exact method depends on whether you are using rigid sheet metal, flexible duct, or a combination of both.
Install the takeoff collar on the main return trunk. Cut a hole in the side of the existing return duct that matches the size of your takeoff collar. Slide the collar into the opening and secure it with sheet metal screws spaced about two inches apart around the perimeter. Seal the joint between the collar and the trunk line with foil tape or duct mastic. This connection needs to be airtight; any leaks here reduce the performance of your entire return system.
Run the duct from the takeoff to the vent opening. For rigid ductwork, measure and cut each section to fit, connecting pieces with S-cleats and drive clips or screws. For flexible duct, stretch it taut along the route without compressing it, and secure both ends with zip ties or band clamps. Support the duct every four to five feet with strapping or wire to prevent sagging. Sagging flexible duct creates dips where air velocity drops and resistance increases.
Connect the duct to the vent box. The duct should terminate at the framed opening you created in Step 2. Use a boot or transition fitting to connect the round or rectangular duct to the wall cavity box. Secure with screws and seal all joints with foil tape. If you are using a canned return, which is a pre-built metal box with flanges, simply attach it to the framing and connect the duct to the built-in collar.
Can you add a return vent to existing ductwork? Yes, and this is exactly how most retrofit installations work. You tap into the main return trunk line using a takeoff collar, run a new branch duct to the new vent location, and seal everything tight. The key is making sure the existing trunk line and blower can handle the additional airflow. If your system is already struggling, adding more return capacity without addressing the underlying issue can actually make things worse. In most cases though, adding a properly sized return branch improves system performance.
Before sealing everything up, do a visual inspection of every joint and connection. Look for gaps, loose connections, or areas where tape has not fully adhered. Fix any issues now because they are much harder to access once everything is closed up.
Step 4: Test and Seal the System
With all connections made, it is time to verify that your return air duct installation is working correctly before you finish the job.
Turn the HVAC system back on. Flip the breaker and set the thermostat to run the fan or activate the heating or cooling mode. You should immediately feel air being pulled into the new return grille if you hold your hand in front of it. A piece of tissue paper held near the grille should be drawn toward it, confirming negative pressure and proper airflow direction.
Check every joint for air leaks. Run your hand along the duct connections and feel for air escaping. You can also use a smoke pencil or hold a piece of tissue near each joint. If you find leaks, apply additional foil tape or duct mastic to seal them. Small leaks may not seem like a big deal, but they add up and reduce the efficiency of your return system over time.
Measure static pressure if possible. If you have access to a manometer, measure the static pressure in the return duct near the furnace. This tells you whether the system is operating within the manufacturer’s recommended range. Most residential systems should have a total external static pressure below 0.5 inches of water column. If the pressure is higher after your installation, the new duct may be undersized or there could be a restriction somewhere in the route.
Install the return air grille cover. Once you have verified everything is working, attach the grille to the wall, ceiling, or floor using screws. The grille should sit flush against the surface with no gaps around the edges. Some homeowners prefer stamped-face grilles for a cleaner look, while others use egg-crate style grilles for maximum airflow. Both work fine as long as the free area of the grille matches your duct sizing.
Common Mistakes to Avoid When You Install a Return Air Duct
Even experienced DIYers run into trouble with ductwork. Here are the mistakes I see most often and how to avoid them.
Undersizing the return duct. This is the number one error. A 4-inch or 6-inch duct might seem easy to run, but it cannot carry enough air for most residential needs. Use the 150-square-inches-per-ton rule to calculate the correct size. An undersized return creates resistance, raises static pressure, and reduces overall system efficiency.
Too many bends in the duct route. Every 90-degree turn adds the equivalent of several feet of straight duct in terms of air resistance. Plan the route to minimize turns, and use gradual curves instead of sharp angles whenever possible.
Leaving joints unsealed. Duct tape, the gray cloth kind, is not acceptable for sealing ductwork. It dries out and fails within a year or two. Use foil tape or duct mastic for all seams and connections. These products last for decades and maintain an airtight seal.
Crushing or kinking flexible duct. Flexible duct needs to be fully extended and supported. A compressed or sagging section acts like a restriction in the line. Pull the duct taut, secure it with supports every four to five feet, and avoid tight bends that flatten the duct interior.
Forgetting to account for the panned return area. If you are using the space between joists or studs as part of the return path, that cavity needs to be sealed on all sides. Gaps between the panning material and the framing cause air to leak into wall cavities and floor spaces instead of traveling back to the furnace.
When to Call a Professional HVAC Contractor
DIY return duct installation is manageable for many homeowners, but some situations call for professional help. If your project involves modifying the main plenum, resizing the trunk line, or working around gas appliances, hire a licensed HVAC contractor. Any installation that requires a building permit or inspection should also go through a professional to ensure code compliance.
Additionally, if you notice persistent airflow problems after installation, have a professional measure static pressure and evaluate the overall system balance. Sometimes what seems like a simple return issue points to a larger problem with the HVAC unit itself. A professional can diagnose the root cause and recommend the right fix.
FAQ
What are the rules for return air ducts?
Return air ducts must follow local building codes, but general rules include: provide at least 150 square inches of return opening per ton of HVAC capacity, keep return openings at least 2 feet from combustion appliances, locate returns in conditioned living spaces only, and ensure the total return airflow matches or exceeds the supply airflow for proper system balance. All duct joints must be sealed with foil tape or duct mastic, and the system should maintain static pressure below 0.5 inches of water column.
Can I add a return vent to existing ductwork?
Yes, you can add a return vent to existing ductwork by installing a takeoff collar on the main return trunk line and running a new branch duct to the desired vent location. This is one of the most common retrofit HVAC projects. The key considerations are making sure the existing system has enough blower capacity for the additional airflow, sizing the new duct correctly using the 150-square-inches-per-ton rule, and sealing all connections airtight with foil tape or duct mastic.
What is the 2 foot rule for ducts?
The 2-foot rule for ducts states that return air openings and ducts must be located at least 2 feet away from the furnace or any combustion appliance in the same room. This prevents the return air system from pulling combustion gases, such as carbon monoxide, back into the living spaces through the HVAC system. This rule is part of most residential building codes and applies to both new installations and retrofits.
How much does it cost to install a return duct?
Professional return duct installation typically ranges from several hundred to a couple thousand dollars depending on the complexity of the route, the type of ductwork needed, and local labor rates. A simple wall return with easy access to the main trunk line is on the lower end, while installations requiring attic or crawlspace routing, custom framing, or multiple branch runs cost more. A DIY installation using materials from a home improvement store can significantly reduce that cost, though you should budget for tools and materials plus a professional consultation if you are unsure about any step.
Conclusion
Adding a return air duct to your HVAC system is one of the most impactful home improvement projects you can take on for comfort and efficiency. Whether you are solving a stuffy bedroom, balancing temperatures across floors, or simply upgrading an older system with inadequate return capacity, the process follows the same four core steps: plan the route, cut the vent opening, install the ductwork, and test the results.
Remember to size your duct correctly using the 150-square-inches-per-ton guideline, seal every joint with foil tape or mastic, and follow the 2-foot rule for safety near combustion appliances. If the project involves gas appliances, major plenum modifications, or anything that makes you uncertain, there is no shame in calling a professional. The goal is a safe, efficient, and comfortable home, and getting the return air duct installation right the first time is the best way to achieve that.