Category: Guides

  • How to Clean a Vicks Humidifier (August 2026) Step by Step Guide

    How to Clean a Vicks Humidifier (August 2026) Step by Step Guide

    Cleaning your Vicks humidifier every week is the single most important thing you can do to keep it running well and the air in your home safe to breathe. I have been using Vicks humidifiers for over five years across multiple models, and I learned the hard way that skipping even one weekly cleaning can lead to stubborn mineral scale, musty odors, and bacteria growth that is tough to reverse. If you want to know how to clean a Vicks humidifier the right way, this guide walks you through every step with exact measurements, safety warnings, and model-specific tips that most manuals gloss over.

    We will cover two cleaning processes: descaling with white vinegar to dissolve mineral deposits, and disinfecting with a bleach solution to kill mold and bacteria. I will also share model-specific instructions for warm mist, cool mist, ultrasonic, and vaporizer units, plus troubleshooting tips for the most common problems I see people run into on forums.

    Why You Need to Clean Your Vicks Humidifier Regularly

    A dirty humidifier does not just perform poorly. It can actually make the air in your room worse. When mineral deposits, mold, and bacteria build up inside the tank and internal components, the humidifier disperses those contaminants into the air you breathe. This is especially concerning for households with children, elderly family members, or anyone with allergies or respiratory issues.

    Hard water accelerates mineral buildup on heating elements and nebulizers, which reduces mist output and can eventually stop your humidifier from working entirely. I have seen neglected Vicks warm mist units where the heating element became so encrusted with scale that it simply stopped producing steam.

    The good news is that a consistent weekly cleaning routine takes about 20 to 30 minutes and prevents all of these issues. Regular cleaning also extends the life of your humidifier significantly. Many users on the BuyItForLife subreddit report their Vicks humidifiers lasting 5 to 10 years with proper maintenance.

    Supplies You Will Need

    Before you start, gather everything so you are not hunting for supplies mid-cleaning. Here is what I keep on hand for weekly Vicks humidifier maintenance:

    • White distilled vinegar – for descaling and mineral deposit removal
    • Unscented household bleach – for disinfection (1/2 teaspoon per 1/2 gallon water)
    • Hydrogen peroxide (3%) – alternative disinfectant if you prefer not to use bleach
    • Soft-bristled brush or old toothbrush – for scrubbing deposits without scratching
    • Cotton swabs – for cleaning hard-to-reach areas like mist nozzles
    • Toothpick – for clearing clogged vaporizer steam outlets
    • Protective gloves – especially when handling bleach
    • Clean, soft cloth – for wiping exterior surfaces
    • Fresh water – preferably distilled or filtered to reduce future buildup

    I store these in a small caddy near my cleaning supplies so weekly maintenance takes almost no setup time. If you have hard water in your area, consider keeping an extra bottle of vinegar on hand because you will use it more frequently.

    Safety Precautions Before You Start

    Safety comes first with any humidifier cleaning. These are non-negotiable steps I follow every single time:

    Always unplug the humidifier before cleaning. Never clean a unit that is plugged in or has been recently running. The heating element in warm mist models gets extremely hot and can cause burns.

    Never mix vinegar and bleach. Combining these two chemicals creates toxic chlorine gas. Always complete the descaling step with vinegar first, rinse thoroughly, then proceed to disinfection with bleach as a completely separate step.

    Wear protective gloves when handling bleach solution. Even at the low concentration used for humidifier cleaning, prolonged skin contact can cause irritation.

    Work in a well-ventilated area. Open a window or run a fan when using bleach, especially in small bathrooms or laundry rooms where fumes can accumulate.

    How to Clean a Vicks Humidifier (Step-by-Step Weekly Method)

    The weekly cleaning process has two parts: scale removal and disinfection. You should do both every week for the best results. The entire process takes about 30 minutes of active work plus soaking time.

    Here is the complete weekly cleaning routine that works for most Vicks humidifier models:

    Step 1: Disassemble the Humidifier

    Unplug the unit and carefully take it apart. Remove the water tank, mist chimney or mist outlet, medicine cup if your model has one, and any removable internal parts. For cool mist models, remove the wicking filter and set it aside. Do not wash the filter with vinegar or bleach. Instead, rinse it under cool water or replace it if it appears discolored or has an odor.

    Take a moment to inspect all parts for visible mold, mineral deposits, or discoloration. This tells you which areas need extra attention during cleaning.

    Step 2: Scale Removal with White Vinegar

    Scale removal is the first and arguably most important step in how to clean a Vicks humidifier. Mineral deposits from hard water accumulate on the heating element (warm mist models), the nebulizer (ultrasonic models), and inside the water tank over time. White distilled vinegar dissolves these deposits effectively.

    For the water tank and removable parts: Fill the tank partially with undiluted white vinegar. Swirl it around to coat all interior surfaces, then let it sit for at least 20 minutes. For heavier buildup, extend the soak to 30 minutes or even overnight.

    For the heating element (warm mist models only): Pour undiluted vinegar into the heating chamber until the element is fully submerged. Let it soak for 20 to 30 minutes. Use a soft-bristled brush to gently scrub away loosened deposits. Never use abrasive pads or sharp metal tools that could damage the coating on the heating element.

    For the nebulizer (ultrasonic models): Place a few drops of vinegar directly on the nebulizer disc and let it sit for 5 minutes. Gently wipe with a cotton swab. Avoid applying pressure that could crack the disc.

    After soaking, dump the vinegar and scrub any remaining deposits with a soft brush. Use cotton swabs for tight spaces like the mist nozzle and float paddle area. A toothpick works well for clearing clogged steam outlets on vaporizer models.

    Step 3: Rinse Thoroughly After Descaling

    Rinse every vinegar-treated part under running water until you can no longer smell vinegar. This is critical because any residual vinegar will mix with the bleach in the next step. I typically rinse each part two or three times to be safe.

    Fill the tank with clean water, swirl, and dump. Repeat until the water runs clear and odor-free.

    Step 4: Disinfecting Your Humidifier with Bleach Solution

    Disinfection kills mold, mildew, and bacteria that vinegar alone cannot eliminate. This step is essential if you notice any musty smell, visible mold spots, or if the humidifier has sat unused for more than a week.

    Mix the bleach solution: Combine 1/2 teaspoon of unscented household bleach with 1/2 gallon of cool water. This specific ratio comes directly from the official Vicks cleaning instructions and is safe for all their humidifier models.

    Disinfect the tank: Pour the bleach solution into the water tank. Swirl it to coat all interior surfaces, making sure the solution reaches every corner. Let it sit for exactly 20 minutes.

    For the base: Pour the remaining bleach solution into the humidifier base, ensuring all water-contact surfaces are covered. Let it stand for 20 minutes as well.

    Do not use bleach on the wicking filter in cool mist models. The filter will degrade and need replacement sooner.

    Step 5: Final Rinse and Reassembly

    This is where patience pays off. Rinse every part that touched the bleach solution under running water at least two or three times. Any residual bleach smell will dissipate, but you want to be thorough. I fill the tank with water, shake it, dump it, and repeat until I cannot detect any bleach odor.

    Wipe down the exterior of the humidifier with a damp, soft cloth. Let all parts air dry completely before reassembling. Reassemble the unit and fill the tank with fresh, cool water. Run the humidifier for a few minutes in a well-ventilated area to flush out any remaining traces of cleaning solution.

    Model-Specific Cleaning Instructions

    Different Vicks humidifier models have slightly different components that require specific attention. I have used several models over the years and these are the quirks worth knowing about.

    Vicks Warm Mist Humidifiers (VWM845, V750 Series)

    Warm mist models have a heating element that boils water to produce steam. This element is the most common spot for mineral buildup because the boiling process concentrates minerals. After weekly descaling with vinegar, check the heating element by touch. If it still feels rough or has visible white crust, soak it again for another 20 minutes.

    The mist chimney on warm mist units can also accumulate scale. Remove it and soak it in vinegar alongside the tank. Use a bottle brush to scrub the inside of the chimney if needed.

    Vicks Cool Mist Humidifiers (V4600, VUL545 Series)

    Cool mist models use a wicking filter and fan system. The wicking filter is the main component to watch. It cannot be washed with vinegar or bleach. Instead, rinse it under cool water weekly and flip it over to extend its life. Replace the filter every 30 to 60 days depending on water hardness and usage.

    The water tray and base of cool mist models tend to collect sediment and mildew. Remove the tray and soak it in vinegar, then use a soft brush to scrub the tray and the area around the float paddle.

    Vicks Ultrasonic Humidifiers

    Ultrasonic models use a small ceramic or metal disc called a nebulizer to create mist. This disc is delicate and prone to mineral buildup that reduces mist output. Clean the nebulizer gently with a cotton swab dipped in vinegar. Never scrub it with a brush or apply heavy pressure.

    Some ultrasonic models also have a vapoPad door for scent pads. Wipe this area with a damp cloth and check for any residue buildup around the door seal.

    Vicks Steam Vaporizers (V150, V188 Series)

    Vaporizers are among the easiest Vicks models to clean because they have fewer parts. The main concern is mineral buildup around the steam outlets. Soak the unit in vinegar as described above and use a toothpick to clear any clogged holes in the steam outlet.

    The medicine cup on vaporizers should be washed with warm soapy water after each use, especially if you use Vicks VapoSteam or similar products.

    Deep Cleaning a Neglected Vicks Humidifier

    If your Vicks humidifier has been sitting unused for months or has not been cleaned regularly, the standard weekly method might not be enough. I have rescued two neglected units using this deep cleaning approach.

    Overnight vinegar soak: For heavy mineral encrustation on the heating element, fill the heating chamber with undiluted white vinegar and let it soak overnight (8 to 12 hours). This gives the acetic acid time to break down thick, hardened scale that a 20-minute soak will not touch.

    Aggressive scrubbing: After the overnight soak, use a soft-bristled toothbrush to scrub the loosened deposits. Work in small circles and reapply vinegar as needed. For particularly stubborn spots, make a paste of baking soda and vinegar and apply it directly to the deposit before scrubbing.

    Repeated disinfection: For units with visible mold or a strong musty smell, you may need to run the bleach disinfection step twice. Follow the same 1/2 teaspoon bleach per 1/2 gallon water ratio and 20-minute soak time, but repeat the entire process after the first round.

    Know when to replace: If the heating element is pitted, rusted, or the mineral buildup has not improved after overnight soaking and scrubbing, it is time to replace the unit. A severely degraded heating element will not heat efficiently and can be a safety concern. Similarly, if the water tank has mold in areas you cannot reach even with a bottle brush, replacement is the safer option.

    How to Clean a Vicks Humidifier Without Vinegar

    Some people cannot tolerate the smell of vinegar or prefer not to use it. I get it. The smell can linger, especially in small spaces. Here are three effective alternatives:

    Hydrogen peroxide (3%): Pour undiluted 3% hydrogen peroxide into the tank and let it sit for 30 minutes. It breaks down mineral deposits and kills bacteria without the strong smell of vinegar. Rinse thoroughly afterward.

    Citric acid solution: Dissolve 1 tablespoon of citric acid powder in 1/2 gallon of warm water. Pour into the tank and soak for 20 to 30 minutes. Citric acid is excellent for dissolving mineral scale and is odorless. You can find it at most grocery stores or online.

    Dish soap and warm water: For light weekly maintenance, a solution of mild dish soap and warm water works for warm steam vaporizers and general tank cleaning. It will not dissolve heavy mineral deposits, but it handles slime, grime, and light buildup well.

    Note that hydrogen peroxide and citric acid are good for descaling but you should still use a bleach solution for disinfection if mold or bacteria is a concern. If you want to avoid bleach entirely, hydrogen peroxide serves as a reasonable (though slightly less potent) disinfectant at full 3% concentration with a 30-minute soak.

    Troubleshooting Common Vicks Humidifier Cleaning Problems

    Even with regular cleaning, you might run into persistent issues. These are the problems I see most often in forums and how to address them.

    My Humidifier Still Smells Musty After Cleaning

    A lingering musty smell usually means mold or bacteria is hiding in an area you missed. Check these spots: the underside of the tank cap, the water tank handle cavity, the seam where the tank meets the base, and any rubber gaskets or seals. Soak these parts in bleach solution for an additional 20 minutes. Run the unit for 10 minutes with fresh water to flush remaining odors.

    If the smell persists after a second thorough cleaning, the mold may have penetrated plastic that cannot be fully cleaned. In that case, replacing the water tank or the entire unit is the safest choice.

    Mineral Buildup Keeps Coming Back Quickly

    If you live in an area with hard water, mineral deposits will return faster. Switch to distilled or filtered water in your humidifier to dramatically reduce buildup. Distilled water costs a bit more but saves significant cleaning time and extends the life of your humidifier.

    Reduced Mist Output After Cleaning

    If your humidifier produces less mist after cleaning, check for residual vinegar or bleach that was not fully rinsed. Also verify that the nebulizer (ultrasonic models) or heating element (warm mist models) is completely free of deposits. A partially clogged nebulizer disc or scaled heating element will reduce output significantly.

    Heating Element Not Working After Scale Removal

    This is a frustrating one. If you scrubbed the heating element too aggressively with an abrasive tool, the protective coating may be damaged. In some cases, the element can still function but will accumulate scale faster. If the element does not heat at all after cleaning, it likely needs replacement. Contact Vicks customer support or check if your model has a replaceable heating element assembly.

    Storage Preparation Tips

    When the dry season ends and you put your humidifier away for the summer, a proper storage cleaning prevents nasty surprises when you pull it out next winter. None of the top competitors cover this, but it makes a real difference.

    Clean the unit using both the descaling and disinfection methods described above. Then let every part dry completely for 24 to 48 hours before storage. Store the humidifier in its original box or a sealed plastic bin in a dry location. Leave the water tank cap loosely attached so air can circulate and prevent mold growth.

    When you take the humidifier out of storage next season, run a quick vinegar rinse and bleach disinfection before first use. Dust and residual moisture can create a perfect environment for mold during months of storage.

    FAQ

    How often should you clean your Vicks humidifier?

    You should clean your Vicks humidifier once a week using both the descaling (vinegar) and disinfection (bleach) processes. If you use hard water, you may need to descale more frequently to prevent mineral buildup on the heating element or nebulizer.

    Can I run vinegar through my Vicks humidifier?

    No, you should not run vinegar through the humidifier while it is operating. The recommended method is to fill the tank or heating chamber with undiluted vinegar and let it soak for 20 minutes with the unit unplugged. Running vinegar through a powered unit can damage internal components and is not recommended by Vicks.

    How do I get rid of mineral buildup in my Vicks humidifier?

    Soak the affected parts in undiluted white vinegar for at least 20 minutes. For heavy mineral buildup, extend the soak to overnight. After soaking, scrub loosened deposits with a soft-bristled brush. Use cotton swabs for tight areas and a toothpick for clogged steam outlets. Rinse thoroughly with clean water.

    What is the best way to clean a Vicks humidifier?

    The best method is a two-step weekly process: first, soak removable parts and the heating chamber in undiluted white vinegar for 20 minutes to dissolve mineral scale. Second, disinfect with a solution of 1/2 teaspoon bleach per 1/2 gallon water for 20 minutes. Rinse all parts thoroughly between and after each step. Never mix vinegar and bleach.

    How do I get the mold smell out of my Vicks humidifier?

    First, clean the unit with the standard vinegar descaling method. Then disinfect with bleach solution (1/2 teaspoon per 1/2 gallon water) for 20 minutes, making sure the solution reaches all interior surfaces including under the tank cap and inside the handle cavity. Rinse thoroughly. If the smell persists after a second cleaning, the mold may have penetrated the plastic and replacement is recommended.

    Can I still use my humidifier if it has mold?

    No, you should not use a humidifier with visible mold. Running a moldy humidifier disperses mold spores into the air, which can cause respiratory issues, allergic reactions, and worsen asthma symptoms. Clean the unit thoroughly with the bleach disinfection method before using it again. If mold has penetrated hard-to-reach areas that cannot be fully cleaned, replace the unit.

    How do I clean my Vicks humidifier without vinegar?

    You can use 3% hydrogen peroxide as a substitute for vinegar. Pour it undiluted into the tank and soak for 30 minutes. Citric acid dissolved in warm water (1 tablespoon per 1/2 gallon) also works for descaling. For light cleaning, mild dish soap and warm water works on vaporizers and tanks. You should still use bleach for disinfection unless you use hydrogen peroxide at full strength for 30 minutes.

    What is the easiest way to clean a humidifier?

    The easiest approach is prevention: use distilled water to minimize mineral buildup and empty the tank daily. For the quickest weekly clean, pour undiluted vinegar into the tank, swirl to coat all surfaces, and let sit for 20 minutes while you do something else. Rinse, then do a quick bleach soak for another 20 minutes. The actual hands-on scrubbing time is only about 5 to 10 minutes.

    Conclusion

    Learning how to clean a Vicks humidifier properly is not complicated once you establish a routine. The two-step weekly process of descaling with vinegar and disinfecting with bleach solution takes about 30 minutes of hands-on time and prevents the vast majority of problems people experience.

    The key habits that make the biggest difference are cleaning weekly without fail, using distilled water if you have hard water in your area, emptying the tank between uses, and letting the unit dry completely before storage. If you follow the steps in this guide, your Vicks humidifier will produce clean, healthy mist for years to come.

    Start with the weekly routine, adjust for your specific model, and do not wait until you see mold or smell musty odors. Consistent maintenance is always easier than deep cleaning a neglected unit.

  • Do I Need a Humidifier 2026: Complete Guide to Indoor Humidity

    Do I Need a Humidifier 2026: Complete Guide to Indoor Humidity

    Wondering “Do I need a humidifier?” is one of those questions that seems simple until you start researching it. I spent weeks digging through medical studies, forum discussions, and HVAC professional advice to figure out the real answer. The short version: if your indoor humidity drops below 30%, a humidifier can make a noticeable difference in your comfort, health, and even the condition of your home. But it is not a must-have for everyone, and using one incorrectly can actually create new problems.

    In this guide, I will walk you through the exact signs that tell you whether a humidifier is worth it for your situation. We will cover the ideal humidity range, the specific health and home symptoms that point to low humidity, and honest information about the risks and maintenance involved. By the end, you will have a clear answer to whether you need a humidifier in 2026.

    Quick Answer: Do I Need a Humidifier?

    You need a humidifier if your indoor relative humidity falls below 30%, which is most common during winter months or in arid climates. Here is a quick checklist to help you decide:

    Health Symptoms: You wake up with a dry throat, your skin feels tight and itchy, you get frequent nosebleeds, or you deal with persistent congestion that does not go away.

    Home Environment: You notice static electricity shocks regularly, your wood furniture or floors are cracking, wallpaper is peeling at the edges, or plants struggle to stay healthy indoors.

    Seasonal Factors: You run your heating system constantly during winter, you live in a naturally dry or arid climate, or your home was built with tight insulation that traps dry air inside.

    If you checked off two or more items across these categories, a humidifier is likely worth the investment. The Environmental Protection Agency recommends keeping indoor humidity between 30% and 50% year-round for optimal comfort and health. Anything below 30% is considered too dry and can start causing problems.

    The easiest way to know for sure is to buy a hygrometer, a small device that measures humidity levels. They cost very little and give you an exact reading so you are not guessing. Place one in the room where you spend the most time, check it over a few days, and let the numbers guide your decision.

    Understanding Indoor Humidity Levels

    Before you can answer whether you need a humidifier, it helps to understand what indoor humidity actually is and why the numbers matter. Relative humidity measures how much water vapor is in the air compared to the maximum amount the air can hold at a given temperature. Warmer air can hold more moisture than cold air, which is why heated indoor air in winter often feels so dry.

    The ideal indoor humidity range, according to the EPA and most HVAC professionals, sits between 30% and 50%. Below 30%, you start noticing physical discomfort and potential damage to your home. Above 50%, you risk creating an environment where mold, dust mites, and bacteria thrive.

    Here is a quick breakdown of what different humidity levels mean for your comfort and health:

    • Below 20%: Extremely dry. You will likely experience dry skin, irritated eyes, cracked lips, static electricity, and increased susceptibility to respiratory infections.
    • 20% to 30%: Still on the dry side. You may notice mild discomfort, especially in the morning, with a scratchy throat or dry nasal passages.
    • 30% to 50%: The sweet spot. Most people feel comfortable at these levels, and health risks from either extreme dryness or excess moisture are minimized.
    • 50% to 60%: Starting to get humid. You might feel slightly sticky, and dust mites begin to multiply more rapidly.
    • Above 60%: Too humid. Mold growth becomes a real concern, especially in bathrooms and basements. Musty odors develop, and allergen levels increase.

    Most homes in colder climates drop well below 30% during winter because heating systems warm the air without adding moisture. I have seen hygrometer readings as low as 15% in heated homes during January, which is drier than the Sahara Desert. That is the kind of environment where a humidifier makes a real difference.

    How to Measure Your Home’s Humidity

    Buy a digital hygrometer from any hardware store or online retailer. Place it in your main living area or bedroom, away from windows and vents, and check the reading at different times of day over a full week. Humidity fluctuates throughout the day and night, so a single reading does not tell the full story.

    Many modern smart thermostats also include humidity sensors. If you have one, check the humidity reading directly on the thermostat or in the companion app. Some smart home systems like Aqara also offer humidity monitoring through small wireless sensors you can place around your home.

    I recommend recording the readings for at least three to five days. Note the lowest reading during nighttime and early morning, since that is when humidity tends to drop the most. If your readings consistently sit below 30%, a humidifier is a solid investment.

    Clear Signs You Need a Humidifier

    Even without a hygrometer, your body and your home will tell you when the air is too dry. I have grouped the most reliable signs into categories so you can quickly assess your situation.

    Physical Health Signs

    Dry, itchy skin: If you find yourself reaching for lotion constantly, especially during winter, low humidity could be the culprit. Dry air pulls moisture from your skin, leaving it tight, flaky, and sometimes cracked. Dermatologists frequently recommend humidifiers as part of a treatment plan for dry skin conditions.

    Frequent nosebleeds: The inside of your nose needs moisture to function properly. When the air is too dry, the delicate blood vessels in your nasal passages crack and bleed. If you or your children get nosebleeds regularly, especially in the morning, low humidity is a likely cause.

    Waking up with a sore throat: That scratchy, dry feeling in your throat first thing in the morning is a classic sign of low humidity. Your throat dries out overnight as you breathe in dry air for hours. If you feel fine after drinking water but the soreness returns by the next morning, the air in your bedroom is probably too dry.

    Persistent congestion and dry cough: Low humidity dries out the mucus membranes in your respiratory system, making it harder for your body to clear irritants and germs. This can lead to a lingering dry cough and a feeling of stuffiness that does not respond to decongestants.

    Chapped lips: Lips have very thin skin and lose moisture quickly in dry environments. If your lips are constantly cracked and peeling despite using lip balm, the air around you may be too dry.

    Dry, irritated eyes: Your eyes need a certain level of moisture in the air to stay comfortable. In very dry environments, tears evaporate faster than your body can produce them, leading to redness, burning, and a gritty feeling.

    Home Environment Signs

    Static electricity: If you get shocked every time you touch a doorknob, light switch, or another person, the humidity in your home is likely too low. Static electricity builds up much more easily in dry air. This is more than just annoying. Static shocks can damage sensitive electronics.

    Cracking or warping wood: Wood furniture, hardwood floors, and even wooden instruments lose moisture to dry air and can crack, split, or warp over time. If you notice gaps between floorboards or cracks in wooden furniture that were not there before, low humidity is taking a toll on your belongings.

    Peeling wallpaper or separating joints: Dry air causes materials to contract. Wallpaper edges may start peeling, and joints in wooden furniture or cabinetry can separate. These are expensive problems that proper humidity levels help prevent.

    Houseplants struggling: Most common houseplants come from tropical or subtropical environments and prefer humidity between 40% and 60%. If your plants have brown, crispy leaf tips despite proper watering, the air in your home may be too dry for them.

    Sleep Quality Signs

    Restless sleep: Dry air can disrupt your sleep without you realizing it. You might wake up multiple times to drink water, clear your throat, or blow your nose. Over time, this fragmented sleep adds up and leaves you feeling exhausted.

    Snoring: Dry air dries out your throat and nasal passages, which can make snoring worse. If you or your partner notice increased snoring during winter months, low humidity could be contributing to the problem.

    Waking up feeling dehydrated: If you consistently wake up feeling parched, with a dry mouth and a strong need for water, your body is losing moisture to the dry air throughout the night.

    Benefits of Using a Humidifier

    If the signs above sound familiar, you might be wondering what kind of improvements you can realistically expect. Here is what proper humidity levels can do for you, based on both research and real-world experiences shared in community forums.

    Respiratory Health

    Keeping humidity in the 30% to 50% range helps your respiratory system function the way it should. Your nasal passages and throat stay moist, which means they can trap dust, allergens, and viruses more effectively. Several studies have shown that maintaining proper humidity levels can reduce the survival rate of airborne viruses, including influenza.

    For people with asthma, allergies, or chronic sinus issues, a humidifier can provide real relief. Dry air triggers inflammation in sensitive airways, but maintaining adequate humidity reduces that trigger. Many pulmonologists recommend humidifiers as part of a broader respiratory care plan.

    Sleep Quality

    This is one of the most commonly reported benefits I found in forum discussions. People who start using a humidifier in their bedroom often notice better sleep within the first few nights. The air feels less irritating, morning throat soreness disappears, and many people report reduced snoring.

    A humidifier can also create a more comfortable sleeping environment by preventing the extreme dryness that forces you to wake up for water. If you live in a cold climate and run the heat all night, a bedroom humidifier can make a significant difference in how rested you feel.

    Skin and Comfort

    Your skin is your largest organ, and it reacts quickly to dry air. Proper humidity levels help your skin retain moisture naturally, reducing the need for heavy creams and lotions. This is especially important for people with eczema or psoriasis, as dry air is a known trigger for flare-ups.

    Many dermatologists recommend humidifiers as a first-line strategy for managing dry skin conditions, often alongside topical treatments. The benefit is that a humidifier treats the environment rather than just the symptoms, so your entire body benefits rather than just the spots where you apply moisturizer.

    Protecting Your Home and Belongings

    Wood furniture, hardwood floors, musical instruments, and even artwork can suffer in dry conditions. Maintaining proper humidity prevents wood from cracking and warping, keeps paint from flaking, and helps preserve the materials in your home. This is not just about comfort. It is about protecting investments that would be expensive to repair or replace.

    Who Benefits Most

    Some groups of people benefit from a humidifier more than others. Infants and young children have more sensitive respiratory systems and smaller nasal passages, making them more susceptible to dry air discomfort. Pediatricians often recommend cool mist humidifiers for nurseries to help babies sleep better and breathe easier.

    Older adults also benefit because aging skin becomes thinner and loses moisture more easily. People with chronic respiratory conditions like COPD, asthma, or chronic bronchitis often find that proper humidity reduces their symptoms. And anyone recovering from a cold, the flu, or RSV can benefit from the soothing effect of moist air on irritated airways.

    Risks and Warnings: When a Humidifier Can Cause Problems

    I want to be honest about the downsides, because forum discussions are full of people who had bad experiences with humidifiers. The most common complaints involve mold, bacteria, white dust, and the maintenance burden. Understanding these risks helps you avoid them.

    Mold and Bacteria Growth

    This is the number one concern I see raised in online discussions. If you do not clean your humidifier regularly, the standing water in the tank becomes a breeding ground for bacteria and mold. When the humidifier runs, it can spray those contaminants into the air, which is the opposite of what you want.

    The solution is straightforward: clean the tank at least once a week, change the water daily, and follow the manufacturer’s cleaning instructions. Use distilled or demineralized water if possible, as it reduces the buildup that bacteria feed on. And never let water sit in the tank when the humidifier is not in use.

    Over-Humidification

    More humidity is not always better. If you push humidity above 50%, you create ideal conditions for mold growth on walls, ceilings, and window frames. Dust mites thrive above 50% humidity, which can worsen allergies. Condensation on windows is a visible warning sign that your humidity is too high.

    This is why I strongly recommend using a hygrometer alongside your humidifier. Many modern humidifiers have built-in humidistats that automatically shut off when the target humidity is reached. If yours does not have this feature, check the humidity level manually and adjust accordingly.

    White Dust from Ultrasonic Humidifiers

    If you use an ultrasonic humidifier with tap water, it can produce a fine white dust that settles on furniture and electronics. This dust comes from the minerals in tap water. While it is generally not harmful to breathe, it is annoying to clean and can build up over time. The fix is simple: use distilled water instead, or choose an evaporative humidifier instead of an ultrasonic one.

    Warm Mist Burn Risk

    Warm mist humidifiers heat water to create steam, which means the unit and the steam it releases can be hot. If you have young children or curious pets, this poses a burn risk. For households with kids or pets, cool mist humidifiers are the safer choice. They work just as effectively for adding moisture to the air without the heat hazard.

    When You Should NOT Use a Humidifier

    Skip the humidifier if your indoor humidity already sits above 50%, if your home has existing mold problems, or if anyone in your household has a mold allergy that could be aggravated by higher humidity. In humid climates during summer, a dehumidifier is the better choice. And if you are not willing to commit to regular cleaning, a humidifier may do more harm than good.

    Humidifier vs Dehumidifier: Which One Do You Need?

    This is one of the most common related questions, and it is important to understand the difference because these two devices do opposite things. A humidifier adds moisture to dry air. A dehumidifier removes excess moisture from humid air. Using the wrong one can make your problems worse.

    Choose a humidifier when: Your indoor humidity is below 30%, your skin and throat feel dry, you get static shocks, wood in your home is cracking, you live in a cold or arid climate, or you run heating systems constantly during winter.

    Choose a dehumidifier when: Your indoor humidity is above 50%, you notice condensation on windows, your home smells musty, you see mold growth in corners or on walls, your basement feels damp, or you live in a humid climate.

    Can you need both? Yes, actually. Many people need a humidifier in winter when heating dries the air, and a dehumidifier in summer when outdoor humidity is high. Your home’s humidity needs change with the seasons, so monitoring with a hygrometer year-round is the best approach.

    Here is a quick comparison to help you decide:

    • Purpose: Humidifier adds moisture; dehumidifier removes moisture.
    • Best when humidity is: Humidifier for below 30%; dehumidifier for above 50%.
    • Common in: Humidifier in winter and arid regions; dehumidifier in summer and humid regions.
    • Signs you need it: Humidifier for dry skin, static, cracked wood; dehumidifier for mold, musty smells, condensation.
    • Health focus: Humidifier soothes dry airways and skin; dehumidifier reduces allergens and mold spores.

    When and How to Use a Humidifier Properly

    Getting a humidifier is only part of the equation. Using it correctly determines whether it actually helps or becomes a source of new problems. Here is practical guidance based on expert recommendations and real user experiences.

    Seasonal Timing

    Most people benefit from running a humidifier from late fall through early spring, when heating systems are active and outdoor temperatures drop. In warmer months, unless you live in an arid climate, natural humidity is usually sufficient and a humidifier is unnecessary.

    If you live in a desert or high-altitude region where humidity stays low year-round, you may need to run a humidifier through all seasons. Use your hygrometer readings to guide your usage rather than relying on a calendar.

    Bedroom Use

    The bedroom is where most people see the biggest benefit from a humidifier. You spend roughly eight hours there every night, breathing the same air. Running a humidifier in your bedroom can improve sleep quality, reduce morning throat dryness, and help with overnight congestion.

    Place the humidifier on a flat, elevated surface at least two feet from your bed. You want the moisture to disperse into the room rather than blowing directly onto you. Keep the door closed while you sleep to let the humidity build up in the room rather than escaping into the rest of the house.

    Tap Water vs Distilled Water

    This topic comes up constantly in forums, and for good reason. Tap water contains minerals that can cause problems depending on your humidifier type. With ultrasonic humidifiers, those minerals become white dust. With evaporative models, minerals can build up on the wick filter and reduce its lifespan.

    Distilled or demineralized water eliminates these issues entirely. However, buying distilled water adds ongoing cost and inconvenience. A practical middle ground is to use filtered water from a pitcher or faucet filter, which reduces mineral content without the expense of distilled water. If you have hard water, distilled water is the better investment.

    Cool Mist vs Warm Mist

    Cool mist humidifiers use either a fan to blow air through a wet wick (evaporative) or ultrasonic vibrations to create a fine mist (ultrasonic). Warm mist humidifiers boil water to create steam. Both types effectively add moisture to the air.

    Choose cool mist if you have children or pets, since there is no burn risk. Cool mist models also tend to cover larger areas and use less electricity. Choose warm mist if you want quieter operation (no fan noise), prefer the option to add medicated inhalants, or live in a very cold climate where the slight warming effect is welcome.

    Cleaning and Maintenance Routine

    Maintenance is the part most people underestimate, and it is the reason some forum users end up frustrated with their humidifiers. Here is a realistic maintenance schedule that keeps your unit running safely:

    • Daily: Empty the water tank, rinse it out, and refill with fresh water. This takes about two minutes and prevents bacteria from multiplying.
    • Weekly: Clean the tank with a mild vinegar solution to remove mineral buildup. Let the vinegar sit for 20 minutes, then scrub with a soft brush and rinse thoroughly.
    • Monthly: Do a deeper clean following the manufacturer’s instructions. Check and replace filters or wicks as needed. Inspect for any mold or discoloration.
    • End of season: Clean the unit thoroughly, dry it completely, and store it in a dry place. Running a humidifier that has been sitting with moisture inside is asking for trouble.

    I know this sounds like a lot, but it becomes routine quickly. The daily water change is no different from watering a plant. And the payoff in air quality and comfort is well worth the small time investment.

    FAQ

    Is a humidifier really necessary?

    A humidifier is not strictly necessary for everyone, but it becomes important when your indoor humidity drops below 30%. If you experience dry skin, frequent nosebleeds, sore throat in the morning, static electricity shocks, or cracking wood in your home, a humidifier can make a significant difference. People in cold winter climates, arid regions, and those with respiratory conditions benefit most from using one.

    What are the signs of low humidity in a home?

    The most common signs of low humidity include dry and itchy skin, chapped lips, frequent nosebleeds, waking up with a sore or scratchy throat, persistent dry cough, static electricity shocks when touching surfaces, cracking or warping wood furniture and floors, peeling wallpaper, and houseplants with brown crispy leaf tips. If you notice several of these signs together, your indoor humidity is likely below the recommended 30% threshold.

    What is the ideal humidity level for a home?

    The EPA recommends keeping indoor humidity between 30% and 50% year-round. Below 30%, the air is too dry and can cause health discomfort and damage to your home. Above 50%, the air becomes too moist and creates conditions for mold growth, dust mites, and bacteria. The best way to maintain this range is to use a hygrometer to monitor levels and adjust your humidifier or dehumidifier accordingly.

    Do I need a humidifier or dehumidifier?

    You need a humidifier if your indoor humidity is below 30% and the air feels dry. You need a dehumidifier if your humidity is above 50% and you notice condensation, mold, or musty smells. Many homeowners actually need both at different times of year: a humidifier during dry winter months and a dehumidifier during humid summer months. Use a hygrometer to check your levels and choose accordingly.

    Should you use a humidifier if you have RSV?

    Yes, a cool mist humidifier can help ease RSV symptoms by keeping the airways moist and loosening mucus, making it easier to breathe. The moist air soothes irritated nasal passages and throat. However, it is critical to keep the humidifier very clean to avoid spreading bacteria or mold into the air, which could worsen respiratory symptoms. Always consult your pediatrician or doctor for specific medical advice regarding RSV treatment.

    Should people with COPD use humidifiers?

    Many pulmonologists recommend humidifiers for COPD patients because dry air can irritate already sensitive airways and make breathing more difficult. Proper humidity between 30% and 50% helps keep mucus thin and easier to clear. However, COPD patients must be especially careful about keeping the humidifier clean, as exposure to mold or bacteria from a dirty unit could trigger a COPD exacerbation. Cool mist humidifiers are generally recommended over warm mist models.

    Can a humidifier help with congestion?

    Yes, a humidifier can help relieve congestion by adding moisture to dry air, which thins mucus and soothes inflamed nasal passages. This makes it easier to breathe and can reduce the discomfort of colds, allergies, and sinus infections. For best results, run a humidifier in your bedroom while you sleep. Cool mist humidifiers are recommended for congestion relief, especially in households with children.

    Are humidifiers safe for babies and toddlers?

    Yes, humidifiers are generally safe and often recommended for babies and toddlers, but only cool mist models. Warm mist humidifiers pose a burn risk if a child touches the unit or the hot steam. Cool mist humidifiers add the same moisture to the air without any heat hazard. Pediatricians frequently recommend running a cool mist humidifier in a baby’s room to ease congestion, improve sleep, and prevent the dry skin and nasal irritation that babies are especially prone to. Clean the unit daily to prevent bacteria and mold.

    Conclusion

    So, do you need a humidifier? If your indoor humidity consistently reads below 30% and you are dealing with dry skin, morning sore throats, static electricity, or cracking wood in your home, the answer is yes. A humidifier is a practical, effective way to bring your indoor environment back into the comfortable 30% to 50% range that the EPA recommends.

    My strongest recommendation is to start with a hygrometer before buying anything else. Measure your humidity over several days, note the patterns, and let the data drive your decision. This small step saves you from buying a device you may not need, or from guessing about whether your air is actually too dry.

    If you do decide to get a humidifier, commit to the basic maintenance routine. Empty and rinse the tank daily, do a vinegar clean weekly, and store it properly when the season ends. A clean humidifier is a helpful tool. A neglected one can cause more problems than it solves.

    Whether you live in a cold winter climate, an arid region, or you just want better sleep and fewer dry-air symptoms, the right answer to “Do I Need a Humidifier” starts with knowing your numbers and understanding what your body and home are telling you.

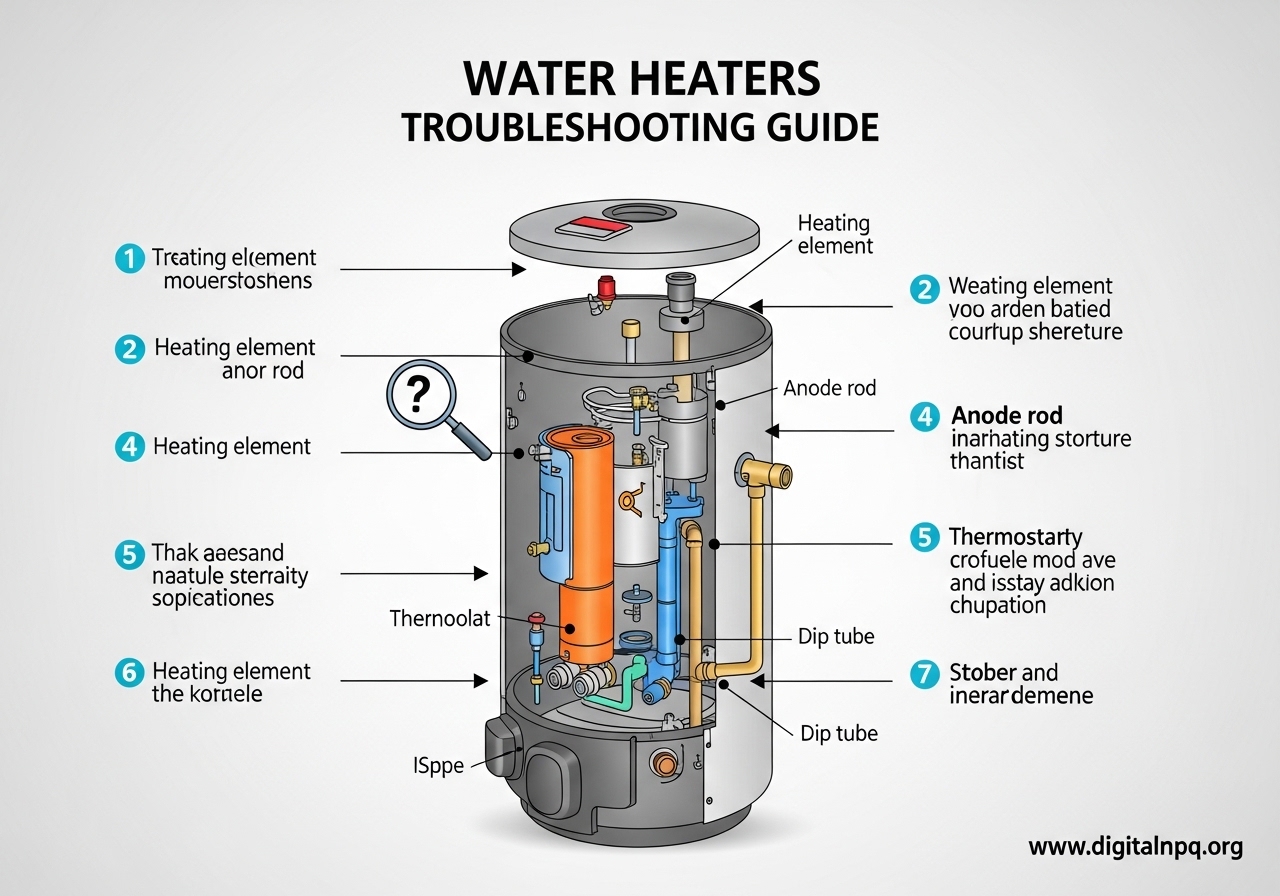
  • Water Heaters Troubleshooting Guide 2026

    Water Heaters Troubleshooting Guide 2026

    Nothing kills a morning routine faster than stepping into an ice-cold shower. If your water heater has stopped working, you are definitely not alone. Water heaters troubleshooting is one of the most searched home repair topics online, and for good reason. Nearly every home relies on one, and when it fails, the disruption is immediate.

    This guide covers the most common water heater problems for gas, electric, and tankless units. I will walk you through each issue step by step, from diagnosing the root cause to applying the right fix. Whether you are dealing with no hot water at all, strange noises, leaks, or temperature swings, you will find clear instructions here.

    Before we get into the specifics, a quick safety note. Working with gas lines and high-voltage electrical components carries real risk. If you smell gas at any point, leave your home immediately and call your gas company. For electrical issues, always shut off power at the breaker before touching any components. Your safety matters more than any repair.

    Most water heater problems fall into a handful of categories: power or gas supply issues, component failures, sediment buildup, and leaks. I have organized this guide so you can jump straight to your specific symptom or read through for a complete understanding of how your water heater works and what goes wrong. Let’s get your hot water running again.

    Quick Reference: Common Water Heater Problems and Solutions

    Before diving into detailed troubleshooting, here is a fast symptom-to-solution reference. Match your problem to the most likely cause, then jump to the detailed section for step-by-step fix instructions.

    • No hot water at all — Tripped breaker (electric), pilot light out (gas), or failed heating element. See the No Hot Water section below.
    • Not enough hot water — Sediment buildup, dip tube failure, thermostat set too low, or undersized tank. Covered in the Inadequate Hot Water section.
    • Water too hot — Thermostat set too high or faulty thermostat. Addressed in the Temperature Issues section.
    • Popping or rumbling noises — Sediment buildup in the tank. See the Strange Noises section.
    • Leaking from base — T&P valve, drain valve, or tank failure. See the Leaking Water Heater section.
    • Rusty or brown water — Corroding anode rod or tank lining. Covered in the Discolored Water section.
    • Rotten egg smell — Bacteria reacting with the anode rod. See the Discolored Water section.
    • Pilot light will not stay lit — Bad thermocouple, dirty pilot orifice, or draft. Covered in the Pilot Light section.
    • Reset button keeps tripping — Failed heating element or bad thermostat. See the Electric Reset section.

    If your specific symptom is not listed here, keep reading. The detailed sections below cover edge cases and less common problems that still trip up homeowners every day.

    No Hot Water: Causes and Fixes

    Complete loss of hot water is the single most common reason people search for water heaters troubleshooting guides. The fix depends entirely on whether you have a gas or electric unit, so the diagnosis paths diverge right at the start.

    Electric Water Heater: No Hot Water

    Start with the simplest cause. Go to your electrical panel and check if the breaker for the water heater has tripped. Electric water heaters typically use a dedicated double-pole breaker rated for 30 amps. If it has tripped, flip it fully off and then back on. If it trips again immediately, you have a short circuit or a failed component that needs further diagnosis.

    If the breaker is fine, the next suspect is the upper heating element or the upper thermostat. Electric water heaters use two heating elements, but if the upper one fails, the entire tank stops heating. The upper element acts as the gatekeeper for the whole system.

    You can test a heating element with a multimeter. Turn off power at the breaker, remove the access panel on the side of the tank, and disconnect one wire from the element. Set your multimeter to the ohms setting and touch both probes to the element terminals. A reading between 10 and 30 ohms is normal. A reading of infinity means the element has burned out and needs replacement.

    The reset button, also called the high-temperature cutoff switch, sits behind the upper access panel. It is usually a red button. If it has popped out, press it back in. If it trips again within minutes, you likely have a bad thermostat or a shorted element.

    Gas Water Heater: No Hot Water

    For gas units, the pilot light is your first check. Look through the viewing window at the bottom of the tank. If you do not see a small blue flame, the pilot has gone out. Relighting instructions are usually printed on a label near the gas control valve. Turn the gas knob to pilot, press and hold it, and use the igniter or a long lighter to relight the pilot. Hold the knob for 30 to 60 seconds before releasing.

    If the pilot will not light at all, check that the gas valve on the supply line is open. If gas is flowing and the pilot still will not ignite, the pilot orifice may be clogged or the gas control valve itself may have failed. Both of these situations usually require professional help.

    A pilot that lights but will not stay lit points to a bad thermocouple. The thermocouple is a small sensor that sits in the pilot flame and generates a tiny electrical current to keep the gas valve open. If it fails, the gas valve shuts off as a safety measure. Replacing a thermocouple is a relatively inexpensive repair that many homeowners can handle themselves, but if you are uncomfortable working with gas components, call a professional.

    Pilot Light Issues (Gas Water Heaters)

    Pilot light problems deserve their own section because they account for a huge portion of gas water heater service calls. Understanding how the pilot system works makes troubleshooting much more straightforward.

    How the Pilot System Works

    The pilot flame serves one primary function: it proves to the gas valve that it is safe to release gas to the main burner. The thermocouple sits directly in the pilot flame and generates about 20 to 30 millivolts of electricity when heated. That voltage holds the electromagnetic valve inside the gas control open. When the flame goes out, the voltage drops, and the valve snaps shut to prevent gas from filling your home.

    Newer gas water heaters use a thermopile instead of a thermocouple. A thermopile is essentially multiple thermocouples stacked together, generating more voltage (typically 500 to 750 millivolts). The troubleshooting steps are similar, but thermopiles cost more to replace.

    Why the Pilot Keeps Going Out

    A pilot that relights but goes out after a few minutes or hours usually has one of three causes. The most common is a failing thermocouple or thermopile. Over time, these sensors degrade and produce less voltage, until they can no longer hold the gas valve open reliably.

    The second cause is a dirty or partially clogged pilot orifice. If the pilot flame is weak and yellow instead of strong and blue, the orifice needs cleaning. A wire brush or compressed air can often clear the blockage. Turn off the gas supply before attempting any cleaning.

    The third cause is a draft blowing the pilot out. Check for gaps around the flue pipe, a damaged draft hood, or negative air pressure in your mechanical room caused by other appliances competing for combustion air. If your water heater is in a small, tightly sealed room, it may not have enough air supply to maintain the pilot.

    Pilot Will Not Light At All

    If the pilot will not light when you try to ignite it, first verify that the gas supply is on. The gas valve on the supply line should be parallel to the pipe in the open position. If gas is flowing but nothing happens at the pilot, the pilot tube or orifice may be completely blocked. This requires disassembling and cleaning the pilot assembly, which is a job best left to a professional if you have no experience with gas components.

    Electric Water Heater Reset and Circuit Breaker Problems

    The reset button on an electric water heater is one of the most commonly misunderstood components. Forum discussions are full of homeowners who pressed the reset button with no response, or found it tripping repeatedly. Here is how to handle both situations.

    How to Find and Press the Reset Button

    The reset button is located behind the upper access panel on your electric water heater. Remove the metal panel and push aside any insulation to expose the thermostat. The reset button is typically red and sits just above the thermostat dial. Press it firmly until you feel or hear a click. If it was tripped, this restores power to the heating elements.

    After resetting, wait about 30 to 45 minutes and check for hot water. If the water heats up normally and the reset button does not trip again, you probably just had a temporary overheating event. If it trips again, you need to dig deeper.

    What It Means When the Reset Trips Repeatedly

    A reset button that trips over and over is telling you something is wrong. The most likely culprit is a failed heating element that has shorted to ground. When an element cracks or develops a pinhole, water contacts the electrical coil inside. This causes a ground fault that trips the high-temperature cutoff.

    The lower heating element is the most common failure point because it does most of the work. Testing both elements with a multimeter, as described in the No Hot Water section above, will usually reveal the bad one. Replace the failed element and the problem should resolve.

    A less common cause is a thermostat that has welded its contacts shut, allowing the water to overheat. If both elements test fine but the reset keeps tripping, replace the thermostat closest to the tripping reset button.

    Breaker Tripping Issues

    If the main circuit breaker trips instead of the reset button, you may have a more serious electrical issue. A breaker that trips immediately after reset indicates a direct short circuit, possibly from a severely damaged heating element or wiring that has burned and contacted the tank. A breaker that trips after the heater runs for a while might indicate the element is drawing too much current due to scale buildup.

    In either case, do not keep resetting the breaker. Repeated tripping damages the breaker and can create a fire hazard. Test the elements, inspect the wiring, and replace any components that show signs of burning or deterioration.

    Inadequate or Not Enough Hot Water

    Having some hot water but not enough is a different problem from having none at all. This section covers the causes and solutions when your water heater runs out of hot water too quickly or never gets the water hot enough.

    Sediment Reducing Effective Capacity

    Over time, minerals in your water settle to the bottom of the tank and form a layer of sediment. In areas with hard water, this buildup can be significant. A tank that holds 50 gallons might effectively only hold 30 gallons of usable hot water because the rest of the space is occupied by sediment. Flushing the tank restores capacity. This is covered in more detail in the Strange Noises section.

    Dip Tube Failure

    The dip tube is a plastic pipe that carries cold incoming water down to the bottom of the tank, where it gets heated. When the dip tube cracks or breaks, cold water enters at the top of the tank and mixes with the hot water headed to your fixtures. The result is lukewarm water that runs out fast.

    Diagnosing a dip tube failure is a process of elimination. If you have flushed the tank, checked the elements, and verified the thermostats, but still get lukewarm water, the dip tube is the likely suspect. Replacing it requires draining the tank and removing the cold water inlet fitting.

    Thermostat Settings and Calibration

    Check your thermostat setting. The recommended temperature is 120 degrees Fahrenheit for safety and efficiency. If it is set lower, you may not have enough heat for your household’s usage patterns. If it is set correctly but the water is still not hot enough, the thermostat may need calibration or replacement.

    Keep in mind that undersized water heaters are a real issue. If you recently added family members, installed a larger soaking tub, or changed your usage habits, your tank may simply be too small. A family of four typically needs at least a 50-gallon tank for gas and a 50 to 80-gallon tank for electric to avoid running out during peak morning demand.

    Strange Noises Coming From Your Water Heater

    Your water heater should operate almost silently. When it starts making noises, those sounds are actually useful diagnostic tools. Different noises point to different problems, so paying attention to what you hear can save you troubleshooting time.

    Popping and Rumbling Sounds

    Popping, rumbling, or banging sounds are the most common water heater noises. They almost always indicate sediment buildup at the bottom of the tank. As the burner or element heats water through the sediment layer, trapped water bubbles expand and burst, creating a popping or rumbling sound. Think of it like boiling water in a pot with a thick layer of sand at the bottom.

    Flushing the tank is the fix. Here is the basic procedure. Turn off power or gas to the unit. Connect a garden hose to the drain valve at the bottom of the tank and run the other end to a floor drain or outside. Turn off the cold water supply. Open the drain valve and let the tank empty. Then turn the cold water back on briefly to stir up remaining sediment. Repeat this fill-and-drain cycle until the water runs clear. Close the drain valve, refill the tank completely, and restore power or gas.

    Screeching or Screaming Sounds

    A high-pitched screech usually means water is being forced through a restricted opening. Check the inlet and outlet valves to make sure they are fully open. A partially closed valve creates a pressure restriction that produces this noise. Heat trap nipples, which are installed on some water heaters to improve efficiency, can also produce a whistling or screeching sound. This is generally harmless but can be annoying.

    Sizzling Sounds

    A sizzling sound, especially near the burner of a gas water heater, often means water is dripping onto the hot burner assembly. This could indicate a small leak inside the tank or from a fitting above the burner. Inspect the area around the burner for signs of moisture. If you find water, track it back to its source. A leak at this location often means the tank itself has a crack, which requires replacement.

    Ticking or Tapping Sounds

    Ticking sounds are usually caused by heat traps or by pipes expanding and contracting as they heat up and cool down. This is typically harmless. If the ticking bothers you, installing dielectric nipples or water heater connectors with built-in heat traps can reduce the noise.

    Leaking Water Heater: Finding and Fixing the Leak

    A leaking water heater demands immediate attention. Even a small leak can cause significant water damage over time, and some leaks indicate that the tank is failing. Here is how to identify the source and determine the right course of action.

    Temperature and Pressure Relief Valve (T&P Valve)

    The T&P valve is a safety device located on the top or side of the tank. It releases water if the temperature or pressure inside the tank exceeds safe limits. A small amount of dripping from this valve during heating cycles can be normal, especially if your home has high water pressure. However, continuous dripping or a steady stream indicates a problem.

    First, check if the valve itself is faulty. Place a bucket under the discharge tube and manually lift the valve lever for a few seconds, then release it. If the valve snaps shut and stops dripping, it was just stuck. If it continues to leak after releasing, the valve seat may be worn out and the valve needs replacement.

    If the valve is releasing water because of excessive pressure, you may need a thermal expansion tank installed on your cold water line. This is common in homes with closed plumbing systems, such as those with a backflow preventer on the main water line.

    Drain Valve Leaking

    The drain valve at the bottom of the tank is a common leak point. If it is dripping, try tightening it by hand. If that does not help, the washer inside the valve has likely deteriorated. You can replace the drain valve, or as a temporary fix, cap it with a garden hose cap available at any hardware store.

    Inlet and Outlet Connection Leaks

    Check the hot and cold water connections at the top of the tank. Leaks here are usually caused by loose fittings or deteriorated plumber’s tape. Tighten the connections with a wrench, and if that does not work, drain the tank, disconnect the fitting, apply fresh Teflon tape, and reconnect.

    Tank Body Leaking

    This is the worst-case scenario. If water is seeping from the body of the tank itself, the tank is failing and needs replacement. There is no safe or effective way to repair a leaking tank. A tank that leaks from the body can rupture without warning, causing flooding. If you see rust streaks on the outside of the tank or water pooling at the base with no clear source, start planning for a replacement.

    Condensation vs. Actual Leak

    Do not confuse condensation with a leak. When cold water fills a tank in a warm, humid environment, condensation can form on the outside of the tank and drip to the floor. This is especially common in basements during summer. Wipe the tank dry and observe whether the moisture returns. If the tank stays dry after wiping, it was condensation. If water reappears quickly at a specific point, it is a leak.

    Discolored, Smelly, or Rusty Hot Water

    Water quality issues that only appear in your hot water supply almost always originate inside the water heater. Here is how to identify and fix the most common water quality problems.

    Rusty or Brown Hot Water

    If your cold water runs clear but the hot water is brown or rust-colored, the problem is inside the tank. The most likely cause is a deteriorated anode rod. The anode rod is a sacrificial metal rod, usually made of magnesium or aluminum, that attracts corrosive elements in the water to protect the steel tank. When the anode rod is consumed, corrosion attacks the tank itself.

    Inspecting the anode rod is a maintenance task every homeowner should do every two to three years. The rod sits under a hex-head plug on top of the tank. Use a socket wrench to remove it. If more than six inches of the steel core wire is exposed, replace the rod. A new anode rod costs very little compared to replacing an entire water heater.

    If the anode rod looks fine but the water is still rusty, the tank lining may be corroding. Unfortunately, once the glass lining inside the tank starts to fail, replacement is the only reliable option.

    Rotten Egg Smell in Hot Water

    A sulfur or rotten egg smell in your hot water is caused by hydrogen gas reacting with bacteria in the tank, and that reaction is accelerated by a magnesium anode rod. The fix is to replace the magnesium anode rod with an aluminum or zinc-aluminum rod, then disinfect the tank by pouring a gallon of hydrogen peroxide through the anode rod opening, letting it sit for two hours, and then flushing the tank.

    Black Specks in Hot Water

    Tiny black specks in your hot water usually come from a deteriorating rubber dip tube or from the anode rod breaking down. Some older dip tubes were made from a plastic formulation that degrades over time, breaking into small fragments. If you see these specks, check the dip tube and replace it if it is crumbling.

    Gas vs Electric Water Heater Troubleshooting Differences

    Understanding the fundamental differences between gas and electric water heaters helps you troubleshoot more efficiently. The two types share a tank and basic plumbing, but the heating mechanism, safety systems, and failure modes are entirely different.

    Key Component Differences

    Gas water heaters use a burner assembly at the bottom of the tank, a gas control valve, a thermocouple or thermopile, a pilot light, and a flue that exhausts combustion gases through the center of the tank. Electric water heaters use one or two immersion heating elements screwed into the side of the tank, thermostats that directly control each element, and a high-temperature cutoff switch.

    Safety Considerations

    Gas water heaters carry the risk of carbon monoxide poisoning and gas leaks. Any time you work on a gas water heater, check for proper venting, ensure the flue is clear, and never modify the gas supply without shutting off the gas first. Electric water heaters carry the risk of electrocution. Always shut off power at the breaker and verify with a voltage tester before touching any electrical component.

    Common Failure Modes Compared

    Gas heaters most commonly fail due to pilot light issues, thermocouple failure, and sediment buildup that insulates the bottom of the tank from the burner. Electric heaters most commonly fail due to burned-out heating elements, tripped reset buttons, and faulty thermostats. Both types suffer from sediment, anode rod depletion, and tank corrosion over time.

    Tankless water heaters have their own unique troubleshooting needs, including error codes, scale buildup in the heat exchanger, and minimum flow rate requirements. If you are considering a switch from a tank to a tankless system, check out our guide to electric tankless water heaters for detailed product recommendations and sizing information.

    Water Heater Maintenance Tips to Prevent Problems

    Most water heater problems are preventable with basic maintenance. A few hours per year can add years to the life of your unit and save you from unexpected cold showers. Here is a seasonal maintenance checklist to keep your water heater running smoothly.

    Annual Flushing

    Flush your tank once a year to remove sediment. The procedure is described in the Strange Noises section above. If you live in an area with hard water, consider flushing every six months. Sediment is the number one enemy of water heater efficiency and longevity. It insulates the bottom of the tank from the heat source, forces the unit to work harder, and creates the popping noises that indicate trouble.

    Anode Rod Inspection

    Check the anode rod every two to three years. As described in the Discolored Water section, the anode rod sacrifices itself to protect your tank. Once it is consumed, the tank begins to corrode. Replacing a spent anode rod costs a fraction of what a new water heater costs, yet most homeowners never check it.

    T&P Valve Testing

    Test the temperature and pressure relief valve once a year. Lift the lever briefly and let it snap back. You should hear water flowing through the discharge tube. If the valve does not release water, or if it continues to leak after closing, replace it. A failed T&P valve is a serious safety hazard.

    Temperature Setting

    Set your water heater thermostat to 120 degrees Fahrenheit. Higher settings waste energy, increase the risk of scalding, and accelerate sediment formation. If 120 degrees feels too cool at the tap, the issue is more likely related to pipe insulation or distance from the heater than the thermostat setting.

    Seasonal Maintenance Checklist

    • Spring: Flush the tank to remove winter sediment buildup. Test the T&P valve. Check the anode rod if it has been more than two years.
    • Summer: Inspect the area around the water heater for moisture or corrosion. Check connections for leaks that might have developed from thermal expansion.
    • Fall: For gas heaters, inspect the flue and draft hood for blockages before heating season. Check the burner flame through the viewing window. A healthy flame is blue with slight yellow tips.
    • Winter: Insulate exposed hot water pipes to reduce heat loss. For heaters in unheated spaces, check that the area stays above freezing to prevent damage.

    When to Call a Professional Plumber

    Some water heater problems are well within the reach of a competent DIYer. Others require professional tools, training, and permits. Knowing the difference saves you money on simple fixes while keeping you safe on complex ones.

    When to DIY

    You can safely handle these repairs yourself: flushing the tank, replacing the anode rod, testing and replacing the T&P valve, replacing heating elements on an electric unit, and adjusting thermostat settings. These tasks require basic hand tools and a multimeter, and there are plenty of resources to guide you through each one.

    When to Call a Professional

    Call a licensed plumber for any of these situations: suspected gas leaks (call immediately), any modification to gas piping, tank replacement, persistent leaks you cannot locate, repeated breaker trips that do not resolve with element replacement, and any situation where you feel uncomfortable or unsure. There is no shame in calling for help. A botched repair on a water heater can cause flooding, fire, or carbon monoxide exposure.

    DIY vs Professional Cost Comparison

    Understanding the cost difference helps you make informed decisions. Replacing a heating element yourself typically costs under 30 dollars for the part and takes about an hour. Having a plumber do the same job might run 150 to 300 dollars including labor and the service call. Flushing the tank is essentially free if you do it yourself, but a professional flush service runs about 100 to 150 dollars.

    On the other hand, replacing a gas valve or thermocouple involves working with gas connections, and a mistake can be dangerous. Professional thermocouple replacement runs around 150 to 250 dollars. A full tank replacement, which involves plumbing, gas or electrical work, and often permits, runs 800 to 3,000 dollars depending on the unit and your area.

    FAQ

    What is the most common problem with a hot water heater?

    The most common water heater problem is sediment buildup in the tank. Over time, minerals from your water supply settle at the bottom of the tank, creating a layer that insulates the water from the heat source. This causes popping noises, reduces heating efficiency, and decreases the effective capacity of the tank. Annual flushing prevents most sediment-related issues.

    Why am I only getting 5 minutes of hot water?

    Getting only a few minutes of hot water before it runs cold usually points to one of three issues: a failed lower heating element on an electric heater (the upper element heats the top portion only), a broken dip tube that allows cold water to mix with hot at the top of the tank, or significant sediment buildup that has reduced the tank’s effective capacity. Start by flushing the tank, then test the heating elements.

    How many years does a water heater usually last?

    A traditional tank water heater lasts 8 to 12 years on average. Gas models tend to last 8 to 10 years, while electric models can reach 10 to 12 years with proper maintenance. Tankless water heaters last significantly longer, typically 15 to 20 years. Regular maintenance, including annual flushing and anode rod inspection, can add several years to any water heater’s lifespan.

    What are the first signs of a water heater going bad?

    The early warning signs of a failing water heater include: rusty or brown-tinted hot water (indicating internal corrosion), rumbling or popping sounds during heating (sediment buildup), water pooling around the base of the unit (potential tank leak), inconsistent water temperature, and visible rust on the exterior of the tank or connections. If you notice two or more of these signs, start planning for a replacement.

    How do I know if my water heater thermostat is bad?

    A faulty thermostat causes inconsistent water temperatures. You might get scalding hot water followed by lukewarm water, or the water never reaches the set temperature. To test it, use a multimeter to check for continuity at the thermostat terminals after shutting off power. No continuity means the thermostat needs replacement. A thermostat that fails to shut off power to the element when the set temperature is reached is also defective and should be replaced immediately.

    Is it safe to use a leaking water heater?

    It depends on the source of the leak. A leaking drain valve or loose pipe fitting can often be repaired safely without shutting down the unit. However, if the tank body itself is leaking, you should turn off power or gas and shut off the water supply immediately. A tank leak means the structural integrity is compromised, and it could rupture. Do not ignore any leak. Even slow drips cause water damage and mold growth over time.

    Conclusion

    Water heaters troubleshooting does not have to be intimidating. Most problems boil down to a handful of common causes: power or gas supply issues, component failures, sediment buildup, and leaks. By working through the symptoms systematically, you can diagnose and often fix the problem yourself without waiting days for a service appointment.

    The most valuable thing you can do for your water heater is maintain it regularly. Annual flushing, anode rod inspections every two to three years, and periodic T&P valve testing will prevent the majority of the problems covered in this guide. A well-maintained water heater can serve you reliably for over a decade.

    Remember that safety always comes first. Gas leaks and electrical hazards are real risks. If you smell gas, leave immediately and call your gas company. If you are ever unsure about a repair, calling a licensed plumber is always the right call. The cost of a service visit is far less than the cost of a flood, fire, or injury.

    Whether you are dealing with a simple pilot light relight or trying to decide if it is time for a full replacement, the troubleshooting steps in this guide give you a clear path forward. Start with the quick reference table, match your symptoms, and follow the detailed instructions for your specific issue. Your hot water will be back before you know it.

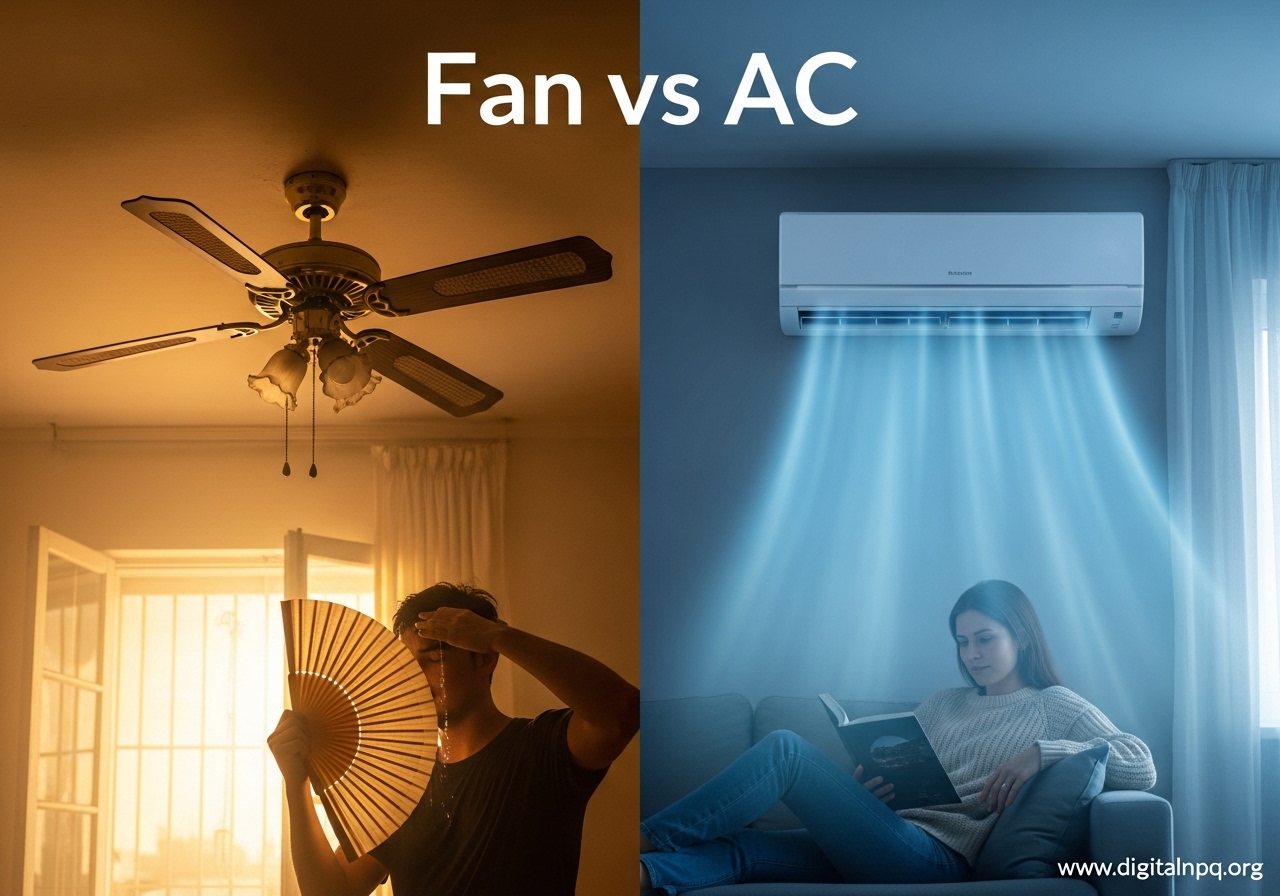
  • Fan vs AC (August 2026): Which Is Better for Cooling?

    Fan vs AC (August 2026): Which Is Better for Cooling?

    Every summer, the same debate plays out in homes across the country: fan vs AC, which one should you rely on to stay cool? Our team dug into the science, the costs, and the health implications to give you a clear answer. The truth is, neither one is universally better. The right choice depends on your climate, your health, your budget, and how hot it actually gets where you live.

    In this guide, we break down exactly how fans and air conditioners work, compare their energy consumption and operating costs, address health concerns like whether AC is safe for bronchitis or heart patients, and give you specific temperature and humidity thresholds to help you decide. By the end, you will know exactly when to flip on the fan, when to crank the AC, and when using both together makes the most sense.

    How Fans and Air Conditioners Cool Differently

    Fans and air conditioners tackle the heat problem in two completely different ways. Understanding this difference is the key to making smart cooling decisions all summer long.

    How Fans Work: The Wind-Chill Effect

    A fan does not actually lower the temperature in your room. Not even a single degree. What a fan does is move air across your skin, which speeds up sweat evaporation. That evaporation pulls heat away from your body, creating a wind-chill effect that makes you feel cooler than the actual room temperature. A good ceiling fan can make an 80-degree room feel closer to 76 degrees on your skin.

    Because fans only move existing air, they use very little electricity. A typical ceiling fan draws between 50 and 75 watts. A desk or box fan uses even less, around 40 to 60 watts. But here is the catch: fans only cool people, not rooms. If you leave a fan running in an empty room, nothing gets cooler. You are just wasting electricity.

    How Air Conditioners Work: Active Heat Removal

    An air conditioner works on a completely different principle. It actively removes heat from indoor air and dumps it outside. The process relies on a chemical refrigerant that cycles through a closed loop of coils. Warm indoor air passes over the evaporator coil inside your home, where the refrigerant absorbs the heat. The compressor then pumps that heated refrigerant to the condenser coil outside, where the heat is released. The cooled air gets circulated back inside.

    This cycle also pulls moisture from the air as a side effect, which is why AC rooms feel less humid. The result is actual temperature reduction, not just perceived cooling. A window AC unit uses 500 to 1,500 watts, while a central air system draws 3,000 to 3,500 watts. That is roughly 20 to 50 times more electricity than a ceiling fan.

    The bottom line in the fan vs AC debate on cooling power: fans make you feel cooler without changing the room, while air conditioners physically remove heat and lower the actual temperature.

    Fan vs AC Energy Efficiency and Electricity Consumption

    Energy consumption is where the fan vs AC cost comparison gets really dramatic. The difference is not small. It is massive.

    Wattage and Hourly Cost Breakdown

    Here is how the numbers stack up for a typical summer day of cooling. A ceiling fan running on medium speed uses about 60 watts and costs roughly $0.01 per hour to operate. Over a full 24-hour day, that comes out to about $0.24. Run it all month and you are looking at around $3 to $5 added to your electricity bill.

    A window air conditioner uses between 500 and 1,500 watts depending on the size and efficiency rating. At the national average electricity rate, running a window AC costs about $0.08 to $0.20 per hour. If you run it for 8 hours a day, that adds up to $19 to $55 per month. A central air conditioning system is even more demanding, using 3,000 to 3,500 watts and costing $0.30 to $0.50 per hour. Monthly central AC costs typically range from $30 to $270 depending on your climate, home size, and thermostat settings.

    To put it simply, running a fan costs about 1% of what it costs to run an air conditioner. Over a full summer season, choosing fans over AC in appropriate conditions could save you hundreds of dollars.

    Calculating Your Own Cooling Costs

    You can estimate your own cooling costs with a simple formula. Multiply the wattage of your device by the number of hours you run it per day, then divide by 1,000 to get kilowatt-hours. Multiply that by your electricity rate (the national average is about $0.14 per kWh). For example, a 75-watt fan running 12 hours per day uses 0.9 kWh, costing about $0.13 per day or $3.84 per month. A 1,500-watt window AC running 8 hours per day uses 12 kWh, costing about $1.68 per day or $50 per month.

    Fan vs AC Pros and Cons Comparison

    Here is a straightforward side-by-side look at the advantages and disadvantages of each option.

    Advantages of Fans

    • Extremely low energy consumption (50-75 watts for ceiling fans)
    • Very low operating cost, roughly $0.01 per hour
    • Portable and easy to move between rooms
    • Simple installation with no professional help needed
    • Quieter operation than most AC units
    • Better air circulation that prevents stale air buildup
    • No refrigerants or chemical coolants involved

    Disadvantages of Fans

    • Do not reduce actual room temperature
    • Ineffective when temperatures exceed 95 degrees Fahrenheit
    • Cannot control indoor humidity levels
    • No air filtration capability
    • Provide zero cooling benefit in an unoccupied room
    • Can blow dust and allergens around if filters are not clean

    Advantages of Air Conditioners

    • Actively lower room temperature by removing heat
    • Control humidity by pulling moisture from the air
    • Filter indoor air, removing dust, pollen, and some pollutants
    • Effective in any temperature, even extreme heat above 100 degrees
    • Provide consistent comfort regardless of outdoor conditions
    • Essential for vulnerable populations during heat waves

    Disadvantages of Air Conditioners

    • High energy consumption (500-3,500 watts depending on type)
    • Significantly higher operating costs, $30-$270 per month
    • Professional installation required for central and split systems
    • Regular maintenance needed (filter changes, coil cleaning, refrigerant checks)
    • Can dry out indoor air, causing skin, eye, and throat irritation
    • Contribute to peak electricity demand and grid strain during summer
    • Contain refrigerants with global warming potential

    Health Considerations: Fan vs AC for Different Conditions

    The health angle of the fan vs AC question comes up more often than you might think. People with respiratory conditions, heart problems, and other health concerns need to think carefully about their cooling choices. Here is what the evidence and medical guidance suggest.

    AC and Bronchitis

    Air conditioning can be a double-edged sword for people with bronchitis or other respiratory conditions. On one hand, AC removes humidity and filters out some airborne particles, which can help people who are sensitive to mold or dust mites. On the other hand, cold, dry air from an AC unit can irritate already inflamed airways and trigger coughing spells. If you have bronchitis, the best approach is to keep your AC set to a moderate temperature, around 72 to 75 degrees, and avoid sitting directly in the cold airflow. Using a humidifier alongside your AC can also help counteract the drying effect.

    Fans and Heart Patients

    Fans are generally safe and even recommended for heart patients during hot weather. The key concern for people with cardiovascular conditions is avoiding heat stress, which puts extra strain on the heart. During moderate heat, a fan provides sufficient cooling without the sudden temperature shocks that air conditioning can sometimes cause. However, during extreme heat events when indoor temperatures rise above 95 degrees, fans alone may not provide enough cooling, and air conditioning becomes necessary to prevent heat-related illness.

    Fan vs AC for Cough and Throat Issues

    If you are dealing with a cough or sore throat, the dry air produced by air conditioning can make things worse by drying out your mucous membranes. A fan set on low or oscillating mode is usually the gentler option because it moves air without drastically changing humidity or temperature. That said, avoid pointing a fan directly at your face while sleeping, as the constant airflow can dry out your throat overnight. The best setup for cough relief is often a fan on low speed with a bowl of water or a small humidifier nearby.

    Dehydration and Heat Stroke Prevention

    Both fans and AC can contribute to dehydration if you are not careful. Fans speed up sweat evaporation, which means you lose water faster without necessarily noticing. Air conditioners dry the air, which can lead to gradual dehydration over hours. In either case, drinking water regularly is essential. For heat stroke prevention during extreme heat, air conditioning is the safer choice because it actually lowers the ambient temperature. Fans cannot protect you once the air temperature exceeds your body temperature.

    When to Use a Fan vs AC: Temperature and Humidity Guide

    This is where theory meets practice. You need a simple, actionable framework for deciding between a fan and AC on any given day. Here are the thresholds our team recommends based on climate data and energy research.

    Use a Fan When:

    • Indoor or outdoor temperature is below 90 degrees Fahrenheit
    • Relative humidity is below 50 percent
    • You only need to cool one or two people in a room, not the entire space
    • It is a mild climate evening or overnight when temperatures naturally drop
    • You want to supplement AC by allowing a higher thermostat setting

    Use AC When:

    • Temperature exceeds 90 degrees Fahrenheit
    • Relative humidity is above 60 percent
    • Anyone in the household is elderly, very young, or has a health condition affected by heat
    • Indoor air quality is poor due to smoke, pollen, or pollution
    • You need to cool multiple rooms simultaneously

    Can You Run a Fan and AC Together?

    Yes, and it is actually a smart strategy. Running a ceiling fan alongside your air conditioner lets you raise your thermostat setting by about 4 degrees without any loss of comfort. The fan helps distribute the cooled air more evenly throughout the room, preventing hot spots and reducing how hard the AC has to work. If your AC normally costs $100 per month to run, this combination approach could cut that by 15 to 20 percent, saving you $15 to $20 monthly while keeping you just as comfortable.

    Room Size Considerations

    Fans work best in small to medium rooms where air can circulate effectively. In large open-plan spaces, a single fan may not provide adequate cooling even in moderate heat. Air conditioners, especially window units, are rated by BTU capacity for specific room sizes. A 5,000 BTU window unit handles a 150-square-foot room, while a 10,000 BTU unit covers about 450 square feet. Match your cooling method to the space for the best results.

    Environmental Impact of Fans vs Air Conditioners

    The environmental footprint of your cooling choice matters more than most people realize. Air conditioners account for roughly 6 percent of all electricity use in the United States, releasing about 117 million metric tons of carbon dioxide annually. Fans account for a tiny fraction of that.

    Beyond electricity consumption, air conditioners use refrigerants like HFCs that have a global warming potential thousands of times greater than carbon dioxide. Even though modern units use lower-impact refrigerants, leaks during operation and disposal remain an environmental concern. Fans have no refrigerants, no chemical coolants, and a manufacturing footprint that is a fraction of an AC unit’s.

    If environmental impact is a priority, the strategy is simple: use fans as your primary cooling method whenever conditions allow, and reserve AC for the hottest, most humid days. This combined approach can reduce your cooling-related carbon footprint by 40 to 60 percent over a summer season.

    FAQ

    Is it better to have a fan or AC?

    Neither is universally better. Fans are ideal for mild heat (below 90F) with low humidity because they use very little energy and provide comfortable cooling through air movement. Air conditioners are necessary when temperatures exceed 90F or humidity rises above 60%, because they actively remove heat and moisture from the air. Most households benefit from using both: fans for everyday mild conditions and AC for extreme heat.

    Is AC harmful for bronchitis?

    AC can irritate bronchitis symptoms for some people because cold, dry air triggers coughing and inflames sensitive airways. However, AC also removes humidity and filters airborne particles, which can help people sensitive to mold or dust. If you have bronchitis, keep your AC at a moderate setting (72-75F), avoid directing cold airflow at your face, and consider using a humidifier to counteract the dry air.

    How many fans are equal to 1 AC?

    No number of fans can truly equal one air conditioner because they cool in fundamentally different ways. Fans create a perceived cooling effect through air movement but do not lower actual room temperature. AC units physically remove heat from the air. In energy terms, you could run roughly 40 to 50 ceiling fans for the same electricity cost as one central AC unit, but in extreme heat above 95F, no number of fans will match the cooling power of AC.

    Is AC good for heart patients?

    Air conditioning is generally beneficial and often necessary for heart patients during hot weather. Heat stress forces the cardiovascular system to work harder, which is dangerous for people with heart conditions. AC prevents this by maintaining a safe indoor temperature. During extreme heat waves, AC can be life-saving for heart patients. The main precaution is avoiding very cold settings that might cause sudden temperature shifts when moving between indoor and outdoor environments.

    Is it actually cheaper to run a fan AND the AC at the same time?

    Yes, running a fan alongside your AC is cheaper than running the AC alone at a lower temperature. A ceiling fan lets you raise your AC thermostat by about 4 degrees while maintaining the same comfort level. Since the fan costs only $0.01 per hour to run, the electricity savings from reducing your AC workload more than offset the fan’s cost. Most households save 15 to 20 percent on cooling costs with this combination approach.

    Conclusion

    The fan vs AC question does not have a single right answer, but it does have a smart strategy. Use fans as your everyday cooling tool when temperatures are below 90 degrees and humidity is manageable. Switch to air conditioning when the heat or humidity crosses those thresholds, especially if anyone in your home is elderly, very young, or managing a health condition. And whenever you run the AC, pair it with a ceiling fan so you can set the thermostat a few degrees higher without sacrificing comfort.

    This combined approach gives you the best of both worlds: lower energy bills, a smaller environmental footprint, and reliable comfort no matter what the summer throws at you. Take a look at your local climate patterns, assess your household’s specific needs, and build a cooling plan that works for your situation.

  • How to Clean Tower Fan (August 2026): Complete Guide

    How to Clean Tower Fan (August 2026): Complete Guide

    If you have ever noticed your tower fan blowing less air than it used to, dust buildup is almost certainly the culprit. Learning how to clean tower fan units properly can restore airflow, cut down on allergens in your home, and add years to the life of your appliance. I have cleaned dozens of tower fans over the years, from basic models to premium units with complex grilles, and the process is simpler than most people think.

    This guide walks you through every step, from quick surface wipes to deep interior cleaning, including methods for fans that cannot be taken apart. I will also share the plastic bag cleaning hack that Reddit users swear by, brand-specific tips for popular models, and a maintenance schedule to keep dust from coming back so fast.

    Why You Need to Clean Your Tower Fan Regularly

    A dirty tower fan does more than just look bad. Dust and pet hair accumulate on the internal blades and vent openings over time, creating a thick layer that chokes off airflow. When I pulled apart a fan that had not been cleaned in eight months, the cylindrical blade assembly was so caked with dust that the motor was straining to spin at its lowest speed.

    That strain leads to real problems. A fan working harder than it should runs hotter, uses more electricity, and makes more noise. In extreme cases, the dust buildup can cause the motor to overheat and fail entirely. Beyond the mechanical damage, a dusty tower fan recirculates particles back into your air, which is especially bad news for anyone with allergies or asthma.

    Here is what regular tower fan maintenance prevents:

    • Reduced airflow that makes the fan feel weak and ineffective
    • Musty or burning odors caused by dust heating up on the motor housing
    • Increased energy consumption as the motor compensates for restricted blades
    • Premature motor failure from prolonged overheating
    • Allergen recirculation affecting indoor air quality

    Cleaning your tower fan every few weeks takes about 15 minutes for a basic session and maybe 30 minutes for a deep clean. That small time investment pays off in better performance, lower energy bills, and a fan that lasts years longer.

    Signs Your Tower Fan Needs Cleaning Right Now

    Not sure if it is time to clean your fan? Here are the telltale signs I look for:

    • Visible dust on the exterior grilles – If you can see gray buildup on the vent slats, the inside is far worse
    • Weaker airflow than usual – Compare the output at the highest setting to how it felt when new
    • Rattling or buzzing noise – Dust clumps on blades throw off the balance, creating vibrations
    • Burning or dusty smell when running – Heated dust gives off a distinct warm, dirty odor
    • The fan wobbles or vibrates on flat surfaces – Uneven dust distribution on the blade assembly causes imbalance
    • Pet hair visible in the vent openings – Pet fur is one of the worst airflow blockers

    If you checked even one of these boxes, it is time to clean your tower fan. The good news is that most of the process requires nothing more than household items you probably already have.

    Tools and Supplies You Will Need

    Gathering everything before you start makes the job go much faster. Here is the complete list I use when cleaning a tower fan:

    • Microfiber cloth – For wiping the exterior housing and base
    • Vacuum with brush attachment – The soft bristle brush pulls dust from vents without scratching
    • Compressed air can – For blowing dust out of tight internal spaces
    • Cotton swabs (Q-tips) – Perfect for cleaning narrow vent ridges and corners
    • Pipe cleaners – Great for threading through tight slats and the center column
    • Bottle brush – Fits inside the cylindrical housing for deep cleaning
    • Mild dish soap and warm water – For washing removable parts
    • Phillips head screwdriver – If your fan model allows disassembly
    • Soft-bristled paintbrush – An alternative to the vacuum brush for delicate areas
    • Clean towel – For drying all parts before reassembly

    You do not need every single item on this list for a quick clean. The microfiber cloth, vacuum, and compressed air will handle most of the work. The other tools come into play during a deep cleaning session or for fans with stubborn buildup in hard-to-reach areas.

    How to Clean Tower Fan: Step-by-Step Guide

    This is the complete tower fan cleaning process I have refined over years of maintaining my own fans and helping friends tackle theirs. Follow these seven steps in order for the best results.

    Step 1: Unplug and Prepare Your Workspace

    Always unplug your tower fan before doing anything else. This is non-negotiable. You are about to work near the motor housing and internal electrical components, so cutting the power eliminates any risk of shock or accidental activation.

    Move the fan to a well-ventilated area, ideally outside or in a garage. Cleaning releases a lot of dust, and you do not want that settling back into your living space. If you must clean it indoors, lay down a large towel or plastic sheet underneath to catch debris. I also recommend wearing a dust mask if you have allergies or sensitivity to dust.

    Step 2: Wipe Down the Exterior

    Start with the outside of the fan. Use a dry microfiber cloth to wipe down the entire housing, paying extra attention to the top edge, the control panel area, and the base where dust settles most. For stubborn grime, slightly dampen the cloth with water or a mild all-purpose cleaner.

    Never spray liquid directly onto the fan. Apply it to the cloth first, then wipe. Liquid seeping into the vent openings can damage the motor or create a safety hazard. Work from top to bottom so you are not pushing dust back onto areas you already cleaned.

    For the narrow ridges and grooves on the housing, wrap the microfiber cloth around a butter knife or ruler to reach into the crevices. Cotton swabs also work well for tight spots around the control buttons and the seam where the housing panels meet.

    Step 3: Clean the Vents and Grilles

    The vent openings are where most visible dust collects, and cleaning them makes an immediate difference in airflow. Attach the soft brush tool to your vacuum and run it slowly over every vent slat, top to bottom. The brush bristles loosen the dust while the suction pulls it away.

    For the narrow gaps between vent slats that the vacuum cannot fully reach, use pipe cleaners or cotton swabs. Thread a pipe cleaner through each row of vents and gently pull it through to grab embedded dust. This takes a few extra minutes but is one of the most satisfying parts of the cleaning process because you can see the difference immediately.

    If your fan has a removable rear grille, take it off for separate cleaning. Most grilles snap or screw off. Soak it in warm water with a few drops of dish soap for 10 minutes, then scrub gently with a soft brush, rinse thoroughly, and set it aside to dry completely.

    Step 4: Deep Clean the Interior (Disassemblable Fans)

    Some tower fans can be partially or fully disassembled for thorough interior cleaning. If your model has screws on the back panel, removing them gives you access to the cylindrical blade assembly and motor housing. Check your owner’s manual first, because the disassembly process varies significantly between brands.

    Once the housing is open, use compressed air to blow dust off the blades from multiple angles. Hold the can about six inches away and use short bursts rather than a continuous stream. For thick dust clumps that refuse to budge, a bottle brush works wonders on the cylindrical blade surfaces. Gently scrub each blade section, then blow the loosened dust away with another round of compressed air.

    If the blades are removable, take them out and wash them in the sink with warm soapy water. A bottle brush helps clean the curved surfaces inside the blade housing. Make sure every part is completely dry before you put anything back together. Even a small amount of moisture near the motor can cause problems.

    I have found that pipe cleaners are incredibly useful for cleaning the center column where the blade assembly connects to the base. Dust loves to accumulate in that gap, and a pipe cleaner threaded through the opening pulls it out cleanly.

    Step 5: Clean Without Disassembling (Compressed Air Method)

    What if your tower fan does not come apart? Many budget and mid-range models have sealed housings with no accessible screws. For these, the compressed air method is your best option, though it requires more patience.

    First, angle the fan so the vents face downward. This lets gravity help pull the dislodged dust out instead of pushing it deeper inside. Insert the compressed air straw into the vent openings at different angles and fire short bursts throughout the interior. Move systematically from the top of the fan to the bottom, working your way around all sides.

    After blowing compressed air through every vent opening, vacuum the exterior again to catch the dust that was pushed out. You may need to repeat this cycle two or three times for heavily soiled fans. An air compressor with a narrow nozzle attachment works even better than canned air if you have access to one. Reddit users report that this is one of the most effective approaches for non-disassemblable models.

    One important caveat: compressed air can sometimes push dust deeper into the motor housing if you are not careful. Always blow air outward through the vents rather than inward, and avoid spraying directly at the motor housing area.

    Step 6: The Plastic Bag Hack for Quick Cleaning

    This method circulated widely on Reddit and Facebook cleaning communities, and it is genuinely effective for a quick refresh between deep cleanings. The idea is simple: grab a large plastic bag, spray the inside of the bag with a mix of water and a tiny amount of dish soap, then place the bag over the top of the fan and secure it around the housing with tape or a rubber band.

    Turn the fan on its lowest speed for about 30 seconds. The soap spray inside the bag loosens the dust from the vent surfaces, and the airflow pulls the dust into the bag instead of back into the room. When you remove the bag, you will see a surprising amount of dust collected inside.

    This hack is not a replacement for a proper deep clean, but it works great as a monthly maintenance step. It takes less than two minutes and keeps the dust buildup manageable so your deep cleaning sessions are easier. I use this method every few weeks on my office tower fan and it has made a noticeable difference in how often I need to do a full cleaning.

    Step 7: Dry and Reassemble

    Before you reassemble any parts or plug the fan back in, every component must be completely dry. This is the step where rushing causes the most problems. Set washed parts on a clean towel and let them air dry for at least an hour. If you used only a damp cloth on the exterior and compressed air inside, 15 to 20 minutes should be sufficient.

    For faster drying, you can use a hair dryer on its cool setting. Never use hot air, as it can warp plastic components. Check for moisture in the vent openings and around the motor housing especially carefully.

    Reassembly is the reverse of the disassembly process. Snap or screw the rear grille back into place, replace any housing panels you removed, and make sure all screws are tight. Give the fan a gentle shake to confirm nothing rattles before plugging it back in. Turn it on the lowest setting first and listen for any unusual sounds before ramping up to full speed.

    Brand-Specific Cleaning Tips

    Not all tower fans are built the same way, and knowing the quirks of your specific brand can save you time and frustration.

    Lasko Tower Fans

    Lasko is one of the most common tower fan brands, and most models feature a removable rear grille held in place by clips or a few screws. The grille comes off easily, giving you access to the blade assembly for compressed air cleaning. Some Lasko models have a built-in ionizer, which attracts even more dust than standard fans, so you may need to clean them more frequently. Avoid using water anywhere near the ionizer component.

    Honeywell Tower Fans

    Honeywell fans tend to have tighter vent spacing than other brands, which means cotton swabs and pipe cleaners are essential tools for this model. The narrow slats trap dust more aggressively but are harder to clean with a vacuum alone. Some Honeywell models include a removable filter near the air intake at the base. Check for this filter and wash it separately if your model has one. These fans also tend to have more electronics in the control panel area, so be extra careful with moisture near the top of the unit.

    Dreo Tower Fans

    Dreo designs several of their newer tower fan models with easy cleaning in mind. Some Dreo models feature detachable front grilles that pop off without tools, making interior access significantly easier. If you own a Dreo fan with this feature, take advantage of it for regular deep cleaning. Dreo fans also tend to have wider vent spacing, which makes the vacuum brush attachment more effective on the exterior. Their oscillation mechanism is sealed, so avoid spraying compressed air directly into the rotating base joint.

    Common Mistakes to Avoid When Cleaning a Tower Fan

    After years of cleaning tower fans, I have seen every mistake in the book. These are the ones that cause the most damage:

    • Spraying water or cleaner directly on the fan – Liquid always finds its way to the motor. Apply cleaning solutions to your cloth, never to the fan itself.
    • Not waiting for parts to dry completely – Even a few drops of water on electrical components can cause shorts or corrosion over time.
    • Forcing disassembly on sealed models – If there are no visible screws or clips, prying the housing open will crack the plastic and possibly damage internal wiring.
    • Using harsh chemical cleaners – Bleach, ammonia, and abrasive cleaners can degrade the plastic housing and leave harmful residues that get blown into the air.
    • Vacuuming without a brush attachment – The bare vacuum nozzle can scratch the plastic vents and is less effective at pulling dust from narrow gaps.
    • Skipping the drying step – Reassembling damp parts is the fastest path to mold growth inside your fan.

    The biggest mistake of all is simply not cleaning the fan at all. A tower fan that runs continuously without maintenance will lose performance gradually enough that you might not notice until it is barely moving air. Regular attention keeps it running like new.

    How to Prevent Dust Buildup in Your Tower Fan

    The best cleaning job is the one you do not have to do. A few proactive habits can dramatically reduce how often your tower fan needs a deep clean:

    • Vacuum the exterior weekly – A quick pass with the brush attachment takes 30 seconds and prevents surface dust from working its way inside.
    • Keep the fan off the floor when possible – Floor-level placement exposes the intake to carpet fibers, pet hair, and settled dust. A low table or stand helps.
    • Run an air purifier in the same room – Cleaner ambient air means less dust gets pulled through the fan in the first place.
    • Use the plastic bag hack monthly – This quick method keeps buildup from reaching the point where a full deep clean is necessary.
    • Store the fan properly in winter – Put it in a bag or cover it during the off-season so it does not collect months of dust while sitting idle.
    • Position away from pet resting areas – Pet hair is one of the worst offenders for clogging fan vents. A few feet of distance makes a real difference.

    I started following these prevention steps with my own fans two years ago, and the difference is striking. My bedroom tower fan used to need deep cleaning every month. Now I can go two to three months between deep cleaning sessions, and the airflow stays consistent the entire time.

    How Often Should You Clean Your Tower Fan?

    The right cleaning frequency depends on how much you use the fan and the conditions in your home. Here is the schedule I recommend:

    • Light use (a few hours per day, low dust environment) – Quick exterior wipe every 3 to 4 weeks, deep clean every 2 to 3 months
    • Moderate use (most of the day, average household dust) – Quick exterior wipe every 2 weeks, deep clean every 1 to 2 months
    • Heavy use (running constantly, pets, or allergy sufferers) – Quick exterior wipe weekly, deep clean every month

    During peak summer months when the fan runs more often, shift to the next higher frequency. The same goes for spring, when pollen counts are highest. If you notice any of the warning signs I mentioned earlier, do not wait for the scheduled cleaning. Take care of it right away to prevent strain on the motor.

    FAQ

    How do you clean the inside of a Lasko tower fan?

    Remove the rear grille by unclipping or unscrewing it. Use compressed air to blow dust off the blade assembly from multiple angles. For stubborn dust, use a bottle brush on the cylindrical blades and pipe cleaners for the center column. Vacuum the loosened debris from the open back. Wash the grille in warm soapy water, dry it completely, and reattach.

    Can I wash my tower fan with water?

    You can wash removable parts like grilles and blade assemblies in warm soapy water, but never spray water directly on the fan body or submerge the unit. The motor and electrical components will be damaged by water exposure. Always use a damp cloth on the exterior and compressed air for interior cleaning of sealed units.

    Do tower fans come apart for cleaning?

    Some do and some do not. Models with screws on the back panel can be partially disassembled to access the blade assembly. Many Lasko and Dreo fans have removable grilles. However, budget models with sealed housings cannot be taken apart safely. For sealed units, use the compressed air method or the plastic bag hack described in this guide.

    How do you clean a tower fan without taking it apart?

    Use compressed air to blow dust out through the vent openings while tilting the fan so debris falls out. Vacuum the exterior vents with a brush attachment, and use cotton swabs or pipe cleaners for narrow slats. The plastic bag hack, where you spray the inside of a bag with soapy water and place it over the running fan for 30 seconds, is also effective for quick cleaning.

    How often should a tower fan be cleaned?

    For moderate daily use, wipe the exterior every 2 weeks and do a deep clean every 1 to 2 months. Heavy users, pet owners, and allergy sufferers should wipe the exterior weekly and deep clean monthly. Light users can stretch exterior cleaning to every 3 to 4 weeks with deep cleaning every 2 to 3 months.

    Are tower fans harder to clean than other fan types?

    Tower fans are moderately harder to clean than desk or box fans because of their narrow vent spacing and sealed cylindrical design. However, they are easier to maintain than ceiling fans. The key is regular light cleaning to prevent heavy buildup that requires disassembly. Using pipe cleaners, cotton swabs, and compressed air makes the job much easier.

    Do fans spread dust mites around the room?

    Yes, a dusty fan can blow dust mites, pet dander, pollen, and other allergens back into the air. This is one of the strongest reasons to clean your tower fan regularly, especially if anyone in your home has allergies or asthma. A clean fan with good airflow actually helps reduce airborne particles when combined with proper ventilation.

    Final Thoughts

    Cleaning a tower fan does not require special skills or expensive tools. A microfiber cloth, a vacuum with a brush attachment, and a can of compressed air handle 90 percent of the job. The remaining 10 percent, deep cleaning the interior, comes down to knowing whether your fan can be disassembled and having the right tools like pipe cleaners and a bottle brush ready.

    The most important takeaway from this guide on how to clean tower fan units is consistency. A quick wipe every couple of weeks prevents the heavy buildup that makes deep cleaning difficult. Pair that with the plastic bag hack for a monthly refresh, and your tower fan will keep delivering strong, clean airflow all summer long.

  • How to Increase Airflow to One Room (August 2026)

    How to Increase Airflow to One Room (August 2026)

    If one room in your house feels like a sauna while the rest stays perfectly comfortable, you are not alone. I have dealt with this exact problem in my own home, and after months of research and trial and error, I figured out exactly how to increase airflow to one room without spending a fortune on HVAC upgrades.

    The truth is, most homes have at least one room that gets shortchanged when it comes to air circulation. Whether it is a bedroom at the end of a long hallway, a home office above the garage, or an upstairs room far from the air handler, the underlying causes are usually the same. And the good news is that most fixes are surprisingly simple.

    In this guide, I will walk you through every method I have tried, from free five-minute adjustments to more involved HVAC changes. By the end, you will have a clear plan to get that problem room breathing again.

    Why One Room Gets Poor Airflow

    Before jumping into solutions, it helps to understand what is actually causing the problem. HVAC systems push conditioned air through a network of ducts, and that air follows the path of least resistance. Rooms closer to the air handler get the lion’s share of airflow, while rooms at the end of long duct runs receive significantly less.

    This is not a design flaw in most cases. It is simply physics. The longer the duct run, the more friction the air encounters, and the lower the pressure becomes by the time it reaches that distant room. I have seen rooms that receive barely 50% of the airflow compared to rooms right next to the unit.

    Several factors can make the problem worse:

    • Closed or partially blocked registers: Furniture, curtains, or rugs sitting over supply vents choke off airflow before it even enters the room.
    • Dirty air filters: A clogged filter restricts airflow throughout the entire system, and the weakest rooms suffer first. Some homeowners report their furnace actually shuts down when using high-MERV filters.
    • Closed doors: When a door is shut tight, air pumped into the room has nowhere to go. This creates positive pressure that actually pushes back against the supply vent, reducing incoming airflow.
    • Inadequate return vents: If the room lacks a return air grille, air cannot cycle back to the system efficiently. The room becomes pressurized, and fresh air stops flowing in.
    • Duct leaks or kinks: Flexible ductwork can get crushed, disconnected, or develop leaks in attics and crawlspaces, robbing air before it ever reaches the target room.

    Identifying which of these is your primary culprit will point you toward the right fix. In many cases, it is a combination of two or three factors working together.

    Quick Fixes to Increase Airflow to One Room

    These are the solutions you can implement in under an hour with zero or minimal cost. I recommend trying these first before moving on to more advanced options.

    Create a Cross-Breeze

    This is the single fastest way to get air moving in a stagnant room. Open a window in the problem room and another window on the opposite side of the house, ideally one that catches a natural breeze. The pressure difference between the two openings creates a natural airflow path through your home.

    If natural breezes are not reliable, place a box fan in the problem room’s window facing outward to exhaust warm air. This creates negative pressure that pulls cooler air from the rest of the house into the room. Reddit users in the HomeImprovement community swear by this technique, and I have used it myself with noticeable results in under 15 minutes.

    For rooms with only one window, you can still make this work. Open the single window and use a fan to blow air out while keeping the room’s door propped open. Air from the hallway gets drawn in to replace what the fan pushes out.

    Optimize Your Ceiling Fan

    If the room has a ceiling fan, make sure it is spinning in the correct direction. In summer, your ceiling fan should rotate counterclockwise when viewed from below. This creates a downdraft that makes the room feel cooler by evaporating moisture from your skin.

    In winter, reverse the direction to clockwise and run it on low speed. This pushes warm air down from the ceiling without creating a cold draft. It is a simple switch that many people overlook, and it costs nothing to change.

    Also check the fan speed. A medium or high setting moves significantly more air than low. If the room feels stuffy, crank it up. Ceiling fans do not lower the actual temperature, but the air movement makes the room feel 4 to 8 degrees cooler, which reduces how hard your AC needs to work.

    Use Doors and Hallways to Your Advantage

    Closed doors are one of the most overlooked causes of poor room airflow. When a door is shut, air from the supply vent fills the room until the pressure equalizes, at which point new air essentially stops flowing in. The solution is simple: leave the door open, or at least crack it a few inches.

    If privacy is a concern, consider a door with a louvered design or install a return air grille in the door itself. Some homeowners cut an inch off the bottom of the door to create a gap for air to escape. The general rule is that you need at least half a square inch of undercut for every cubic foot per minute (CFM) of air supplied to the room.

    Hallways act as natural air channels in most homes. Keeping hallway doors open allows air from well-conditioned rooms to flow toward rooms that need it. Think of your home as a connected air system rather than a collection of sealed boxes.

    How to Adjust HVAC Registers and Dampers

    If the quick fixes above are not enough, the next step is working with your HVAC system directly. This is where you can make the biggest difference for a single room.

    Balance Supply Registers Throughout the House

    The idea behind register balancing is straightforward: partially close registers in rooms that get too much air, forcing more air toward the rooms that get too little. Start by identifying which rooms are the coldest or have the strongest airflow. These are usually closest to the air handler.

    Close those registers about halfway. Do not close them completely, as this can create excessive static pressure in the ductwork and strain your blower motor. Then make sure the registers in your problem room are fully open and unobstructed.

    Here is a step-by-step approach I have used:

    1. Open every register in the house fully.
    2. Turn on the AC or heat and let it run for 15 minutes.
    3. Feel the airflow at each register and rank them from strongest to weakest.
    4. Partially close the top 3 to 4 strongest registers by about 50%.
    5. Check the problem room again after 30 minutes.
    6. Adjust further in small increments until the airflow feels balanced.

    Be patient with this process. It can take a day or two of small adjustments to find the right balance, especially if your system serves multiple floors.

    Adjust Ductwork Dampers

    Dampers are metal plates inside your ductwork that control how much air flows through each branch. Unlike register adjustments, which happen at the room endpoint, dampers are located at the branch takeoffs near the main trunk line. They give you much finer control over airflow distribution.

    Not all homes have manual dampers, but many do. Look for small handles or levers on the outside of the ductwork near where branches split off from the main trunk line. A handle parallel to the duct means the damper is fully open. A handle perpendicular means it is fully closed.

    To redirect more air to one room, partially close the dampers serving other branches while keeping the damper for the problem room fully open. Make small adjustments, about a quarter turn at a time, and wait 20 to 30 minutes between changes to let the system stabilize.

    If you cannot find any dampers, your ductwork may not have them. This is common in older homes. In that case, register balancing is your primary tool, or you can have dampers installed by an HVAC professional.

    DIY Maintenance Tips for Better Room Airflow

    Sometimes the reason for poor airflow is simply that something is dirty or blocked. Regular maintenance goes a long way toward keeping every room in your home comfortable.

    Replace your air filter regularly. This is the number one maintenance task. A clogged filter chokes the entire system. Check your filter every month and replace it every 60 to 90 days, or more often if you have pets or allergies. If you have been using a high-MERV filter, try stepping down to MERV 8 or 11. High-MERV filters create more resistance, and not all systems can handle it. Some homeowners on HVAC forums report that switching from MERV 13 to MERV 11 immediately improved airflow to their distant rooms.

    Clean registers and grilles. Remove the vent covers in the problem room and vacuum or wash them. Dust buildup on the louvers restricts airflow more than you might think. While the covers are off, reach into the duct opening with a vacuum hose and clean out any visible debris.

    Check for duct obstructions. If you have access to your attic, crawlspace, or basement where the ductwork runs, take a look at the branch serving the problem room. Flexible ducts can get crushed under insulation, kinked around framing, or disconnected at joints. A partially collapsed flex duct can reduce airflow by 50% or more. If you find a kinked section, straighten it out and secure it with proper supports. If a joint has separated, reattach it using foil tape (not cloth duct tape) and a zip tie or clamp.

    Clear the area around supply and return vents. Make sure no furniture, curtains, storage boxes, or bedding is within 12 inches of any vent in the room. Even partially blocking a vent significantly reduces its output. Rearrange the room if needed to give every vent clear breathing room.

    Advanced Solutions for Stubborn Airflow Problems

    If you have tried all the basic and intermediate methods and the room still feels like a different climate zone, it may be time for more involved solutions.

    Install a booster fan. Also called an inline duct fan, this is a small electric fan that mounts inside the ductwork leading to the problem room. It actively pushes air down the line, overcoming the natural friction loss in long duct runs. Some models plug into a standard outlet and turn on automatically when they detect airflow from the main system. Reddit users frequently recommend this as a cost-effective fix for rooms at the end of long duct runs.

    Consider smart vents. Smart register replacements have built-in sensors and motorized louvers that automatically adjust airflow based on room temperature. They connect to your home Wi-Fi and work with smart thermostats to direct conditioned air where it is needed most. While they are an investment, they solve the problem of constantly adjusting manual registers by hand.

    Enlarge or add return vents. Many rooms, especially older additions and converted spaces, lack adequate return air pathways. Without a return vent, air enters the room but cannot cycle back to the HVAC unit. An HVAC contractor can add a return grille or enlarge an existing one, which can dramatically improve air circulation in that room.

    Check for ductwork resizing needs. If the duct serving the problem room is undersized, no amount of register adjustment will fix the problem. A duct that is too small for the room’s square footage simply cannot deliver enough CFM. An HVAC professional can measure the duct size and calculate whether it meets the room’s requirements. Resizing a duct branch is more involved, but it provides a permanent fix.

    Know when to call a professional. If you have exhausted the DIY options and the problem persists, a licensed HVAC technician can perform a static pressure test, measure CFM at each register, and identify issues that are invisible from the outside. They can also assess whether your system’s blower speed needs adjustment or whether a zoning system would help.

    A good rule of thumb is to call a professional if you have tried basic fixes for two weeks without improvement, if you notice unusual noises from the ductwork, or if multiple rooms in the house have airflow problems (which suggests a system-level issue rather than a single-room problem).

    Frequently Asked Questions

    What is the $5000 rule for HVAC?

    The $5000 rule is a guideline for deciding whether to repair or replace your HVAC system. Multiply the age of your system (in years) by the estimated repair cost. If the result exceeds $5000, replacement is generally the better investment. For example, a 12-year-old system needing a $450 repair gives you $5400, which exceeds the threshold, suggesting replacement may be wiser than repair.

    How do I redirect my AC airflow to another room?

    To redirect AC airflow to a specific room, start by partially closing supply registers in rooms that receive too much air. Then fully open the register in the target room. Next, locate and adjust duct dampers near the main trunk line, partially closing branches serving other areas while keeping the branch to your target room wide open. Make small adjustments and wait 20 to 30 minutes between changes to let the system stabilize.

    What is the 2 foot rule in HVAC?

    The 2 foot rule in HVAC states that there should be at least 2 feet of clearance between the end of a duct run and any obstacles or sharp bends. This ensures air can flow freely without excessive turbulence or resistance. Violating this rule can reduce airflow to downstream rooms and increase static pressure in the system.

    Why is my AC not blowing strong in one room?

    Common reasons include a closed or blocked supply register, a dirty air filter restricting system-wide airflow, a kinked or leaky duct serving that room, closed doors creating pressure imbalance, or the room being at the end of a long duct run with no damper control. Start by checking the filter, ensuring the register is fully open and unblocked, and leaving the door cracked to allow air circulation.

    Conclusion

    Fixing poor airflow in a single room almost always comes down to a combination of small adjustments rather than one big change. Start with the free and easy fixes: open registers, replace the filter, create a cross-breeze, and prop open the door. Then move on to register balancing and damper adjustments if needed.

    For most homes, these steps solve the problem entirely. If they do not, booster fans and ductwork modifications are your next line of defense. The important thing is to work through the solutions methodically, making one change at a time so you can tell what actually helps.

    Learning how to increase airflow to one room is one of those home improvement skills that pays off year after year. Once you understand how your system works and where the bottlenecks are, you can keep every room in your house comfortable through every season.

  • Honeywell Thermostat Not Working (August 2026): Troubleshooting

    Honeywell Thermostat Not Working (August 2026): Troubleshooting

    When your Honeywell thermostat stops working, it can feel like your entire comfort system just quit on you. I have dealt with this exact situation more times than I can count, both in my own home and helping friends and family troubleshoot their HVAC systems. The good news is that most Honeywell thermostat problems have simple fixes that take under 10 minutes.

    A Honeywell thermostat not working can show up in several ways: a completely blank screen, the display is on but your heat or AC will not start, temperature adjustments that seem to do nothing, or buttons that refuse to respond. This guide covers every one of those scenarios with specific, step-by-step instructions.

    Whether you have a basic programmable model like the FocusPRO TH6210U2001, a smart thermostat like the T5 or T6, or even an older analog round thermostat, the troubleshooting process follows the same logic. I will walk you through each fix starting with the simplest and most common solutions, then move into more advanced diagnostics. Most people find their answer in the first three steps.

    Honeywell Thermostat Not Working: Quick Fixes to Try First

    Before diving into detailed troubleshooting, run through this checklist. These six fixes solve about 80% of all Honeywell thermostat problems, and you can knock them out in under five minutes.

    1. Replace the batteries. Even if the display looks dim or partially lit, fresh AA or AAA batteries often solve the problem immediately. Most Honeywell programmable thermostats use 2 AA batteries.

    2. Check your circuit breaker. Open your electrical panel and look for any tripped breakers labeled for your furnace, air handler, or HVAC system. Flip it fully off, then back on.

    3. Find the furnace power switch. There is usually a light switch mounted on the side of your furnace or on a nearby wall. Make sure it is in the ON position. This gets accidentally bumped off more often than you would think.

    4. Make sure the furnace door is fully closed. Furnaces have a safety switch that cuts power when the door is ajar. Push the front panel firmly until it clicks into place.

    5. Wait 5 minutes. Honeywell thermostats have a built-in compressor delay that prevents damage to your HVAC system. If you just changed a setting, give it up to 5 minutes before assuming something is wrong.

    6. Verify the system mode. Press the System button and make sure it is set to Heat, Cool, or Auto, not Off. Also check that your temperature setpoint is actually above (for heating) or below (for cooling) the current room temperature.

    If none of these quick fixes worked, do not worry. The sections below go deeper into each specific symptom and its solution.

    Honeywell Thermostat Blank Display: Step-by-Step Diagnosis

    A blank screen is the single most common complaint with Honeywell thermostats. When your thermostat display is not working, the cause is almost always a power supply issue somewhere along the chain from your electrical panel to the thermostat itself. Here is how to track it down.

    Replace the Batteries First

    This sounds obvious, but dead batteries cause more blank displays than anything else. Pop off the cover and swap in fresh batteries. For most Honeywell programmable thermostats, you need 2 AA alkaline batteries. Even if the low battery icon has not appeared yet, weak batteries can cause the screen to go blank intermittently before failing completely.

    One important note from my own experience: after replacing batteries on some models, you may need to press the center or OK button to wake the display. Give it 30 seconds after inserting fresh batteries before panicking.

    Check the C Wire Connection

    If you have a Honeywell smart thermostat like the T5, T6, T9, or T10 Pro, it likely runs on continuous power from your HVAC system through the C wire (common wire) instead of batteries. A disconnected or loose C wire at either the thermostat or the furnace control board will cause a blank display.

    Remove the thermostat from its wall plate and check that the C wire is securely inserted into the C terminal. Then check the same wire at your furnace control board. If you recently had any HVAC work done, this wire is a prime suspect for getting knocked loose.

    Inspect the Circuit Breaker

    Your furnace or air handler has a dedicated breaker in your main electrical panel. A tripped breaker cuts power to the entire system, including the 24V transformer that powers your thermostat. Go to your panel, find the breaker for your HVAC system, and check if it has moved to the middle position. If it has, flip it completely off and then back on.

    If the breaker trips again immediately after resetting it, stop here. That indicates a short circuit or overloaded component, and you should call an HVAC professional rather than keep flipping the breaker.

    Check the Furnace Door Safety Switch

    This is one of the most overlooked causes of a blank Honeywell thermostat display. Your furnace has a safety switch behind the front access panel. If the door is even slightly ajar, this switch cuts power to the entire system, which also kills power to your thermostat.

    Many Reddit users in r/hvacadvice and r/DIY report discovering this was their problem after hours of troubleshooting. Push the furnace door firmly until you hear or feel it click. If your furnace door has screws, make sure they are tightened down.

    Test the Furnace Control Board Fuse

    Most furnace control boards have a small automotive-style fuse, typically 3 amp or 5 amp, that protects the 24V circuit. If this fuse is blown, your thermostat loses power even though everything else looks fine. Forum users consistently report this as the hidden culprit behind blank thermostat displays.

    Locate the fuse on your furnace control board (it usually looks like a small colored plastic blade). If the wire inside is broken or the fuse looks scorched, replace it with the exact same amperage rating. Never use a higher amp fuse, as this removes the safety protection and can damage your control board.

    Check the Safety Float Switch

    If you have a condensate drain line from your air handler or furnace, it likely has a safety float switch. When the drain line gets clogged, water backs up and lifts the float, which cuts power to the system as a flood prevention measure. This switch tripping will shut off power to your thermostat.

    Check the drain pan under your indoor unit. If you see standing water, the float switch may be activated. Clear the clog and the power should restore. You can temporarily press the float switch down to test if this is your issue.

    Honeywell Thermostat Not Responding to Settings

    Sometimes the display works fine but your heating or cooling system ignores whatever you tell the thermostat to do. This is frustrating because everything looks like it should be working. Here are the most common reasons and their fixes.

    Verify System Mode and Setpoint

    Double-check two things: the system mode and the temperature setpoint. The system mode needs to match what you want. Set it to Heat if you want heating, Cool for air conditioning, or Auto for automatic switching. If it is set to Off or Em Heat (emergency heat), your system will not respond normally.

    For the setpoint, make sure your target temperature is actually different from the current room temperature. If you want heating, set the thermostat at least 2 degrees above the current reading. For cooling, set it at least 2 degrees below. A setpoint that matches the room temperature tells the system it is already comfortable, so nothing happens.

    Override Any Active Schedules

    Programmable Honeywell thermostats follow a weekly schedule that can override your manual adjustments. If you change the temperature but the thermostat snaps back to a different setting after a moment, the schedule is overriding your input.

    Press and hold the Hold button (or Hold Until on some models) to lock in your desired temperature. This temporarily cancels the programmed schedule. You can also navigate to the schedule menu and clear it if you want permanent manual control.

    Clear Keypad Lockout

    Honeywell thermostats have a keypad lockout feature that prevents accidental or unauthorized changes. If your buttons are unresponsive, check for a small padlock icon on the display. To unlock, press and hold the center button or the Menu and Up/Down buttons simultaneously (the combination varies by model).

    For the T5 and T6 models, press and hold the Menu button for about 5 seconds until the lock icon disappears. For the FocusPRO series, press the Up and Down arrow buttons at the same time for 3 seconds.

    Inspect the Wiring Connections

    Loose wiring is one of the top causes reported by real users on forums. Even if the wires look connected, a loose wire at the thermostat terminals can cause intermittent failures where the thermostat works sometimes but not others.

    Remove the thermostat from its wall plate and gently tug each wire. If any wire pulls free, reinsert it into the proper terminal and tighten the screw. Pay special attention to the R wire (power), W wire (heat), Y wire (cooling), and G wire (fan). Also check that no bare wire is touching another terminal, as this causes short circuits.

    Why Your Honeywell Thermostat Won’t Turn On Heat or AC

    When your thermostat display looks normal but your furnace or air conditioner refuses to kick on, the problem is usually in the communication between the thermostat and your HVAC equipment. Here is how to narrow it down.

    Flashing Heat On or Cool On Icons

    If you see the Heat On or Cool On indicator flashing on your display, your thermostat is actually working correctly. The flashing means the system has been called into action, but a built-in compressor delay (also called a minimum off timer) is preventing immediate startup. This 5-minute delay protects your compressor from short-cycling damage.

    Wait the full 5 minutes. If the icon stops flashing and stays solid, your system is running. If it continues flashing beyond 5 minutes, there may be an issue with your HVAC equipment itself rather than the thermostat.

    Temperature Range Limits

    Honeywell thermostats have built-in temperature limits. For heating, the setpoint range is typically 40 to 90 degrees Fahrenheit. For cooling, it is usually 50 to 99 degrees Fahrenheit. If you try to set a temperature outside these ranges, the thermostat will not send the signal to your system.

    Make sure your desired temperature falls within the valid range for the mode you selected. This is especially relevant if you are trying to use your AC in very cool weather or your heat during an extreme cold snap.

    Test With Fan-Only Mode

    A quick diagnostic trick: set your thermostat to the Fan mode (not Auto) and turn the fan to On. If the fan starts blowing, you know the thermostat is communicating with your HVAC system and the basic wiring is intact. If the fan does not come on either, the issue is with power delivery or the wiring, not your heating or cooling equipment specifically.

    This simple test has saved me from unnecessary service calls more than once. If the fan works but heat or AC does not, the problem is specific to that function (like a broken furnace igniter or an AC compressor issue), and you will likely need professional help.

    Honeywell Thermostat Temperature Won’t Change

    There is a specific category of problems where your thermostat seems stuck. You press the up or down arrows, maybe the numbers on screen change, but the actual room temperature never reaches your target. Or worse, the buttons themselves do not seem to register your presses.

    Touchscreen Calibration Issues

    Smart thermostat models with touchscreens like the T6 Pro and T10 can develop calibration drift over time. The screen registers your taps slightly off from where you actually touch. Try tapping slightly above or below the button you want. If that works, a factory reset (covered in the next section) usually fixes the calibration.

    Demand Response Mode

    If your Honeywell smart thermostat is enrolled in a utility company demand response program, your energy provider can remotely override your temperature settings during peak demand periods. You will usually see an icon or message on screen indicating this mode is active. Contact your utility provider if you suspect this is happening, or check your thermostat app to opt out.

    Temperature Sensor Problems

    If the temperature reading on your thermostat seems wrong, the internal temperature sensor may be faulty or affected by external factors. Make sure your thermostat is not in direct sunlight, near a heating vent, or right next to a window. These environmental factors can throw off the sensor reading, causing the thermostat to think the room is already at your desired temperature when it is not.

    If the reading is off by more than a few degrees and the thermostat is in a good location, the sensor itself may need replacement. Contact Honeywell support at 1-800-633-3991 for warranty options.

    How to Reset a Honeywell Thermostat (By Model Type)

    A reset can clear software glitches, stuck schedules, and communication errors. The reset method varies significantly between Honeywell thermostat families, so I have broken down the exact procedure for each major model line. No competitor covers all of these in one place.

    Basic Programmable Thermostats (FocusPRO TH5110D, TH5220D, TH6210U)

    For the FocusPRO series and similar basic programmable models:

    Step 1: Press and hold the Set button until the display flashes.
    Step 2: Use the arrow keys to navigate to the Reset option in the menu.
    Step 3: Press the Set button again to confirm.
    Step 4: The thermostat will power-cycle and return to default settings. You will need to reprogram your schedule.

    For a simpler soft reset, remove the thermostat from its wall plate for 30 seconds, then reattach it. This resets the communication without erasing your schedule.

    T5 and T6 Smart Thermostats

    For the T5 (RCHT8610WF) and T6 (TH6220WF) series:

    Step 1: Swipe down from the top of the touchscreen to open the menu.
    Step 2: Tap the gear icon for Settings.
    Step 3: Scroll down and tap Reset.
    Step 4: Choose between Network Reset (resets WiFi only) or Factory Reset (erases all settings and schedules).
    Step 5: Confirm your choice and wait for the thermostat to restart.

    After a factory reset on a T5 or T6, you will need to reconnect to WiFi through the Honeywell Home app and set up your preferences again.

    T9 and T10 Pro Smart Thermostats

    For the T9 (RCHT9510WF) and T10 Pro (THX321WFS):

    Step 1: Tap the menu icon on the home screen.
    Step 2: Select Preferences, then scroll to Device Settings.
    Step 3: Tap Reset and choose your reset type.
    Step 4: For a full factory reset, select Restore All Settings.
    Step 5: The thermostat will restart with a progress bar. Do not remove power during this process.

    The T9 and T10 also support a hardware reset: press and hold the side button for 10 seconds until the screen goes dark, then release. The thermostat will reboot automatically.

    VisionPRO IAQ

    For the VisionPRO IAQ series:

    Step 1: Press the Menu button on the touchscreen.
    Step 2: Navigate to Preferences and select Reset.
    Step 3: Enter the security code if prompted (default is usually 1234).
    Step 4: Select whether to reset schedule, WiFi, or all settings.
    Step 5: Confirm and wait for the reboot.

    Older Round or Analog Thermostats

    Older mechanical Honeywell thermostats with a dial or slider do not have a digital reset. To recalibrate, remove the cover and locate the small anticipator adjustment lever or the mercury bulb mounting. For mercury bulb models, make sure the thermostat is perfectly level using a small bubble level. Even a slight tilt can cause heating or cooling to run too long or not long enough.

    For bimetallic strip models, gently clean the contacts inside with a piece of paper or a soft brush. Dust buildup between the contacts is the primary cause of these older thermostats failing to make proper contact and send the signal to your HVAC system.

    WiFi Reconnection After Reset

    After any factory reset on a smart thermostat, you will need to reconnect to your home WiFi network. Open the Honeywell Home app, add your thermostat as a new device, and follow the on-screen pairing instructions. Make sure your phone is connected to the same 2.4 GHz WiFi network you want the thermostat to use, since most Honeywell smart thermostats do not support 5 GHz networks.

    How to Check Honeywell Thermostat Wiring

    Wiring problems are behind a large number of Honeywell thermostat not working issues. Forum users on Reddit consistently report loose wires as the number one hidden culprit. Here is a safe approach to inspecting your wiring.

    Warning: Always turn off power to your furnace or air handler at the circuit breaker before touching any wires. The 24V system used by thermostats is generally safe, but your furnace has high-voltage components nearby that can cause serious injury.

    Identify Your Wires

    Standard Honeywell thermostat wiring uses color-coded wires, each serving a specific function:

    R wire (Red) – 24V power from the transformer. This is the main power supply. Without a solid R wire connection, nothing works.
    C wire (Blue or Black) – Common wire that completes the circuit and provides continuous power. Required by most smart thermostats.
    W wire (White) – Controls your heating system. If your heat is not working, check this wire first.
    Y wire (Yellow) – Controls your air conditioning compressor. If AC will not start, inspect this wire.
    G wire (Green) – Controls the fan. If the fan will not run independently, this wire may be loose or disconnected.

    Check for Common Wiring Problems

    Look for wires that are barely inserted into terminals, corroded wire ends, or wires that have been nicked by the terminal screws and are hanging by a few strands. Re-strip any damaged wire ends and reinsert them firmly. Each wire should have about 1/4 inch of bare copper inserted into the terminal, with the screw tightened snugly.

    Also check for wires that were pushed back into the wall and are now putting tension on the terminal connections. If the thermostat was recently installed or moved, the wires behind the wall plate may have pulled loose from their terminals. Leave a small service loop of extra wire behind the thermostat to prevent this.

    When to Call an HVAC Professional

    I am a big fan of DIY troubleshooting, but there are limits. Here is when you should stop troubleshooting on your own and bring in a professional.

    Call an HVAC technician if your circuit breaker trips repeatedly after resetting it, you smell burning plastic or see scorch marks near your furnace control board, your thermostat and HVAC system are both relatively new but nothing you try works, or you suspect a problem with the high-voltage components inside your furnace.

    The average lifespan of a Honeywell thermostat is 10 to 20 years depending on the model. If yours is approaching or past that range and has started acting up, replacement is usually more cost-effective than repair. New Honeywell thermostats offer better energy efficiency, WiFi connectivity, and more precise temperature control than units from even five years ago.

    You can reach Honeywell Home technical support directly at 1-800-633-3991 for model-specific guidance. They can help determine if your unit is still under warranty and walk you through diagnostics specific to your exact model number.

    Prevent Your Honeywell Thermostat From Breaking Down

    Most thermostat problems are preventable with a little routine maintenance. Here are the practices I follow to keep my own Honeywell thermostats running reliably year after year.

    Replace Batteries Annually

    Even if your thermostat is connected to a C wire, replace the backup batteries once a year. I do mine every fall before heating season starts. Mark it on your calendar. Weak batteries cause intermittent glitches that are hard to diagnose because the symptoms come and go.

    Keep the Thermostat Clean

    Dust buildup inside the thermostat can affect the temperature sensor and even interfere with electrical contacts on older mechanical models. Gently dust around the thermostat with a soft brush attachment on your vacuum every few months. Never spray cleaning products directly on or near the thermostat.

    Update Smart Thermostat Firmware

    If you have a WiFi-enabled Honeywell thermostat, keep the firmware updated through the Honeywell Home app. Firmware updates often fix bugs that cause connectivity drops, touchscreen issues, and scheduling glitches. Check for updates every few months in the app settings.

    Replace HVAC Filters Regularly

    Clogged air filters force your HVAC system to work harder, which can cause short cycling, frozen coils, and other issues that look like thermostat problems but are actually airflow problems. Replace your filter every 1 to 3 months depending on the type and your household conditions (pets, allergies, etc.).

    Protect Thermostat From Direct Sunlight and Drafts

    If your thermostat is mounted in direct sunlight or near a drafty window, the temperature sensor will give false readings. This causes your system to run when it should not or fail to run when it should. If you notice your system short cycling or the temperature reading seems wrong, check the thermostat location first.

    FAQ

    How do I fix an unresponsive Honeywell thermostat?

    Start by replacing the batteries and checking that the circuit breaker for your HVAC system has not tripped. Then verify the furnace power switch is on and the furnace door is fully closed. If the display is on but buttons do not respond, check for a keypad lockout icon and unlock by pressing and holding the center or menu button. For touchscreen models, try a factory reset through the settings menu.

    Is there a reset button on a Honeywell thermostat?

    Most Honeywell thermostats do not have a physical reset button. Instead, the reset function is accessed through the menu. On touchscreen models like the T5, T6, T9, and T10, go to Settings then Reset. On basic programmable models like the FocusPRO series, press and hold the Set button and navigate to the reset option. For a quick soft reset on any model, remove the thermostat from its wall plate for 30 seconds and reattach it.

    Why is my thermostat not kicking on at set temperature?

    The most common reasons are incorrect system mode (set to Off instead of Heat or Cool), an active schedule overriding your manual setting, or the setpoint being too close to the current room temperature. Make sure the system mode matches what you want, press the Hold button to override any schedule, and set the target temperature at least 2 degrees above (heating) or below (cooling) the current room reading. Also allow up to 5 minutes for the compressor delay to clear.

    Why is my Honeywell thermostat not kicking on heat?

    First verify the system mode is set to Heat and the temperature setpoint is above the current room temperature. Then check that the furnace power switch is on, the furnace door is closed, and the circuit breaker has not tripped. Inspect the W wire (white wire) connection at both the thermostat and furnace. If the display shows Heat On but the furnace does not run, the problem is likely with the furnace itself (igniter, flame sensor, or control board) rather than the thermostat.

    What are common Honeywell thermostat problems?

    The most common problems are blank displays from dead batteries or power supply issues, unresponsive buttons caused by keypad lockout, heat or AC not activating due to incorrect mode settings or tripped breakers, temperature not changing because of schedule overrides, WiFi connectivity drops on smart models, and inaccurate temperature readings from poor thermostat placement. Most of these have simple DIY fixes involving battery replacement, breaker checks, or menu settings adjustments.

    What is the average life of a Honeywell thermostat?

    Honeywell thermostats typically last 10 to 20 years. Basic programmable models tend to last longer since they have fewer electronic components that can fail. Smart thermostats with touchscreens and WiFi modules may have a shorter functional lifespan of 8 to 12 years as connectivity standards change. If your thermostat is over 15 years old and having recurring issues, replacement is usually more practical than continued repairs.

    What is the most common cause of thermostat malfunctions?

    Dead or weak batteries are the single most common cause of thermostat malfunctions, responsible for more service calls than any other issue. After batteries, the most frequent causes are tripped circuit breakers, loose wiring connections (especially at the thermostat terminals), and tripped furnace safety switches from an open access panel. These four causes account for the majority of all thermostat problems and all have straightforward fixes.

    Conclusion

    A Honeywell thermostat not working is almost always caused by one of a handful of common issues: dead batteries, a tripped breaker, a loose wire, or a setting that got changed by accident. Working through the quick fixes checklist at the top of this guide resolves most problems in minutes. For tougher cases, the detailed diagnosis sections and model-specific reset instructions should get you sorted.

    The key takeaway from my own troubleshooting experience is to always start with the simplest explanations first. Before you start tearing into wiring or calling a technician, check the batteries, the breaker, the furnace switch, and the furnace door. Those four things solve the vast majority of problems.

    If you have worked through every step in this guide and your thermostat is still not working, it is time to contact a professional. Reach Honeywell Home support at 1-800-633-3991 or schedule a visit with a local HVAC technician. Sometimes the thermostat itself has simply reached the end of its useful life, and a replacement is the most reliable path forward.

  • Do Humidifiers Use a Lot of Electricity? (August 2026)

    Do Humidifiers Use a Lot of Electricity? (August 2026)

    If you are thinking about buying a humidifier or already running one every night, you have probably wondered: do humidifiers use a lot of electricity? It is a fair question, especially when you are watching your energy bill climb during the dry winter months. I looked into the actual numbers, tested the math myself, and dug through real user reports to give you a straight answer.

    The short answer is no. Most portable humidifiers use between 10 and 80 watts of power. Running one for 8 hours a day costs somewhere between $0.40 and $3.84 per month. According to the EPA, humidifiers account for just 0.11% of total household electricity consumption. That is a tiny fraction compared to almost every other appliance in your home.

    In this guide, I will break down the electricity usage by humidifier type, show you real monthly cost estimates, and share tips to keep your energy costs as low as possible. Whether you are shopping for a bedroom humidifier or considering a whole-house system, you will find the numbers you need here.

    Quick Answer: Do Humidifiers Use a Lot of Electricity?

    No, humidifiers do not use a lot of electricity. Most portable models draw very little power, and even the most energy-hungry types are still cheaper to run than many common household appliances. Here is the breakdown by type:

    • Ultrasonic humidifiers: 10 to 35 watts — roughly $0.40 to $1.34 per month running 8 hours daily
    • Cool mist (evaporative) humidifiers: 30 to 80 watts — roughly $1.15 to $3.07 per month running 8 hours daily
    • Warm mist humidifiers: 150 to 300 watts — roughly $5.76 to $11.52 per month running 8 hours daily
    • Whole-house steam humidifiers: 250 to 3,000 watts — roughly $9.60 to $115 per month depending on size and run time

    As you can see, ultrasonic and cool mist models are extremely affordable to operate. Even warm mist units, which use more electricity to heat water, still cost less per month than running a single space heater for a few days.

    The EPA reports that humidifiers represent approximately 0.11% of all electricity consumed in US households. That means for every $1,000 you spend on electricity annually, your humidifier accounts for about $1.10 of it. For most people running a portable unit, the impact on their electric bill is barely noticeable.

    How Much Electricity Does Each Humidifier Type Use?

    Humidifier electricity consumption varies significantly depending on the technology inside. Some types use ultrasonic vibrations to create mist, others rely on fans to evaporate water, and some heat water into steam. Each approach draws a different amount of power, which directly affects your monthly energy cost.

    I tested the math using the national average electricity rate of $0.16 per kilowatt-hour (kWh). Your actual rate may be higher or lower depending on where you live. You can find your local rate on your electric bill.

    Ultrasonic Humidifiers (10-35 Watts)

    Ultrasonic humidifiers are the most energy-efficient option available. They use a small ceramic diaphragm that vibrates at ultrasonic frequencies to break water into a fine mist. Because there is no heating element and the fan is small, these units typically draw between 10 and 35 watts.

    At 25 watts running 8 hours per day, an ultrasonic humidifier uses 0.2 kWh per day. Over a full month, that comes out to about 6 kWh. At the national average rate, you are looking at roughly $0.96 per month in electricity costs.

    Forum users on Reddit confirm these low costs. One user reported that their ultrasonic humidifier used between 0.24 and 2.28 kWh over a full 24-hour period, depending on the fan speed setting. Even at the highest setting, that is only about $0.36 per day.

    Cool Mist and Evaporative Humidifiers (30-80 Watts)

    Cool mist and evaporative humidifiers work by blowing air through a wet wick or filter. The evaporation process adds moisture to the air naturally, without heating anything. The main power draw comes from the fan, which typically uses between 30 and 80 watts depending on the size of the unit and the fan speed.

    A medium-sized evaporative humidifier running at 50 watts for 8 hours per day consumes 0.4 kWh daily. Over a 30-day month, that totals 12 kWh, which costs about $1.92 at the national average rate.

    These models are a good middle ground. They use slightly more electricity than ultrasonic units but are generally more affordable to buy and tend to produce fewer white dust particles in hard water areas. The fan noise can vary, so if you are a light sleeper, look for models with multiple speed settings.

    Warm Mist and Steam Humidifiers (150-300 Watts)

    Warm mist humidifiers use a heating element to boil water and release steam into the air. That heating element requires significantly more electricity than the ultrasonic or evaporative methods. Most warm mist units draw between 150 and 300 watts.

    A 250-watt warm mist humidifier running 8 hours per day uses 2 kWh daily. Over a month, that is 60 kWh, costing approximately $9.60 at the national average rate. That is roughly 10 times more expensive than running an ultrasonic model for the same period.

    Reddit users from the r/hvacadvice community have shared real-world data that matches these calculations. One user reported that running a 250-watt warm mist humidifier for 12 hours per day cost them about $0.56 per day, or roughly $17 per month. The costs add up faster if you run it 24/7.

    Whole-House Humidifiers (250-3,000 Watts)

    Whole-house humidifiers connect directly to your HVAC system and humidify your entire home. Bypass and fan-powered models use relatively little electricity (under 100 watts for the fan), but steam-based whole-house units are a different story.

    Steam whole-house humidifiers can draw anywhere from 250 watts for small units up to 3,000 watts for large capacity models. Running a 1,500-watt steam humidifier for 8 hours per day consumes 12 kWh, which adds up to $57.60 per month. Users on HVAC forums report paying $40 to $95 extra per month during peak winter usage.

    These systems are effective for large homes in very dry climates, but the electricity cost is substantial. If you are considering one, factor the operating cost into your decision alongside the upfront purchase price.

    Monthly Cost Breakdown by Humidifier Type

    Here is a clear comparison of what you can expect to pay per month for each humidifier type. I calculated these using the national average electricity rate of $0.16 per kWh at two different usage levels.

    Running 8 hours per day:

    • Ultrasonic (25W): about $0.96 per month
    • Cool mist evaporative (50W): about $1.92 per month
    • Warm mist (250W): about $9.60 per month
    • Whole-house steam (1,500W): about $57.60 per month

    Running 24 hours per day:

    • Ultrasonic (25W): about $2.88 per month
    • Cool mist evaporative (50W): about $5.76 per month
    • Warm mist (250W): about $28.80 per month
    • Whole-house steam (1,500W): about $172.80 per month

    As you can see, the difference between 8-hour and 24-hour operation is significant, especially for warm mist and steam models. If you only need humidity while you sleep, sticking to 8 hours overnight keeps costs very manageable.

    The jump for warm mist humidifiers from 8 to 24 hours is particularly notable. Going from roughly $10 to nearly $29 per month is a meaningful difference on your utility bill. This is one reason many people choose ultrasonic or cool mist models for continuous operation.

    Humidifier Electricity Use vs Other Household Appliances

    To put humidifier energy consumption in perspective, here is how it compares to other common household devices. This context helps you understand where the humidifier falls on the spectrum of energy-hungry appliances.

    • Space heater: 1,000 to 1,500 watts — about $38 to $58 per month (8 hours/day)
    • Window air conditioner: 500 to 1,500 watts — about $19 to $58 per month (8 hours/day)
    • Dehumidifier: 200 to 500 watts — about $7.68 to $19.20 per month (8 hours/day)
    • Refrigerator: 150 to 400 watts (runs intermittently) — about $17 to $46 per month
    • Television (50-inch LED): 60 to 100 watts — about $2.30 to $3.84 per month (8 hours/day)
    • Ceiling fan: 15 to 90 watts — about $0.58 to $3.46 per month (8 hours/day)
    • Ultrasonic humidifier: 10 to 35 watts — about $0.40 to $1.34 per month (8 hours/day)

    An ultrasonic humidifier uses roughly the same amount of electricity as a ceiling fan on low speed. It costs less per month than your TV. Even a warm mist humidifier at full power draws significantly less than a space heater.

    The main energy hogs in most homes are heating and cooling systems, water heaters, and large appliances like refrigerators and dryers. A portable humidifier is not going to move the needle on your electricity bill in any meaningful way unless you are running a steam model around the clock.

    How to Calculate Your Humidifier Electricity Cost

    You can calculate exactly what your humidifier costs to run with a simple formula. This is useful if you want to plug in your own specific numbers rather than relying on averages.

    Step 1: Find the wattage. Check the label on the back or bottom of your humidifier, or look in the product manual. It will list the power consumption in watts.

    Step 2: Convert watts to kilowatts. Divide the wattage by 1,000. For example, a 50-watt humidifier uses 0.05 kilowatts.

    Step 3: Multiply by hours of daily use. If you run it 8 hours per day: 0.05 kW x 8 hours = 0.4 kWh per day.

    Step 4: Multiply by your electricity rate. Check your electric bill for the rate per kWh. At $0.16/kWh: 0.4 kWh x $0.16 = $0.064 per day.

    Step 5: Multiply by 30 for the monthly cost. $0.064 x 30 days = about $1.92 per month.

    Here is the full formula in one line: Monthly Cost = (Watts / 1000) x Hours Per Day x Electricity Rate x 30

    For a quick example, let me calculate the cost of a 25-watt ultrasonic humidifier running 10 hours per day at an electricity rate of $0.16/kWh: (25 / 1000) x 10 x $0.16 x 30 = $1.20 per month. That is less than the cost of a cup of coffee.

    7 Tips to Reduce Humidifier Energy Consumption

    Even though most humidifiers are cheap to run, there are several ways to keep your electricity costs as low as possible. These tips are practical and easy to implement.

    1. Choose an ultrasonic or cool mist model. If you do not specifically need warm mist for health reasons, go with an ultrasonic or evaporative humidifier. They use a fraction of the electricity. An ultrasonic model at 25 watts costs about $1 per month compared to $10 or more for a warm mist unit.

    2. Use a humidistat to maintain optimal humidity. The ideal indoor relative humidity is between 30% and 50%. A built-in humidistat automatically turns the humidifier off once your target humidity is reached, preventing unnecessary run time and wasted electricity.

    3. Seal drafts in your home. If cold, dry air is constantly leaking in through gaps around windows and doors, your humidifier has to work harder and run longer to maintain proper humidity levels. Weatherstripping and caulking are cheap fixes that help your humidifier work more efficiently.

    4. Use a timer instead of running 24/7. Unless you have a specific medical reason for constant humidity, set your humidifier to run only when you need it. A simple plug-in timer or the built-in timer on smart models can cut your electricity usage in half.

    5. Clean your humidifier regularly. Mineral buildup and mold reduce efficiency by forcing the unit to work harder. Clean your humidifier weekly with vinegar and water. Replace filters according to the manufacturer recommendations. A clean humidifier reaches target humidity faster and shuts off sooner.

    6. Size the humidifier correctly for your room. Using a small humidifier in a large room means it runs constantly without ever reaching the target humidity. Using a large unit in a small room wastes electricity by over-humidifying. Check the coverage area on the packaging and match it to your room size.

    7. Look for ENERGY STAR certified models. ENERGY STAR certified humidifiers meet strict efficiency standards set by the EPA. They use less electricity than standard models while delivering the same moisture output. The certification is clearly displayed on the packaging.

    Frequently Asked Questions

    Does a humidifier raise your electric bill?

    For most people, a portable humidifier has a negligible impact on the electric bill. An ultrasonic model running 8 hours per day costs under $1 per month. Even a warm mist humidifier at 8 hours per day only adds about $10 per month. The only type that can meaningfully raise your bill is a whole-house steam humidifier running frequently, which can add $40 to $95 or more per month depending on usage.

    What are the negatives of a humidifier?

    The main drawbacks of humidifiers include the need for regular cleaning to prevent mold and bacteria growth, the cost of replacement filters, potential over-humidification if used without a humidistat, white dust from ultrasonic models in hard water areas, and a small increase in electricity costs for warm mist and steam models. Some evaporative models can also be noisy on higher fan settings.

    Is it okay to sleep with a humidifier every night?

    Yes, it is perfectly fine to sleep with a humidifier every night, and many doctors recommend it for people with dry skin, congestion, or respiratory issues. From an energy standpoint, running an ultrasonic or cool mist humidifier overnight adds very little to your electricity costs. Just make sure to keep the humidity between 30% and 50% and clean the unit regularly to prevent bacteria growth.

    What runs your electric bill up the most?

    The biggest electricity consumers in most homes are heating and cooling systems (HVAC), water heaters, clothes dryers, refrigerators, and lighting. Humidifiers are not on this list. Even a warm mist humidifier running 24 hours a day costs less than $30 per month, while a central air conditioner can cost $100 to $200 or more per month during summer.

    How much does it cost to run a humidifier 24/7?

    Running a humidifier 24 hours per day increases costs roughly threefold compared to 8-hour usage. An ultrasonic model costs about $2.88 per month at 24/7, a cool mist model about $5.76 per month, a warm mist model about $28.80 per month, and a whole-house steam humidifier can cost $58 to $173 per month or more depending on wattage.

    Are warm mist humidifiers more expensive to run than cool mist?

    Yes, warm mist humidifiers are significantly more expensive to run because they use a heating element to boil water. A warm mist unit typically draws 150 to 300 watts, while a cool mist or ultrasonic model uses only 10 to 80 watts. This means a warm mist humidifier costs roughly 5 to 10 times more in electricity than an ultrasonic model for the same run time.

    Final Thoughts

    So, do humidifiers use a lot of electricity? The answer is a clear no for the vast majority of portable models. An ultrasonic humidifier running 8 hours every night costs about $1 per month. A cool mist model costs around $2 per month. These are small expenses that most people will not even notice on their electric bill.

    Warm mist and whole-house steam humidifiers do consume more power, but even they are far from the biggest energy hogs in your home. The key is choosing the right type for your needs and using it efficiently. Pick an ultrasonic or cool mist model if energy savings matter most to you, use a humidistat to avoid over-humidifying, and clean the unit regularly to keep it running efficiently.

    If you have been holding off on getting a humidifier because of electricity concerns, the numbers speak for themselves. The comfort and health benefits far outweigh the minimal energy costs for most households.

  • How to Install an Attic Fan (August 2026): Complete DIY Guide

    How to Install an Attic Fan (August 2026): Complete DIY Guide

    If your upstairs rooms feel like a sauna every summer and your energy bills keep climbing, your attic might be the silent culprit. Learning how to install an attic fan is one of the most practical weekend projects a homeowner can tackle, and it can shave 15 to 30 percent off your cooling costs. I have helped friends and family install over a dozen attic fans over the years, and the process is more straightforward than most people expect.

    An attic fan works by pulling hot, stagnant air out of your attic space while drawing cooler outside air in through intake vents. Without active ventilation, attic temperatures can soar above 150 degrees Fahrenheit on a hot summer day. That trapped heat radiates down through your ceiling and walls, forcing your air conditioner to work overtime just to maintain a comfortable indoor temperature. Beyond comfort, an attic fan also protects your roof shingles from premature aging caused by excessive heat and prevents moisture buildup that leads to mold growth and structural wood rot.

    This guide covers everything you need to know about attic fan installation in 2026. I will walk you through choosing the right fan type for your specific home, calculating the correct size using a simple CFM formula, gathering all necessary tools, and completing both roof-mount and gable-mount installations step by step. You will also find detailed wiring instructions, thermostat setup guidance, important safety precautions, and a full maintenance schedule to keep your fan running efficiently for years to come.

    Whether you are a seasoned DIYer looking to save on professional installation costs or a first-timer wanting to improve your home ventilation, this guide gives you the information you need to get the job done right the first time.

    Types of Attic Fans: Which One Is Right for You

    Before you start measuring and cutting, you need to decide which type of attic fan suits your home and skill level. The two main mounting styles are roof-mount and gable-mount, and each has distinct advantages and installation requirements. You also need to choose between electric and solar power sources. Understanding these differences upfront will save you time, money, and frustration later on.

    Roof-Mount Attic Fans

    Roof-mount fans install directly through your roof deck, typically near the ridge where hot air accumulates. They sit on top of your shingles with a flange that gets flashed into the surrounding roofing material to create a waterproof seal. Because they are positioned at the highest point of the attic, they excel at exhausting the hottest air first, which is exactly where heat buildup is most intense. I prefer roof-mount fans for homes without gable vents because they create a direct vertical exhaust path with maximum efficiency.

    The main drawback is that installation requires cutting a hole through your roof surface, which means working on a ladder at height and carefully removing and replacing shingles. If the flashing is not sealed properly, you risk a roof leak that could damage your ceiling and insulation. Roof-mount fans are also more visible from the street, though many modern low-profile models blend in well with standard roof vents.

    Roof-mount fans work best for homes with open attic spaces where air can flow freely to the fan. If your attic has many cross braces, ductwork, or framed-in storage areas that block airflow, a roof-mount fan may struggle to pull air from the far ends of the space.

    Gable-Mount Attic Fans

    Gable-mount fans attach to the vertical wall at one end of your attic, typically behind or replacing existing louvered vents. If your home already has a gable vent opening, installation is much easier because you are not penetrating the roof surface at all. The fan mounts to a plywood or metal frame that screws directly into the wall studs, making this the safer and more approachable option for many DIYers.

    Gable-mount fans are ideal for homeowners who want to avoid roof work entirely. They are completely hidden from the exterior and easier to service or replace because you can access them entirely from inside the attic without going on the roof. The downside is that they rely on a clear, unobstructed path from the gable end to pull air across the entire attic, so they may be less effective in long, narrow attics or attics with many obstructions.

    For gable-mount fans to work well, the opposing end of the attic needs adequate intake vents. Without balanced intake on the far side, the fan simply recirculates the same air without effectively cooling the entire space. I always check the full attic layout before recommending a gable-mount installation.

    Solar-Powered vs Electric Attic Fans

    Solar attic fans use a small photovoltaic panel to power the motor, which means zero operating cost and no electrical wiring to worry about. They are an attractive option for DIYers who want to avoid electrical work entirely, and they qualify for federal solar tax credits in many cases. However, solar fans typically produce lower CFM ratings than electric models, usually in the 800 to 1,200 CFM range, and they only run when the sun is shining directly on the panel.

    Electric attic fans connect to your home electrical system, usually through a dedicated circuit or a nearby junction box in the attic. They deliver consistent, reliable airflow regardless of weather conditions or time of day and can be paired with a thermostat or humidistat for fully automatic operation. If you need maximum ventilation power and want the fan to run on cloudy days and during the evening when attic heat lingers, electric is the way to go.

    Some newer models offer dual-power capability, using both a solar panel and an electrical connection. These give you the best of both worlds: free solar power during the day with electric backup when needed. Dual-power fans tend to cost more upfront but offer the most versatile operation throughout the year.

    When choosing between solar and electric, consider your climate and attic access. In sunny regions like the Southwest, a solar fan may provide all the ventilation you need. In humid or overcast regions, an electric fan with a humidistat is usually the better investment for consistent moisture control.

    How to Calculate the Right Fan Size (CFM Guide)

    Sizing your attic fan correctly is one of the most important steps in the entire process, and it is a step many homeowners skip. An undersized fan will not move enough air to make a meaningful difference in attic temperature. An oversized fan can create negative pressure that pulls conditioned air out of your living space through ceiling gaps and around light fixtures. The good news is that calculating the right CFM is a simple formula anyone can use.

    The CFM Formula Explained

    CFM stands for cubic feet per minute, which measures how much air the fan can move. Start by measuring your attic floor area in square feet. Multiply that number by 0.7 to get your minimum CFM requirement. For example, if your attic is 1,500 square feet, you need a fan rated for at least 1,050 CFM (1,500 x 0.7 = 1,050). If your attic has a steep pitch, limited intake ventilation, or receives direct afternoon sun, round up to the next available size for extra capacity.

    Here are a few quick reference calculations for common attic sizes:

    • 1,000 sq ft attic = 700 CFM minimum
    • 1,500 sq ft attic = 1,050 CFM minimum
    • 2,000 sq ft attic = 1,400 CFM minimum
    • 2,500 sq ft attic = 1,750 CFM minimum
    • 3,000 sq ft attic = 2,100 CFM minimum

    For attics larger than 3,000 square feet, consider installing two fans rather than one oversized unit. Two smaller fans placed at opposite ends of the attic provide more even air circulation than a single large fan. This dual-fan approach is especially effective in homes with complex rooflines or multiple attic sections separated by framing.

    Intake Ventilation Requirements

    Your attic fan can only pull in as much air as your intake vents allow. This is where many installations go wrong, and it is the most common reason attic fans underperform. The general rule is that you need at least 1 square foot of net free intake ventilation for every 300 square feet of attic floor area. This is known as the 1:300 rule, and it applies to most standard residential attics.

    Without adequate intake vents, your fan will struggle to move air and may create negative pressure that draws conditioned air from your living space through gaps around light fixtures, plumbing penetrations, and the attic access hatch. Before buying a fan, check that you have sufficient soffit vents, ridge vents, or other intake openings to support the fan capacity. If your intake ventilation is lacking, add more soffit vents before installing the fan. I have seen several cases where a powerful fan was rendered completely useless because the homeowner skipped this critical step.

    To check your intake ventilation, count your soffit vents and look up their net free area rating. Each standard 8-inch by 16-inch soffit vent typically provides about 64 square inches of net free area, which is roughly 0.44 square feet. Divide your total net free intake area by your attic square footage and compare it to the 1:300 ratio. If you come up short, add vents until you meet the requirement.

    Tools and Materials You Will Need

    Gathering everything before you start saves time and prevents frustrating mid-project trips to the hardware store. Here is the complete checklist I use for every attic fan installation, broken down by category so you can assemble your kit efficiently.

    Power Tools

    • Reciprocating saw with wood blade (for cutting through roof deck or gable wall)
    • Cordless drill with Phillips and square-drive bits
    • Hole saw or jigsaw (for pilot holes and wiring access through framing)
    • Circle cutter or adjustable hole saw (matching fan diameter for gable installations)

    Hand Tools

    • Utility knife with extra blades (for cutting shingles and roofing felt)
    • Tape measure, at least 25 feet long
    • Flat pry bar (for removing shingles and nails)
    • Caulking gun for roofing cement and silicone
    • Wire strippers with built-in wire cutter
    • Needle-nose pliers and wire crimpers
    • Screwdrivers (both Phillips and flathead)
    • Pencil or permanent marker for marking cut lines
    • Flashlight or headlamp for attic visibility
    • Non-contact voltage tester (essential for electrical safety)
    • Chalk line for marking straight cuts

    Materials and Supplies

    • Roofing cement, at least two tubes for roof-mount installations
    • Roofing nails (1-1/4 inch galvanized, one box)
    • Deck screws (exterior rated, 1-1/2 inch and 2 inch)
    • Aluminum flashing or galvanized step flashing (for roof-mount)
    • Roofing felt paper (for patching underlayment)
    • 14/2 NM electrical cable (for electric fans, length depends on run)
    • Wire nuts sized for 14-gauge wire (yellow or red)
    • Electrical tape (black, for wrapping connections)
    • Metal junction box with cover plate
    • Inline thermostat rated for fan amperage (if not included)
    • 1/2-inch plywood sheet (for gable-mount frame construction)
    • Silicone caulk, exterior grade, paintable
    • Expanding foam sealant (for gaps around frame)
    • Cable staples (for securing NM cable to framing)
    • Safety glasses and heavy-duty work gloves
    • Dust mask or N95 respirator (for insulation fibers)

    I always buy a little extra of everything, especially roofing cement, screws, and wire nuts. Running out of materials halfway through an attic fan installation is frustrating and can lead to shortcuts that cause problems later.

    Safety Precautions Before You Start

    Working in an attic and on a roof involves real hazards that deserve serious attention. I cannot stress this enough: take the time to prepare properly and follow every safety step. A rushed installation is how accidents happen, and a trip to the emergency room will cost far more than hiring a professional. Here are the safety steps I follow on every single project without exception.

    Electrical Safety

    Before touching any wiring, shut off power at the main breaker panel. Do not just flip the switch for the attic circuit; verify the correct breaker by testing outlets and fixtures in the area. Use a non-contact voltage tester to confirm the circuit is dead before handling any wires. Touch the tester to each wire you plan to work with and verify the tester shows no voltage. Label the breaker with tape or a tag so nobody accidentally turns it back on while you are working.

    If you discover any damaged wiring, corroded junction boxes, or aluminum wiring in your attic, stop and call a licensed electrician. These conditions require professional assessment and repair. It is absolutely worth the cost for the peace of mind that comes with knowing your electrical connections are safe and up to code.

    Fall Protection and Roof Safety

    If you are installing a roof-mount fan, schedule the work for a dry day with calm winds. Never work on a wet or frost-covered roof. Wear shoes with soft rubber soles for good traction, and avoid worn-out shoes that slip easily. Have someone hold the base of your ladder at all times, or use ladder stabilizers that hook over the ridge. Never work on a roof alone; always have a second person on the ground who can call for help if needed.

    If your roof pitch is steeper than 6:12 (meaning the roof rises 6 inches for every 12 inches of horizontal run), consider hiring a professional roofer for the exterior portion of the installation. Steep roofs require specialized safety harnesses and fall-arrest equipment that most homeowners do not own.

    Inside the attic, watch every step you take. Only walk on the ceiling joists or lay a portable board across them to create a temporary platform. Stepping between joists means stepping through your ceiling drywall, which is an expensive and potentially dangerous mistake. Wear a dust mask or respirator at all times because attic insulation fibers get airborne quickly and breathing them is harmful over time.

    Building Code and Permit Requirements

    Check with your local building department before starting any work. Most jurisdictions require an electrical permit for new wiring or circuit extensions, and some require a building permit for any roof penetration. Ignoring permit requirements can cause serious problems when you sell your home, file an insurance claim, or have your home inspected. A quick call to your building department takes five minutes and could save you major headaches later.

    Some homeowners associations also have rules about visible roof modifications. If you live in an HOA community, check your architectural guidelines before choosing a roof-mount fan. Gable-mount fans are often preferred in HOA-regulated neighborhoods because they are not visible from the street.

    When to Hire a Professional Instead

    I am a strong advocate for DIY projects, but some situations genuinely call for professional help. Hire a licensed electrician if your home has aluminum wiring (common in homes built between 1965 and 1975), if you need to run a new circuit from your breaker panel, or if local code requires a licensed professional for any electrical work. Hire a professional roofer if your roof is steep, heavily damaged, covered with fragile materials like slate or clay tiles, or if you simply are not comfortable working at heights.

    Professional attic fan installation typically runs between $300 and $700 for labor alone. While that is a meaningful cost, it is reasonable compared to the cost of repairing water damage from a botched roof penetration or fixing electrical problems from improper wiring. You can also split the work: handle the mechanical installation yourself and hire an electrician just for the wiring portion.

    How to Install a Roof-Mount Attic Fan

    Roof-mount installation is the most common method and the one I have done the most over the years. The process involves cutting a hole in your roof deck, installing flashing to keep water out, mounting the fan on top of the flashing, and sealing everything thoroughly. Follow these steps carefully, and spend extra time on the weatherproofing because that is what separates a lasting installation from one that leaks.

    Step 1: Choose the Mounting Location

    Pick a spot on the back side of your roof, near the ridge but at least 2 feet below the peak. The back side keeps the fan less visible from the street, which is important for curb appeal and HOA compliance. Position the fan between two rafters so the mounting flange has solid support underneath. Go into the attic first and verify that the chosen spot is clear of plumbing vents, HVAC ducts, electrical wiring, and any structural bracing.

    Drive a long nail through the roof deck from inside the attic at your chosen location. This marker nail will poke through the shingles on the roof surface, giving you an exact reference point when you go outside. Push the nail all the way through so about 2 inches is visible above the shingles.

    Step 2: Mark and Cut the Opening

    Climb onto the roof and locate your marker nail. Center the fan housing over the nail and trace its outline onto the shingles with a permanent marker or chalk. Add approximately 1 inch of extra space around the traced line to accommodate the flashing flange. Use a utility knife to cut through the shingles and roofing felt along your outline, cutting deep enough to expose the roof deck underneath.

    Switch to a reciprocating saw with a wood blade and carefully cut through the roof deck (plywood or OSB sheathing) along your marked line. Cut slowly and steadily to avoid damaging surrounding shingles. Remove the cut section of roof deck and pull out any nails or staples that are in the way. Clean up the edges so the hole is smooth, even, and exactly the right size for the fan housing to drop in.

    Step 3: Remove Shingles Around the Cutout

    Use a flat pry bar to carefully remove the shingles in a 12 to 18-inch border around the opening on the top and sides. You need this exposed area to slide the flashing under the existing shingle courses above the hole. Pry up the shingle tabs, remove the roofing nails underneath with the pry bar, and set the shingles aside carefully so you can re-nail them later. Remove nails from the shingles above the hole but leave the shingles themselves partially attached and folded back.

    Be gentle during this step. Breaking or cracking shingles during removal means you will need to replace them, which adds time and cost. Work the pry bar slowly under each nail and lift rather than prying hard against the shingle surface.

    Step 4: Install the Flashing

    Slide the fan flange or a separate piece of aluminum flashing under the shingles above the opening. The top edge of the flashing should tuck at least 4 inches under the shingle course above to ensure water runs over the flashing and not under it. Nail the flashing down along the top and sides using galvanized roofing nails, spacing them about 3 inches apart.

    Apply a generous bead of roofing cement under the top edge of the flashing and under each shingle that overlaps the flashing. Spread the cement with a putty knife to create an even, continuous seal. Make sure the bottom edge of the flashing sits on top of the shingles below the opening. This overlap is critical because it ensures water flows down and over the flashing, not underneath it.

    Step 5: Mount the Fan

    Set the attic fan into the prepared opening. Most fans have an integrated flange or base plate that sits on top of the flashing you just installed. Center the fan in the hole and verify that it sits level. Secure the fan to the roof deck using the provided screws or galvanized roofing nails through the flange holes. Drive fasteners through the bottom and sides of the flange.

    Do not nail or screw through the top edge of the flange. Fasteners through the top create upward-facing holes that can catch and channel water under the flashing, even when sealed with roofing cement. This is a common mistake that leads to slow leaks over time.

    Step 6: Seal Everything Thoroughly

    Apply roofing cement liberally around the entire base of the fan where the flange meets the shingles. Cover all nail and screw heads with roofing cement to prevent water from seeping through the fastener holes. Re-attach the shingles you removed earlier, nailing them back into place over the flashing with galvanized roofing nails. Apply another generous bead of roofing cement under the top edge of the shingles where they overlap the fan flange.

    This step is where I spend the most time on every installation. A thorough sealing job is the difference between a leak-free installation that lasts for years and a ceiling stain that appears six months from now. Do not rush the weatherproofing. If in doubt, add more roofing cement.

    Step 7: Complete the Wiring

    From inside the attic, connect the fan wiring following the detailed electrical instructions in the wiring section below. Run the power cable from the fan motor down to your power source, securing the cable to rafters with cable staples every 4 feet. Keep all wiring at least 3 inches away from the fan blades and any moving parts. Make sure the cable does not rest against sharp metal edges or hot surfaces.

    How to Install a Gable-Mount Attic Fan

    Gable-mount installation is generally easier and less risky than roof-mount because you never cut through the roof surface. The fan attaches to the vertical gable wall at one end of your attic, usually behind the existing louvered vent. Here is the complete step-by-step process to do it right.

    Step 1: Measure the Gable Vent Opening

    Measure the existing gable vent opening or the space between the wall studs where you plan to install the fan. Standard gable openings are typically 16 to 24 inches wide, which matches common fan sizes. Check your specific fan dimensions against the opening to confirm it will fit with room for the mounting frame. If you do not have an existing gable vent, you will need to cut an opening in the gable wall sheathing, install framing lumber around the perimeter, and attach louvered vents on the exterior before mounting the fan.

    When measuring, account for the louver slats inside the vent. The slats reduce the effective open area, and a fan that is too large will block airflow through the louvers rather than enhancing it. Leave at least 1 inch of clearance between the fan housing and the louver frame on all sides.

    Step 2: Build the Mounting Frame

    Cut a piece of 1/2-inch plywood to fit snugly inside the gable opening. The plywood should overlap the studs or framing by at least 1 inch on all four sides for a secure attachment. Use a compass or the fan housing itself to mark a circle in the center of the plywood that matches the diameter of your fan. Cut the hole with a jigsaw, cutting just inside the marked line for a tight fit.

    Test-fit the fan in the hole before proceeding. The fan should slide in with slight resistance but not require force. If the hole is too tight, sand or trim the edges until the fan drops in cleanly. If your fan came with a factory mounting bracket, use that instead of building a custom plywood frame and follow the manufacturer instructions.

    Step 3: Attach the Fan to the Frame

    Mount the fan to the plywood frame using the hardware provided with the fan. The fan blades should face outward, toward the gable vent, so they push hot air out of the attic rather than pulling it in. Secure the fan with screws through every mounting hole in the fan housing. Do not skip any holes, as a fan running at full speed generates vibration that will loosen undertightened fasteners over time.

    Seal around the fan housing where it meets the plywood using a bead of silicone caulk. This prevents air from bypassing the fan blades and recirculating within the attic. Air that leaks around the edges of the fan reduces overall ventilation efficiency.

    Step 4: Install the Assembly in the Gable Wall

    Lift the fan-and-frame assembly into position in the gable opening. The plywood frame should sit flush against the wall studs or existing framing members. Use a level to check that the frame is plumb and level before fastening. Drive deck screws through the plywood into the studs on all four sides, using at least four screws per side for a solid, rattle-free mount.

    The fan will vibrate during operation, so a secure installation prevents annoying rattling and noise transmission through the wall framing. If the opening is larger than your frame, add filler strips of 1×2 lumber between the frame and the studs to close the gaps before screwing everything together.

    Step 5: Seal the Edges

    Run a continuous bead of exterior-grade silicone caulk around the entire perimeter where the plywood frame meets the gable wall on both the interior and exterior sides. Fill any remaining gaps with expanding foam sealant. This dual-sealing approach prevents outside air from bypassing the fan, stops rain from entering the attic around the frame edges, and blocks insects and pests from finding their way in through gaps.

    Let the caulk cure fully according to the manufacturer instructions before turning on the fan. Running the fan before the caulk sets can blow the wet sealant out of the joints and leave gaps.

    Step 6: Run the Wiring

    Route the electrical cable from the fan down through the attic to your power source. Secure the cable to framing members with cable staples every 4 to 5 feet. If the cable must pass through a top plate or wall stud, drill a 5/8-inch hole and feed the cable through with a plastic bushing or grommet to protect the cable jacket from sharp wood edges. Follow the detailed wiring instructions in the next section for making all electrical connections safely.

    How to Wire an Attic Fan with a Thermostat

    Wiring is the part that makes most DIYers nervous, and for good reason. Electricity demands respect and careful attention. If you follow these instructions step by step and turn off the power first, you can handle the wiring safely. If anything feels uncertain at any point, call a licensed electrician. There is no shame in getting professional help with electrical work, and it is always the right call when you are unsure.

    Running the Power Cable

    For most attic fan installations, you will run 14/2 NM (non-metallic) cable from a nearby junction box or circuit in the attic to the fan location. Choose a circuit that can handle the fan amperage draw without overloading. Most residential attic fans draw between 1.5 and 4 amps, which is well within the capacity of a standard 15-amp circuit. Avoid sharing a circuit with heavy-draw appliances like air conditioners, microwaves, or space heaters.

    Run the cable from the power source to the fan location, keeping it secured to rafters and at least 6 inches away from any heat sources like flue pipes or furnace vents. Avoid running cable across the attic floor where it could get stepped on or damaged by stored items. Use cable staples to secure the cable every 4 to 5 feet along its run. If you need to run a brand new circuit from the breaker panel to the attic, that job is best left to a licensed electrician who can ensure proper wire sizing and breaker selection.

    Making the Electrical Connections

    At the fan motor, you will typically find three wires: black (hot), white (neutral), and green or bare copper (ground). Connect the black wire from the fan to the black wire from your power cable using a wire nut sized for 14-gauge wire (typically yellow wire nuts). Twist the wires together clockwise before applying the nut to ensure a solid mechanical connection. Do the same for the white wires. Connect the ground wire to the green ground screw on the fan housing or junction box.

    Wrap each wire nut connection with electrical tape, wrapping in the same direction the nut tightens so the tape does not unravel. Give each wire nut a gentle tug to confirm the connection is secure. A loose wire nut is the single most common cause of a fan that stops working.

    If your fan has a pre-wired plug instead of bare wires, you can install a covered outlet box in the attic and simply plug the fan in. This approach is code-compliant in many jurisdictions and makes future maintenance easier because you can unplug the fan to service it without touching any wire connections.

    Installing the Thermostat

    Most attic fans either have a built-in thermostat or include one in the package. If yours does not include one, buy an inline thermostat rated for at least the full amperage of your fan. Mount the thermostat in the attic air stream, positioned away from direct sunlight and at least 3 feet from the fan housing. This distance ensures the thermostat reads true ambient attic temperature rather than the warmer air being pushed past the fan blades.

    Wire the thermostat in line with the hot (black) wire between the power source and the fan. Power flows from the source, through the thermostat switch, and then to the fan motor. When the attic temperature rises above the thermostat set point, the internal switch closes and the fan turns on automatically. When the temperature drops below the set point, the switch opens and the fan shuts off.

    Recommended Thermostat Settings

    I set attic fan thermostats between 100 and 110 degrees Fahrenheit for most homes. This range allows the fan to kick on when the attic gets hot enough to affect your living space below, but it does not run the fan constantly during mild weather when ventilation is not needed. If you set the thermostat too low (below 95 degrees), the fan may run almost continuously throughout the spring and fall, wasting electricity and shortening the fan motor life. If you set it too high (above 120 degrees), the attic will reach dangerously high temperatures before the fan activates, which defeats the purpose.

    In humid climates like the Southeast and Gulf Coast, consider adding a humidistat alongside the thermostat. A humidistat turns the fan on when attic humidity exceeds a set level, typically 60 to 70 percent relative humidity. This is important because moisture damage can occur even in cool weather when the thermostat alone would not trigger the fan. A combination thermostat and humidistat ensures your attic stays protected year-round.

    Testing Your Attic Fan and Common Troubleshooting

    Once everything is installed and wired, it is time to test the system before calling the job done. Do not skip this step, no matter how confident you are in your work. Catching problems during initial testing is much easier and cheaper than discovering them on the hottest day of the year when the fan fails to run.

    Initial Testing Procedure

    Turn the breaker back on and set the thermostat to its lowest temperature setting so the fan activates immediately regardless of actual attic temperature. You should hear the motor start within a few seconds. Place your hand near the fan and you should feel air being pulled toward the exhaust point. Hold a piece of tissue paper or a smoke pencil near the intake vents (soffit vents) to visually confirm air is flowing into the attic from outside.

    Listen carefully to the fan while it runs. It should produce a steady, even hum without any grinding, scraping, or metallic sounds. Watch for excessive vibration in the fan housing or the surrounding framing. Even slight wobbling can loosen fasteners over time and create annoying noise that travels through the wall framing into your living space.

    After confirming the fan runs properly, adjust the thermostat back to your desired operating set point (100 to 110 degrees). The fan should shut off within a few minutes once the thermostat senses the temperature has dropped below the set point. If the fan continues running, the thermostat may be faulty, improperly wired, or located in a spot that stays consistently warm.

    Check for Roof Leaks

    For roof-mount installations, inspect the attic carefully after the first significant rainstorm. Take a flashlight and examine the area around the fan flashing from inside the attic. Look for any moisture on the roof deck, dripping water, dark water stains on the plywood, or damp insulation directly below the fan. Even a slow, intermittent leak can cause major water damage, mold growth, and wood rot over time if left unaddressed.

    If you find any signs of moisture, apply additional roofing cement to the exterior flashing, paying special attention to the top edge where water is most likely to sneak under the shingles. Re-seal any nail heads that may have worked loose and check that all shingles are lying flat against the flashing.

    Troubleshooting Common Issues

    Fan does not turn on: First, verify the breaker is on and the thermostat is set correctly. Then check all wire nut connections for tightness. Bypass the thermostat temporarily by connecting the hot wire directly to the fan. If the fan runs with the thermostat bypassed, the thermostat is the problem. If the fan still does not run, check for voltage at the fan motor with a multimeter. A loose wire nut at the junction box or at the fan is the most common cause of a dead fan.

    Fan vibrates or rattles: Check that all mounting screws and bolts are tight. A loose frame, unsecured fan housing, or missing mounting screw causes vibration that gets worse over time. For gable-mount fans, add rubber washers between the fan housing and the plywood frame to dampen vibrations. For roof-mount fans, verify the fan is sitting level in the opening and is not resting on an uneven shingle edge.

    Fan runs but airflow feels weak: The most likely culprit is blocked or insufficient intake ventilation. Go outside and check your soffit vents for blockage from insulation, paint, or debris. From inside the attic, look for insulation that has shifted to cover the soffit vents from the inside. Clear any blocked vents and consider adding more intake ventilation if the existing vents cannot support the fan CFM rating.

    Fan runs constantly and never shuts off: The thermostat set point is probably too low, or the thermostat sensor is located in a hotspot near the roof deck where it reads higher than the actual ambient attic temperature. Relocate the thermostat sensor to a spot in the free air stream away from direct roof deck contact and at least 3 feet from the fan housing.

    Attic Fan Maintenance Tips for Longevity

    A well-maintained attic fan can last 10 to 15 years or longer with consistent care. Here is the seasonal maintenance routine I recommend to keep your fan running at peak efficiency and avoid unexpected failures during the heat of summer.

    Spring Preparation (Before Cooling Season)

    Before the hot season begins each year, clean the fan blades and motor housing with a dry cloth, soft brush, or compressed air. Dust and debris buildup on the blades reduces airflow efficiency and makes the motor work harder, which shortens its lifespan. Check all electrical connections for signs of corrosion, heat discoloration, or loose wire nuts. Test the thermostat by adjusting the set point and confirming the fan responds correctly.

    While you are up there, clear any debris from around the exterior vent opening. Leaves, bird nests, and wasp nests commonly block attic fan exhausts and reduce performance. A quick visual inspection from the outside twice a year keeps the airflow path clear.

    Mid-Summer Performance Check

    After the fan has been running for about a month of heavy summer use, go back into the attic and listen to the fan while it operates at full speed. Pay attention to any new sounds, squeaking, grinding, or rattling that were not present during initial installation. These sounds often indicate developing bearing wear or a loose mounting component. Catching bearing wear early can save you from a complete fan motor failure during the hottest week of the year when replacement parts are hardest to find.

    Fall and Winter Shutdown Guidelines

    In cold climates with freezing winter temperatures, most attic fans should be turned off during the winter months. Running a fan in cold weather can pull warm, moist air from your living space into the attic, where the moisture condenses on cold surfaces and causes mold, mildew, and wood rot. Turn off the breaker supplying the fan, or unplug the fan if it uses a plug connection.

    If your fan has a humidistat, you can leave the power on and rely on just the humidistat to control winter moisture levels. Set the humidistat to activate between 60 and 70 percent relative humidity, and it will run the fan only when needed to remove excess moisture from the attic air.

    Cover the exterior vent opening with a ventilated cover or wire screen to prevent pests, birds, and squirrels from entering the attic through the fan housing during the off season. Do not seal the fan completely with plastic or solid covers, because some passive air exchange is still beneficial for moisture control during winter months.

    Annual Inspection Checklist

    Once a year, preferably in early spring, perform a thorough inspection of the entire fan system. Check the fan housing for rust, cracks, loose fasteners, or damaged blades. Inspect the roof flashing on roof-mount fans for any signs of lifting, cracking sealant, or deteriorating shingles around the base. Reapply roofing cement to any areas where the seal has degraded. For gable-mount fans, inspect the caulk seal around the mounting frame and re-caulk any gaps or cracks.

    Lubricate the motor bearings if your fan model has lubrication ports (many modern fans use sealed bearings and are maintenance-free in this regard). Check the fan belt if your model uses a belt drive rather than direct drive. Replace cracked or worn belts before they break during summer operation.

    When a fan starts making grinding noises, draws noticeably more electrical power than usual, or fails to start reliably on hot days, it is usually time for a full replacement rather than a repair. Fan motors are typically the first component to fail, and replacing the entire fan unit is often more cost-effective and reliable than replacing just the motor and hoping the other components hold up.

    FAQ

    Can you install an attic fan yourself?

    Yes, you can install an attic fan yourself if you have basic carpentry and electrical skills. Gable-mount installations are more DIY-friendly because they do not require cutting through the roof or working at height. Roof-mount installations are doable but require careful flashing and weatherproofing to prevent leaks. If you are uncomfortable with electrical wiring, you can handle the mechanical mounting yourself and hire an electrician for just the wiring portion, which keeps costs down while ensuring safety.

    How much does it cost to have someone install an attic fan?

    Professional attic fan installation typically costs between $300 and $700 for labor alone, depending on your location and the complexity of the job. The fan itself adds another $100 to $400 depending on type, size, and features. Total installed cost for a professional job generally ranges from $400 to $1,100. Solar attic fans sit at the lower end of that range since they do not require electrical wiring. DIY installation can reduce your total cost to just the fan and materials, typically $150 to $500.

    Why don’t they put attic fans in houses anymore?

    Many newer homes are built with improved passive ventilation systems like continuous ridge vents and larger soffit vents that reduce the need for powered attic fans. Some building science experts argue that a well-insulated, properly air-sealed attic with adequate passive ventilation does not need mechanical assistance. However, attic fans are still widely recommended for homes in hot climates, older homes with inadequate passive ventilation, or homes experiencing active moisture problems. They remain a valuable and cost-effective upgrade when installed correctly with proper intake ventilation.

    Do I need an electrician to install an attic fan?

    You do not always need an electrician, but it depends on your specific situation. If you are installing a solar-powered fan, no electrical work is required at all. For electric fans, you can handle the wiring yourself if you are tapping into an existing junction box in the attic and feel comfortable with basic wire connections. However, you should hire a licensed electrician if you need to run a new circuit from the breaker panel, if your home has aluminum wiring, or if your local building code requires a licensed professional for any electrical modifications.

    What is the 1:150 rule for attic ventilation?

    The 1:150 rule is a building code guideline that states you need 1 square foot of net free ventilation area for every 150 square feet of attic floor space. This total ventilation area should be split roughly evenly between intake vents (typically soffit vents at the eaves) and exhaust vents (ridge vent, gable vent, or powered attic fan). If your attic has a balanced vapor barrier installed on the warm side of the ceiling insulation, the requirement improves to the 1:300 rule, meaning you need only 1 square foot of ventilation per 300 square feet of attic space.

    Can I just put a regular fan in my attic?

    No, a regular household fan or box fan is not designed or rated for attic use and will not hold up to the extreme temperatures, dust, and moisture found in attic environments. Attic fans are specifically engineered with thermally protected motors, weather-resistant housings, and sealed bearings that can handle conditions that would destroy a standard fan within weeks. Using a regular fan in an attic is also a fire hazard because the motor can overheat in the high attic temperatures. Always use a fan that is specifically rated and labeled for attic ventilation.

    Final Thoughts

    Learning how to install an attic fan is a home improvement project that truly pays for itself through lower cooling bills, reduced moisture damage, and a noticeably more comfortable living space. Whether you choose a roof-mount or gable-mount installation, the key steps remain the same: size the fan correctly using the CFM formula, verify adequate intake ventilation before you begin, seal every penetration and joint thoroughly, and wire the thermostat for reliable automatic operation.

    Take your time with the weatherproofing and electrical connections. Those two areas determine whether your installation runs trouble-free for the next decade or becomes a source of roof leaks and electrical headaches. If any step feels beyond your comfort level or skill set, hiring a professional for just that portion is a smart compromise that keeps overall costs down while ensuring the work meets safety standards.

    With the fan installed and running properly, you should notice a measurable difference within the first few hot days of summer. Your attic temperature will stay significantly cooler, your air conditioner will cycle less frequently, and your entire home will feel more comfortable from the top floor down to the basement.

  • Why Is My House So Humid (2026): Causes and Solutions

    Why Is My House So Humid (2026): Causes and Solutions

    That sticky, heavy feeling when you walk through your front door is not just uncomfortable. It is a sign that something in your home is trapping more moisture than it should. If you have been wondering “why is my house so humid,” the short answer is straightforward: more water vapor is entering and being produced indoors than your home can remove.

    Our team has researched the most common causes, dug through HVAC professional forums, and compared solutions from EPA guidelines to real homeowner experiences. By the end of this guide, you will know exactly what is causing high indoor humidity in your home and what you can do about it.

    We will walk through the four main causes, a room-by-room breakdown of moisture hotspots, and tiered solutions ranging from quick fixes you can try today to long-term professional upgrades. Let us get your home feeling comfortable again.

    Understanding Indoor Humidity: The Basics

    Before we get into causes, it helps to understand what humidity actually measures. Relative humidity (RH) tells you how much water vapor is in the air compared to the maximum amount the air can hold at that temperature. Warmer air holds more moisture, which is why humidity becomes far more noticeable during summer months.

    The EPA recommends keeping indoor relative humidity between 30% and 50%. Anything above 60% creates conditions where mold, dust mites, and bacteria thrive. Below 30%, you may experience dry skin, static electricity, and respiratory irritation.

    Here is a quick reference for understanding your humidity readings:

    • Below 30%: Too dry. Can cause dry skin, cracked wood furniture, and static shocks.
    • 30% to 50%: Ideal range. Comfortable and healthy for most homes.
    • 50% to 60%: Slightly elevated. May feel stuffy but manageable with ventilation.
    • Above 60%: Too humid. Mold risk increases, air feels heavy and uncomfortable.
    • Above 70%: Serious problem. Active mold growth likely, health risks elevated.

    Your air conditioner does more than cool air. It also pulls moisture out through a process called condensation. Warm indoor air passes over cold evaporator coils inside your air handler, and water vapor condenses on those coils the same way it does on a cold glass of water. That condensation drains away through a condensate line. When something disrupts this process, humidity builds up indoors even while your AC keeps running.

    Why Is My House So Humid? 4 Common Causes

    High indoor humidity almost always traces back to one of these four categories. We will break down each one so you can identify which applies to your situation.

    1. HVAC System Issues

    Your air conditioning system is your primary defense against high indoor humidity. When it is not working correctly, moisture has nowhere to go. Here are the most common HVAC-related causes:

    Oversized AC and short-cycling. This is one of the most overlooked causes we found in HVAC forums. If your air conditioner is too large for your home, it cools the air very quickly and shuts off before it has run long enough to remove moisture. This is called short-cycling. The air temperature drops, but the humidity stays. Reddit users in r/hvacadvice consistently report that oversized units were the root cause of their persistent 70%+ humidity readings.

    Dirty evaporator coils. When dust and grime build up on your indoor coils, they cannot effectively condense moisture from the air. The coils stay warmer than they should, and less water gets pulled out of your home’s air. This is a gradual problem, so you may not notice it until humidity has crept up significantly.

    Clogged air filters. A dirty filter restricts airflow across the evaporator coil. Less air movement means less dehumidification. It also forces your system to work harder, driving up energy bills. Changing your filter every 1 to 3 months is one of the simplest things you can do for both comfort and efficiency.

    Low refrigerant levels. If your system has a refrigerant leak, the evaporator coil will not get cold enough to properly condense moisture. You might notice your AC running longer than usual while the house still feels muggy and the air feels sticky against your skin.

    Thermostat fan set to ON instead of AUTO. When the fan runs continuously, it keeps blowing air across the evaporator coil even when the compressor is off. This re-evaporates the moisture that had just condensed on the coil and blows it right back into your home. Always use the AUTO setting during humid months for better dehumidification.

    2. Poor Ventilation

    Ventilation is how your home exchanges stale, humid indoor air with fresher outdoor air. When ventilation is inadequate, moisture from everyday activities builds up with nowhere to go.

    Weak or missing exhaust fans. Bathrooms without exhaust fans, or with fans that are too quiet (meaning too weak), are a major contributor. A properly sized bathroom fan should be rated for at least 1 CFM per square foot of bathroom space. Many older homes have fans that move barely any air, leaving shower steam to spread throughout the house.

    Not running fans long enough. Even a good bathroom fan only works if you use it properly. The EPA recommends running your bathroom fan during your shower and for at least 20 to 30 minutes afterward. Most people turn it off as soon as they leave the room, leaving significant moisture trapped inside.

    Range hoods that recirculate instead of venting outside. Many kitchen range hoods, especially in apartments and condos, filter grease but blow the moist air right back into the kitchen. If your range hood vents into the cabinet above it rather than through an exterior wall, it is not removing moisture from your home at all.

    Tightly sealed homes without mechanical ventilation. Newer homes are built tight for energy efficiency, which is great for heating and cooling bills but terrible for moisture if there is no mechanical ventilation system. Homes built after 2000 often need a heat recovery ventilator (HRV) or energy recovery ventilator (ERV) to manage humidity and indoor air quality properly.

    3. Indoor Moisture Sources

    Everyday activities add surprising amounts of water vapor to your indoor air. Here are the biggest contributors:

    Cooking. Boiling water, simmering soups, and using the oven all release steam. Cooking without lids or without running the range hood can add 1 to 2 pints of moisture per meal to your air. Over the course of a day, a family that cooks three meals at home adds substantial humidity.

    Showers and baths. A single hot shower can release about 1 pint of moisture into the air. A long shower or bath can produce even more. Multiple family members showering without proper ventilation compounds the problem quickly, especially in the morning when several people shower back to back.

    Laundry. Drying clothes indoors on a rack or line is a major moisture source. Even vented dryers that are not properly sealed can leak humid air into the laundry room instead of sending it outside. Check that your dryer vent hose is tightly connected and not kinked.

    House plants. Plants release moisture through transpiration. A few plants will not cause issues, but a large collection of indoor plants, especially in a smaller home, can contribute meaningfully to indoor humidity. This is particularly noticeable in homes with dozens of plants in a sun room or enclosed porch.

    Plumbing leaks. Hidden leaks under sinks, behind walls, or in crawl spaces add moisture continuously. A slow drip might seem harmless, but running 24 hours a day, it adds up to gallons of water vapor entering your air. Check for water stains, warped flooring, or musty smells near plumbing fixtures.

    Pets and aquariums. Open-topped fish tanks and large aquariums allow constant evaporation into the room. Multiple pets drinking, panting, and being bathed indoors also add small but real amounts of moisture over time.

    4. Outdoor Air Infiltration

    Your home is not perfectly sealed. Air finds its way in through gaps, cracks, and openings, and when that air is humid, it brings moisture with it.

    Air leaks around windows and doors. Gaps in weatherstripping, caulking that has shrunk or cracked, and poorly sealed window frames all allow outside air to enter. In summer, this means warm, humid air constantly seeps indoors and raises your humidity levels.

    Crawl space and basement moisture. Exposed earth in crawl spaces releases moisture continuously as ground water evaporates. This humid air rises into your living space through the stack effect, which is the same principle that makes warm air rise through a chimney. A home with an unsealed crawl space can have 30% higher indoor humidity than one with a properly sealed and insulated crawl space.

    Ductwork leaks. If your HVAC ducts have gaps or disconnected sections in the attic or crawl space, your system may be pulling humid air from those spaces and distributing it throughout your home. This is one of the more hidden causes because the humidity source is out of sight behind walls or above ceilings.

    Does opening windows help? It depends entirely on the outdoor humidity. In summer, opening windows when it is hot and humid outside will make your indoor humidity worse, not better. Opening windows only helps when the outside air is drier than your indoor air, such as on a cool, dry fall day. This is a common point of confusion we found repeatedly in forum discussions.

    Room-by-Room Humidity Hotspots

    Not all rooms contribute equally to your home’s humidity problem. Here is a breakdown of the biggest moisture generators and what you can do about each one.

    Bathrooms. The number one humidity hotspot in most homes. Every shower releases about a pint of water vapor. If your bathroom fan is weak, broken, or not used properly, that moisture spreads to adjacent rooms and hallways. Fix: Run the fan during every shower and for 20 to 30 minutes after. If your fan is more than 10 years old, consider upgrading to a quieter, higher-CFM model.

    Kitchen. Boiling, simmering, baking, and dishwashing all produce steam. A pasta dinner can add a pint of water to your kitchen air in 15 minutes. Fix: Use your range hood on high when cooking anything that produces steam. Cook with lids on pots whenever possible. If your range hood recirculates air, consider upgrading to one that vents outside.

    Laundry room. Washing and especially drying clothes generates significant moisture. An unvented dryer or a vent hose that has come loose can dump gallons of water vapor into your home per load. Fix: Make sure your dryer vent is clean and properly connected to the exterior. Never dry clothes on indoor racks if humidity is already a problem.

    Basement. Ground moisture seeps through concrete walls and floors because concrete is porous. Basements stay cooler than the rest of the house, so the same amount of moisture results in higher relative humidity compared to upstairs rooms. Fix: Use a dedicated basement dehumidifier. Check that your gutters and downspouts direct water at least 6 feet away from your foundation. Seal any visible cracks in the walls.

    Crawl spaces. Exposed dirt floors allow continuous evaporation into the air beneath your home. That humid air then rises into your living areas through the stack effect. Fix: Install a proper vapor barrier (6 mil or thicker polyethylene sheeting) over the entire crawl space floor. Seal the seams and extend it 6 inches up the walls. Consider crawl space encapsulation if the problem is severe.

    How to Reduce Humidity in Your House

    We have organized solutions into three tiers based on how quickly you can implement them and how much they cost. Start with the quick fixes and work your way up as needed.

    Quick Fixes You Can Do Today

    These solutions cost nothing or very little and you can start them immediately:

    • Set your thermostat fan to AUTO. If it is currently set to ON, switch it now. This stops the fan from re-evaporating moisture off the coils between cooling cycles.
    • Run bathroom exhaust fans during every shower and for at least 20 minutes afterward. This single habit change can reduce humidity by 5 to 10%.
    • Cook with lids on pots and run your kitchen range hood on the highest setting whenever you are boiling or simmering.
    • Change your HVAC air filter if it has been more than 2 months. A clean filter improves airflow and dehumidification significantly.
    • Check for visible plumbing leaks under sinks, around toilets, and near your water heater. Even a slow drip adds up over 24 hours.
    • Keep windows and doors closed on hot, humid days. Only open them when the outdoor air is noticeably drier than your indoor air.

    Medium-Term Solutions

    These require a modest investment and may take a weekend to implement:

    • Upgrade your exhaust fans. Replace weak bathroom fans with models rated at least 80 to 110 CFM. Look for models rated 1.0 sones or less so they are quiet enough that people actually use them.
    • Seal air leaks. Apply new weatherstripping to exterior doors and windows. Caulk gaps around window frames and where pipes enter exterior walls.
    • Install a vapor barrier in your crawl space. This is one of the highest-impact fixes for homes with exposed crawl space floors. The material is inexpensive and the job can be done in a day.
    • Clean your dryer vent. A clogged dryer vent reduces drying efficiency and may leak humid air indoors. Clean it at least once a year, and check that the hose connection is secure.
    • Improve attic ventilation. Ensure your attic has proper soffit and ridge vents to allow warm, moist air to escape rather than getting trapped.

    Long-Term Solutions

    These are larger investments that provide lasting results:

    • Whole-house dehumidifier. Installed as part of your HVAC system, a whole-house dehumidifier can maintain consistent humidity levels throughout your home regardless of outdoor conditions. It works independently of your AC, so it dehumidifies even on mild days when cooling is not needed.
    • Properly sized HVAC system. If your AC is oversized (a common problem in many homes), replacing it with a correctly sized unit will dramatically improve dehumidification. A professional load calculation (Manual J) can confirm whether your current system is properly matched to your home.
    • Professional air sealing and insulation. A comprehensive air sealing job addresses hidden leaks throughout your home’s building envelope. Combined with proper insulation, this reduces both humidity and energy costs year-round.
    • Heat pump with dehumidification mode. Modern variable-speed heat pumps can run at lower speeds specifically to remove moisture without overcooling your home. This directly addresses the short-cycling problem that oversized traditional AC units create.

    When to Call a Professional

    Many humidity problems can be diagnosed and partially resolved with the steps above. But some situations call for professional help. Here is how to know when it is time to make that call.

    You should call an HVAC professional if:

    • Your indoor humidity stays above 60% despite running the AC and exhaust fans consistently.
    • You notice water stains on ceilings, walls, or around air vents that were not there before.
    • Your AC runs for less than 10 minutes before shutting off (a classic sign of short-cycling).
    • You smell mold or mildew but cannot find the source of the odor.
    • Your energy bills have increased noticeably without a change in usage patterns or rates.
    • Condensation forms on the inside of your windows regularly, especially between window panes.

    An HVAC technician can measure your system’s performance, check refrigerant levels, inspect ductwork for leaks, and perform a Manual J load calculation to determine if your AC is properly sized for your home. These are things that are difficult to accurately assess on your own without specialized tools and training.

    Reddit users in HVAC forums frequently report that a professional assessment revealed an oversized unit or a hidden duct leak they had lived with for years without realizing it. The cost of a diagnostic visit is often far less than the accumulated energy waste and potential water damage from leaving the problem unresolved.

    Health Risks of High Indoor Humidity

    High indoor humidity is not just a comfort problem. It can directly affect your health and the structural integrity of your home.

    Mold and mildew growth. Mold begins growing when indoor humidity exceeds 60% for extended periods. It thrives in bathrooms, basements, behind furniture against exterior walls, and inside ductwork. Mold spores trigger allergic reactions, cause respiratory problems, and can be particularly dangerous for people with compromised immune systems or existing respiratory conditions.

    Dust mite proliferation. Dust mites thrive in humid environments above 50% RH. Their waste products are one of the most common indoor allergens, triggering asthma attacks and allergic rhinitis. Reducing humidity below 50% is one of the most effective ways to control dust mite populations in your home.

    Respiratory issues. High humidity makes the air feel heavier and harder to breathe, especially for people with asthma or COPD. Humid air also carries more airborne pollutants and allergens, compounding respiratory irritation and making existing conditions worse.

    Sleep disruption. Sleeping in a humid room is uncomfortable because your body struggles to cool itself through perspiration when the air is already saturated with moisture. This leads to tossing, turning, night sweats, and poor overall sleep quality.

    Structural damage. Prolonged high humidity warps wood flooring, damages drywall, peels paint, and accelerates rust on metal fixtures and nails. The cost of repairing humidity damage to your home can far exceed the cost of fixing the underlying humidity problem itself.

    FAQ

    How do you fix high humidity in your house?

    Start by setting your thermostat fan to AUTO, running bathroom exhaust fans during and after showers, cooking with lids on pots, and changing your HVAC air filter. If humidity stays above 50%, check for air leaks around windows and doors, upgrade weak exhaust fans, and consider a portable or whole-house dehumidifier. For persistent problems, have an HVAC professional check if your AC is properly sized and inspect your ductwork for leaks.

    Why does my house have 70% humidity?

    70% indoor humidity usually means your AC is not removing enough moisture, your home has poor ventilation, or outdoor humid air is leaking in through gaps and cracks. The most common cause is an oversized AC unit that short-cycles, cooling the air quickly but shutting off before it can dehumidify. Other causes include weak exhaust fans, plumbing leaks, and unsealed crawl spaces allowing ground moisture to rise into your living areas.

    Is it bad if your house is too humid?

    Yes. Indoor humidity above 60% creates ideal conditions for mold growth, dust mite proliferation, and bacterial growth. It can trigger allergies, worsen asthma, cause respiratory irritation, and disrupt your sleep. It also damages your home by warping wood, peeling paint, and promoting rot. The EPA recommends keeping indoor humidity between 30% and 50%.

    Does opening windows reduce humidity?

    It depends on the outdoor conditions. Opening windows only reduces indoor humidity if the outside air is drier than your indoor air. On a hot, humid summer day, opening windows will make your indoor humidity worse. On a cool, dry day in fall or spring, opening windows can help flush out humid indoor air. Check the outdoor humidity level before opening windows to decide if it will help or hurt.

    What causes 80% humidity in a house?

    80% indoor humidity is a serious problem that almost always involves multiple contributing factors working together. Common causes include a broken or severely undersized AC system, standing water in a crawl space or basement, major plumbing leaks, no exhaust fans in bathrooms or kitchen, or severe air leakage from a humid outdoor environment. At 80% humidity, active mold growth is almost certainly occurring, and you should call a professional immediately.

    Is 70% humidity in your house too high?

    Yes, 70% humidity is well above the EPA recommended range of 30% to 50%. At 70% RH, mold can grow on surfaces within 24 to 48 hours, dust mite populations explode, and the air feels noticeably muggy and uncomfortable. You should take action to reduce humidity immediately using exhaust fans, dehumidifiers, and by addressing the underlying cause.

    Does putting heating on reduce humidity?

    Heating does reduce relative humidity because warm air can hold more moisture than cold air. However, it does not actually remove moisture from your home. The absolute amount of water vapor stays the same, but the relative humidity percentage drops because the warmer air has a higher moisture-holding capacity. For actual moisture removal, you need ventilation, dehumidification, or your AC system running properly.

    Conclusion

    High indoor humidity is almost always caused by one or more of four things: HVAC problems such as oversized units and short-cycling, poor ventilation from weak or missing exhaust fans, indoor moisture sources like cooking and showering, and outdoor air infiltration through gaps and unsealed crawl spaces. The good news is that most of these causes are fixable.

    Start with the quick fixes. Set your thermostat fan to AUTO. Run your exhaust fans properly during and after showers. Change your air filter. These simple steps make a real difference for many homeowners, and they cost almost nothing. If your house is still too humid after trying those, move to the medium-term solutions like sealing air leaks and upgrading exhaust fans.

    If you have tried the DIY approaches and your humidity stays above 60%, it is time to bring in a professional. An HVAC technician can tell you whether your AC is the right size for your home, check for hidden duct leaks, and recommend whether a whole-house dehumidifier or system upgrade is the best path forward.

    Understanding why your house is so humid is the first step toward fixing it. Now that you know what to look for, grab a hygrometer, check your readings, and start with the easiest fixes first.