Category: Guides

  • How to Clean a Heat Pump 2026: Complete DIY Guide

    How to Clean a Heat Pump 2026: Complete DIY Guide

    Learning how to clean a heat pump is one of the smartest things you can do as a homeowner. I learned this the hard way after ignoring my own unit for over a year. My energy bills crept up month after month, and it took a musty smell coming from the vents for me to realize something was wrong. The evaporator coil was coated in dust and the filter was nearly blocked solid.

    After spending a weekend cleaning it myself, the difference was immediate. Airflow improved, the musty smell disappeared, and my next electric bill dropped by about 18 percent. That single afternoon of work saved me hundreds of dollars in wasted energy and likely prevented an expensive repair bill down the road.

    In this guide, I will walk you through exactly how to clean a heat pump step by step. I cover the indoor unit, the outdoor condenser, filters, coils, and the drain line. I also break down what you can safely tackle yourself versus when it makes sense to hire a professional.

    Important safety warning: Always turn off power to your heat pump at the circuit breaker before beginning any cleaning work. Never attempt to open or service refrigerant lines, electrical components, or the compressor. Those tasks require a licensed HVAC technician.

    Signs Your Heat Pump Needs Cleaning

    Your heat pump gives you several clear signals when it needs attention. Catching these early prevents bigger problems and keeps your system running at peak efficiency.

    Here are the most common signs that your heat pump needs a cleaning:

    • Reduced airflow from vents: If the air coming from your indoor unit feels weak, a clogged filter or dirty coil is likely restricting airflow.
    • Strange or musty odors: A dirty heat pump can develop mold and mildew inside the air handler, producing unpleasant smells every time the system runs.
    • Higher than normal energy bills: According to the U.S. Department of Energy, a dirty heat pump can waste 10 to 25 percent more energy than a clean one.
    • Uneven heating or cooling: Rooms that used to heat or cool evenly may develop hot or cold spots when airflow is restricted by buildup.
    • Visible dirt or debris: If you can see dust coating the outdoor fins or grime on the indoor unit louvers, cleaning is overdue.
    • Unusual noises: Rattling, buzzing, or grinding sounds can indicate debris caught in the fan blades or blower motor.

    If you notice two or more of these symptoms, it is time to give your heat pump a thorough cleaning.

    Tools and Materials You Will Need

    Before starting, gather your supplies. Most of these items are probably already in your garage or kitchen. The full list for a DIY cleaning costs between $20 and $50 if you need to buy everything from scratch.

    1. Screwdriver set (Phillips and flathead) for removing access panels
    2. Shop vacuum with brush attachment for loose dirt and debris
    3. Soft-bristled brush or an old toothbrush for gentle coil cleaning
    4. Vinegar and baking soda for a natural cleaning solution (mix one cup vinegar and half a cup baking soda in a gallon of water)
    5. Mild dish soap as an alternative cleaner for stubborn grime
    6. Foaming coil cleaner (optional but recommended for deep coil cleaning)
    7. Garden hose with a spray nozzle for the outdoor unit
    8. Fin comb (optional) for straightening bent aluminum fins on the condenser

    You will also want a drop cloth or old towels to protect your floor near the indoor unit, and gloves to keep your hands clean.

    How to Clean a Heat Pump: Step-by-Step Guide

    Heat pump cleaning involves two main components: the indoor unit (air handler) and the outdoor unit (condenser). I recommend starting with the indoor unit since it is the easier one to access, then moving outside.

    Step 1: Turn Off the Power

    This is non-negotiable. Locate the circuit breaker that controls your heat pump and switch it to the off position. If your system has a dedicated outdoor disconnect switch near the condenser, turn that off as well. Working on a powered heat pump is dangerous and can damage the system.

    Verify the power is off by trying to turn on the thermostat. Nothing should happen. Tape a note over the breaker box that says “Do Not Turn On” if other people are in the house.

    Step 2: Clean or Replace the Air Filters

    Filter maintenance is the single most important cleaning task for any heat pump owner. A clogged filter forces the blower motor to work harder, reduces airflow, and degrades indoor air quality. I clean my filters once a month and replace them every three months.

    For reusable filters:

    1. Open the front panel of the indoor unit by gently pulling it forward or removing the clips.
    2. Slide the filter out carefully. It will likely be covered in dust and pet hair.
    3. Take the filter outside or hold it over a trash bin. Use your shop vacuum with the brush attachment to remove loose dust from the front side.
    4. If the filter is sticky or has buildup, wash it with mild dish soap and lukewarm water. Use a soft nylon brush for stubborn spots.
    5. Rinse thoroughly until the water runs clear.
    6. Shake off excess water and let the filter air dry completely in a shaded spot. Never reinstall a wet filter.
    7. Once dry, slide the filter back into position and close the front panel.

    For disposable filters: Simply remove the old filter and replace it with a new one of the same size. Check the MERV rating. For most homes, a MERV 8 to 11 filter strikes the right balance between filtration and airflow. Higher MERV ratings capture smaller particles but can restrict airflow if your system is not designed for them.

    Step 3: Clean the Indoor Unit (Air Handler)

    With the filter removed, you now have access to the evaporator coil and the blower area. This part requires a gentle touch because the aluminum fins on the coil bend easily.

    Cleaning the evaporator coil:

    1. Use your shop vacuum with the soft brush attachment to gently remove dust from the surface of the coil. Work in an up-and-down motion following the direction of the fins.
    2. For heavier buildup, apply a foaming coil cleaner according to the product instructions. Let it sit for the recommended time (usually 5 to 10 minutes) so it can break down grime.
    3. Rinse the coil cleaner away if the product requires it. Some no-rinse formulas are designed to wash off naturally when condensation forms during operation.
    4. Use your soft-bristled brush to gently clean between the fins. Never apply heavy pressure.

    Cleaning the drain pan:

    The drain pan sits below the evaporator coil and catches condensation. Over time, algae and slime can build up inside it, causing clogs that lead to water damage.

    1. Check the pan for standing water or slimy residue.
    2. If dirty, wipe it out with a cloth soaked in your vinegar solution.
    3. Pour a cup of vinegar down the condensate drain line to kill algae and keep the line flowing freely.

    Cleaning the blower wheel:

    The blower wheel can collect dust on its blades, which reduces the volume of air it can move. If you can see the blower through the access panel, use your vacuum and brush to clean the visible blade surfaces. For a thorough blower cleaning, you may need to remove the blower assembly, which is a task better suited for a professional HVAC technician.

    Wipe down the exterior louvers and housing of the indoor unit with a damp cloth. Make sure all vents are unobstructed and the area around the unit is clear of furniture, curtains, or clutter.

    Step 4: Clean the Outdoor Unit (Condenser)

    The outdoor condenser unit takes a beating year-round. Leaves, grass clippings, dirt, pollen, and debris collect around and inside the unit, restricting airflow through the condenser coil. I clean my outdoor unit twice a year, once in the spring before cooling season and again in the fall before heating season.

    1. Clear the surrounding area. Remove any vegetation, weeds, or debris within a two-foot radius of the unit. Trim back shrubs or branches that encroach on the sides or top.
    2. Remove the top grille or side panels. Most condenser units have screws holding the protective grille in place. Remove them with your screwdriver and set the panels aside.
    3. Vacuum loose debris. Use your shop vacuum to remove leaves, dirt, and grass from the base of the unit and the fan area. Be careful not to bump the fan blades or the refrigerant lines.
    4. Clean the condenser coil fins. Spray the fins from the inside out using your garden hose with a gentle spray nozzle. This pushes the dirt outward rather than deeper into the coil. Avoid using a pressure washer because the high pressure will bend the delicate aluminum fins.
    5. Apply coil cleaner if needed. For stubborn grime, spray a foaming coil cleaner on the fins and let it sit per the instructions. Then rinse thoroughly with the hose.
    6. Straighten bent fins. If you notice crushed or bent fins, gently comb them straight with a fin comb. This restores proper airflow through the coil.
    7. Clean the fan blades. Wipe the fan blades with a damp cloth. Check for cracks or damage while you are in there.
    8. Reassemble the unit. Replace the panels and screws. Make sure everything is secure before restoring power.

    One common question I see on forums is whether it is okay to hose down the outdoor unit. The answer is yes, as long as you use a gentle spray and avoid the electrical box. The U.S. Department of Energy specifically recommends cleaning outdoor coils by hosing off dirt and debris with the power turned off.

    Step 5: Clean the Condensate Drain Line

    A clogged condensate drain line is one of the most common causes of water damage from heat pumps. When the drain line backs up, water overflows from the drain pan and can ruin ceilings, walls, and flooring.

    1. Locate the drain line exit point. It is usually a PVC pipe that runs from the indoor unit to the outside of your home or to a floor drain.
    2. Pour a mixture of one cup vinegar and one cup warm water down the access port near the indoor unit.
    3. Let the solution sit for 15 to 30 minutes to break down algae and slime.
    4. Flush the line with warm water to push the debris through.
    5. Check the exit point outside to confirm water is flowing freely.

    I do this every three months as preventative maintenance. It takes about five minutes and has saved me from at least two potential clogs over the years.

    Step 6: Check Supply and Return Registers

    If you have a central heat pump system with ductwork, take a few minutes to check the supply and return registers throughout your home. Vacuum dust from the register grilles and make sure none of them are blocked by furniture or rugs. Blocked registers force your heat pump to work harder and create uneven temperatures.

    For ductless mini-split heat pumps, this step does not apply since each indoor unit delivers air directly to its zone without ducts.

    Step 7: Restore Power and Test

    After all cleaning is complete and everything is dry, restore power at the circuit breaker and the outdoor disconnect switch. Set your thermostat to heat or cool mode, depending on the season, and let the system run for about 15 minutes.

    Check for the following during the test run:

    • Airflow from the indoor unit feels strong and consistent
    • No unusual noises from either unit
    • The outdoor fan is spinning freely
    • No strange odors from the vents

    If everything checks out, your cleaning is complete. If you notice any issues like weak airflow, strange sounds, or error codes on the thermostat, schedule a service call with an HVAC professional.

    DIY vs Professional Heat Pump Cleaning

    One of the most common questions homeowners ask is what they can safely clean themselves and when they need to call in a pro. I have been cleaning my own heat pump for years, but there are clear boundaries I respect.

    Tasks you can safely do yourself:

    • Clean or replace air filters monthly
    • Wipe down the indoor unit exterior and louvers
    • Clean the condensate drain line with vinegar
    • Clear debris from around the outdoor unit
    • Hose down the outdoor condenser coils gently
    • Replace disposable filters
    • Vacuum visible dust from accessible coils

    Tasks that require a professional HVAC technician:

    • Deep evaporator coil cleaning on sealed units
    • Refrigerant line inspection and refrigerant recharge
    • Blower motor removal and deep cleaning
    • Electrical component testing and repair
    • Ductwork inspection and cleaning
    • Compressor diagnostics

    Professional heat pump cleaning services typically cost between $150 and $300 or more depending on your location, system type, and the scope of work. A full professional service usually includes coil cleaning, refrigerant level checks, electrical testing, and a complete system inspection.

    DIY cleaning supplies cost roughly $20 to $50 if you are starting from scratch, and most of those supplies last for multiple cleaning sessions. That said, I still recommend scheduling a professional tune-up once a year even if you handle the routine maintenance yourself. Many manufacturers require documented annual professional maintenance to keep your warranty valid.

    How Often Should You Clean Your Heat Pump

    Cleaning frequency depends on your environment, how often you use the system, and whether you have pets or allergy sufferers in the household. Here is the schedule I follow and recommend.

    Monthly:

    • Check and clean or replace the air filter
    • Inspect the area around the outdoor unit for debris buildup
    • Listen for unusual sounds during operation

    Every three months:

    • Flush the condensate drain line with vinegar
    • Wipe down indoor unit louvers and exterior housing
    • Check supply and return registers for blockages

    Twice a year (spring and fall):

    • Clean the outdoor condenser coils with a hose
    • Clear vegetation from around the outdoor unit
    • Clean the evaporator coil if accessible
    • Check the drain pan for standing water or slime

    Once a year:

    • Schedule a professional maintenance visit that includes refrigerant level checks, electrical testing, and a full system inspection

    Pet owners and allergy sufferers should consider cleaning filters every two to three weeks instead of monthly. Pet hair clogs filters faster than normal household dust, and clean filters make a noticeable difference for anyone with seasonal allergies.

    Common Mistakes to Avoid

    Over the years I have seen (and made) a few common mistakes that can damage a heat pump or reduce its performance. Avoiding these will save you time and repair costs.

    Using harsh chemical cleaners. Avoid bleach, abrasive powders, or industrial degreasers on coils and fins. These chemicals corrode the aluminum and copper components. Stick with mild dish soap, vinegar solutions, or purpose-made HVAC coil cleaners.

    Bending the coil fins. The aluminum fins on both the evaporator and condenser coils are paper-thin and bend easily. Always use a soft brush and light pressure. If fins do get bent, use a fin comb to gently straighten them.

    Skip the power shutoff. It is tempting to just vacuum a filter without shutting off the breaker, but doing so risks electrical shock and can damage the blower motor if it accidentally activates while you are working inside the unit.

    Using a pressure washer on the outdoor unit. A garden hose with a spray nozzle is sufficient. Pressure washers will crush the coil fins and force water into the electrical compartment.

    Neglecting the outdoor unit entirely. Many homeowners focus only on the indoor unit because that is the one they see every day. The outdoor condenser is equally important. Restricted outdoor airflow reduces the system’s ability to release or absorb heat, which directly impacts efficiency.

    Reinstalling wet filters. A damp filter promotes mold growth inside the air handler. Always let reusable filters dry completely before putting them back in place.

    FAQ

    Can you clean your heat pump yourself?

    Yes, you can clean many parts of your heat pump yourself including air filters, the indoor unit exterior, the condensate drain line, and the outdoor condenser coils. These routine maintenance tasks require basic tools and take about one to two hours. However, tasks involving refrigerant lines, electrical components, or deep internal cleaning should be left to a licensed HVAC technician.

    Do heat pumps need to be cleaned?

    Yes, heat pumps absolutely need regular cleaning. Dust, dirt, pet hair, and debris build up on filters and coils over time, which reduces airflow, lowers energy efficiency by 10 to 25 percent, and can cause breakdowns. Without regular cleaning, your heat pump works harder, costs more to run, and has a shorter lifespan.

    Do you need to clean the outside unit of a heat pump?

    Yes, the outdoor condenser unit requires regular cleaning. Leaves, grass clippings, dirt, and pollen collect on and around the unit, blocking airflow through the condenser coil. Turn off the power, remove debris from the surrounding area, and gently hose down the coils from the inside out twice a year for best results.

    How much does it cost to have your heat pump cleaned?

    Professional heat pump cleaning typically costs between $150 and $300 or more depending on your location, system type, and the level of service included. A full professional cleaning usually covers coil cleaning, refrigerant level checks, electrical component testing, and a complete system inspection. DIY cleaning supplies cost roughly $20 to $50.

    Conclusion

    Knowing how to clean a heat pump is a straightforward skill that pays for itself in lower energy bills, fewer breakdowns, and better indoor air quality. The process comes down to seven steps: shut off the power, clean the filters, clean the indoor evaporator coil and drain pan, clean the outdoor condenser, flush the drain line, check your registers, and test the system.

    Most of this work takes one to two hours and requires only basic household tools. Monthly filter cleaning alone can improve your system’s efficiency by a noticeable margin. Pair your DIY efforts with an annual professional tune-up, and your heat pump will serve you well for 15 to 20 years or more.

    Start with the filter this weekend. It is the easiest first step and you will feel the difference in airflow almost immediately.

  • Best AC Temperature for Sleeping (August 2026): Expert Guide

    Best AC Temperature for Sleeping (August 2026): Expert Guide

    If you have ever tossed and turned on a muggy summer night, blasting the AC and wondering what temperature will finally help you drift off, you are not alone. Our team has spent hours digging through sleep research, testing thermostat settings, and comparing notes from sleep experts to answer one question: what is the best AC temperature for sleeping?

    The short answer is 60 to 67 degrees Fahrenheit (15.5 to 19.5 degrees Celsius), with 65 degrees Fahrenheit (18.3 degrees Celsius) being the sweet spot for most healthy adults. This range is backed by the National Sleep Foundation and supported by research from the National Institutes of Health. But the real answer depends on your age, the season, your bedding, and whether your partner runs hot or cold.

    In this guide, we break down the science behind why temperature matters for sleep, give you age-specific recommendations, share energy-saving strategies, and offer practical tips for couples who argue over the thermostat. Let us help you find the best AC temperature for sleeping so you can wake up feeling refreshed instead of groggy.

    The Best AC Temperature for Sleeping: What the Science Says

    Sleep researchers have studied bedroom temperature for decades, and the consensus is remarkably consistent. The National Sleep Foundation recommends keeping your bedroom between 60 and 67 degrees Fahrenheit for optimal sleep. Dr. Matthew Walker, a neuroscience professor at UC Berkeley and author of “Why We Sleep,” has emphasized that a cool bedroom is one of the most underrated sleep aids available.

    Here is a quick breakdown of the ideal sleeping temperature by age group:

    • Healthy adults (18-64): 60-67 degrees Fahrenheit (15.5-19.5 degrees Celsius), with 65 degrees Fahrenheit being the sweet spot
    • Older adults (65+): 65-78 degrees Fahrenheit (18.3-25.5 degrees Celsius), since aging reduces the body’s ability to regulate temperature
    • Children (1-17): 68-72 degrees Fahrenheit (20-22.2 degrees Celsius), as their smaller bodies respond differently to cold
    • Infants (under 1): 68-72 degrees Fahrenheit (20-22.2 degrees Celsius), avoiding both overheating and chilling

    A 2023 study published in the journal “Science of the Total Environment” tracked the sleep of older adults in Boston and found that the optimal sleeping temperature for that group was 68 to 77 degrees Fahrenheit (20-25 degrees Celsius). This is warmer than the general recommendation, which confirms that one size does not fit all when it comes to the best AC temperature for sleeping.

    You may have also heard of the 20-degree rule for air conditioning. This guideline suggests setting your AC no more than 20 degrees below the outside temperature. On a 95-degree day, that means your AC should target 75 degrees or above. Going lower can strain your AC unit, increase your energy bill dramatically, and create too sharp a contrast for your body to adjust to comfortably. The 20-degree rule is more about protecting your equipment and wallet than optimizing sleep, but it is worth knowing when you are trying to balance comfort with practical costs.

    How Room Temperature Affects Your Sleep

    Your body has an internal clock called the circadian rhythm, and temperature is one of its strongest signals. About two hours before your usual bedtime, your core body temperature naturally drops by 2 to 3 degrees Fahrenheit. This drop is not a coincidence. It is a biological trigger that tells your brain to start producing melatonin, the hormone that makes you feel sleepy.

    A cool bedroom supports this natural process. When the air around you is between 60 and 67 degrees, your body does not have to work as hard to shed heat through your skin. Blood flows more easily to your extremities, which helps your core temperature continue dropping. This is why a warm bath before bed can actually help you sleep. The warm water dilates your blood vessels, and when you step out, your body temperature drops rapidly, mimicking the natural pre-sleep cooling process.

    Temperature also affects the quality of your sleep, not just how fast you fall asleep. Research from the NIH shows that sleeping in a room that is too warm reduces your time in REM (rapid eye movement) sleep and slow-wave sleep. These are the stages where your brain consolidates memories, repairs tissue, and regulates emotions. Skip them, and you wake up feeling like you barely slept, even if you were in bed for eight hours.

    What Happens When Your Bedroom Is Too Hot

    Sleeping in a room above 70 degrees Fahrenheit creates a cascade of problems. Your body struggles to lower its core temperature, which delays melatonin production and makes it harder to fall asleep in the first place. One study found that every degree above the optimal range increased wakefulness and reduced sleep efficiency.

    Once you do fall asleep in a hot room, your sleep is more fragmented. You spend less time in the deep, restorative stages and more time tossing and turning. People who sleep in rooms above 75 degrees often report waking up drenched in sweat, feeling dehydrated, and experiencing headaches in the morning.

    Hot bedrooms are especially problematic during summer months in humid climates. The combination of heat and moisture makes it harder for sweat to evaporate from your skin, which is your body’s primary cooling mechanism. If you live in a place like Florida or Southeast Asia, running your AC at the right temperature is not just about comfort. It is about getting any sleep at all.

    What Happens When Your Bedroom Is Too Cold

    Going too far in the other direction has its own set of drawbacks. When your bedroom drops below 60 degrees Fahrenheit, your body starts working to generate heat rather than shed it. Blood vessels in your extremities constrict to keep your core warm, which can leave your hands and feet feeling icy. Cold feet, in particular, are a surprisingly common cause of difficulty falling asleep.

    Below 55 degrees, your body may start shivering, which is essentially involuntary muscle contractions designed to generate heat. Shivering makes it nearly impossible to relax into sleep. Even if you manage to fall asleep, the continuous muscle tension can prevent you from reaching the deeper stages of sleep where the most restorative processes happen.

    Very cold AC settings also dry out the air, which can irritate your throat, nasal passages, and skin. Many people who crank their AC down to 58 or 59 degrees wake up with a dry cough or a scratchy throat, which they mistake for a cold when it is actually just the dry air. If you prefer a very cold bedroom, running a humidifier alongside your AC can help balance things out.

    Best AC Temperature for Sleeping by Age Group

    Your ideal sleep temperature shifts throughout your life. Understanding these differences can help you dial in the perfect setting for everyone in your household.

    Adults (18-64 years): 60-67 degrees Fahrenheit

    Most healthy adults sleep best when the thermostat is set between 60 and 67 degrees. The sweet spot of 65 degrees works well because it is cool enough to support your body’s natural temperature drop without being so cold that you need excessive bedding. If you sleep with a comforter and light pajamas, 65 degrees is a reliable starting point. Adjust by one or two degrees in either direction based on how you feel in the morning.

    Older Adults (65+ years): 65-78 degrees Fahrenheit

    As we age, the body becomes less efficient at regulating temperature. Older adults have less subcutaneous fat and slower metabolic rates, which means they feel cold more easily. A 2023 study from the Harvard T.H. Chan School of Public Health found that older adults slept best when the room was between 68 and 77 degrees Fahrenheit. If you are caring for an elderly parent, err on the warmer side of the standard range and check whether they are comfortable rather than assuming the standard 65 degrees works for them.

    Children and Infants: 68-72 degrees Fahrenheit

    Children need a slightly warmer room than adults. The American Academy of Pediatrics recommends keeping the nursery between 68 and 72 degrees. Infants cannot regulate their body temperature as effectively as adults, and both overheating and being too cold pose risks. Avoid heavy blankets in cribs, and dress your baby in a single layer more than what you would wear at that temperature. If you are wondering about the best AC temperature for sleeping with a baby in the room, 70 degrees is a safe middle ground.

    Seasonal AC Temperature Strategies for Better Sleep

    Your AC strategy should shift with the seasons. Here is how we approach it throughout the year.

    Summer: Managing Extreme Heat

    During summer, outside temperatures can easily exceed 90 degrees, making it tempting to crank your AC down to 60. Resist that urge. The 20-degree rule means your AC should ideally not be set more than 20 degrees below the outdoor temperature to avoid straining the unit and spiking your energy bill. Instead, set your AC to around 68-70 degrees and use a ceiling fan or bedside fan to create a wind chill effect. The air movement makes the room feel 3-4 degrees cooler than the thermostat reads.

    Another strategy is to pre-cool your bedroom. Drop the temperature to 65 degrees about an hour before bed, then raise it to 68-70 degrees once you are asleep. Your body is most sensitive to temperature when falling asleep, not during the later stages of sleep.

    Winter: Staying Warm Without Drying Out

    In winter, you might assume you can turn the AC off entirely, but central heating can push indoor temperatures well above the sleep-friendly range, especially in well-insulated homes. Set your thermostat to 65 degrees at night. If your heating system dries out the air, use a humidifier to keep humidity between 30 and 50 percent. Dry air makes you feel colder than the thermostat suggests, which can lead you to overheat the room.

    Spring and Fall: The Sweet Spot

    Transitional seasons are the easiest for sleep temperature. Open windows on mild nights can bring in fresh air at the perfect 60-65 degree range without any AC needed. If you use your AC during these seasons, set it to 65 degrees and let natural ventilation do some of the work.

    Energy-Saving Tips for Year-Round Sleep Comfort

    Keeping your AC at the best temperature for sleeping does not have to drain your wallet. Here are a few strategies we have tested that make a real difference on the energy bill.

    • Use a programmable thermostat: Set it to drop to 65 degrees 30 minutes before bed, then raise it to 70 degrees after you have been asleep for two hours.
    • Run a fan alongside your AC: A fan lets you set the AC 3-4 degrees warmer while feeling just as cool. Fans use a fraction of the electricity.
    • Close blinds and curtains during the day: Preventing solar heat gain means your AC does not have to work as hard in the evening.
    • Use “Dry” mode in humid climates: Dehumidifying the air makes it feel cooler without dropping the temperature as far, and it costs less energy.
    • Insulate your bedroom: Weather-stripping around windows and doors keeps cool air in and hot air out, reducing how hard your AC runs.

    When Couples Disagree on the Best AC Temperature for Sleeping

    If you and your partner constantly argue about the thermostat, there is actually science behind your conflict. Research shows that women tend to prefer warmer sleeping environments than men, partly due to differences in metabolic rate and body composition. A study from the journal “Nature Climate Change” found that most office temperature standards were designed based on male metabolic rates, and the same principle applies at home.

    Here are some practical solutions that have worked for couples we know:

    • Separate bedding: Use different blankets on the same bed. The cold-sleeper gets a heavy duvet while the warm-sleeper uses a thin sheet or light blanket.
    • Target the middle ground: Set the AC to 67 degrees, which is at the upper end of the ideal range. The warm-sleeper stays comfortable with lighter clothing, and the cold-sleeper adds a layer.
    • Use a dual-zone system: If you have a larger budget, smart thermostats with room sensors or dual-zone HVAC let each side of the bed have different temperatures.
    • Try the “cave” approach: Set the AC to 62-64 degrees and give the cold-sleeper a heated mattress pad or warm pajamas. The room stays cool, which benefits sleep for both people.

    The key is finding a compromise that keeps both people within a range that does not actively hurt their sleep. If one partner is waking up sweating or shivering, the temperature needs adjustment regardless of what the science says.

    Humidity: The Overlooked Factor in Sleep Temperature

    Temperature gets all the attention, but humidity plays an equally important role in how comfortable you feel at night. The ideal humidity level for sleep is between 30 and 50 percent. When humidity is too high, sweat does not evaporate efficiently from your skin, making 70 degrees feel like 78. When humidity is too low, the air pulls moisture from your skin and airways, causing dry throat, itchy eyes, and cracked lips.

    Your AC naturally dehumidifies the air as it runs, which is why the air in an air-conditioned room can feel dry. In humid climates like the Gulf Coast, running your AC in “Dry” mode can be more effective and efficient than cooling mode. It pulls moisture from the air without dropping the temperature as aggressively, which keeps you comfortable at a higher thermostat setting and saves energy.

    If you live in a dry climate, consider running a humidifier in your bedroom alongside the AC. This is especially important in winter when heating systems further dry out the air. A small humidifier set to maintain 40 percent humidity can make a 65-degree room feel perfectly comfortable instead of parched.

    Beyond Temperature: Sleep Hygiene Tips for 2026

    Getting the temperature right is a big piece of the puzzle, but it works best when combined with good overall sleep habits. Here are the sleep hygiene practices that pair well with an optimal thermostat setting.

    • Block out light: Use blackout curtains or a sleep mask. Light suppresses melatonin production even more effectively than temperature affects it.
    • Reduce noise: A white noise machine or fan can mask disruptive sounds and help you stay asleep through the night.
    • Choose breathable bedding: Cotton, bamboo, or linen sheets wick moisture and breathe better than synthetics. Memory foam mattresses trap heat, so if you sleep hot, consider a mattress topper designed for cooling.
    • Take a warm shower before bed: The warm water dilates blood vessels near your skin. When you step out, your body temperature drops quickly, reinforcing the natural pre-sleep cooling cycle.
    • Automate with a smart thermostat: Devices like the Nest or Ecobee can learn your sleep schedule and automatically adjust the temperature. Set it to 65 degrees at bedtime and 70 degrees an hour before you wake up so you are not shocked awake by cold air.
    • Avoid heavy meals and caffeine late: Digestion raises your core body temperature, and caffeine blocks adenosine receptors that promote sleepiness.

    Combining these habits with the right thermostat setting creates what sleep researchers call a “sleep-conducive environment.” You are stacking the odds in your favor, making it easier to fall asleep quickly and stay asleep through the night.

    FAQ

    What is the 20 rule for air conditioning?

    The 20-degree rule recommends setting your AC no more than 20 degrees Fahrenheit below the outside temperature. On a 95-degree day, you would set your AC to at least 75 degrees. This prevents excessive strain on your AC unit, reduces energy consumption, and avoids the shock of walking between extreme temperature differences. It is a guideline for equipment protection and energy savings rather than sleep optimization.

    Is 65 degrees too cold for sleep?

    No, 65 degrees Fahrenheit (18.3 degrees Celsius) is not too cold for most healthy adults. In fact, it is widely considered the ideal sleeping temperature by the National Sleep Foundation. However, if you are an older adult, have poor circulation, or feel uncomfortably cold, you may prefer a slightly warmer setting between 67 and 70 degrees. The key is finding a temperature where you can fall asleep quickly and stay asleep without shivering.

    Is 72 degrees too hot to sleep in?

    For most adults, 72 degrees Fahrenheit is at the upper edge of the comfortable range and may feel too warm, especially in humid conditions. The National Sleep Foundation recommends 60-67 degrees for optimal sleep. At 72 degrees, many people experience more fragmented sleep, reduced time in deep sleep stages, and increased wakefulness. If you must sleep at 72 degrees, using a fan to create air movement can make it feel cooler and more comfortable.

    What temperature should my AC be at for sleep?

    Set your AC between 60 and 67 degrees Fahrenheit (15.5-19.5 degrees Celsius) for the best sleep quality. The sweet spot for most adults is 65 degrees. Older adults may prefer 65-78 degrees, while children and infants need 68-72 degrees. Start at 65 degrees and adjust by one or two degrees based on your personal comfort and bedding thickness.

    Is sleeping with AC good for you?

    Yes, sleeping with the AC on is generally good for you when set to the right temperature. A cool room supports your body’s natural temperature drop before sleep, which improves sleep onset and sleep quality. Benefits include faster time to fall asleep, deeper sleep stages, and reduced nighttime waking. Just avoid setting the AC below 60 degrees or pointing vents directly at your body, as extremely cold or dry air can cause throat irritation and dry skin.

    Conclusion

    The best AC temperature for sleeping falls between 60 and 67 degrees Fahrenheit for most adults, with 65 degrees being the most reliable starting point. But your personal ideal depends on your age, your bedding, your climate, and whether you share a bed with someone who runs at a different temperature.

    Start tonight by setting your thermostat to 65 degrees. Give it three or four nights before you adjust. Your body takes time to adapt to a new sleeping temperature. From there, shift by one degree at a time until you find the setting where you fall asleep easily and wake up feeling rested. That number is your personal best AC temperature for sleeping.

    Pair the right temperature with breathable bedding, a dark room, and a consistent bedtime routine, and you have the foundation for genuinely better sleep. Small changes to your thermostat setting can make a bigger difference than most people expect.

  • Whole House Fan vs Attic Fan (2026): Which One Your Home Need?

    Whole House Fan vs Attic Fan (2026): Which One Your Home Need?

    If your upstairs turns into an oven every summer and your energy bills keep climbing, you have probably considered adding ventilation beyond your central air system. Two popular options come up again and again: whole house fans and attic fans. They sound similar, they both live near the roof, and they both move air. But they do completely different jobs for your home.

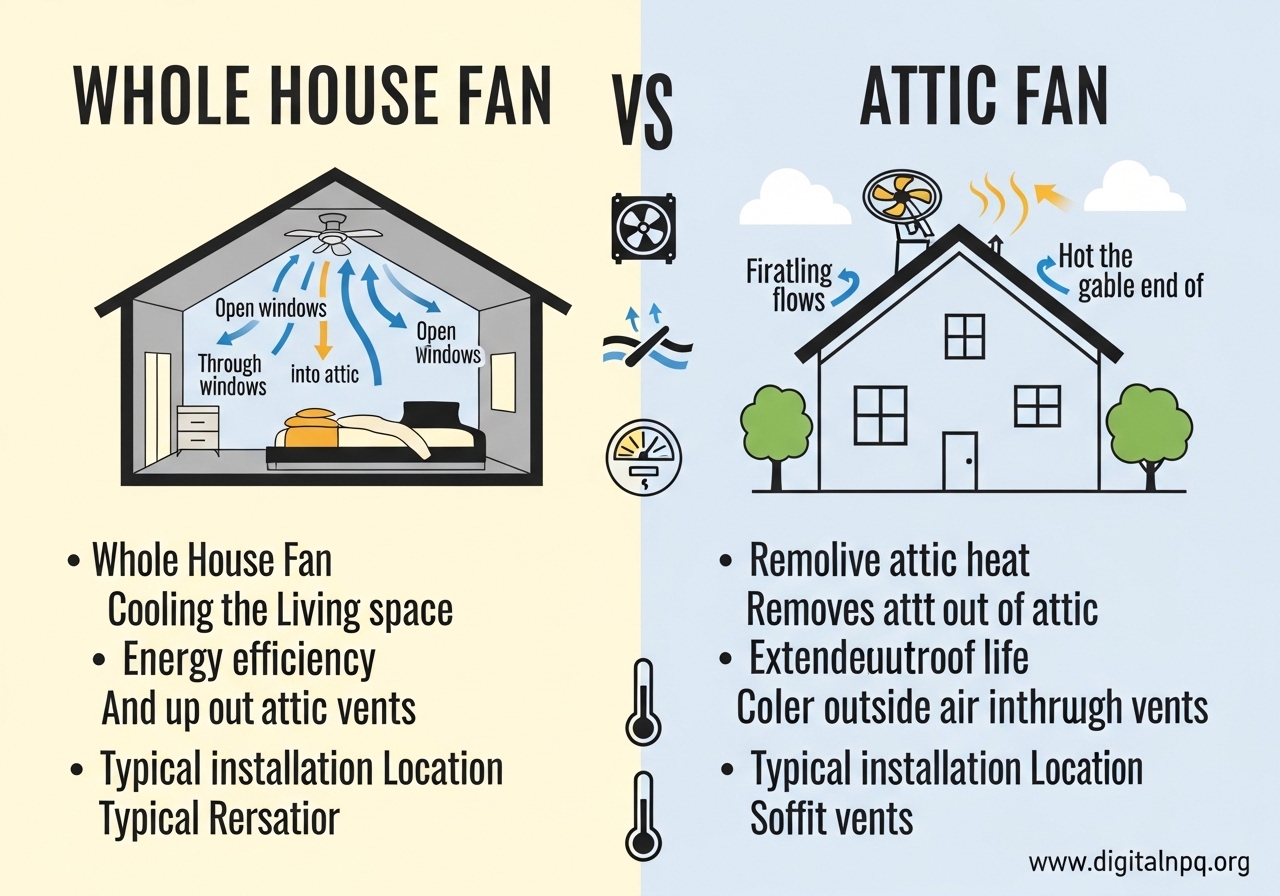
    The whole house fan vs attic fan question comes down to what you are trying to accomplish. A whole house fan cools your living space by pulling fresh outdoor air through open windows and exhausting stale air through attic vents. An attic fan sits in your attic and only vents hot air from the attic to the outside. One cools people. The other protects your roof and insulation.

    Here is the quick breakdown of how they differ:

    • Purpose: Whole house fans cool living spaces; attic fans ventilate attic spaces only
    • Airflow: Whole house fans pull air from outside through windows; attic fans push attic air out through roof vents
    • Best time to run: Whole house fans work best after sundown when outdoor air is cool; attic fans run during the day when attic temperatures peak
    • Energy impact: Whole house fans can reduce AC usage by 50-90%; attic fans lower attic heat load on your insulation
    • Installation: Whole house fans need a ceiling cut between living space and attic; attic fans mount on the roof or gable wall
    • Cost: Whole house fans typically cost more upfront; attic fans are simpler and less expensive to install

    In this guide, I will break down everything you need to know about each fan type so you can make the right call for your home, climate, and budget.

    What Is a Whole House Fan?

    A whole house fan is a large ventilation fan installed in the ceiling between your top-floor living space and the attic. When you turn it on, it creates negative pressure inside your home, pulling cool outdoor air through open windows and pushing warm indoor air up into the attic and out through attic vents.

    Think of it like opening every window in your house while a giant exhaust fan clears out the hot air that has been trapped inside all day. The effect is immediate. Within minutes, you can feel the temperature drop as fresh air replaces the stale, overheated air that was sitting in your rooms.

    Here is how the process works step by step:

    • You open several windows in your home (typically 4 to 6 inches each)
    • The fan draws cool outdoor air inside through those open windows
    • Air moves through your hallways and rooms, picking up heat
    • The fan pushes that warmed air into the attic
    • The air exits through existing attic vents like soffit vents, ridge vents, or gable vents

    Whole house fans are rated by CFM (cubic feet per minute), which tells you how much air they can move. A typical residential unit moves between 3,000 and 7,000 CFM. The general rule of thumb is that you want enough CFM to replace all the air in your home every 2 to 3 minutes. For a 2,000-square-foot home with 8-foot ceilings, that means you need roughly 5,300 to 8,000 CFM.

    The best time to run a whole house fan is after the sun goes down and the outside temperature drops below your indoor temperature. In dry climates with significant day-to-night temperature swings, this strategy works incredibly well. You can cool your entire house overnight and then close everything up in the morning to trap that cool air inside.

    What Is an Attic Fan?

    An attic fan is a smaller ventilation fan installed in your attic space. Its only job is to exhaust hot air from the attic to the outside. It does not touch the air in your living space at all. Instead, it focuses on keeping attic temperatures from building up to extreme levels during hot days.

    Without an attic fan, your attic can easily reach 150 to 160 degrees Fahrenheit on a hot summer day. That superheated air sits right above your ceiling insulation, working against your air conditioning system. Even with good insulation, heat radiates downward into your living space, forcing your AC to work harder and longer.

    An attic fan solves this by actively pulling hot air out of the attic and replacing it with cooler outside air drawn through intake vents. Here is how it works:

    • A thermostat mounted in the attic monitors the temperature
    • When the attic reaches a set temperature (usually 100 to 110 degrees), the fan turns on automatically
    • The fan exhausts hot air through a roof vent or gable vent
    • Cooler outside air enters through soffit vents or other intake vents
    • Once the attic cools to the thermostat shutoff point, the fan stops

    Attic fans come in three main types. Gable-mounted fans install on the triangular wall at the end of your attic and are the easiest to service. Roof-mounted fans sit directly on the roof surface and are more visible but very effective at exhausting heat. Solar-powered attic fans use a small solar panel to run the motor, which means zero operating cost but limited power on cloudy days.

    You will also see attic fans called power attic ventilators or PAVs. They typically move between 800 and 1,600 CFM, which is plenty for an attic space but far less than a whole house fan needs to move. Most models include a thermostat and some include a humidistat for winter moisture control.

    Whole House Fan vs Attic Fan: Key Differences

    Now that you understand what each fan does on its own, let me put them side by side. The table below covers the most important differences at a glance.

    • Primary Purpose: Whole house fan cools your living space; attic fan cools the attic only
    • Airflow Direction: Whole house fan pulls outdoor air through windows and up into attic; attic fan pushes attic air out through roof vents
    • What Gets Cooled: Whole house fan targets rooms and hallways where people live; attic fan targets the attic cavity above insulation
    • Installation Spot: Whole house fan mounts in the ceiling between top floor and attic; attic fan mounts on the roof or gable wall
    • Operation Timing: Whole house fan runs at night when outdoor air is cool; attic fan runs during the day when attic heat peaks
    • Window Requirement: Whole house fan requires open windows to draw in air; attic fan needs no windows opened in living space
    • Thermostat Control: Whole house fan is manually switched on and off; attic fan runs automatically on a thermostat
    • CFM Range: Whole house fan moves 3,000 to 7,000+ CFM; attic fan moves 800 to 1,600 CFM
    • DIY Friendly: Whole house fan usually needs professional installation; attic fan can be a DIY project for experienced homeowners

    The biggest distinction to remember is simple: a whole house fan affects the air you breathe in your rooms, while an attic fan only affects the air trapped above your ceiling. They serve different purposes and solve different problems. In many homes, using both together actually makes a lot of sense.

    Cooling Effectiveness: Which Fan Cools Better?

    If your main goal is to feel cooler in your living room, bedroom, or kitchen, the whole house fan wins by a wide margin. Nothing about an attic fan directly cools the air you experience. Let me explain why.

    A properly sized whole house fan can lower your indoor temperature by 10 to 20 degrees within minutes of turning it on. In the right climate, this can eliminate the need for air conditioning entirely during spring and fall, and significantly reduce it during summer. Users on home improvement forums consistently report that their whole house fan makes their home comfortable within 15 to 30 minutes after sunset.

    An attic fan works indirectly. By keeping your attic cooler (typically reducing attic temperatures by 30 to 50 degrees), it reduces the heat that radiates down through your ceiling. This means your air conditioner does not have to work as hard. Studies show that a cooler attic can reduce your cooling energy costs by about 10 percent. But you still need your AC running on hot days because the attic fan does not replace it.

    For real temperature reduction in living spaces, the whole house fan is far more effective. It replaces hot indoor air with cool outdoor air. An attic fan only reduces the heat load from above, which helps but cannot match the direct cooling effect of moving fresh air through your home.

    When a Whole House Fan Outperforms

    Whole house fans work best in areas where the nighttime temperature drops at least 15 to 20 degrees below the daytime high. If you live somewhere that hits 95 degrees during the day but cools to 65 at night, a whole house fan can flush all that heat out overnight. This covers much of the western United States, mountain states, and inland areas with dry heat.

    When an Attic Fan Makes More Sense

    In humid regions where nighttime temperatures stay high (think Gulf Coast, Southeast, or tropical areas), a whole house fan would just pull in warm, sticky air. An attic fan is the better investment here because it reduces your attic heat without requiring open windows or cool outside air. It simply helps your existing AC system run more efficiently.

    Installation Requirements and Complexity

    Installation is one of the biggest differences between these two fan types, and it directly affects your total cost.

    Whole House Fan Installation

    Installing a whole house fan is a significant project. The fan gets mounted in the ceiling of your top floor, which means cutting a hole in the drywall or plaster, framing an opening between the ceiling joists, and sealing everything properly. You also need adequate attic venting for all that air to escape. Most homes need additional soffit vents, ridge vents, or gable vents to handle the volume of air a whole house fan pushes.

    The electrical work usually requires a dedicated circuit, especially for larger models. Some modern units plug into a standard outlet, but many need hardwiring by a licensed electrician. A professional installation typically takes 4 to 8 hours and involves framing, electrical work, drywall repair, and sealing.

    I strongly recommend professional installation for whole house fans. The ceiling cut needs to be precise, the unit needs proper support framing, and the electrical connection must meet local codes. A poor installation can lead to air leaks, vibration noise, and even structural issues.

    Attic Fan Installation

    Attic fan installation is much simpler. A gable-mounted fan requires cutting an opening in the gable wall, mounting the fan, and running wiring to a thermostat. A roof-mounted fan involves cutting a hole in the roof, flashing it properly to prevent leaks, and securing the fan housing. Both types need basic electrical work to connect the thermostat and power.

    Many experienced DIYers handle attic fan installation over a weekend. The main challenge with roof-mounted models is ensuring the flashing is done correctly to prevent water intrusion. If you are not comfortable working on your roof or with basic electrical wiring, hire a professional. A typical professional installation takes 2 to 4 hours.

    Solar attic fans are the simplest to install because they do not require electrical wiring. You mount the fan, attach the small solar panel, and you are done. The tradeoff is that they only run when the sun is shining, which is actually when you need them most.

    Cost Comparison: Product and Installation

    Cost is often the deciding factor when homeowners choose between these two options. Here is what you can expect to pay for each.

    Whole House Fan Costs

    The fan unit itself typically costs between $400 and $1,200 depending on size, features, and brand. Professional installation adds another $500 to $1,500, bringing the total project cost to roughly $900 to $2,700. Higher-end models with insulated doors, variable speed motors, and smart controls sit at the top of that range.

    Additional attic venting, if needed, can add $200 to $600 to the project. Your installer should evaluate whether your existing vents provide enough exhaust area for the fan to work properly.

    Attic Fan Costs

    Attic fans are considerably less expensive. A standard electric attic fan costs $80 to $350 for the unit itself. Solar models run $150 to $600. Professional installation adds $150 to $500, bringing the total to $230 to $850 for electric models and $300 to $1,100 for solar models.

    The payback period is also different. A whole house fan can pay for itself in 1 to 3 years through reduced AC usage. An attic fan typically takes 3 to 5 years to recoup its cost through lower cooling bills. Both add value to your home, with whole house fans generally having a higher perceived value among homebuyers.

    Energy Efficiency and Savings

    Both fans save energy compared to running central air conditioning, but they do it in different ways and at different scales.

    Whole House Fan Energy Savings

    A whole house fan uses roughly 200 to 700 watts of electricity while running. Compare that to a central air conditioner that uses 3,500 to 5,000 watts. In the right climate, a whole house fan can reduce your air conditioning costs by 50 to 90 percent during the cooling season. That translates to real dollar savings.

    For a homeowner spending $150 per month on cooling, switching to a whole house fan strategy could cut that to $15 to $75 per month. The savings depend on your climate, electricity rates, and how consistently you use the fan instead of the AC.

    Attic Fan Energy Savings

    A standard attic fan uses 100 to 300 watts while running. Solar models use zero grid electricity. The savings come from reducing your attic temperature, which lightens the load on your air conditioner. Most studies estimate a 5 to 15 percent reduction in cooling costs when an attic fan is properly installed and adequate intake vents are in place.

    The savings are modest compared to a whole house fan, but the investment is also much smaller. If your attic is poorly ventilated and your AC runs constantly in summer, an attic fan can make a noticeable difference in both comfort and energy bills.

    Environmental Impact

    Both fans reduce your carbon footprint by cutting AC usage. Whole house fans have the larger environmental benefit because they can replace AC entirely during certain months. Solar attic fans are the greenest option of all since they run entirely on sunlight.

    Noise Levels: What to Expect

    Noise is the number one complaint I see in forum discussions about whole house fans. It is worth understanding what to expect from each fan type before you commit.

    Whole House Fan Noise

    Older whole house fan models are genuinely loud. We are talking 60 to 80 decibels, which is comparable to a dishwasher or garbage disposal running in your ceiling. The noise comes from the large blades moving massive amounts of air, plus vibration transferred through the ceiling framing.

    Modern whole house fans have gotten much quieter. Newer belt-drive models and direct-drive units with variable speed controls typically produce 40 to 55 decibels on low to medium speeds. On high speed, they still generate noticeable noise, but it is manageable. Insulated dampers and vibration isolators help reduce the racket significantly.

    Many users on Reddit report running their whole house fan on high for 30 minutes to flush the hot air, then dropping to low speed for the rest of the night. On low, most people sleep right through it.

    Attic Fan Noise

    Attic fans are generally quieter because they are smaller and separated from your living space by the ceiling and attic floor insulation. You might hear a low hum when standing directly below the fan, but it rarely disturbs daily activities or sleep. Typical noise levels range from 30 to 50 decibels depending on the model and mounting type.

    Gable-mounted fans tend to be the quietest because the gable wall provides some sound buffering. Roof-mounted models can create a slight vibration that travels through the roof framing. Solar attic fans are nearly silent since they use small, low-speed motors.

    Best Climates for Each Fan Type

    Your local climate is the single most important factor in choosing between these two fans. What works perfectly in Arizona might be useless in Florida.

    Whole House Fan: Best Climates

    Whole house fans perform best in areas with these characteristics:

    • Large day-to-night temperature swings (20+ degrees)
    • Low to moderate humidity levels
    • Summer nighttime temperatures below 70 degrees
    • Dry heat rather than muggy conditions

    This covers most of the western US including California, Nevada, Arizona (higher elevations), Oregon, Washington (eastern), Colorado, Utah, Idaho, Montana, and parts of Texas. Users from San Diego on Reddit consistently praise their whole house fans for keeping homes comfortable without AC from April through October.

    Attic Fan: Best Climates

    Attic fans work well everywhere because they do not depend on cool outdoor air. They just need a hot attic and adequate intake venting. However, they provide the most benefit in these situations:

    • Hot, humid climates where whole house fans are less effective
    • Homes with poor existing attic ventilation
    • Areas with intense sun exposure on the roof
    • Regions where ice dams form in winter

    In the Southeast, Gulf Coast, and Midwest, attic fans are usually the more practical investment. They help your AC work better without requiring you to open windows in humid weather.

    Mixed Climate Strategy

    If you live in a transitional climate that has dry stretches and humid stretches, an attic fan is your safe baseline choice. It helps year-round without any special operating requirements. If you also have a few months of cool, dry nights, you could add a whole house fan for those shoulder seasons when it really shines.

    Pros and Cons of Whole House Fans

    Pros

    • Cools your entire living space quickly and effectively
    • Reduces or eliminates AC usage in suitable climates
    • Brings fresh outdoor air inside, improving indoor air quality
    • Uses a fraction of the electricity that central AC requires
    • Fast payback period of 1 to 3 years in the right climate

    Cons

    • Requires opening windows, which raises security concerns at night
    • Not effective in humid climates where outdoor air is warm and sticky
    • Older models can be quite loud, especially on high speed
    • Professional installation is recommended, adding to the cost
    • Only works when outdoor temperature is cooler than indoor temperature

    Pros and Cons of Attic Fans

    Pros

    • Works in all climates since it does not depend on cool outdoor air
    • Runs automatically with thermostat control
    • Lower upfront cost and simpler installation
    • Solar options available for zero operating cost
    • Helps extend roof life by reducing heat and moisture buildup

    Cons

    • Does not directly cool living spaces
    • Provides modest energy savings compared to whole house fans
    • Can cause negative pressure issues if intake venting is inadequate
    • Roof-mounted models require careful flashing to prevent leaks

    Negative Pressure and Safety Concerns

    This is a topic most articles skip, but it matters for your safety. Negative pressure happens when a fan exhausts more air from a space than can be replaced through intake vents. Both fan types can create this problem, but attic fans are the bigger concern.

    When an attic fan runs without enough soffit vents or other intake vents to supply replacement air, it creates negative pressure in the attic. This vacuum effect can pull conditioned air from your living space through cracks around light fixtures, plumbing penetrations, and the attic access hatch. You end up sucking cool air out of your home and into the attic, which works against your AC system.

    More seriously, negative pressure can cause backdrafting with gas appliances like water heaters and furnaces. If your attic fan pulls hard enough, it can draw combustion gases like carbon monoxide back down the flue instead of letting them vent outside. This is a real safety hazard.

    To prevent these issues:

    • Make sure your attic has at least 1 square foot of net free vent area for every 300 CFM of fan capacity (intake vents plus exhaust vents combined)
    • Ensure soffit vents are clear and unblocked by insulation
    • Have your gas appliances checked for proper venting if you install an attic fan
    • Consider a sealed combustion chamber for gas appliances near the attic

    Whole house fans create negative pressure too, but since you intentionally open windows to supply air, the pressure equalizes naturally. Just make sure you open enough windows when running the fan to allow adequate airflow.

    Can You Use Both Fans Together?

    Yes, and many homeowners do. A whole house fan and an attic fan serve different purposes, so there is no conflict in running both. In fact, they complement each other nicely.

    During the day, your attic fan runs on its thermostat, keeping the attic from overheating while your AC handles the living space. After sunset, when the outdoor temperature drops, you turn on the whole house fan to flush out the hot indoor air and replace it with cool fresh air. The whole house fan actually does double duty here because it pushes air through the attic on its way out, helping with attic ventilation at the same time.

    Forum users on r/HomeImprovement frequently recommend this dual-fan approach, especially for homes in dry climates. The attic fan handles daytime heat reduction, and the whole house fan takes over for nighttime cooling. Together, they can dramatically cut your AC usage throughout the entire cooling season.

    If you can afford both installations, this combination gives you the most comprehensive ventilation strategy. Just make sure your attic has enough total vent area to handle the airflow from both fans.

    Which Fan Is Right for Your Home?

    By now you should have a good sense of which direction fits your situation. Here is a simple decision framework to help you choose.

    Choose a Whole House Fan If:

    • You live in a dry climate with cool nights (western US, mountain states)
    • Your main goal is to reduce or eliminate air conditioning costs
    • You want to cool your living space directly, not just your attic
    • You are comfortable opening windows at night for airflow
    • You want the fastest payback on your investment

    Choose an Attic Fan If:

    • You live in a humid climate where opening windows at night does not help
    • You want to protect your roof and extend shingle life
    • You prefer a set-it-and-forget-it solution with automatic operation
    • Your budget is tighter and you want a simpler installation
    • You are concerned about ice dams forming in winter

    Get Both If:

    • You live in a dry climate and want maximum cooling efficiency
    • Your attic runs extremely hot and your AC struggles to keep up
    • You want daytime attic ventilation plus nighttime whole-house cooling

    Still not sure? Start with an attic fan. It is the lower-cost option, it works in any climate, and you can always add a whole house fan later if your climate supports it.

    Frequently Asked Questions

    Why don’t people use whole house fans anymore?

    Whole house fans declined in popularity as central air conditioning became standard in new homes. Many homeowners prefer the convenience of AC, which cools without requiring open windows. Older whole house fans also developed a reputation for being loud, which turned people off. However, modern models are significantly quieter and more efficient, and whole house fans are making a comeback as homeowners look for ways to cut energy costs.

    What are the disadvantages of a whole house fan?

    The main disadvantages are: you must open windows for the fan to work, which can be a security concern at night. The fan is ineffective in humid climates because it pulls outdoor air inside. Older models can be quite loud. Installation typically requires a professional. The fan only works when outdoor air is cooler than indoor air, so it cannot help during the hottest part of the day.

    Can I leave my whole house fan on all night?

    Yes, you can run a whole house fan all night in most situations. Many homeowners do exactly that during summer, running the fan on low speed to maintain cool airflow throughout the night. Just make sure you have enough windows open to supply adequate air and that the windows you leave open are secure. If noise is an issue, run it on high for 30 minutes before bed to cool the house, then switch to low for the night.

    Do you leave windows open when using a whole house fan?

    Yes, windows must be open for a whole house fan to work. The fan pulls air in through open windows and exhausts it through the attic. Without open windows, the fan would create negative pressure and struggle to move air effectively. You typically need to open 4 to 6 windows about 4 to 6 inches each. Open windows on the lower floors and opposite sides of the house for the best airflow.

    How much energy does a whole house fan save compared to AC?

    A whole house fan uses 200 to 700 watts compared to a central AC unit that uses 3,500 to 5,000 watts. In the right climate with cool nights, a whole house fan can reduce cooling costs by 50 to 90 percent. For a household spending $150 per month on cooling, that could mean savings of $75 to $135 per month during the cooling season.

    Is an attic fan worth the investment?

    An attic fan is generally worth the investment if your attic gets excessively hot or has ventilation problems. For the relatively low cost of $230 to $850 installed, an attic fan can reduce attic temperatures by 30 to 50 degrees, lower your cooling costs by 5 to 15 percent, extend the life of your roof, and help prevent ice dams in cold climates. Solar models add the benefit of zero operating costs.

    Final Thoughts

    The whole house fan vs attic fan decision comes down to your climate, your budget, and what you want to accomplish. A whole house fan is the clear winner for direct cooling in dry climates with cool nights. It can slash your AC costs in half or more and pay for itself within a few years. An attic fan is the practical choice for humid regions, budget-conscious homeowners, and anyone who wants a simple, automatic solution that works everywhere.

    Neither fan replaces the other. If your home and budget allow, running both gives you the best of both worlds: attic heat reduction during the day and whole-house cooling at night. Whatever you choose, proper installation and adequate venting are essential for safety and performance.

    Before making your final decision, talk to a local HVAC professional who understands your regional climate. They can evaluate your attic ventilation, electrical capacity, and home layout to recommend the right fan type and size for your specific situation.

  • Types of AC Compressors (August 2026): Complete Guide

    Types of AC Compressors (August 2026): Complete Guide

    If you have ever wondered why some air conditioners run whisper-quiet while others rumble through the night, the answer usually comes down to one component: the compressor. The types of AC compressors used in a cooling system determine everything from energy efficiency and noise levels to how long the unit will last before needing replacement.

    Our team has spent years working with residential and commercial HVAC systems, and we have seen firsthand how the right compressor makes or breaks an installation. Whether you are a homeowner comparing central air units, a technician preparing for certification, or a building manager planning a commercial upgrade, understanding the different types of AC compressors helps you make better decisions.

    In this guide, we break down all five main compressor types, explain how each one works in plain language, and show you exactly which type belongs in which application. By the end, you will know which compressor matches your needs and why.

    What Is an AC Compressor?

    An AC compressor is the pump that drives the entire cooling process in an air conditioning system. Think of it as the heart of your AC unit. Just like your heart circulates blood through your body, the compressor circulates refrigerant through the system, enabling your air conditioner to absorb heat from indoors and release it outside.

    Without a functioning compressor, no cooling happens. The refrigerant would sit still, the evaporator coil would warm up, and your home would stay hot. Every air conditioning system, from a small window unit to a massive commercial chiller, relies on a compressor to keep the refrigerant moving and the cooling cycle going.

    The compressor sits in the outdoor condensing unit of a central AC system. It draws in low-pressure refrigerant gas from the evaporator coil inside your home, squeezes it into a high-pressure state, and sends it to the condenser coil where the heat gets released. This continuous loop is what keeps your indoor space comfortable year-round.

    How AC Compressors Work

    The cooling cycle in an air conditioner follows a simple but effective four-step process. Understanding this cycle makes it much easier to see why different types of AC compressors exist and why certain types work better for specific applications.

    Step 1: Evaporation. Inside your home, the evaporator coil contains liquid refrigerant at low pressure. Warm indoor air blows across this coil, and the refrigerant absorbs the heat, evaporating from a liquid into a gas. This is what cools the air that gets circulated back into your rooms.

    Step 2: Compression. The low-pressure refrigerant gas travels through the suction line to the compressor. Here, the compressor squeezes the gas, dramatically raising both its pressure and temperature. This step is critical because the refrigerant needs to be hotter than the outdoor air for the next step to work.

    Step 3: Condensation. The hot, high-pressure gas flows into the condenser coil outside. A fan blows outdoor air across the coil, and the refrigerant releases its heat to the outside environment. As it loses heat, the refrigerant condenses back into a high-pressure liquid.

    Step 4: Expansion. The high-pressure liquid passes through an expansion valve or metering device, which drops the pressure suddenly. This causes the refrigerant to cool rapidly, turning into a cold, low-pressure mixture ready to absorb more indoor heat. The cycle then repeats.

    The compressor is the only component that actively adds energy to this cycle. Everything else is passive heat exchange. That is why the compressor type matters so much. It directly affects how efficiently the system runs, how much energy it consumes, and how much noise it makes.

    Types of AC Compressors: Complete Overview

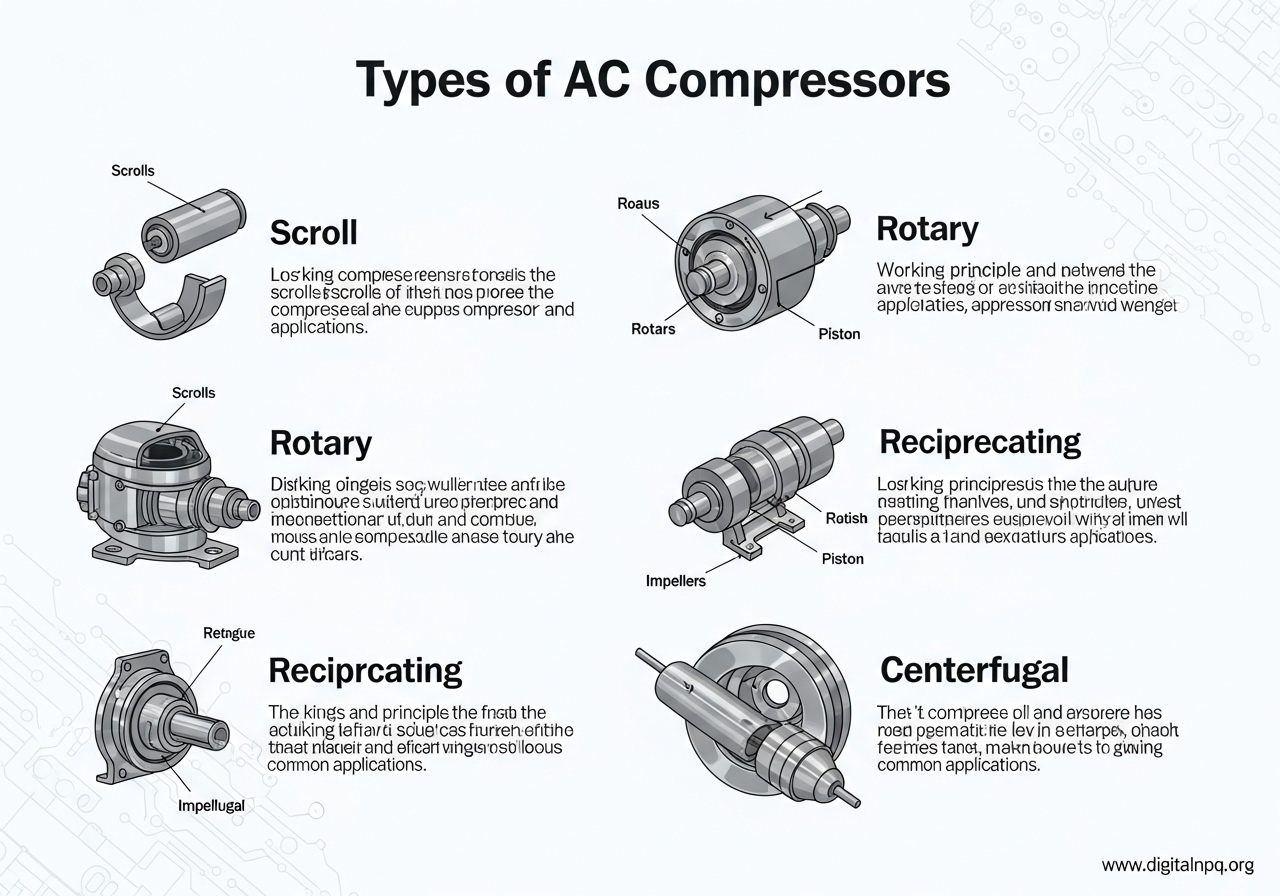
    There are five main types of AC compressors used in modern cooling systems. Each type uses a different mechanical method to compress refrigerant gas, and each has distinct advantages that make it suitable for specific applications.

    Here are the five types of AC compressors you will encounter:

    • Scroll Compressor – Uses two spiral-shaped scrolls to compress refrigerant; quiet and efficient; dominates residential central AC
    • Rotary Compressor – Uses a rotating mechanism inside a cylinder; compact and affordable; common in window units and mini-splits
    • Reciprocating Compressor – Uses pistons moving up and down in cylinders; widely available and easy to service; found in residential and light commercial AC
    • Screw Compressor – Uses interlocking helical rotors; handles large capacities with continuous output; built for commercial and industrial systems
    • Centrifugal Compressor – Uses a high-speed rotating impeller; designed for massive cooling loads; used in hospitals, data centers, and large campuses

    The key distinction among these types comes down to how they compress the refrigerant. Scroll, rotary, reciprocating, and screw compressors are all positive displacement compressors, meaning they physically reduce the volume of the gas to increase pressure. Centrifugal compressors use kinetic energy instead, accelerating the gas with an impeller and then converting that velocity into pressure.

    Let us look at each type in detail.

    1. Scroll Compressor

    Scroll compressors are the most popular type found in residential air conditioning systems today. If you have a central AC unit or a heat pump installed at home in the last 10 years, it most likely uses a scroll compressor.

    How a Scroll Compressor Works

    A scroll compressor contains two interleaving spiral-shaped scrolls. One scroll stays fixed in place while the other orbits around it in a circular motion. As the orbiting scroll moves, it creates crescent-shaped gas pockets between the two spirals.

    These gas pockets start large at the outer edge of the scrolls where the refrigerant enters. As the orbiting scroll continues its motion, the pockets gradually shrink in size, squeezing the refrigerant gas into higher and higher pressure. By the time the gas reaches the center of the scrolls, it has been fully compressed and is discharged into the condenser.

    Because the compression happens continuously and smoothly, scroll compressors produce very little vibration compared to piston-based designs. This smooth operation is what makes them notably quieter than many other compressor types.

    Advantages of Scroll Compressors

    Scroll compressors offer several benefits that make them the go-to choice for residential HVAC systems. They operate at noise levels between 60 and 72 decibels, which is noticeably quieter than reciprocating compressors. Their simple design with fewer moving parts means fewer points of failure and longer typical lifespans of 12 to 20 years.

    They also handle liquid refrigerant better than piston compressors, reducing the risk of damage from liquid slugging. Many modern scroll compressors come with variable-speed technology, allowing them to adjust output based on cooling demand. This translates to better humidity control and lower energy consumption during mild weather.

    Disadvantages of Scroll Compressors

    The main drawback of scroll compressors is that they are generally more expensive upfront than reciprocating models. They are also more difficult to repair when something goes wrong. If a scroll mechanism fails, the entire compressor usually needs replacement rather than an in-place repair.

    Additionally, scroll compressors are not well-suited for extremely large cooling loads. Most residential scroll compressors top out around 5 tons of cooling capacity, which covers homes up to about 3,000 square feet but falls short for commercial applications.

    Best Applications

    Scroll compressors are ideal for residential central air conditioning systems, residential heat pumps, ductless mini-split systems, and light commercial applications up to about 5 tons. Brands like Copeland dominate the scroll compressor market, and many major AC manufacturers including Trane, Carrier, and Lennox use Copeland scrolls in their residential units.

    2. Rotary Compressor

    Rotary compressors are compact workhorses commonly found in smaller cooling systems. If you own a window air conditioner, a portable AC unit, or a ductless mini-split, there is a strong chance it uses a rotary compressor.

    How a Rotary Compressor Works

    A rotary compressor uses a rotating mechanism inside a cylindrical chamber to compress refrigerant. The most common design uses an eccentric roller mounted on a shaft inside the cylinder. As the shaft spins, the roller pushes against the cylinder wall, creating a shrinking space that compresses the refrigerant gas.

    Another rotary design uses sliding vanes that extend from a central rotor. As the rotor spins, the vanes slide in and out, creating variable-size pockets that compress the gas. Both designs achieve compression through continuous rotation rather than the back-and-forth pumping action of pistons.

    The continuous rotary motion makes these compressors small, lightweight, and relatively inexpensive to manufacture. That is why they dominate the market for compact AC units where space and cost are primary concerns.

    Advantages of Rotary Compressors

    Rotary compressors shine in small spaces. Their compact design allows manufacturers to build them into window units, portable ACs, and wall-mounted mini-split indoor units where larger compressors simply would not fit.

    They are also among the quietest compressor types available, typically operating between 50 and 65 decibels. This makes them ideal for bedroom installations and other noise-sensitive areas. Rotary compressors tend to have fewer vibration issues as well, which further reduces noise and wear on surrounding components.

    From a cost perspective, rotary compressors are affordable to manufacture and replace, making them a practical choice for budget-friendly cooling equipment.

    Disadvantages of Rotary Compressors

    The primary limitation of rotary compressors is capacity. They are generally limited to small and medium-sized cooling systems, typically under 2.5 tons. If you need to cool a large home or a commercial space, a rotary compressor simply will not deliver enough output.

    Rotary compressors also tend to have slightly shorter lifespans than scroll or reciprocating models, typically lasting 8 to 15 years depending on usage and maintenance. They can be sensitive to debris and contamination in the refrigerant system, which can cause premature wear on the rotating components.

    Best Applications

    Rotary compressors are the standard choice for window air conditioners, portable AC units, wall-mounted ductless mini-splits, and small through-the-wall AC units. They are the compressor you will find in most room-level cooling products sold at major retailers.

    3. Reciprocating Compressor

    Reciprocating compressors are one of the oldest and most widely recognized compressor designs in the HVAC industry. They use a piston-and-cylinder arrangement that works much like a car engine, except instead of burning fuel, they compress refrigerant gas.

    How a Reciprocating Compressor Works

    Inside a reciprocating compressor, one or more pistons move up and down inside cylinders. On the downstroke, an intake valve opens and low-pressure refrigerant gas enters the cylinder. On the upstroke, the intake valve closes and the piston compresses the gas. When the pressure reaches the discharge threshold, the exhaust valve opens and the high-pressure gas flows out to the condenser.

    Multi-cylinder reciprocating compressors can have 2, 4, 6, or even 8 cylinders working together, allowing them to handle larger cooling capacities than single-cylinder models. Each cylinder operates on its own compression cycle, staggered to provide more even output.

    This design has been around for over a century and is well-understood by HVAC technicians everywhere. That familiarity is one of its biggest strengths when it comes to serviceability.

    Advantages of Reciprocating Compressors

    Reciprocating compressors are widely available and typically cost less than scroll compressors of comparable capacity. Because the design is so common, nearly every HVAC technician knows how to diagnose and repair them, which keeps service costs down.

    They also offer good flexibility in terms of operating conditions. Reciprocating compressors can handle a wide range of refrigerants and work well across different pressure ratios. Many models allow for capacity control by unloading individual cylinders, which helps with efficiency at partial loads.

    For automotive air conditioning, the reciprocating design (in swash-plate or wobble-plate variations) remains the standard because it handles the vibration and temperature extremes found under a car hood.

    Disadvantages of Reciprocating Compressors

    The main downsides of reciprocating compressors are noise and vibration. The start-and-stop piston motion creates more vibration than the smooth scrolling or rotating action of other designs. Noise levels typically range from 70 to 80 decibels, making them the loudest common compressor type for residential use.

    Reciprocating compressors also have more moving parts than scroll or rotary designs. More parts mean more potential points of failure, including piston rings, valves, connecting rods, and bearings. They also tend to be slightly less energy efficient than scroll compressors at typical residential operating conditions.

    Best Applications

    Reciprocating compressors are commonly used in residential central AC units, light commercial systems, automotive air conditioning, and refrigeration applications. They remain popular where cost is a primary concern and where serviceability by a wide range of technicians is important.

    4. Screw Compressor

    Screw compressors step up into the world of commercial and industrial cooling. These compressors use a pair of interlocking helical rotors to compress refrigerant continuously, making them well-suited for applications that demand high cooling capacity around the clock.

    How a Screw Compressor Works

    A screw compressor contains two meshing helical rotors inside a precisely machined housing. One rotor has helical lobes (the male rotor) and the other has matching grooves (the female rotor). As the male rotor turns, it drives the female rotor in the opposite direction.

    Refrigerant gas enters through an intake port at one end of the rotors. As the rotors turn, the lobes and grooves mesh together, trapping the gas in progressively smaller pockets. By the time the gas reaches the discharge port at the other end, it has been compressed to the target pressure.

    This process happens continuously without the pulsation that comes from piston-based designs. The result is a smooth, steady flow of compressed refrigerant that is ideal for large systems running at constant load.

    Advantages of Screw Compressors

    Screw compressors excel at high-capacity cooling. They can handle systems ranging from about 20 tons up to several hundred tons of cooling capacity, making them a staple in medium-to-large commercial buildings.

    They offer excellent reliability for continuous operation. With fewer wearing surfaces than reciprocating compressors, screw compressors can run 24 hours a day, 7 days a week without the frequent maintenance that piston designs demand. Many screw compressors operate for 15 to 25 years in commercial installations.

    Modern screw compressors also feature variable capacity control through slide valves or variable-speed drives. This allows them to modulate output efficiently, reducing energy consumption during periods of lower cooling demand.

    Disadvantages of Screw Compressors

    The biggest barrier for screw compressors is cost. They are significantly more expensive than scroll or reciprocating compressors, both in upfront purchase price and in installation requirements. They also require professional maintenance by technicians with specific training in screw compressor service.

    Screw compressors are not practical for residential applications. Their smallest capacities still far exceed what a typical home needs, and the installation requirements including three-phase electrical service make them unsuitable for most residential settings.

    Best Applications

    Screw compressors are the standard choice for medium and large commercial buildings, hospitals, hotels, industrial process cooling, and large refrigeration plants. They handle the heavy lifting that smaller compressor types simply cannot manage.

    5. Centrifugal Compressor

    Centrifugal compressors represent the heavyweights of the AC compressor world. They are designed for the largest cooling installations on the planet, from hospital complexes to university campuses to skyscrapers.

    How a Centrifugal Compressor Works

    Unlike the other four compressor types that mechanically squeeze refrigerant gas, centrifugal compressors use speed and momentum. A high-speed rotating impeller spins the refrigerant gas outward at tremendous velocity, similar to how a centrifuge separates materials in a laboratory.

    The high-velocity gas exits the impeller and enters a diffuser section, where the passage widens and the gas slows down. As the velocity drops, the kinetic energy converts into pressure energy. This is the same basic principle used in turbochargers and jet engines.

    Large centrifugal chillers often use multiple stages, passing the gas through several impeller and diffuser sections in sequence to achieve very high pressure ratios. These machines can be enormous, sometimes the size of a delivery truck, and they require specialized engineering to install and maintain.

    Advantages of Centrifugal Compressors

    Centrifugal compressors offer unmatched cooling capacity. A single centrifugal chiller can provide hundreds or even thousands of tons of cooling, enough to air condition an entire building complex. They are the only practical choice for the largest cooling installations.

    At scale, they are remarkably energy efficient. Large centrifugal chillers routinely achieve coefficient of performance (COP) ratings that smaller compressor types cannot match. When you are moving enough air and water to cool a 50-story building, even small efficiency gains translate to significant energy and cost savings.

    They also have very few wearing parts compared to positive displacement compressors. The rotating impeller runs on bearings, and with proper maintenance, centrifugal compressors can operate for 25 to 30 years or more.

    Disadvantages of Centrifugal Compressors

    The drawbacks are straightforward: size, cost, and complexity. Centrifugal compressors are extremely expensive, often costing hundreds of thousands of dollars for the compressor alone. They require specialized three-phase electrical service, concrete mounting pads, and extensive piping infrastructure.

    Maintenance requires specially trained technicians and often involves working with the original manufacturer. A failure in a centrifugal compressor is not a quick fix. It typically means shutting down a major portion of a building’s cooling system while repairs are completed.

    They are also sensitive to operating conditions. Running a centrifugal compressor too far from its design point can cause surge, a potentially damaging condition where the gas flow reverses rapidly. Modern controls help prevent surge, but it remains a design consideration.

    Best Applications

    Centrifugal compressors are used exclusively in large commercial and industrial applications. You will find them in hospital complexes, university campuses, data centers, shopping malls, large office towers, and district cooling plants. They are never used in residential or small commercial settings.

    Comparing the Types of AC Compressors Side by Side

    With all five types of AC compressors covered, let us put them head to head. The following comparison breaks down the key differences across efficiency, noise, capacity, and typical applications.

    • Scroll: High efficiency, 60-72 dB noise, up to 5 tons, residential central AC and heat pumps, moderate cost, 12-20 year lifespan
    • Rotary: Good efficiency, 50-65 dB noise, up to 2.5 tons, window units and mini-splits, low cost, 8-15 year lifespan
    • Reciprocating: Moderate efficiency, 70-80 dB noise, up to 10 tons, residential and light commercial, low to moderate cost, 10-15 year lifespan
    • Screw: High efficiency at scale, 65-75 dB noise, 20-500+ tons, commercial and industrial, high cost, 15-25 year lifespan
    • Centrifugal: Highest efficiency at scale, 70-85 dB noise, 100-5000+ tons, large commercial and industrial, very high cost, 25-30+ year lifespan

    Notice the pattern: smaller compressor types (rotary, reciprocating) serve homes and small businesses. Mid-range types (scroll) handle most residential and light commercial needs. Large types (screw, centrifugal) serve commercial and industrial applications. Matching the right compressor type to your cooling load is the single most important factor in getting an efficient, reliable system.

    For energy efficiency, scroll compressors lead the residential market with SEER ratings commonly reaching 18-22 in modern units. At the commercial scale, centrifugal chillers achieve the best efficiency per ton of cooling, but only when running at or near full capacity. Variable-speed technology has improved partial-load efficiency across all compressor types in recent years.

    On noise, rotary compressors are the quietest, making them ideal for bedrooms and living spaces. Reciprocating compressors are the loudest in typical residential applications. If noise sensitivity is a concern for your installation, scroll or rotary compressors are the better choices.

    Which Compressor Type Is Right for You?

    Choosing among the types of AC compressors comes down to three factors: the size of the space you need to cool, your budget, and how much noise you can tolerate.

    For a home or apartment (up to about 3,000 sq ft): A scroll compressor in a central AC or heat pump system is the most common and efficient choice. For individual rooms, a rotary compressor in a mini-split or window unit provides quiet, affordable cooling.

    For a small business or light commercial space: Scroll or reciprocating compressors handle loads up to about 10 tons. Scroll compressors offer better efficiency and quieter operation, while reciprocating compressors cost less upfront and are easier to service.

    For a medium-to-large commercial building: Screw compressors are the standard choice for cooling loads between 20 and several hundred tons. They offer the reliability and capacity that commercial operations demand.

    For industrial facilities, hospitals, or campus-scale cooling: Centrifugal compressors are the only practical option for these massive cooling loads. Their efficiency at scale and long service life justify the high upfront investment.

    One important consideration that comes up in forum discussions is the distinction between rotary compressors as a specific type versus a broad category. In HVAC terminology, “rotary compressor” refers to the specific vane or roller design used in window units and mini-splits. It is not a general category that includes all rotating compressors. Scroll and screw compressors also use rotary motion but are classified separately based on their distinct compression mechanisms.

    AC Compressor Maintenance Tips

    Regardless of which type of AC compressor you have, proper maintenance extends its life and keeps it running efficiently. Here are the practices that matter most.

    Keep coils clean. Dirty condenser coils force the compressor to work harder, raising discharge pressure and energy consumption. Hose down your outdoor unit monthly during cooling season, and schedule a professional coil cleaning annually.

    Change air filters regularly. Clogged filters restrict airflow across the evaporator coil, which can cause the coil to freeze and send liquid refrigerant back to the compressor. Liquid slugging is one of the most common causes of compressor failure, especially in reciprocating models.

    Maintain proper refrigerant charge. Both undercharged and overcharged systems stress the compressor. A system low on refrigerant runs longer cycles and may overheat the compressor motor. An overcharged system raises discharge pressure beyond design limits. Have a qualified technician check refrigerant levels once a year.

    Listen for unusual sounds. Each compressor type has a characteristic sound during normal operation. If you notice new rattling, buzzing, clicking, or grinding noises, shut the system off and call a technician. Early intervention on bearing wear or valve issues can prevent total compressor failure.

    Schedule annual professional inspections. An HVAC technician can measure compressor amperage, check superheat and subcooling, inspect electrical connections, and identify developing problems before they cause a breakdown. This annual checkup typically costs between $75 and $200 and can save thousands in premature compressor replacement.

    Common Signs of AC Compressor Problems

    Catching compressor issues early can be the difference between a repair and a full system replacement. Here are the warning signs to watch for.

    Loud or unusual noises: A sudden increase in noise, especially metallic banging, clanking, or buzzing, often indicates internal mechanical damage. In scroll compressors, a high-pitched squeal can mean the scroll set is failing. In reciprocating models, knocking sounds usually point to worn piston pins or connecting rods.

    Warm air from vents: If your AC is running but the air coming from your vents is not cool, the compressor may not be circulating refrigerant. This could be caused by an electrical failure, a bad capacitor, or a seized compressor motor.

    Hard starting or short cycling: If the outdoor unit struggles to start, hums for several seconds before kicking on, or turns off after just a few minutes, the compressor may be overheating or failing electrically. A hard start kit sometimes helps, but persistent short cycling usually indicates a more serious problem.

    Rising energy bills: A compressor that is losing efficiency draws more power to deliver the same cooling output. If your electric bills climb without a change in usage patterns, have a technician check compressor performance.

    Circuit breaker tripping: A compressor that trips the breaker repeatedly is drawing excessive current, which can mean an internal short, a failing start winding, or a grounded compressor. Do not keep resetting the breaker. Call a professional.

    FAQ

    What are the 4 types of AC compressors?

    The four main types of AC compressors are scroll, rotary, reciprocating, and centrifugal. Some classifications include screw compressors as a fifth type. Scroll compressors dominate residential central AC, rotary compressors are common in window units and mini-splits, reciprocating compressors are used in residential and automotive AC, and centrifugal compressors handle large commercial and industrial cooling loads.

    What are the different types of air conditioner compressors?

    Air conditioner compressors fall into two categories: positive displacement and dynamic. Positive displacement types include scroll (spiral-shaped scrolls compress gas), rotary (rotating mechanism inside a cylinder), reciprocating (pistons in cylinders), and screw (interlocking helical rotors). The dynamic type is the centrifugal compressor, which uses a high-speed impeller. Each type is designed for specific capacity ranges and applications, from small window units to industrial chillers.

    What are the 5 types of refrigerant compressors?

    The five types of refrigerant compressors are scroll, rotary, reciprocating, screw, and centrifugal. Scroll and rotary are most common in residential systems, reciprocating is used in residential and automotive applications, screw handles commercial and industrial loads, and centrifugal is reserved for the largest cooling installations such as hospitals and campus buildings.

    Which AC compressor type is most efficient?

    For residential use, scroll compressors are the most efficient, especially variable-speed models that adjust output to match cooling demand. At commercial and industrial scales, centrifugal compressors offer the highest efficiency per ton of cooling. Rotary compressors are efficient for their small size in window units and mini-splits. The key to maximum efficiency is matching the compressor type to the application and ensuring proper installation and refrigerant charge.

    How long do AC compressors last?

    AC compressor lifespans vary by type. Rotary compressors typically last 8 to 15 years. Reciprocating compressors average 10 to 15 years. Scroll compressors last 12 to 20 years. Screw compressors run 15 to 25 years in commercial settings. Centrifugal compressors can exceed 25 to 30 years with proper maintenance. Regular maintenance including annual inspections, proper refrigerant charge, and clean coils significantly extends compressor life across all types.

    Which compressor is best for home AC?

    For home air conditioning, scroll compressors are the best choice for central AC and heat pump systems. They offer the best combination of efficiency, quiet operation, and reliability for residential use. For individual rooms or small apartments, rotary compressors in ductless mini-splits or window units provide affordable and quiet cooling. Reciprocating compressors are still used in some residential units but are gradually being replaced by scroll designs in newer systems.

    Final Thoughts

    Understanding the types of AC compressors gives you a real advantage whether you are buying a new system, maintaining an existing one, or troubleshooting a problem. Each of the five main types serves a specific purpose. Scroll compressors lead residential installations with their quiet and efficient operation. Rotary compressors power compact units like window ACs and mini-splits. Reciprocating compressors offer affordable and serviceable cooling for homes and small businesses. Screw and centrifugal compressors handle the heavy lifting in commercial and industrial environments.

    The most important takeaway is that there is no single best compressor. There is only the right compressor for your specific application and budget. If you are selecting a new AC system, ask the installer what compressor type it uses and why that choice fits your home or building. If you are maintaining an existing system, follow the maintenance tips in this guide to keep your compressor running strong for its full expected lifespan.

    For any installation, replacement, or major repair, always work with a licensed HVAC professional. Compressors operate under high pressure and involve refrigerants that require EPA certification to handle. A qualified technician ensures the job is done safely and correctly the first time.

  • How to Install Return Air Duct (August 2026)

    How to Install Return Air Duct (August 2026)

    If some rooms in your house feel stuffy, uneven in temperature, or just never seem to get comfortable no matter how you set the thermostat, the problem might not be your HVAC unit at all. It could be your return air duct system. Learning how to install return air duct properly can solve airflow problems, lower your energy bills, and make every room in your home comfortable year-round.

    A return air duct pulls stale air from your living spaces back to the furnace or air handler so it can be filtered, heated or cooled, and redistributed through the supply ducts. Without enough return airflow, your HVAC system works harder than it should, and certain rooms end up with poor air circulation. Most homes have a single central return vent in a hallway, but bedrooms, basements, and additions often need their own returns to maintain balanced airflow.

    I have helped several homeowners add return ducts to solve closed-door comfort issues, and the improvement is immediate once the system is balanced correctly. This guide walks you through the full process, from planning the route to testing the final installation, so you can tackle this project with confidence.

    Supply vs Return Ducts: What is the Difference?

    Before you start cutting holes in walls, it helps to understand how the two types of ducts work together. Your HVAC system has a supply side and a return side, and both need to be properly sized and balanced for the system to work efficiently.

    Supply ducts carry conditioned air, whether heated or cooled, from the furnace or air handler out to the rooms through registers and vents. You can usually feel air blowing from these vents when the system is running. Return ducts do the opposite job: they pull air from the rooms back to the HVAC unit through larger grilles, often located in hallways or on walls near the floor.

    Think of it like a circle. The supply side pushes air out, and the return side pulls it back in. If the return side is undersized or missing in certain rooms, that circle gets broken. The air has nowhere to go, pressure builds up, and your system struggles. A well-designed return air duct installation ensures the total return airflow matches or slightly exceeds the supply airflow for balanced operation.

    One common misconception is that return ducts only carry “cold” air. In reality, they carry whatever air is in the room, whether that is warm air in winter or cool air in summer. That air gets pulled back to the system, reconditioned, and sent out again through the supply side.

    Signs You Need an Additional Return Air Duct

    Not every home needs extra return ducts, but many do, especially older homes that were built with a single central return. Here are the most common signs that adding a return air vent could help your situation.

    Uneven temperatures between rooms. If one bedroom is always warmer or cooler than the rest of the house, poor return airflow is often the culprit. Without a return path, air from the supply vent pressurizes the room and prevents new conditioned air from entering effectively.

    Doors that are hard to open or close when the HVAC runs. This happens because air from supply registers builds pressure in a room with no return vent. The pressure pushes against the door, making it difficult to move. You might also notice whistling sounds around the door frame as air tries to escape through gaps.

    High static pressure readings. If an HVAC technician has told you that your system has high static pressure, undersized or insufficient return ductwork is a likely cause. High static pressure forces the blower motor to work harder, which shortens its lifespan and reduces overall efficiency.

    Your HVAC system runs constantly. When return airflow is restricted, the system cannot pull enough air back to reach the target temperature. The thermostat never gets satisfied, and the unit keeps running, driving up energy bills and wearing out components faster.

    Dusty rooms or poor indoor air quality. Return ducts pull air through the filter. Without a return in a particular room, dust and allergens tend to accumulate because the air is not being cycled back through the filtration system.

    Tools and Materials You Will Need

    Having everything ready before you start saves time and reduces frustration. Here is a complete checklist of what you need for a typical return air duct installation.

    Tools

    • Tape measure and pencil for marking cuts
    • Stud finder to locate wall framing and avoid wiring
    • Drywall saw or reciprocating saw for cutting vent openings
    • Tin snips, both left and right hand, for cutting sheet metal
    • Drill with sheet metal screws and driver bits
    • Level for aligning the vent grille
    • Utility knife for trimming insulation and duct board
    • Hammer and framing nails if you need to modify joists or studs
    • Flashlight or headlamp for working in tight spaces

    Materials

    • Return air vent grille sized to match your duct opening, commonly 12×12, 14×14, or 20×20 inches
    • Sheet metal ductwork or flexible duct line sized appropriately for your system
    • Takeoff collar or starting collar to connect new duct to the existing return plenum
    • Metal foil tape or duct mastic for sealing all joints
    • Zip ties or metal band clamps for securing flexible duct
    • Duct board or thermo-pan for framing the return box in wall cavities
    • Wood framing material if building a custom return box
    • Safety glasses, work gloves, and a dust mask

    Safety Precautions Before You Start

    Working with ductwork involves cutting metal, navigating tight spaces, and interacting with your HVAC system. Follow these safety steps to protect yourself and your home.

    Shut off the HVAC system. Turn the thermostat off and flip the breaker for the furnace or air handler. You do not want the blower kicking on while you are cutting into ductwork. Lock out the breaker if others are in the house.

    Wear protective gear at all times. Sheet metal edges are extremely sharp and can cause serious cuts. Wear heavy work gloves, safety glasses, and a dust mask, especially when working in older ductwork that may contain accumulated debris.

    Check for wiring and plumbing before cutting. Use a stud finder with electrical detection before cutting into any wall, ceiling, or floor. You do not want to nick a wire or pipe. If you are unsure what is behind a surface, cut a small inspection hole first.

    Follow local building codes and the 2-foot rule. Most building codes require that return air ducts and openings be located at least 2 feet from the furnace or combustion appliance in the same room. This prevents the return from pulling combustion gases back into the system. Check your local code requirements, as they vary by jurisdiction. If your project involves gas appliances, consider hiring a licensed professional to verify compliance.

    Avoid return ducts in garages or mechanical rooms with combustion equipment. Drawing air from these spaces can introduce carbon monoxide and other hazardous fumes into your living areas. Always locate return vents in conditioned living spaces.

    Step 1: Plan the Return Air Duct Route and Location

    Planning is the most important step in any return air duct installation. A poorly planned route leads to restricted airflow, difficult installations, and potentially having to redo work. Take your time here and the rest of the project goes much smoother.

    Calculate the correct duct size. HVAC professionals use a simple rule of thumb: you need a minimum of 150 square inches of return duct opening per ton of air conditioning. A standard 3-ton system, which covers most average homes, requires at least 450 square inches of total return opening. That could be a single 20-by-24-inch grille or multiple smaller grilles that add up to the same area. If you are adding a secondary return rather than replacing the main one, size it to handle the specific room or zone it serves.

    Choose the best location for the vent grille. For wall installations, pick an interior wall if possible to avoid insulation and exterior weather barriers. The vent should be near the floor for heating-dominant climates or near the ceiling for cooling-dominant climates. For homes with both heating and cooling needs, a wall placement at mid-height is a good compromise. In basements, floor-level returns in the joist bay are common and straightforward to install.

    Map the route from the vent location back to the main return trunk or plenum. The shortest, straightest path gives the best airflow. Avoid sharp turns and long horizontal runs where possible. If you need to route through joist bays, plan to use the space between the ceiling joists in a basement or between floor joists on an upper level. Flexible duct can navigate around obstacles but should be kept as short as possible because the ridged interior creates more air resistance than smooth sheet metal.

    Identify the tie-in point on the existing system. Look for a convenient spot on the main return trunk line where you can install a takeoff collar. This is usually a rectangular or round fitting that you cut into the existing duct, creating a branch connection for your new return line. The takeoff should be accessible and positioned so the new duct can connect without sharp bends.

    Take measurements of every segment along the route and make a materials list based on those measurements. It is better to have a little extra duct and fittings than to come up short halfway through the job.

    Step 2: Cut the Vent Opening

    With your plan in place, the first physical step is creating the opening where the return air grille will sit. The method differs slightly depending on whether you are working with drywall, plaster, or a floor installation.

    For wall installations in drywall: Use your stud finder to confirm the bay between two studs is clear of wires and pipes. Mark the outline of the vent opening on the wall using the grille as a template. Most return grilles have a lip that covers the rough opening, so the hole should be about three-quarters of an inch smaller than the grille dimensions on each side. Drill a pilot hole in each corner, then use a drywall saw to cut along the outline. Pull out the drywall piece and clean up any loose insulation inside the wall bay.

    For ceiling installations: The process is similar, but you are working between ceiling joists. Mark the opening, cut carefully, and be aware that ceiling cavities often contain more wiring and ductwork than walls. If you are installing in a finished ceiling, have someone help hold the cut section so it does not fall into the cavity above.

    For floor installations: Floor return openings require cutting through the subfloor between joists. Use a reciprocating saw for this step and be mindful of finished flooring above. Floor returns are common in basement installations where you can work from below and simply cut the subfloor to create the opening.

    Once the opening is cut, frame the inside of the cavity with duct board or sheet metal to create a smooth return path. This boxed-in section guides air from the grille into the duct line. Seal all interior seams with foil tape to prevent air leaks at this critical junction.

    Step 3: Install and Connect the Return Air Ductwork

    This is where the pieces come together. You are connecting the new vent opening to the existing HVAC system through the duct route you planned in Step 1. The exact method depends on whether you are using rigid sheet metal, flexible duct, or a combination of both.

    Install the takeoff collar on the main return trunk. Cut a hole in the side of the existing return duct that matches the size of your takeoff collar. Slide the collar into the opening and secure it with sheet metal screws spaced about two inches apart around the perimeter. Seal the joint between the collar and the trunk line with foil tape or duct mastic. This connection needs to be airtight; any leaks here reduce the performance of your entire return system.

    Run the duct from the takeoff to the vent opening. For rigid ductwork, measure and cut each section to fit, connecting pieces with S-cleats and drive clips or screws. For flexible duct, stretch it taut along the route without compressing it, and secure both ends with zip ties or band clamps. Support the duct every four to five feet with strapping or wire to prevent sagging. Sagging flexible duct creates dips where air velocity drops and resistance increases.

    Connect the duct to the vent box. The duct should terminate at the framed opening you created in Step 2. Use a boot or transition fitting to connect the round or rectangular duct to the wall cavity box. Secure with screws and seal all joints with foil tape. If you are using a canned return, which is a pre-built metal box with flanges, simply attach it to the framing and connect the duct to the built-in collar.

    Can you add a return vent to existing ductwork? Yes, and this is exactly how most retrofit installations work. You tap into the main return trunk line using a takeoff collar, run a new branch duct to the new vent location, and seal everything tight. The key is making sure the existing trunk line and blower can handle the additional airflow. If your system is already struggling, adding more return capacity without addressing the underlying issue can actually make things worse. In most cases though, adding a properly sized return branch improves system performance.

    Before sealing everything up, do a visual inspection of every joint and connection. Look for gaps, loose connections, or areas where tape has not fully adhered. Fix any issues now because they are much harder to access once everything is closed up.

    Step 4: Test and Seal the System

    With all connections made, it is time to verify that your return air duct installation is working correctly before you finish the job.

    Turn the HVAC system back on. Flip the breaker and set the thermostat to run the fan or activate the heating or cooling mode. You should immediately feel air being pulled into the new return grille if you hold your hand in front of it. A piece of tissue paper held near the grille should be drawn toward it, confirming negative pressure and proper airflow direction.

    Check every joint for air leaks. Run your hand along the duct connections and feel for air escaping. You can also use a smoke pencil or hold a piece of tissue near each joint. If you find leaks, apply additional foil tape or duct mastic to seal them. Small leaks may not seem like a big deal, but they add up and reduce the efficiency of your return system over time.

    Measure static pressure if possible. If you have access to a manometer, measure the static pressure in the return duct near the furnace. This tells you whether the system is operating within the manufacturer’s recommended range. Most residential systems should have a total external static pressure below 0.5 inches of water column. If the pressure is higher after your installation, the new duct may be undersized or there could be a restriction somewhere in the route.

    Install the return air grille cover. Once you have verified everything is working, attach the grille to the wall, ceiling, or floor using screws. The grille should sit flush against the surface with no gaps around the edges. Some homeowners prefer stamped-face grilles for a cleaner look, while others use egg-crate style grilles for maximum airflow. Both work fine as long as the free area of the grille matches your duct sizing.

    Common Mistakes to Avoid When You Install a Return Air Duct

    Even experienced DIYers run into trouble with ductwork. Here are the mistakes I see most often and how to avoid them.

    Undersizing the return duct. This is the number one error. A 4-inch or 6-inch duct might seem easy to run, but it cannot carry enough air for most residential needs. Use the 150-square-inches-per-ton rule to calculate the correct size. An undersized return creates resistance, raises static pressure, and reduces overall system efficiency.

    Too many bends in the duct route. Every 90-degree turn adds the equivalent of several feet of straight duct in terms of air resistance. Plan the route to minimize turns, and use gradual curves instead of sharp angles whenever possible.

    Leaving joints unsealed. Duct tape, the gray cloth kind, is not acceptable for sealing ductwork. It dries out and fails within a year or two. Use foil tape or duct mastic for all seams and connections. These products last for decades and maintain an airtight seal.

    Crushing or kinking flexible duct. Flexible duct needs to be fully extended and supported. A compressed or sagging section acts like a restriction in the line. Pull the duct taut, secure it with supports every four to five feet, and avoid tight bends that flatten the duct interior.

    Forgetting to account for the panned return area. If you are using the space between joists or studs as part of the return path, that cavity needs to be sealed on all sides. Gaps between the panning material and the framing cause air to leak into wall cavities and floor spaces instead of traveling back to the furnace.

    When to Call a Professional HVAC Contractor

    DIY return duct installation is manageable for many homeowners, but some situations call for professional help. If your project involves modifying the main plenum, resizing the trunk line, or working around gas appliances, hire a licensed HVAC contractor. Any installation that requires a building permit or inspection should also go through a professional to ensure code compliance.

    Additionally, if you notice persistent airflow problems after installation, have a professional measure static pressure and evaluate the overall system balance. Sometimes what seems like a simple return issue points to a larger problem with the HVAC unit itself. A professional can diagnose the root cause and recommend the right fix.

    FAQ

    What are the rules for return air ducts?

    Return air ducts must follow local building codes, but general rules include: provide at least 150 square inches of return opening per ton of HVAC capacity, keep return openings at least 2 feet from combustion appliances, locate returns in conditioned living spaces only, and ensure the total return airflow matches or exceeds the supply airflow for proper system balance. All duct joints must be sealed with foil tape or duct mastic, and the system should maintain static pressure below 0.5 inches of water column.

    Can I add a return vent to existing ductwork?

    Yes, you can add a return vent to existing ductwork by installing a takeoff collar on the main return trunk line and running a new branch duct to the desired vent location. This is one of the most common retrofit HVAC projects. The key considerations are making sure the existing system has enough blower capacity for the additional airflow, sizing the new duct correctly using the 150-square-inches-per-ton rule, and sealing all connections airtight with foil tape or duct mastic.

    What is the 2 foot rule for ducts?

    The 2-foot rule for ducts states that return air openings and ducts must be located at least 2 feet away from the furnace or any combustion appliance in the same room. This prevents the return air system from pulling combustion gases, such as carbon monoxide, back into the living spaces through the HVAC system. This rule is part of most residential building codes and applies to both new installations and retrofits.

    How much does it cost to install a return duct?

    Professional return duct installation typically ranges from several hundred to a couple thousand dollars depending on the complexity of the route, the type of ductwork needed, and local labor rates. A simple wall return with easy access to the main trunk line is on the lower end, while installations requiring attic or crawlspace routing, custom framing, or multiple branch runs cost more. A DIY installation using materials from a home improvement store can significantly reduce that cost, though you should budget for tools and materials plus a professional consultation if you are unsure about any step.

    Conclusion

    Adding a return air duct to your HVAC system is one of the most impactful home improvement projects you can take on for comfort and efficiency. Whether you are solving a stuffy bedroom, balancing temperatures across floors, or simply upgrading an older system with inadequate return capacity, the process follows the same four core steps: plan the route, cut the vent opening, install the ductwork, and test the results.

    Remember to size your duct correctly using the 150-square-inches-per-ton guideline, seal every joint with foil tape or mastic, and follow the 2-foot rule for safety near combustion appliances. If the project involves gas appliances, major plenum modifications, or anything that makes you uncertain, there is no shame in calling a professional. The goal is a safe, efficient, and comfortable home, and getting the return air duct installation right the first time is the best way to achieve that.

  • When to Use a Dehumidifier (August 2026): Complete Guide

    When to Use a Dehumidifier (August 2026): Complete Guide

    Indoor humidity might not be something you think about every day, but it silently affects your comfort, your health, and even the structure of your home. If you have ever walked into a room and felt that heavy, sticky sensation in the air, or noticed water beading on your windows for no obvious reason, excess moisture is likely the culprit. Knowing when to use a dehumidifier can make the difference between a comfortable living space and one plagued by mold, musty smells, and warped wood.

    In this guide, I will walk you through everything you need to know about indoor humidity, the unmistakable signs that you need a dehumidifier, seasonal guidelines for running one, and a room-by-room breakdown that most guides skip entirely. I have spent hours digging through forum discussions, EPA recommendations, and real homeowner experiences to put this together, so you can trust that the advice comes from actual data, not just manufacturer marketing.

    Whether you are dealing with a damp basement, summer humidity that makes your living room feel like a sauna, or winter condensation fogging up every window, this article will help you figure out exactly when a dehumidifier is the right tool for the job.

    Understanding Indoor Humidity Levels

    Before you can decide when to use a dehumidifier, you need to understand what indoor humidity actually is and what the right levels look like. Relative humidity, or RH, measures how much water vapor is present in the air compared to the maximum amount the air can hold at a given temperature. When the air is warm, it can hold more moisture. When it cools down, that moisture condenses on surfaces, which is exactly what causes wet windows, damp walls, and that sticky feeling.

    The Environmental Protection Agency recommends keeping indoor relative humidity between 30% and 50%. This is the sweet spot where the air feels comfortable, mold struggles to grow, dust mite populations stay low, and your home stays protected from moisture damage. Some experts narrow this further to 30-40% during winter months to prevent window condensation in colder climates.

    When humidity creeps above 50%, problems start to build quickly. Mold and mildew thrive in environments above 60% RH. Dust mites multiply rapidly at 50% and above. Wood absorbs excess moisture and begins to warp, peel, or rot. Paint blisters, wallpaper peels, and metal fixtures can start corroding. On the flip side, humidity below 30% brings its own issues: dry skin, irritated sinuses, static electricity, and cracked wooden furniture.

    The only reliable way to know your indoor humidity level is to use a hygrometer. These small, inexpensive devices (often available for under $15) give you a real-time digital reading of your room’s RH percentage. Place one in the room where you suspect excess moisture, let it run for 24 hours, and check the readings at different times of day. If you consistently see numbers above 50%, it is time to think about a dehumidifier.

    Signs You Need a Dehumidifier

    Your home will tell you when it has a moisture problem, you just need to know what to look for. Here are the most common signs that indicate it is time to start running a dehumidifier:

    • Condensation on windows, mirrors, or pipes: If you regularly see water droplets forming on the inside of your windows, especially in the morning, your indoor humidity is too high. This is one of the earliest and most visible warning signs.
    • Musty or damp odors: That distinctive “basement smell” is caused by mold and mildew growth. If you notice it in any room, not just the basement, moisture is present and actively feeding microbial growth.
    • Visible mold or mildew spots: Black, green, or white patches on walls, ceilings, grout lines, or around windows mean mold has already established itself. A dehumidifier helps stop it from spreading further.
    • Allergy flare-ups and respiratory discomfort: High humidity increases dust mite populations and mold spore counts. If your allergies or asthma symptoms worsen indoors, excess moisture may be the trigger.
    • Warped wood or peeling paint: Wood flooring, furniture, and trim absorb moisture from the air. If your floorboards are cupping, your doors are sticking, or paint is bubbling off the walls, humidity is the likely cause.
    • A damp or clammy feeling indoors: Sometimes the simplest sign is how the air feels. If your home feels sticky and uncomfortable even when the thermostat reads a reasonable temperature, humidity is the invisible culprit.
    • Water stains on walls or ceilings: Brownish or yellowish stains indicate moisture buildup behind the surface. While you should investigate the source (a leak, poor ventilation), a dehumidifier helps manage the ambient moisture while you address the root cause.

    If you notice two or more of these signs in the same room or area of your home, you should seriously consider running a dehumidifier. One sign alone might be a ventilation issue. Multiple signs together almost always point to a humidity problem that needs attention.

    When to Use a Dehumidifier

    This is the section you came here for. The short answer is: use a dehumidifier any time your indoor humidity consistently exceeds 50% RH. But the real answer depends on the season, your climate, and specific situations happening in your home. Let me break it down.

    During Summer Months

    Summer is the most common time people need a dehumidifier. Warm air holds more moisture, and in many regions, summer brings high outdoor humidity that seeps into your home through doors, windows, and even through your foundation. If you live in a humid climate zone, like the southeastern United States, summer humidity can push indoor RH well above 60% even with air conditioning running.

    Your air conditioner does remove some humidity as a byproduct of cooling, but it is not designed to be a dehumidifier. On mild summer days when temperatures are comfortable but the air feels thick, your AC may not run long enough to pull out excess moisture. That is exactly when a dedicated dehumidifier makes the biggest difference. Run it in the rooms where you spend the most time, and target that 45-50% RH range.

    Forum users from humid regions consistently report running their dehumidifiers from May through September. Many set their humidistat to 50% and let the unit cycle on and off automatically. Users also note that opening windows for just 10 minutes on dry, breezy mornings can help reduce indoor moisture before sealing up for the day.

    During Winter Months

    Winter dehumidifier use surprises a lot of people, because cold air is naturally drier. But here is the catch: when you heat cold outdoor air inside your home, the warm air can hold more moisture, and that moisture comes from everyday activities like cooking, showering, and even breathing. In well-insulated or tightly sealed homes, that moisture has nowhere to go.

    Winter condensation is a major problem in many homes. You might see it as frost or water on the inside of windows, water running down window frames, or damp patches on exterior walls. This happens because warm, moist indoor air hits cold surfaces and the water vapor condenses out. If your windows are constantly wet during winter, a dehumidifier can help reduce that indoor moisture load.

    However, there is an important caveat. In very cold climates where indoor humidity naturally drops to 30% or below in winter, running a dehumidifier can make the air too dry. Always check your hygrometer readings first. If you are already at 30-35% RH, skip the dehumidifier and focus on ventilation instead. If you are at 50% or above despite cold outdoor temperatures, run the unit.

    After Water Damage or Flooding

    If your home has experienced any kind of water intrusion, whether from a burst pipe, a roof leak, groundwater seepage, or a full flooding event, a dehumidifier is not optional, it is essential. Mold can begin growing on damp surfaces within 24 to 48 hours. The faster you bring humidity down below 50%, the better your chances of preventing widespread mold growth.

    After water damage, run your dehumidifier continuously at its maximum setting until the hygrometer reads below 50% RH consistently for at least 48 hours. Open closet doors, remove wet materials, and use fans to circulate air across damp surfaces. This is one situation where you want to be aggressive with dehumidification, not conservative.

    Year-Round in Basements and Crawl Spaces

    Basements and crawl spaces are naturally prone to high humidity because they sit below ground level where soil moisture constantly migrates through concrete and masonry. Even a basement that looks and feels dry can have humidity levels above 60% RH. I have seen forum posts from homeowners who were shocked to discover their “dry” basement was sitting at 68% humidity when they finally bought a hygrometer.

    For these below-grade spaces, many homeowners run a dehumidifier year-round, setting the humidistat to 45-50% and using a continuous drain hose so they never have to empty a water bucket. If you only have the budget or space for one dehumidifier, the basement is usually where it will do the most good for your entire home.

    Room-by-Room Guide: Where Dehumidifiers Help Most

    Not every room in your home needs a dehumidifier, and understanding which rooms benefit most helps you place your unit where it has the greatest impact.

    Basement

    The basement is the number one location for a dehumidifier in most homes. Concrete foundations absorb moisture from the surrounding soil, and because basements have limited ventilation and cooler temperatures, condensation forms easily. If your basement smells musty, feels damp, or shows any signs of mold, run a dehumidifier here first. Choose a unit rated for your basement’s square footage, and opt for a model with a built-in pump or gravity drain to avoid manual emptying.

    Bathroom

    Bathrooms generate massive amounts of moisture from showers and baths. A single hot shower can release over a pound of water vapor into the air. If your bathroom has an exhaust fan, always run it during and for at least 30 minutes after showering. If the bathroom lacks ventilation, or if you still see condensation on mirrors and walls long after showering, a small portable dehumidifier can help manage the excess moisture. Look for a compact unit that fits on a counter or shelf.

    Bedroom

    Your bedroom might not seem like a high-humidity space, but nighttime tells a different story. Each person exhales about a pint of water vapor per night through breathing and perspiration. If you sleep with the door closed in a room without great airflow, humidity can climb. If you wake up with a stuffy nose, itchy eyes, or condensation on bedroom windows, check the humidity. A quiet portable dehumidifier set to 45% can improve sleep quality significantly, especially for allergy sufferers.

    Kitchen

    Cooking, boiling water, running the dishwasher, and washing dishes all release moisture into the air. Range hoods help, but many people do not use them consistently. If you notice condensation on kitchen windows or a persistent film of moisture on surfaces, a dehumidifier can help. A smaller unit placed away from the cooking area works well.

    Crawl Spaces and Attics

    Crawl spaces are notorious for high humidity, and the problem can affect the entire house above. Moisture in crawl spaces leads to wood rot, pest problems, and mold that can make its way into your living areas through floor gaps and ductwork. Attics can also develop humidity problems if bathroom exhaust fans vent into the attic space instead of outside. Both areas benefit from dehumidification, but make sure you choose a unit rated for the temperature range of these spaces.

    When NOT to Use a Dehumidifier

    Just as important as knowing when to run a dehumidifier is understanding when not to use one. Running a dehumidifier in the wrong conditions wastes energy and can actually create new problems.

    When humidity is already below 30%: If your hygrometer reads below 30% RH, your air is already too dry. Running a dehumidifier will pull it lower, causing dry skin, cracked lips, static shocks, and irritated respiratory passages. In this scenario, you might actually need a humidifier instead.

    In very cold spaces below 41 degrees Fahrenheit: Most refrigerant-based dehumidifiers cannot operate efficiently in temperatures below 41 degrees F. The internal coils can freeze, which prevents moisture removal and can damage the unit. If you need dehumidification in an unheated garage, shed, or crawl space during winter, look for a desiccant dehumidifier instead, which uses absorbent materials rather than cooling coils.

    When your HVAC system handles humidity well: Some modern HVAC systems have built-in dehumidification modes that effectively manage indoor humidity without a separate unit. If your whole-house system keeps RH in the 30-50% range on its own, adding a standalone dehumidifier is redundant and wastes electricity.

    In arid or desert climates: Homes in dry climates like the southwestern United States rarely have excess humidity problems. In fact, these regions often struggle with air that is too dry. Check your hygrometer before investing in any moisture management equipment.

    Portable vs Whole-House Dehumidifiers

    Choosing between a portable unit and a whole-house system depends on your home, your budget, and the severity of your humidity problem. Here is how to think about the decision.

    Portable dehumidifiers are freestanding units you can move from room to room. They work well for single spaces like a basement, bedroom, or bathroom. Most collect water in a bucket that you empty manually, though many also support a hose for continuous drainage. Portable units are affordable, easy to set up, and give you flexibility. The downside is that they only treat the air in one room at a time, and you need to maintain each unit individually.

    Whole-house dehumidifiers integrate directly into your HVAC system and treat all the air circulating through your home. They connect to your existing ductwork and use a dedicated drain line, so there is no bucket to empty. Once installed and set to your target humidity, they operate automatically with minimal maintenance. The trade-off is higher upfront cost and professional installation, but for homes with widespread humidity issues, whole-house units are more effective and energy-efficient per square foot than running multiple portable units.

    If your humidity problem is isolated to one room, start with a portable unit. If multiple rooms or your entire home feels too humid, a whole-house system is the better long-term investment.

    Tips for Getting the Most from Your Dehumidifier

    Based on real homeowner experiences shared across forums and my own research, here are practical tips that make a real difference in how well your dehumidifier performs.

    Set your humidistat to 45-50%: This is the ideal range for most homes. Setting it lower wastes energy and can over-dry the air. Setting it higher defeats the purpose. Many experienced users recommend 50% as the default and adjusting down to 45% during peak humidity periods.

    Use a continuous drain: Emptying a water bucket gets old fast, and if you forget, the unit shuts off and humidity climbs back up. Connect a drain hose and let gravity (or a built-in pump) handle the water disposal. This is especially important for basements and crawl spaces where you want set-and-forget operation.

    Keep doors and windows closed: A dehumidifier can only control the air in a sealed space. If windows are open or doors lead to humid areas, the unit will run constantly trying to dry air that keeps getting replaced. Close the space, let the unit work, and you will reach your target humidity much faster.

    Clean the filter regularly: A clogged air filter forces the unit to work harder, reduces moisture removal efficiency, and can shorten the life of the compressor. Check and clean the filter every two to four weeks, depending on how dusty the environment is.

    Choose the right size for your space: Dehumidifier capacity is rated in pints per day. A small room might only need a 20-pint unit, while a large basement could require 50 or even 70 pints per day. Undersized units run constantly without reaching the target humidity, which wastes energy and frustrates you. When in doubt, size up.

    Position the unit for good airflow: Do not shove the dehumidifier into a corner or against a wall. Leave at least 6 to 12 inches of clearance on all sides so air can circulate freely. Some units pull air from the back and exhaust from the top, so make sure neither vent is blocked.

    FAQ

    What are the signs I need a dehumidifier?

    Common signs include condensation on windows or pipes, musty odors, visible mold or mildew spots, warped wood or peeling paint, worsening allergy symptoms indoors, and a persistent damp or clammy feeling in the air. If you notice two or more of these signs, check your humidity with a hygrometer. A reading consistently above 50% RH confirms you need a dehumidifier.

    Is it better to use a dehumidifier in the summer or winter?

    Most homeowners need a dehumidifier more in summer when outdoor humidity is high and warm air holds more moisture. However, winter use is important in homes with poor ventilation, condensation on windows, or tight insulation that traps moisture from cooking and showering. Check your hygrometer: if RH is above 50% in either season, run the dehumidifier.

    What months should you use a dehumidifier?

    In humid climates, most people run dehumidifiers from May through September. In temperate regions, the typical season runs from June through August. However, basements and crawl spaces often need dehumidification year-round regardless of climate. After any water damage event, run a dehumidifier continuously until humidity stays below 50% for at least 48 hours.

    Should you use a dehumidifier if you have COPD?

    Yes, but with care. High humidity worsens COPD symptoms by increasing mold, dust mites, and airborne allergens. Maintaining indoor humidity between 30-50% can help breathing. However, air that is too dry (below 30%) can also irritate airways. Use a hygrometer to monitor levels, and consult your doctor about the ideal humidity range for your specific condition.

    When not to use a dehumidifier?

    Avoid using a dehumidifier when indoor humidity is already below 30% RH, in spaces colder than 41 degrees Fahrenheit (where coils can freeze), when your HVAC system already maintains proper humidity, or in arid climates where the air is naturally dry. Running a dehumidifier in these situations wastes energy and can make the air uncomfortably dry.

    How do I know when to use a dehumidifier?

    Use a hygrometer to measure your indoor relative humidity. If the reading consistently shows 50% RH or higher, you should use a dehumidifier. Physical signs like window condensation, musty smells, mold spots, and allergy flare-ups also indicate it is time to start running one.

    Should you run a dehumidifier all the time?

    No, you should not run a dehumidifier continuously unless you are dealing with active water damage. Instead, set the humidistat to your target humidity (45-50%) and let the unit cycle on and off automatically. Running it nonstop wastes energy and can over-dry the air. The exception is basements with persistent moisture issues, where continuous operation at a moderate setting may be necessary.

    Conclusion

    Figuring out when to use a dehumidifier comes down to one simple rule: if your indoor relative humidity consistently reads above 50% on a hygrometer, it is time to run one. Summer brings the most widespread need, but winter condensation, water damage events, and chronically damp basements all create situations where a dehumidifier is essential year-round.

    Pay attention to what your home tells you. Condensation on windows, musty odors, and allergy flare-ups are not just annoyances. They are warning signs that excess moisture is affecting your living space and potentially your health. Buy a hygrometer, check your readings, and act when the numbers cross that 50% threshold.

    With the right unit in the right room, set to the right humidity level, a dehumidifier is one of the most effective tools for protecting both your home and your comfort. Take the time to size it properly for your space, use a continuous drain if possible, and maintain the filter regularly. Your home, your health, and your energy bill will all benefit from getting this right.

  • How to Install a Window AC Unit (August 2026): Complete Guide

    How to Install a Window AC Unit (August 2026): Complete Guide

    If you are staring at a boxed window air conditioner wondering whether you can handle the installation yourself, the short answer is yes. Most homeowners and renters can complete a window AC installation in about 30 to 60 minutes with basic hand tools. I have installed over a dozen window AC units in apartments, older homes, and modern builds, and the process follows the same general steps regardless of the space.

    The most important thing is matching your unit to your window type and having a second person to help lift heavier models. If you are still shopping for a unit, check out our window air conditioner recommendations to find one that fits your room size and window dimensions. In this guide, I will walk you through every step of how to install a window AC unit, including special situations like sliding windows, vinyl frames, and rental-friendly setups where drilling is not an option.

    How to Install a Window AC Unit: The Complete Process

    Installing a window air conditioner comes down to seven core steps: prepare the window, attach the mounting rail to the unit, install the support bracket, lift the unit into place, extend the side panels, seal the gaps, and secure everything with hardware. Most new units ship with an installation kit that includes the bracket, accordion panels, screws, and foam stripping. You just need a few basic tools and about an hour of focused effort.

    The process is slightly different depending on whether you have a double-hung window, a sliding window, or a casement window. I will cover the standard double-hung installation first since it accounts for roughly 80% of residential setups, then address the special cases separately.

    Tools and Materials You Will Need

    Before you start unboxing anything, gather your tools. Having everything ready saves time and prevents mid-project trips to the hardware store.

    Here is what you need for a standard installation:

    • Phillips and flathead screwdrivers – for the bracket screws and L-brackets
    • Power drill – optional but makes pilot holes much easier, especially in wood frames
    • Level (9-inch or larger) – to check that the unit tilts slightly backward for drainage
    • Measuring tape – to confirm the window opening matches your AC unit dimensions
    • Pencil – for marking bracket and screw positions
    • Foam weather stripping – most kits include this, but extra is always useful
    • Support bracket – typically included with the unit, or purchase a universal bracket separately

    You may also want a few optional items depending on your situation. A safety bracket or chain is smart for heavy units and required by building codes in some cities. A piece of plywood cut to your sill dimensions helps level out uneven or rotted window sills in older homes. If you are renting and cannot drill, pick up some heavy-duty mounting tape or command strips rated for outdoor use.

    How to Prepare Your Window for AC Installation

    Window preparation is the step most people rush through, and it causes the majority of installation problems. Take ten minutes to do this right and the rest of the process goes smoothly.

    Measure the Window Opening

    Open your window and measure the width of the opening at the narrowest point. Compare this to the width specifications on your AC unit box. The unit should be 2 to 4 inches narrower than the minimum window width so the accordion panels can extend properly. Also measure the window sill depth from the inside edge to the outside stop. Most units need at least a 2-inch deep sill for stable placement.

    Clean and Inspect the Window

    Wipe down the window sill, the inside of the frame, and the sash (the part of the window that moves up and down). Dirt and debris prevent foam seals from adhering properly. Check wood frames for rot or soft spots by pressing firmly with your screwdriver. If the wood crumbles, you need to reinforce the sill with a support board before installing the unit.

    Remove the Window Screen

    Most window screens pop out from the inside by pressing the spring clips at the top or bottom and pushing the screen out. Set the screen aside somewhere safe. You will not need it while the AC is installed. If your screen does not come out easily, check for small tabs on the sides that need to be squeezed simultaneously.

    Check Your Window Type

    The standard installation steps below assume a double-hung window, which is the most common type in homes and apartments. If you have sliding windows that move horizontally, casement windows that crank outward, or vinyl window frames, skip ahead to the Special Situations section for modifications. Knowing your window type before you start prevents frustration halfway through the job.

    How to Install a Window AC Unit Step by Step

    This is the main event. Follow these seven steps in order and you will have a secure, well-sealed installation that cools your room efficiently and drains properly.

    Step 1: Attach the Top Mounting Rail

    Most window AC units come with a metal or plastic mounting rail that screws into the top edge of the unit. Line it up with the pre-drilled holes on the top of the chassis and secure it with the provided screws. The rail should sit flush against the unit with no gaps. This rail is what the window sash will rest against when closed, so it needs to be firmly attached.

    Some models have the rail pre-installed. If yours does, skip this step and move on.

    Step 2: Install the Support Bracket

    The support bracket is the L-shaped piece that sits on the window sill and extends outward to hold the weight of the unit. Position it on the sill so the inner edge sits flush with the inside of the frame. Most brackets have adjustable legs that you extend to contact the exterior wall below the window.

    Use your level across the bracket to check that it tilts slightly downward toward the outside. This slight backward tilt is critical because it allows condensation to drain outside instead of pooling inside your room. Aim for about a quarter-inch drop from front to back. Secure the bracket to the sill using the provided screws, drilling pilot holes first if you are working with wood.

    Step 3: Lift the AC Unit Into Place

    This is where you need a helper. Even “lightweight” window AC units weigh 40 to 80 pounds, and you are lifting them at an awkward angle above waist height. One person should hold the window open while the other slides the bottom of the unit onto the support bracket.

    Slide the unit outward until the bottom edge rests on the bracket and the top mounting rail contacts the window sash. The unit should feel stable on the bracket before you let go. Lower the window sash down behind the top rail so it rests on the mounting rail. The sash holds the top of the unit in place while the bracket supports the bottom.

    Step 4: Extend and Secure the Accordion Panels

    Window AC units use expandable accordion-style panels to fill the gap between the unit and the window frame on each side. Slide each panel outward until it contacts the window frame. Most panels have small screws or clips that attach them to the unit chassis. Secure them according to the instructions in your manual.

    The panels should extend evenly on both sides. If one side extends much farther than the other, your unit is not centered in the window. Shift it left or right on the bracket until both panels extend equally. This ensures a balanced installation and better seal coverage.

    Step 5: Seal All Gaps with Foam Weather Stripping

    Gaps between the unit, panels, and window frame let hot air in and cold air out. They also invite insects and rain. Press self-adhesive foam weather stripping (included in most kits) along every seam where the panels meet the window frame, where the top rail meets the sash, and along the bottom of the accordion panels.

    For larger gaps wider than a quarter inch, layer two strips of foam or fill the space with a piece of rigid insulation board cut to size. Pay special attention to the gap between the two window sashes where they meet when the window is closed. This is the most commonly missed sealing point and a major source of air leaks.

    Step 6: Secure the Unit with L-Brackets or Screws

    Most installation kits include small L-shaped brackets that screw into the top of the lower window sash and overlap onto the upper sash. These prevent someone from opening the window from outside and they add a layer of security. Screw one bracket on each side of the sash.

    If your kit does not include L-brackets, drive a screw through the top of the lower sash into the upper sash at a slight downward angle. This locks the window in the closed position. For units over 50 pounds, I also recommend adding a safety bracket or chain that connects the unit to the exterior wall. Some city building codes specifically require this, so check your local regulations.

    Step 7: Test the Unit and Verify Drainage

    Plug the unit into a grounded outlet. Avoid using extension cords with window AC units because they can overheat. If your outlet is too far away, hire an electrician to install a closer outlet rather than risking an electrical fire.

    Turn the unit on and let it run for five minutes. Check the area around the unit for air leaks by slowly moving your hand along the seams. You should feel cold air inside and no air movement at the sealed gaps. Go outside (if accessible) and check that the unit tilts slightly backward so condensation drips away from your wall. If water pools under the unit inside your room, the tilt angle needs adjustment.

    Special Situations: Different Window Types

    Not every window is a standard double-hung. Here is how to adapt the installation process for other common window types.

    Sliding Windows (Horizontal)

    Sliding windows that move left to right require a different approach. You need a window AC unit designed for horizontal installation, or you can build a plywood frame to hold a standard unit vertically. The better option is buying a casement or slider AC unit specifically made for this window type.

    The installation process is the same concept applied sideways. The support bracket attaches to the bottom track, the unit slides in horizontally, and the side panels extend vertically to fill the gaps. Some kits include a special vertical bracket for this orientation. Make sure the drain holes in the unit still face outward after installation, as tilting the unit incorrectly in a horizontal position can cause drainage problems.

    Vinyl Window Frames

    Vinyl windows present a challenge because most manufacturers recommend against drilling into vinyl frames. The vinyl can crack, and drilling may void the window warranty. Instead, use a no-drill support bracket that clamps onto the window sill and supports the unit from below. Several companies make universal brackets with adjustable clamps that work on vinyl sills.

    For the L-brackets that normally screw into the sash, substitute heavy-duty exterior mounting tape rated for at least 50 pounds. Apply the tape to the bracket and press firmly against the vinyl sash. This holds the window closed and prevents movement without penetrating the vinyl.

    Old Houses with Uneven Sills

    If you live in an older home with warped, sloped, or damaged window sills, the support bracket will not sit level. Cut a piece of plywood to the dimensions of your sill and place it between the bracket and the sill to create a flat, level surface. Use shims under the plywood to correct any slope. The plywood also distributes the weight of the unit across a wider area, which is helpful if the sill has soft spots.

    Many homeowners on DIY forums recommend this approach, and it works well for sills that have settled unevenly over decades. Just make sure the combined height of the plywood and bracket still allows the window to close against the mounting rail.

    Rental-Friendly Installation (No Drilling)

    If you rent your apartment and cannot drill into the window frame, you still have solid options. Use a universal no-drill support bracket that sits on the sill and extends outward. Secure the window sash closed with a tension rod or wooden dowel cut to fit between the sash and the top of the frame, rather than using L-brackets with screws.

    Heavy-duty exterior mounting tape can hold foam stripping and smaller brackets in place. Check with your landlord before installing a window AC unit, as some leases require approval. Most landlords are fine with it as long as you are not making permanent modifications to the property.

    Safety Tips and Common Mistakes to Avoid

    Window AC units are heavy appliances sitting several feet off the ground. Taking safety seriously protects you, your property, and anyone walking below your window.

    Always Use a Support Bracket

    I never install a window AC unit without a support bracket, regardless of what the manual says about the unit being light enough to rest on the sill alone. The bracket distributes weight to the exterior wall and provides a stable platform. Without it, the entire weight of the unit sits on the window sill, which can crack or bow over time. Units heavier than 50 pounds absolutely require a bracket, and many manufacturers void the warranty if you skip it.

    Consider a Safety Chain for Upper Floors

    If you live on the second floor or higher, attach a safety chain or cable from the unit to the exterior wall. Several cities have building codes that mandate this for window AC units above the ground floor. The chain prevents the unit from falling out of the window if the bracket fails or the unit shifts. A simple masonry bolt into the exterior wall with a steel cable looped through the unit handle is all it takes.

    Do Not Block the Drain Holes

    Every window AC unit has small drain holes at the bottom rear that let condensation flow outside. If these holes get blocked by debris, weather stripping, or the bracket, water backs up inside the unit and drips onto your floor. Check the drain holes after installation by pouring a small amount of water into the drain pan inside the unit. It should flow freely to the outside.

    Use a Dedicated Circuit for Large Units

    Window AC units rated above 10,000 BTU typically draw enough power to warrant a dedicated electrical circuit. Plugging a large unit into a shared circuit with other appliances can trip the breaker or, worse, overheat the wiring. If your lights flicker when the compressor kicks on, move the unit to a different outlet or have an electrician add a dedicated circuit.

    Common Mistakes I See Often

    The most frequent mistake is not tilting the unit backward. Without that slight rearward tilt, water pools inside and drips on your floor instead of draining outside. The second most common error is leaving gaps unsealed around the accordion panels and sash. Even small gaps significantly reduce cooling efficiency. The third mistake is installing on a damaged sill without reinforcing it first, which can lead to the unit becoming unstable over time.

    How to Maintain Your Window AC Unit

    Proper maintenance keeps your window air conditioner running efficiently and extends its lifespan. Most maintenance tasks take just a few minutes each month.

    Monthly Filter Cleaning

    The air filter behind the front grille catches dust and debris. A clogged filter forces the compressor to work harder, raises your electric bill, and reduces cooling power. Pop the front grille off (it usually snaps off without tools), remove the filter, and rinse it under running water. Let it dry completely before reinstalling. If the filter is torn or excessively dirty after cleaning, replace it. Replacement filters are inexpensive and available at most hardware stores.

    Check the Seals Each Season

    Before you turn the unit on for the first cooling season each year, inspect all the foam weather stripping and seals. Foam degrades over time from sun exposure and temperature changes. Replace any strips that have compressed, cracked, or lost their adhesive. Fresh seals make a noticeable difference in cooling efficiency.

    End-of-Season Removal and Storage

    If you live in a region with freezing winters, remove the unit before the first frost. Leaving a window AC in place through winter creates drafts, risks ice damage to the unit, and blocks natural light during the darkest months of the year. To remove the unit, reverse the installation steps: unplug, remove L-brackets, pull foam stripping, collapse accordion panels, lift the unit out with a helper, and store it upright in a dry location. Cover the unit with a plastic bag or storage cover to keep dust out.

    If removing the unit is not practical, buy an insulated window AC cover that fits over the exterior of the unit. These covers block cold air from entering through the unit and protect it from winter weather. They cost around $15 to $25 and pay for themselves in reduced heating costs within one season.

    FAQ

    Can I install a window AC unit myself?

    Yes, most window AC units can be installed by one or two people without professional help. The process takes about 30 to 60 minutes and requires only basic hand tools like a screwdriver, level, and measuring tape. Most units ship with a complete installation kit including the bracket, screws, accordion panels, and foam stripping. Having a second person to help lift the unit into place is strongly recommended for units over 40 pounds.

    What holds a window AC unit in place?

    A window AC unit is held in place by three main components: the support bracket underneath that rests on the sill and extends to the exterior wall, the closed window sash that presses down against the top mounting rail, and the L-brackets or screws that lock the sashes together. The accordion side panels also help stabilize the unit laterally. For heavy units or upper-floor installations, a safety chain bolted to the exterior wall provides an additional layer of security.

    How are window AC units attached?

    Window AC units attach to the window frame using a combination of hardware. The support bracket screws into the window sill (or clamps on for vinyl windows). The top mounting rail on the unit sits behind the lower window sash. L-shaped brackets screw into the top of the lower sash and overlap onto the upper sash to prevent the window from opening. Accordion panels extend from the unit to the window frame on each side, and foam weather stripping seals all gaps.

    How to install a window AC unit without drilling?

    To install a window AC unit without drilling, use a universal no-drill support bracket that clamps onto the window sill instead of screwing in. Secure the window sash in the closed position using a tension rod or wooden dowel between the sash and the top of the frame. Use heavy-duty exterior mounting tape to attach foam stripping and any small brackets. This approach works well for renters who cannot modify window frames. Always check with your landlord before installing a window AC unit.

    How long does it take to install a window AC unit?

    A standard window AC unit installation takes about 30 to 60 minutes from unboxing to testing. The first installation may take closer to an hour as you familiarize yourself with the parts and steps. Subsequent installations on the same window typically take 20 to 30 minutes since the bracket positioning and measurements are already established. Having all your tools gathered before you start saves significant time.

    Can a window AC unit fall out of the window?

    Yes, a window AC unit can fall out if it is not properly secured. This is a real safety concern, especially for upper-floor installations. Units fall when the support bracket is missing or incorrectly installed, the window sash is not locked in place, or the sill is damaged and cannot support the weight. Always use the support bracket, secure the window with L-brackets, and consider adding a safety chain for installations above the ground floor. Check your local building codes, as some cities require safety chains for window AC units on upper floors.

    Conclusion

    Learning how to install a window AC unit is one of those practical skills that pays off every summer. The process is straightforward: prepare the window, mount the bracket, place the unit, seal the gaps, and secure it all with hardware. Whether you have standard double-hung windows, sliding windows, or vinyl frames that cannot be drilled, the principles stay the same.

    The two things I always emphasize are using a support bracket (no exceptions) and having a helper for lifting. Those two steps prevent the most common problems I see, from units that sit crooked to ones that fall because they were never properly supported. If you are still choosing a unit for your space, our window air conditioner recommendations can help you find the right size and BTU rating for your room. Stay cool this summer.

  • How to Increase Humidity (August 2026): Complete Guide

    How to Increase Humidity (August 2026): Complete Guide

    If you have ever woken up with a scratchy throat, dry skin that feels like sandpaper, or a static shock every time you touch a doorknob, you are probably living with low indoor humidity. I dealt with this for years in a drafty apartment where the humidity regularly dropped below 20% during winter. Learning how to increase humidity transformed my comfort level at home and even helped me sleep better.

    In this guide, I will walk you through every practical method to raise your indoor moisture, from simple free tricks that take five minutes to long-term solutions. Whether you want to know how to increase humidity without a humidifier or you are ready to invest in one, I have tested these approaches and can tell you what actually works.

    The EPA recommends keeping indoor humidity between 30% and 50%. Most homes in cold climates drop well below that during heating season. Let me show you how to fix that.

    Why Indoor Humidity Drops (and Why It Matters)

    Before we get into solutions, it helps to understand the problem. Relative humidity (RH) is the percentage of water vapor currently in the air compared to the maximum amount that air can hold at a given temperature. Warmer air holds more moisture than cold air.

    When you heat cold outdoor air inside your home, the temperature rises but the actual water content stays the same. The result? The relative humidity plummets. That is why a comfortable 45% RH in summer can drop to 15-20% once you crank the furnace in January. The air literally cannot hold enough moisture at those lower starting temperatures to stay comfortable once heated.

    This is not just a comfort issue. Dry air directly affects your health. Your mucous membranes, the moist linings of your nose, throat, and lungs, need adequate humidity to trap pathogens and keep functioning as your body’s first line of defense. Studies have shown that viruses survive longer and spread more easily in dry air below 40% RH. At home, dry air causes wood furniture and flooring to crack, wallpaper to peel at the edges, and paint to chip.

    Forum users on r/HomeImprovement frequently report humidity readings as low as 16-25% during winter, with symptoms ranging from nosebleeds to cracked hands. One user mentioned their acoustic guitar started warping at 22% humidity. These are real problems that go beyond mild discomfort.

    What Is the Ideal Humidity Level?

    The EPA and most HVAC professionals recommend maintaining indoor relative humidity between 30% and 50%. This range strikes a balance between comfort and safety.

    Here are the sweet spots for different situations:

    • General living spaces: 30-50% RH
    • Bedrooms (for sleep comfort): 40-50% RH
    • Sinus and respiratory relief: 40-50% RH
    • Houseplants (tropical varieties): 50-60% RH
    • Wood furniture and instruments: 35-45% RH

    Going above 60% RH invites trouble. Mold thrives above that threshold, and dust mites multiply rapidly. You do not want to solve a dry air problem by creating a mold problem. A cheap digital hygrometer, which you can find for under $15, is essential for tracking where your levels actually sit.

    In summer, you may not need to increase humidity at all. In fact, you might need to lower it. But from late fall through early spring, especially in colder climates, the air inside most homes runs too dry. That is when you need to take action.

    How to Increase Humidity in a Room Without a Humidifier

    You do not need to buy anything to start improving your indoor moisture today. Here are seven methods I have personally tested, ranked roughly from fastest to most sustained effect.

    1. Boil Water on the Stovetop

    This is the fastest way I know to increase humidity in a room without a humidifier. A rolling pot of water on the stove sends concentrated steam into your kitchen and surrounding areas within minutes. On especially dry days, I keep a large pot simmering for 30-45 minutes and watch my hygrometer climb 5-10%.

    For a pleasant bonus, toss in a cinnamon stick, citrus peels, or cloves. One Reddit user on r/Frugal shared this exact trick, noting it makes the house smell incredible while doing double duty as a moisture booster. Just do not leave the stove unattended.

    2. Leave the Bathroom Door Open During Showers

    A hot shower produces a significant amount of steam. Instead of trapping it in the bathroom with the exhaust fan running, leave the door open and let that moisture travel into adjacent rooms. After my morning shower, I keep the bathroom door wide open for at least an hour.

    This works best in smaller homes and apartments where the steam can reach living areas. If you have a large house, the effect stays localized to rooms near the bathroom. Still, it is free moisture that would otherwise get vented outside.

    3. Place Bowls of Water Near Heat Sources

    Water evaporates faster when it is warm. Placing shallow bowls or saucers of water on or near radiators, heating vents, or sunny windowsills creates a slow, steady release of moisture throughout the day. The key is surface area. A wide, shallow bowl evaporates much faster than a tall, narrow glass of water.

    Molekule’s guide on this topic explains the physics well: more surface area means more water molecules can escape into the air at once. I use ceramic bowls on my radiators and refill them every morning. Some people buy ceramic humidifier bells designed to hang on radiators, which look nicer and save space.

    4. Add Houseplants That Release Moisture

    Plants naturally release water vapor through a process called transpiration. The more plants you have, the more moisture they collectively add to the air. Tropical plants like peace lilies, Boston ferns, spider plants, and areca palms are among the best for boosting humidity because they transpire heavily and prefer moist environments.

    A single plant will not dramatically change your RH, but a collection of 8-10 medium-to-large plants in one room makes a measurable difference. I keep four ferns and two peace lilies in my bedroom, and my hygrometer consistently reads 3-5% higher than the rest of the house. Grouping plants close together amplifies the effect because they create a shared microclimate of higher humidity.

    5. Air-Dry Your Laundry Indoors

    Hanging wet laundry on a drying rack inside your home is a two-for-one benefit. Your clothes dry, and the evaporating water goes straight into your indoor air. A single load of wet laundry can release over a liter of water into the air as it dries.

    For the best effect, place the drying rack in the room where you need the most humidity, ideally near a heat vent or radiator. One forum user on r/houseplants mentioned they specifically hang wet laundry near their plant collection to keep the local humidity around the plants higher. This is a particularly good trick for apartment dwellers who may not have outdoor drying space.

    6. Leave the Dishwasher Door Open After a Cycle

    When your dishwasher finishes its cycle and the dishes are still hot and wet, crack the door open and let that steam escape into your kitchen. The heat and moisture from the rinse cycle provide a noticeable bump in humidity, especially in open-plan kitchens connected to living areas.

    This takes zero extra effort since you are already running the dishwasher. Just make the habit of opening it at the end instead of letting it dry on its own. You save energy by skipping the heated dry cycle, too.

    7. Hang a Wet Towel Near a Vent or Radiator

    Drape a damp (not dripping) towel over a chair near a heating vent or radiator. As warm air passes through the fabric, the water evaporates steadily over several hours. This is a technique people on r/Home swear by for overnight humidity boosts in the bedroom.

    For best results, use a large bath towel, soak it thoroughly, wring it out so it is damp but not dripping, and position it where airflow hits it. One towel can last most of the night before it dries out completely.

    How to Increase Humidity With a Humidifier

    If natural methods are not getting your humidity high enough, a humidifier is the most reliable and controllable solution. Here is what you should know about the main types.

    Ultrasonic humidifiers use high-frequency vibrations to create a fine mist. They are quiet, energy-efficient, and work well for single rooms. Some produce a cool mist, others warm. The main drawback is that they can leave a white dust residue if you use hard water instead of distilled water.

    Evaporative humidifiers pull air through a wet wick filter using a fan. They are self-regulating to some degree because as humidity rises, evaporation slows down. They tend to be more affordable and do not produce white dust, but the fans can be noticeable in a quiet bedroom.

    Warm mist humidifiers boil water before releasing steam. They feel more comfortable in cold weather and the boiling process kills bacteria. However, they use more electricity and the hot steam can be a burn hazard around children or pets.

    Whole-house humidifiers connect directly to your HVAC system and distribute moisture through your existing ductwork. They are the most effective option for large homes but require professional installation and a higher upfront cost.

    Regardless of which type you choose, placement matters. Put your humidifier in the room where you spend the most time or where symptoms are worst. Keep it at least a few feet from walls and furniture to prevent moisture buildup on surfaces. And clean it regularly according to the manufacturer’s instructions to prevent bacterial growth.

    Room-by-Room Strategies to Increase Humidity

    Different rooms have different needs. Here is how I approach humidity in specific spaces around my home.

    Bedroom: This is where low humidity hits hardest because you spend 7-8 hours there breathing dry air. The wet towel method works well overnight. A small humidifier on your nightstand targeted at 40-50% RH is the most reliable approach. Adding a few plants to the room provides a gentle, constant moisture source. I keep my humidifier running at a low setting all night and check the hygrometer first thing in the morning.

    Living room: This is usually the largest space, so single-room methods have less impact here. Decorative bowls of water on a sunny windowsill add a slow, steady supply of moisture. If you have a fireplace or wood stove, placing a cast-iron kettle of water on top turns it into a natural humidifier. A console humidifier rated for large spaces is usually the most practical solution for open living areas.

    Apartment-specific tips: If you rent and cannot modify your HVAC system, focus on the natural methods above combined with a portable humidifier in your bedroom. Many apartment dwellers on forums report struggling to get humidity above 25% because forced-air heating systems are aggressive at drying out small spaces. Running a humidifier in one room with the door closed is more effective than trying to humidify the entire unit at once.

    How to Monitor and Maintain Proper Humidity

    You cannot manage what you do not measure. A digital hygrometer is the single most important tool for anyone trying to increase humidity. Without one, you are guessing.

    Place your hygrometer at about desk height in the room you spend the most time in. Avoid putting it right next to a humidifier, window, or vent, since those spots give misleading readings. Check it morning and evening for a few days to understand your baseline.

    Here are the signs that your humidity is too low:

    • Static electricity shocks when touching surfaces
    • Dry, itchy skin or chapped lips
    • Waking up with a sore throat or dry cough
    • Wood furniture showing cracks or gaps at joints
    • Plants with crispy brown leaf edges

    And here are the warning signs that humidity is too high:

    • Condensation on windows or walls
    • Musty or damp smell in any room
    • Visible mold on surfaces or grout lines
    • Allergy symptoms worsening indoors

    Adjust your methods daily based on what the hygrometer tells you. In winter, you will likely need to run humidifiers more frequently. In spring and fall, natural methods might be enough on their own. The key is consistency and monitoring.

    FAQ

    How can I make my humidity higher?

    The fastest ways to increase humidity are boiling water on the stove, running a humidifier, or leaving the bathroom door open during and after a hot shower. For a sustained effect, place bowls of water near heat sources, add houseplants, and air-dry laundry indoors. A hygrometer will help you track your progress.

    How can I raise the humidity without a humidifier?

    You can raise humidity without a humidifier by boiling water on the stovetop, placing shallow bowls of water near radiators or vents, leaving the bathroom door open during showers, air-drying laundry indoors, hanging damp towels near heat sources, adding houseplants, and leaving the dishwasher open after a cycle. These methods combined can raise indoor RH by 5-15%.

    What to do if the humidity is low?

    If your humidity is below 30%, start by using the quickest methods: boil water on the stove and run hot water in the bathroom with the door open. Then set up longer-term solutions like water bowls near heat sources and a humidifier in your main living space. Check your humidity with a hygrometer and aim for the 30-50% range.

    What is the best humidity level for sinus problems?

    The best humidity level for sinus problems is between 40% and 50% RH. This range keeps your nasal passages moist enough to function as a defense against irritants and pathogens without creating conditions where mold and dust mites thrive. Anything below 30% dries out mucous membranes, while above 60% increases the risk of mold-related sinus issues.

    Does hanging a wet towel increase humidity?

    Yes, hanging a damp towel near a heat source like a radiator or vent does increase humidity. The warm airflow speeds up evaporation from the fabric, releasing moisture into the air over several hours. For the best effect, use a large bath towel, soak it thoroughly, wring it out until damp, and place it where warm air passes through it. This is a popular overnight trick for bedrooms.

    How do I increase humidity overnight in my bedroom?

    To increase humidity overnight, run a humidifier in your bedroom set to maintain 40-50% RH, hang a damp towel near a vent or radiator, place a bowl of water near a heat source, and keep a few humidity-releasing plants in the room. Close the bedroom door to trap the moisture in one space. Check your hygrometer in the morning to see if adjustments are needed.

    Final Thoughts

    Getting your indoor humidity into the 30-50% range does not have to be complicated or expensive. Start with the free methods that take almost no effort: open the bathroom door after showers, leave the dishwasher cracked open, set out bowls of water near your heat sources. If those are not enough, add a humidifier in the rooms where you spend the most time.

    The most important step is getting a hygrometer so you can actually see where your levels are. Before I bought one, I had no idea my apartment was sitting at 18% humidity in January. Once I could measure it, I could manage it.

    Whether you are trying to protect your health, save your wood furniture, stop the static shocks, or just breathe easier at night, knowing how to increase humidity gives you control over one of the most underrated aspects of home comfort. Use a combination of natural methods and a good humidifier, check your readings regularly, and adjust with the seasons. Your sinuses, your skin, and your houseplants will all thank you.

  • How to Insulate a Garage (August 2026): Complete DIY Guide

    How to Insulate a Garage (August 2026): Complete DIY Guide

    If your garage feels like an oven in summer and a freezer in winter, you are not alone. Learning how to insulate a garage is one of the most practical home improvement projects you can tackle, and it pays off in comfort, energy savings, and property value. I have helped dozens of homeowners transform their garages from unusable iceboxes into comfortable workshops, home gyms, and storage spaces. This guide walks you through every step, from choosing the right insulation materials to installing it on walls, ceilings, and doors.

    Whether you have an attached garage that shares a wall with your living room or a detached unit sitting at the edge of your property, the insulation principles are the same. The difference lies in how much R-value you need and where you focus your efforts. We will cover climate-specific recommendations, material comparisons, and the common mistakes that cost homeowners time and money.

    By the end of this guide, you will know exactly which insulation type fits your garage, what R-value your climate zone demands, and how to install it step by step. Let us get into it.

    Why Insulate Your Garage?

    Insulating your garage is not just about comfort. It is a practical decision that affects your entire home. An attached garage with poor insulation acts as a thermal bridge, letting cold air seep into your living spaces during winter and hot air push through during summer. Homeowners in places like Minnesota have reported that insulating their attached garage made a noticeable difference in the rooms directly above and beside it.

    The temperature swing data from real homeowners is convincing. One Reddit user measured their uninsulated garage door surface at 140 degrees Fahrenheit on a summer day. After installing reflective insulation panels, that surface temperature dropped to 100 degrees. The air temperature inside the garage went from 120 degrees down to 95 degrees. That is the difference between a space you can actually use and one that feels dangerous.

    Here are the main reasons homeowners decide to insulate their garages:

    • Energy efficiency: Reduces heat transfer between the garage and adjacent living spaces, lowering heating and cooling bills.
    • Temperature control: Keeps the garage usable year-round for workshops, home gyms, or hobbies.
    • Vehicle protection: Prevents extreme temperature swings that can damage car batteries, tires, and fluids.
    • Sound absorption: Reduces noise from power tools, music, or vehicles entering and leaving the garage.
    • Moisture prevention: Limits condensation that leads to rust on tools and mold on stored items.
    • Property value: A finished, insulated garage adds usable square footage and appeals to future buyers.

    There is a difference between attached and detached garages worth noting. An attached garage shares walls with your home, so insulating it has a direct impact on your indoor climate and energy bills. A detached garage stands alone, so the benefits are primarily about comfort inside the garage itself and protecting whatever you store there. Both benefit from insulation, but the urgency and return on investment are higher for attached garages, especially in extreme climates.

    Understanding R-Values for Garage Insulation

    R-value is the single most important number in any insulation project. It measures thermal resistance, which is how effectively a material slows down heat flow. The higher the R-value, the better the insulation performs. When you are figuring out how to insulate a garage, you need to match the R-value to your climate zone and the part of the garage you are insulating.

    Think of it this way: R-13 insulation resists heat flow about half as well as R-30. If you live in a cold climate and only install R-13 in your ceiling, you are leaving significant energy savings on the table. The Department of Energy publishes climate zone recommendations that serve as your baseline.

    Here is a breakdown of recommended R-values based on climate zones:

    • Climate Zones 1-3 (Hot – Southern US): Walls R-13 to R-15, Ceiling R-30, Garage Door R-5 to R-8
    • Climate Zones 4-5 (Mixed – Central US): Walls R-15 to R-21, Ceiling R-38, Garage Door R-6 to R-10
    • Climate Zones 6-7 (Cold – Northern US): Walls R-21 to R-23, Ceiling R-49, Garage Door R-8 to R-12

    Your wall framing also dictates what you can install. A standard 2×4 stud wall gives you 3.5 inches of cavity depth, which limits you to about R-13 or R-15 with fiberglass batts. A 2×6 stud wall gives you 5.5 inches of depth, allowing R-19 or R-21. This is one of the most common questions on DIY forums, and the answer is straightforward: measure your stud depth before buying insulation. If you have 2×4 walls and want higher R-values, you can add a layer of rigid foam board over the studs before installing your wall covering.

    For ceilings, the target R-value is much higher because heat rises and escapes through the roof. Most climate zones call for R-30 at minimum, and cold climates benefit from R-49 or higher. The ceiling is where you get the biggest return on your insulation investment.

    Types of Insulation Materials

    Choosing the right insulation material depends on your budget, your garage structure, and whether you want a DIY project or plan to hire a contractor. Here is how the main options compare.

    Fiberglass Batts

    Fiberglass batts are the most common garage insulation choice for DIYers. They come in pre-cut rolls that fit between standard stud spacing (16 or 24 inches on center). Fiberglass offers an R-value of roughly 3.2 to 4.3 per inch of thickness, so a standard 3.5-inch batt delivers R-13 to R-15.

    The advantages are clear: fiberglass batts are affordable, widely available at any home improvement store, and easy to cut with a utility knife. They do not require special equipment to install. The downsides include skin irritation during handling, reduced performance if compressed, and no inherent air sealing. You need to install them carefully to avoid gaps that undermine the whole wall’s performance.

    Rigid Foam Board

    Rigid foam board insulation comes in three main types: extruded polystyrene (XPS), expanded polystyrene (EPS), and polyisocyanurate (polyiso). XPS delivers about R-5 per inch, EPS about R-3.8 to R-4.4 per inch, and polyiso about R-6 to R-6.5 per inch. Polyiso has the highest R-value per inch but performs poorly in very cold temperatures below 50 degrees Fahrenheit.

    Foam board is excellent for garage door insulation and for adding R-value over stud walls. It also works as a continuous insulation layer that eliminates thermal bridging through the studs. The main drawback is cost, which runs higher than fiberglass per square foot. You also need to seal the seams between boards with tape or spray foam to prevent air leaks.

    Spray Foam Insulation

    Spray foam is the top performer for both insulation and air sealing in one step. Open-cell spray foam offers about R-3.7 per inch and is softer and less expensive. Closed-cell spray foam delivers R-6 to R-7 per inch, adds structural rigidity, and acts as its own vapor barrier. For garage applications, closed-cell is usually the better choice because it handles moisture and temperature extremes better.

    The catch is cost. Professional spray foam installation is significantly more expensive than other options. DIY spray foam kits exist, but forum users consistently report that the kits are messy, the coverage is less than advertised, and the results do not match professional application. If you choose spray foam, budget accordingly and consider whether the superior air sealing justifies the cost for your situation.

    Mineral Wool (Rock Wool)

    Mineral wool batts offer an R-value of about 3.3 per inch, similar to fiberglass, but with distinct advantages. Mineral wool is fire resistant up to 2,000 degrees Fahrenheit, which adds a meaningful safety margin in a garage where flammable materials are stored. It also absorbs sound better than fiberglass, making it a strong choice if you use your garage as a workshop or band practice space.

    Mineral wool is denser than fiberglass, which means it holds its shape in stud cavities and does not sag over time. It costs more than fiberglass but less than spray foam. The main downside is that it is heavier and requires more effort to cut precisely.

    Blown-In Insulation

    Blown-in insulation (cellulose or fiberglass) is the go-to choice for garages with finished walls where you cannot access the stud cavities. Small holes are drilled in the wall, insulation is blown in through a hose, and the holes are patched. It is also common for ceiling and attic applications where there is a large open space above the ceiling drywall.

    Blown-in insulation requires renting a blowing machine, which most home improvement stores offer. It works well for retrofit projects but is less practical for new construction or gutted garages where you have full access to the framing. The R-value is similar to fiberglass batts at about 2.2 to 3.7 per inch depending on the material and density.

    Quick Material Comparison

    • Best budget option: Fiberglass batts
    • Best for air sealing: Closed-cell spray foam
    • Best for fire resistance: Mineral wool
    • Best per-inch R-value: Polyiso rigid foam board (in warm/mixed climates)
    • Best for retrofit walls: Blown-in cellulose or fiberglass
    • Best for garage doors: Rigid foam board or reflective radiant barrier kits

    Tools and Materials Checklist

    Before starting any insulation work, gather everything you need. Running to the hardware store mid-project because you forgot a tool wastes time and breaks your momentum. Here is a complete checklist.

    Safety Equipment

    • N95 or P100 respirator mask (mandatory for fiberglass and mineral wool)
    • Safety glasses or goggles
    • Long sleeves and work gloves
    • Knee pads (you will spend time on the floor)

    Cutting and Measuring Tools

    • Utility knife with extra blades
    • Long straightedge or T-square (for cutting foam board and batts)
    • Tape measure
    • Pencil or marker

    Fastening Tools

    • Staple gun with appropriate staples (for faced batt insulation)
    • Hammer or nail gun
    • Caulk gun
    • Drill with driver bits

    Materials

    • Insulation (batts, foam board, or spray foam kit)
    • Vapor barrier sheeting (if required by your climate zone)
    • Vapor barrier tape
    • Silicone or polyurethane caulk
    • Expanding spray foam (for gaps around windows, doors, and rim joists)
    • Construction adhesive (for foam board on garage doors)
    • Drywall, PVC panels, or other wall covering material
    • Weatherstripping for garage door bottom seal

    How to Insulate Garage Walls: Step by Step

    This is the core section of the project. Wall insulation gives you the biggest improvement in temperature control and energy efficiency for an attached garage. Follow these steps in order and take your time on each one. Rushing leads to gaps, compression, and wasted money.

    Steps to insulate garage walls:

    1. Clear the walls: Remove everything from the garage walls including shelving, hooks, nails, and any existing covering. You need bare studs exposed from floor to ceiling. Disconnect and remove any electrical outlets or switches, labeling the wires so you can reconnect them later.
    2. Inspect and seal all gaps: Check every stud bay for gaps around pipes, wires, and the rim joist where the wall meets the floor. Fill these gaps with expanding spray foam or caulk. Air sealing before insulating is critical because insulation does not stop air movement, it only slows heat transfer through solid material.
    3. Install vapor barrier (if needed): In cold climates (zones 5-7), install a 6-mil polyethylene vapor barrier on the warm side of the wall (facing the interior of the garage) before adding insulation. In hot-humid climates (zones 1-3), the vapor barrier goes on the exterior side. In mixed climates (zone 4), check local building codes as requirements vary.
    4. Measure and cut batt insulation: Measure each stud cavity individually because spacing can vary, especially in older garages. Cut the batt about half an inch wider than the cavity for a snug friction fit. Use a straightedge and utility knife to make clean, straight cuts.
    5. Press insulation into stud bays: Start at the top of each cavity and work downward. Push the insulation gently into place without compressing it. Compressed fiberglass loses R-value because the air pockets that provide thermal resistance are squeezed out. The batt should fill the cavity from face to face.
    6. Staple flanges to stud faces: If you are using faced insulation (with a paper or foil facing), staple the flanges to the front face of the studs, not the sides. Overlap the flanges slightly for a continuous barrier. Space staples every 8 to 12 inches along each flange.
    7. Cut around obstacles: For electrical boxes, split the batt and tuck half behind the box and half in front. For pipes, cut a notch in the batt so it fits around the pipe without leaving a gap. Small gaps around obstacles are a major source of heat loss, so take the time to fit the insulation tightly.
    8. Install wall covering: Insulation must be covered with a thermal barrier for fire safety. Drywall is the standard choice and provides a clean, paintable surface. PVC panels are an alternative that is moisture resistant, easy to clean, and faster to install. Secure the wall covering with screws to the studs, making sure to hit every stud for a solid installation.

    One important detail: if your garage has 2×4 studs and you want more than R-15 in the walls, add a layer of 1-inch rigid foam board over the studs before installing drywall. This breaks the thermal bridge through the studs and adds R-5 to R-6.5 of continuous insulation. It does push the wall surface out slightly, but the performance gain is significant.

    For electrical boxes, remember to extend them outward to match the new wall surface depth. Box extenders are cheap and take five minutes to install. Skipping this step leaves exposed wires behind the drywall, which is a fire hazard.

    How to Insulate a Garage Ceiling

    Ceiling insulation is where you see the biggest temperature improvement, especially in attached garages with living space above. Heat rises, and an uninsulated garage ceiling acts like a giant radiator pushing cold air up into the rooms above in winter and absorbing cool air in summer.

    The approach differs depending on whether your garage has an exposed rafter ceiling or a finished ceiling with drywall already in place.

    Exposed Rafter Ceiling

    If your garage has open rafters with no ceiling material installed, you have the easiest path. Measure the rafter spacing (usually 16 or 24 inches on center) and install batt insulation between the rafters just like you would for walls. For cold climates, aim for R-38 to R-49, which means you may need to use thicker batts (up to 12 inches for R-38 fiberglass) or combine batts with rigid foam board.

    If your rafters are not deep enough to hold the full R-value you need, you have two options. First, you can attach rigid foam board to the bottom of the rafters, then install your ceiling material over it. Second, you can fur down the rafters with additional framing to create more depth for thicker batts. The foam board approach is faster and more common.

    When working overhead, use a scaffold or platform rather than a ladder. You will be holding heavy insulation above your head, and a ladder does not provide enough stability or workspace. Rent a rolling scaffold for a day if you do not have one.

    Finished Ceiling (Retrofit)

    If your garage already has drywall on the ceiling, blown-in insulation is your best option. Small holes (about 2 inches) are cut in the drywall between each rafter bay, insulation is blown in through a hose, and the holes are patched and painted over. This process is effective but does require renting a blowing machine.

    An alternative for finished ceilings is to add rigid foam board directly over the existing drywall and then install a second layer of drywall over it. This adds continuous insulation without disturbing the existing ceiling. The downside is that you lose an inch or two of ceiling height, which matters if your garage door tracks are close to the ceiling.

    Garage Attic Space

    If your garage has an attic space above the ceiling, you can insulate the attic floor (which is the garage ceiling from below). Lay unfaced batts or blow in cellulose insulation between the ceiling joists. This is one of the easiest insulation jobs because gravity does the work for you. Just lay the batts in place without compressing them.

    Forum users in cold climates emphasize that the garage attic is often overlooked. One homeowner in Minnesota reported that insulating the garage attic above the ceiling dropped the garage temperature swing by 15 degrees compared to just wall insulation alone.

    How to Insulate a Garage Door

    The garage door is often the weakest thermal link in the building envelope. Most standard garage doors are thin steel or aluminum panels with no insulation value at all. A single-layer metal door has an R-value of essentially zero, meaning it transfers heat almost as freely as if the door were not there.

    You have three main approaches for garage door insulation, each with different costs and effectiveness.

    Insulation Kits

    Purpose-built garage door insulation kits are the easiest option. They typically include pre-cut rigid foam or reflective panels designed to fit into the horizontal channels of standard sectional garage doors. Most kits include enough panels for a standard two-car garage door and come with adhesive or fasteners.

    The results from real users are positive. One homeowner reported that NASA TECH reflective panels reduced the door surface temperature from 140 degrees Fahrenheit to 100 degrees on a sunny day, and the interior air temperature dropped from 120 degrees to 95 degrees. Those are real numbers from a real garage, not manufacturer claims.

    DIY Foam Board Method

    You can also buy rigid foam board (XPS or EPS) and cut it to fit each panel section of your garage door. Measure each panel channel carefully because the dimensions can vary across the door. Use construction adhesive to attach the foam board to the inside of each panel. Seal the edges with foil tape to prevent air infiltration.

    This method gives you more control over the R-value because you choose the foam board thickness. A 1.5-inch XPS panel delivers R-7.5, which is a significant upgrade from an uninsulated metal door. The cost is lower than a kit if you already have a utility knife and straightedge.

    Reflective Radiant Barrier

    Reflective insulation works differently from other types. Instead of slowing conductive heat transfer, it reflects radiant heat away from the surface. This makes it particularly effective at reducing summer heat gain through garage doors that face direct sunlight. It has a lower R-value than foam board, but the radiant barrier effect can drop surface temperatures significantly.

    The best approach for most garages is to combine reflective panels with foam board for both radiant heat reflection and conductive resistance. This gives you the best of both worlds.

    Critical Warning: Garage Door Weight and Balance

    Adding insulation panels to your garage door adds weight. A typical two-car steel garage door weighs 150 to 200 pounds without insulation. Adding foam board or insulation kits adds another 30 to 80 pounds depending on the material. This extra weight affects the torsion springs that counterbalance the door.

    After insulating your garage door, check whether the door still opens and closes smoothly and stays in place when partially opened. If the door feels heavy, falls shut, or the opener strains, you need to have the springs adjusted or replaced by a professional. This is not a DIY task. Garage door torsion springs are under extreme tension and have caused serious injuries. Call a garage door technician for spring adjustment.

    Air Sealing: The Step Most People Skip

    Insulation slows heat transfer, but it does not stop air movement. If your garage has gaps, cracks, and penetrations that let outside air stream in, your insulation is fighting a losing battle. Energy Star recommends air sealing before insulating, yet many DIYers skip this step entirely because it is not as satisfying as pressing fluffy batts into walls.

    Here are the most common air leak points in a garage:

    • Rim joist: Where the wall framing meets the concrete foundation. This is the biggest single air leak in most garages. Seal it with expanding spray foam.
    • Window frames: Gaps between the window frame and rough opening. Seal with caulk on the interior and exterior.
    • Garage door frame: The gap between the door frame and the framing. Use expanding foam for large gaps and caulk for small ones.
    • Electrical boxes: Every outlet and switch box is a penetration. Use foam gaskets behind the cover plates and seal around the box with caulk.
    • Pipe and wire penetrations: Any hole drilled through the framing for plumbing or wiring. Seal with fire-rated caulk or spray foam.

    For the garage door itself, install or replace the bottom weatherstrip seal. This rubber strip compresses against the floor when the door closes, blocking air, water, and pests. Most garage doors have a channel that holds a replaceable seal, and new weatherstripping costs very little while making a big difference in drafts.

    The rim joist deserves special attention. In a typical garage, the sill plate sits directly on the concrete foundation, and the rim joist sits on top of the sill plate. The joint between the concrete and the wood is almost never airtight. Cut pieces of rigid foam board to fit between each floor joist at the rim joist, press them in place, and seal around the edges with spray foam. This alone can cut drafts by 30 to 50 percent.

    Vapor Barriers: When and Where You Need Them

    Vapor barriers cause more confusion than almost any other part of garage insulation. Getting them wrong can trap moisture inside your walls, leading to mold, rot, and structural damage. Getting them right keeps your insulation dry and performing as intended.

    A vapor barrier is a material (usually 6-mil polyethylene plastic sheeting) that prevents water vapor from moving through walls and ceilings. Water vapor moves from warm areas to cold areas, so the barrier needs to be on the warm side of the wall assembly.

    Here is the breakdown by climate:

    • Cold climates (zones 5-7): Install the vapor barrier on the interior (warm) side of the wall, between the insulation and the interior wall covering. This prevents warm indoor moisture from entering the wall cavity and condensing on cold exterior surfaces.
    • Hot-humid climates (zones 1-3): Install the vapor barrier on the exterior side of the wall. This prevents hot, humid outdoor air from entering the wall and condensing on cooler interior surfaces.
    • Mixed climates (zone 4): Requirements vary by local building codes. Some jurisdictions require a vapor barrier, others allow a vapor retarder (less restrictive), and some require nothing at all. Check with your local building department.

    The biggest mistake you can make is installing vapor barriers on both sides of the wall. This creates a moisture sandwich. Any water vapor that gets into the wall cavity (and some always does through small gaps) has nowhere to escape. It condenses inside the wall, saturates the insulation, and creates mold. Always allow one side of the wall assembly to be vapor-permeable so the wall can dry out.

    If you are using faced insulation (batts with paper or foil facing), the facing counts as a vapor barrier. Do not add a separate polyethylene vapor barrier if you already have faced insulation installed facing the correct direction. That would create a double barrier.

    Common Mistakes to Avoid When Insulating a Garage

    After reading dozens of forum posts from homeowners who insulated their garages, several mistakes show up repeatedly. Learning from these experiences saves you time and money.

    Compressing Insulation to Make It Fit

    Fiberglass and mineral wool insulation work by trapping air in tiny pockets. When you compress a 6-inch batt into a 4-inch cavity, you reduce the R-value because those air pockets collapse. A compressed R-19 batt performs closer to R-13. If your cavity is too shallow for the insulation you bought, return it and get the correct thickness. Never force thick insulation into thin spaces.

    Skipping the Air Sealing Step

    This is the most common mistake and the biggest performance killer. Insulation cannot do its job if air is streaming through gaps around it. One homeowner on a DIY forum reported spending an entire weekend installing wall insulation, only to find the garage was still drafty because he never sealed the rim joist. He had to pull sections of insulation back out to fix the problem. Seal first, insulate second. Always.

    Wrong Vapor Barrier Placement

    Installing the vapor barrier on the wrong side of the wall traps moisture instead of blocking it. In cold climates, the barrier goes on the interior side. In hot climates, it goes on the exterior side. Getting this backwards means moisture condenses inside the wall cavity where you cannot see it, and by the time you notice the problem, you have mold and rot.

    Ignoring the Garage Door Springs

    Adding insulation to your garage door changes its weight. Even a 30-pound increase can throw off the spring tension enough to cause problems. The door may not stay open on its own, the opener may struggle, or the door may slam shut unexpectedly. This is a safety hazard. After insulating the door, test the balance by disconnecting the opener and raising the door manually to chest height. It should stay there on its own. If it falls or rises, call a garage door technician for spring adjustment.

    Leaving Gaps Around Obstacles

    Electrical boxes, pipes, and ductwork create obstacles in stud cavities. It is tempting to cut insulation roughly and move on, but every gap is a thermal bypass that lets air circulate behind the insulation. Take the extra time to split batts around obstacles and tuck pieces tightly into irregular spaces. Small gaps add up fast across an entire wall.

    Using Faced Insulation on the Wrong Side

    Faced insulation has the vapor barrier built into one side. The facing must always point toward the warm side of the wall (interior in cold climates, exterior in hot climates). Installing it backwards puts the vapor barrier on the wrong side, which can trap moisture inside the wall.

    Not Wearing Proper Safety Gear

    Fiberglass insulation causes skin irritation, itching, and respiratory discomfort. Mineral wool is slightly better but still requires protection. Always wear a long-sleeved shirt, gloves, safety glasses, and at minimum an N95 respirator. This is not optional. The discomfort of fiberglass particles in your lungs lasts far longer than the few seconds it takes to put on a mask.

    FAQ

    What is the best way to insulate a garage?

    The best way to insulate a garage is to use fiberglass batts or mineral wool in the walls, rigid foam board on the garage door, and blown-in or batt insulation in the ceiling. Start with air sealing all gaps and cracks, then install insulation from top to bottom (ceiling first, then walls, then door). For attached garages in cold climates, aim for R-21 walls, R-38 to R-49 ceiling, and R-8 to R-12 on the garage door.

    Should an unheated garage be insulated?

    Yes, insulating an unheated garage is still worthwhile. Insulation slows temperature swings, which protects stored items, vehicles, and tools from extreme heat and cold. An insulated unheated garage will stay cooler in summer and warmer in winter compared to an uninsulated one, even without active heating. If the garage is attached to your home, insulating it also reduces heat transfer into adjacent living spaces.

    Can you insulate a garage yourself?

    Yes, most garage insulation is a manageable DIY project. Fiberglass batts require only a utility knife, staple gun, and basic safety gear. Foam board for the garage door needs a knife and construction adhesive. The main exceptions are spray foam insulation, which requires professional equipment, and garage door spring adjustments after adding insulation weight. If you can handle basic carpentry, you can insulate a garage over a weekend.

    Is it a good idea to insulate your garage?

    Insulating your garage is a good idea if you use it as a workshop, home gym, or storage space, or if it is attached to your home. Benefits include temperature regulation, reduced energy costs for adjacent rooms, noise reduction, moisture control, and protection for vehicles and tools. The return on investment is highest for attached garages in extreme climates where temperature differences between the garage and living space are significant.

    How much does it cost to insulate a garage?

    DIY garage insulation costs vary by material and garage size. For a standard two-car garage (about 500 square feet of wall and ceiling area), fiberglass batts are the most affordable option. Rigid foam board and mineral wool cost more per square foot. Spray foam is the most expensive option and typically requires hiring a professional. The total cost depends heavily on your chosen R-value, material type, and whether you hire labor.

    What R-value do I need for garage insulation?

    R-value requirements depend on your climate zone. For walls: R-13 to R-15 in warm climates (zones 1-3), R-15 to R-21 in mixed climates (zones 4-5), and R-21 to R-23 in cold climates (zones 6-7). For ceilings: R-30 in warm climates, R-38 in mixed climates, and R-49 in cold climates. For garage doors: R-5 to R-8 in warm areas, R-6 to R-10 in mixed areas, and R-8 to R-12 in cold areas. Always check local building codes for specific requirements.

    Should I insulate my garage ceiling?

    Yes, the ceiling is often more important than the walls because heat rises and escapes through the roof. In attached garages with living space above, ceiling insulation directly affects the comfort and energy efficiency of those rooms. In detached garages, ceiling insulation prevents extreme heat buildup in summer. Aim for R-30 at minimum, and up to R-49 in cold climates.

    How long does garage insulation last?

    Fiberglass and mineral wool insulation last 80 to 100 years when properly installed and kept dry. Spray foam lasts 80-plus years. Rigid foam board has a similar lifespan. The main factors that reduce insulation lifespan are moisture exposure, pest damage, and physical compression. If your insulation gets wet from a leak or condensation, it needs to be replaced because wet insulation loses R-value and can grow mold.

    Conclusion

    Learning how to insulate a garage is one of those home improvement skills that pays for itself over and over. You start with air sealing every gap and crack, move through wall insulation with properly fitted batts or foam board, tackle the ceiling for maximum temperature control, and finish with garage door insulation to close the biggest thermal weak spot. Each step builds on the last, and together they transform a drafty, uncomfortable space into somewhere you actually want to spend time.

    Start by assessing your garage: measure your stud depth, check your climate zone, and calculate how much material you need. Pick up your insulation, grab the tools from the checklist above, and set aside a weekend. The work is straightforward, the materials are affordable, and the results are immediate. You will feel the difference the first morning you walk into your garage and it does not feel like stepping into a meat locker or a sauna.

  • How to Clean Baseboard Heaters (August 2026) Complete Guide

    How to Clean Baseboard Heaters (August 2026) Complete Guide

    If you have never cleaned your baseboard heaters, you are not alone. Most homeowners skip this task entirely, and I was one of them until I noticed a burning smell every time I turned on the heat during the first cold snap of the year. That smell was years of accumulated dust, pet hair, and debris literally burning off the heating elements. After learning how to clean baseboard heaters properly, the smell disappeared and my heating bills dropped noticeably. This guide covers everything you need to know to tackle this job yourself, from the tools you need to the exact step-by-step process that works for both electric and hydronic units.

    Dirty baseboard heaters do more than just smell bad. They can reduce your heating efficiency by up to 20%, aggravate allergies, and circulate dust and pet dander throughout your home every time the heat kicks on. Whether you have electric resistance heaters or hydronic hot water units, the cleaning process is straightforward once you know the steps. I will walk you through the entire process, including some tips I picked up from HVAC professionals and trial-and-error over the past few years.

    Why Cleaning Baseboard Heaters Matters

    Baseboard heaters work by drawing cool air from floor level, passing it over heated fins or elements, and releasing warm air back into the room through convection. When dust, pet hair, and debris build up on those fins, they block airflow and force the heater to work harder to produce the same amount of warmth. That means higher energy bills and less comfortable rooms.

    The buildup happens faster than most people realize. Pet owners in particular will find that pet dander and fur collect in the fins within just a few months. Allergy sufferers often notice a direct correlation between dirty heaters and worsened symptoms. When the heater runs, it circulates all that trapped dust and dander right back into the air you breathe.

    There is also the safety angle. A thick layer of debris on heating elements can create an unpleasant burning odor when you first turn on the heat, and in extreme cases, heavy accumulation can pose a fire risk. Regular cleaning keeps your system running safely and efficiently, extends the life of your heating units, and improves the overall indoor air quality in your home.

    Tools and Supplies You Will Need

    Before you start, gather everything in one place. Having the right tools ready saves time and frustration. Here is what I recommend based on what has worked best for me and what HVAC professionals suggest:

    • Vacuum cleaner with brush attachment — This is your primary tool. The soft bristles loosen dust without damaging the delicate aluminum fins. A shop-vac works even better if you have one because the stronger suction pulls debris from deeper between the fins.
    • Crepice tool attachment — The narrow vacuum attachment helps reach tight spaces between fins and behind the heater where dust collects heavily.
    • Microfiber cloths — Use these for wiping down covers, both inside and out. Microfiber traps dust rather than just pushing it around.
    • Mild dish detergent and warm water — For washing covers that have sticky residue or grease buildup. Avoid harsh chemical cleaners.
    • Compressed air canister — Optional but helpful for blowing dust out of tight corners and between fins. Use it carefully to avoid blowing dust everywhere.
    • Screwdriver — Most baseboard heater covers are held in place by clips or screws. A Phillips or flathead screwdriver is usually all you need.
    • Needle-nose pliers — Handy for gently straightening bent fins and removing any stubborn debris stuck between them.
    • Fin comb (optional) — A specialized tool for straightening bent aluminum fins. If you do not have one, needle-nose pliers work for minor bends.
    • Safety glasses and dust mask — You will be working with accumulated dust and debris. Protect your eyes and lungs, especially if you have allergies.
    • Drop cloth or old towels — Place these on the floor beneath the heater to catch falling dust and debris for easier cleanup.

    How to Clean Baseboard Heaters: Step-by-Step Guide

    This is the complete process I follow every time I clean baseboard heaters. The entire job takes about 30 to 45 minutes per heater if it has been cleaned within the last year. For heaters that have not been cleaned in several years, budget closer to an hour per unit because the buildup will be heavier.

    Step 1: Turn Off Power and Let the Heater Cool Completely

    Safety comes first. Go to your circuit breaker panel and turn off the power to the baseboard heaters. If your heaters have a dedicated thermostat, turn it to the off position as well. Wait at least 30 minutes for the heating elements to cool down completely. Electric baseboard heaters can reach temperatures hot enough to cause burns, so do not skip this step even if the heater has been off for a short while.

    If you have hydronic baseboard heaters, you do not need to worry about electrical burns, but you should still turn off the thermostat so the system does not kick on while you are working. The hot water pipes can also be warm to the touch, so give them time to cool.

    Step 2: Remove the Baseboard Heater Covers

    Most baseboard heater covers are designed to be removable for cleaning. Look at the top of the cover and you will typically see it is held in place by a series of spring clips or snap-in brackets. To remove the cover, push down gently on the top edge while pulling the bottom edge toward you. The cover should pop free from the clips.

    Some models use screws instead of clips. In that case, use your screwdriver to remove the screws along the top and bottom edges. Place the screws in a small container so you do not lose them. Once the fasteners are removed, lift the cover straight up and off the unit.

    If the cover feels stuck, do not force it. Older covers can become wedged in place from paint or years of grime. Gently wiggle the cover back and forth while pulling outward until it releases. Set the cover aside on your drop cloth.

    Step 3: Vacuum Dust and Loose Debris

    With the cover removed, you will see the heating fins and elements. Before doing anything else, use your vacuum with the brush attachment to remove as much loose dust and debris as possible. Start at the top of the fins and work your way down in smooth, even strokes. Let the vacuum do the work — do not press hard against the fins because they bend easily.

    Pay special attention to the bottom of the unit where dust collects in thick layers. Use the crevice tool to reach into the corners and along the back wall behind the heater. This is where years of debris tend to accumulate, especially in homes with pets.

    If you are using compressed air, now is the time to use it. Blow air between the fins from one side while vacuuming from the other to capture the dislodged dust. This method is particularly effective for heaters that have not been cleaned in a long time.

    Step 4: Clean the Fins Thoroughly

    After vacuuming the loose debris, inspect the fins closely. You will likely see remaining dust clinging to the metal surfaces. Use a soft brush or a microfiber cloth wrapped around a ruler or paint stick to gently wipe between the fins. Work in the same direction as the fins run to avoid bending them.

    For stubborn grime, lightly dampen the cloth with water or a very mild detergent solution. The key word here is lightly. You want the cloth barely damp, not wet. Excess moisture can damage electrical components or cause rust on unprotected metal parts.

    While you are cleaning the fins, check for any that are bent or crushed. Bent fins restrict airflow and reduce heating efficiency. Use your needle-nose pliers or a fin comb to gently straighten them back into alignment. Work slowly and carefully because the aluminum is thin and can break if you apply too much force.

    Step 5: Wipe Down the Covers Inside and Out

    Take the cover you set aside earlier and clean both sides. For light dust, a dry microfiber cloth is sufficient. Wipe the inside surface first since it tends to be the dirtiest, then wipe the outside. Work from one end to the other in a single direction to avoid redistributing dust.

    For covers with sticky residue or grease, use warm water with a few drops of mild dish detergent. Dampen a microfiber cloth in the solution, wring it out well, and wipe the cover down. Rinse with a clean damp cloth and dry immediately with a towel. Let the cover air dry completely before reinstalling it to prevent moisture from reaching the heating elements.

    This is also a good time to check the cover for damage. If the cover is rusted, dented, or has broken clips, consider replacing it. Replacement covers are available and can give old heaters a fresh look while improving airflow through clean, unobstructed vents.

    Step 6: Clean Behind and Around the Heater

    With the cover still off and the fins cleaned, take a moment to clean the floor and wall behind the heater. Vacuum the floor area beneath the unit where dust has settled. Wipe the wall behind the heater with a dry cloth to remove any cobwebs or dust that has accumulated there.

    This step is easy to skip but it makes a real difference. Dust behind the heater gets pulled into the fins when the heater runs, so cleaning this area helps keep the fins cleaner for longer between deep cleaning sessions.

    Step 7: Reassemble and Test

    Once everything is clean and dry, reinstall the cover by reversing the removal process. Line up the cover with the clips or screw holes and snap or fasten it back into place. Make sure the cover sits flush and secure with no gaps or loose edges.

    Turn the power back on at the circuit breaker and set the thermostat to your preferred temperature. Listen for any unusual sounds and check that the heater warms up normally within 15 to 20 minutes. You should notice that the room reaches your target temperature faster than before, and there should be no burning smell from the freshly cleaned unit.

    Electric vs. Hydronic Baseboard Heaters: Cleaning Differences

    The basic cleaning process is similar for both types, but there are some important distinctions to keep in mind.

    Electric baseboard heaters use resistance coils to generate heat. The coils can get extremely hot, so always confirm the power is off before cleaning. Avoid getting water anywhere near the electrical components. If you use a damp cloth on the fins, make sure it is only barely damp and never drip water onto the coils or wiring. Electric heaters also tend to attract more dust because the heating elements do not have the thermal mass that hydronic pipes do, so the fins may need more frequent attention.

    Hydronic baseboard heaters use hot water flowing through pipes to heat the fins. Since there are no exposed electrical coils, you have slightly more flexibility with cleaning methods. A slightly damp cloth is generally safe to use on the fins and pipes. However, be careful around any valves or connections — you do not want to loosen anything or introduce moisture into the system. Hydronic systems also need occasional bleeding to remove air from the pipes, which is a separate maintenance task from cleaning.

    Common Cleaning Mistakes to Avoid

    After cleaning dozens of baseboard heaters and reading through countless forum posts from homeowners, I have seen the same mistakes come up repeatedly. Here are the ones to watch out for:

    • Not turning off the power first. This is the most dangerous mistake. Electric baseboard heaters draw significant current and can cause serious burns or electrical shock if you touch the elements while they are energized. Always flip the breaker.
    • Using too much water. Water and electrical components do not mix. Even with hydronic heaters, excess moisture can cause rust or damage surrounding materials. Stick to barely damp cloths.
    • Bending the fins. The aluminum fins are delicate. Pressing too hard with a vacuum, brush, or cloth can crush them, which permanently reduces airflow and heating efficiency. Work gently.
    • Using harsh chemical cleaners. Abrasive sprays, bleach-based products, and heavy-duty degreasers can damage the finish on covers and corrode the metal fins. Mild dish detergent and water is all you need.
    • Rushing through the job. Proper cleaning takes time per unit. Trying to speed through the process usually means leaving dust behind or accidentally bending fins. Budget adequate time, especially for the first cleaning.
    • Forgetting to clean behind the heater. The wall and floor behind the unit collect significant dust that gets pulled right back into the fins during operation. Skipping this step means your freshly cleaned heater will get dirty again much faster.

    How Often Should You Clean Baseboard Heaters?

    The ideal cleaning frequency depends on your household. For most homes, a thorough cleaning once per year is sufficient. The best time to do it is in late summer or early fall before the heating season begins, so you start the cold months with clean, efficient heaters.

    Pet owners should plan to clean their baseboard heaters two to three times per year. Pet hair and dander accumulate surprisingly fast inside the fins, and the buildup reduces both efficiency and air quality. If you have multiple pets or long-haired breeds, lean toward three cleanings per year.

    Allergy sufferers should clean at least twice per year — once before heating season and once midway through winter. The dust and allergens trapped in the fins get circulated every time the heater runs, which can make symptoms worse even with good air filters in your home.

    For homes in particularly dusty environments or older homes with more gaps where outdoor air enters, consider adding a second annual cleaning. And if you have baseboard heaters that have not been cleaned in over five years, expect the first deep cleaning to take extra time and possibly require a second pass to remove all the compacted debris.

    One quick tip between deep cleanings: running your vacuum brush attachment along the top vent of the cover once a month takes just a few minutes and helps keep surface dust from working its way inside the unit.

    FAQ

    What is the best way to clean baseboard heaters?

    The best way to clean baseboard heaters is to turn off the power at the circuit breaker, remove the front cover, vacuum loose dust with a brush attachment, wipe the fins with a barely damp microfiber cloth, clean the cover separately with mild soap and water, then reassemble. This method works for both electric and hydronic units and takes about 30 to 45 minutes per heater.

    Do you have to clean baseboard heaters?

    Yes, you should clean your baseboard heaters regularly. Dirty heaters can lose up to 20% of their heating efficiency, produce a burning smell from accumulated debris, circulate dust and allergens throughout your home, and in extreme cases pose a fire risk. Annual cleaning keeps them running safely and efficiently.

    How often should baseboard heaters be bled?

    Hydronic baseboard heaters should be bled once per year, typically at the start of the heating season. Bleeding removes trapped air from the pipes that can cause gurgling sounds and reduce heating performance. Electric baseboard heaters do not need bleeding since they do not use water. Bleeding is a separate task from cleaning and involves opening a small valve on each unit with a bleed key or screwdriver.

    Can baseboard heat cause allergies?

    Yes, dirty baseboard heaters can worsen allergy symptoms. When dust, pet dander, and other allergens accumulate on the heating fins, the convection process circulates those particles back into the air every time the heater runs. Regular cleaning significantly reduces airborne allergens. Allergy sufferers who clean their baseboard heaters report noticeable improvement in symptoms, especially during winter months when heaters run most frequently.

    Can I use water to clean my baseboard heaters?

    You can use a barely damp cloth to wipe the fins and covers, but never spray water directly onto the unit or use soaking wet cloths. For electric baseboard heaters, excess water near the coils or wiring creates a safety hazard. A lightly dampened microfiber cloth is safe for both electric and hydronic units when used carefully. For the covers, you can wash them separately with mild soap and water as long as they are completely dry before reinstallation.

    How do I clean baseboard heater fins that are bent?

    Gently straighten bent fins using needle-nose pliers or a fin comb. Grip the bent portion of the fin lightly and slowly bend it back into alignment with the surrounding fins. Work slowly because the aluminum is thin and can tear if you apply too much force. If many fins are crushed over a large area, a fin comb designed for baseboard heaters can straighten multiple fins at once. Always straighten fins when the power is off and the unit is completely cool.

    Conclusion

    Knowing how to clean baseboard heaters is one of those straightforward home maintenance skills that pays off every single winter. The process is simple: turn off the power, remove the covers, vacuum and wipe the fins, clean the covers, and reassemble. It takes less than an hour per heater, and the results are immediate — better heating performance, lower energy bills, cleaner air, and no more burning smell when the heat turns on.

    I recommend tackling this job before each heating season. If you have pets or allergies, plan for two or three cleanings per year. The tools are inexpensive, the steps are easy to follow, and the improvement in comfort and air quality makes the effort well worth it. Your baseboard heaters will thank you, and so will your heating bill.